


ATI balancer crank pinning write-up.
Launching!
Joined: Apr 2005
Posts: 208
Likes: 0
From: CAIRNS QLD AUST
we dont pin ours over here that way
we drill in from the end horozontally
with a guide plate after the ballancer is on
you can put as many pins in as you like
and as long as you like
full length of ballancer hub if you want
we drill in from the end horozontally
with a guide plate after the ballancer is on
you can put as many pins in as you like
and as long as you like
full length of ballancer hub if you want
This is the proper way to do it. This way is much stronger than drilling from the side.
So who sells that pinning kit? That's how I thought they were always done.
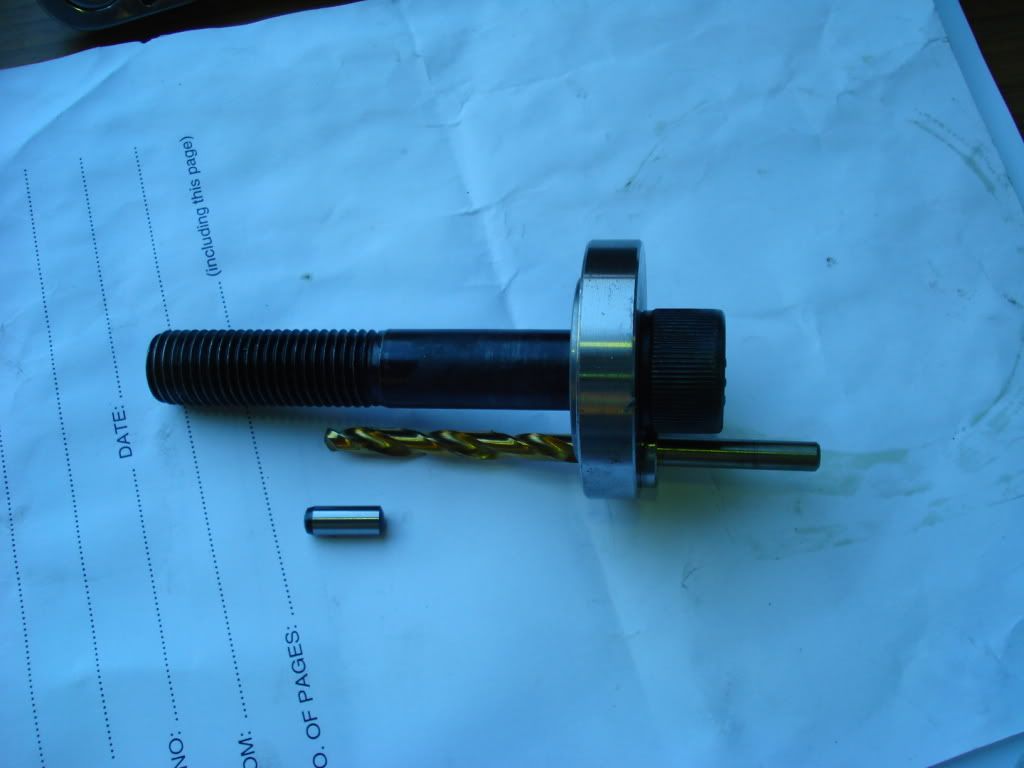
too bad there is no writeup on the front ATI pinning method. thats what i am currently attempting. the squared off part is for people who have keyways already machined into the crank. you should be keeping the bit oiled and check to make sure it does not lose its pointed tip. I started slow and then increased pressure gradually for 30 second intervals. I had to go deeper than what procharger recommended to get the pin all the way in perfectly without going too deep. I will say the hardest thing you can run into is thinking you have it deep enough and then taking the damper back off, realizing that you have to put it back on to continue, and finding out just how much of a bitch it is to get it lined back up.
Last edited by I8UR4RD; Apr 5, 2012 at 07:37 PM.
Launching!
Joined: Apr 2005
Posts: 208
Likes: 0
From: CAIRNS QLD AUST
are you trying to drill horizontally along between the crank and balancer from the end ?
or crossways through the ballancer then in to the crank?
if horizontally pic the side withOUT a key way if you have one so you get a half round in both crank and ballancer for the pin
or crossways through the ballancer then in to the crank?
if horizontally pic the side withOUT a key way if you have one so you get a half round in both crank and ballancer for the pin
LS1 Tech Stories
The Best V8 Stories One Small Block at Time

6 Common C5 Corvette Failures and What's Involved In Repairing Them
Pouria Savadkouei
Retro Modern Bandit Pontiac Trans AM Comes With Burt Reynolds' Autograph
Verdad Gallardo
Top 10 Greatest Cadillac V Series Performance Models Ever, Ranked
Pouria Savadkouei
Top 10 Most Powerful Chevy Trucks Ever Made!

Hennessey's New Supercharged Silverado ZR2 Has 700 HP
Verdad Gallardo
Coachbuilt N2A Anteros Is an LS2-Powered C6 Corvette In Italian Clothes
Verdad Gallardo
Awesome K5 Blazer Restomod Comes With C7 Corvette Power
Verdad Gallardo
10 Camaros You Should Never Buy

10 LS Engine Myths That Refuse to Die
Verdad GallardoLaunching!
Joined: Apr 2005
Posts: 208
Likes: 0
From: CAIRNS QLD AUST
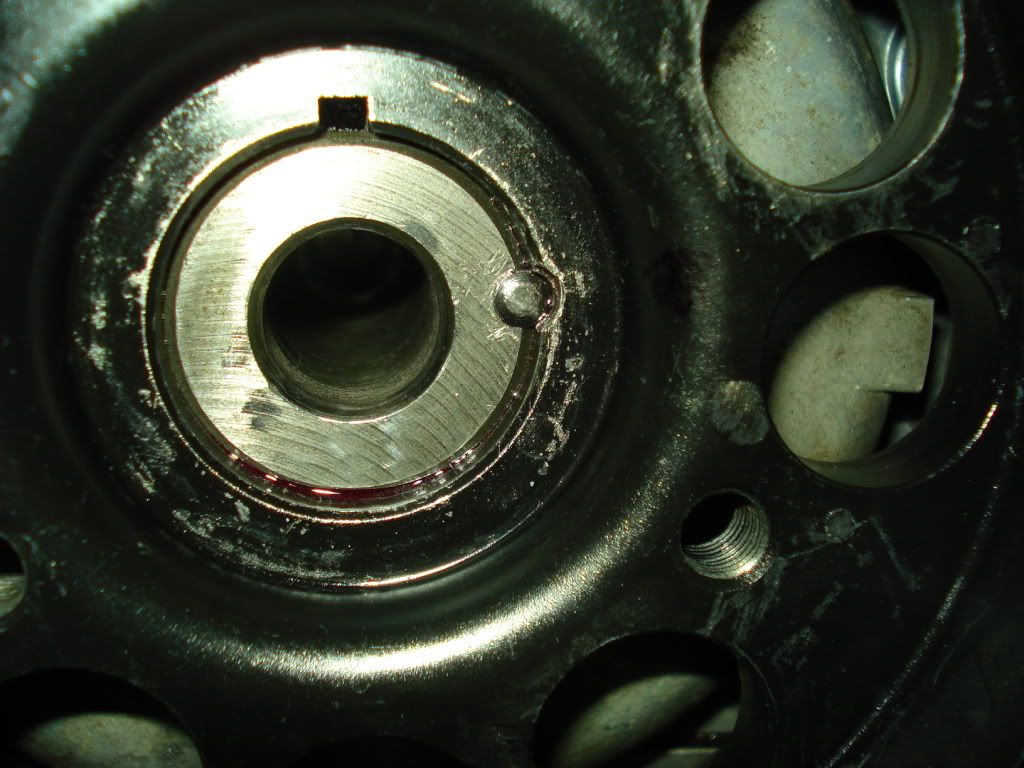
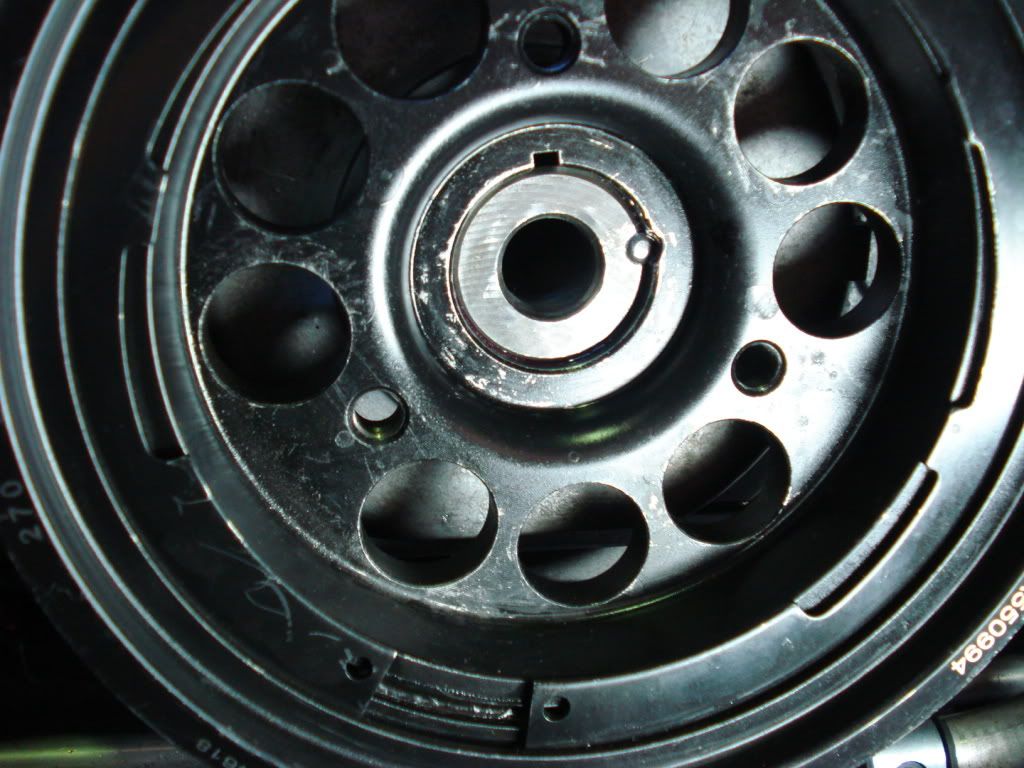
i am drilling from the front currently not the side aka vertically. i am not drilling through the supplied square cut keyway included in the black hub that attatches to the crank snout. I have the hub on the crank snout with the jig inside of it bolted down and I am in the process of drilling it that way. It was the only way I could get the hub to stay still enough to create a new path. i am not seeing much of a dent in the hub. i wanted to drill into a new portion of the hub to make sure that there would be a new half moon keyway for the pin. once i am past the hub i should hit the crank. what i am unsure of is whether or not i should just attatch the jig directly to the crank and bolt it down and start drilling the crank that way. this has been super confusing for me.
ok not sure whats going on there is you ballancer in two parts ours are all one piece like the oem one
with mine and the ones we do here the ballancer is pulled on to the crank and pulled up in to position and torqued up as normal ,then the crank bolt is removed and the jig is fitted to the crank snout hard up against the ballancer rotate the jig so the hole misses the key way and tighten up ,then drill the hole
it should be half in the crank and half in the ballancer
have you got a pic

I believe it is due to the fact of it being stronger. The reason I say its stronger is the entire key would have to shear off this way vs just the diameter of the keyway going from the side drill method, make sense???
BTW my Vortech kit has been run for 23k miles pushing 9lbs with one keyway drilled from the end with no problems at all.
It is harder to shear, but either one can technically fail regardless. I would think the reason it is stronger from the front is because there is more surface area pushing against the crank. Either way having a keyway machined is ideal.