


Process of Mounting Intercooler
Banned
Joined: Jul 2008
Posts: 406
Likes: 1
From: Trollin DFW Texas
It's a custom fab and most guys use different sized FMICs so one mans setup wont always work for you
Best bet is to disassemble the front of the car and hold the IC in the position you want it to be in the end. Then fit, build brackets, reassemble the body and plumb. Same process would apply to any vehicle
Heres my 3rd gen with a 31x12x3 FMIC
Fitting infront of rad
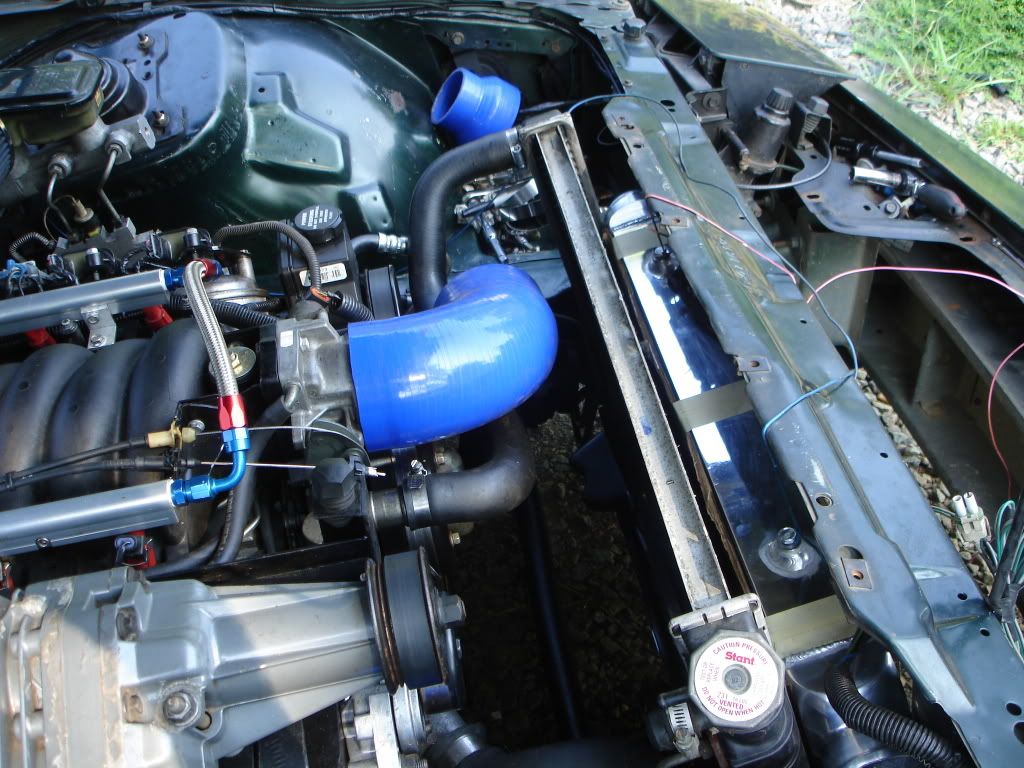
Fabbing brackets
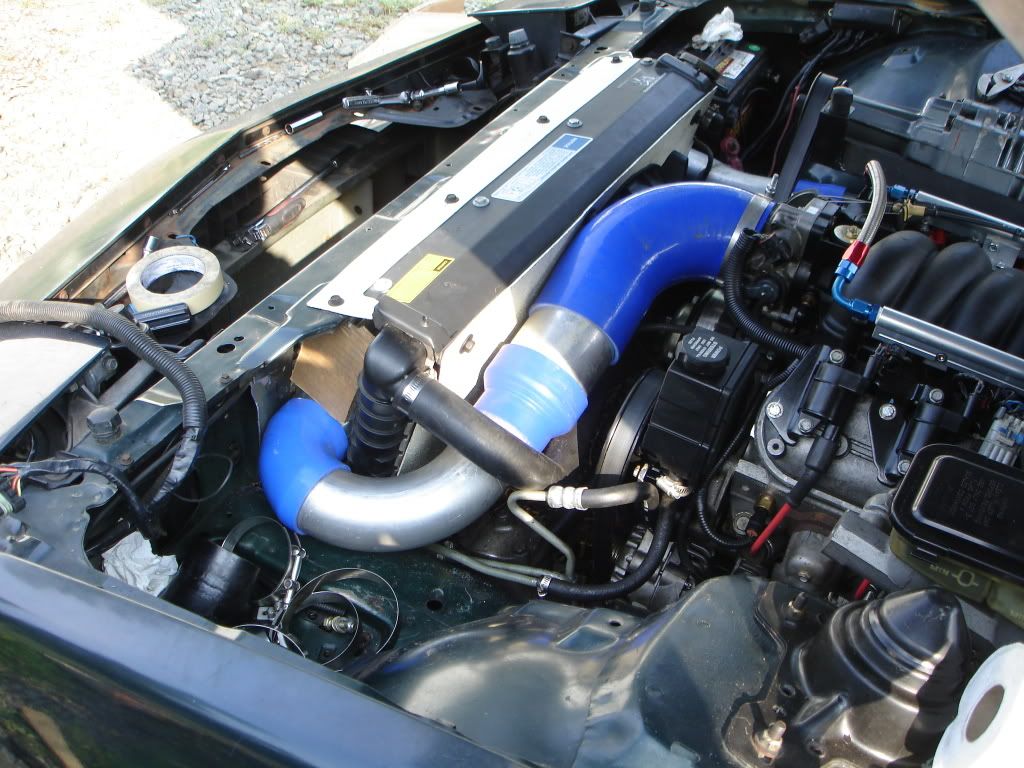
Plumbing
Best bet is to disassemble the front of the car and hold the IC in the position you want it to be in the end. Then fit, build brackets, reassemble the body and plumb. Same process would apply to any vehicle
Heres my 3rd gen with a 31x12x3 FMIC
Fitting infront of rad
Fabbing brackets
Plumbing
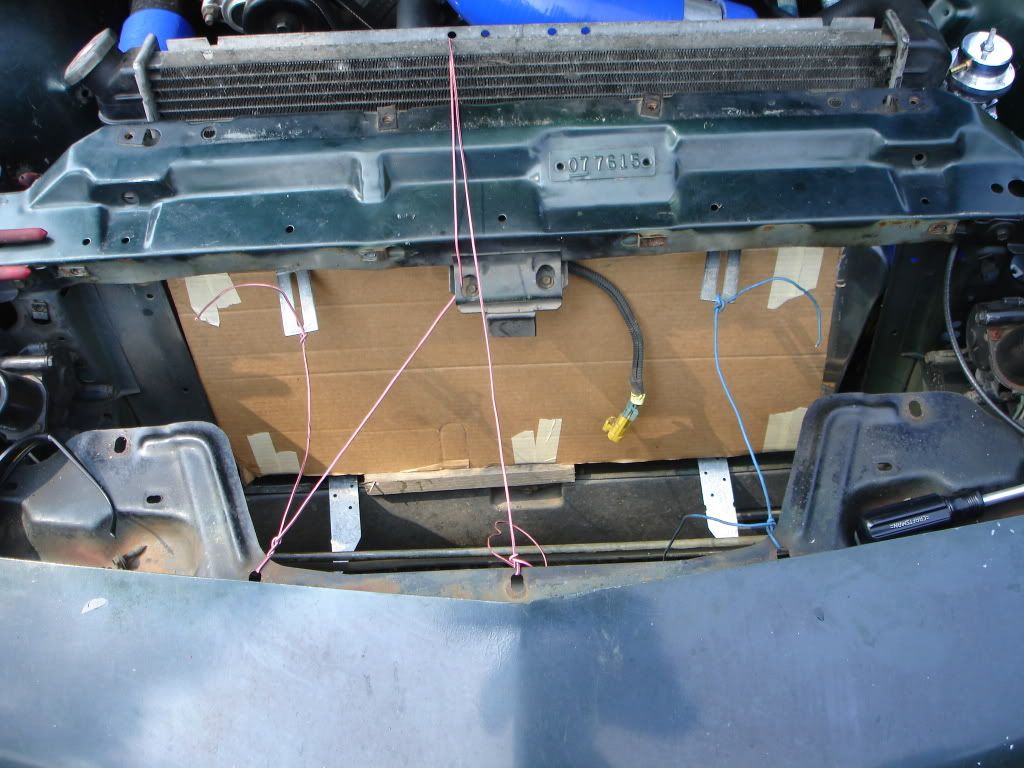
 or was it just for the fab b/c in the last pic you posted it is still in there after the inter cooler is in there, just kinda confused? Are you trying to make it a bottom feeder for your inter cooler? Im just trying to see what your doing here!
 Last edited by NoTractionLS1; Aug 20, 2010 at 10:59 PM.
You dont wanna see my build.
It'll make you all cringe!
I cut the entire core support, crash bars and padding, pretty much everything from the inside tangent point of one headlight to the other headlight, and used 1-1/4 tubing to fab up a core support and move the STOCK radiator to a diff location and a cage for the intercooler. I'm grinding on it and making it pretty right now. Pics to come!
LS1 Tech Stories
The Best V8 Stories One Small Block at Time

Topdon ONE vs. Artidiag 800 BT2: Which is the Diagnostic Tablet For You?
Pouria Savadkouei
Gas Monkey Built a 6-Wheel Ferrari Testarossa With a Corvette LT4 Engine
Verdad Gallardo
7 Most Reliable High-Performance Engines GM Has Ever Built
Verdad Gallardo
Amazing '71 Camaro Restomod Is Modern Muscle Car Under the Skin
Verdad Gallardo
6 Common C5 Corvette Failures and What's Involved In Repairing Them
Pouria Savadkouei
Retro Modern Bandit Pontiac Trans AM Comes With Burt Reynolds' Autograph
Verdad Gallardo
Top 10 Greatest Cadillac V Series Performance Models Ever, Ranked
Pouria Savadkouei
Top 10 Most Powerful Chevy Trucks Ever Made!

Hennessey's New Supercharged Silverado ZR2 Has 700 HP
Verdad Gallardo

Ummm so what is exactly going on with your build, like someone already stated your heat soaking the hell out of the inter cooler with it sitting so close to the radiator. And do you honestly have a cardboard box in your engine bay or was it just for the fab b/c in the last pic you posted it is still in there after the inter cooler is in there, just kinda confused? Are you trying to make it a bottom feeder for your inter cooler? Im just trying to see what your doing here!
For the cardboard, I hope you do the same when fitting a rad or IC. It protects the core fins until the placement and build is finalized. The thread was about fitting the FMIC, not the final product. It is removed now
Stock air dam scoops enough air in there, no need for more stuff complicating the system
Mounted mine in front of the radiator.
Tilted the radiator back a smidge, cut into the cross-brace a smidge, and then opened a chute from the front license plate to the IC.
Why you ask....because I like my foglights.
I've got a thread around here somewhere that shows pictures of it.....
Tilted the radiator back a smidge, cut into the cross-brace a smidge, and then opened a chute from the front license plate to the IC.
Why you ask....because I like my foglights.
I've got a thread around here somewhere that shows pictures of it.....

