


2001 RCSB GT-42 Build
Thread Starter
TECH Senior Member
iTrader: (8)
Joined: Jan 2007
Posts: 13,845
Likes: 0
From: Here and sometimes there too.
So I need some pointers with the electrical regarding the fuel system. I talked with Nate from Nastyperformance and he recommended that I run 10 gauge wire to the pump.
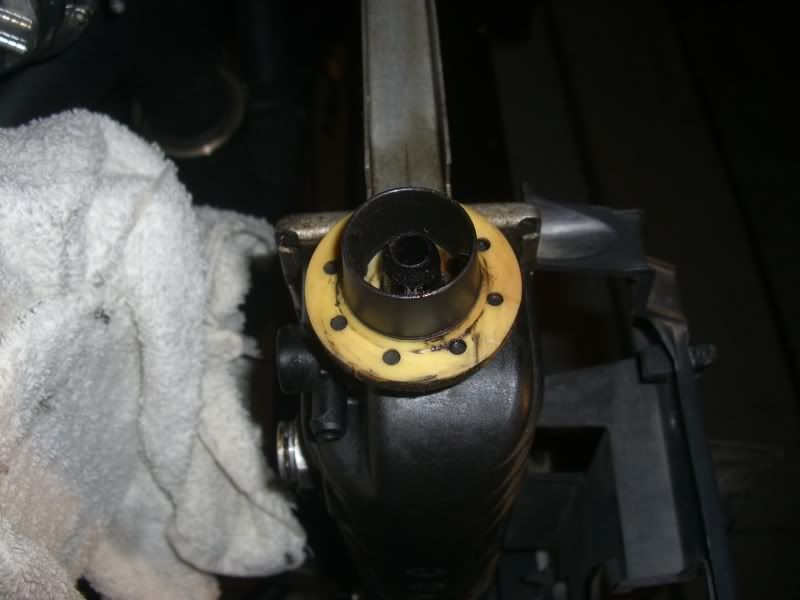
I was hoping just to extend the wiring harness all the way back to the pump, but doesn't look like it will be that easy of a solution. Here's my harness clip...
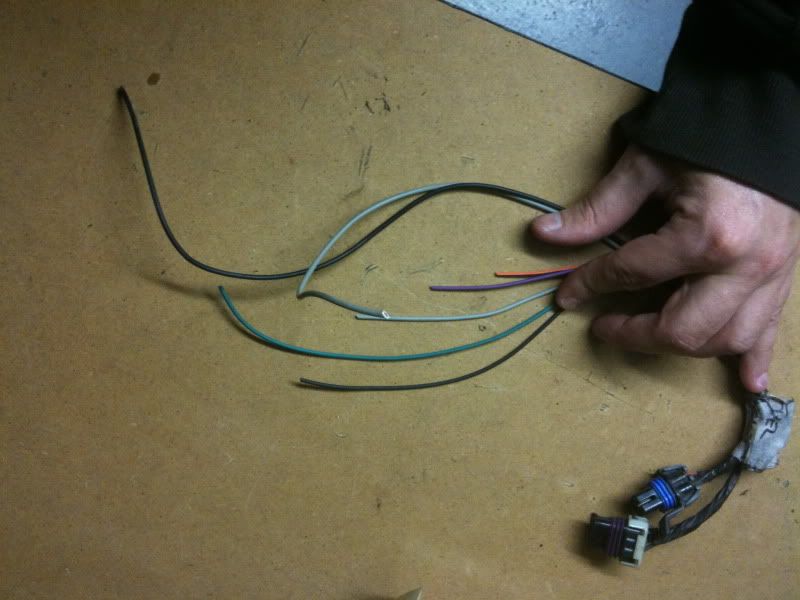
Looks like my power supply is the 16 gauge black and grey wire as opposed to the other smaller 18-20 gauge wires. I don't think I'll be able to fit 10 gauge wire into that clip so that I could reuse it can I? Whole reason I wanted to re-use the bucket was so that I could also re-use the harness, how are other people doing this?
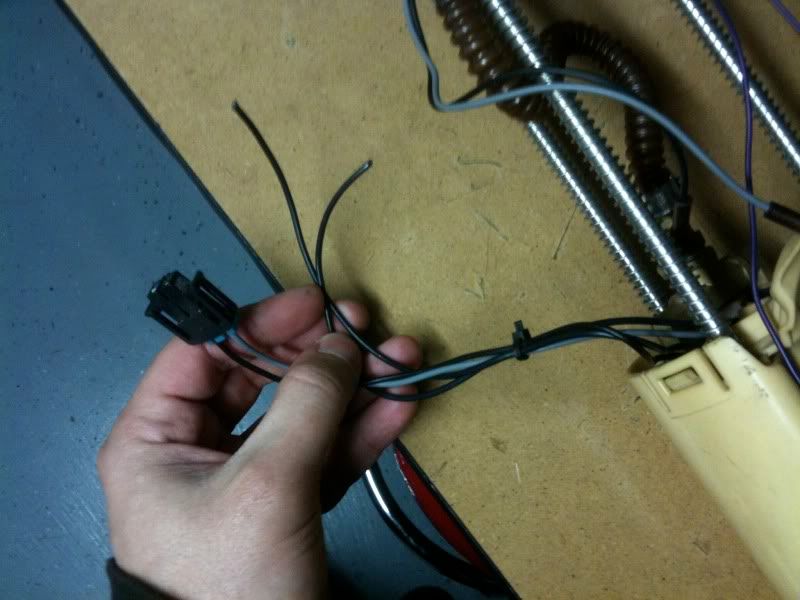
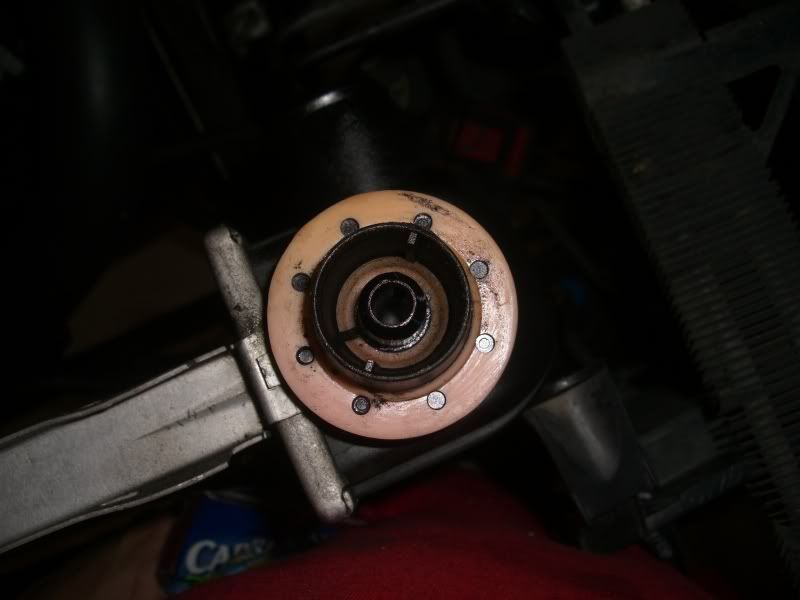
Same deal with the pump wiring, looks like these wires might be on the small side as well, no?
Suggestions?
I was hoping just to extend the wiring harness all the way back to the pump, but doesn't look like it will be that easy of a solution. Here's my harness clip...
Looks like my power supply is the 16 gauge black and grey wire as opposed to the other smaller 18-20 gauge wires. I don't think I'll be able to fit 10 gauge wire into that clip so that I could reuse it can I? Whole reason I wanted to re-use the bucket was so that I could also re-use the harness, how are other people doing this?
Same deal with the pump wiring, looks like these wires might be on the small side as well, no?
Suggestions?
Thread Starter
TECH Senior Member
iTrader: (8)
Joined: Jan 2007
Posts: 13,845
Likes: 0
From: Here and sometimes there too.
I fitted a set of twin walboro pumps in that stock bucket, I don't wanna fry my wires obviously by putting too much current through those smaller wires.
If you don't use the factory clip you can use the grey wire to trigger an external relay and run a 10 gauge wire direct from the alternator to relay to pump. Very simple and has worked good for me. I ran a dual relay setup in the event that one failed.
Thread Starter
TECH Senior Member
iTrader: (8)
Joined: Jan 2007
Posts: 13,845
Likes: 0
From: Here and sometimes there too.

Also got a few things done today, finally was able to complete a couple projects without getting hung up on something!!

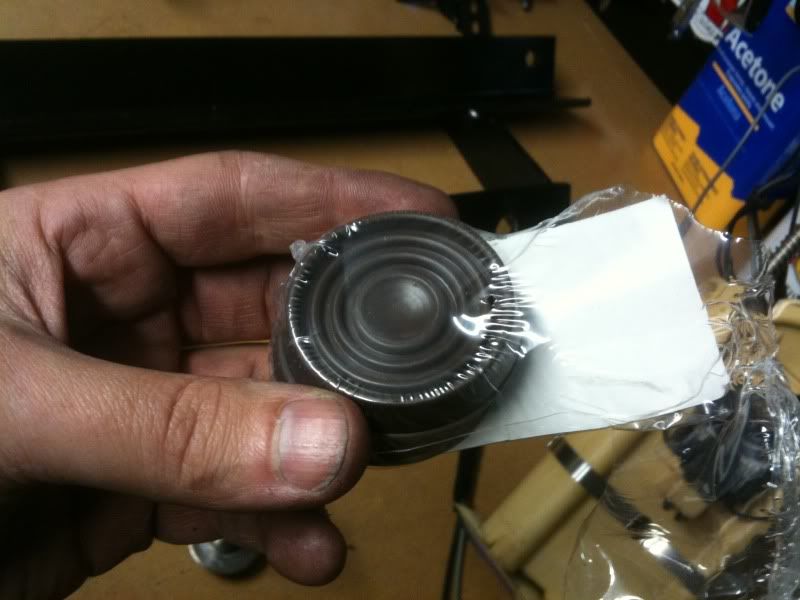
Bought some rubber pads from home depot...
Drilled a hole through them...
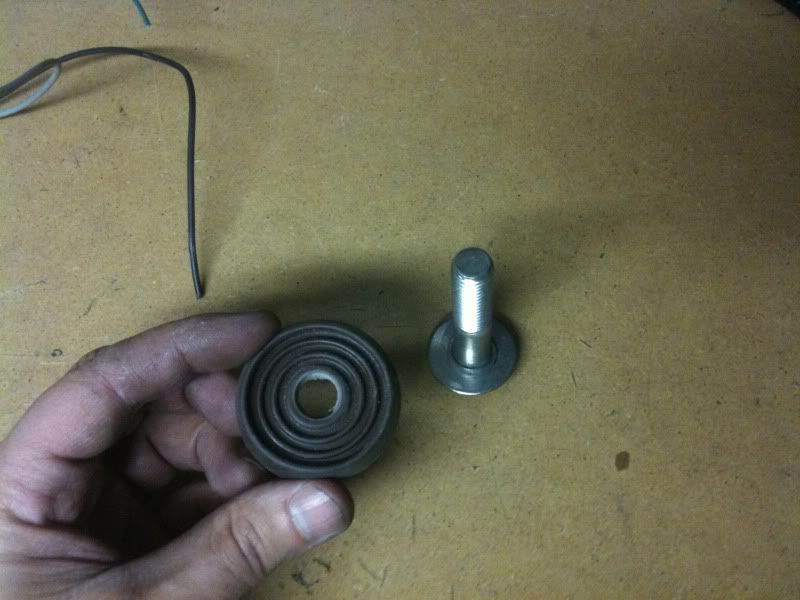
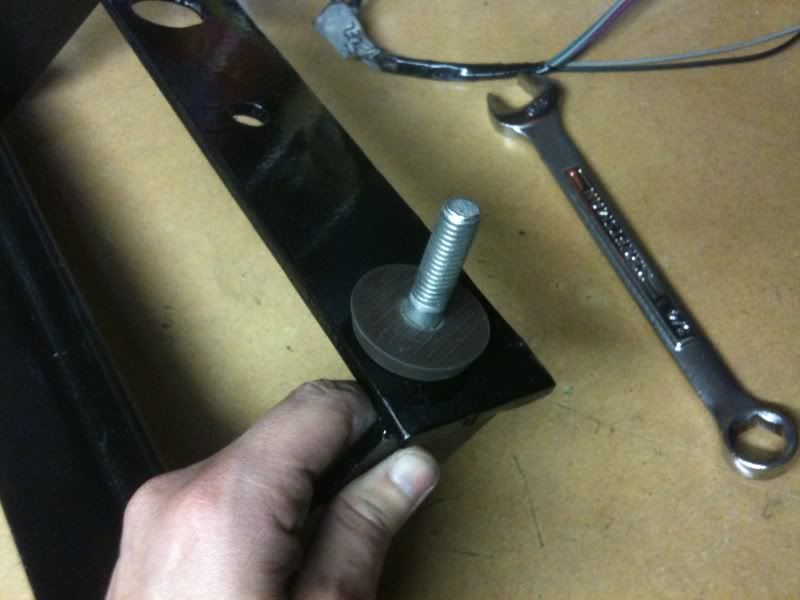
Sandwhiched them in between the bracket and the frame...
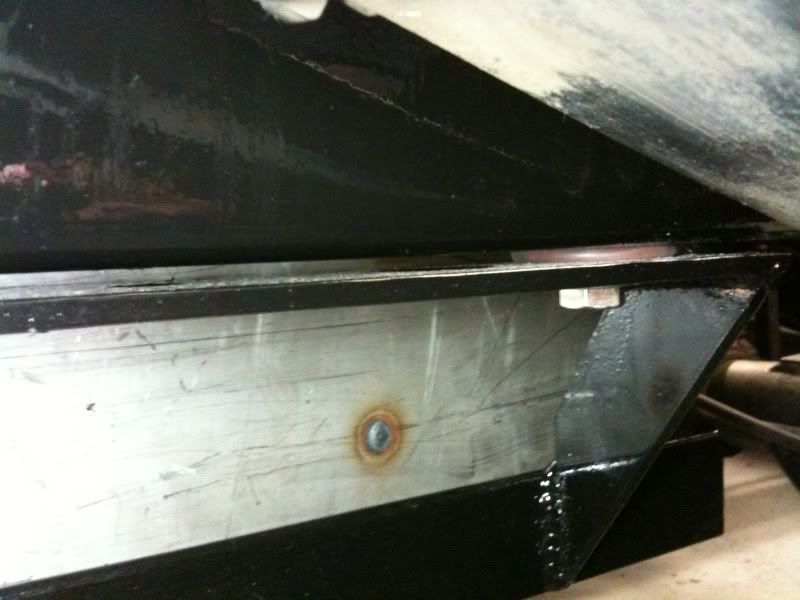
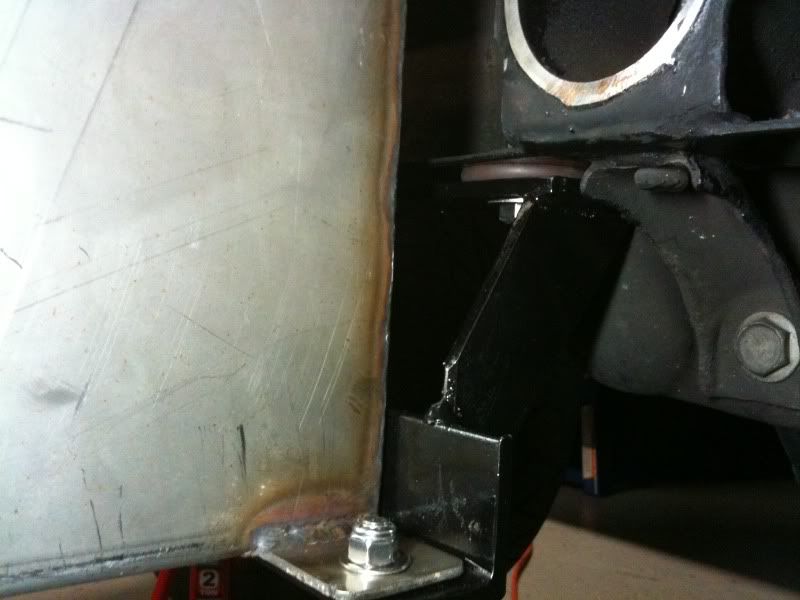
Now the Tank is level and is flush with the frame rails with the exception of the fill'er and some vents.
Also bought some sheet metal and fabbed myself a PCM tray so that I can re-locate the PCM to where the battery used to be.
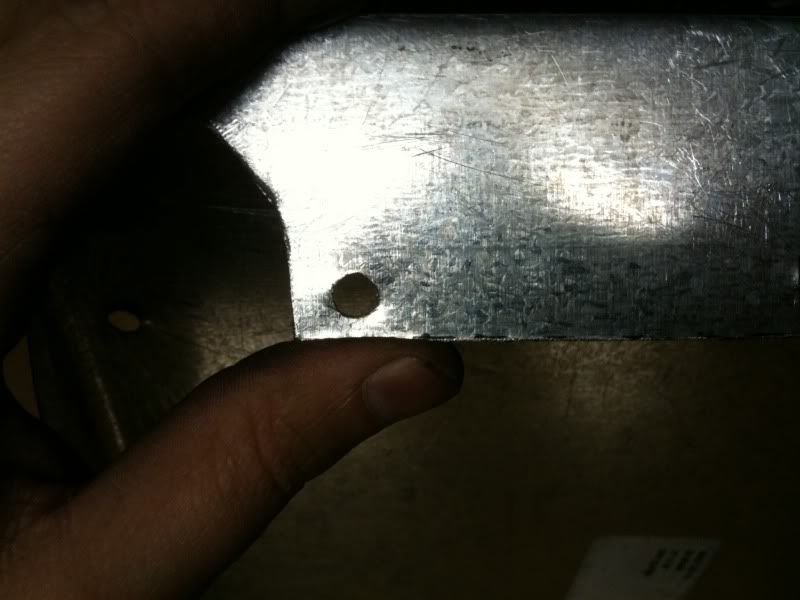
I started with a flat piece, started cutting and bending it...
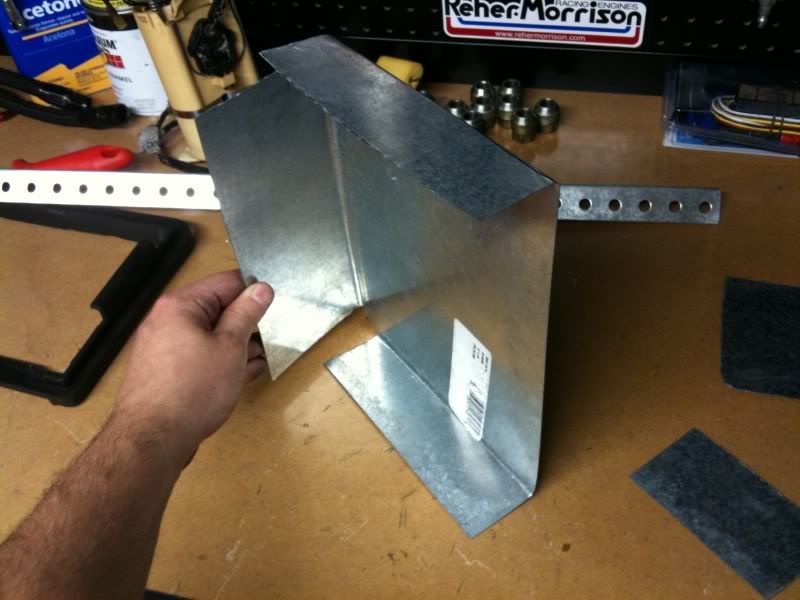
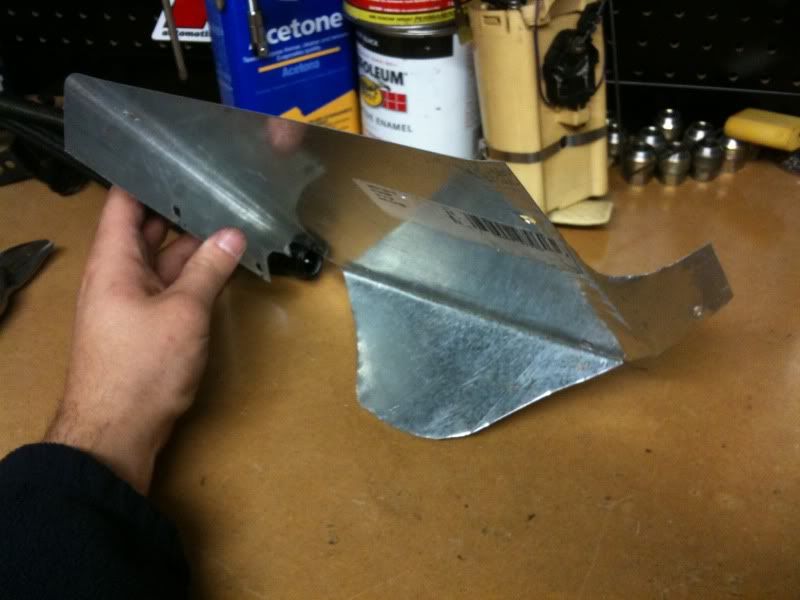
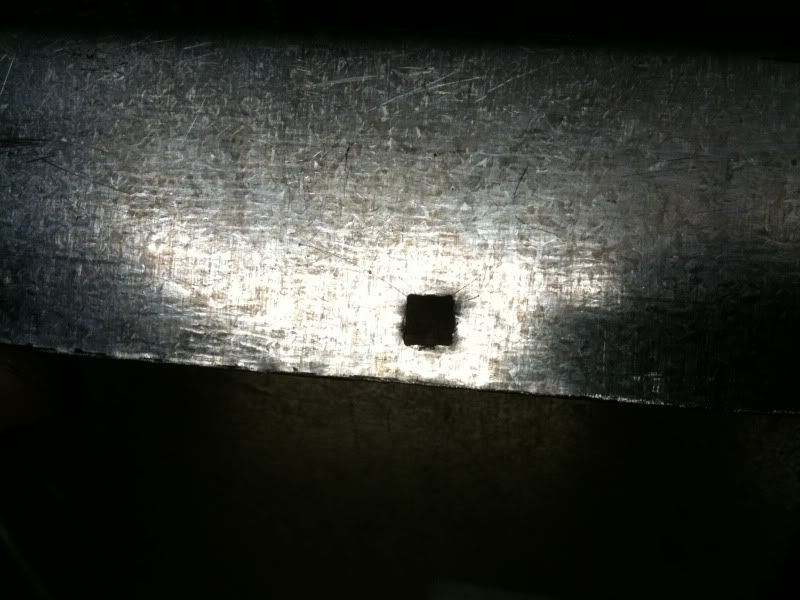
I was trying to use some spare Flat Head bolts that I had but they had a square shaft so I had to do the same with the holes...
Here it is mounted in place...
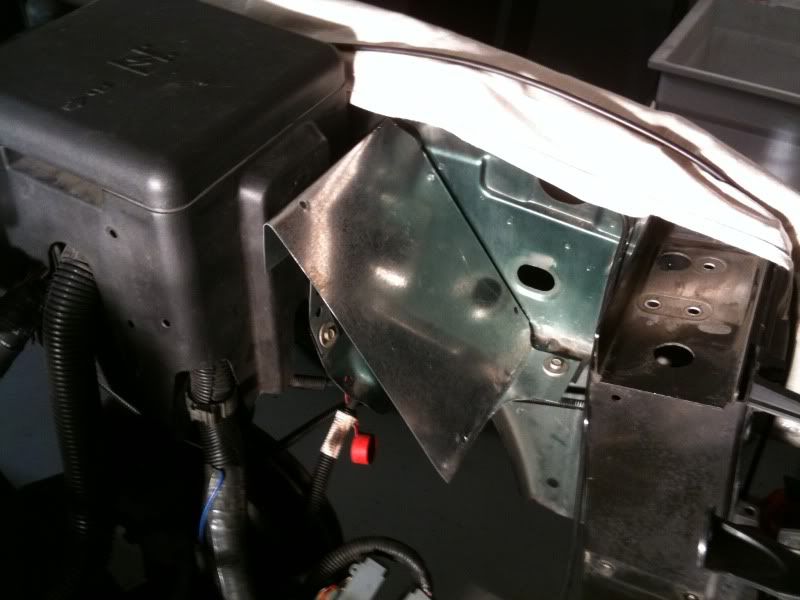
With the plastic PCM tray that I hacked to pieces...
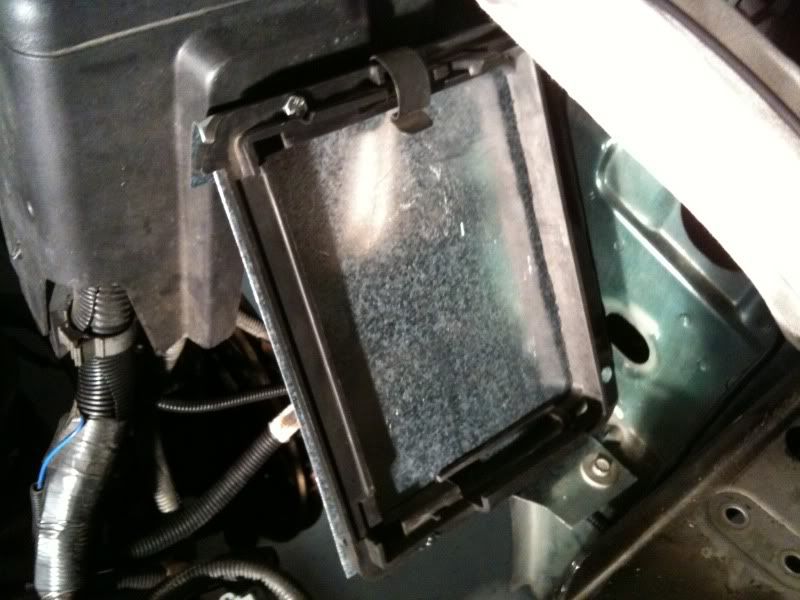
PCM installed...
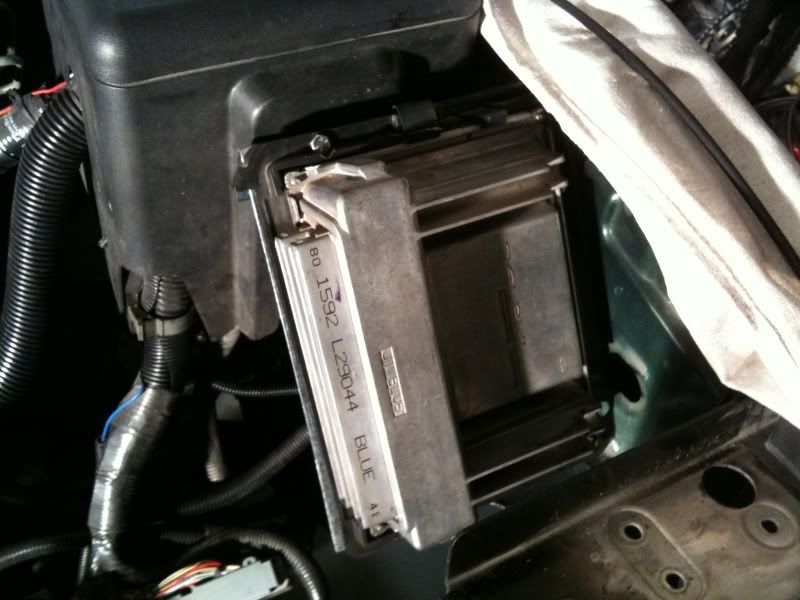
And I'm still able to re-use the stock plastic shield.
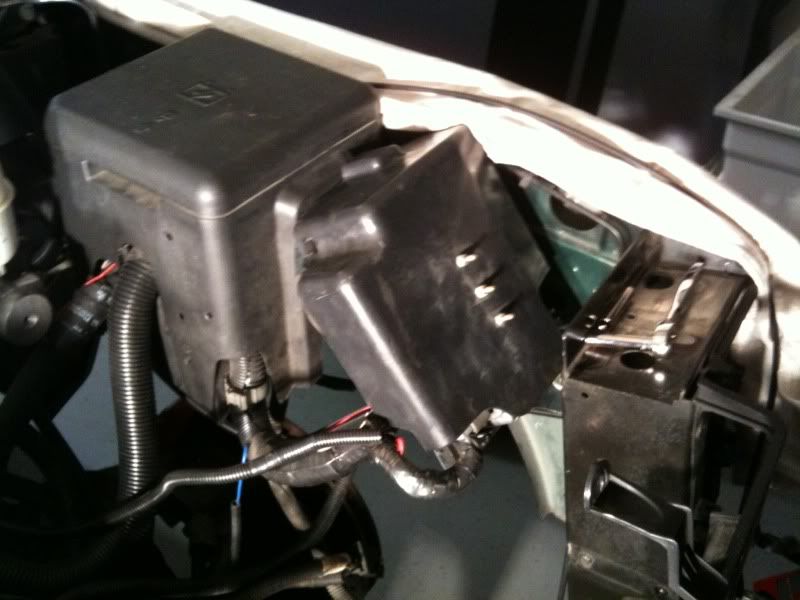
I left enough room for the windshield washer fluid/methanol tank as well so I can still re-use that. I think it came out well.
Last edited by Spoolin; Jan 6, 2011 at 10:03 PM.
Thread Starter
TECH Senior Member
iTrader: (8)
Joined: Jan 2007
Posts: 13,845
Likes: 0
From: Here and sometimes there too.
So good news bad news, first the bad news...I'm such a LAZY POS!! I don't know why but I spent only a few hours in the garage this whole week, and it's not like I didn't have free time to do it, just never got up off my *** and did it!!  at myself! Now onto the good...
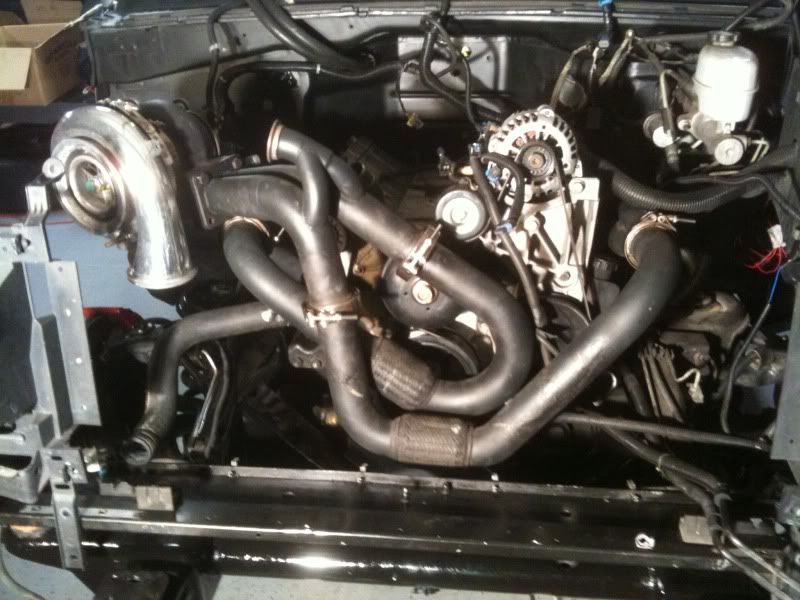
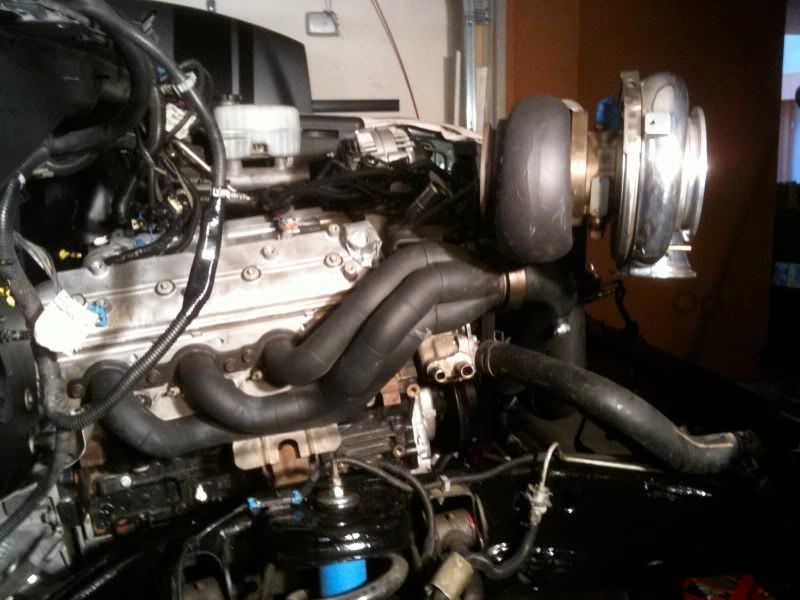
Got the turbo hung yesterday!! I forgot to take a picture of it but there's a bracket that holds the turbo up so the hot parts just kinda sit there with little weight but their own to support.

All that's left to do (big breath now)...
Intake,
Coolant crossover,
Valve cover swap,
PCV system,
Fuel system (from A - Z),
Run some wiring to a couple new things and spice it into the harness,
Reconnect and re-route the harness to all the sensors and what not,
Put the starter back in,
Change the spark plugs,
Run turbo oil feed and return lines,
Put all the cooling systems back in,
Fluids,
Tune,
Battery re-location,
Fab up rear crossmember,
Put the body panels and bed back in,
Cut hole in bed for fuel tank,
Get a new gas cap/door
Dip stick install, both of them
That's all I can think of for now.
at myself! Now onto the good... Got the turbo hung yesterday!! I forgot to take a picture of it but there's a bracket that holds the turbo up so the hot parts just kinda sit there with little weight but their own to support.
All that's left to do (big breath now)...
Intake,
Coolant crossover,
Valve cover swap,
PCV system,
Fuel system (from A - Z),
Run some wiring to a couple new things and spice it into the harness,
Reconnect and re-route the harness to all the sensors and what not,
Put the starter back in,
Change the spark plugs,
Run turbo oil feed and return lines,
Put all the cooling systems back in,
Fluids,
Tune,
Battery re-location,
Fab up rear crossmember,
Put the body panels and bed back in,
Cut hole in bed for fuel tank,
Get a new gas cap/door
Dip stick install, both of them
That's all I can think of for now.
WTF youre located in plain maine? i saw the mountains and the style of your truck and instantly thought of my stomping grounds... aka California.
Either way, those headers turned out straight GANSTAR!!!!
Either way, those headers turned out straight GANSTAR!!!!
Thread Starter
TECH Senior Member
iTrader: (8)
Joined: Jan 2007
Posts: 13,845
Likes: 0
From: Here and sometimes there too.
Thanks man!

There's alot of design in these hot parts that go unnoticed to the casual observer. I feel very lucky to have these.

LS1 Tech Stories
The Best V8 Stories One Small Block at Time

Topdon ONE vs. Artidiag 800 BT2: Which is the Diagnostic Tablet For You?
Pouria Savadkouei
Gas Monkey Built a 6-Wheel Ferrari Testarossa With a Corvette LT4 Engine
Verdad Gallardo
7 Most Reliable High-Performance Engines GM Has Ever Built
Verdad Gallardo
Amazing '71 Camaro Restomod Is Modern Muscle Car Under the Skin
Verdad Gallardo
6 Common C5 Corvette Failures and What's Involved In Repairing Them
Pouria Savadkouei
Retro Modern Bandit Pontiac Trans AM Comes With Burt Reynolds' Autograph
Verdad Gallardo
Top 10 Greatest Cadillac V Series Performance Models Ever, Ranked
Pouria Savadkouei
Top 10 Most Powerful Chevy Trucks Ever Made!

Hennessey's New Supercharged Silverado ZR2 Has 700 HP
Verdad GallardoI think your right, forgot the guy's name but it sounds about right! He worked for Curt D at one point right? What I know is the kit was built by an employee of Curt a few years ago. Eventually that guy went on to open his own shop and now builds really incredible kit's! I could find his web-site in my PM box but again, I think your right about who he is.
Thanks guys, it's gonna be alot of fun when it's done, getting all the smaller details straightened out is what's gonna take me a while to figure out, all the heavy lifting is mostly done.
Thanks guys, it's gonna be alot of fun when it's done, getting all the smaller details straightened out is what's gonna take me a while to figure out, all the heavy lifting is mostly done.
His name is Walker Morgan. Owns MPfab now. He's local to me, and a really stand up guy! He also has a really sweet *** EVO thats pretty stout. Has a custom kit on it that he built.

Thread Starter
TECH Senior Member
iTrader: (8)
Joined: Jan 2007
Posts: 13,845
Likes: 0
From: Here and sometimes there too.
Hey do you guys use those tiny gaskets on the coolant cross-over tubes? I just bolted mine down and then took a peak in my Gm manual and they showed a picture of this little gasket. I've never used them, not on my last build or the one before that but I would imagine it's kinda important but I've never had any issues running without them.
It'd prob be a good idea to run them now with the added HP. Silly to not run them really since their like 50 cents ea. Make sure to run a crossover tube in the back of block as well and not just block the holes there. #7/8 cylinders will hate you if you do...
Thread Starter
TECH Senior Member
iTrader: (8)
Joined: Jan 2007
Posts: 13,845
Likes: 0
From: Here and sometimes there too.
Cool, I take it they are sold at the stealership? I'm gonna stop by there today. And I have the 4-corner coolant crossover tubes so I'm good to go as far as the back ones are concerned!!
Thread Starter
TECH Senior Member
iTrader: (8)
Joined: Jan 2007
Posts: 13,845
Likes: 0
From: Here and sometimes there too.
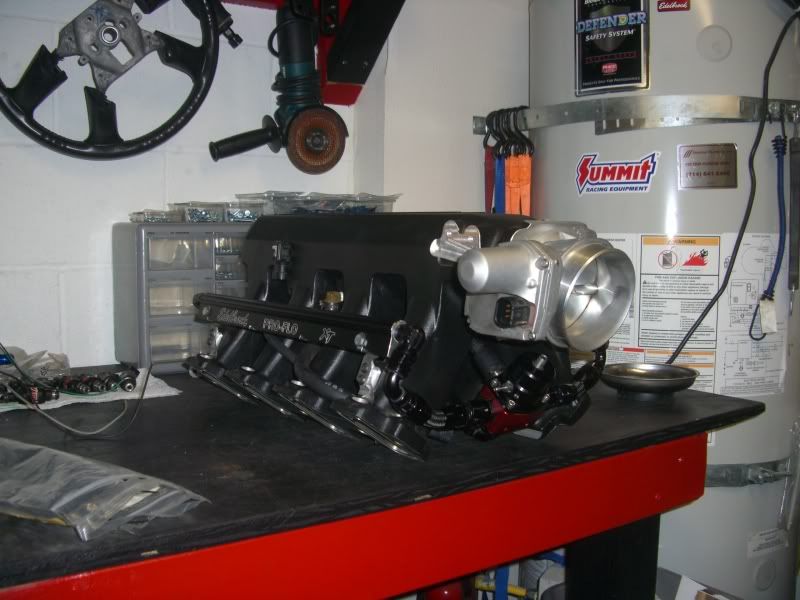
Well, got some nick-nacks done that needed doing, nothing spectacular but it was a bunch of little things that took 3-4 hours of doing. Also got my new braided Stainless Steel fuel lines and dis-assembled my old fuel system so that I could re-use the fittings, looks like I might need one or two -6AN fittings but I should have enough for what I plan on doing...
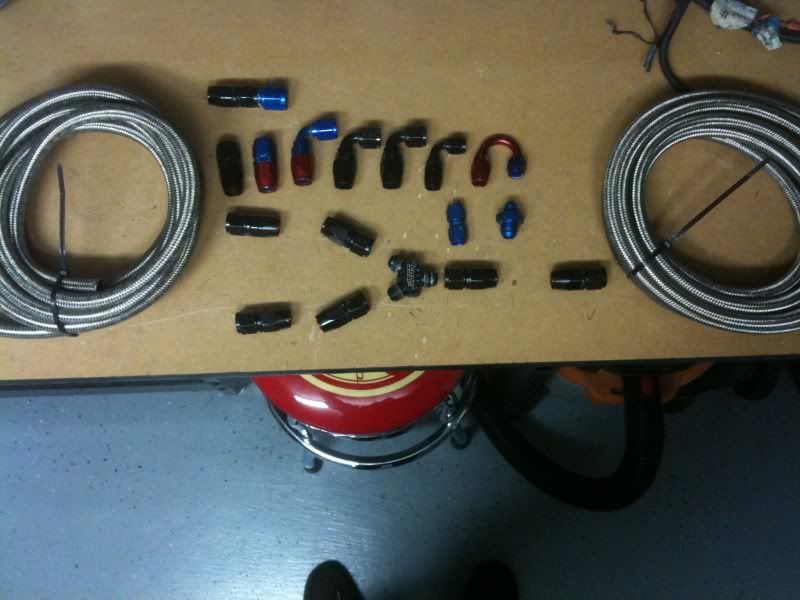
Just as I was about to start cutting fuel lines, I talked to my buddy Henry and he suggested checking out a couple video's on youtube concerning making fuel lines. Did you guys know you can cut braided Stainless Steel fuel lines and the cloth ones with a chisel and a hammer!!
So yup, instead of taping the SS lines and pulling out the die-grinder I just chiseled through the SS fuel lines, worked like a freaking charm! Couldn't believe it!
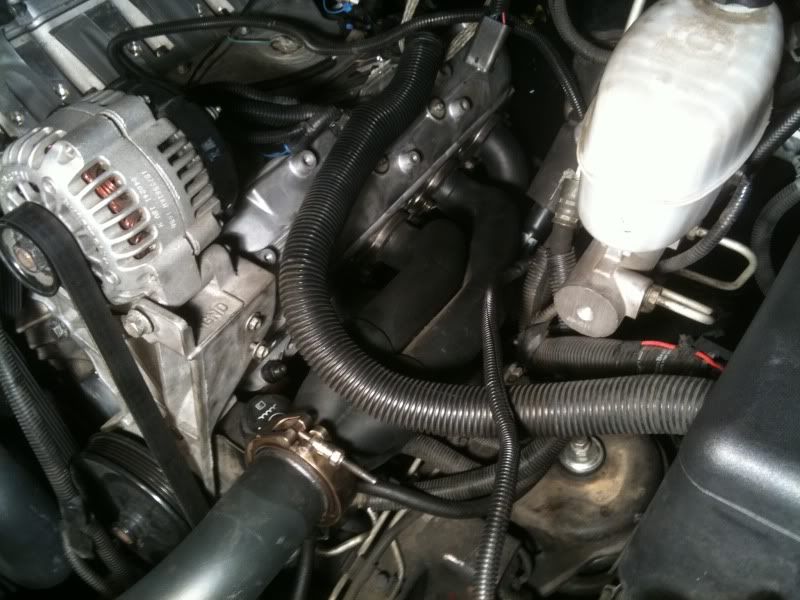
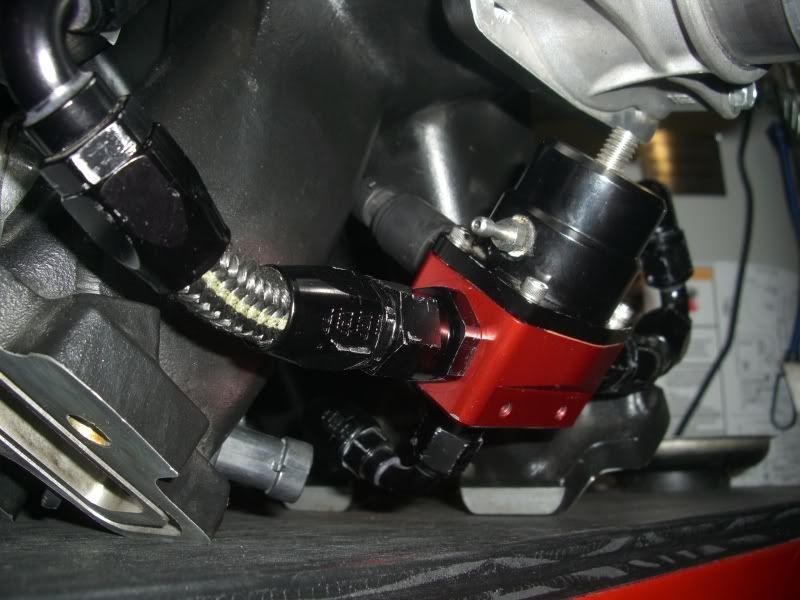
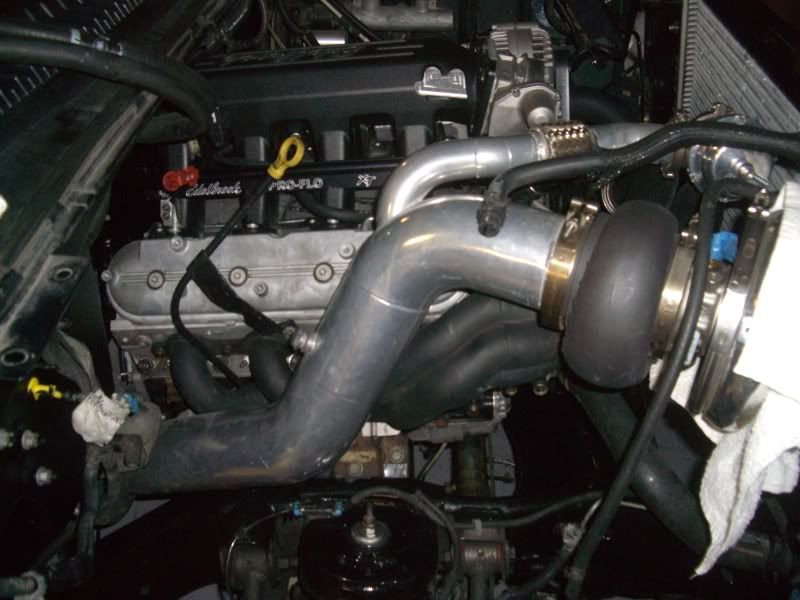
So aside from that, I've been wanting to install the FPR right under the intake, in between the Fuel rails...I know right!! Wasn't sure if it was gonna work but I'm able to fit it in such a way that allows me to access the spring set screw, the FP sensor and run the return line, it's just gonna be at a bit of a weird 45 degree angle. Does anyone foresee any problem with this?
Here's a very basic idea of where it's gonna go...
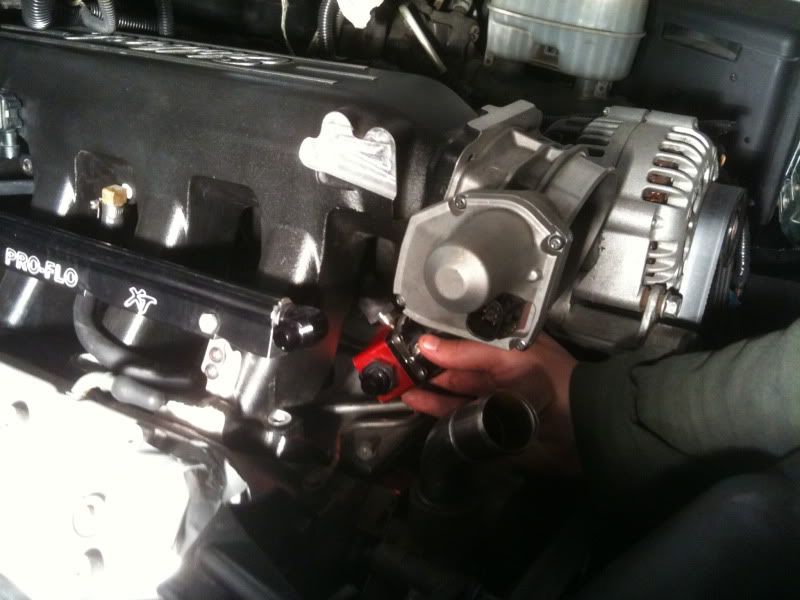
Although it might not looks super blingy, I'm hopeful that when I run the lines it will be a clean and efficient. I already have the supply worked out to where there's a minimal amount of fuel lines. I just don't want to put the FPR on the firewall like last time and have an excess of fuel lines running all around the engine bay.
If anyone has any suggestions on how or where they placed their FPR I'm all ears, just know that I'm set on having the supply feed the back of the rails.
Just as I was about to start cutting fuel lines, I talked to my buddy Henry and he suggested checking out a couple video's on youtube concerning making fuel lines. Did you guys know you can cut braided Stainless Steel fuel lines and the cloth ones with a chisel and a hammer!!
So yup, instead of taping the SS lines and pulling out the die-grinder I just chiseled through the SS fuel lines, worked like a freaking charm! Couldn't believe it!
So aside from that, I've been wanting to install the FPR right under the intake, in between the Fuel rails...I know right!!
Wasn't sure if it was gonna work but I'm able to fit it in such a way that allows me to access the spring set screw, the FP sensor and run the return line, it's just gonna be at a bit of a weird 45 degree angle. Does anyone foresee any problem with this?Here's a very basic idea of where it's gonna go...
Although it might not looks super blingy, I'm hopeful that when I run the lines it will be a clean and efficient. I already have the supply worked out to where there's a minimal amount of fuel lines. I just don't want to put the FPR on the firewall like last time and have an excess of fuel lines running all around the engine bay.
If anyone has any suggestions on how or where they placed their FPR I'm all ears, just know that I'm set on having the supply feed the back of the rails.
Last edited by Spoolin; Jan 16, 2011 at 02:47 AM.
Thread Starter
TECH Senior Member
iTrader: (8)
Joined: Jan 2007
Posts: 13,845
Likes: 0
From: Here and sometimes there too.
Got the fuel lines cut and assembled for the front and back of the Fuel rails. I test fitted the intake on the motor and found that the supply lines (back of the fuel rails) slightly touch the oil sender so I'm gonna modify the supply lines later tonight or tomorrow morning.
Hopefully by the end of the weekend I'll have all the fuel lines run and done, the intake on, most of the engine harness connected and can move on to other stuff.
Here's what I go so far...

Supply...
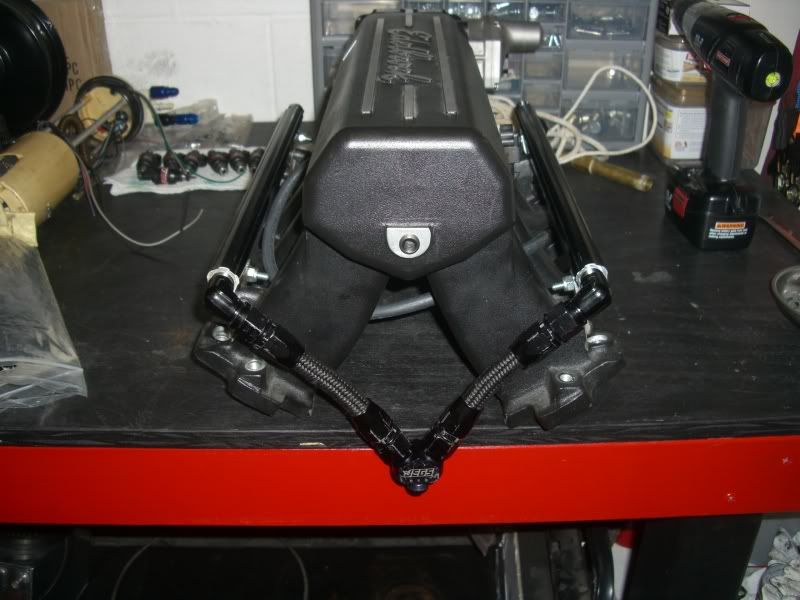
Return...
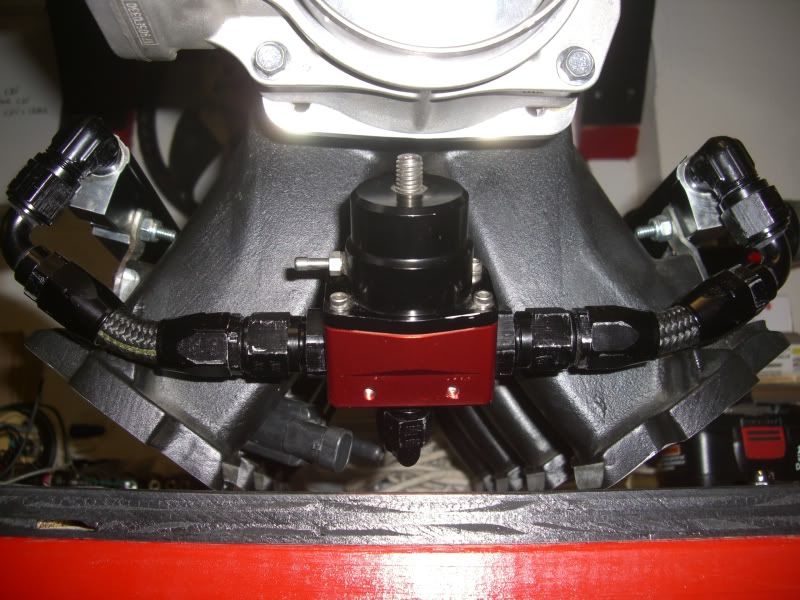
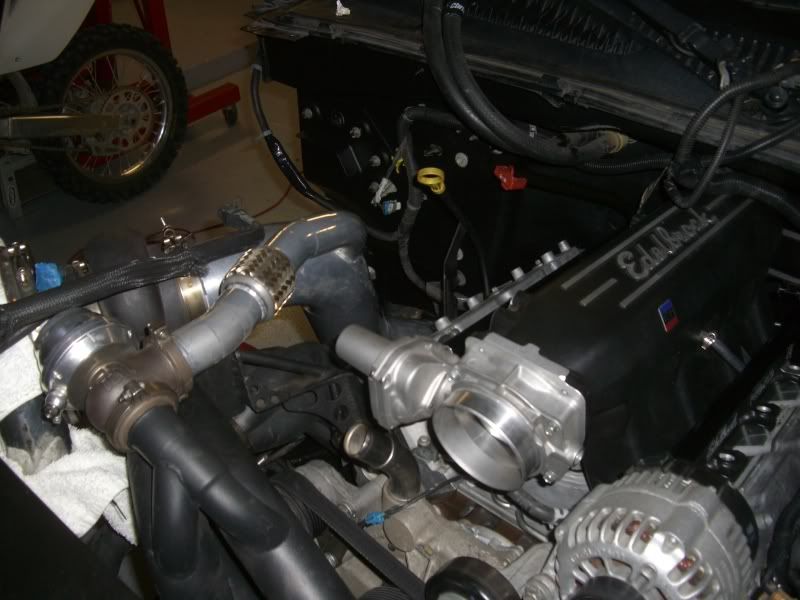
And here it is test fitted on the engine...
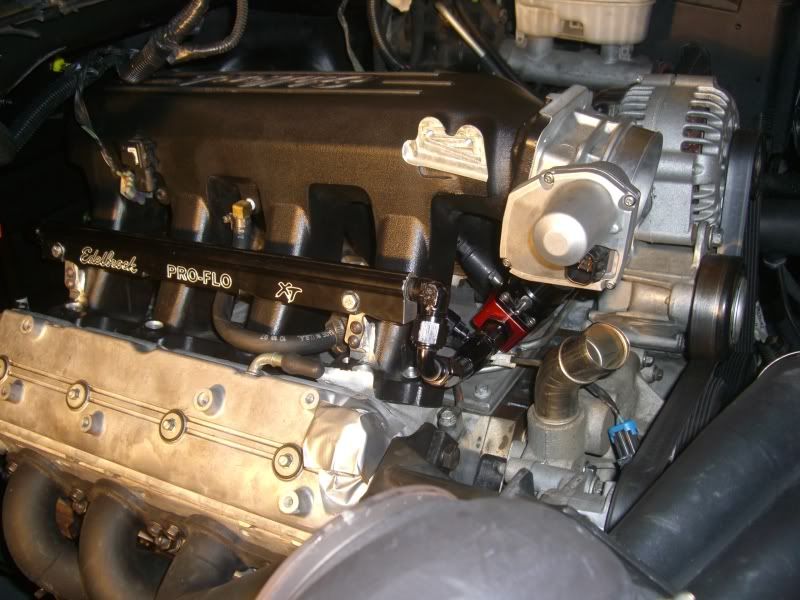
Coolant vent from the cross-over tubes clear perfectly and nothing really impedes or touches. I have SS lines for both the Supply and Return lines that will be run from the motor all the way back to the tank. I'm also gonna touch up the fittings once finished with some paint, I scruffed up the Powder coating on them last year when I first did my fuel system, not having the proper wrenches. Kind of a waste of $$ but at least the fittings themselves don't get scratched up.
Hopefully by the end of the weekend I'll have all the fuel lines run and done, the intake on, most of the engine harness connected and can move on to other stuff.
Here's what I go so far...
Supply...
Return...
And here it is test fitted on the engine...
Coolant vent from the cross-over tubes clear perfectly and nothing really impedes or touches. I have SS lines for both the Supply and Return lines that will be run from the motor all the way back to the tank. I'm also gonna touch up the fittings once finished with some paint, I scruffed up the Powder coating on them last year when I first did my fuel system, not having the proper wrenches. Kind of a waste of $$ but at least the fittings themselves don't get scratched up.
Thread Starter
TECH Senior Member
iTrader: (8)
Joined: Jan 2007
Posts: 13,845
Likes: 0
From: Here and sometimes there too.
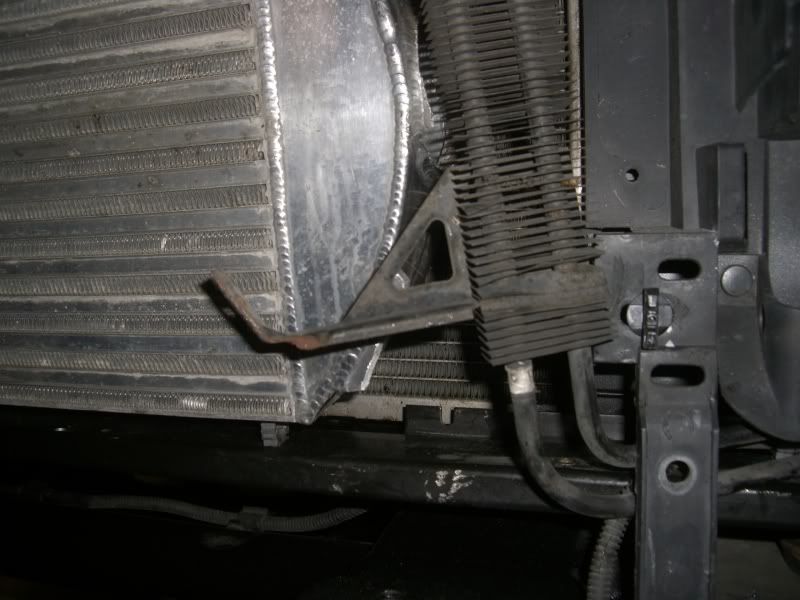
So question these "things" on the bottom of the radiator are just rubber pads to help keep the lower half of the radiator in place and not slide around correct?? They serve no other purpose!
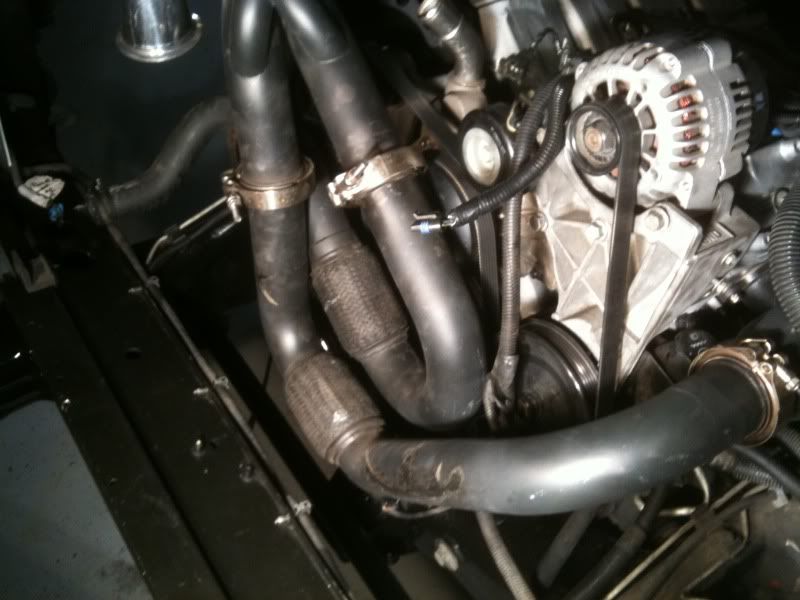
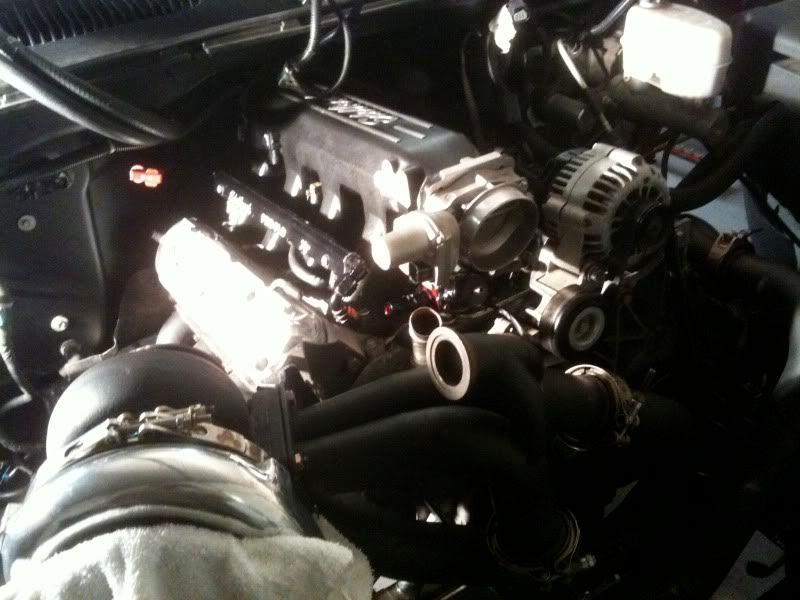
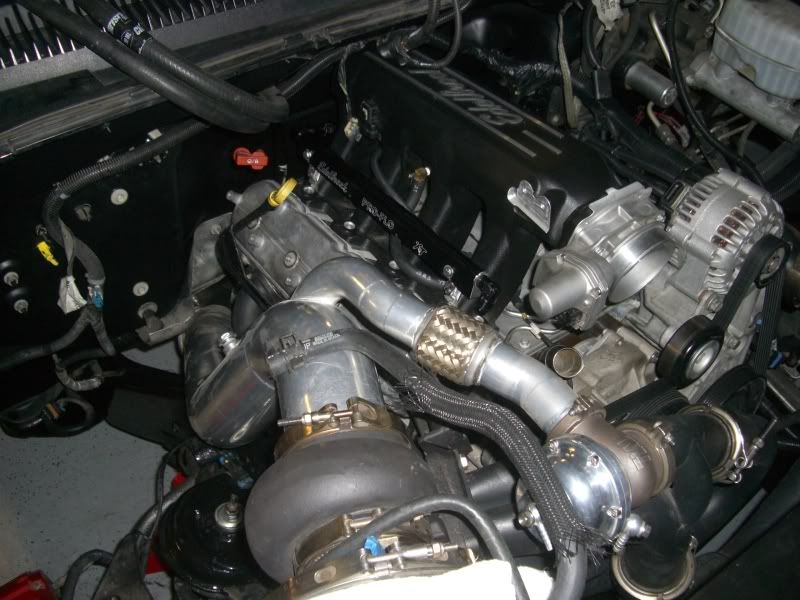
So here is my DP and wastegate hooked up, it gets a little tight between the last primary, the frame and the heat shield but it's nothing that can't be adjusted for...
Here's my Radiator and intercooler mounted, I still have to secure the lower half of the intercooler somehow because as of now it's just hanging from the top core support...
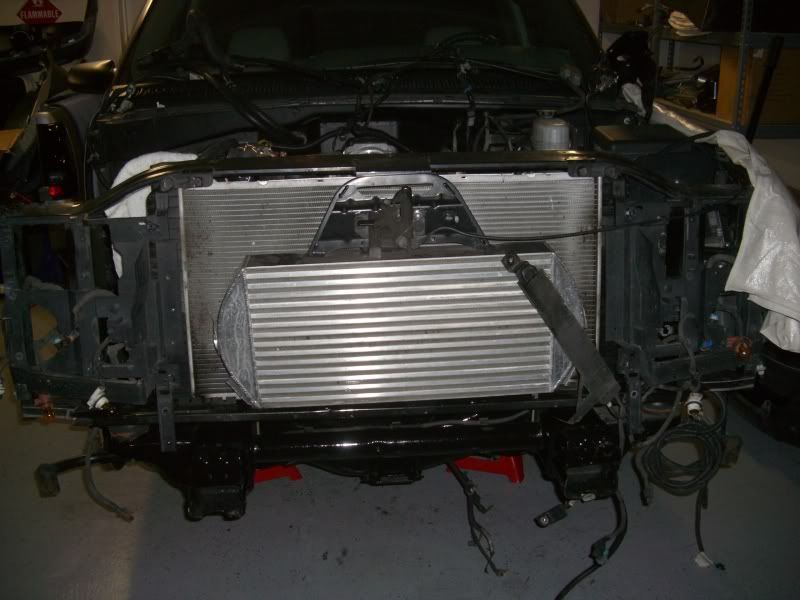
You can see the piping on either side of the intercooler that needs to be fabbed up, those pipes got crunched in Curt's accident!
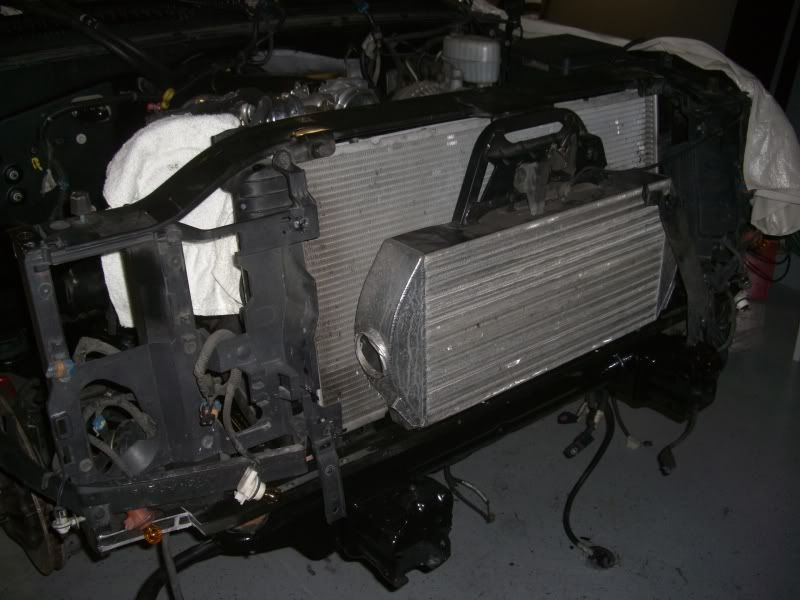
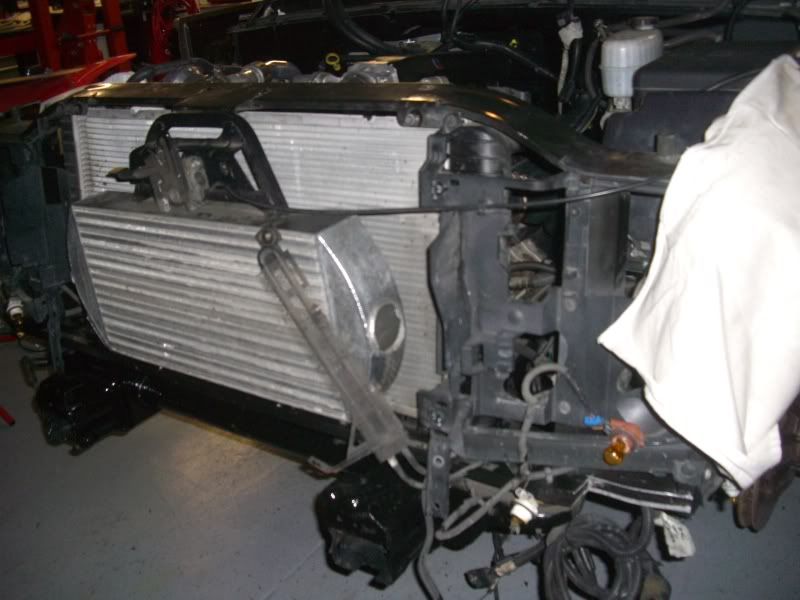
Looks like I'll have to cut this bracket off of the Power steering heat exchanger and fab up something else to secure the lower half. This normally bolted to the A-frame that supports the A/C heat exchanger.
So here is my DP and wastegate hooked up, it gets a little tight between the last primary, the frame and the heat shield but it's nothing that can't be adjusted for...
Here's my Radiator and intercooler mounted, I still have to secure the lower half of the intercooler somehow because as of now it's just hanging from the top core support...
You can see the piping on either side of the intercooler that needs to be fabbed up, those pipes got crunched in Curt's accident!
Looks like I'll have to cut this bracket off of the Power steering heat exchanger and fab up something else to secure the lower half. This normally bolted to the A-frame that supports the A/C heat exchanger.
Last edited by Spoolin; Jan 16, 2011 at 02:48 AM.