418+Turbo+FD RX7 Build
 03-19-2011, 07:20 PM
#21

Some interior pics from last year, to give an idea of what it looks like together. Also a vid of me running a 10.9 cam-only last year.


http://www.youtube.com/watch?v=IQ4veH8s3qM
http://www.youtube.com/watch?v=IQ4veH8s3qM

 03-19-2011, 08:38 PM
#23
Launching!
iTrader: (22)

Join Date: Apr 2008
Location: lewistown, PA
Posts: 291
Likes: 0
Received 0 Likes
on
0 Posts

words cannot express how jealous i am right now, not only do you have my favorite car(FD), but now it is going to be turbo LS1 powered. You sir are my idol. Car looks amazing and the color scheme works very well. Definitely subscribing to your thread!
Ps. Dewalt cordless impacts FTW! I have there 3/8 and 1/2 impacts and dont know how i ever lived without them.
Ps. Dewalt cordless impacts FTW! I have there 3/8 and 1/2 impacts and dont know how i ever lived without them.
03-20-2011, 06:30 PM
#25
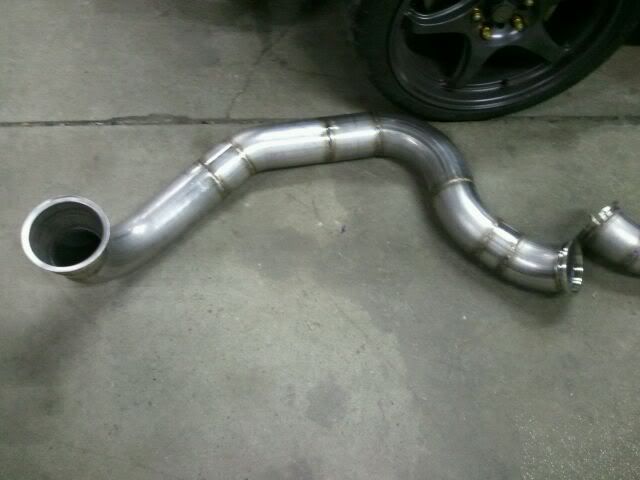
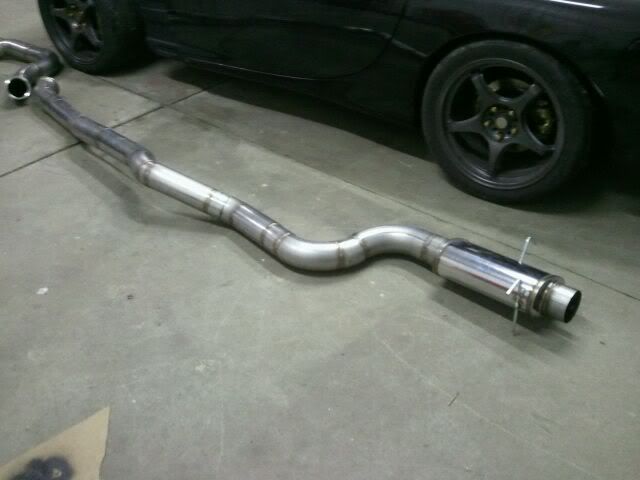
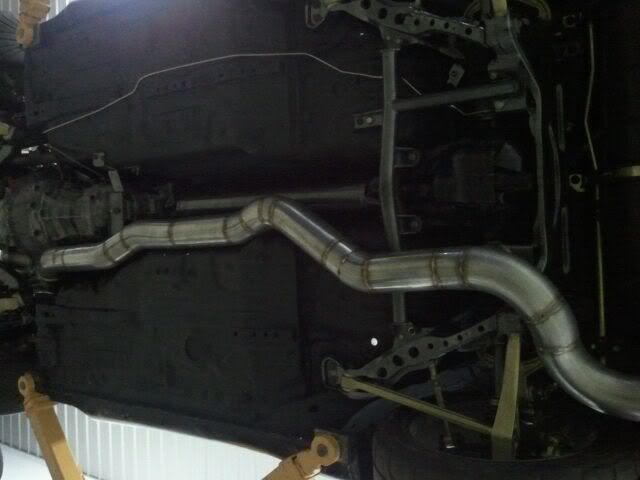
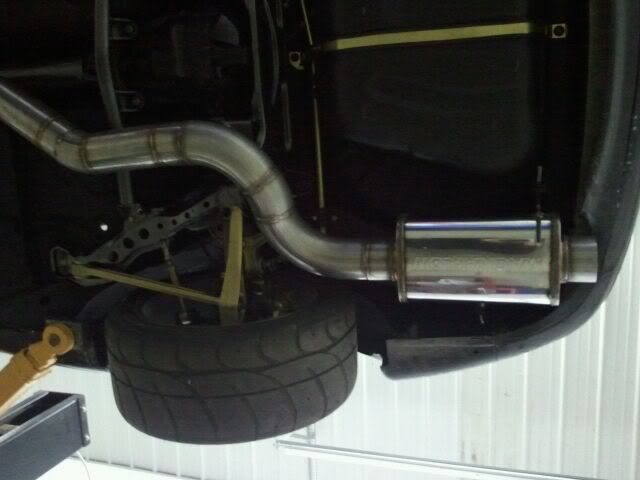
the exhaust is all welded up and fabricated, we may add more to it later but for now this is how she will be. 30+ welds and over 20hrs of fabricating and 10hrs of welding alone to complete this exhaust system.
downpipe
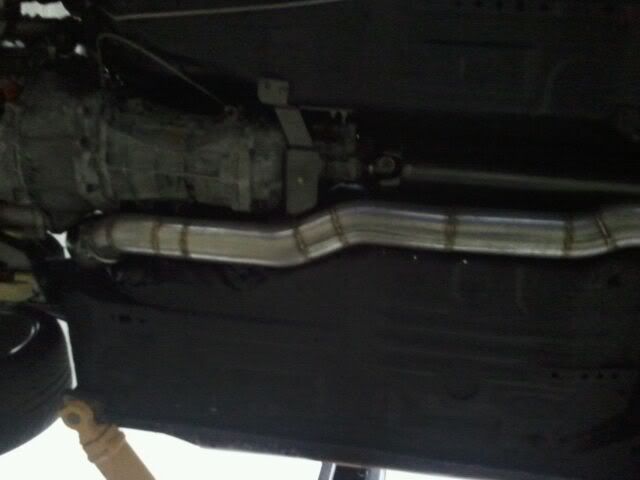
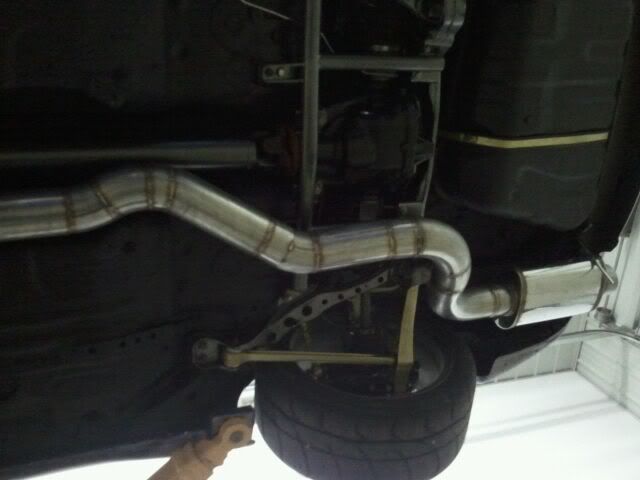
back section
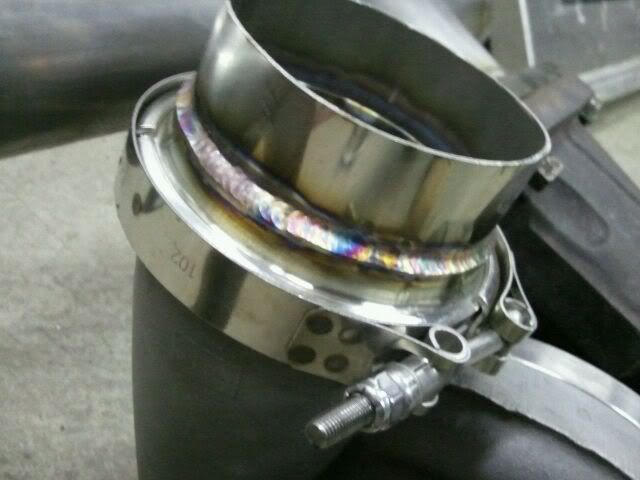
making some rainbows while welding 3.5in pipe for the turbo cold side vband.
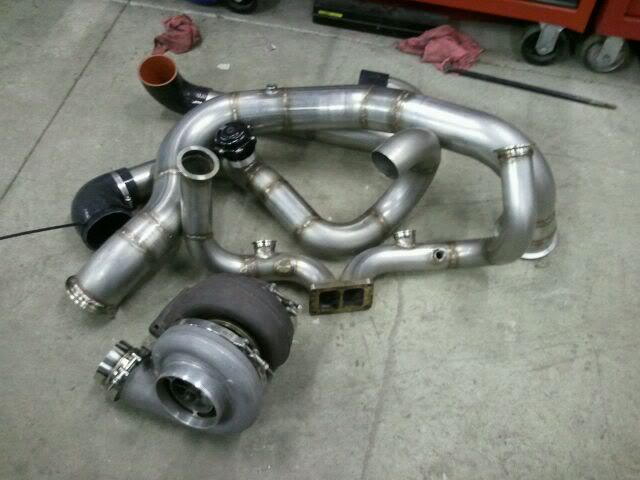
and finaly a pipe of stuff with 3 o2 sensor bungs, one for each bank and another for a wideband in the down pipe. wastegate vbands all welded up also.
downpipe
back section
making some rainbows while welding 3.5in pipe for the turbo cold side vband.
and finaly a pipe of stuff with 3 o2 sensor bungs, one for each bank and another for a wideband in the down pipe. wastegate vbands all welded up also.
Last edited by ablakez28; 03-20-2011 at 06:38 PM.
04-04-2011, 12:27 AM
#26
Did some wrenching today with Mingle and Luke L. Had a blast and got a ton done.
I just washed the car and started taking it apart yet again.


It’s magic !!!!!!!!!!!!!!!!!!!!


Then disassembled mostly everything from the engine bay aleady and am ready to get going toward paint prep.

I just washed the car and started taking it apart yet again.
It’s magic !!!!!!!!!!!!!!!!!!!!
Then disassembled mostly everything from the engine bay aleady and am ready to get going toward paint prep.
 04-05-2011, 02:20 PM
#29
Thanks guys! Slo is your build on here?
So I decided to bead blast my cold side stainless and I LOVE the finish. Hard to get a pic of but you get the idea. Manifolds and hot pipes are out getting coated right now.


Washed the engine bay, steel wool, then red pads, then strubbers, then mitt. Always using soap water/exchange water buckets. Got the bay perfectly clean.

Then started sanding with 220. Mostly done and then I will do 400.

So I decided to bead blast my cold side stainless and I LOVE the finish. Hard to get a pic of but you get the idea. Manifolds and hot pipes are out getting coated right now.
Washed the engine bay, steel wool, then red pads, then strubbers, then mitt. Always using soap water/exchange water buckets. Got the bay perfectly clean.
Then started sanding with 220. Mostly done and then I will do 400.
04-07-2011, 02:04 AM
#30
TECH Enthusiast
iTrader: (17)

Join Date: Sep 2005
Location: Detroit, MI - Camp Pendleton, CA
Posts: 619
Likes: 0
Received 0 Likes
on
0 Posts
My build isnt on here... I'm done with the flaming from the 240 crowd. I just sent my hot piping out for powder coating too LOL.
Not to hijack:

Nice build, one of my favorites!
Not to hijack:
Nice build, one of my favorites!
 04-09-2011, 08:05 PM
#34
I had planned to get a ton done today but ended up with a sick friend at the hospital all day, just got home. Going to the garage now. I am also doing a frame off resto on a 64 impala for someone so my time has been divided.
Engine Bay is sanded in 400
Have everything to start building fuel system
Trying to get started on the 8-point tomorrow
Engine Bay is sanded in 400
Have everything to start building fuel system
Trying to get started on the 8-point tomorrow
04-10-2011, 03:42 AM
#35
So as we all know I am really happy with how the underside and wheel wells turned out. After much thought I decided last minute to shoot the bay with the same 3M product. Super happy with the results and believe me this stuff is durable as all hell. One of the reasons I shot it over the single stage gloss black I have on hand as well.
Ready

Primed

Wet

Finished

Ready
Primed
Wet
Finished
 04-16-2011, 04:16 PM
#37
TECH Enthusiast
iTrader: (19)

Join Date: Dec 2006
Location: Lynchburg, Va
Posts: 516
Likes: 0
Received 0 Likes
on
0 Posts
how did you weld the manifolds, you used a mild steel band on the manifolds and stain;less on the piping right? also where the piping run through i see theres no possibility of the belt not hitting the pipe coming off the driver side, i would rather put V bands on the manifolds then move my alt up top. i know you TIG welded it up but what rod, and did you pre heat? any pics you have of it finished with belt routing would help greatly! thanks man
04-16-2011, 05:47 PM
#38
how did you weld the manifolds, you used a mild steel band on the manifolds and stain;less on the piping right? also where the piping run through i see theres no possibility of the belt not hitting the pipe coming off the driver side, i would rather put V bands on the manifolds then move my alt up top. i know you TIG welded it up but what rod, and did you pre heat? any pics you have of it finished with belt routing would help greatly! thanks man
Belt will fit fine since im going to run electric power steering
Why would I move the alt if I do not have to? I do not understand this concept. Please note that in an RX7 I can not move the alt to where f-body guys do....it would hit my hood.
Anyhow I am really busy the next few weeks but I am going to try to work on it tomorrow some.
Last edited by ablakez28; 04-16-2011 at 06:13 PM.
04-19-2011, 02:00 PM
#39
Sorry for the cell phone pics
I installed a new pilot bearing
Spec p-trim twin setup
Spec flywheel
New slave/tob
John Donovan welded in a -12 oil return line
Installed -4 feed
Old slave wouldn’t go flush messing up my air gap, after removal and tapping the inside ring I got it to giving me a proper air gap for clutch install with no shim. However I didn’t like that I had to beat on the inside and replaced it for a new one. Sorry didn’t take pics of the clutch install process.

Installed temp sensor

Feed and return

John welded in IAT bung and Innovative bead rolled my cold side

A million dollars in AN/Fuel stuff

Starting to assemble


Ahhhhhh finally back in. I am happy with how it looks.

I installed a new pilot bearing
Spec p-trim twin setup
Spec flywheel
New slave/tob
John Donovan welded in a -12 oil return line
Installed -4 feed
Old slave wouldn’t go flush messing up my air gap, after removal and tapping the inside ring I got it to giving me a proper air gap for clutch install with no shim. However I didn’t like that I had to beat on the inside and replaced it for a new one. Sorry didn’t take pics of the clutch install process.
Installed temp sensor
Feed and return
John welded in IAT bung and Innovative bead rolled my cold side
A million dollars in AN/Fuel stuff
Starting to assemble
Ahhhhhh finally back in. I am happy with how it looks.
