418+Turbo+FD RX7 Build

 04-25-2011, 06:29 PM
#62
TECH Veteran
iTrader: (17)
Join Date: Mar 2009
Location: Indy
Posts: 4,220
Likes: 0
Received 0 Likes
on
0 Posts

Im trying to figure out why i havent been following this build! WTF!
Looks incredible man! I have been very strongly considering an RX7, this body or the previous, 93 and newer if i have the choice, but either will be fine with me, or a 240 swap.
These cars just come out really nice in the end! Great work man! Love it!
Looks incredible man! I have been very strongly considering an RX7, this body or the previous, 93 and newer if i have the choice, but either will be fine with me, or a 240 swap.
These cars just come out really nice in the end! Great work man! Love it!
04-25-2011, 08:21 PM
#63

Thankd Bill!
Man they won't drop it either. They are trying to even find a new argument now too. How desperate can you be to not feel "wrong" it's sad IMO.
Thanks!
A friend of mine did a ls1/240 and I love that thing.
Man they won't drop it either. They are trying to even find a new argument now too. How desperate can you be to not feel "wrong" it's sad IMO.
Im trying to figure out why i havent been following this build! WTF!
Looks incredible man! I have been very strongly considering an RX7, this body or the previous, 93 and newer if i have the choice, but either will be fine with me, or a 240 swap.
These cars just come out really nice in the end! Great work man! Love it!
Looks incredible man! I have been very strongly considering an RX7, this body or the previous, 93 and newer if i have the choice, but either will be fine with me, or a 240 swap.
These cars just come out really nice in the end! Great work man! Love it!
A friend of mine did a ls1/240 and I love that thing.
06-01-2011, 01:32 AM
#67
Been really busy 
Over a month since I updated this WTF!
Luke is working on the wiring
I am working on the cage
Turbo is in Alabama
More updates soon as I really want to drive this summer maybe.
I made a fuel system from scratch(man this was a lot of work) sorry I didnt take many pics and it looks super ballin under the car. Twin 044s using magnafuel y -10An to -8 each rail, each rail to return.


My welding and fab skills are coming along decent. This isn't the prettiest weld I laid down but is literally the ONLY pic I took today (unless you want to see my garden).
So I will try to fit and weld all of the bars soon!

Just figured I would give you guys some pics of the fuel system and a few randoms
Light washed it out real bad so I just threw the effect on it meh you get to see how I did the front split this way lol


Rear split hidden above sway bar

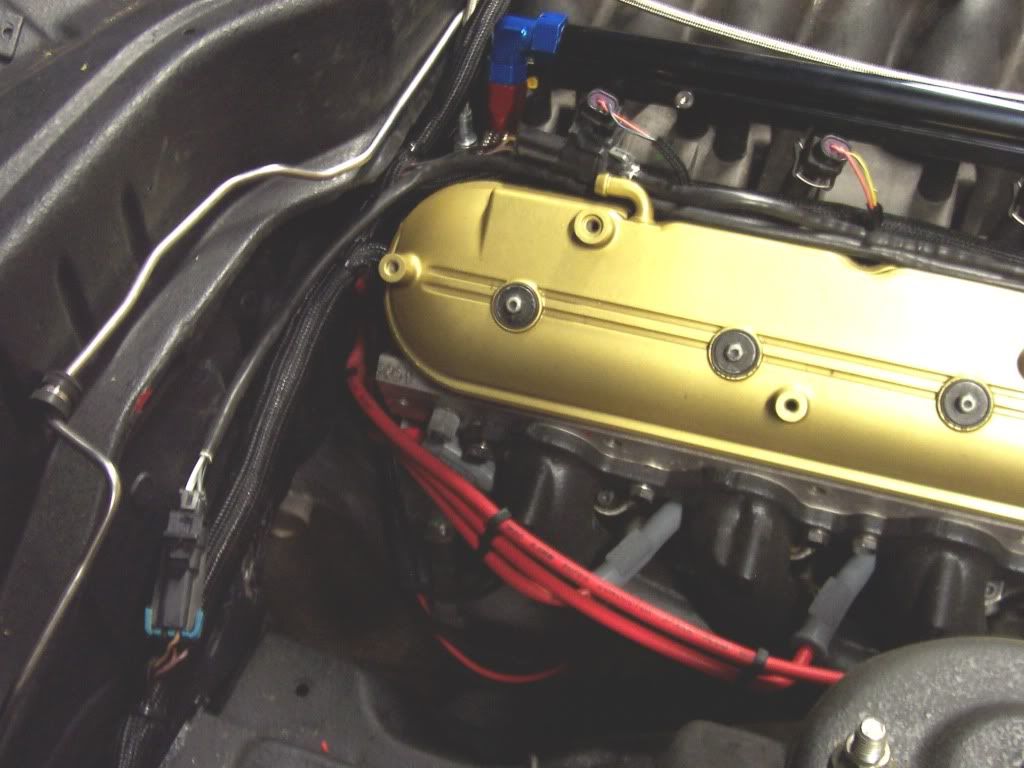
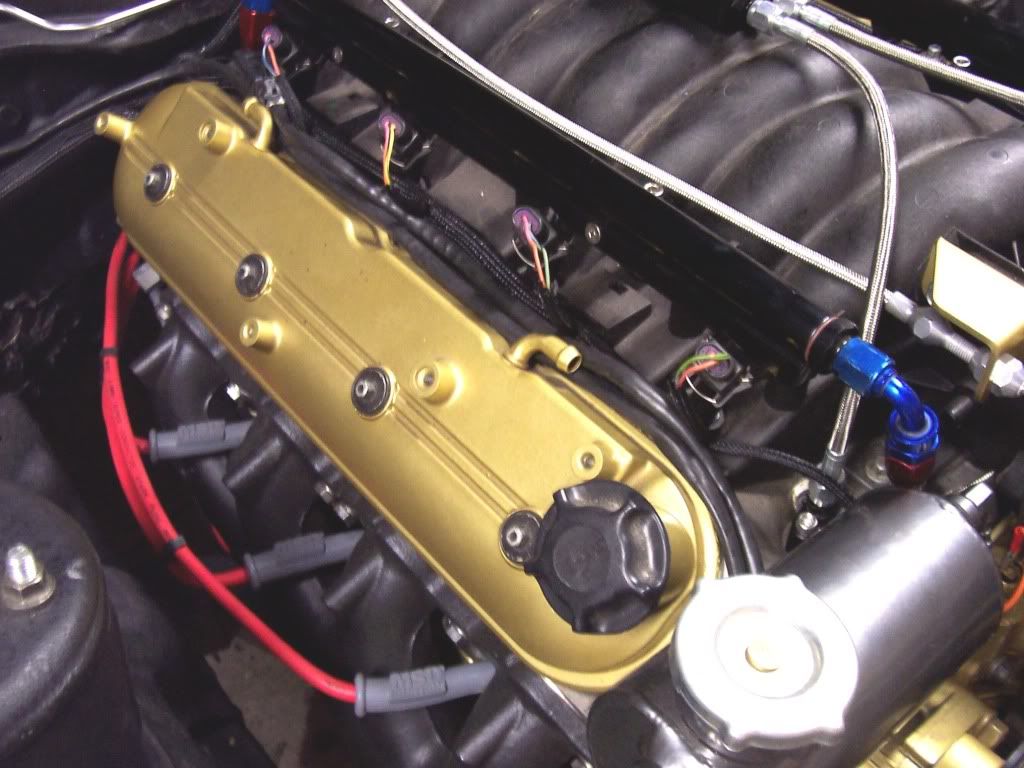
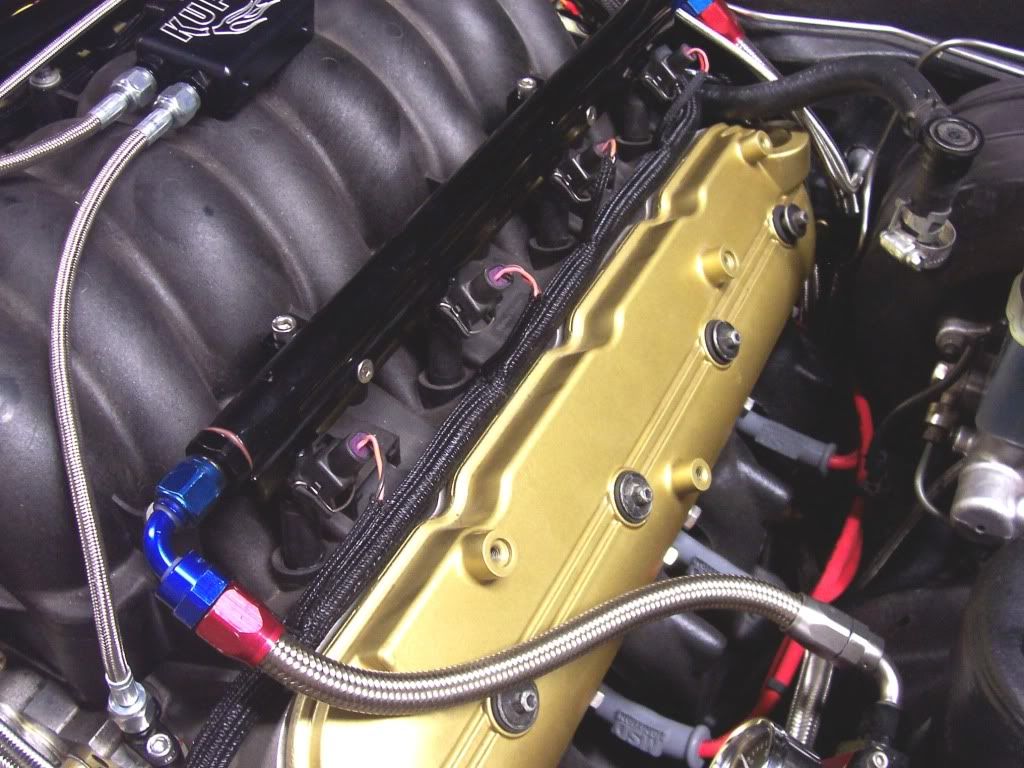
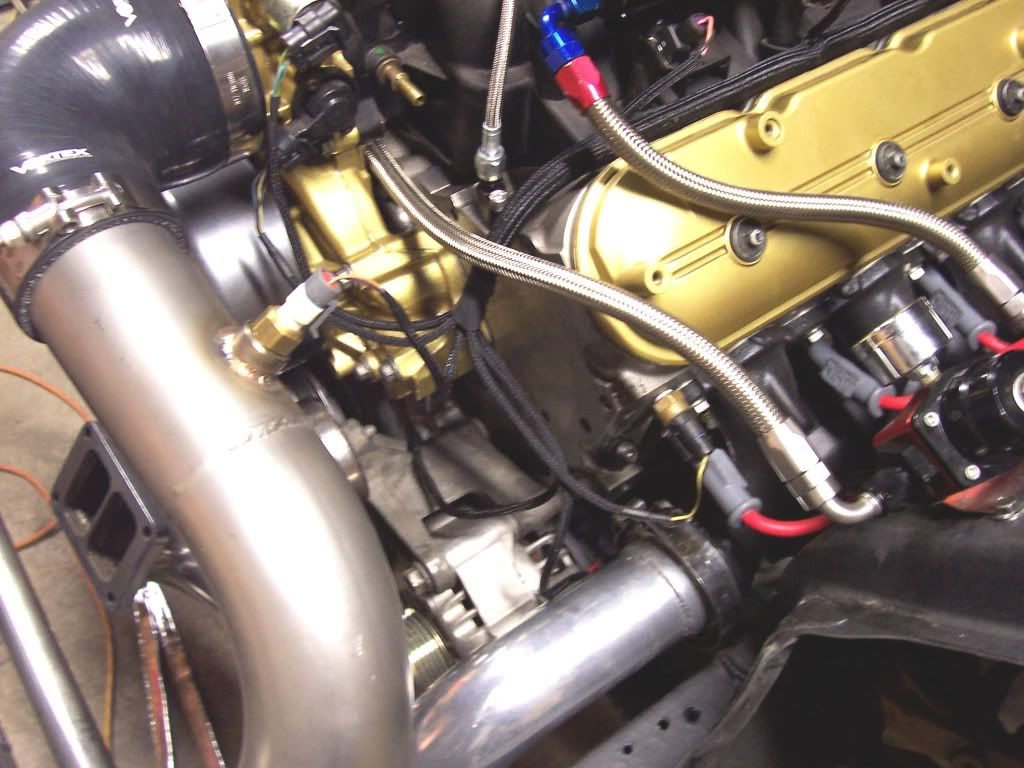
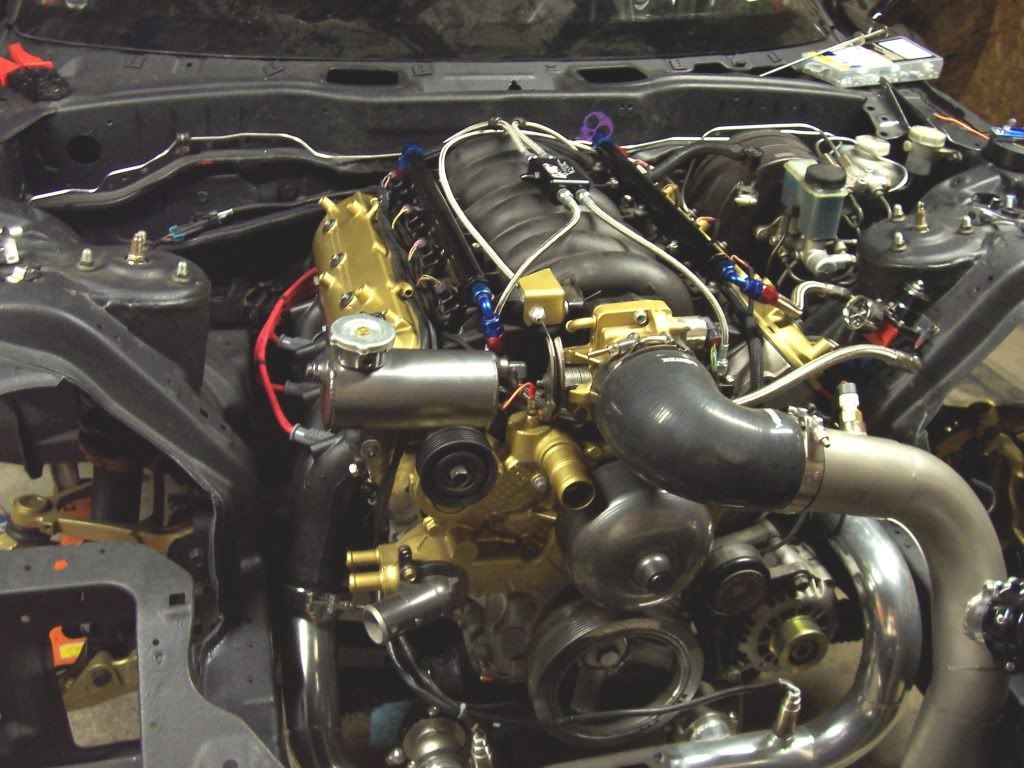
Couple motor shots, turbo is out for some :snky: as you see but I installed the new steam port system and need to put the wires through the firewall and attach the boots


Over a month since I updated this WTF!
Luke is working on the wiring
I am working on the cage
Turbo is in Alabama
More updates soon as I really want to drive this summer maybe.
I made a fuel system from scratch(man this was a lot of work) sorry I didnt take many pics and it looks super ballin under the car. Twin 044s using magnafuel y -10An to -8 each rail, each rail to return.
My welding and fab skills are coming along decent. This isn't the prettiest weld I laid down but is literally the ONLY pic I took today (unless you want to see my garden).
So I will try to fit and weld all of the bars soon!
Just figured I would give you guys some pics of the fuel system and a few randoms
Light washed it out real bad so I just threw the effect on it meh you get to see how I did the front split this way lol
Rear split hidden above sway bar
Couple motor shots, turbo is out for some :snky: as you see but I installed the new steam port system and need to put the wires through the firewall and attach the boots
06-06-2011, 12:19 AM
#68
Well I got the cage DONE today. All I know was this was a ton of work between shaping the plates and getting proper angles on the feet and notches. I am glad I finally gathered up some confidence and did this thing! Here are the pics from today.


After some hammertone rustoleum paint. One more layer needs applied. Thanks Brian 302N20 for bringing this over today.


After some hammertone rustoleum paint. One more layer needs applied. Thanks Brian 302N20 for bringing this over today.
 06-06-2011, 10:09 PM
#70
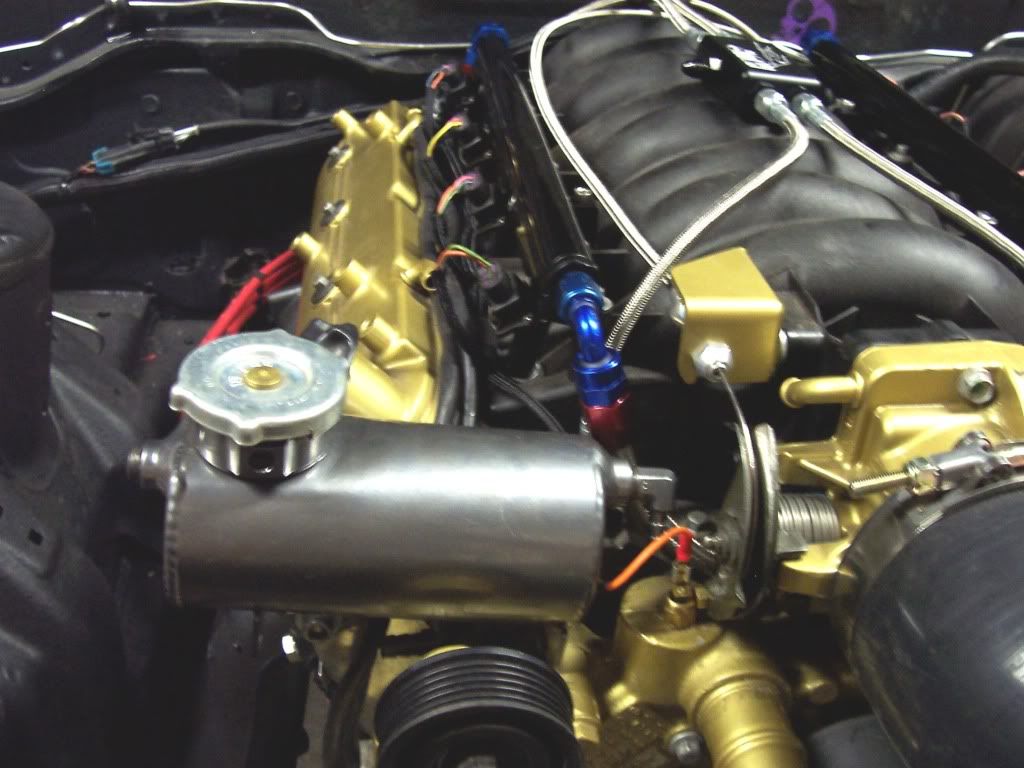
Nice catch on the rad! The downpipe isnt hooked up to anything since I sent the turbo to FI for some upgrades. One in its final place I will make the lines. I anticipate some headaches and have three diff thermostat housings to try out.
Also not sure if i told you but I cant find all of my brake lines to make a copy of my abs delete again.
 06-08-2011, 01:04 AM
#74
Thanks! Soon I hope. Wiring pending to be honest.
Thanks man I deff understand its not for everyone but its cool that some beside myself like it.
That is a KUP product to open all four passages on the heads.
http://www.kurturbanperformance.com/...or-system.html
That is a KUP product to open all four passages on the heads.
http://www.kurturbanperformance.com/...or-system.html
 06-13-2011, 12:46 PM
#77
Wiressssss

My task for the day was coil relocation. I didn't take enough pics but I grabbed allthread rod, brackets, drilled holes and installed grommets, passed wires through, crimped and made wires(PITA) then put it all together. Bracket welded via Viper Specialty Performance


Yeah I deff could have cut the wires shorter. But left them encase I have to relo again.

After Luke laid out the harness on the motor it was ready to wrap


Installed


My task for the day was coil relocation. I didn't take enough pics but I grabbed allthread rod, brackets, drilled holes and installed grommets, passed wires through, crimped and made wires(PITA) then put it all together. Bracket welded via Viper Specialty Performance
Yeah I deff could have cut the wires shorter. But left them encase I have to relo again.
After Luke laid out the harness on the motor it was ready to wrap
Installed
06-16-2011, 02:37 PM
#78
Wiring Re-cap:
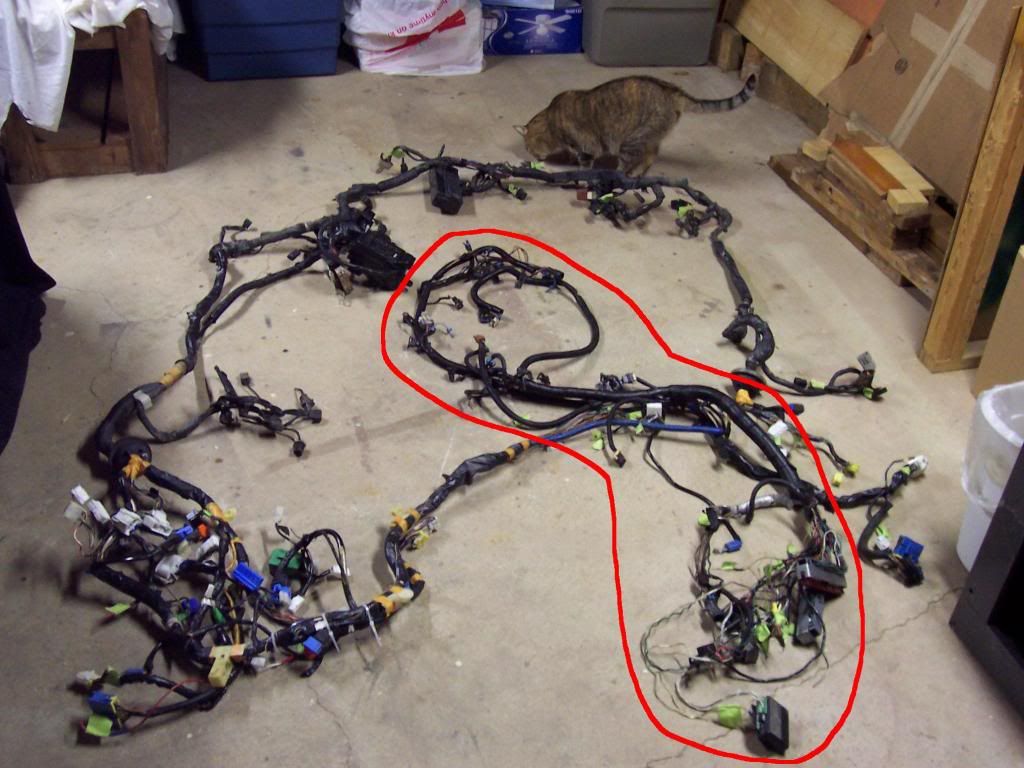
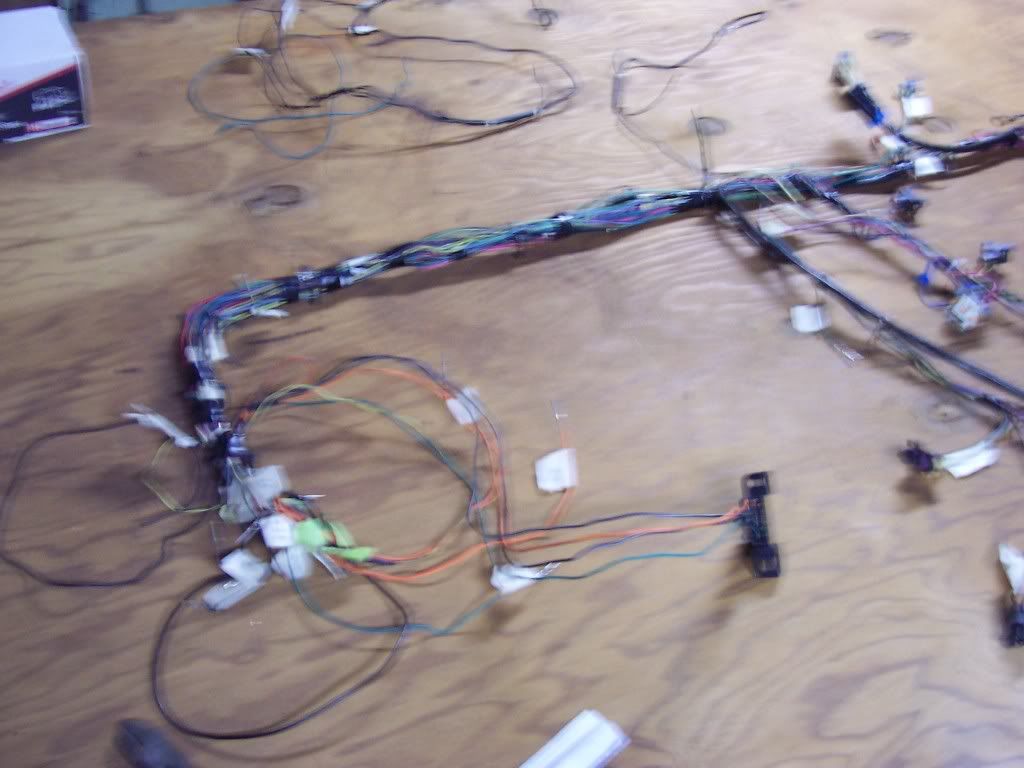
To refresh your memory, this is what I started with:
(http://www.nyspeed.com/showthread.ph...=1#post3132919)
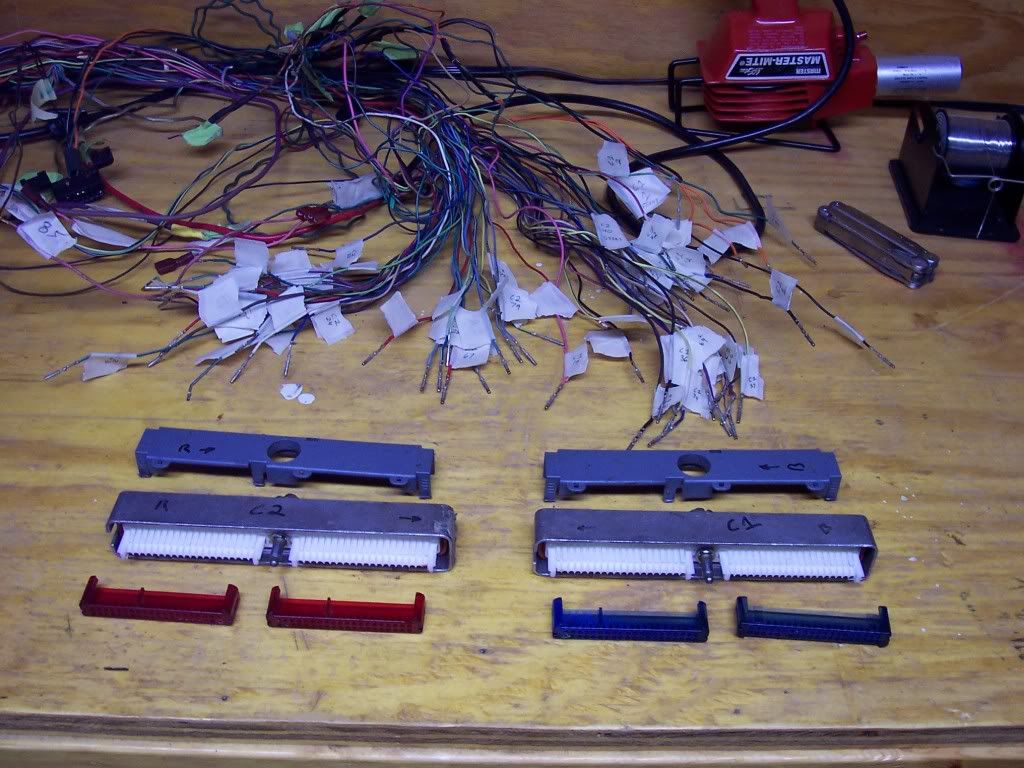
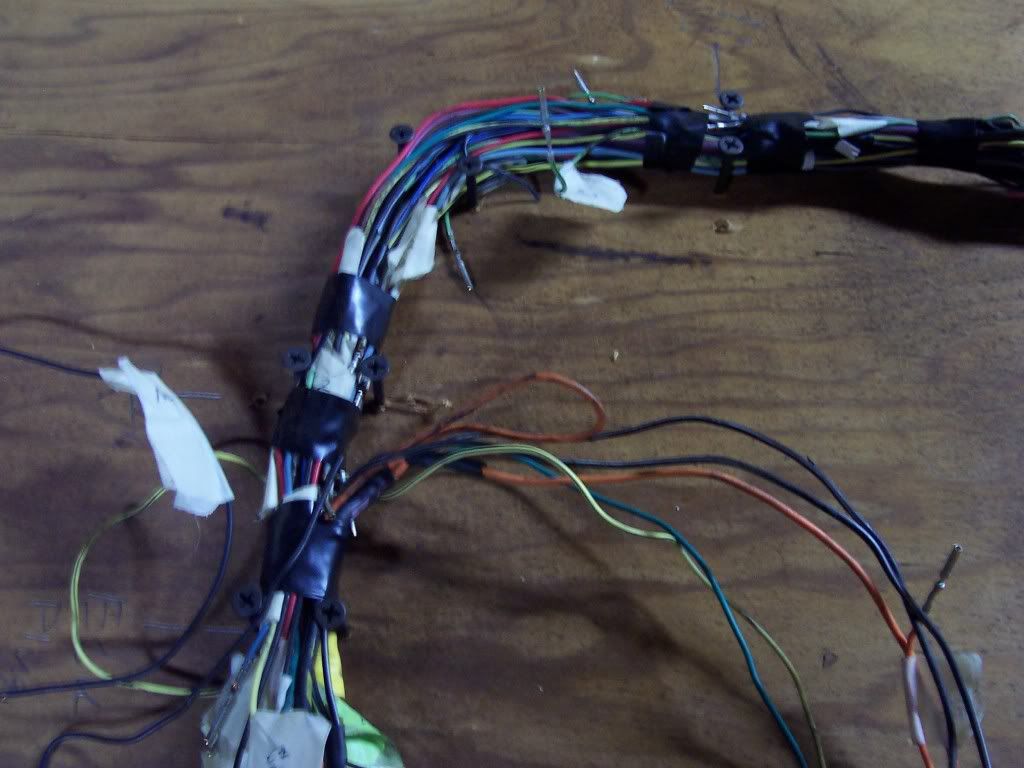
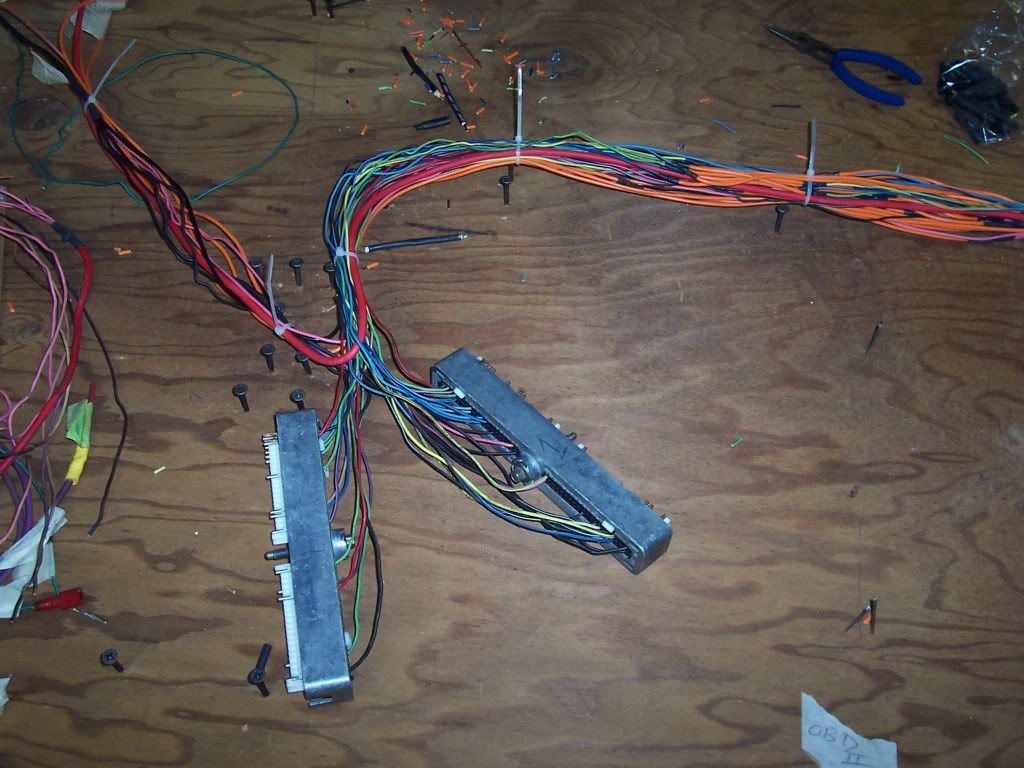
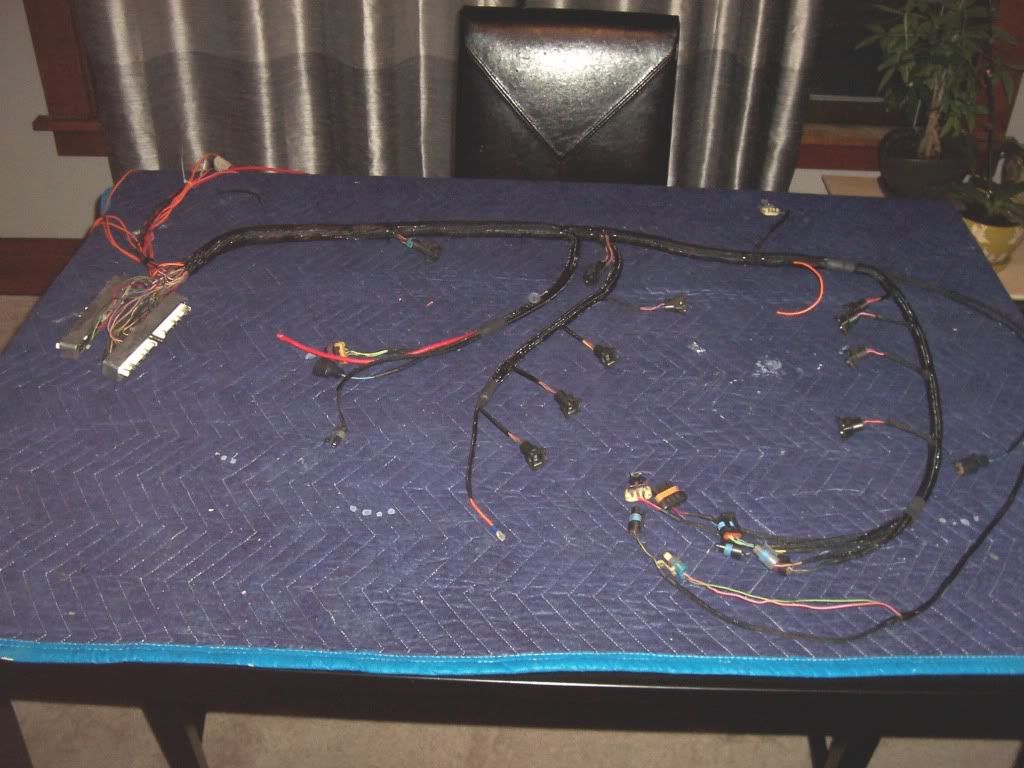
I pulled all the tape and loom off of the harness and inspected the wiring. I removed approximately 2 feet of charred wire due to a bad ground. I also repaired numerous holes in the insulation and replaced fatigued wiring. Once the harness was "repaired" I was ready to lay the harness back on the motor. In order to do this I de-pinned the ECU connectors, marked each pin, and bundled each separate connector harness.
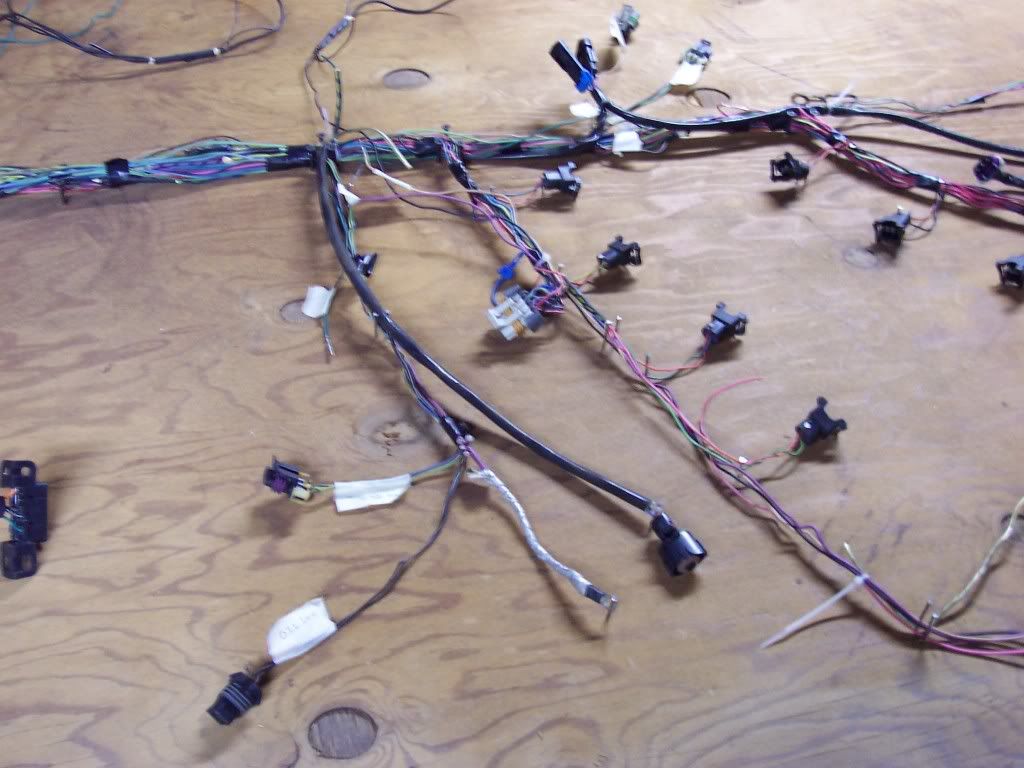
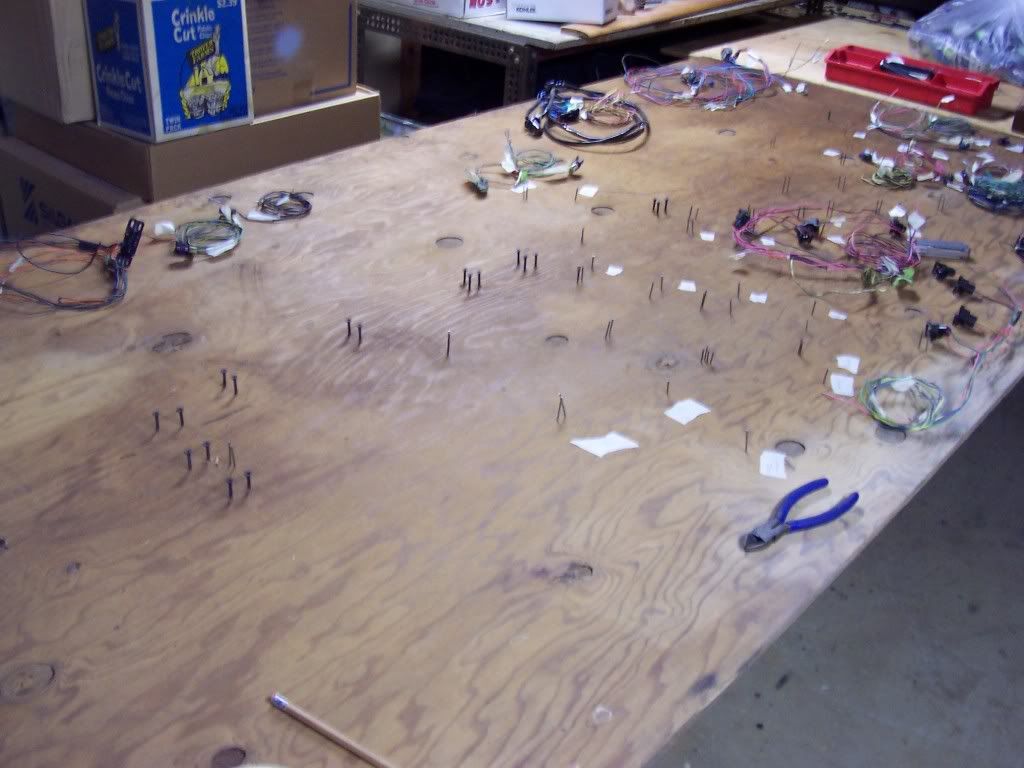
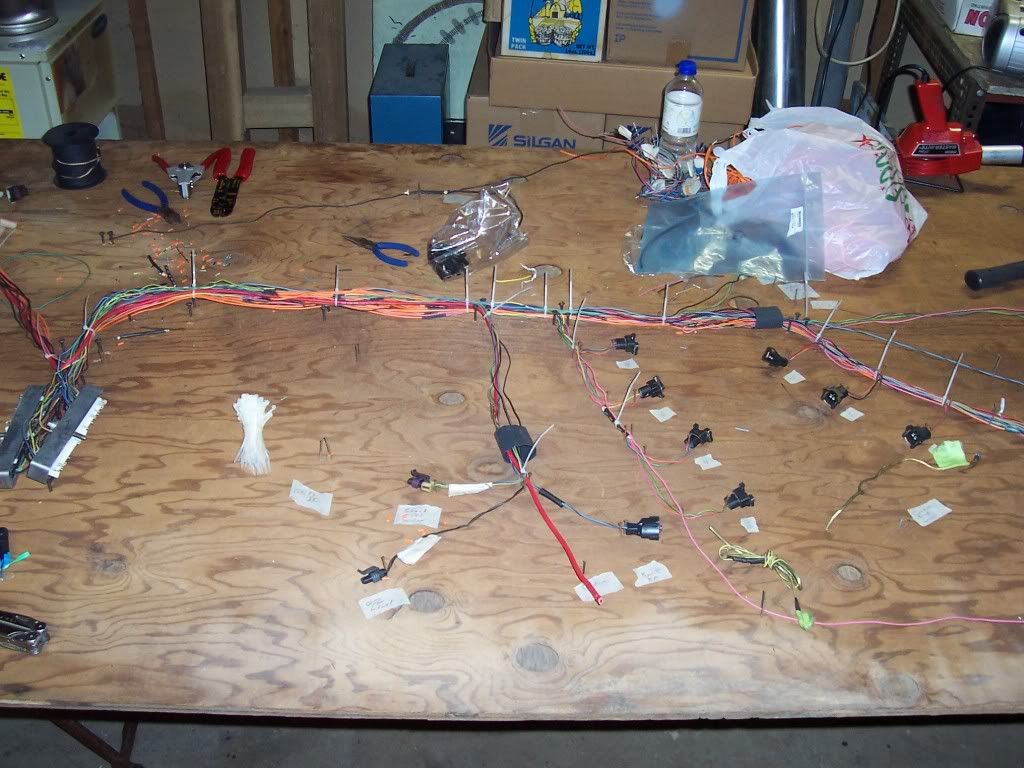
Once the harness was the right length and had the proper wire routing I created a wiring board from it.
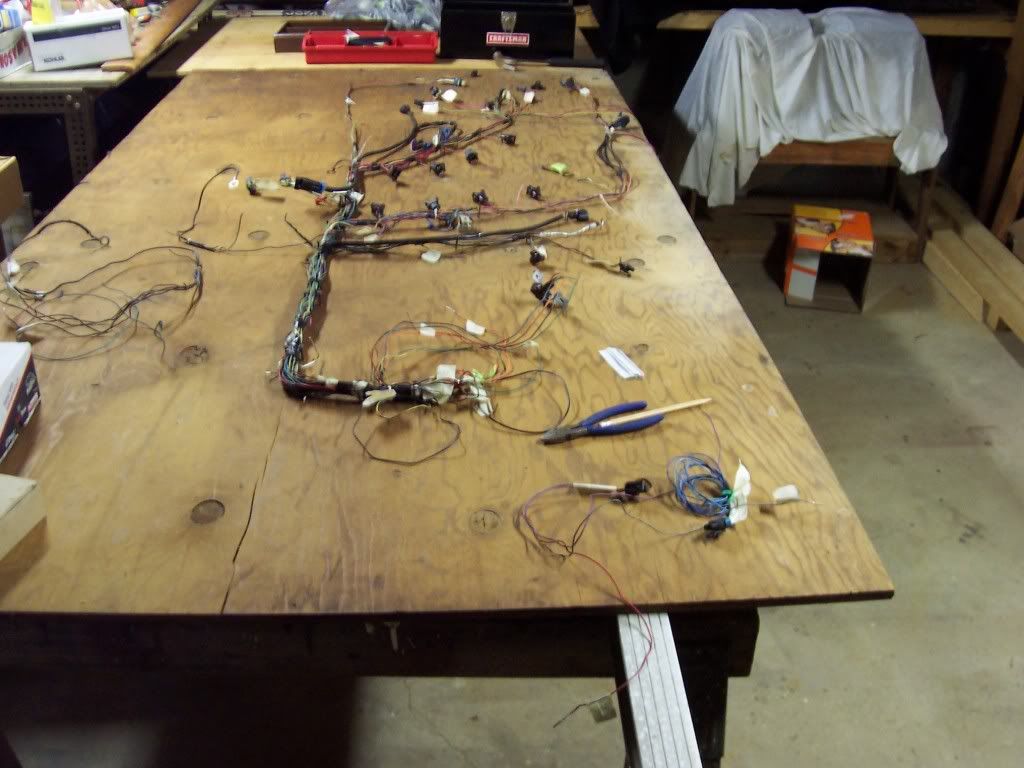
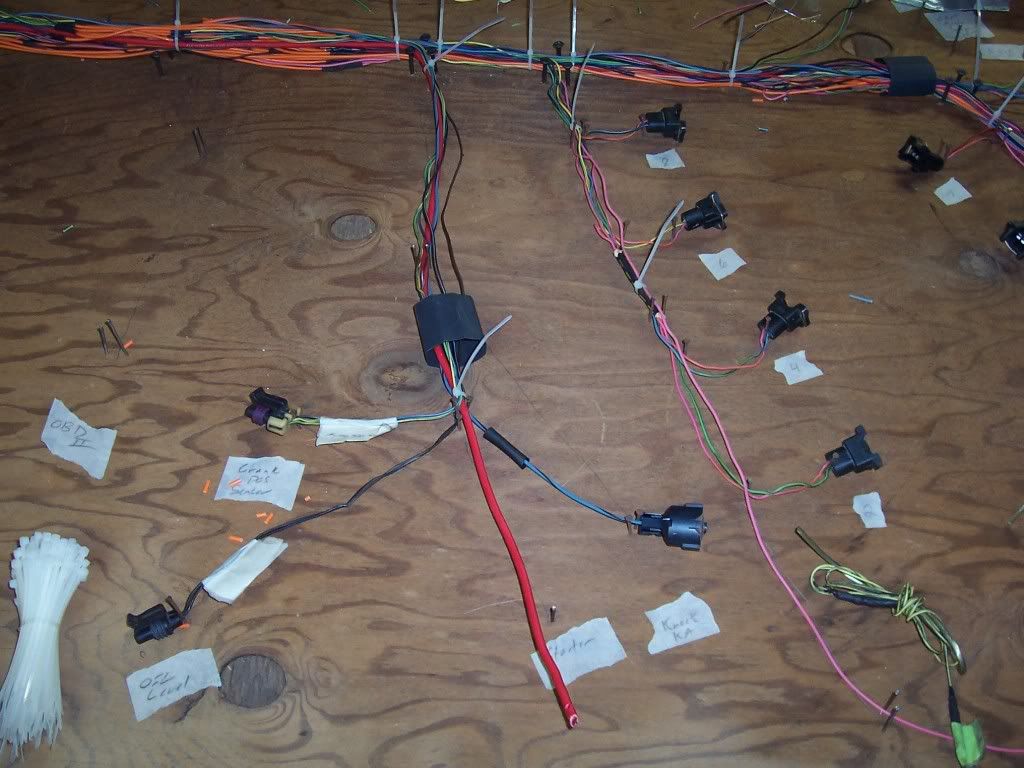
I marked and placed guide points on key areas on the harness. This gives me reference for the next step...
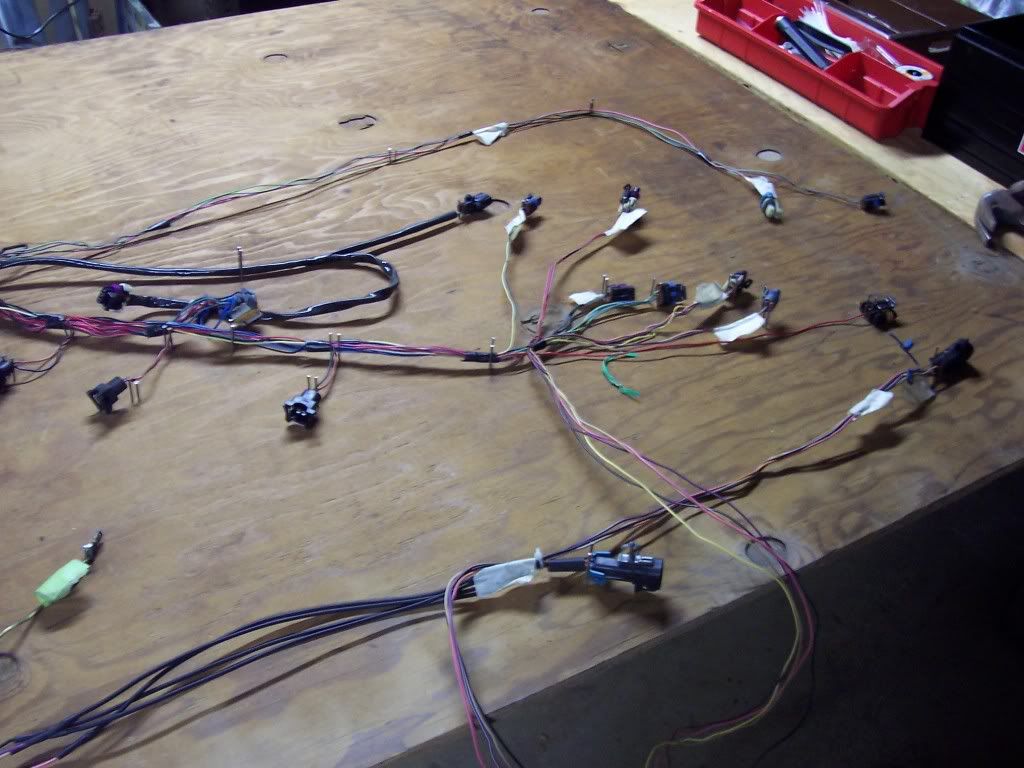

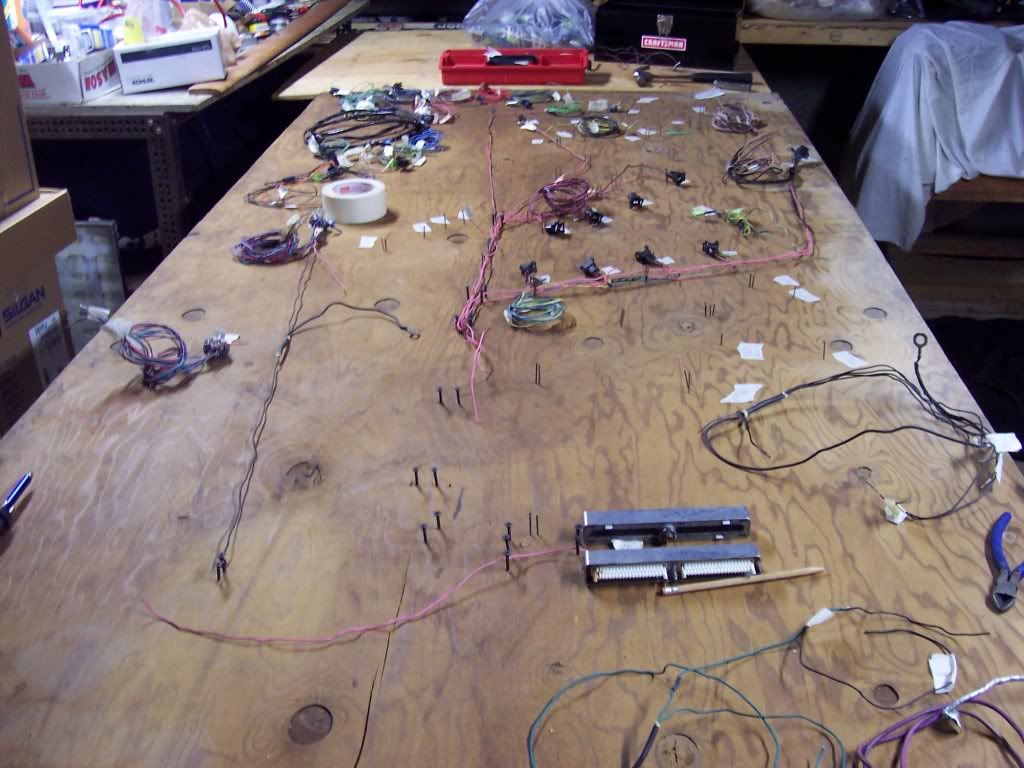
Once the board is done I take the whole harness back apart and start all over.
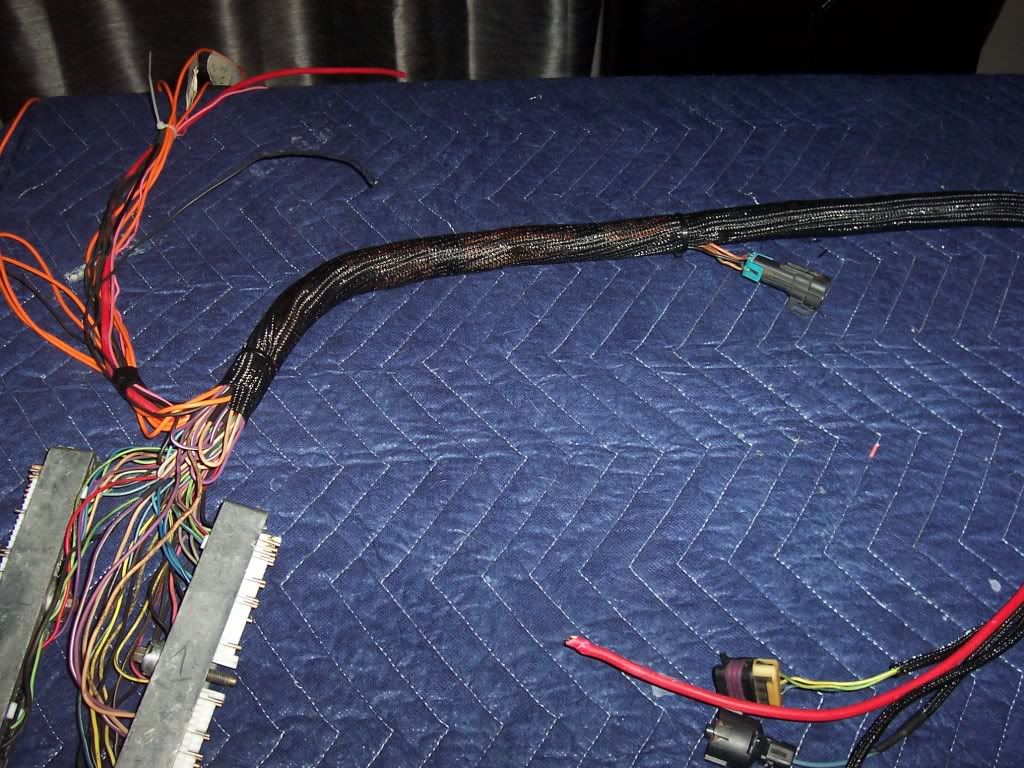
I first laid the common power wires and then the common grounds.
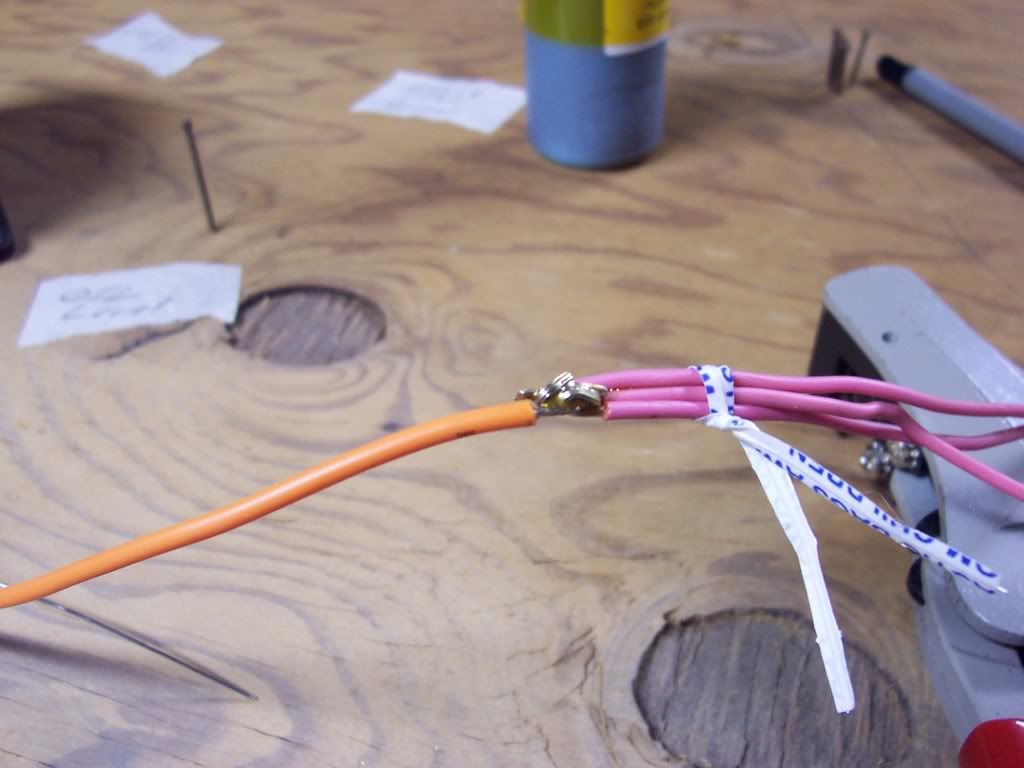

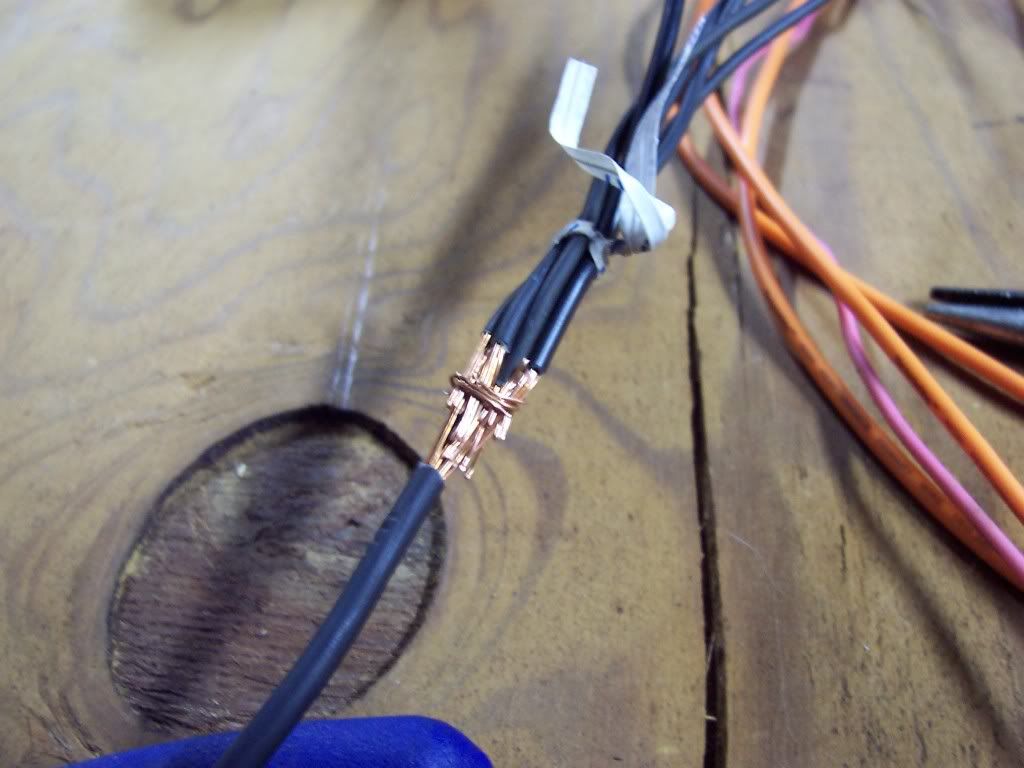
(Note - I did not get a picture of the wires soldered. This was to show how to properly attach multiple wires. These connections are stronger than using a solder splice.)
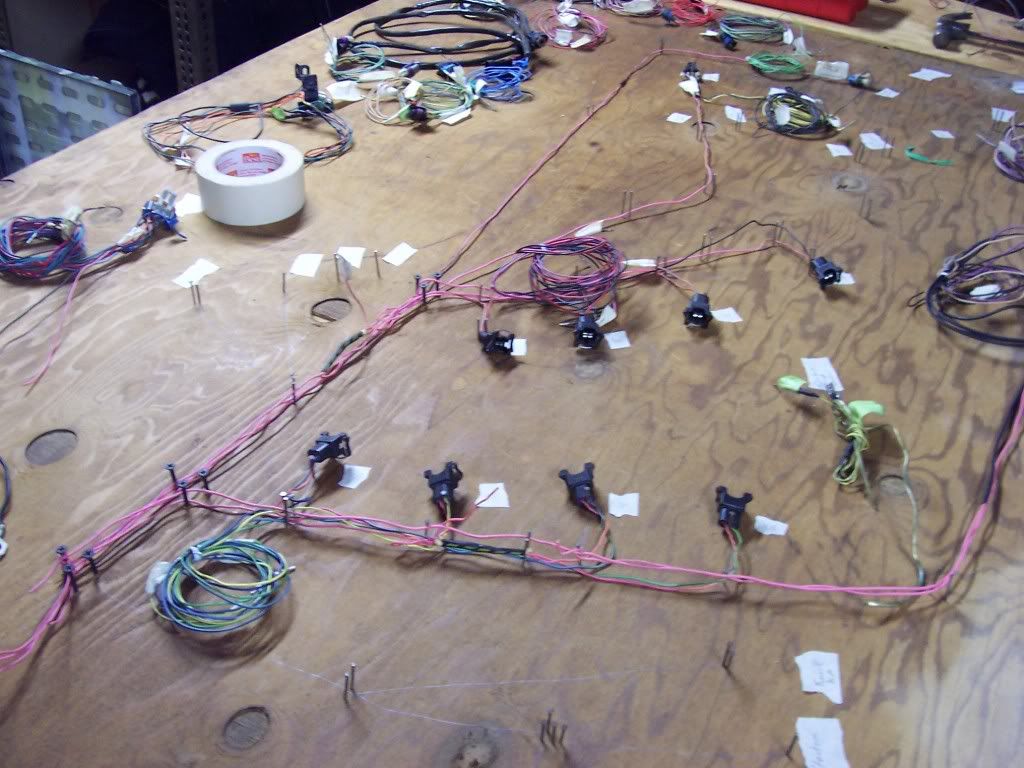
The rest is to lay down the connector on the board in the appropriate location, cut the wires to the ECU, pin the wires, and add a length of new wire back in to re-connect. This needed to be done due to relocating the ECU to the passenger side kick panel in the A pillar.
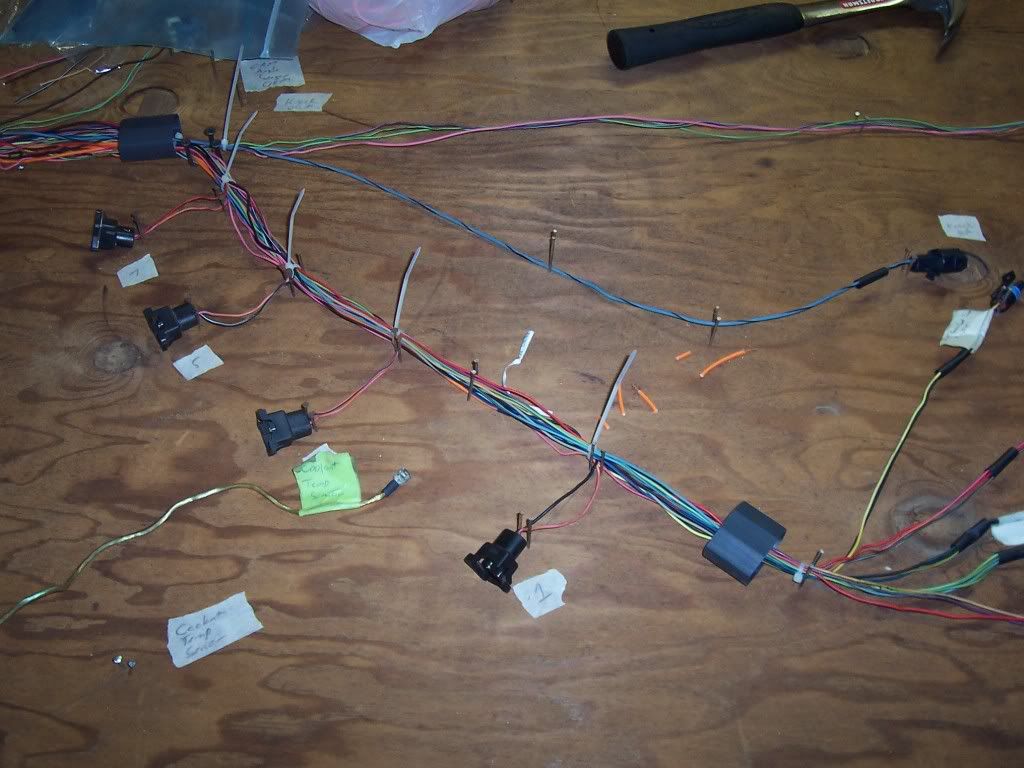
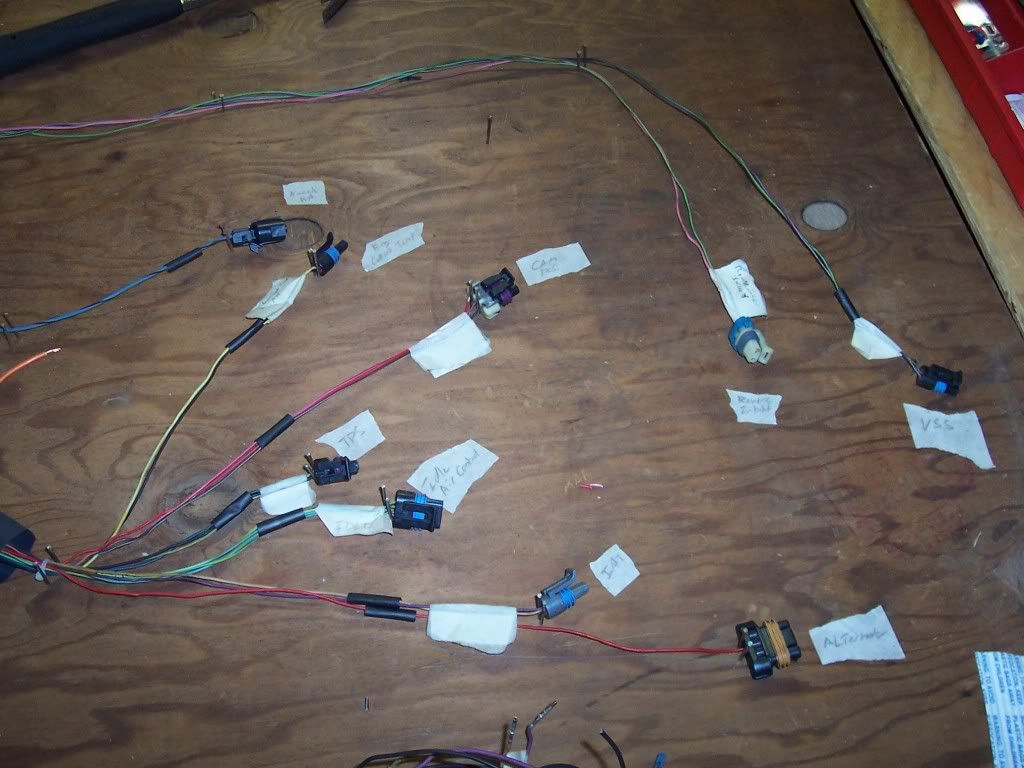
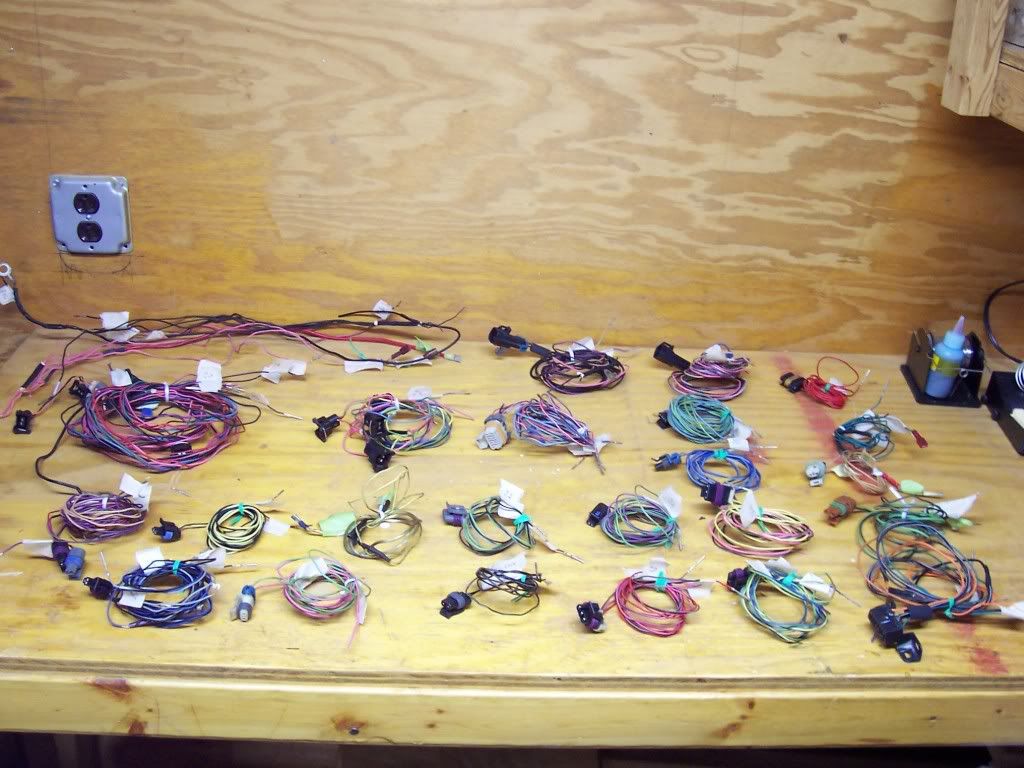
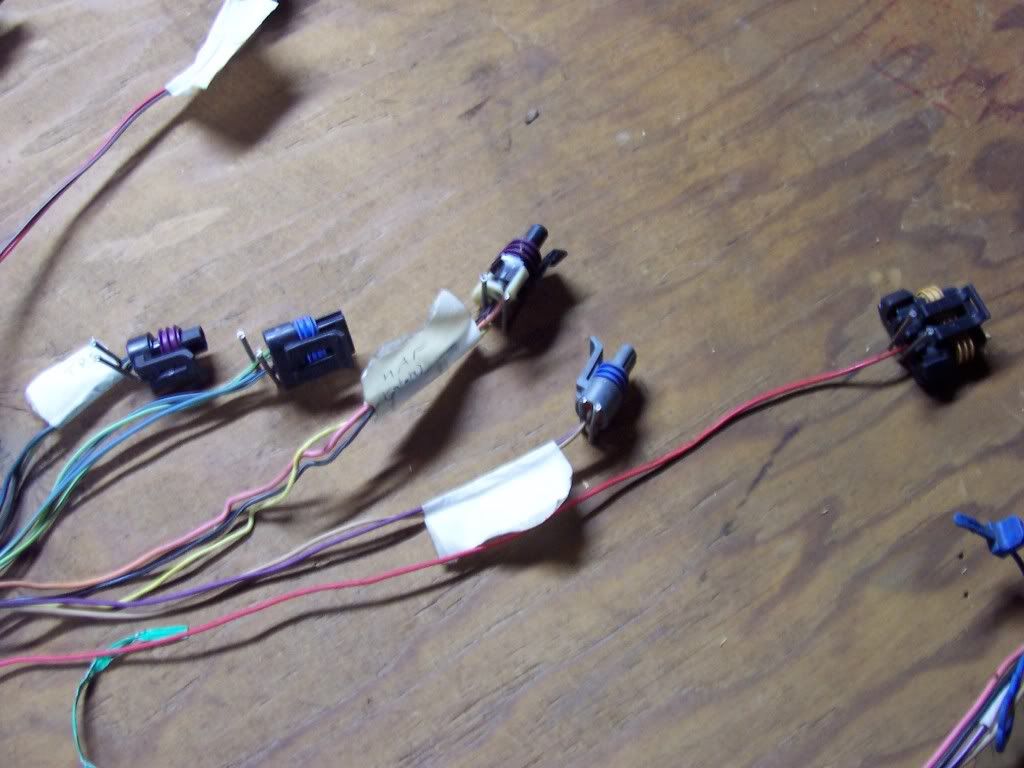
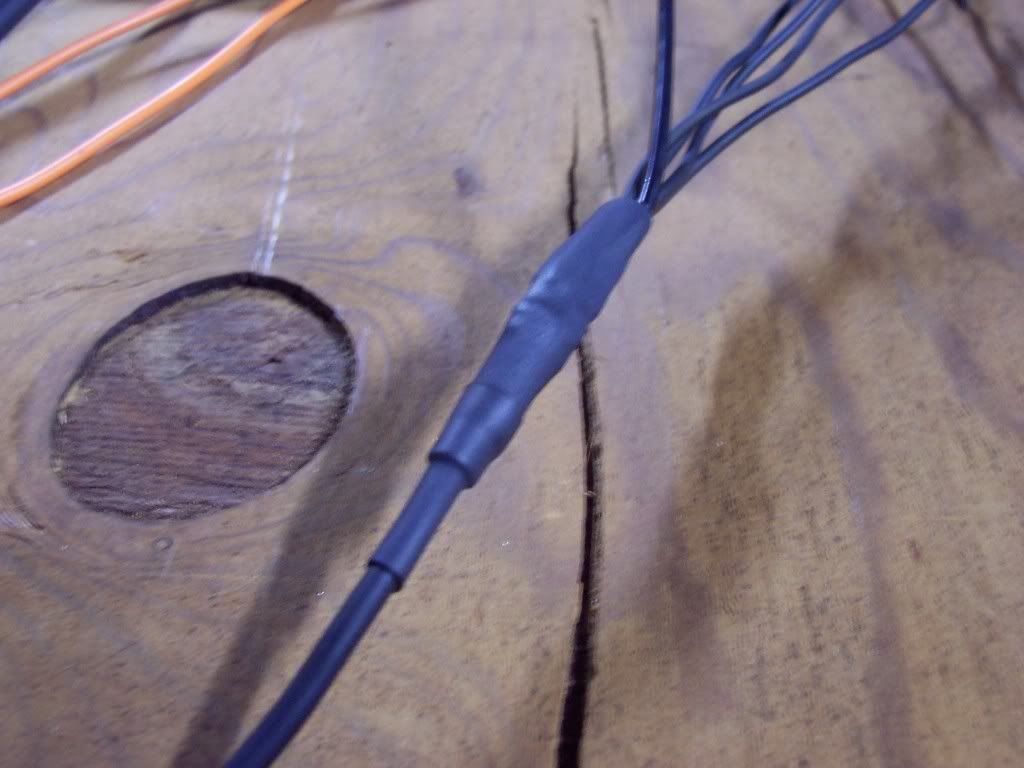
As I built the harness I slid shrink tubing on each wire group that I was able to get at in order to hold the small wrap. For the main harness I used a high ratio shrink tubing to hold all the secondary breakouts and for added strength.
The final step was to tie the harness, run the actual wrap, and shrink the connections.
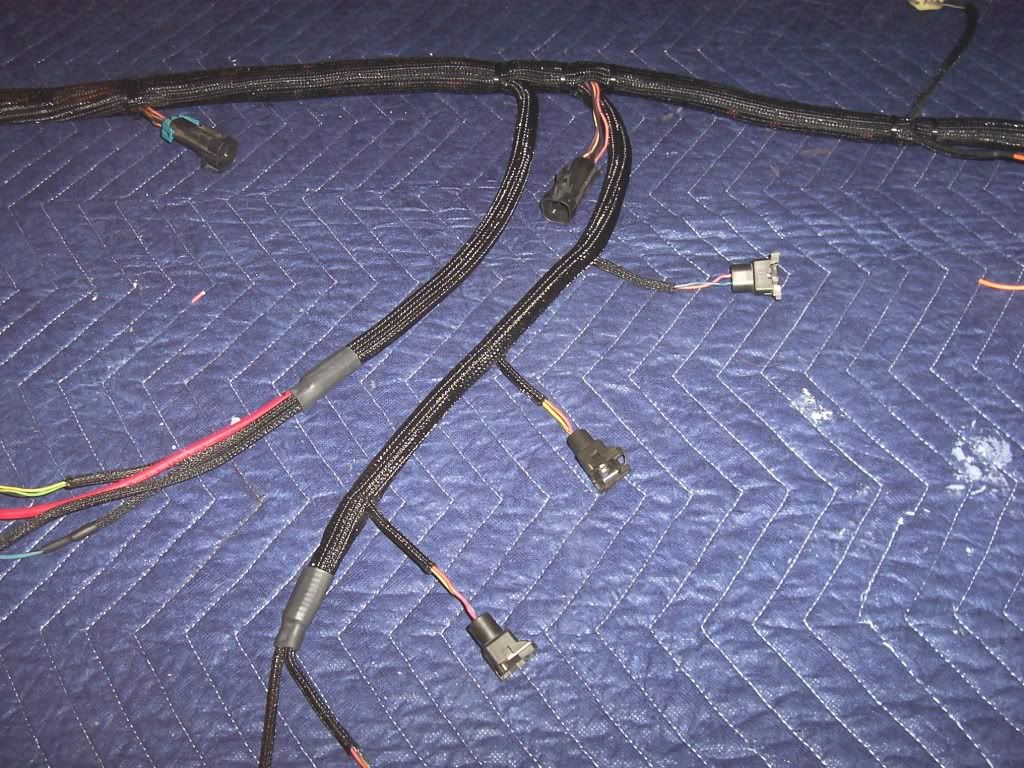
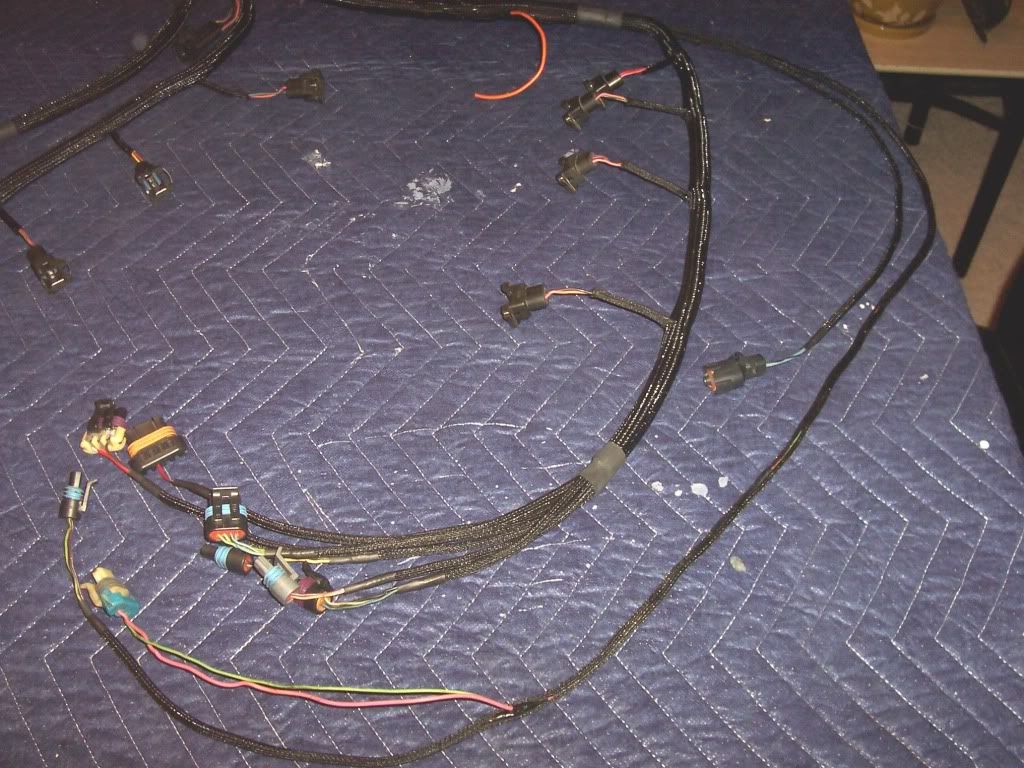
Then comes the final install.......

To refresh your memory, this is what I started with:
(http://www.nyspeed.com/showthread.ph...=1#post3132919)
I pulled all the tape and loom off of the harness and inspected the wiring. I removed approximately 2 feet of charred wire due to a bad ground. I also repaired numerous holes in the insulation and replaced fatigued wiring. Once the harness was "repaired" I was ready to lay the harness back on the motor. In order to do this I de-pinned the ECU connectors, marked each pin, and bundled each separate connector harness.
Once the harness was the right length and had the proper wire routing I created a wiring board from it.
I marked and placed guide points on key areas on the harness. This gives me reference for the next step...
Once the board is done I take the whole harness back apart and start all over.
I first laid the common power wires and then the common grounds.
(Note - I did not get a picture of the wires soldered. This was to show how to properly attach multiple wires. These connections are stronger than using a solder splice.)
The rest is to lay down the connector on the board in the appropriate location, cut the wires to the ECU, pin the wires, and add a length of new wire back in to re-connect. This needed to be done due to relocating the ECU to the passenger side kick panel in the A pillar.
As I built the harness I slid shrink tubing on each wire group that I was able to get at in order to hold the small wrap. For the main harness I used a high ratio shrink tubing to hold all the secondary breakouts and for added strength.
The final step was to tie the harness, run the actual wrap, and shrink the connections.
Then comes the final install.......
06-16-2011, 02:39 PM
#79
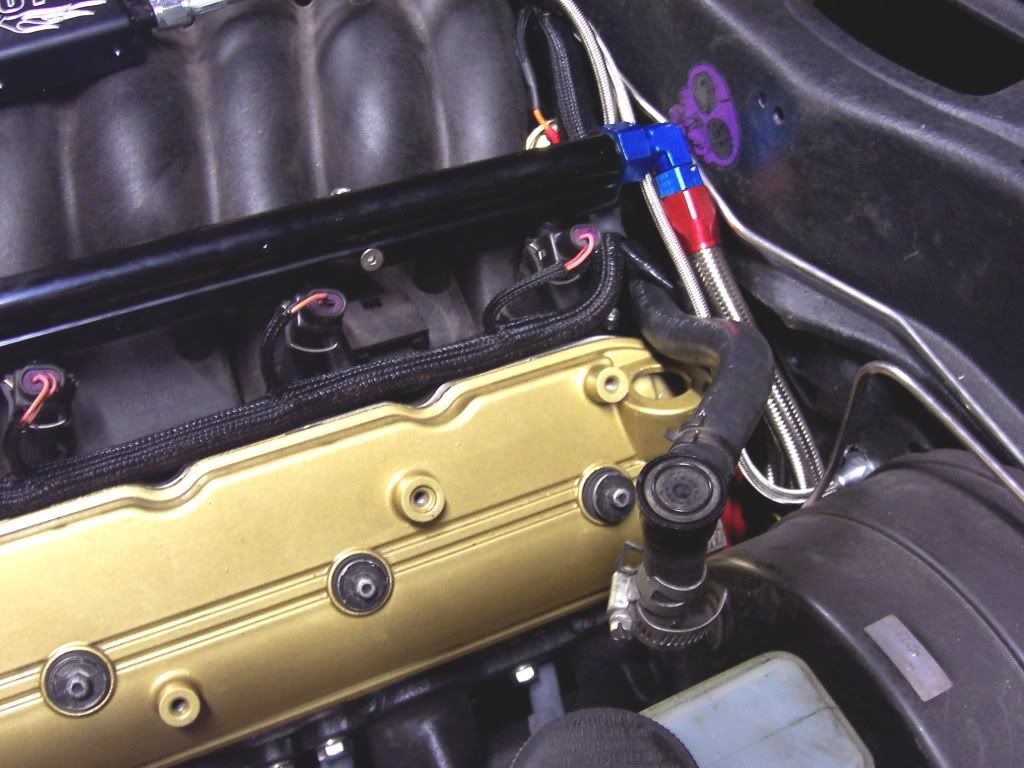
My hands hurt from making AN fittings......so here are some pics. If you guys didn't know none of my fuel or any of the stainless is from a kit. I assemble all of my lines using products I get from Innovative and Ferry Hydraulic.


Dan Lesser Owner of Viper Specialty Performance helped my out by welding some Alum for me. Thanks Dan!

Painted! I made sure I had paint almost identical to my powdercoat before I had anything powdered for this reason.

Ok lets make a PCV system, tank assembled and mounted


Oh my what do we have here? Just got my turbo back. I had a different wheel, race cover and rebuild done by Forced Inductions


Dan Lesser Owner of Viper Specialty Performance helped my out by welding some Alum for me. Thanks Dan!
Painted! I made sure I had paint almost identical to my powdercoat before I had anything powdered for this reason.
Ok lets make a PCV system, tank assembled and mounted
Oh my what do we have here? Just got my turbo back. I had a different wheel, race cover and rebuild done by Forced Inductions