
66 Chevelle LQ4 GT4276 Build Thread

 07-11-2011, 03:57 AM
#22
Launching!
Thread Starter
iTrader: (5)

Join Date: Mar 2004
Location: Chippewa Falls, WI
Posts: 292
Likes: 0
Received 0 Likes
on
0 Posts

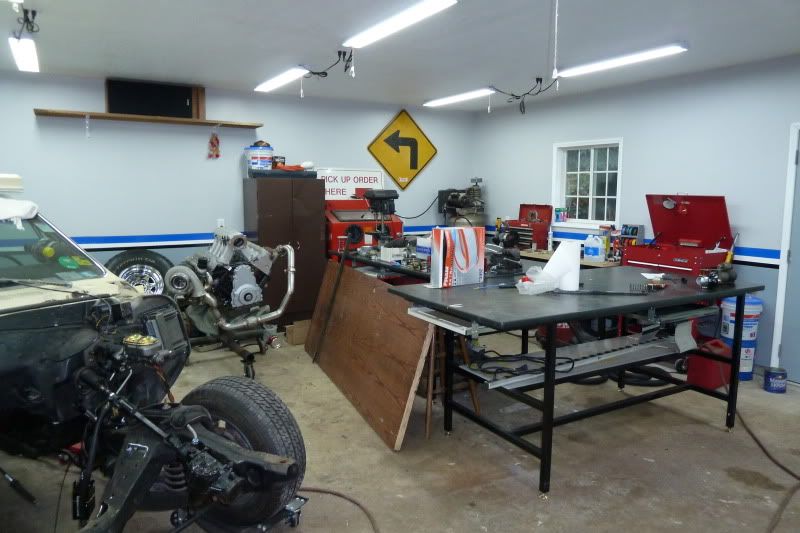
Not much turbo related stuff going on. I finally had some time to work on this again. Spring/summer has been keeping me busy with yard work, a jeep to get running, and a typhoon to tune.
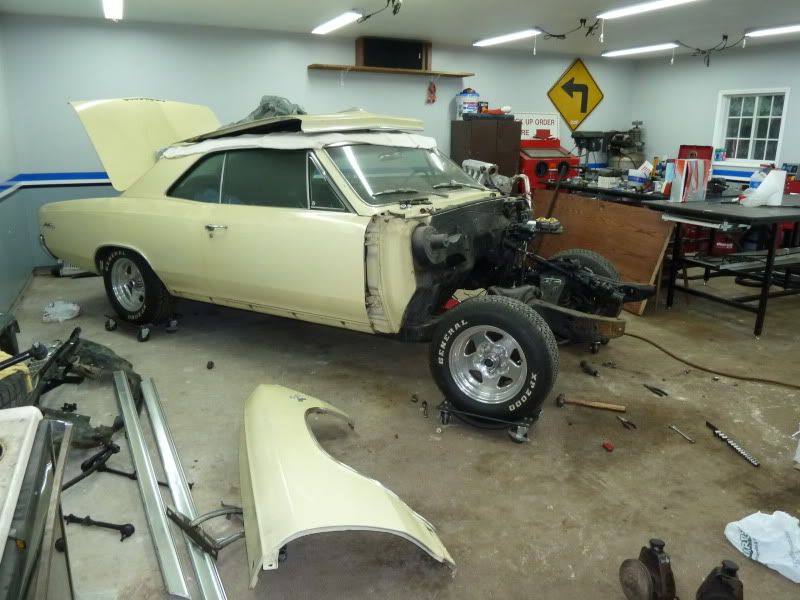
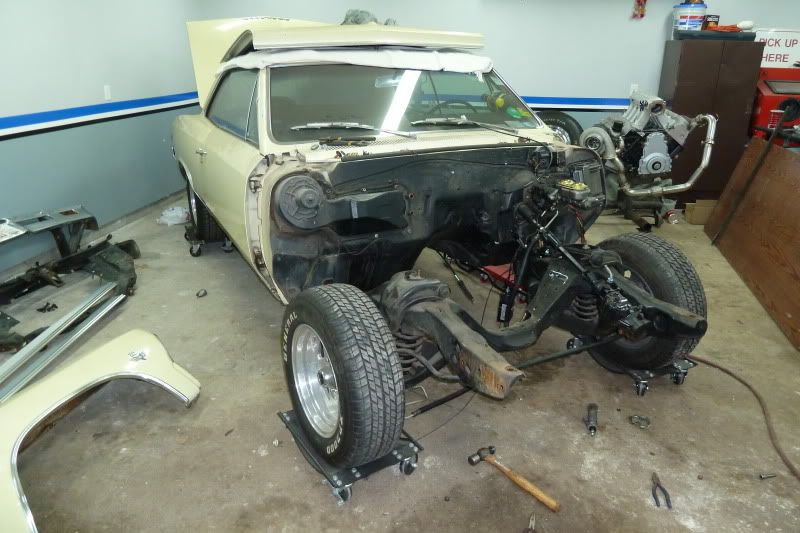
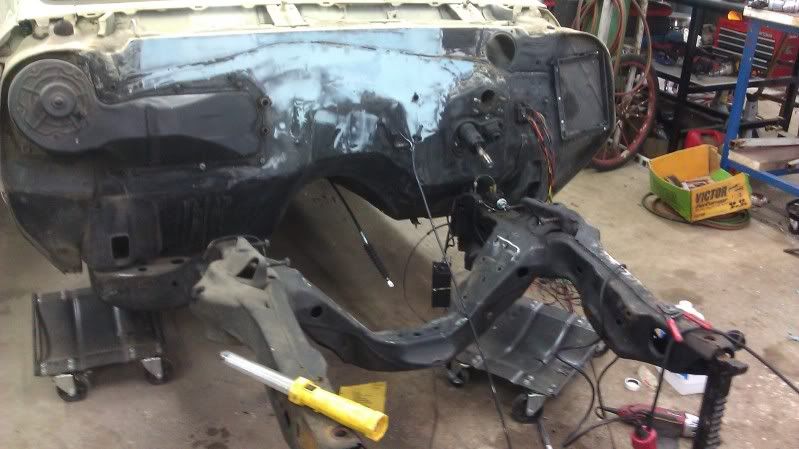
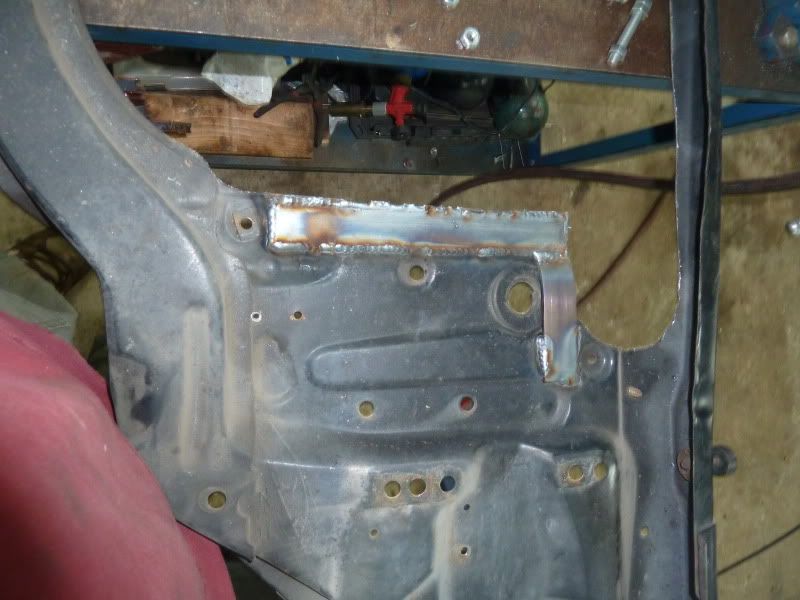
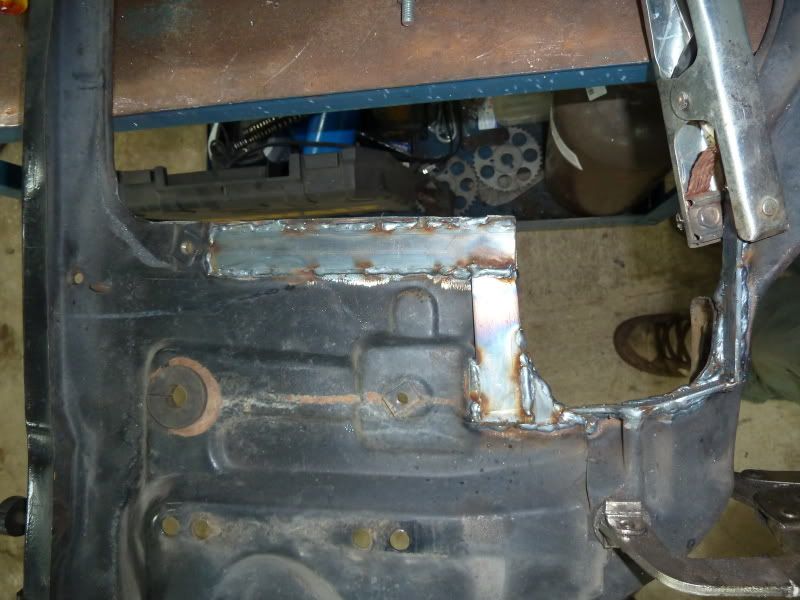
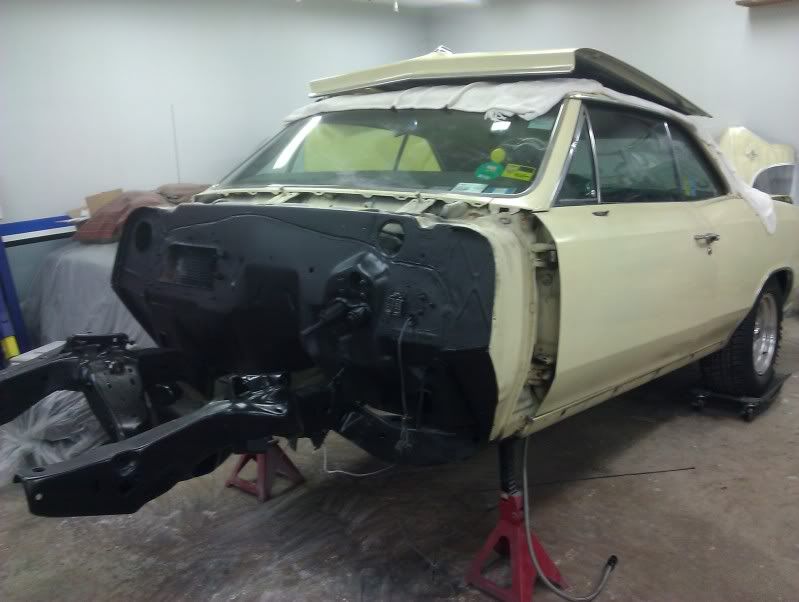
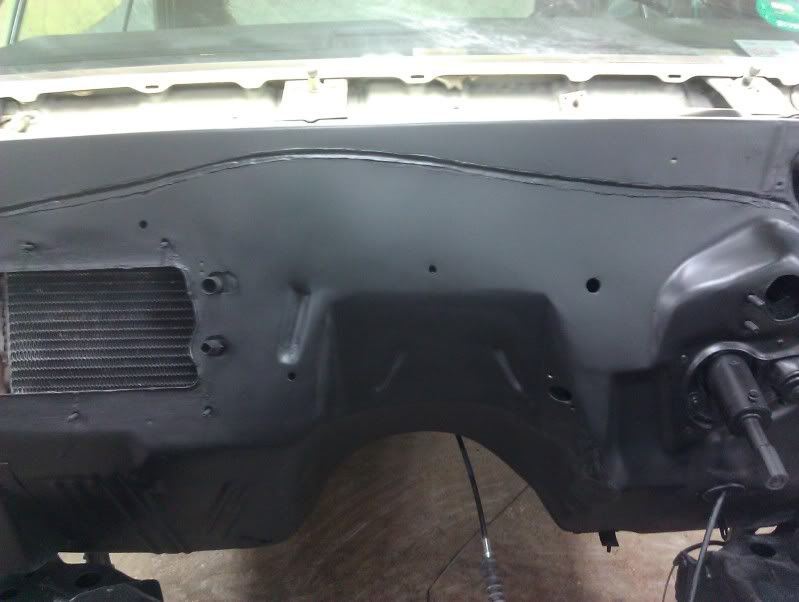
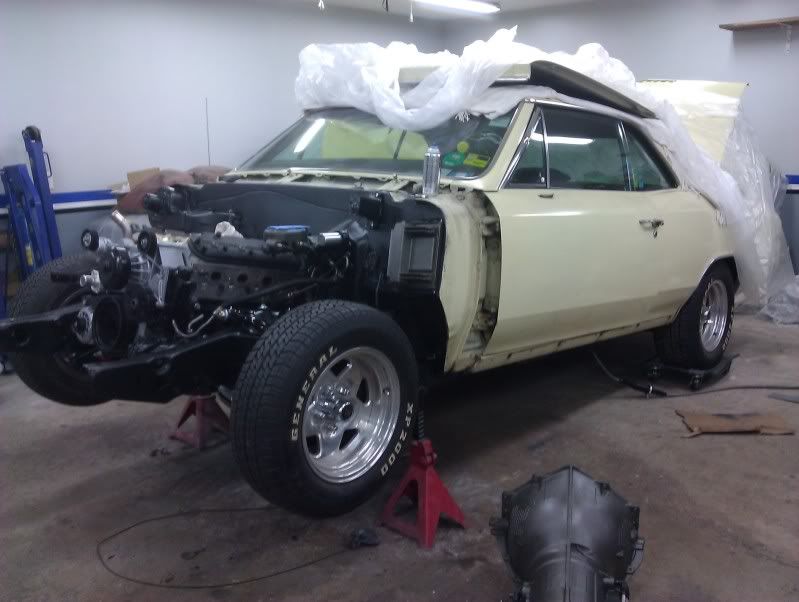
Worked on pulling the front end. and cleaning up/smoothing the firewall. installing a lower steering column bushing and welding in a sleeve to fit a cherokee collapsable shaft and grand cherokee steering box. Also strengthening up the core support that got cut up from the IC.
next is pulling the suspension, boxing in the frame notches for the oil pan. smoothing the fire wall and painting the front end.
The car is getting qa1 front coilovers when it comes back together also.

 12-07-2011, 10:51 PM
#25
Launching!
Thread Starter
iTrader: (5)
Join Date: Mar 2004
Location: Chippewa Falls, WI
Posts: 292
Likes: 0
Received 0 Likes
on
0 Posts
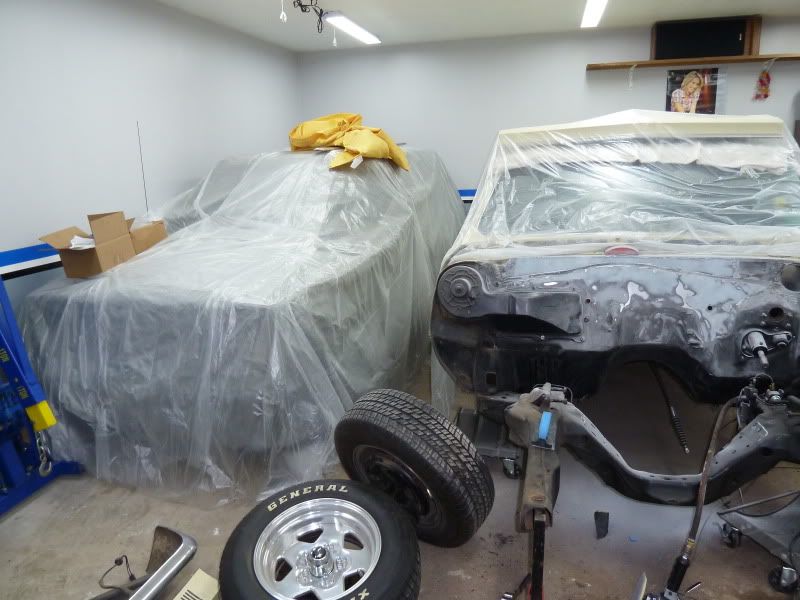
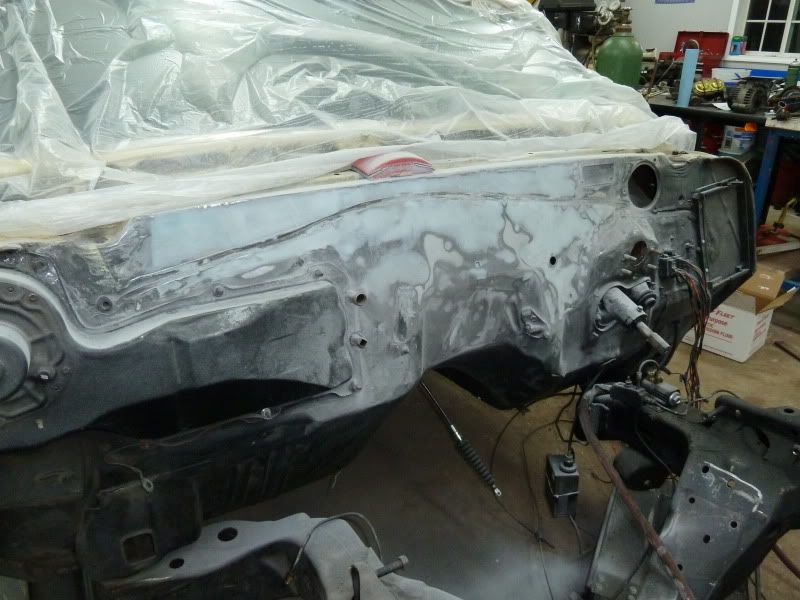
Have been working on this a bit more lately. Pics of progress in no particular order.
Spectre oil cap, will be brushed up, maybe painted to match, also modding covers for catch can set up soon. matching power steering cap as well.
Smoothing out firewall, also the typhoon covered up for the winter in the corner.
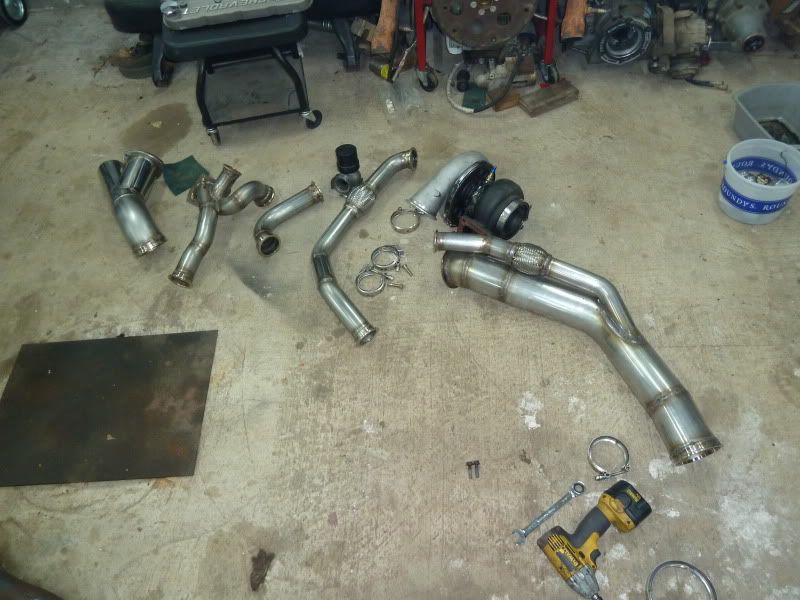
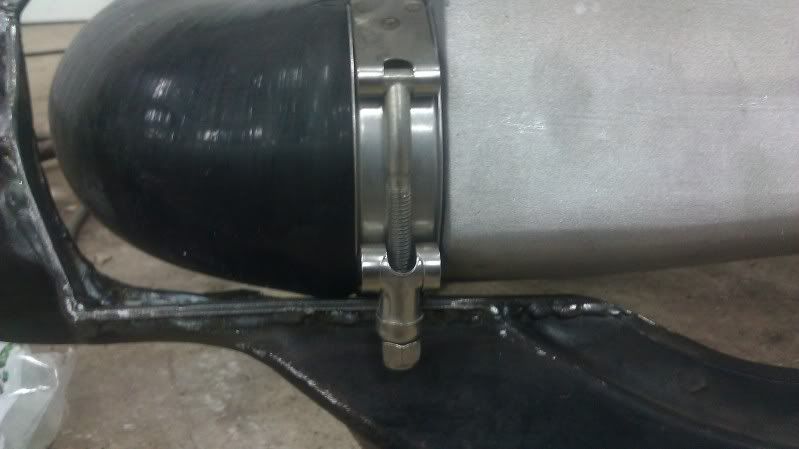
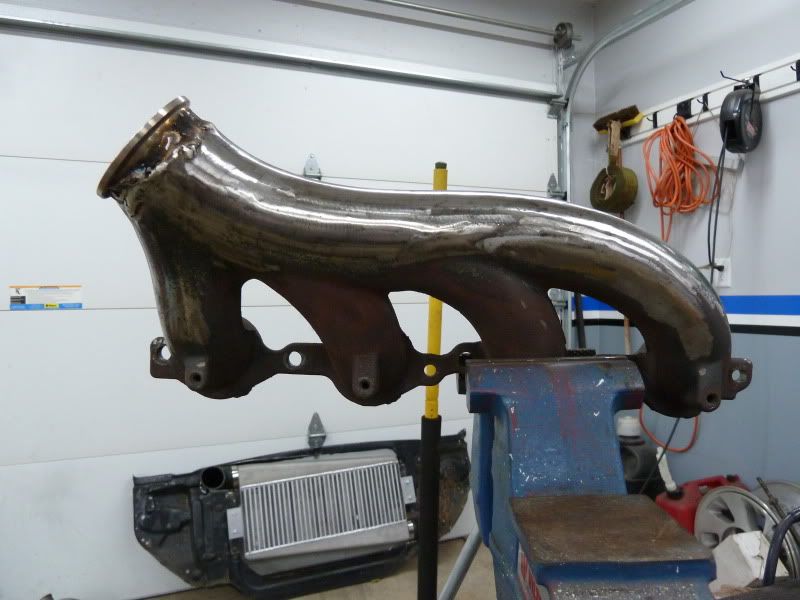
Pulled the pipes back off the motor and smoothed the welds on the inside getting ready for coatings.
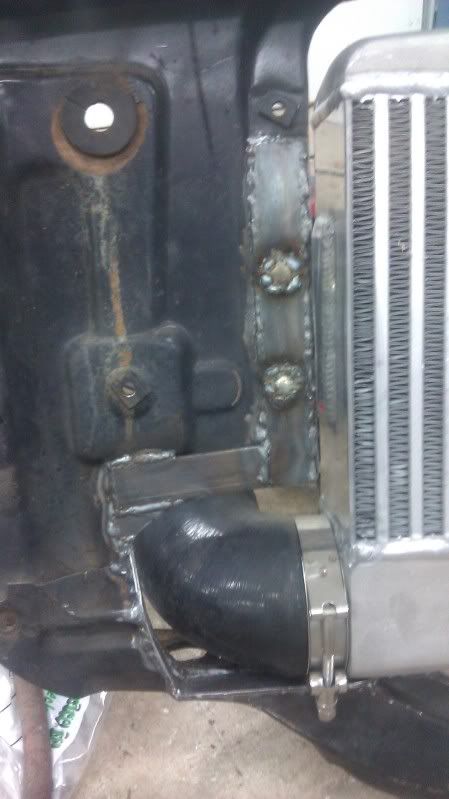
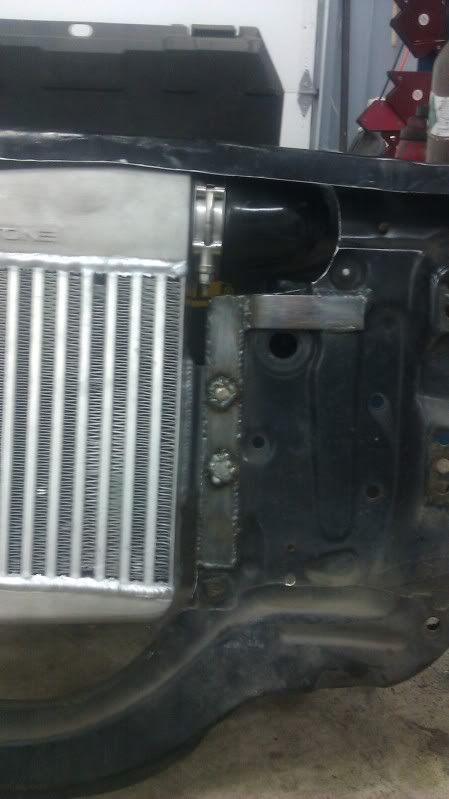
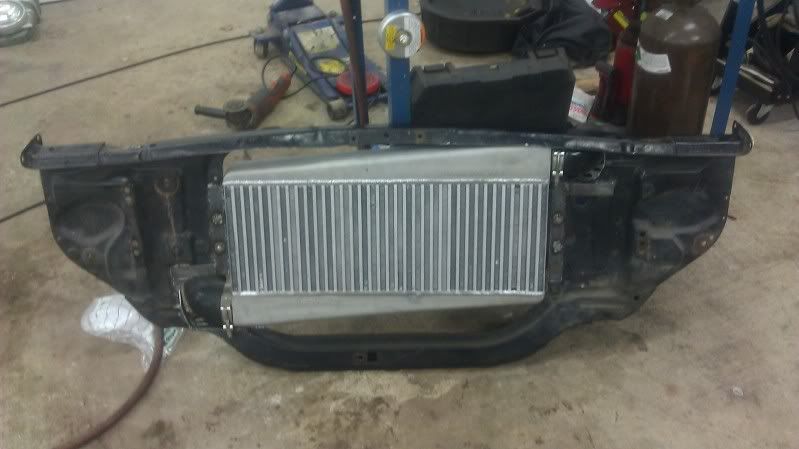
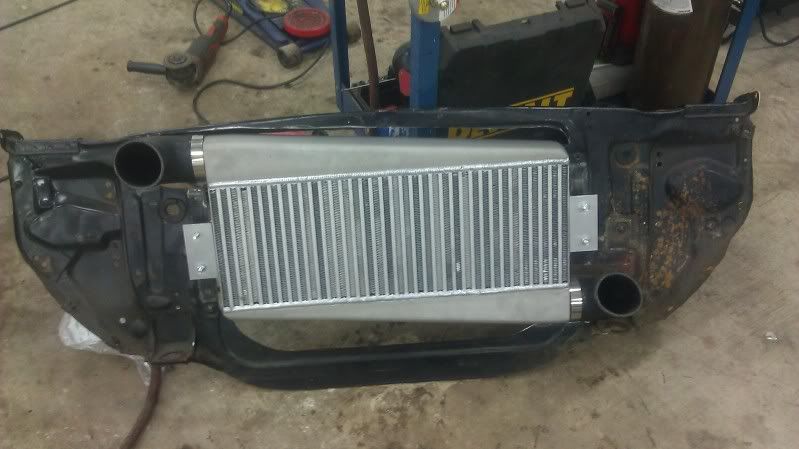
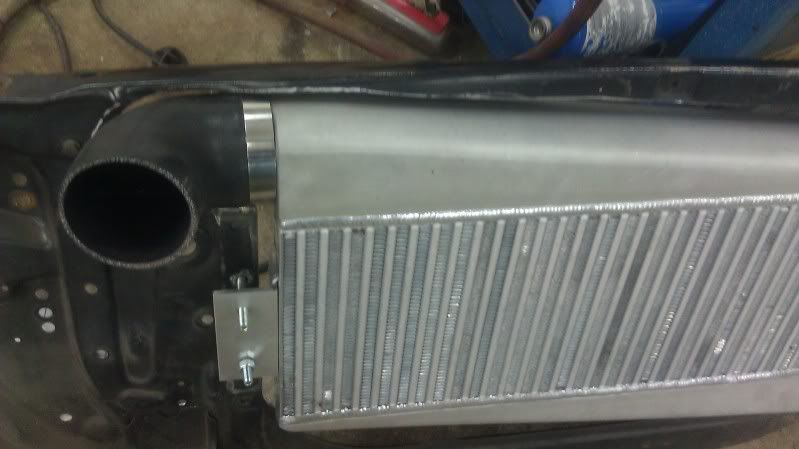
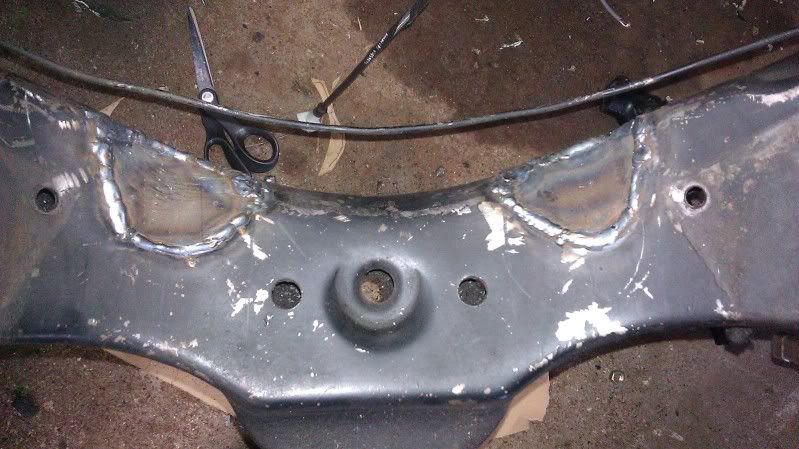
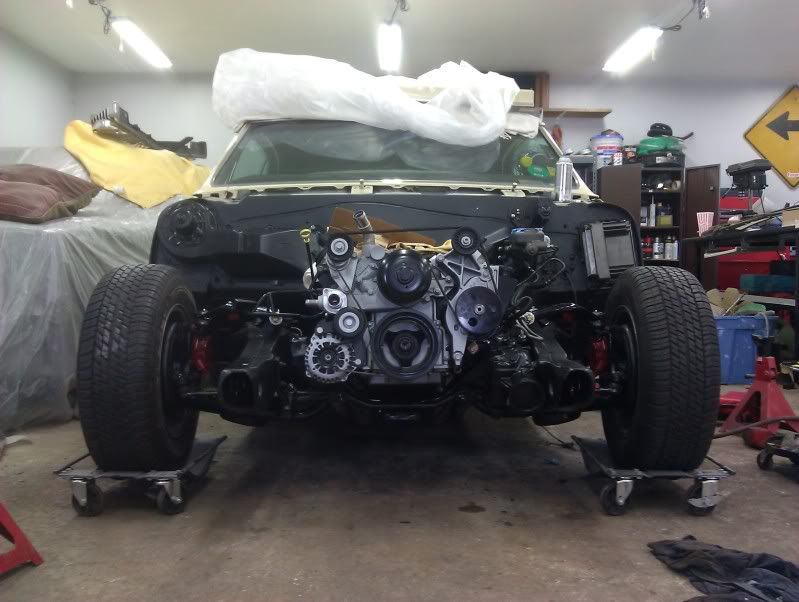
Braced core support for mounting the IC and radiator, boxed in lower corner
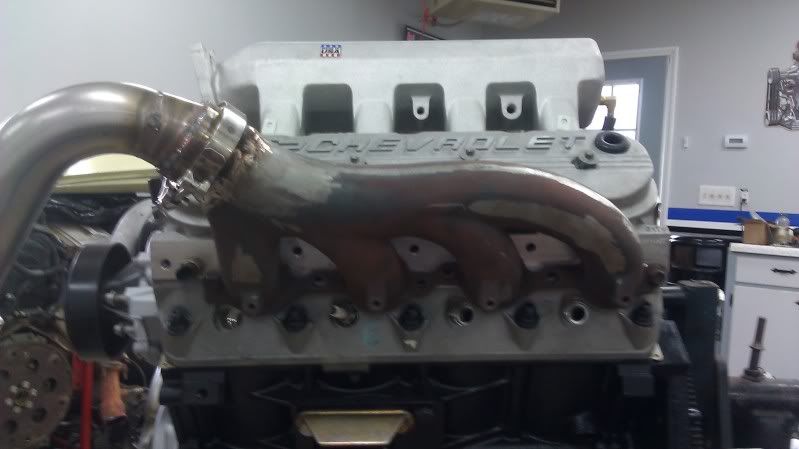
Smoothing out manifolds and prepping for coating also.

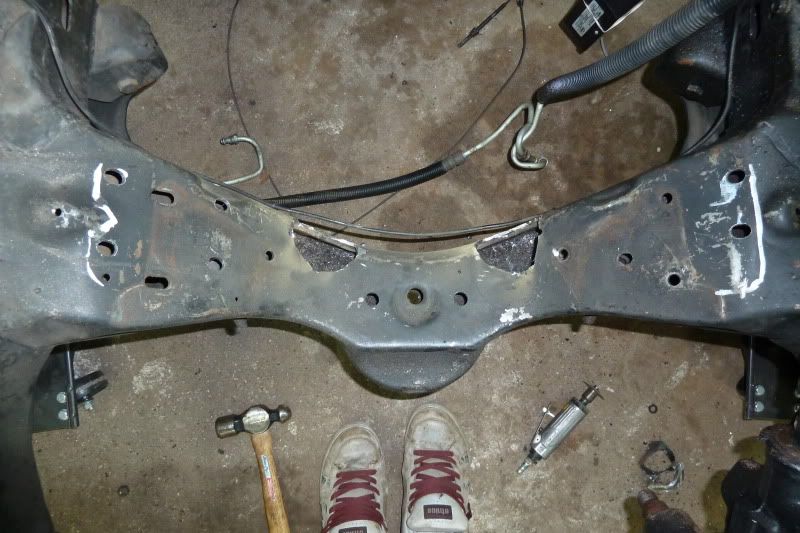
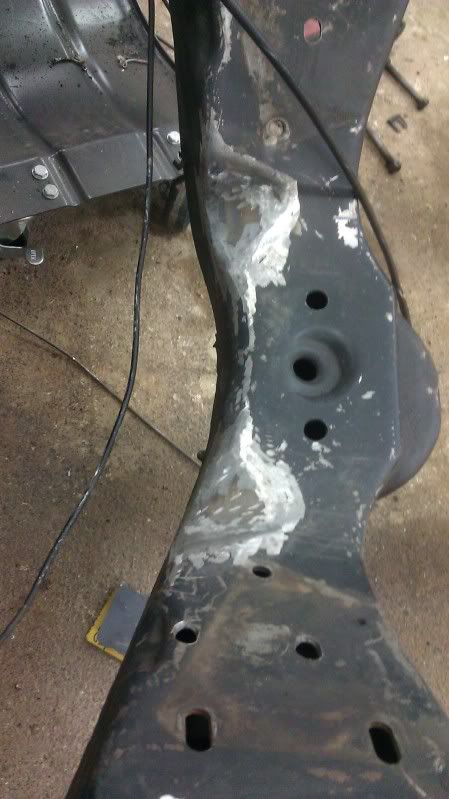
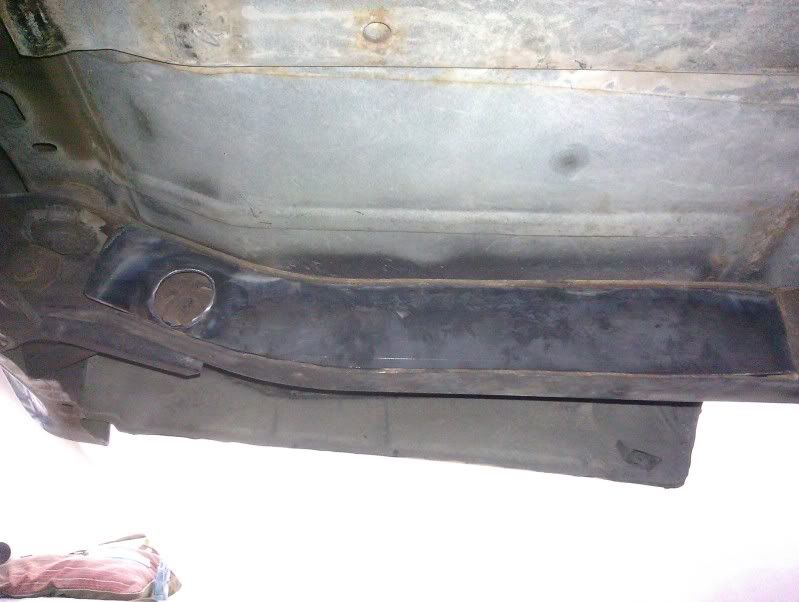
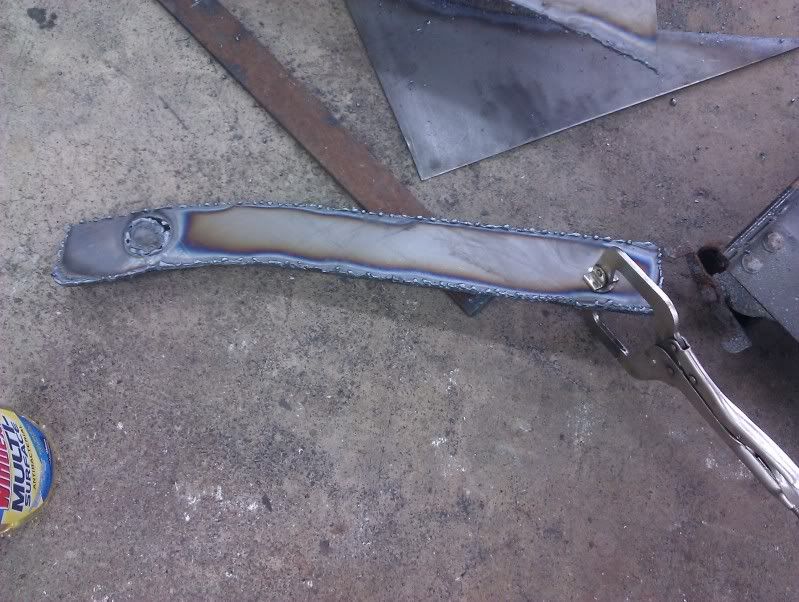
Welded up frame for oil pan notch
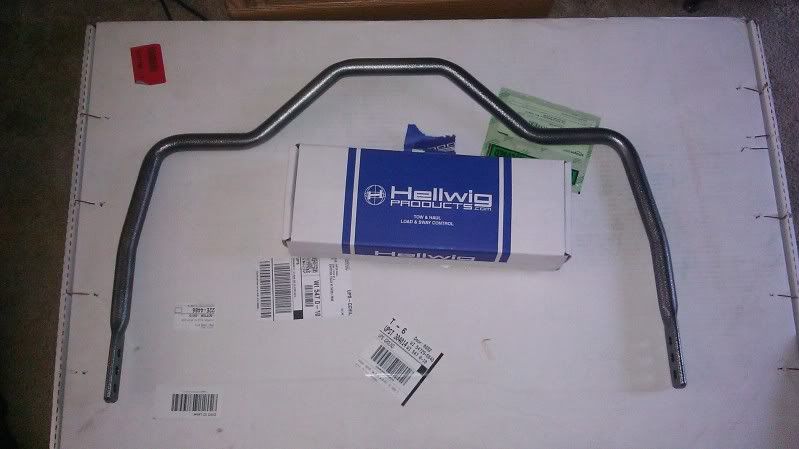
rear sway bar- Hellwig pro touring, should work good as drag bar since its adjustable as well
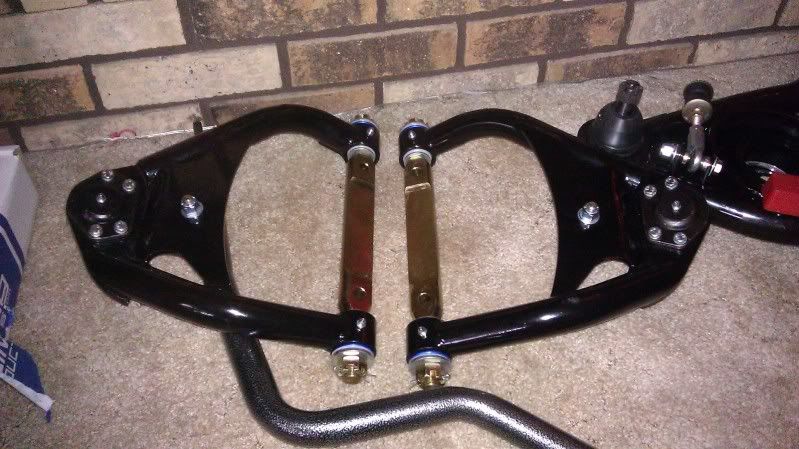
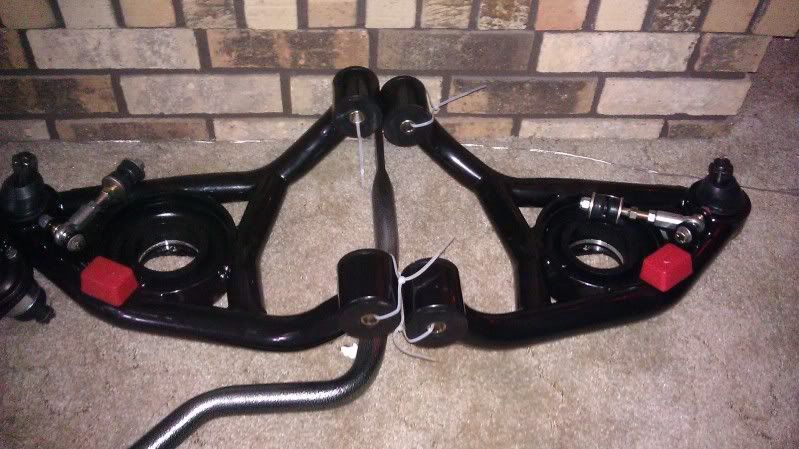
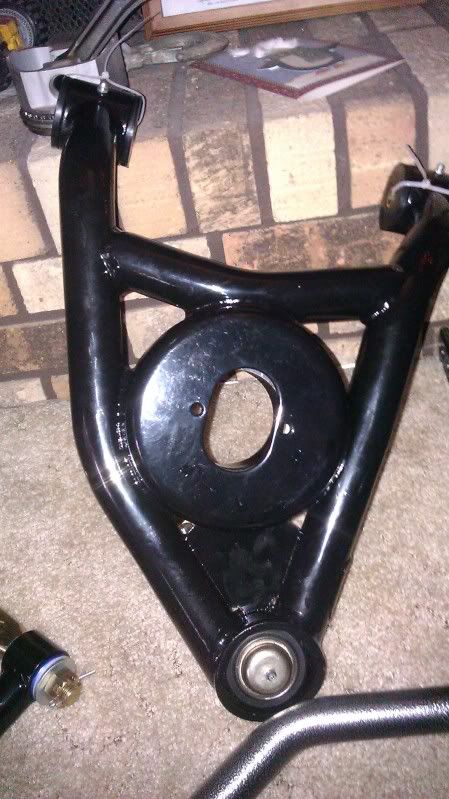
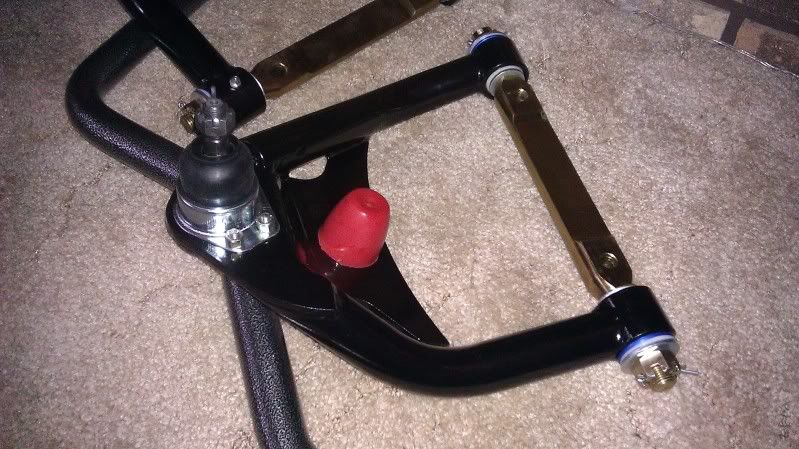
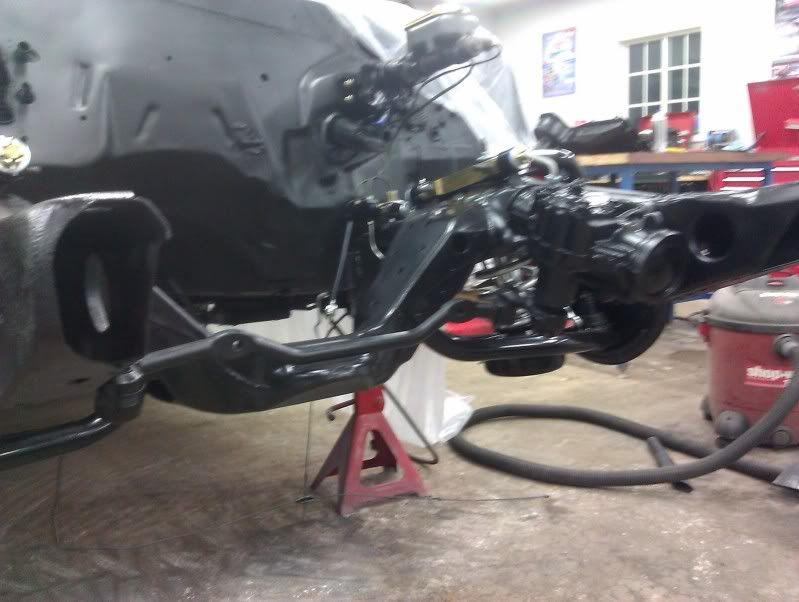
Front tube arms, uppers and lowers
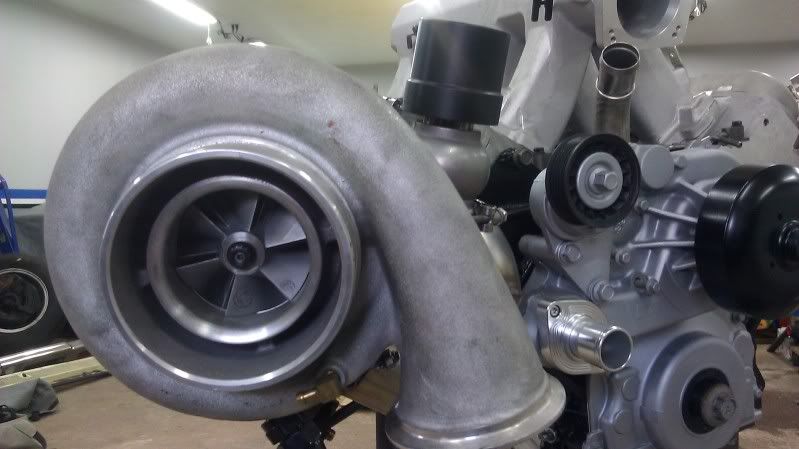
another cool turbo shot
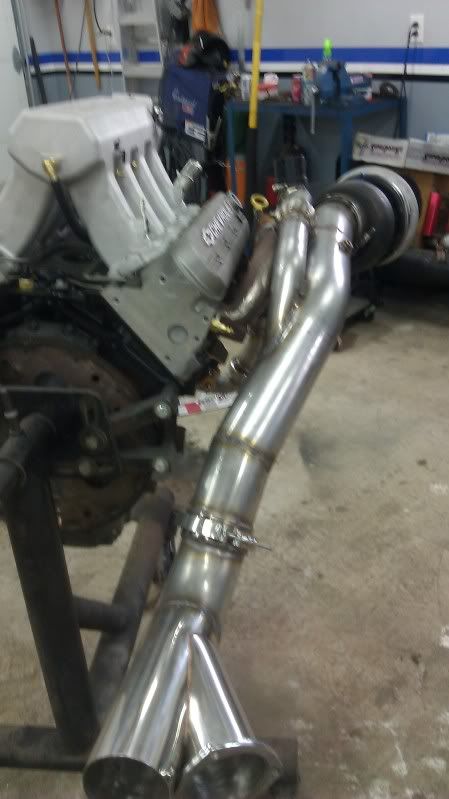
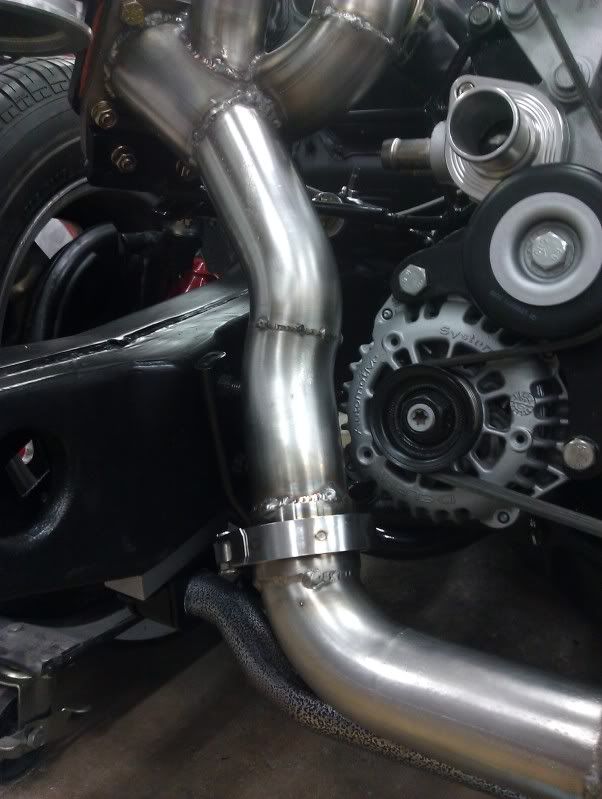
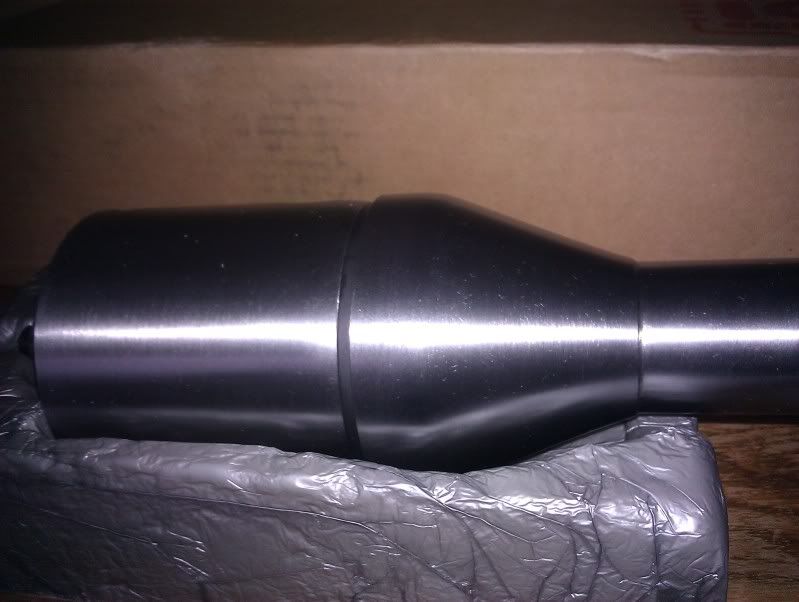
Shot of DP and cutout routing
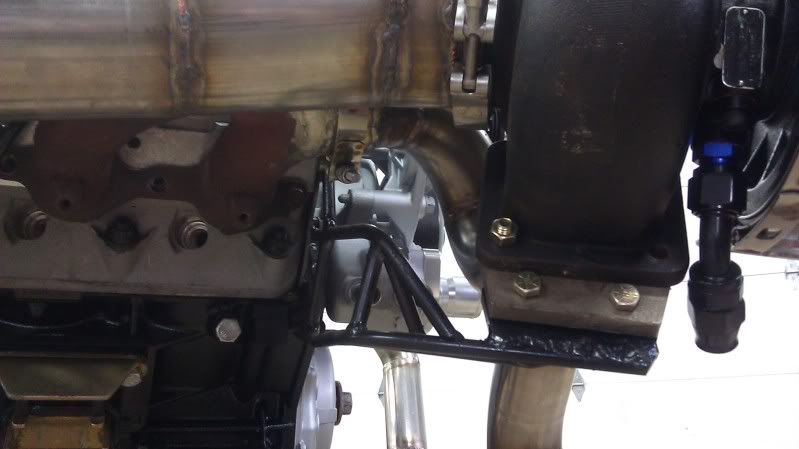
Plug access
Spectre oil cap, will be brushed up, maybe painted to match, also modding covers for catch can set up soon. matching power steering cap as well.
Smoothing out firewall, also the typhoon covered up for the winter in the corner.
Pulled the pipes back off the motor and smoothed the welds on the inside getting ready for coatings.
Braced core support for mounting the IC and radiator, boxed in lower corner
Smoothing out manifolds and prepping for coating also.
Welded up frame for oil pan notch
rear sway bar- Hellwig pro touring, should work good as drag bar since its adjustable as well
Front tube arms, uppers and lowers
another cool turbo shot
Shot of DP and cutout routing
Plug access
 02-16-2012, 07:24 PM
#28
Launching!
Thread Starter
iTrader: (5)
Join Date: Mar 2004
Location: Chippewa Falls, WI
Posts: 292
Likes: 0
Received 0 Likes
on
0 Posts
ok guys, finally have some time to update this thread.
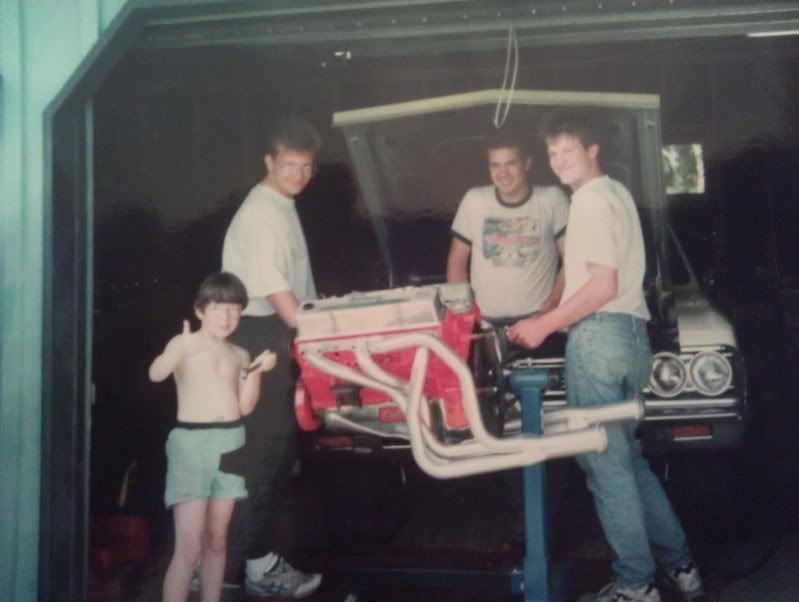
First off here is a pic of me ( the one on the far left, yep in my swim trunks)
This was back when the built 355 was installed with the help of my dad and his friends at the time..
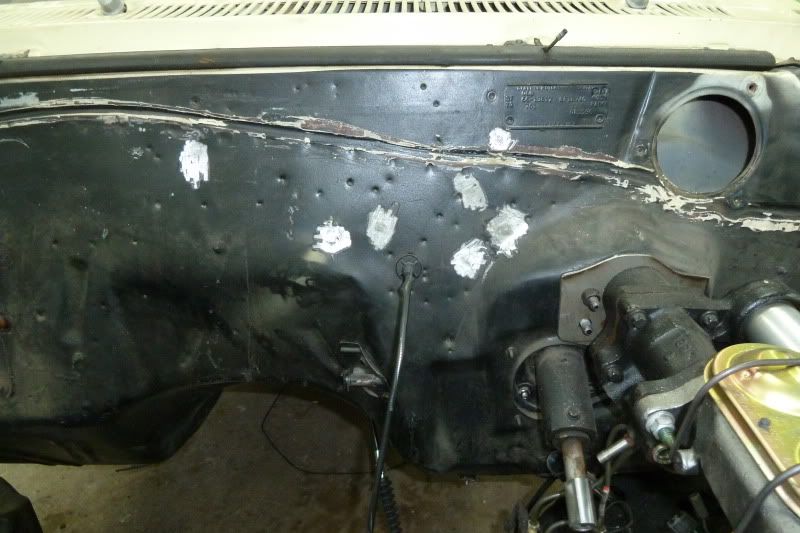
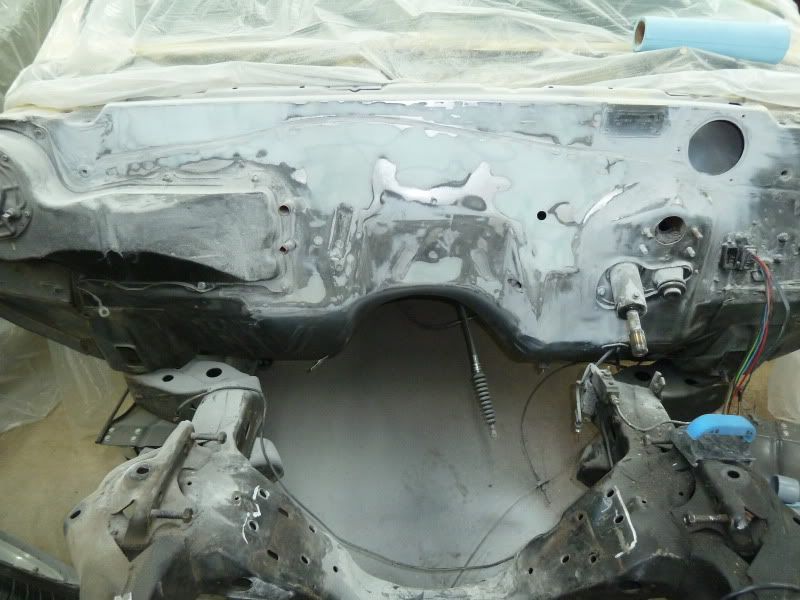
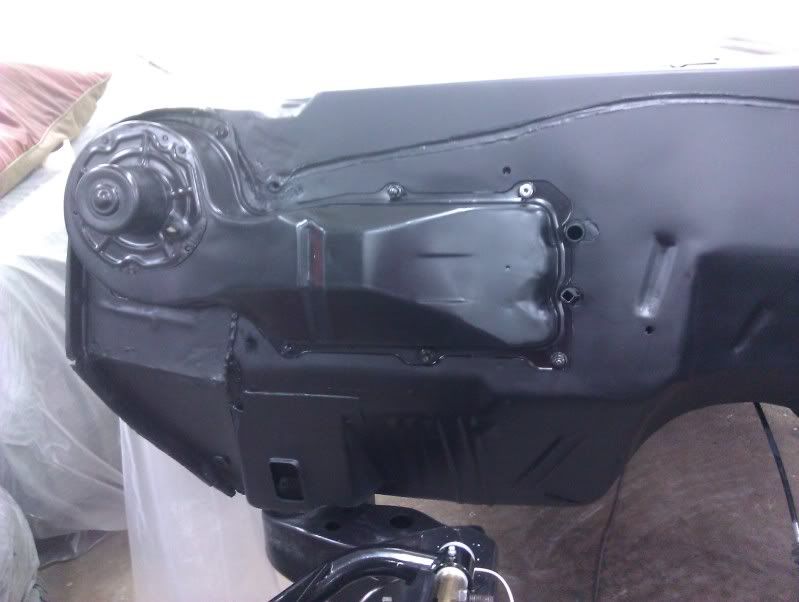
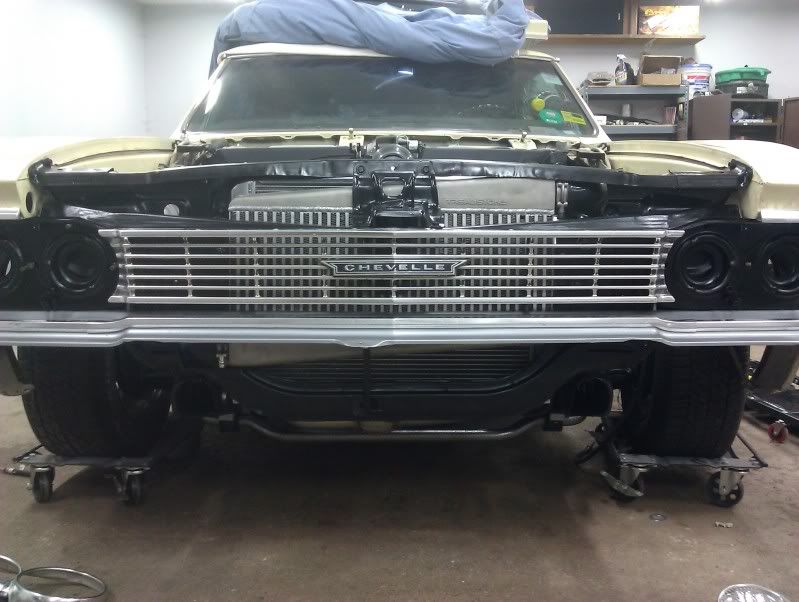
The frame and firewall is finally painted, after redoing it a couple times (I am not a body man)

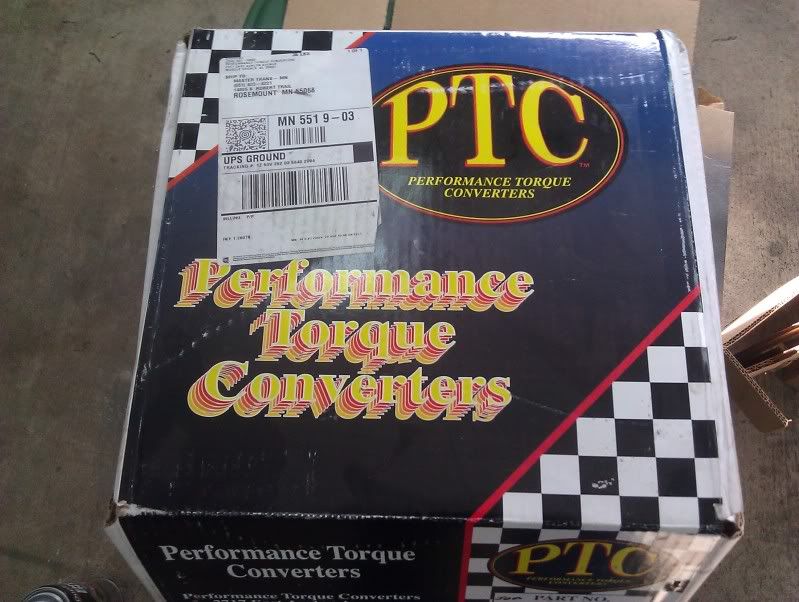
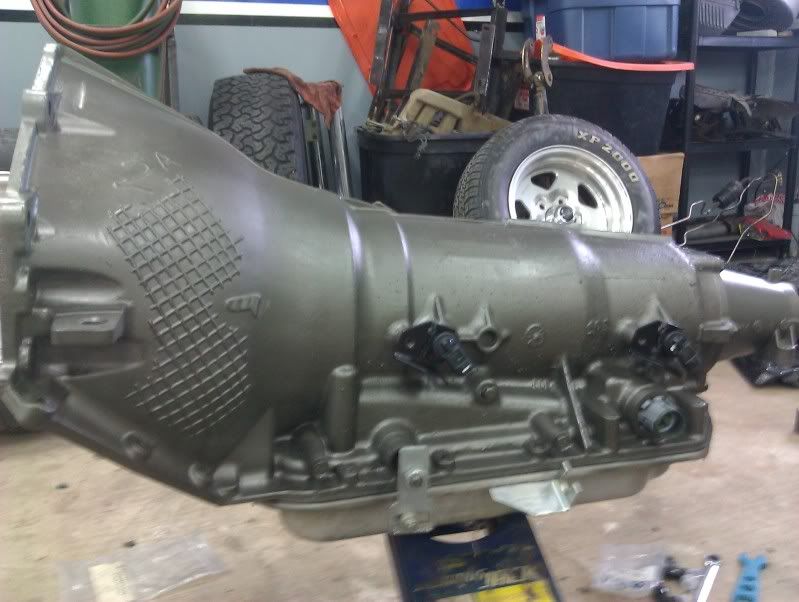
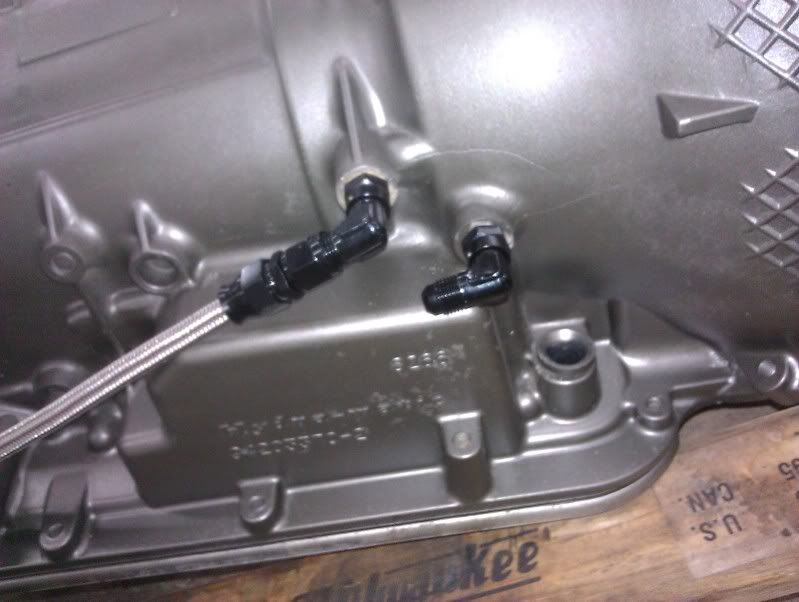
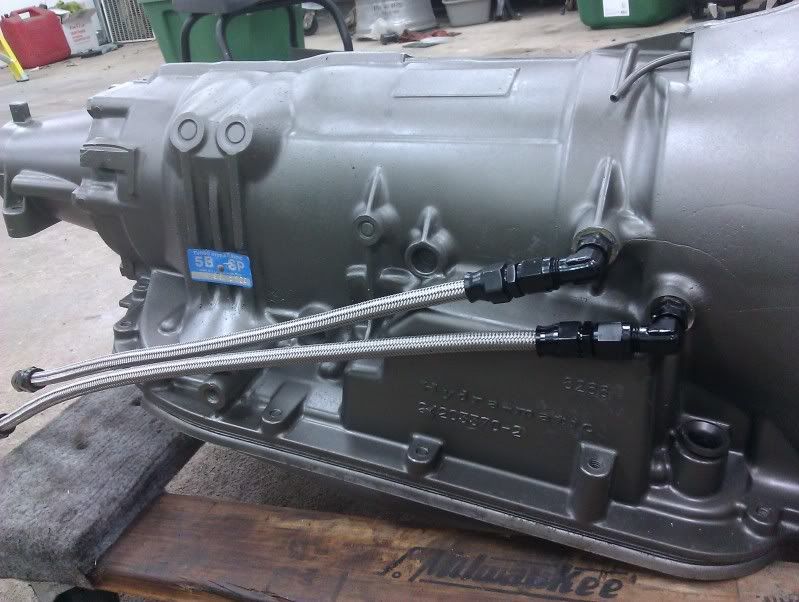
Transmission is back from Master Transmission out of Rosemount, MN Built with a transgo 2 kit and a PTC converter. Tapped the trans for NPT threads and swivel fittings to fit into the tight tunnel.
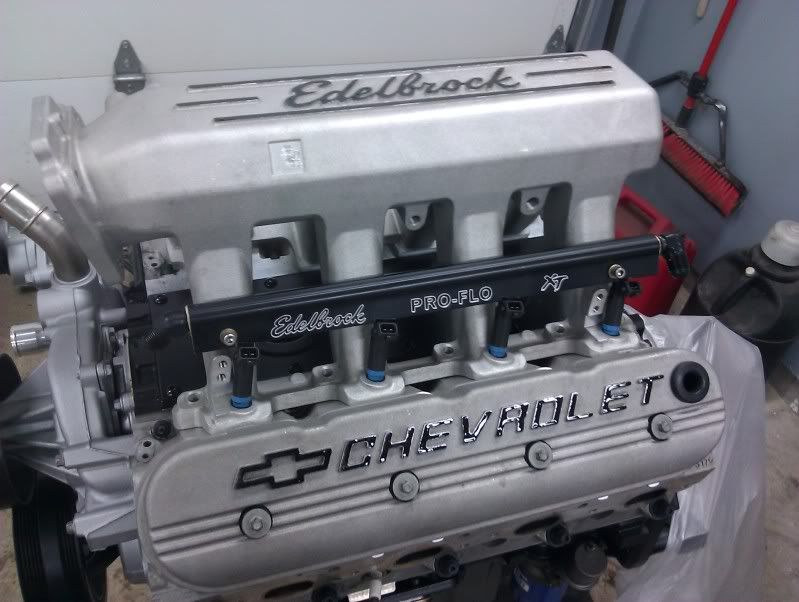
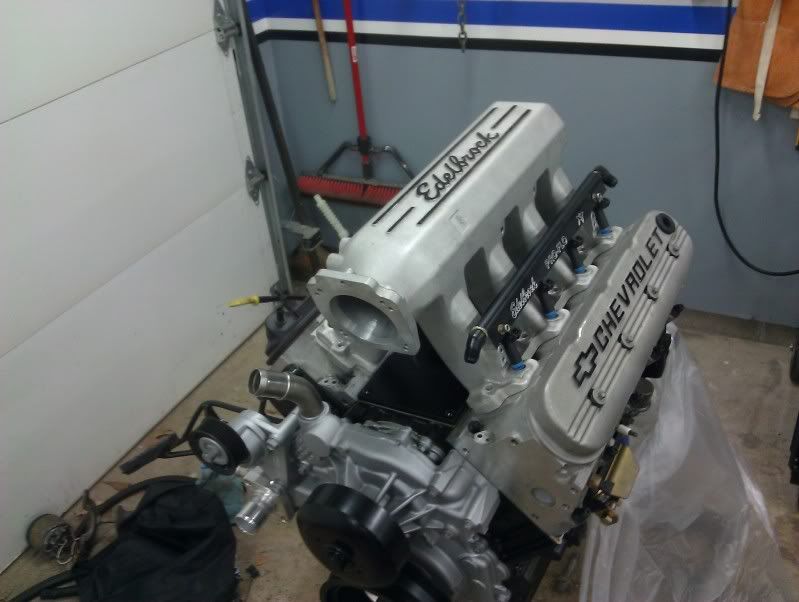
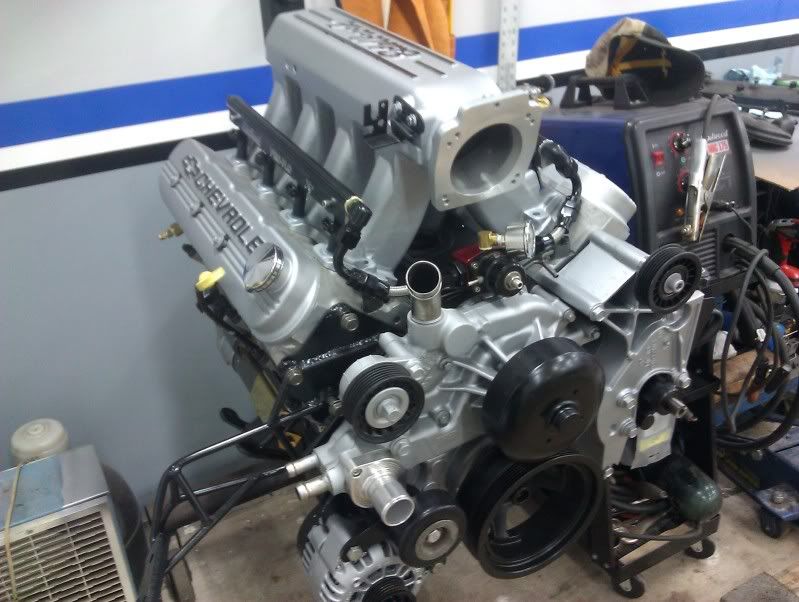
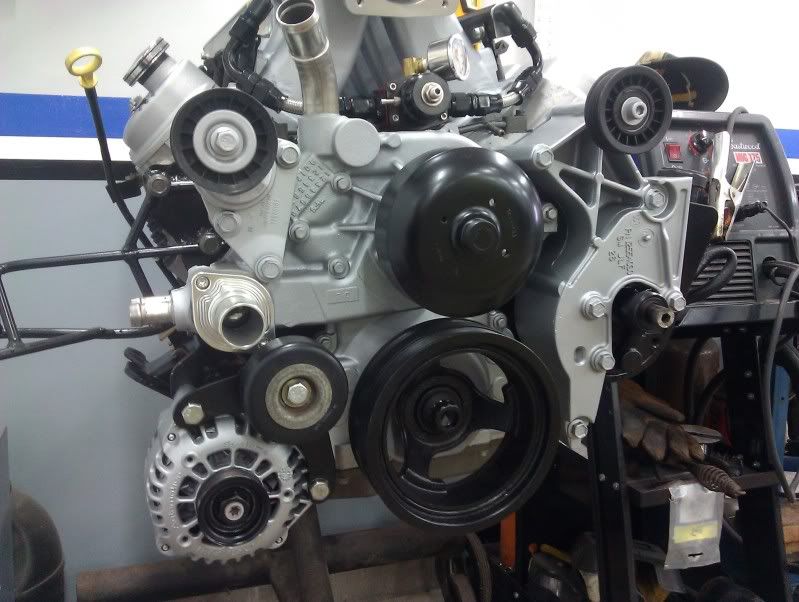
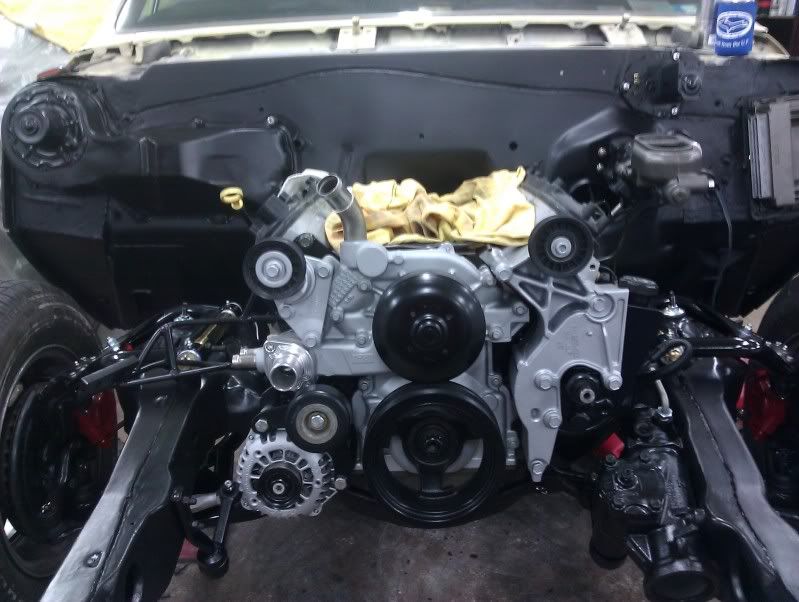
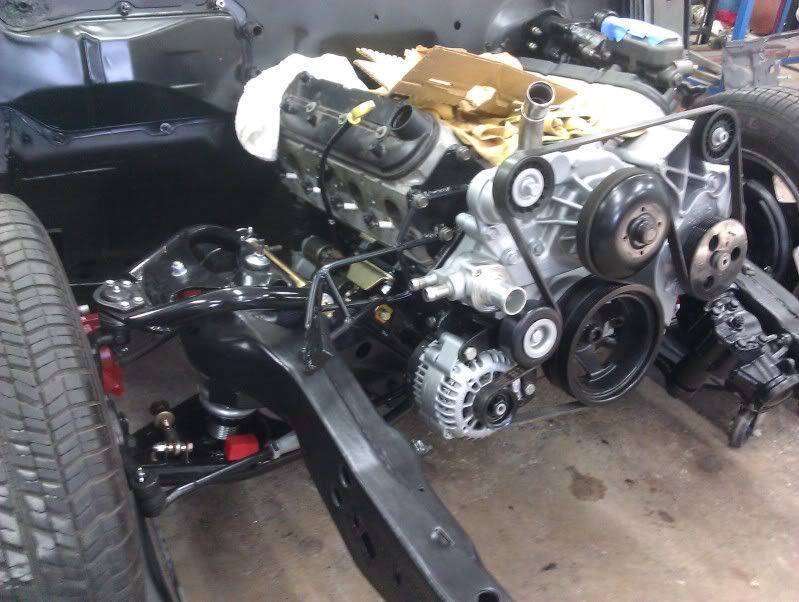
Dressed the motor on the stand:

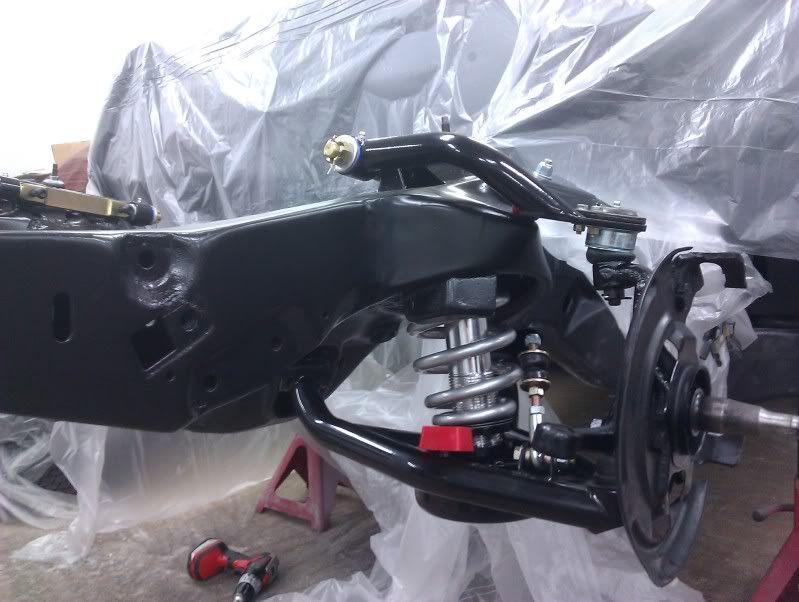
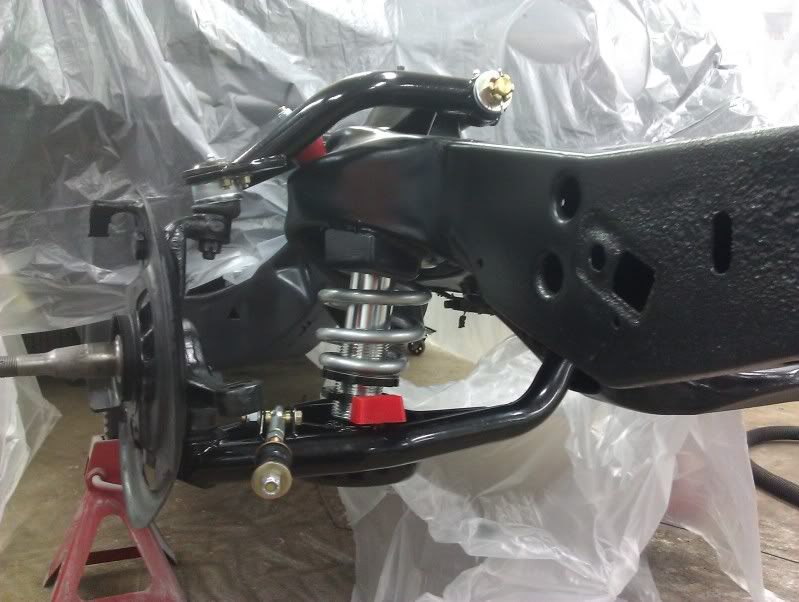
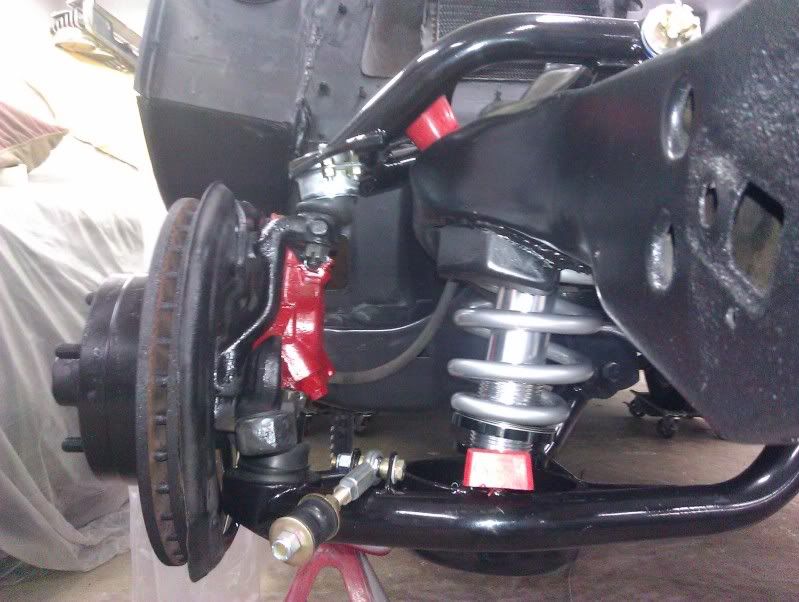
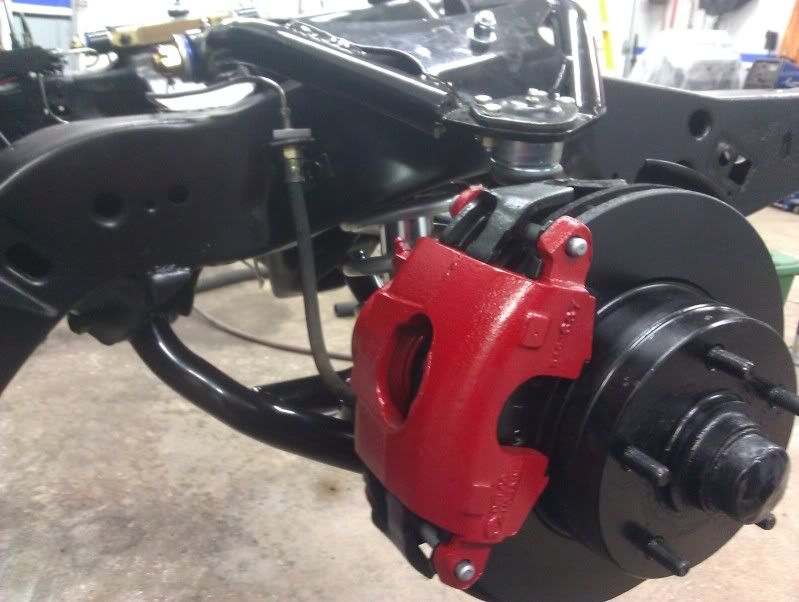
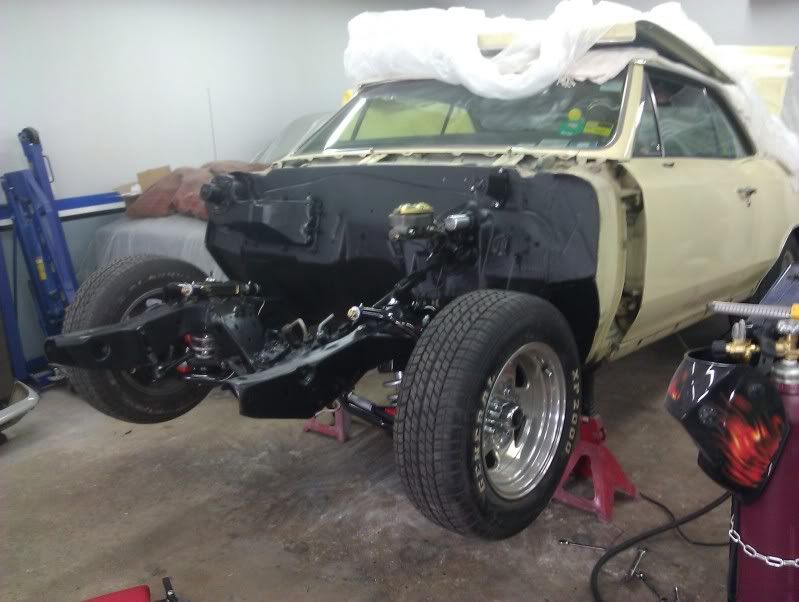
Installed from A-arms, Stock spindles/brakes for now, Jeep Cherokee Steering box and QA1 front coilover kit single adjustable.
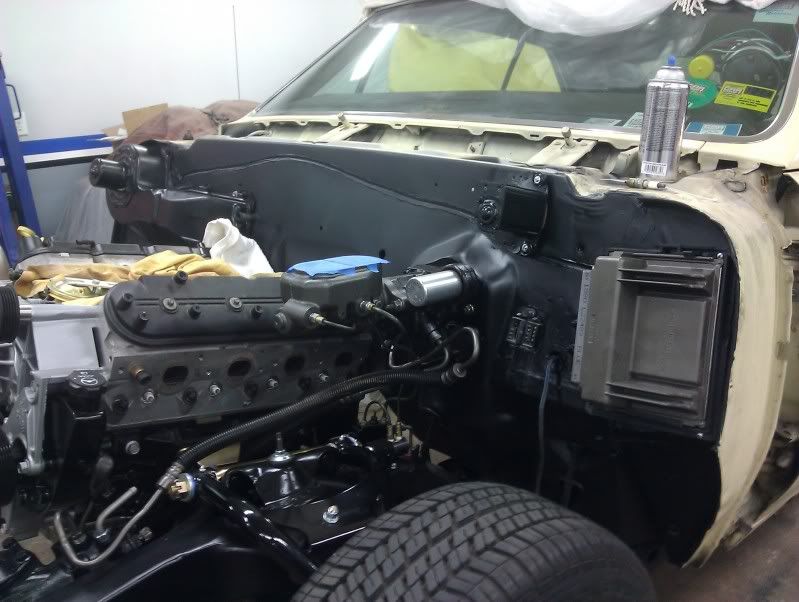
heater box installed, used 3M Caulk strip for the seal.

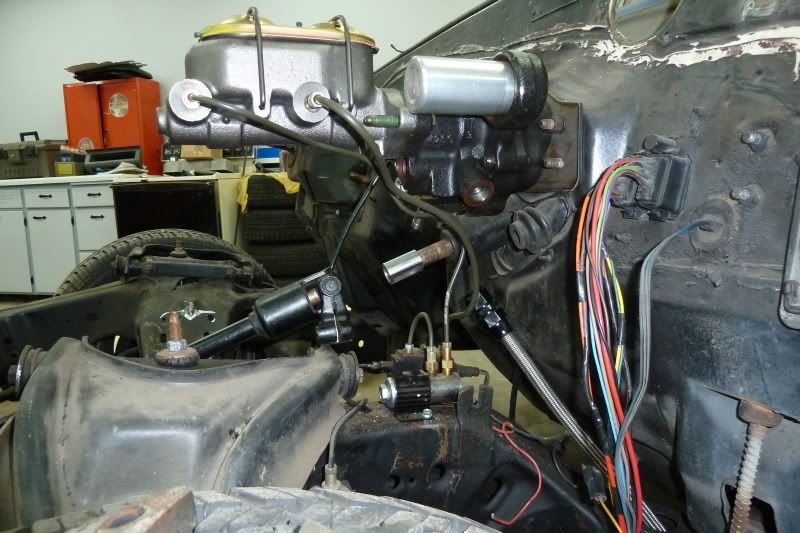
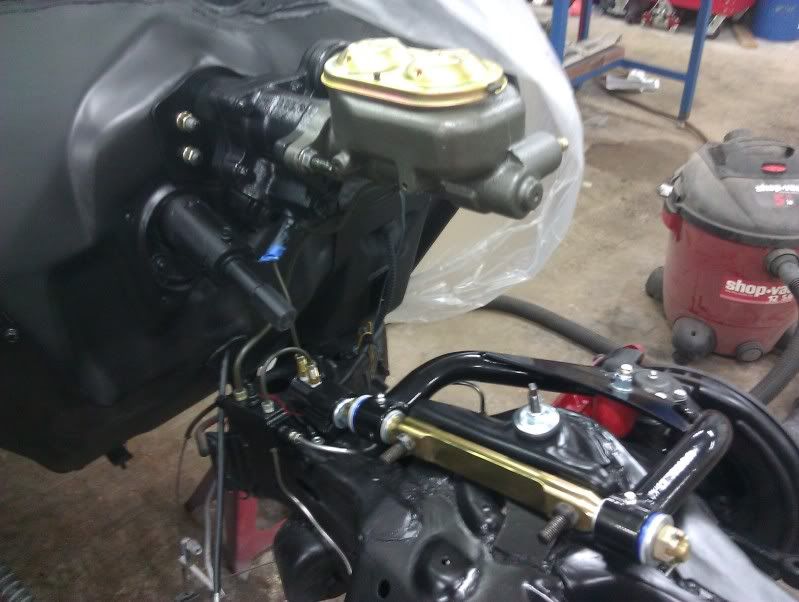
Hydrobooster off 2004 2500HD with Corvette large piston booster.
tires on, ready for the motor to go in.
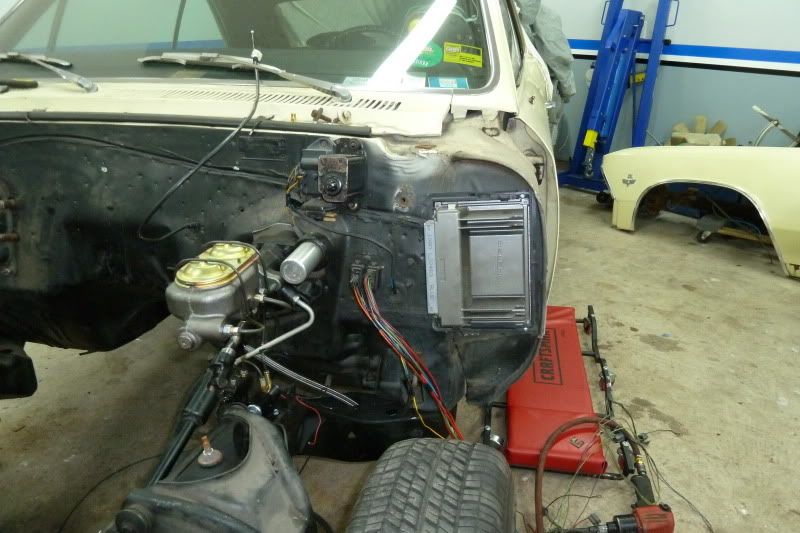
You can see the approx ride height and where the computer is mounted using the stock plastic clipped bracket. the computer will be under the fender and not be seen.
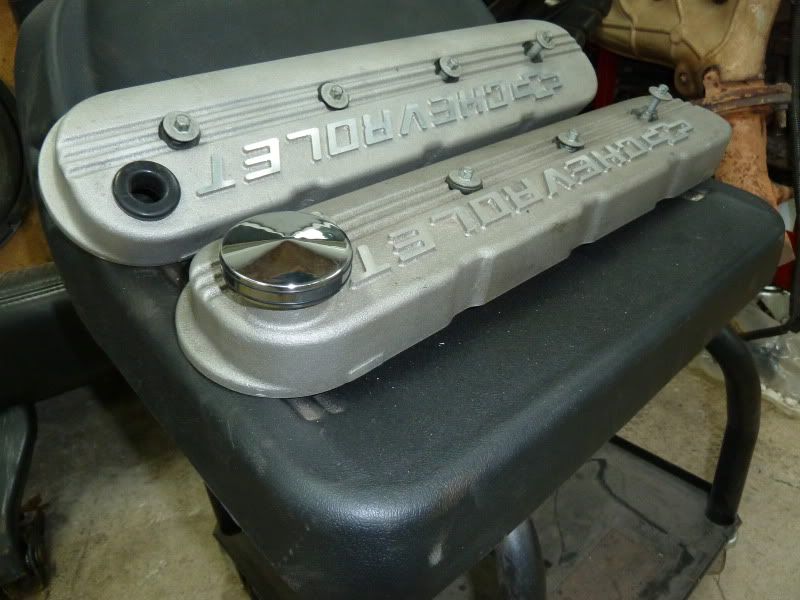
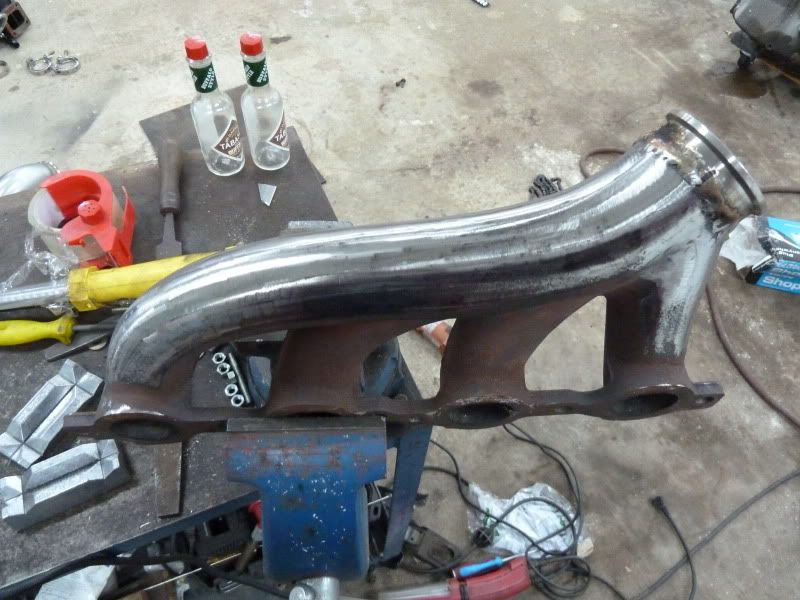
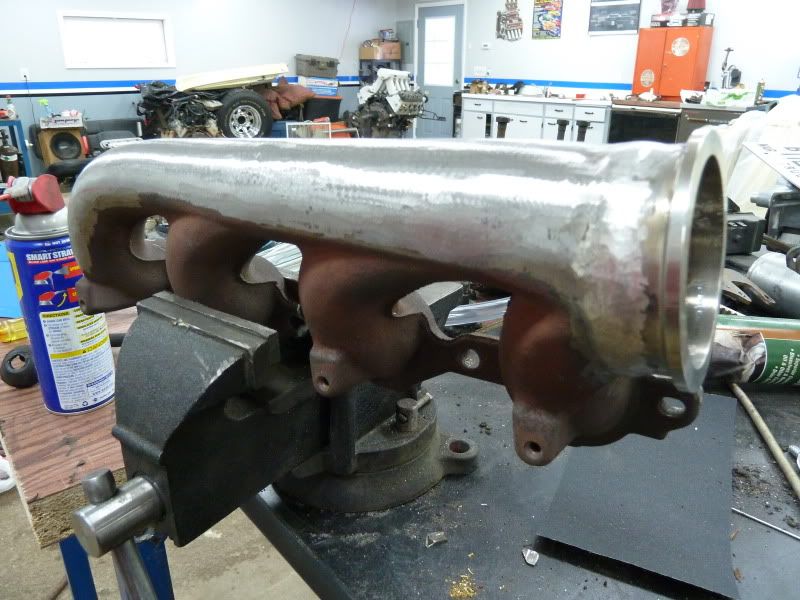
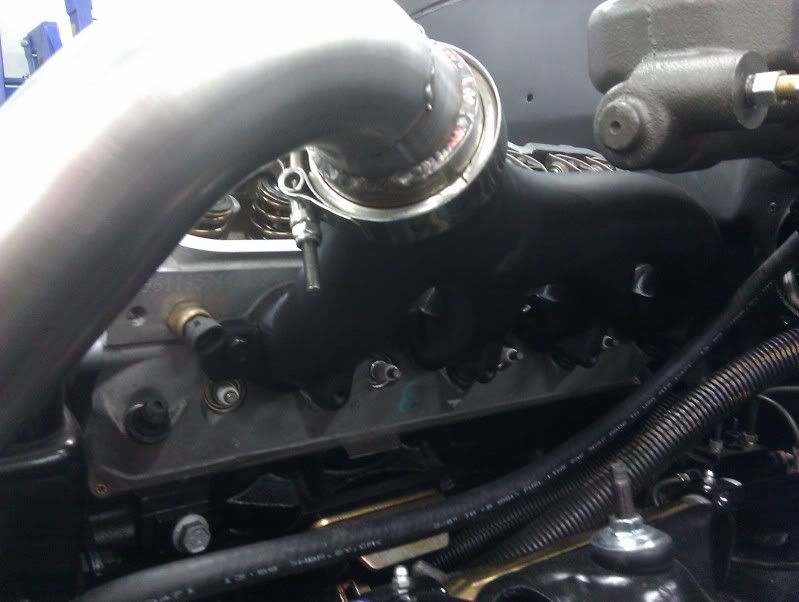
Mocked up intake and exhuast manifolds ( painted with turbo X 2000 degree coating and baked in the oven by me.

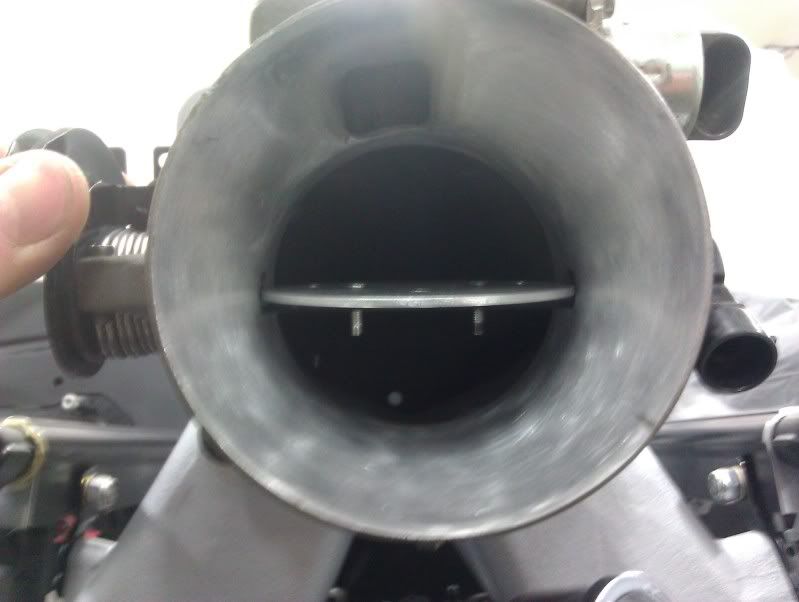
I welded up the throttle body to get rid of the vac fitting and port, also polished and modded the stop to open 100%

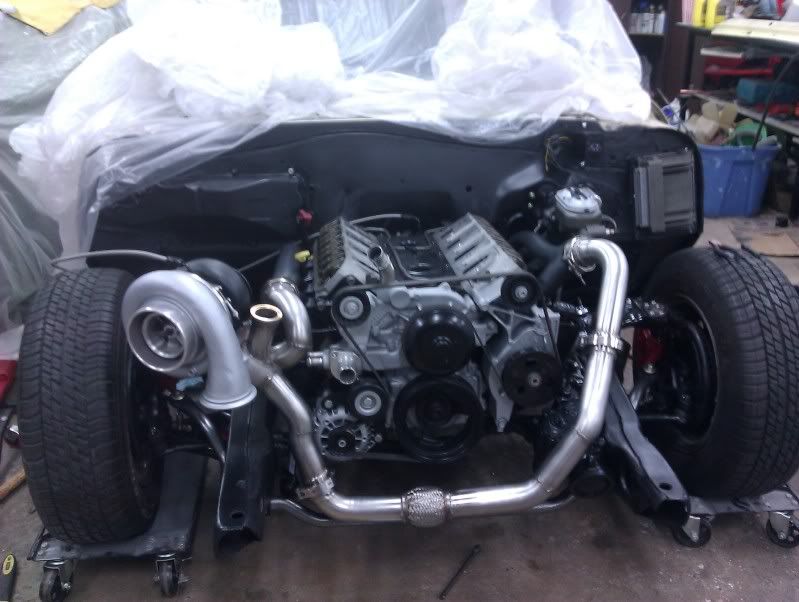
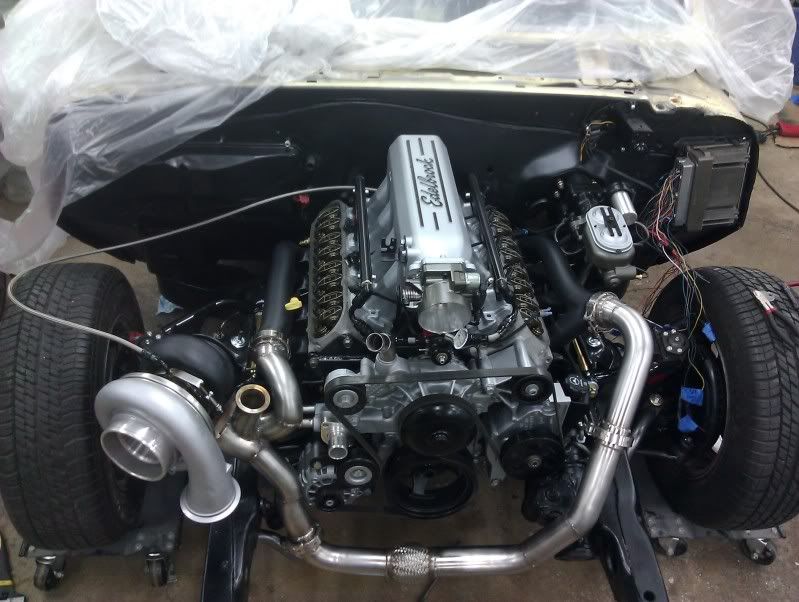
everything in and tight, pipes in for good, and turbo mounted for good. You can now see the final routing and such. You will also notice the new Hellwig front 1 1/4 inch hollow sway bar, a very nice piece. It was a tight fit with the crossover and I had to space the mounting of the bar down to accommodate it.

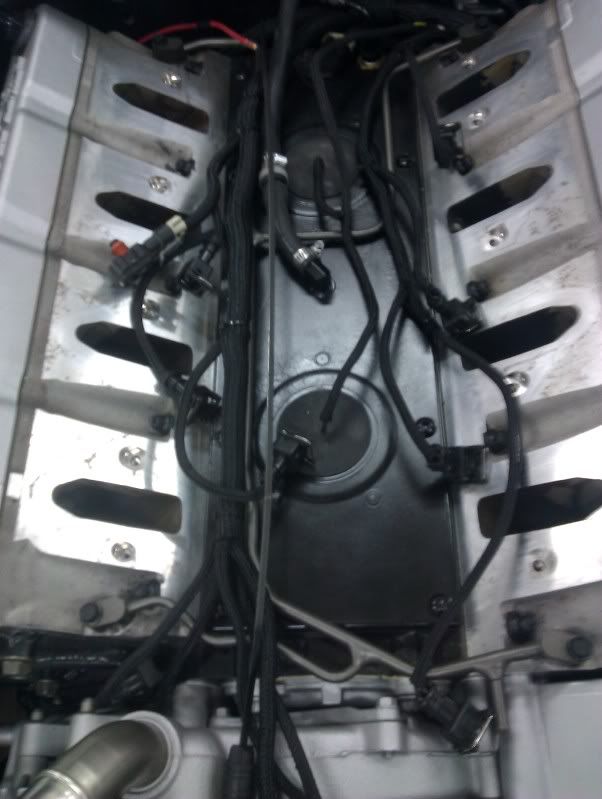
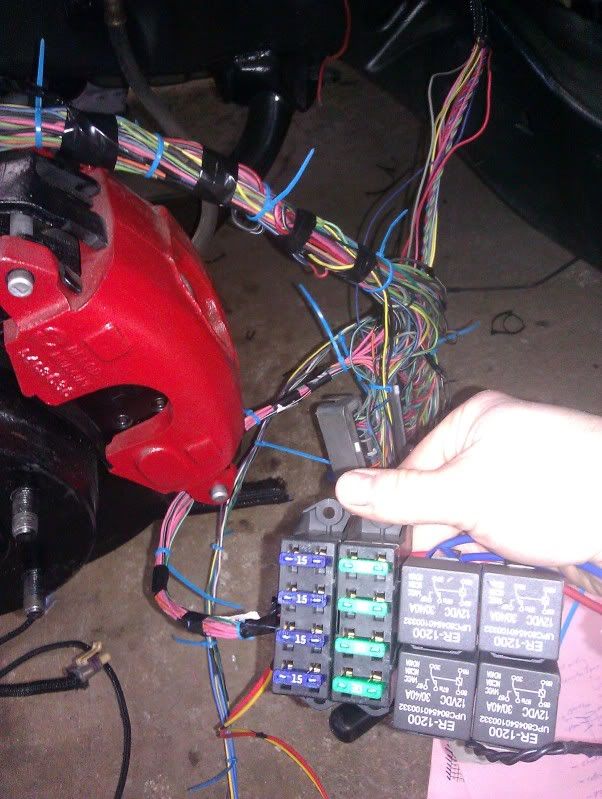
Currently workin on catch can routing, wiring up the fuse panel, mounting coil packs ( once i find the brackets I made for them).
Its coming together a lot faster now.
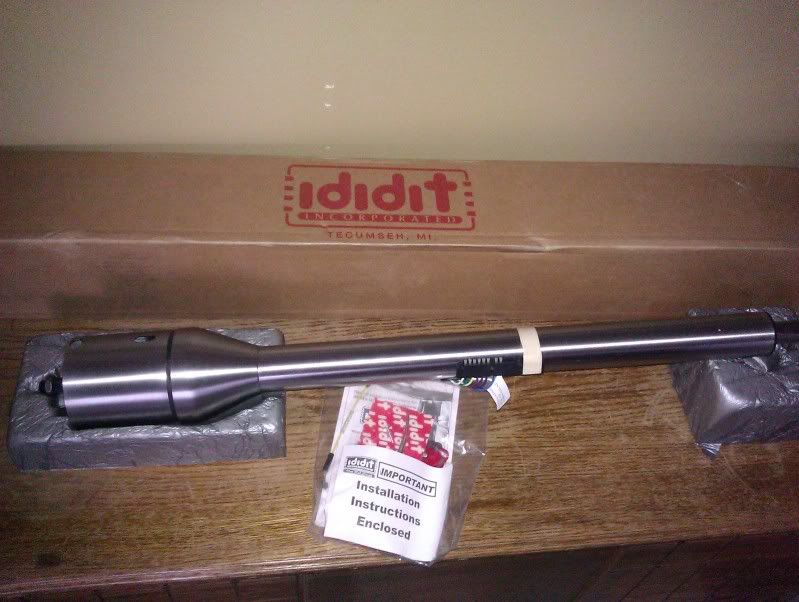
Ordering up a tilt column tonight as well. Its getting exciting to see the pile of parts get smaller and smaller
First off here is a pic of me ( the one on the far left, yep in my swim trunks)
This was back when the built 355 was installed with the help of my dad and his friends at the time..
The frame and firewall is finally painted, after redoing it a couple times (I am not a body man)
Transmission is back from Master Transmission out of Rosemount, MN Built with a transgo 2 kit and a PTC converter. Tapped the trans for NPT threads and swivel fittings to fit into the tight tunnel.
Dressed the motor on the stand:
Installed from A-arms, Stock spindles/brakes for now, Jeep Cherokee Steering box and QA1 front coilover kit single adjustable.
heater box installed, used 3M Caulk strip for the seal.
Hydrobooster off 2004 2500HD with Corvette large piston booster.
tires on, ready for the motor to go in.
You can see the approx ride height and where the computer is mounted using the stock plastic clipped bracket. the computer will be under the fender and not be seen.
Mocked up intake and exhuast manifolds ( painted with turbo X 2000 degree coating and baked in the oven by me.
I welded up the throttle body to get rid of the vac fitting and port, also polished and modded the stop to open 100%
everything in and tight, pipes in for good, and turbo mounted for good. You can now see the final routing and such. You will also notice the new Hellwig front 1 1/4 inch hollow sway bar, a very nice piece. It was a tight fit with the crossover and I had to space the mounting of the bar down to accommodate it.
Currently workin on catch can routing, wiring up the fuse panel, mounting coil packs ( once i find the brackets I made for them).
Its coming together a lot faster now.
Ordering up a tilt column tonight as well. Its getting exciting to see the pile of parts get smaller and smaller


 03-08-2012, 02:48 AM
#35
Launching!
Thread Starter
iTrader: (5)
Join Date: Mar 2004
Location: Chippewa Falls, WI
Posts: 292
Likes: 0
Received 0 Likes
on
0 Posts
Thanks guys, It's been a blast building it and cutting my teeth learning fab work along the way. I think the next car I do will be better and get together faster than this one. It seems like its taking forever.
Updates:
Rolled the car around to work on the rear frame/gas tank axle etc.
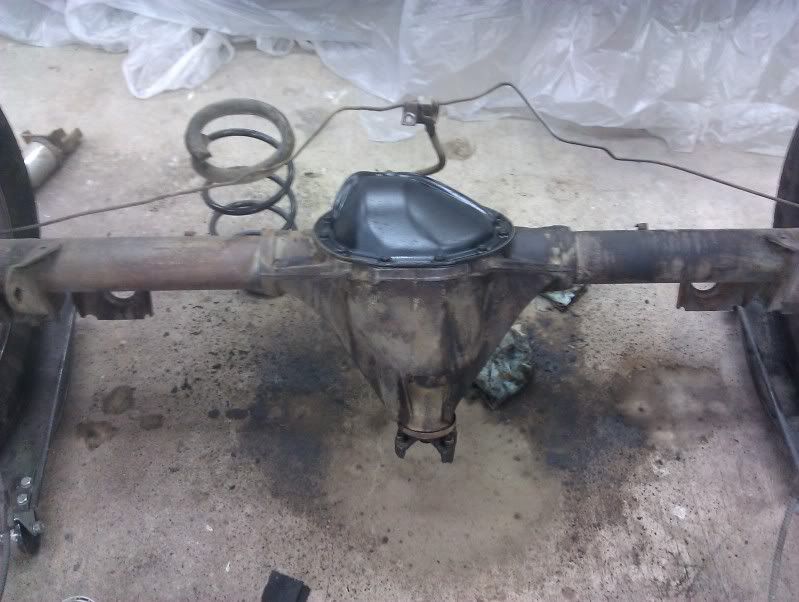
Pulled rear axle
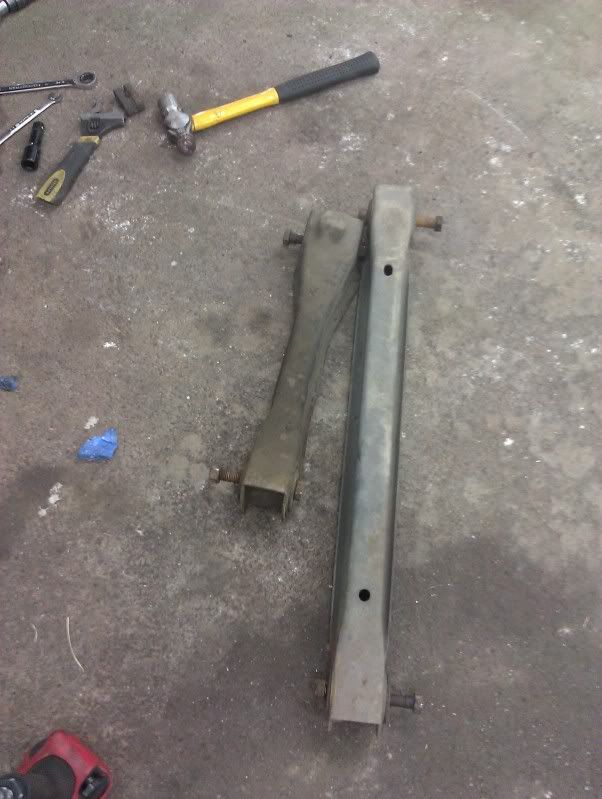
Stock arms are very flimsy- these are going for new adjustable arms when it gets back together.
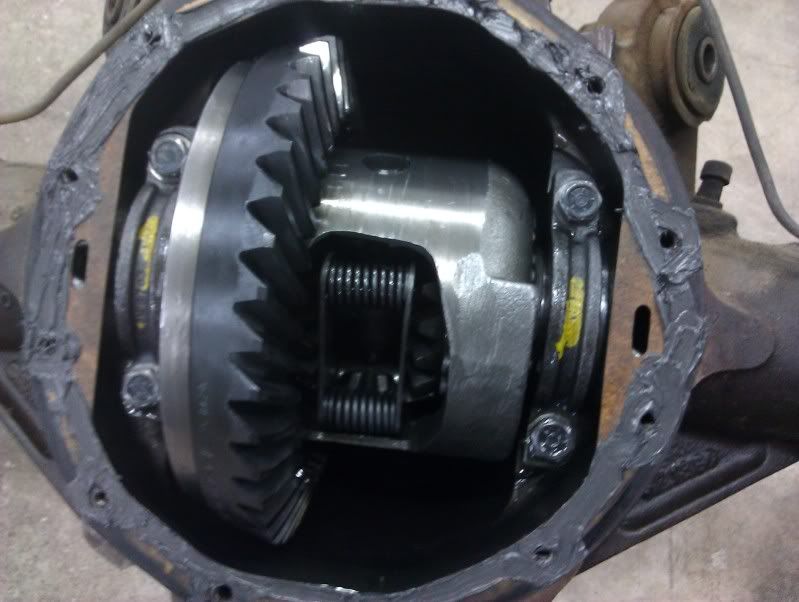
Axle ended up not being original, pulled codes and came out to be late 67/early 68 12 bolt factory 3.73 posi. This is getting replaced shortly with a aftermarket rear axle. I have a couple options in mind, any suggestions?
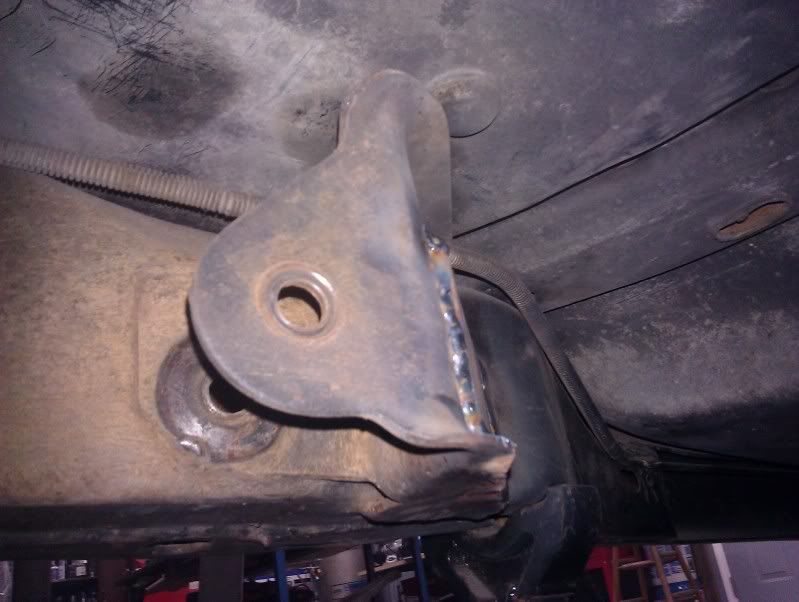
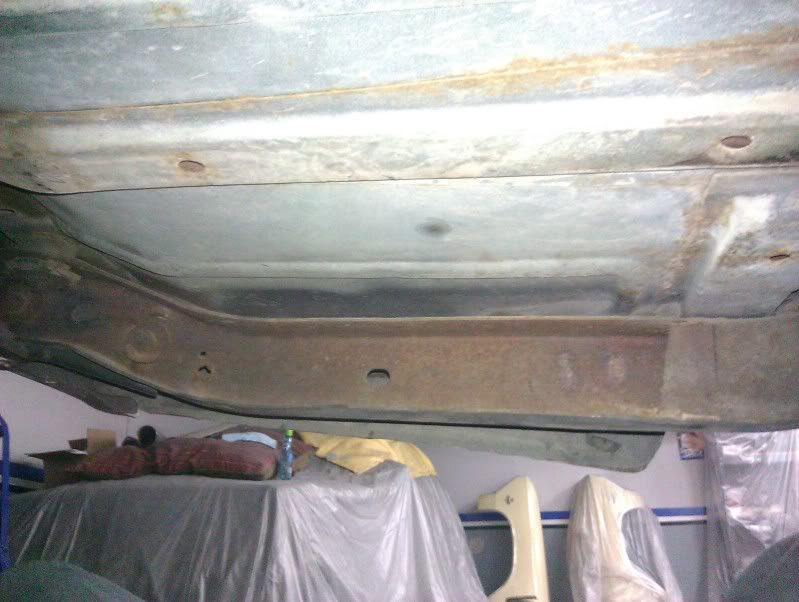
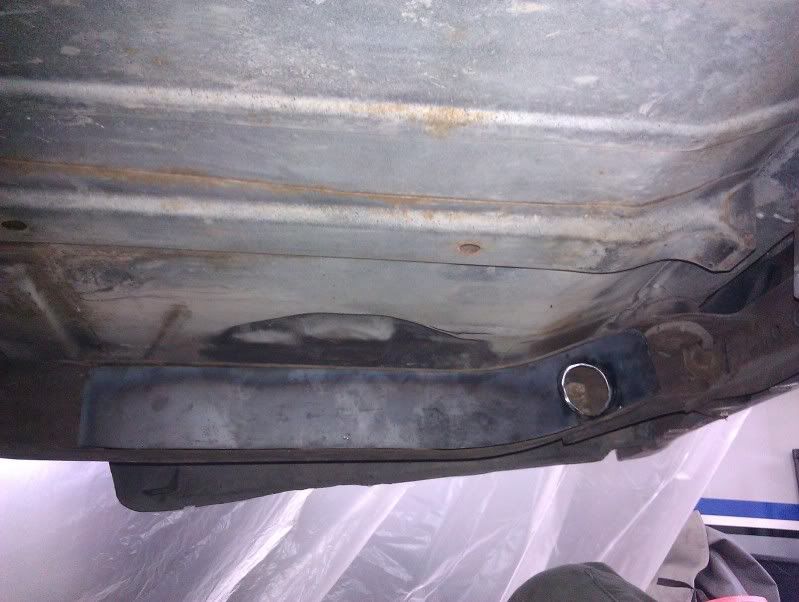
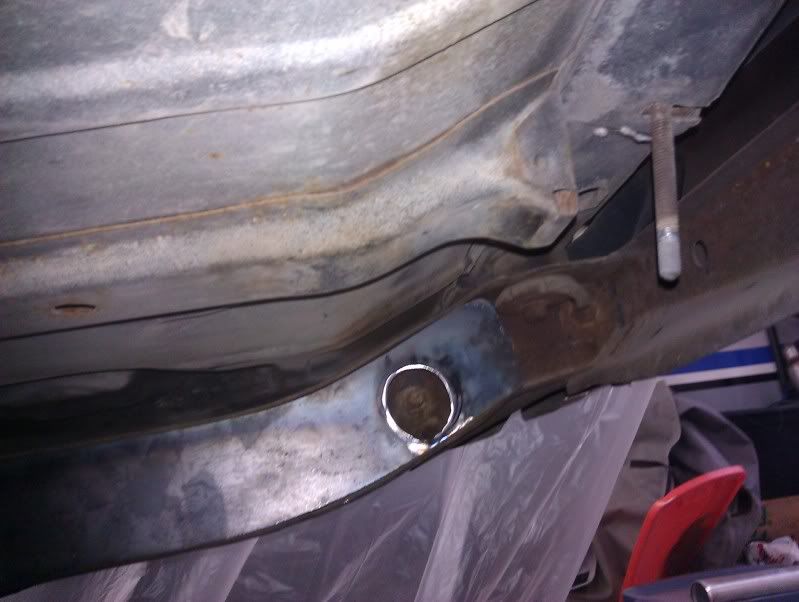
Started to clean up the frame and found some areas to strengthen up without doing a frame off.
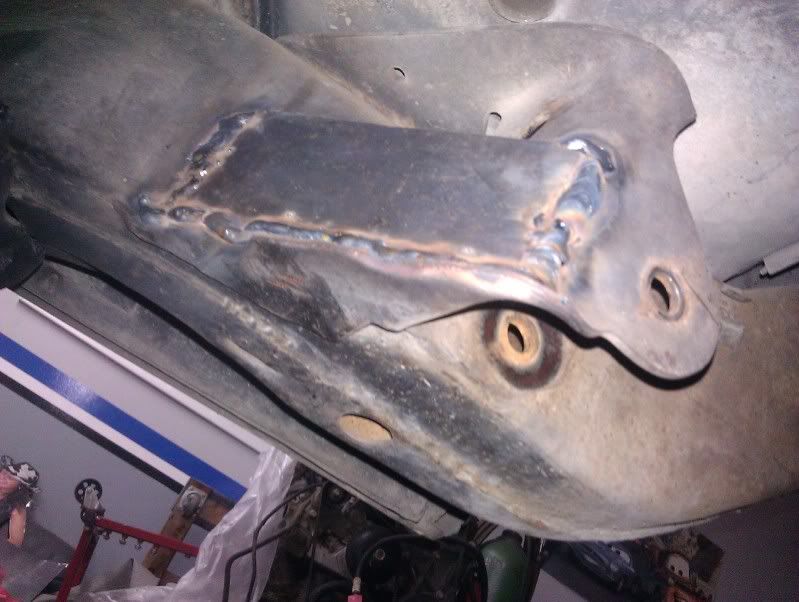
1st set of business was to make a simple added gusset for the lower control arm mount.
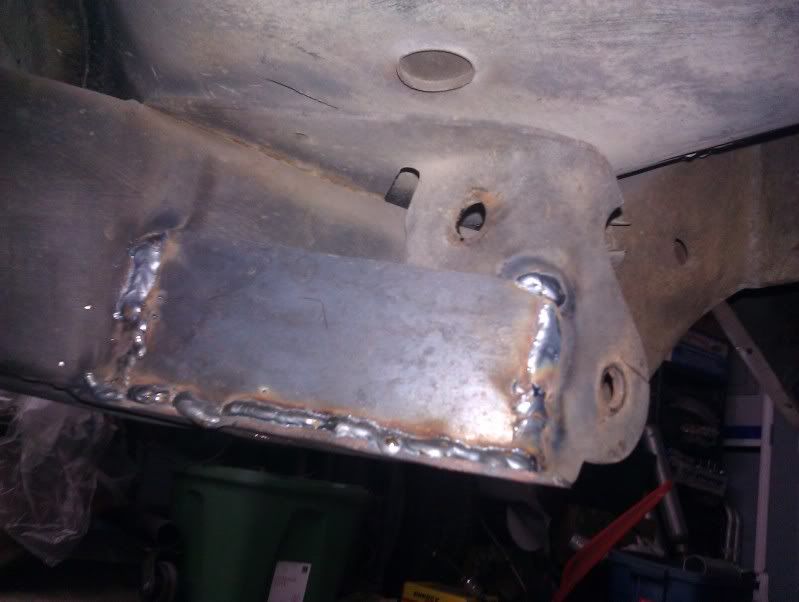
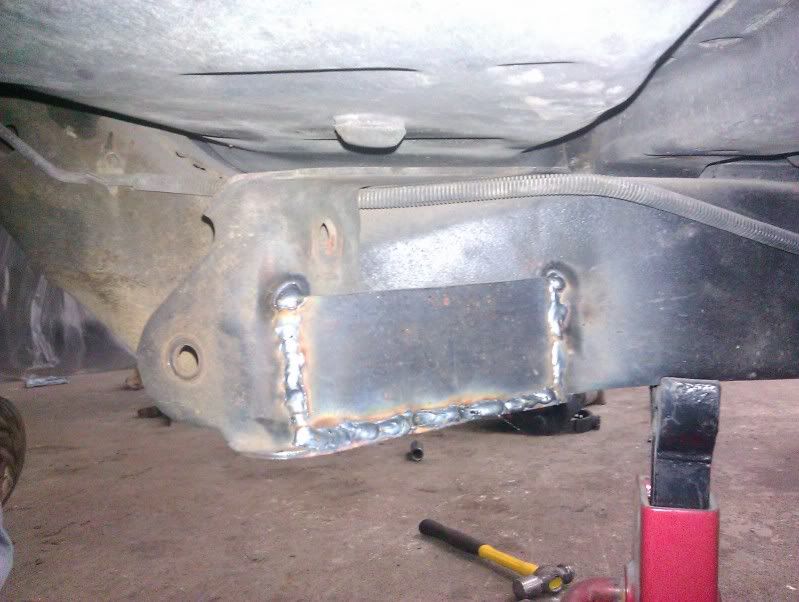
Next I decided to play around with my torches and make some plates to box in the frame behind the axle. Also planning some braces for the rear crossmember as well as a fuel filter mount on the drivers frame rail.

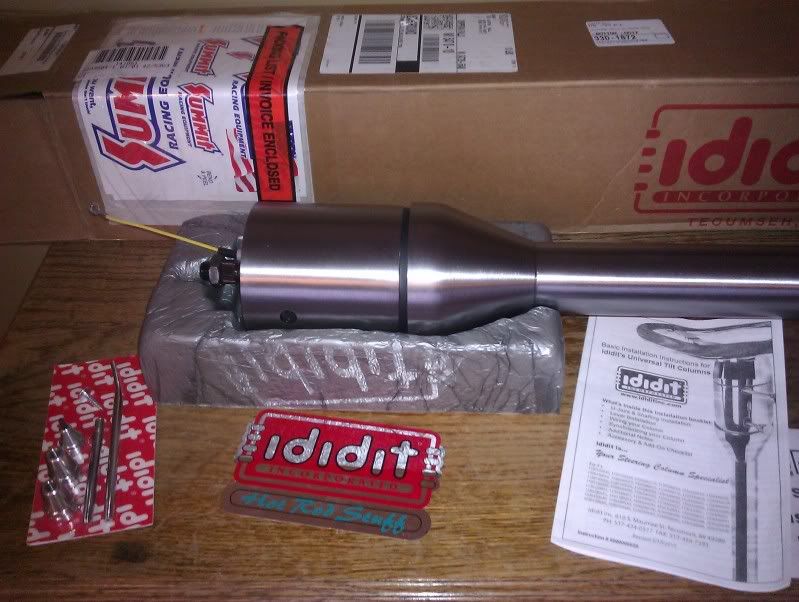
Just recieved the new tilt column from Summit. This is a Made in USA Ididit column direct fit for the 66 chevelle floor shift. Very good quality and packaging. I originally ordered up the Summit universal column but was not happy with its fit and finish, thus sent that back and decided to buck up on this purchase. I am very happy I did.

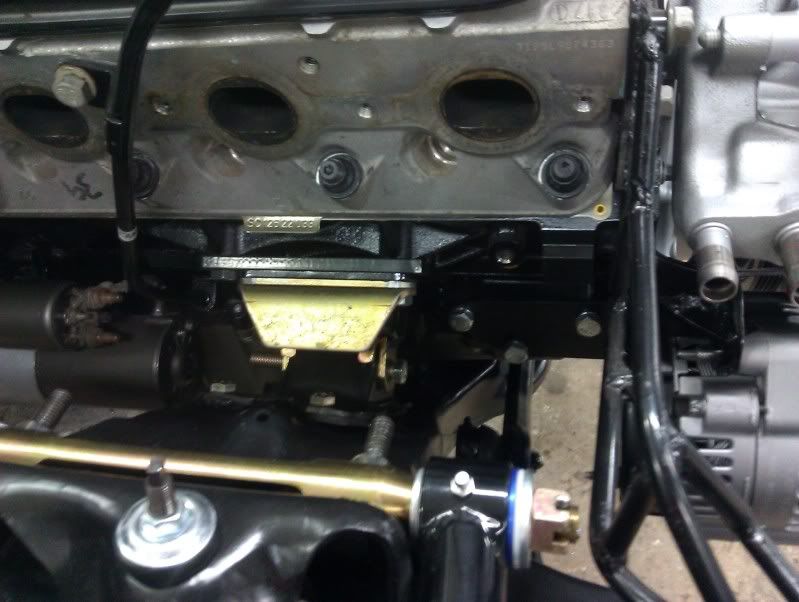
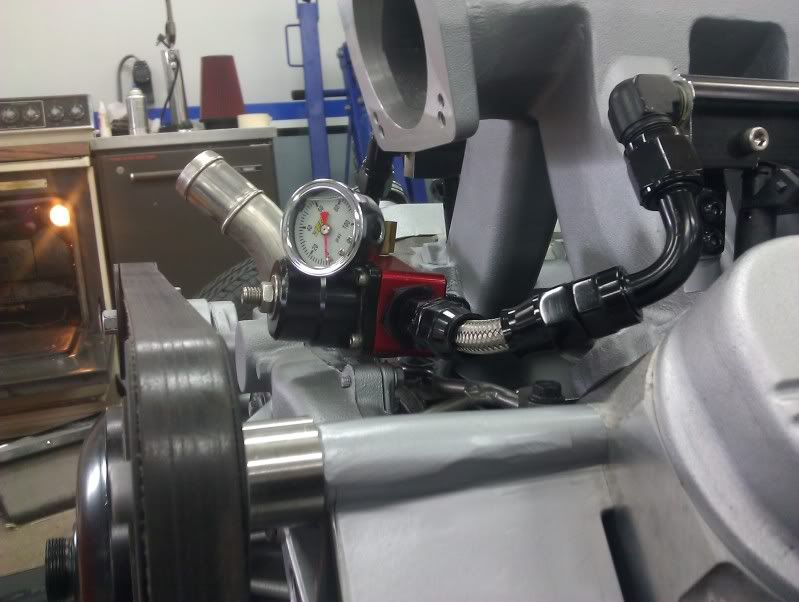
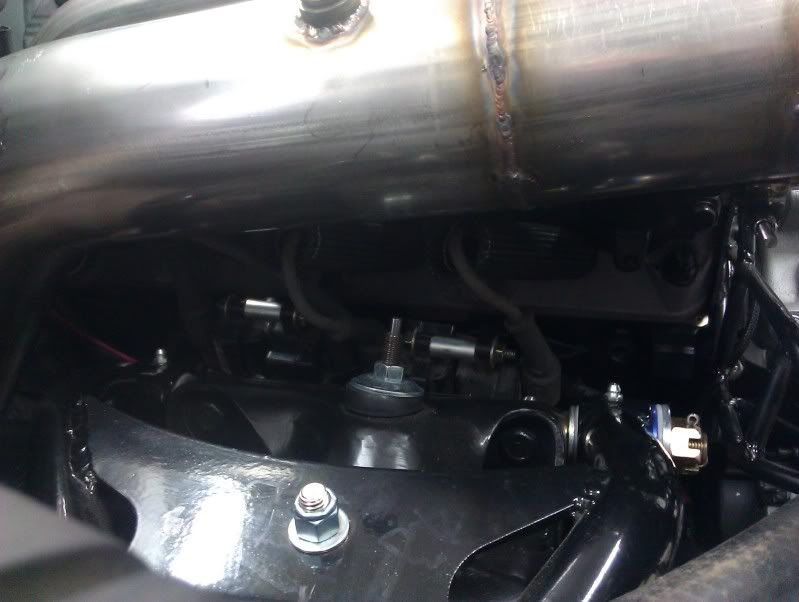
I also had a bit of time to mount up the coil brackets and wires and test fit the DP again. It is going to need a bit more clearancing.


Thats about it for now. Looking to finish up the frame mods and get the underside painted up. Then get a axle ordered up soon.
Comments are always welcome.
Thanks
Updates:
Rolled the car around to work on the rear frame/gas tank axle etc.
Pulled rear axle
Stock arms are very flimsy- these are going for new adjustable arms when it gets back together.
Axle ended up not being original, pulled codes and came out to be late 67/early 68 12 bolt factory 3.73 posi. This is getting replaced shortly with a aftermarket rear axle. I have a couple options in mind, any suggestions?
Started to clean up the frame and found some areas to strengthen up without doing a frame off.
1st set of business was to make a simple added gusset for the lower control arm mount.
Next I decided to play around with my torches and make some plates to box in the frame behind the axle. Also planning some braces for the rear crossmember as well as a fuel filter mount on the drivers frame rail.
Just recieved the new tilt column from Summit. This is a Made in USA Ididit column direct fit for the 66 chevelle floor shift. Very good quality and packaging. I originally ordered up the Summit universal column but was not happy with its fit and finish, thus sent that back and decided to buck up on this purchase. I am very happy I did.
I also had a bit of time to mount up the coil brackets and wires and test fit the DP again. It is going to need a bit more clearancing.
Thats about it for now. Looking to finish up the frame mods and get the underside painted up. Then get a axle ordered up soon.
Comments are always welcome.
Thanks
05-23-2012, 07:23 PM
#36
Launching!
Thread Starter
iTrader: (5)
Join Date: Mar 2004
Location: Chippewa Falls, WI
Posts: 292
Likes: 0
Received 0 Likes
on
0 Posts
Alight, been a bit since an update.
Car is running currently. Heres the catching up on whats all finished.
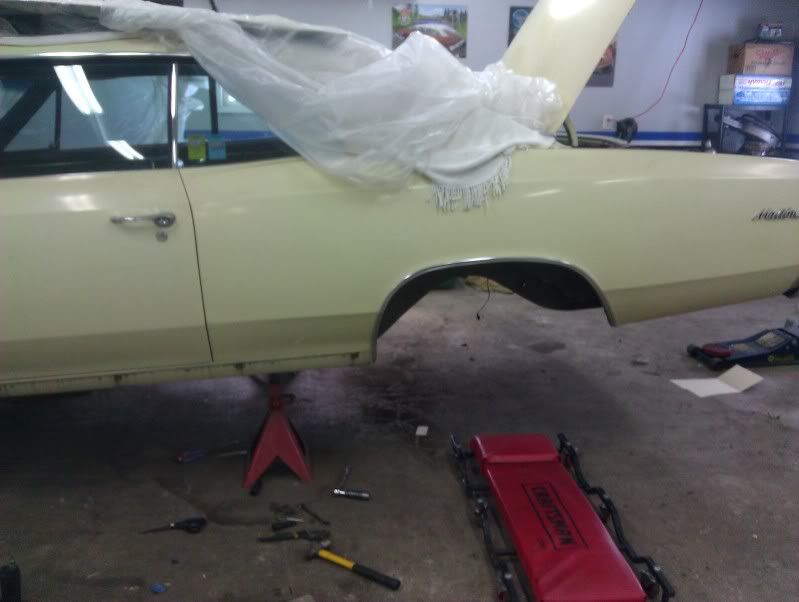
Front clip on

Fuse block wired, computer mounted etc
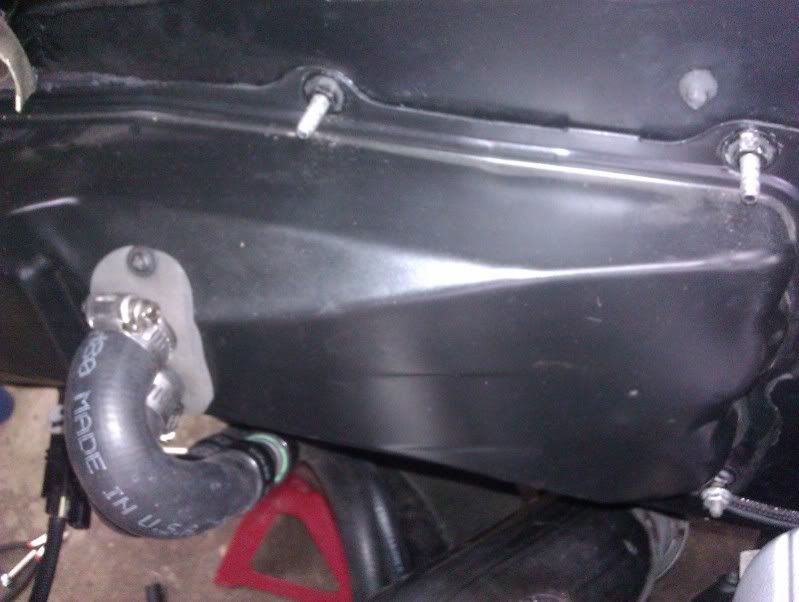
Heater core was leaking, and I had clearance issues with the DP, trans dip, and coolant lines. So i ordered a camaro/nova BBC heater core and modded the box. Turned out good, Made a plate to seal up the old holes in the fire wall.

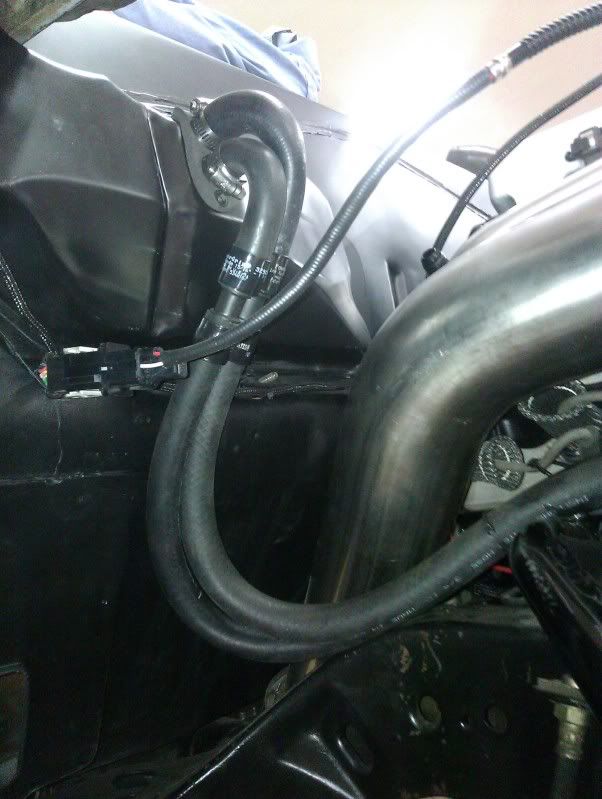
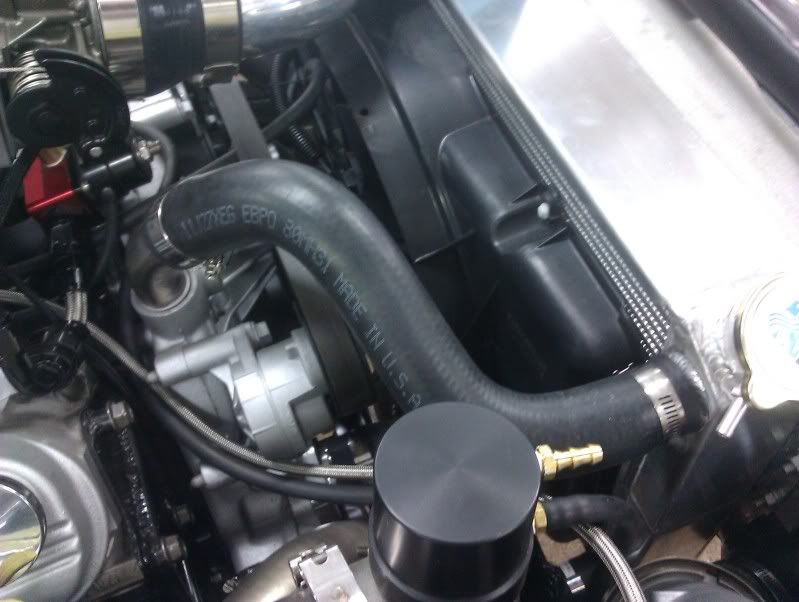
New upper hose that fits better, have the part # saved if anyone else wants it.
Inner fender cut and painted and installed, had to take a bit off to fit around the turbo/DP

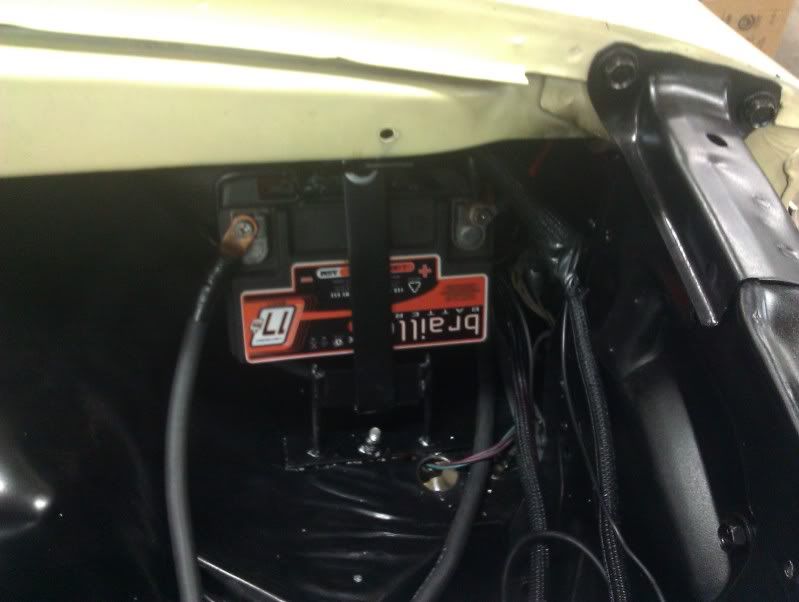
Battery mounted
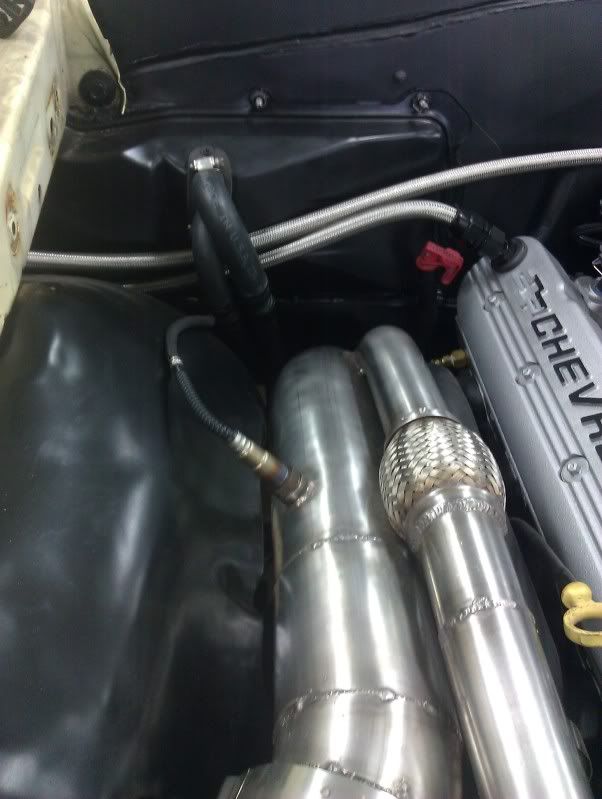
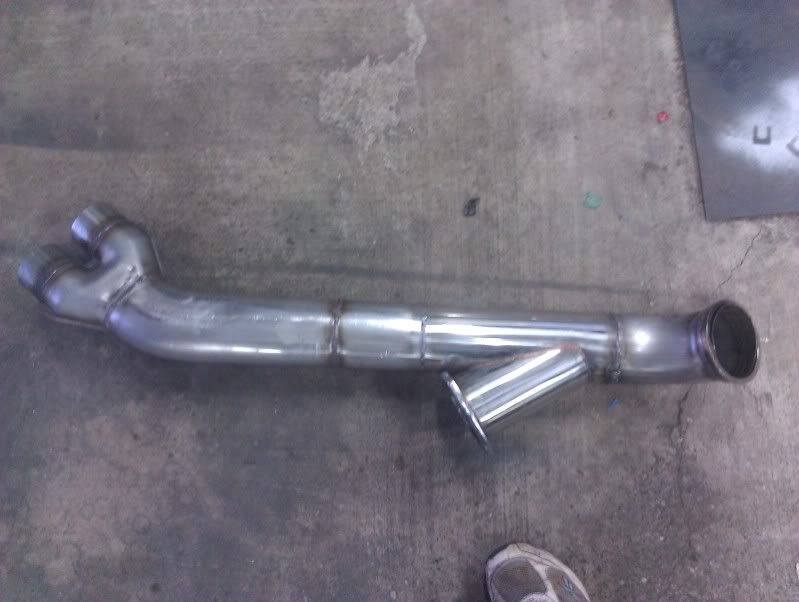
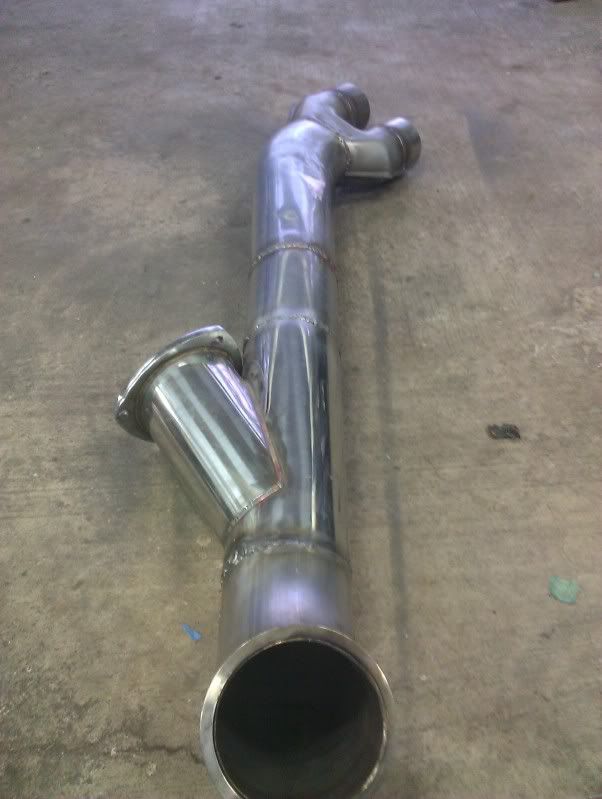
downpipe to exhuast transition made. 4 inch QTP cutout and 4 inch into dual 3 inch pypes kit.
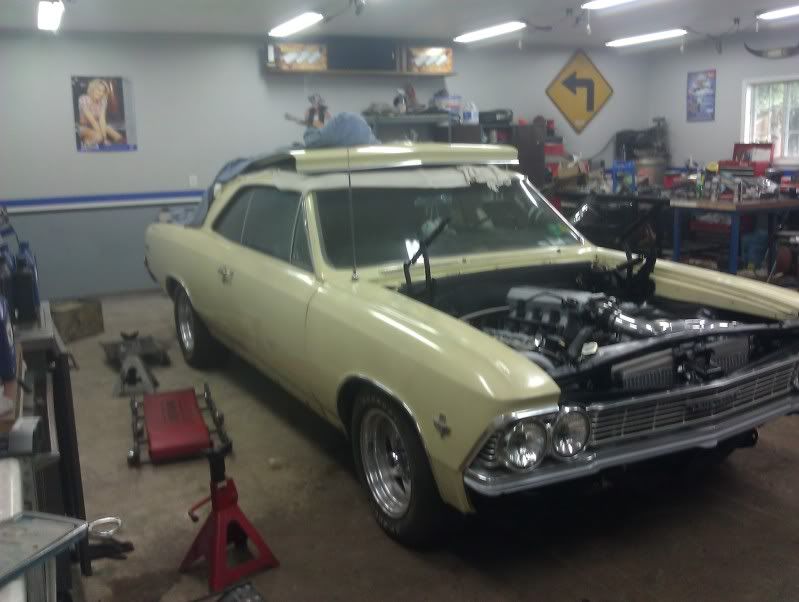
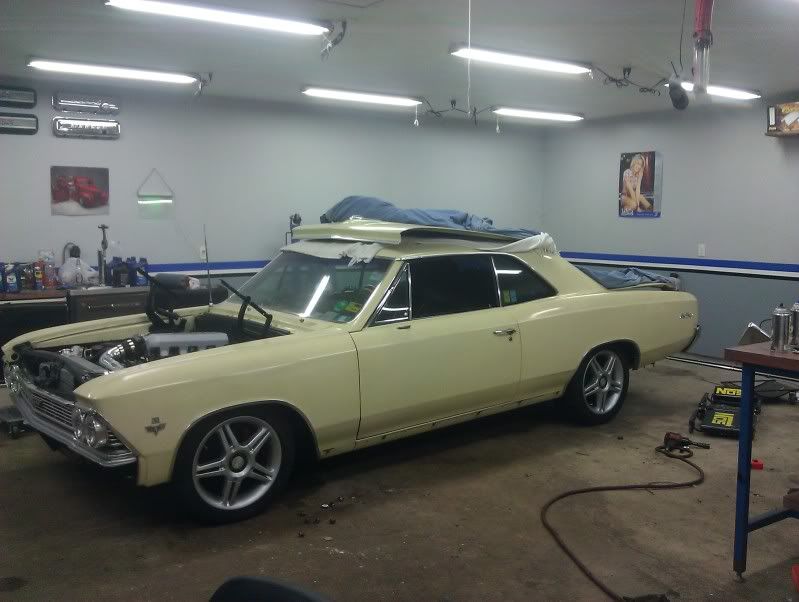
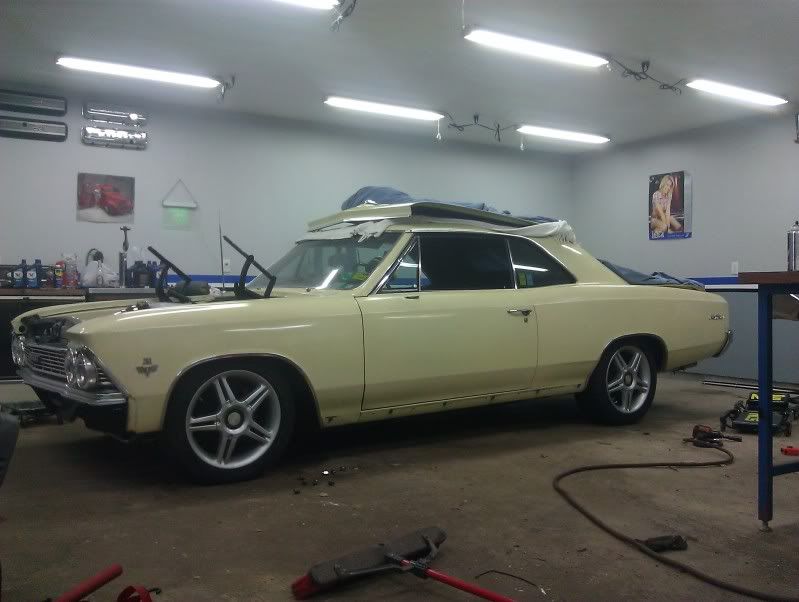
Tried out some wheels off my typhoon on the car to see how they look, not bad, kinda growing on me.
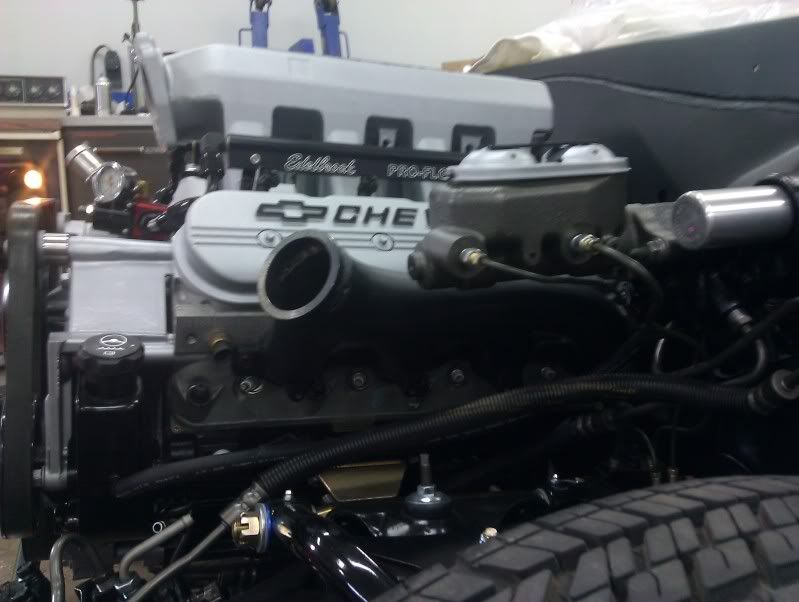
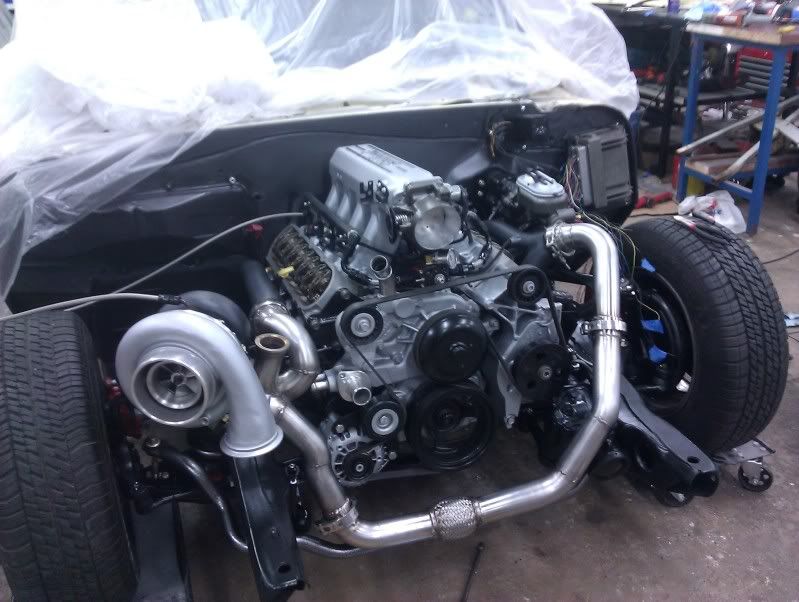
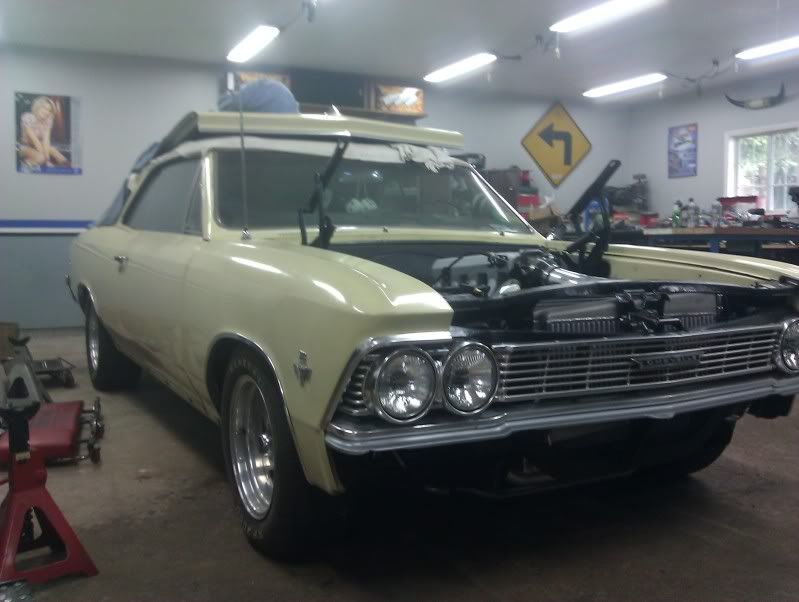
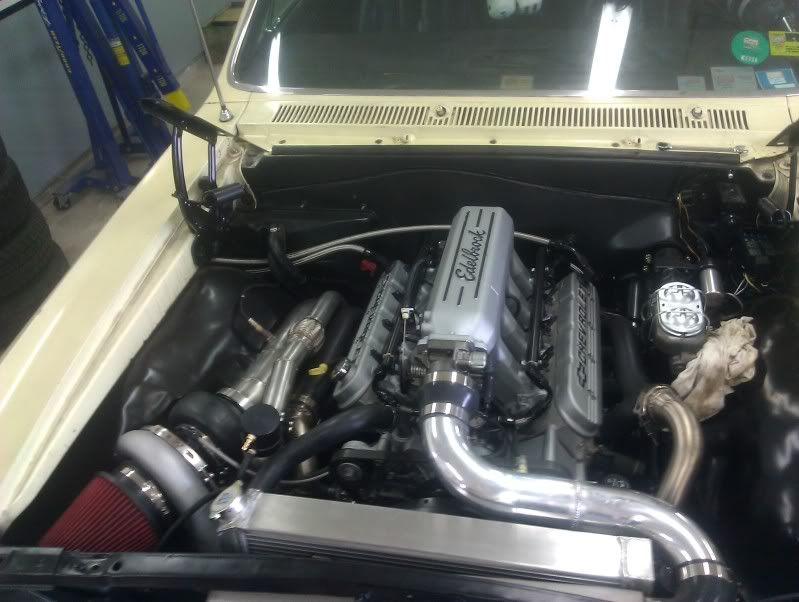
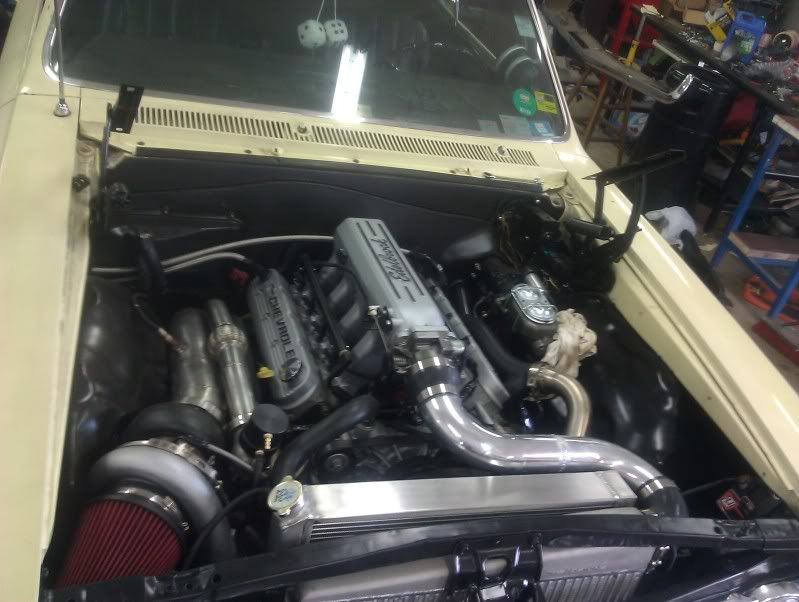
Engine bay all done
I also spent alot of time wiring in the car and gauges etc. Installed exhuast out the back, and other items.
Working on bolting on hood, aligment then off to get tuned.
Car is running currently. Heres the catching up on whats all finished.
Front clip on
Fuse block wired, computer mounted etc
Heater core was leaking, and I had clearance issues with the DP, trans dip, and coolant lines. So i ordered a camaro/nova BBC heater core and modded the box. Turned out good, Made a plate to seal up the old holes in the fire wall.
New upper hose that fits better, have the part # saved if anyone else wants it.
Inner fender cut and painted and installed, had to take a bit off to fit around the turbo/DP
Battery mounted
downpipe to exhuast transition made. 4 inch QTP cutout and 4 inch into dual 3 inch pypes kit.
Tried out some wheels off my typhoon on the car to see how they look, not bad, kinda growing on me.
Engine bay all done
I also spent alot of time wiring in the car and gauges etc. Installed exhuast out the back, and other items.
Working on bolting on hood, aligment then off to get tuned.


