


Ati damper install help!!!!
yeah some people said no loctite on it, but i was like BS!.....haha so i actually searched a few stores and found the RED GEL HI TEMP combination....and that **** is rare. but the best. no use in cheapin out. the bolt is easy to get off anyway if you got a strong brave friend to hold the breaker bar on the bolt while someone turns over the starter for a split second....itll do all the work for you. or kill you.

On your 3rd video, the only correction I would say is that with pinning the front of the crank like you're doing, you don't line up the tool with the keyway in the pulley. You are actually creating a new keyway that is a half circle in both the crank and the pulley.
no i wasnt kidding. my bud weighs like 270lbs and he braver than I. either way it came loose in about 2 seconds. but ok...so i shoudnt thread it thru the hub pathway. because the cut edges probably wouldnt allow for a rounded shape for the pin to go into. makes sense. ill redo the vid when im actually doing it. that was just a rough draft, so hopefully itll help someone in my position on of these days...or maybe ill get Alzheimers and forget and need it again.
I discovered today that in order to pin the crank on the side using the ATI tool, I have to remove the front sway bar.... what a pain in the *** considering I haven't removed it in probably 6-7 years.
Also, does anyone know how to get the tool off the crank when I'm done? It went on pretty hard, so I'm not sure how I'm going to be able to get it off.
Strike that, I'm going to just pick up a 6" long bit tomorrow and I'll be fine.
I8UR4RD how are you making out on your intsall?
Also, does anyone know how to get the tool off the crank when I'm done? It went on pretty hard, so I'm not sure how I'm going to be able to get it off.
Strike that, I'm going to just pick up a 6" long bit tomorrow and I'll be fine.
I8UR4RD how are you making out on your intsall?
Last edited by The Alchemist; Nov 25, 2011 at 05:44 PM.
Not to the original poster, but the other guy. I put 2 pins in my crank that are in-line and used one single keyway. It's pretty damn solid, don't foresee any issues. Figured why not, it was all apart. I machined my own jig that locked to the crank snout and wouldn't move out of alignment while drilling (made sure they are dead nuts in-line), so can't comment on using the ATI one. Also didn't feel like having my new Innovators West balancer cut for a 2nd keyway. The front pin method doesn't work that well with an IW balancer and with most pin kits since it has a very deep recess by the crank. The timing cover and oil pump were off at the time, so plenty of room to work and the pin could be put a lil' farther back with a decent space between pins..
I've done the front pin way only with a stock balancer for a buddy, it was pretty easy to do. Was in a C5, so the steering rack had to be removed. Not an issue for an f-body. The only thing that was tricky was when we removed it later to do a cam swap, had to be lined up perfectly to reinstall it. Not that difficult though.
Always used a BIG breaker bar to remove crank bolts, all were 6 speed cars. Put in 5-6 gear and lock the e-brake. Never had an issue. With an Auto, might be tricky or use a flywheel holding tool.
I discovered today that in order to pin the crank on the side using the ATI tool, I have to remove the front sway bar.... what a pain in the *** considering I haven't removed it in probably 6-7 years.
Also, does anyone know how to get the tool off the crank when I'm done? It went on pretty hard, so I'm not sure how I'm going to be able to get it off.
Strike that, I'm going to just pick up a 6" long bit tomorrow and I'll be fine.
I8UR4RD how are you making out on your intsall?
Also, does anyone know how to get the tool off the crank when I'm done? It went on pretty hard, so I'm not sure how I'm going to be able to get it off.
Strike that, I'm going to just pick up a 6" long bit tomorrow and I'll be fine.
I8UR4RD how are you making out on your intsall?
well i finally got the damper bolted onto the a/c pulley and loctited. then i had to find out how to get it on there. i didnt have an install tool, but i was able to rig something up to get the bolt in deep enough to pull it down onto the snout after keeping it in the freezer overnite it went on. it helped to lightly sand the area and put a drop of grease on and it slipped right in with little effort. now i am in the process of drilling. a battery drill WILL NOT WORK. so i stepped it up to an electric. I am feeling a little unsure as far as where to drill into the hub. i think the cut path shown in the video i posted IS supposed to line up with the drill bit guide. Because the hub itself is not drilling that easy. even after 10 minutes it didnt seem to really be making a dent. so i am thinking about going against what you said and drilling through the rectangular cut pathway that already exists in the hub. the drill will smooth the edges and make them round. I have it taped on the bit itself to prochargers 1 and 5/8 and im just going to work at it till it hits the bit guide. Once that is done I am concerned that I will need to remove the hub again to clean the shavings out. And like the guy a few posts above said....it seems like itd be a REAL pain to line up the two half moons again in order to shove the pin in. This is 4 days and counting working on just the pulleys. I however did get the bracket on and the air pump relocated.
I drilled my crank yesterday, and was anticipating a bear of a time, and surprisingly, the crank drilled pretty easily in less than a minute or so using an 18 volt cordless drill. I used some grease, drilled for 5-10 seconds, pulled down on the bit and shavings came out, did that 2-3 more times and went through the crank without issue.
FYI, in the future you want to heat the pulley as it will expand slightly, causing it to slip on easier.
FYI, in the future you want to heat the pulley as it will expand slightly, causing it to slip on easier.
LS1 Tech Stories
The Best V8 Stories One Small Block at Time

Topdon ONE vs. Artidiag 800 BT2: Which is the Diagnostic Tablet For You?
Pouria Savadkouei
Gas Monkey Built a 6-Wheel Ferrari Testarossa With a Corvette LT4 Engine
Verdad Gallardo
7 Most Reliable High-Performance Engines GM Has Ever Built
Verdad Gallardo
Amazing '71 Camaro Restomod Is Modern Muscle Car Under the Skin
Verdad Gallardo
6 Common C5 Corvette Failures and What's Involved In Repairing Them
Pouria Savadkouei
Retro Modern Bandit Pontiac Trans AM Comes With Burt Reynolds' Autograph
Verdad Gallardo
Top 10 Greatest Cadillac V Series Performance Models Ever, Ranked
Pouria Savadkouei
Top 10 Most Powerful Chevy Trucks Ever Made!

Hennessey's New Supercharged Silverado ZR2 Has 700 HP
Verdad Gallardo so when you drilled it....did you do it with the jig inside of the hub. or the jig directly on the snout of the crank. because since i am supposedly not supposed to use the cut path in the hub.....then when drilling the new pathway in the hub.....thats not so easy. and it would then make me wonder if the length i measured on the drill bit would even be right. this is starting to just **** me off. been up since this morning trying to get an answer. 8 hrs and nothing
You install the pulley onto the crank, and instead of putting in the crank bolt, you put on the jig, and bolt it to the pulley and crank. Now start drilling on a fresh spot of the pulley and crank, in other words, don't drill in the pulley where the keyway is.
Make sure you use some type of lubricant on the drill bit, and make sure you don't overheat the bit as it will dull instantly.
So like I said above, start drilling, pull out the bit to pull out some shavings, then go back at it for another 5-10 seconds. If you're not seeing shavings, then you're not making progress and it's then time to look into getting a different drill bit.


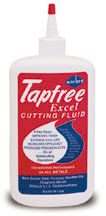
Tapfree works great for keeping the drill bit lubed. I squirt a little in the hole, then put a lot of pressure on the drill. You want the drill shavings to come spiraling out. If you don't use enough pressure on the drill, you'll dull the bit. Stop after about ten seconds, and squirt some more Tapfree in. I've used WD40 for a drill lubricant when in a pinch, it doesn't work as well as Tapfree does, but it's a lot better than going in dry. Bob
__________________
ATI ProCharger and Moser Sales 260 672-2076
PM's disabled, please e-mail me
E-mail: brutespeed@gmail.comob@brutespeed.com
https://brutespeed.com/ Link to website

ATI ProCharger and Moser Sales 260 672-2076
PM's disabled, please e-mail me
E-mail: brutespeed@gmail.comob@brutespeed.com
https://brutespeed.com/ Link to website

Dude...its not that hard. Take and old crank bolt and run the ATI hub down on the crank. Then back the old bolt off. Install the fixture onto the crank. Drill into the fixture to the marked depth of the pin. Tap pin in with a punch and your golden. As said keep lubricated and use a good bit.


Dude...its not that hard. Take and old crank bolt and run the ATI hub down on the crank. Then back the old bolt off. Install the fixture onto the crank. Drill into the fixture to the marked depth of the pin. Tap pin in with a punch and your golden. As said keep lubricated and use a good bit.
Moderator

Joined: Nov 2001
Posts: 3,048
Likes: 12
From: Raleigh, NC
not really advice on install but That's not the ideal pin kit for the ATI dampner. I made the mistake and bought that one also then I realized I didn't wanna risk anything and messing up the dampner so I ordered the actual side pin kit from ati. Most argue that this one is stronger and the side pin can shear off. So I pinned it twice with both pins that come with it and sent my dampner back to have a second keyway put in it. You can use the one you have though if you want.

Moderator
Joined: Nov 2001
Posts: 3,048
Likes: 12
From: Raleigh, NC
the hub itself is not drilling that easy. even after 10 minutes it didnt seem to really be making a dent. so i am thinking about going against what you said and drilling through the rectangular cut pathway that already exists in the hub. the drill will smooth the edges and make them round. I have it taped on the bit itself to prochargers 1 and 5/8 and im just going to work at it till it hits the bit guide. Once that is done I am concerned that I will need to remove the hub again to clean the shavings out. And like the guy a few posts above said....it seems like itd be a REAL pain to line up the two half moons again in order to shove the pin in. This is 4 days and counting working on just the pulleys. I however did get the bracket on and the air pump relocated.
Finally, I went out and bought the tiniest, hardened bits I could find. That same evening, after running the smallest bit to start a hole and an intermediate-sized bit to enlarge it some more, I was able to complete the drill-through with the supplied bit.
What a pain!

Thanks guys. This is great info that was sorely needed in the forums here for future procharger do it your selfers. yeah....honestly it didn't sound hard, but then again the instructions in that particular area are garbage. It's strange really...in the F-body install manual that comes with the kit, it shows the stock balancer being pinned? But it did however sound easy to mess something up. I called Bob today. And the directions are as follows.
1. Attach the hub/ balancer to the cranks' snout.
2. Run the bolt through the jig, making sure you avoid lining it up with the existing keyway provided by ATI in the hub/ balancer and tighten thoroughly to ensure it does not move while drilling.
3. Tape off the bit a 1inch and 5/8th's so you will know when to stop drilling.
4. Using cutting oil, or a similar lubricant, drill in intervals at low speed with high pressure.
5. Once the hole is drilled, remove the bolt and fixture, and clean off any and all shavings.
6. Get it in the hole.......(that's what she said)
I will be making a vid. Any one have anything to add or suggestions on how to make this process easier or more reliable then , by all means, enlighten us all.
Last edited by I8UR4RD; Nov 28, 2011 at 08:42 PM.
Thanks guys. This is great info that was sorely needed in the forums here for future procharger do it your selfers. yeah....honestly it didn't sound hard, but then again the instructions in that particular area are garbage. It's strange really...in the F-body install manual that comes with the kit, it shows the stock balancer being pinned? But it did however sound easy to mess something up. I called Bob today. And the directions are as follows.
1. Attach the hub/ balancer to the cranks' snout.
2. Run the bolt through the jig, making sure you avoid lining it up with the existing keyway provided by ATI in the hub/ balancer and tighten thoroughly to ensure it does not move while drilling.
3. Tape off the bit a 1inch and 5/8th's so you will know when to stop drilling.
4. Using cutting oil, or a similar lubricant, drill in intervals at low speed with high pressure.
5. Once the hole is drilled, remove the bolt and fixture, and clean off any and all shavings.
6. Get it in the hole.......(that's what she said)
I will be making a vid. Any one have anything to add or suggestions on how to make this process easier or more reliable then , by all means, enlighten us all.
1. Attach the hub/ balancer to the cranks' snout.
2. Run the bolt through the jig, making sure you avoid lining it up with the existing keyway provided by ATI in the hub/ balancer and tighten thoroughly to ensure it does not move while drilling.
3. Tape off the bit a 1inch and 5/8th's so you will know when to stop drilling.
4. Using cutting oil, or a similar lubricant, drill in intervals at low speed with high pressure.
5. Once the hole is drilled, remove the bolt and fixture, and clean off any and all shavings.
6. Get it in the hole.......(that's what she said)
I will be making a vid. Any one have anything to add or suggestions on how to make this process easier or more reliable then , by all means, enlighten us all.
I think your #2 instruction is a little off, in that, you need to tighten the bolt head to where it's corners dont protrude into the jig's drill bit hole. One of the bolt heads flat sides needs to be next to the drill bit hole. It dosent matter if the bolt head corner covers the keyway in the balancer as you wont be installing anything in there. Hope this helps...
your right i shouldve been more clear. the jig does have a raised surface on it. this is the side that faces the crank. the hole in the jig that guides the bit is what i was saying should not be lined up with the existing keyed pathway in the balancer. its raining and 38 outside today so no video yet....bought some cutting oil and im waiting on the sun and a day where i make it home before 6pm. sure will be nice to begin doing the easier parts of the install. im sure i will be making more threads.