Forced Induction Superchargers | Turbochargers | Intercoolers

PROJECT RED ROCKET TUNING HAS STARTED! AES390, Twin turbo, 4l80e. PG21, Post 408! :)

Thread Tools
 
Search this Thread
 
Old 06-01-2013, 08:32 PM
  #41  
12 Second Club
iTrader: (19)
 
LS1RedZ's Avatar
 
Join Date: Mar 2005
Location: Waco, TX
Posts: 3,080
Likes: 0
Received 1 Like on 1 Post

Default

What valve covers and coil pack mounts are those?
Old 06-19-2013, 07:20 PM
  #42  
TECH Addict
Thread Starter
iTrader: (11)
 
allout06's Avatar
 
Join Date: Nov 2010
Location: Kokomo, In
Posts: 2,107
Likes: 0
Received 1 Like on 1 Post
Default

Well, ive been making some progress. It's slow, but it's progress. the motor is about 90% done. Just a few little small things i need to get for it. I plan on doing quite of bit of work to the engine bay this weekend, with a long stretch of maybe painting it. We'll see how things go. Any of you got the heater box out without removing the dash?

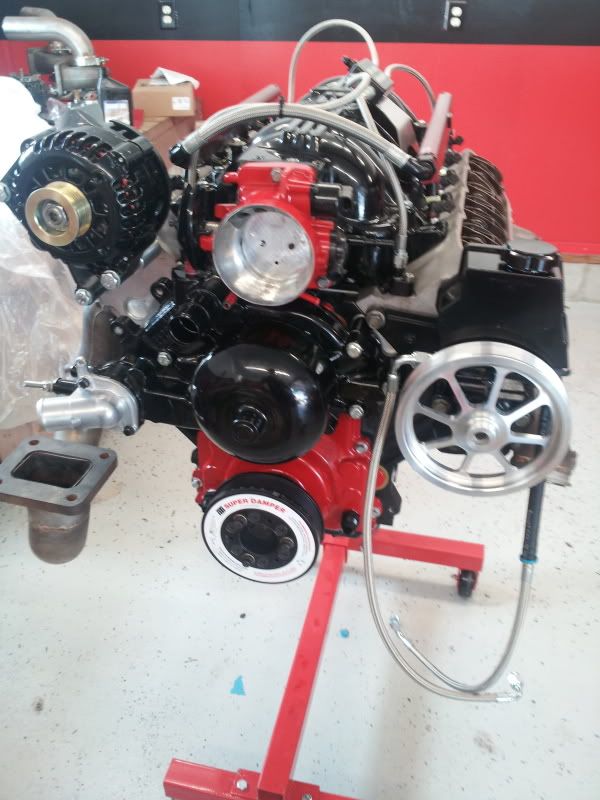
Heres the motor as it sits right now.


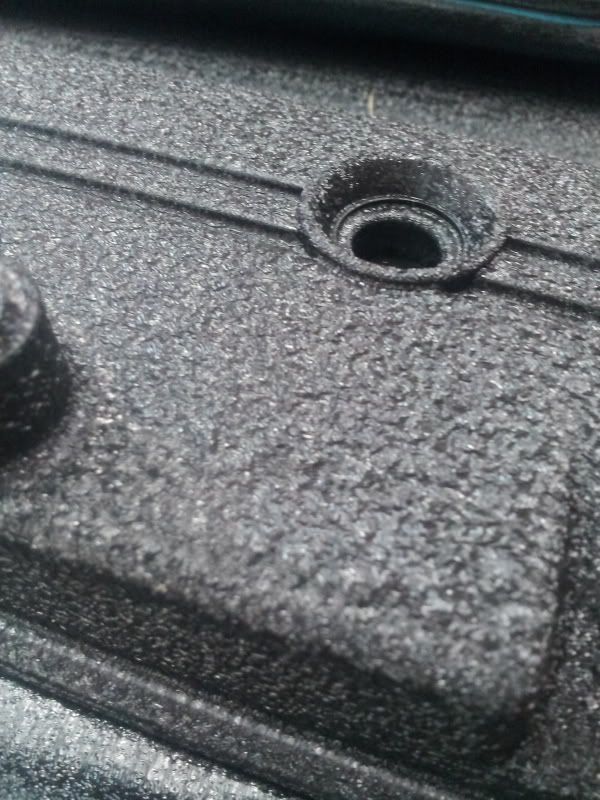
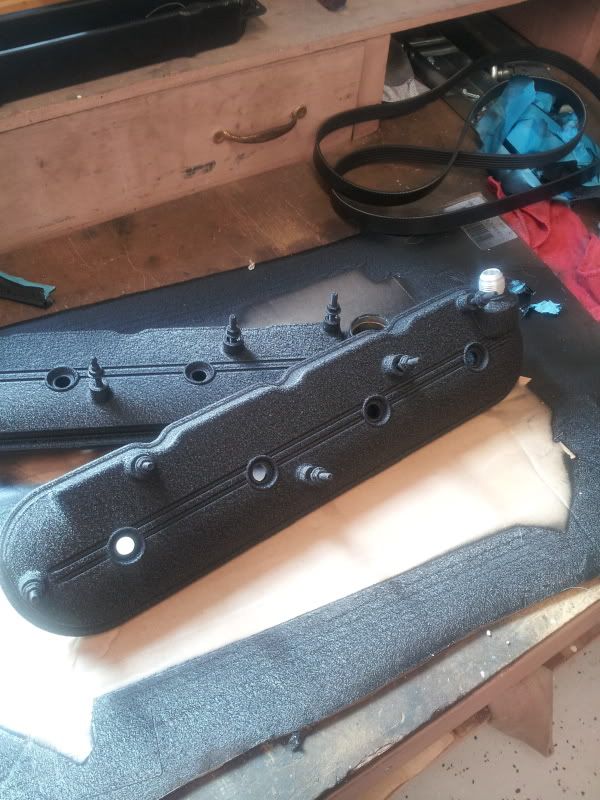
After dicking around with some "businesses" around town that powder coat and getting quoted $250 to have valve covers PAINTED, i decided to wrinkle coat my stockers. Also had -10 fittings welded in. Turned out pretty nice.


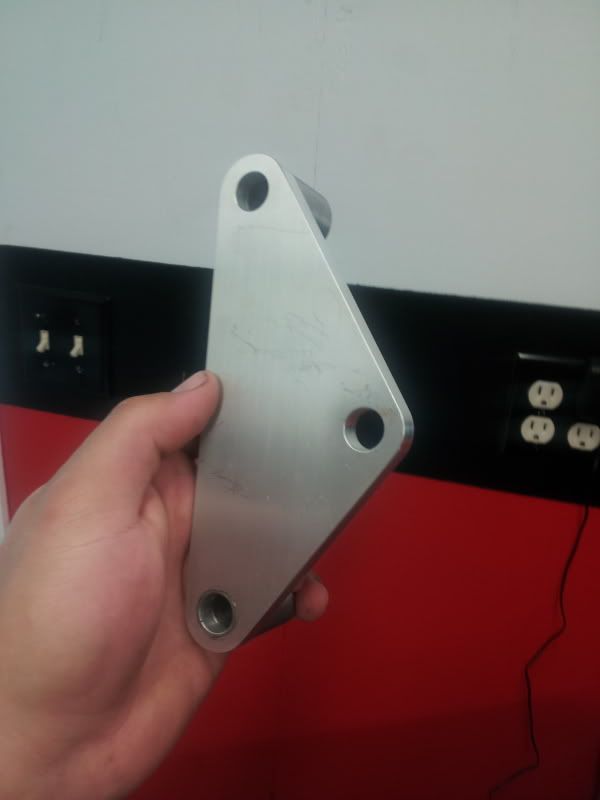
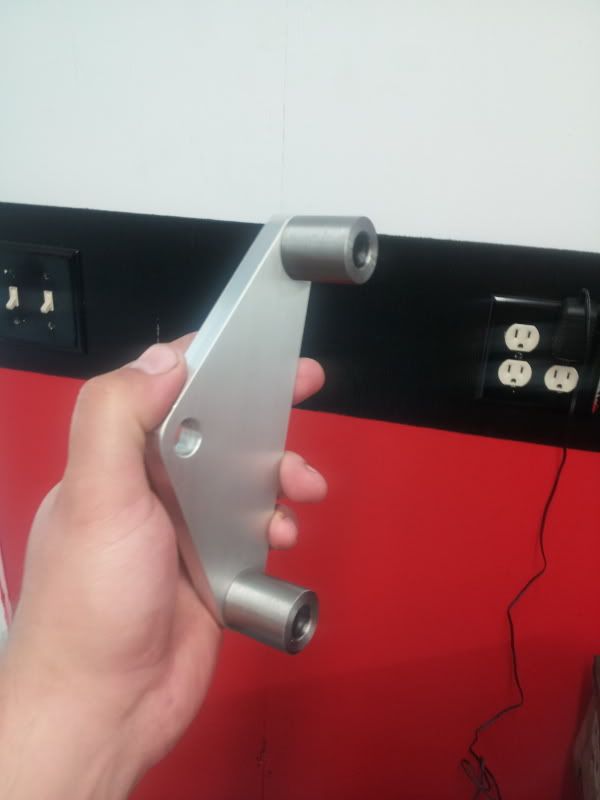
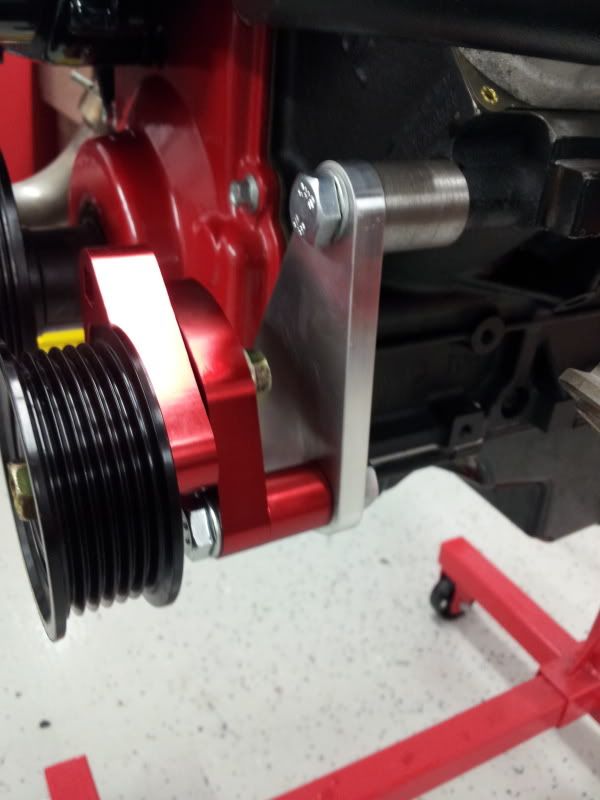
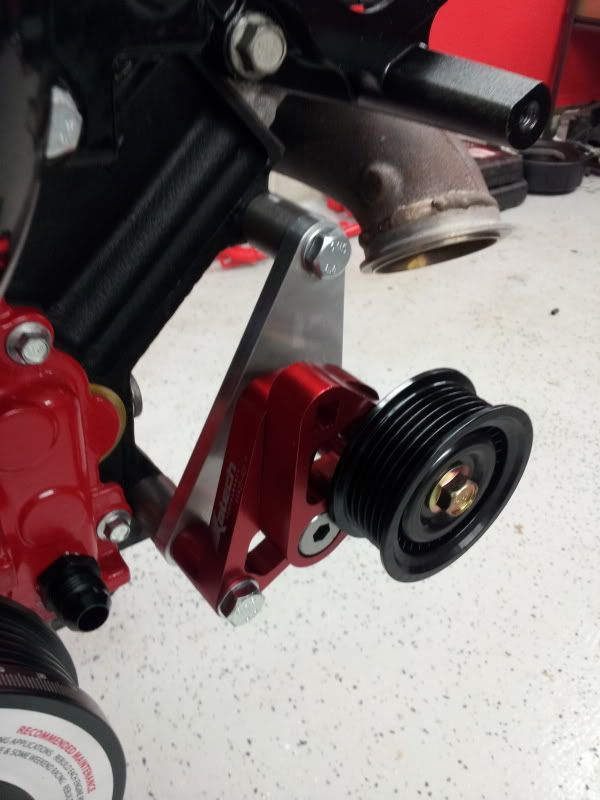
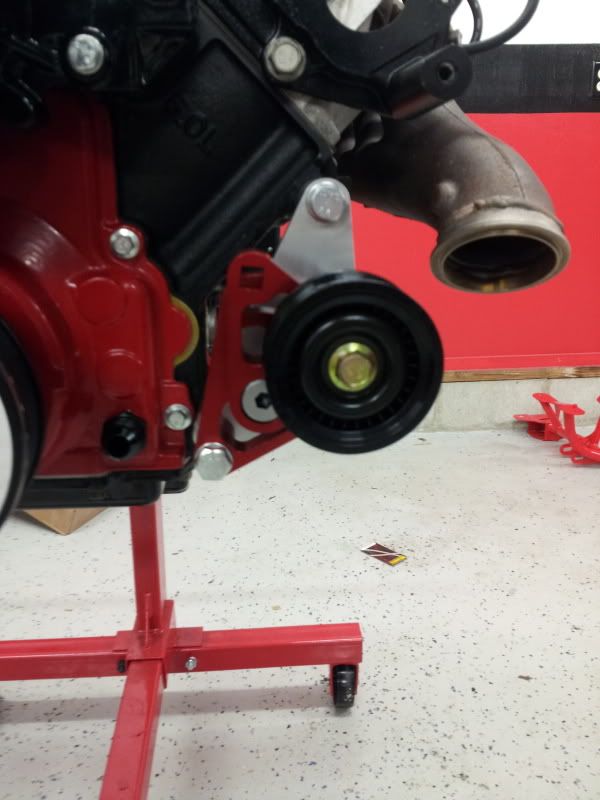
Had my buddy make me a tensioner relocation bracket for my iron block. The huron speed one didnt fit. so this is what we came up with.
Ill get her bolted up this weekend with my Katech tensioner


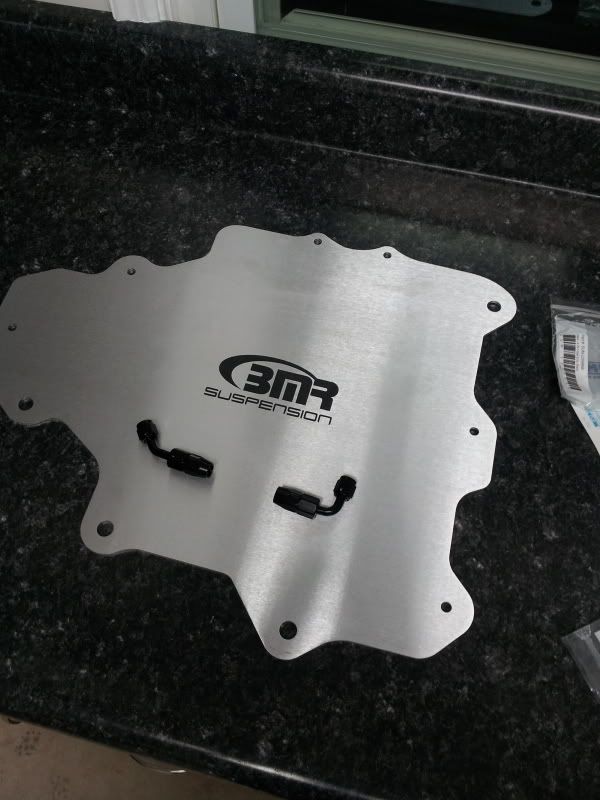
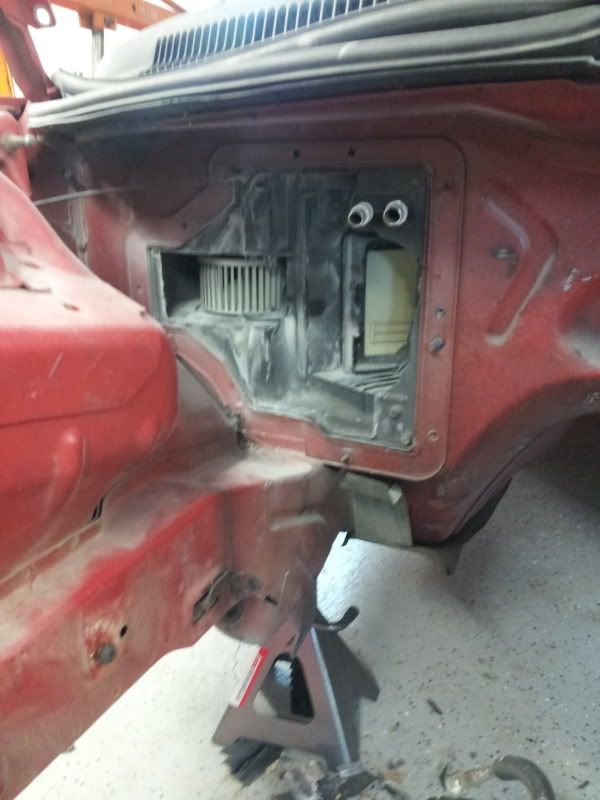
Got my BMR HVAC panel in...I do plan on keeping heat. Im going to cut out a couple holes for the hoses.


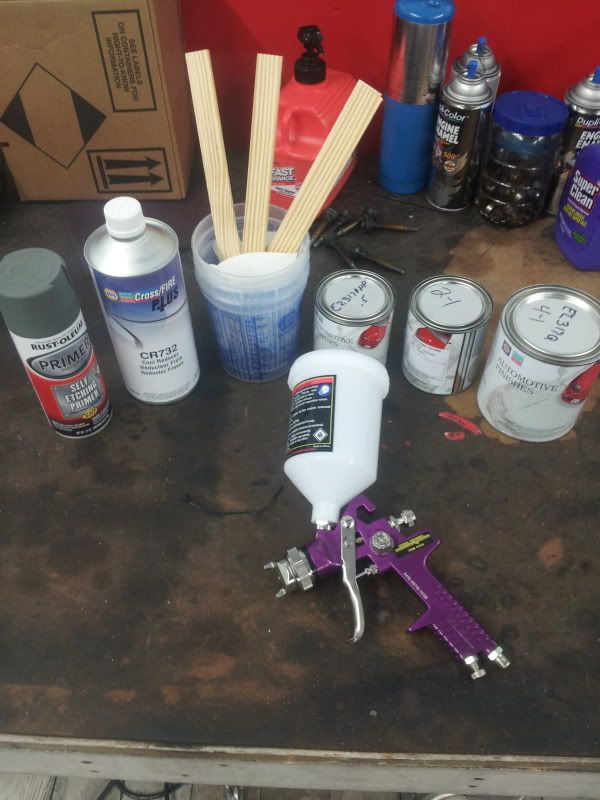
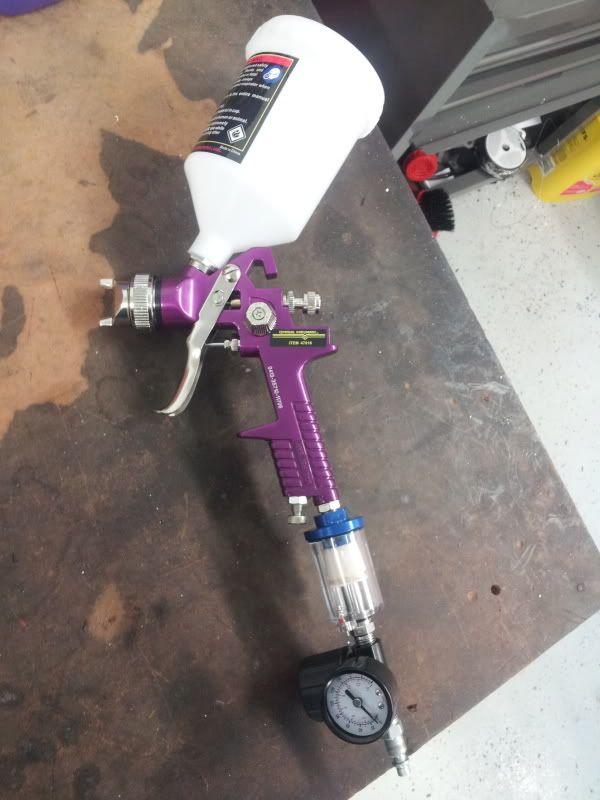
Also picked up some paint and a spray gun.


Sry for not updating. I think ive done more work on my buddies procharged camaro then i have my own car lol
Old 06-19-2013, 07:21 PM
  #43  
TECH Addict
Thread Starter
iTrader: (11)
 
allout06's Avatar
 
Join Date: Nov 2010
Location: Kokomo, In
Posts: 2,107
Likes: 0
Received 1 Like on 1 Post
Default

Originally Posted by LS1RedZ
What valve covers and coil pack mounts are those?

The valve covers were ebay fabbed covers. which fit like **** so i sent them back and im just going to use the stockers. the mounts were designed by me and a friend and he cut em out on his CNC machine. PM if you want some more info on em. he does sell them
Old 06-19-2013, 08:14 PM
  #44  
TECH Addict
iTrader: (16)
 
I8UR4RD's Avatar
 
Join Date: Oct 2010
Location: Bama
Posts: 2,593
Likes: 0
Received 2 Likes on 2 Posts
Default

progress! such a good thing. wheres the TH400!
Old 06-20-2013, 05:09 PM
  #45  
10 Second Club
iTrader: (30)
 
djfury05's Avatar
 
Join Date: Jan 2008
Location: Beaufort, SC
Posts: 3,430
Likes: 0
Received 3 Likes on 2 Posts

Default

If your wanting to retain heat but delete the portion that sticks into the engine bay you can do that without removing the dash. A big hammer is your friend. It is very dirty dusty work so stuff wear a mask and I'd have a vacuum right next to it trying to suck up all the fiberglass dust.
Old 06-20-2013, 06:20 PM
  #46  
TECH Addict
Thread Starter
iTrader: (11)
 
allout06's Avatar
 
Join Date: Nov 2010
Location: Kokomo, In
Posts: 2,107
Likes: 0
Received 1 Like on 1 Post
Default

Originally Posted by djfury05
If your wanting to retain heat but delete the portion that sticks into the engine bay you can do that without removing the dash. A big hammer is your friend. It is very dirty dusty work so stuff wear a mask and I'd have a vacuum right next to it trying to suck up all the fiberglass dust.
awesome man! thanks for the tip!
Old 06-20-2013, 07:31 PM
  #47  
TECH Junkie
iTrader: (17)
 
Tally TransAm's Avatar
 
Join Date: Nov 2001
Location: Tallahassee, Fl
Posts: 3,410
Likes: 0
Received 2 Likes on 2 Posts

Default

Originally Posted by djfury05
If your wanting to retain heat but delete the portion that sticks into the engine bay you can do that without removing the dash. A big hammer is your friend. It is very dirty dusty work so stuff wear a mask and I'd have a vacuum right next to it trying to suck up all the fiberglass dust.
i did the same ****. used a dremel with a cutting bit for most and did the rest with a flap wheel or sanding drum on the dremel
Old 06-20-2013, 09:13 PM
  #48  
TECH Senior Member
iTrader: (24)
 
Reject's Avatar
 
Join Date: Apr 2005
Location: Texas
Posts: 9,197
Received 4 Likes on 3 Posts

Default

mowr updates!!!
Old 06-21-2013, 07:37 AM
  #49  
TECH Addict
Thread Starter
iTrader: (11)
 
allout06's Avatar
 
Join Date: Nov 2010
Location: Kokomo, In
Posts: 2,107
Likes: 0
Received 1 Like on 1 Post
Default

Originally Posted by Tally TransAm
i did the same ****. used a dremel with a cutting bit for most and did the rest with a flap wheel or sanding drum on the dremel
good deal. i need to pick up a new dremel kit. I've used all mine up.

Originally Posted by Reject
mowr updates!!!
lmao. im tryin!

i.got my tensioner on last night and my valve covers mounted up. heres some pics of the bracket i had made. ill snap some pics of the valve covers. what valve cover breather you guys recommend. by the looks of it, ill.need a tall one, i don't think itll clear the back of the alternator unless i do some more trimming.


Old 06-21-2013, 09:40 AM
  #50  
TECH Senior Member
iTrader: (8)
 
Blackpanther99's Avatar
 
Join Date: Sep 2012
Location: Baytown, TX
Posts: 6,963
Received 4 Likes on 4 Posts

Default

Damn dude props! Sweet piece of engine.
Old 06-21-2013, 10:08 AM
  #51  
TECH Addict
Thread Starter
iTrader: (11)
 
allout06's Avatar
 
Join Date: Nov 2010
Location: Kokomo, In
Posts: 2,107
Likes: 0
Received 1 Like on 1 Post
Default

Originally Posted by Blackpanther99
Damn dude props! Sweet piece of engine.
thanks bro! i got a couple buddies comin over today to help tackle this mess of an engine bay. the wiring relocation is going to be interesting. im going to try to do it wihout cutting anything.
Old 06-21-2013, 11:37 AM
  #52  
TECH Senior Member
iTrader: (8)
 
Blackpanther99's Avatar
 
Join Date: Sep 2012
Location: Baytown, TX
Posts: 6,963
Received 4 Likes on 4 Posts

Default

Wiring is a bitch! Lol
Old 06-21-2013, 03:52 PM
  #53  
Teching In
iTrader: (11)
 
blazinhd's Avatar
 
Join Date: May 2010
Location: NWI
Posts: 41
Likes: 0
Received 0 Likes on 0 Posts

Default

if you ever come up north i want to see that thing!!!!! very detailed thread worth the read!!
Old 06-23-2013, 07:23 PM
  #54  
TECH Addict
Thread Starter
iTrader: (11)
 
allout06's Avatar
 
Join Date: Nov 2010
Location: Kokomo, In
Posts: 2,107
Likes: 0
Received 1 Like on 1 Post
Default

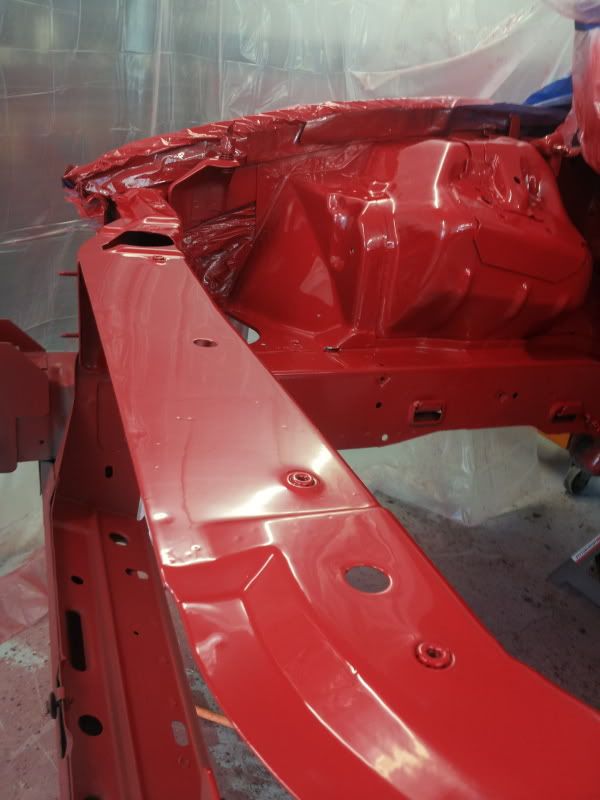
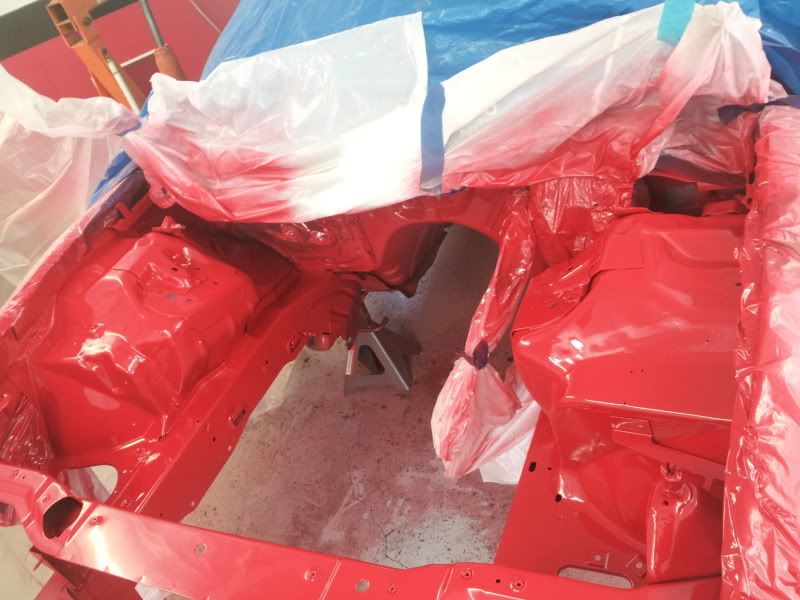
Mission accomplished! after 18hrs of cleaning, standing, cleaning some more, running places to get **** and painting, i finally got the bay painted! I've never painted before with an hvlp gun and i think it turned out great. not bad for a $9 harbor freight gun/regulator/filter and some napa paint!


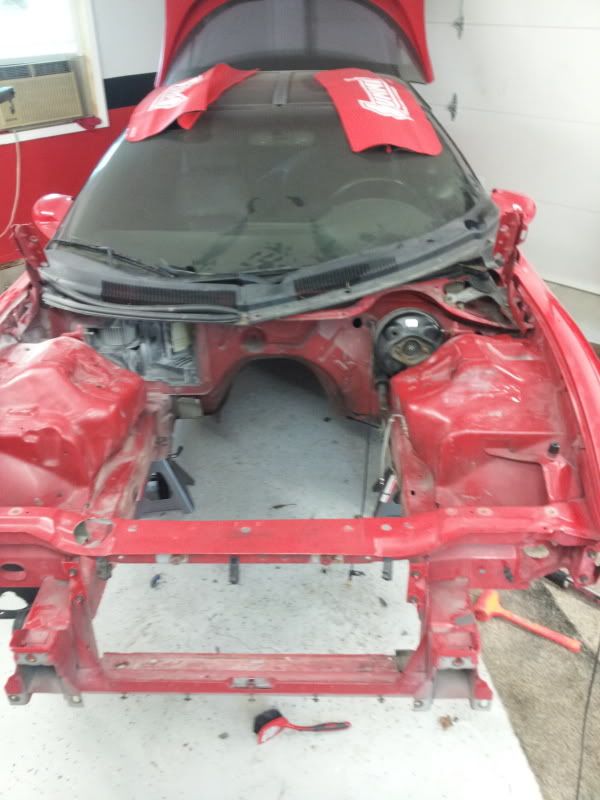
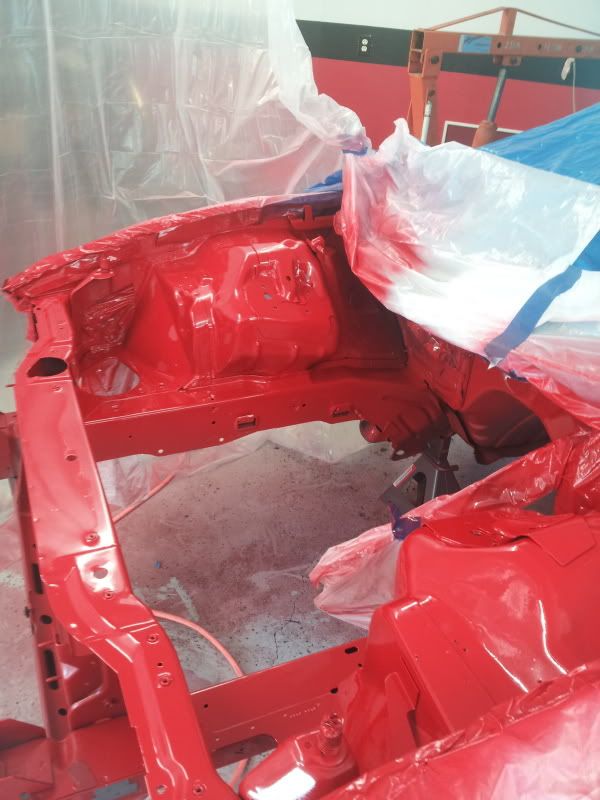
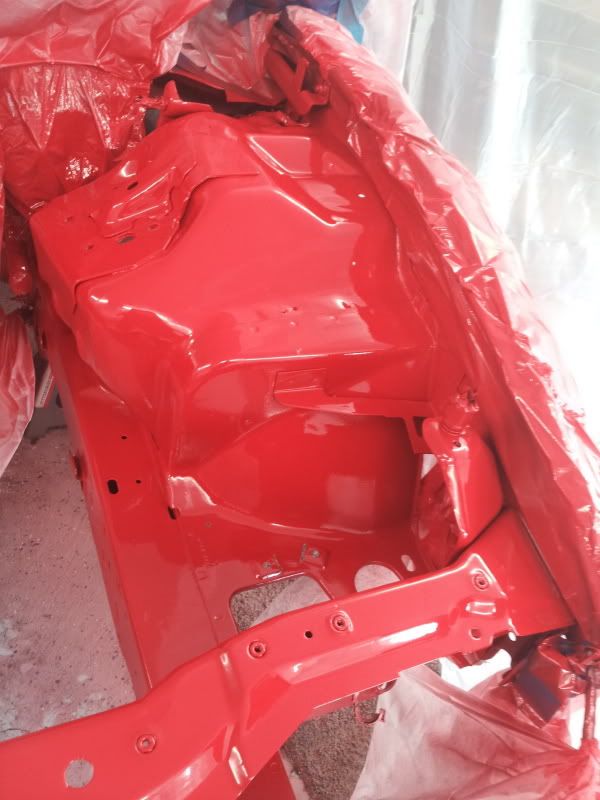
now.i feel like im making some progress. i need to route the harness under the fenders and re-lume the engine harness and im.going to try to get the motor back in the car in the couple weeks! stay tuned!
Old 06-23-2013, 07:35 PM
  #55  
TECH Senior Member
iTrader: (8)
 
Blackpanther99's Avatar
 
Join Date: Sep 2012
Location: Baytown, TX
Posts: 6,963
Received 4 Likes on 4 Posts

Default

Came out clean!
Old 06-23-2013, 07:42 PM
  #56  
TECH Addict
Thread Starter
iTrader: (11)
 
allout06's Avatar
 
Join Date: Nov 2010
Location: Kokomo, In
Posts: 2,107
Likes: 0
Received 1 Like on 1 Post
Default

thanks! it looks even better in person. it looks wet!
Old 06-23-2013, 07:45 PM
  #57  
TECH Addict
iTrader: (28)
 
Cam72aro's Avatar
 
Join Date: Feb 2006
Location: Sugar Land, Tx
Posts: 2,137
Likes: 0
Received 1 Like on 1 Post

Default

Paint came out really nice. Prep sucks, but I truly enjoy spraying paint. It's fun to me.
Old 06-23-2013, 07:51 PM
  #58  
TECH Addict
Thread Starter
iTrader: (11)
 
allout06's Avatar
 
Join Date: Nov 2010
Location: Kokomo, In
Posts: 2,107
Likes: 0
Received 1 Like on 1 Post
Default

Originally Posted by Cam72aro
Paint came out really nice. Prep sucks, but I truly enjoy spraying paint. It's fun to me.
i agree. the cleaning part is for the birds.but spraying the paint was def fun!
Old 06-23-2013, 08:02 PM
  #59  
TECH Addict
iTrader: (28)
 
Cam72aro's Avatar
 
Join Date: Feb 2006
Location: Sugar Land, Tx
Posts: 2,137
Likes: 0
Received 1 Like on 1 Post

Default

Cleanup sucks, sanding sucks. Painting is fun. Is it base clear, or single stage enamel?
Old 06-23-2013, 08:17 PM
  #60  
TECH Addict
Thread Starter
iTrader: (11)
 
allout06's Avatar
 
Join Date: Nov 2010
Location: Kokomo, In
Posts: 2,107
Likes: 0
Received 1 Like on 1 Post
Default

it was base clear. 2:1 paint to reducer and 4:1 clear to hardener. i used a pint of paint and about a pint or little more of clear.


Quick Reply: PROJECT RED ROCKET TUNING HAS STARTED! AES390, Twin turbo, 4l80e. PG21, Post 408! :)


All times are GMT -5. The time now is 09:58 PM.