The 'LOLVO'
 03-11-2014, 06:07 PM
#61
Launching!
Thread Starter

 03-12-2014, 06:14 PM
#63
Launching!
Thread Starter
Pretty expensive all things considered, I think I'll be able to get this muscle-car pan to fit without spending any more money. I did also consider the MAST Motorsport pan which has pretty much the same measurements as the Autokraft but is a cast item. Looks good too, but again, expensive.
03-12-2014, 06:23 PM
#64
9 Second Club

The difference I found with the Autokraft compared to others....most others needed more spent to have an oil filter.
The Autokraft is complete, plus being steel...easy for anyone to cut and weld if needed.
Plus it is fairly well made inside, decent trapdoors around the oil pickup etc.
Welding outside looks a bit shitty, but it works.
The Autokraft is complete, plus being steel...easy for anyone to cut and weld if needed.
Plus it is fairly well made inside, decent trapdoors around the oil pickup etc.
Welding outside looks a bit shitty, but it works.
11-07-2014, 06:15 PM
#65
Launching!
Thread Starter
Progress...
Finished building my new shed. Home for the LOLVO.

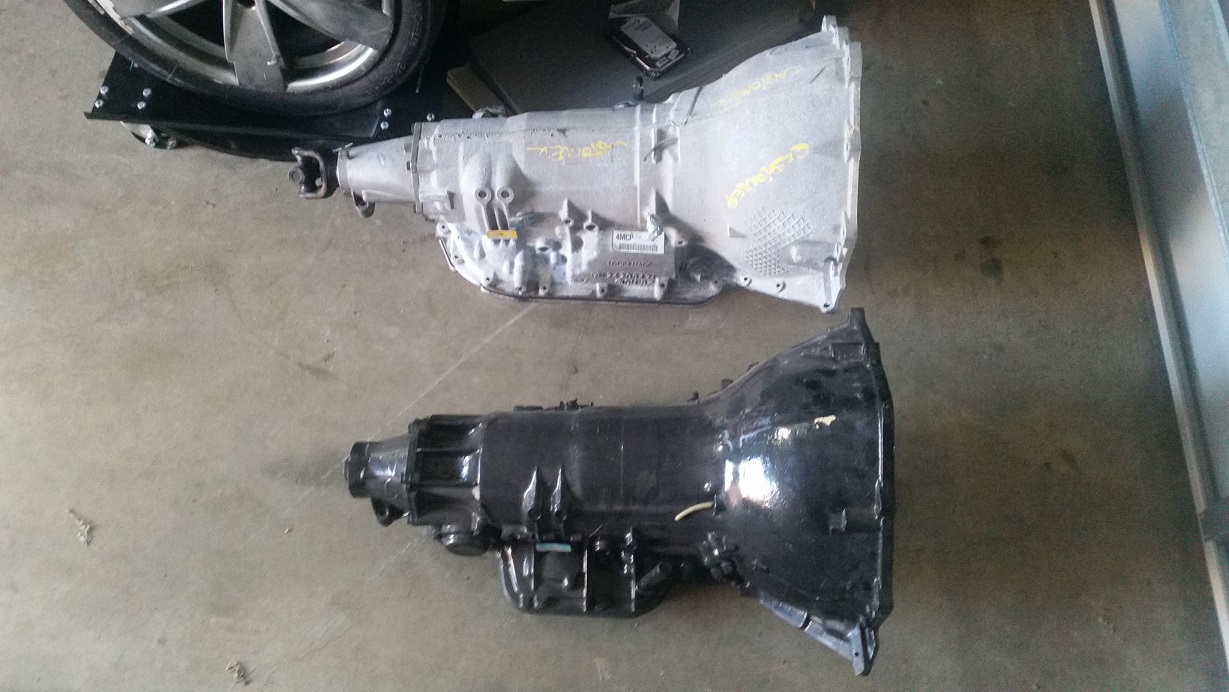
I sold the TH400 gearbox I had intended to (and already had mounts made for) using in the Volvo and purchased a 4L80e instead. These are pretty hard to come by in Australia.
Needs a small adjustment on the passenger side. Bit too close to the rail.
Still need to get the wastegates welded on, but have marked some possible locations.
Finished building my new shed. Home for the LOLVO.
I sold the TH400 gearbox I had intended to (and already had mounts made for) using in the Volvo and purchased a 4L80e instead. These are pretty hard to come by in Australia.
Needs a small adjustment on the passenger side. Bit too close to the rail.
Still need to get the wastegates welded on, but have marked some possible locations.
11-13-2014, 03:54 AM
#66
Launching!
Thread Starter
So, a little more progress.
Also bought this...
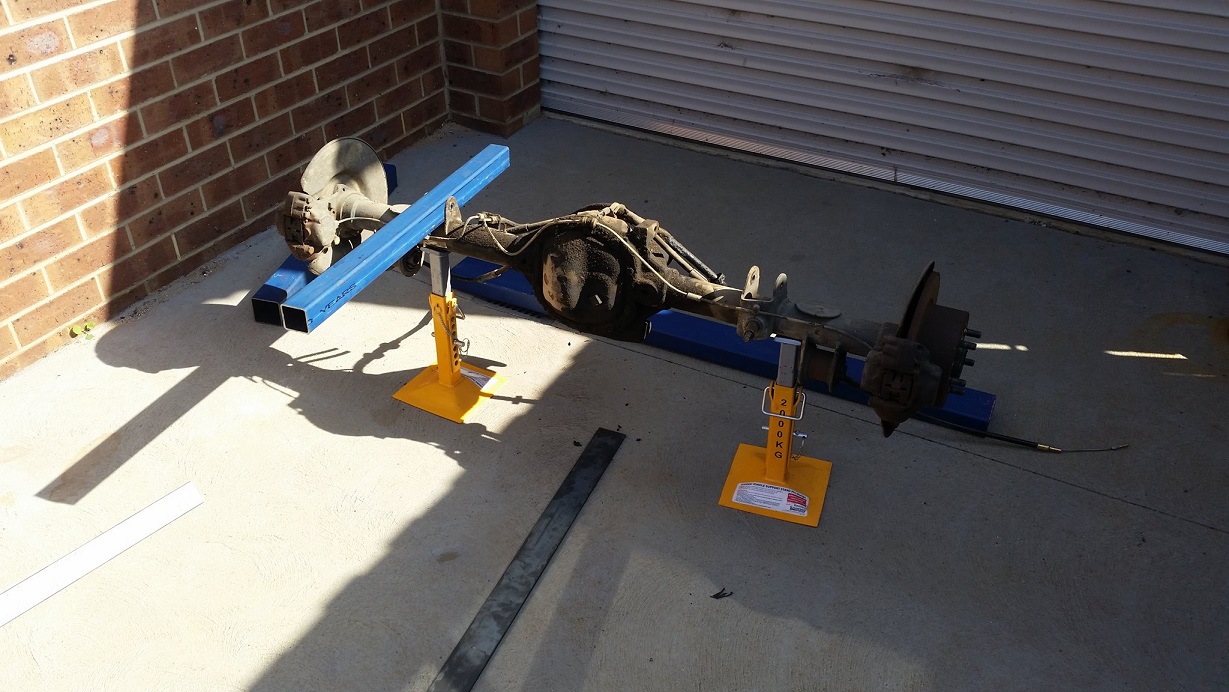
Removing 8.8" diff and some other bits and pieces for franken-lolvo-stein transplant. The rest will go in the bin.
Also bought this...
Removing 8.8" diff and some other bits and pieces for franken-lolvo-stein transplant. The rest will go in the bin.
01-03-2015, 04:47 PM
#67
Teching In

Join Date: Aug 2013
Location: Illinois
Posts: 6
Likes: 0
Received 0 Likes
on
0 Posts
Updates??? I'm wanting to put my turbo in nearly the same spot of my 240 and was curious about exhaust clearance between the hood, engine, and shock tower. It looks like it would be tight and possibly melt the coils. Nice build! I'm looking forward to seeing the outcome of this bad girl.
01-04-2015, 04:18 AM
#68
Launching!
Thread Starter
Updates??? I'm wanting to put my turbo in nearly the same spot of my 240 and was curious about exhaust clearance between the hood, engine, and shock tower. It looks like it would be tight and possibly melt the coils. Nice build! I'm looking forward to seeing the outcome of this bad girl.

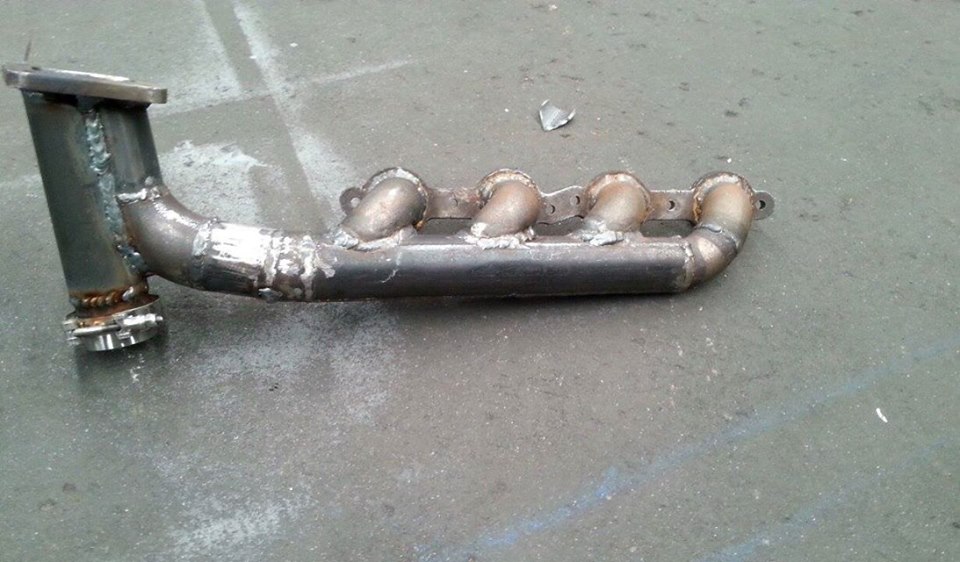
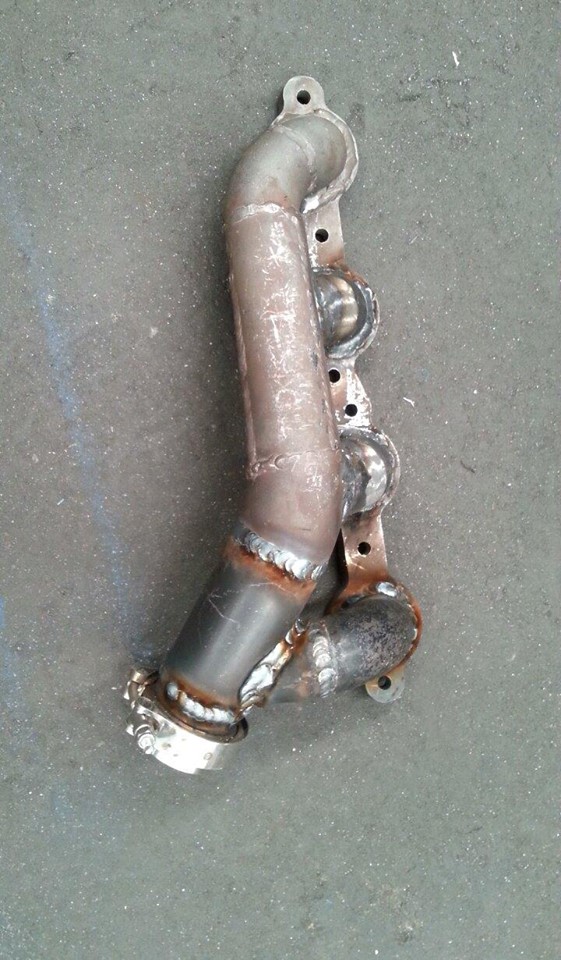
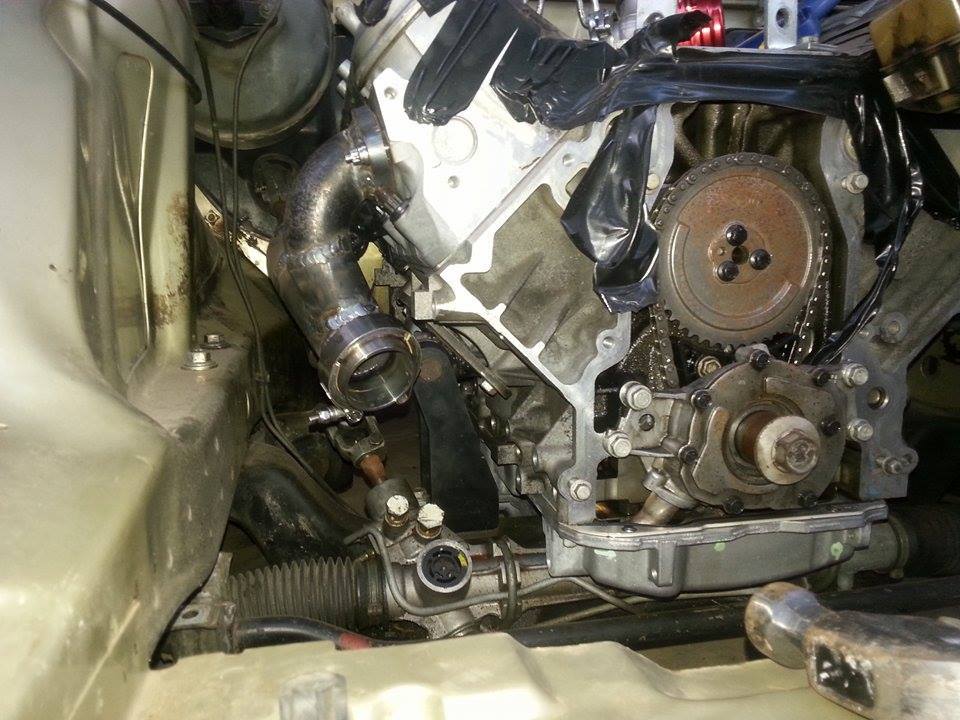
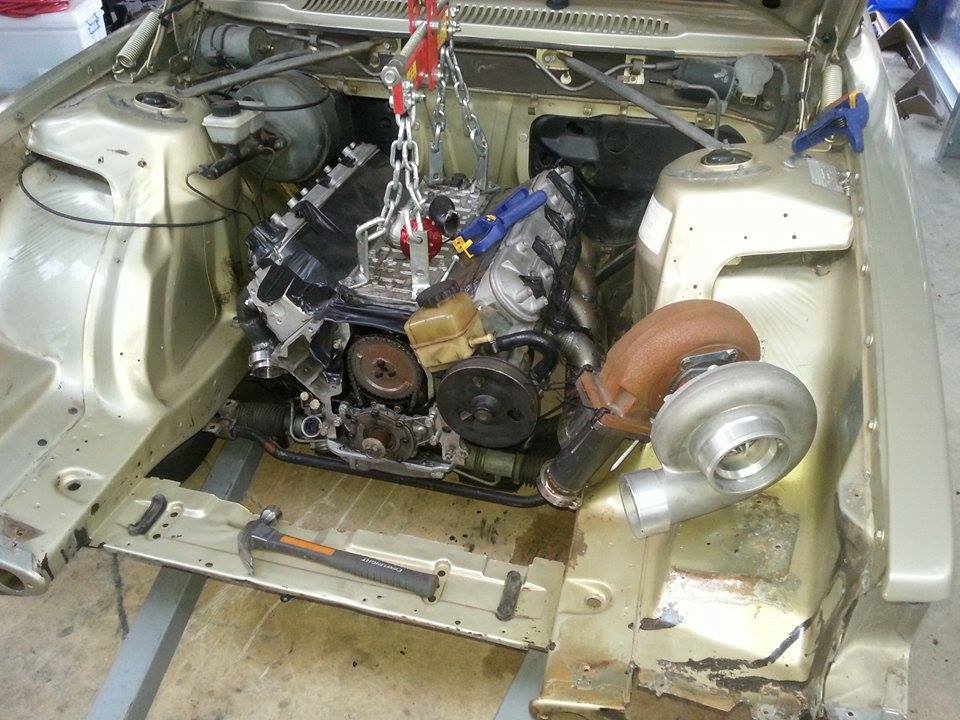
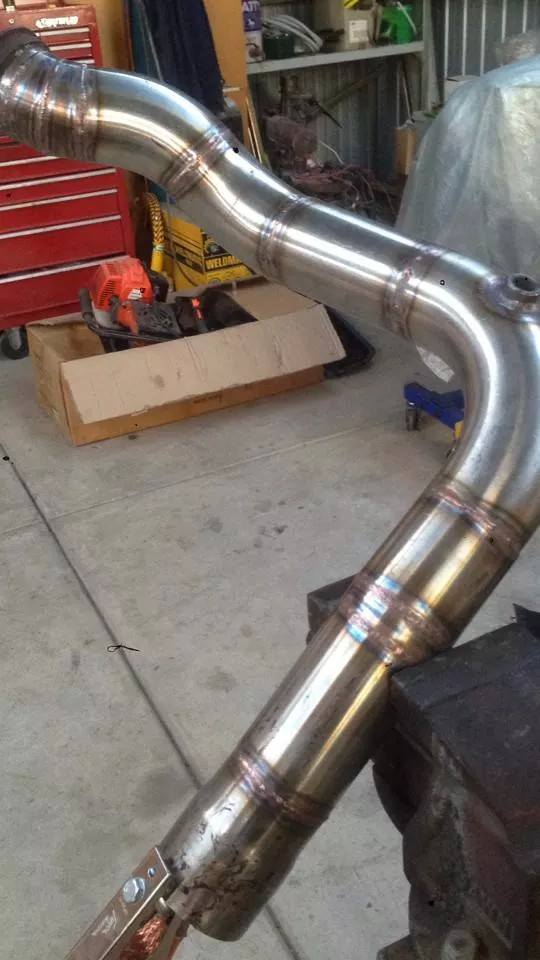
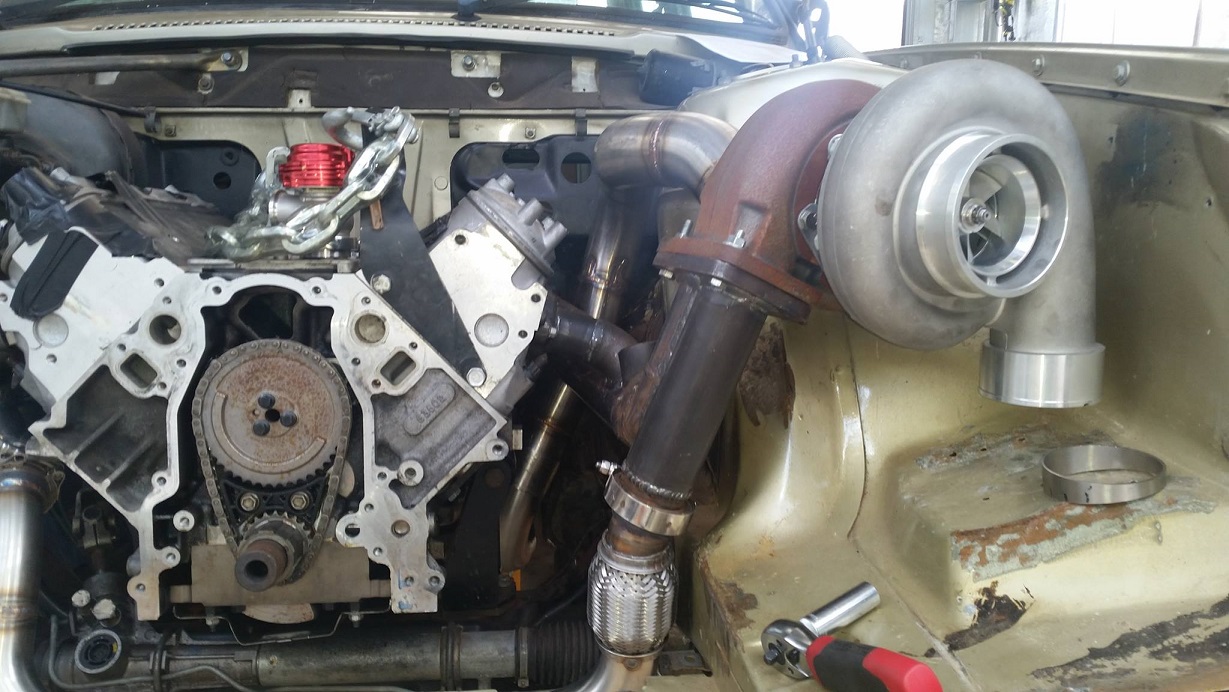
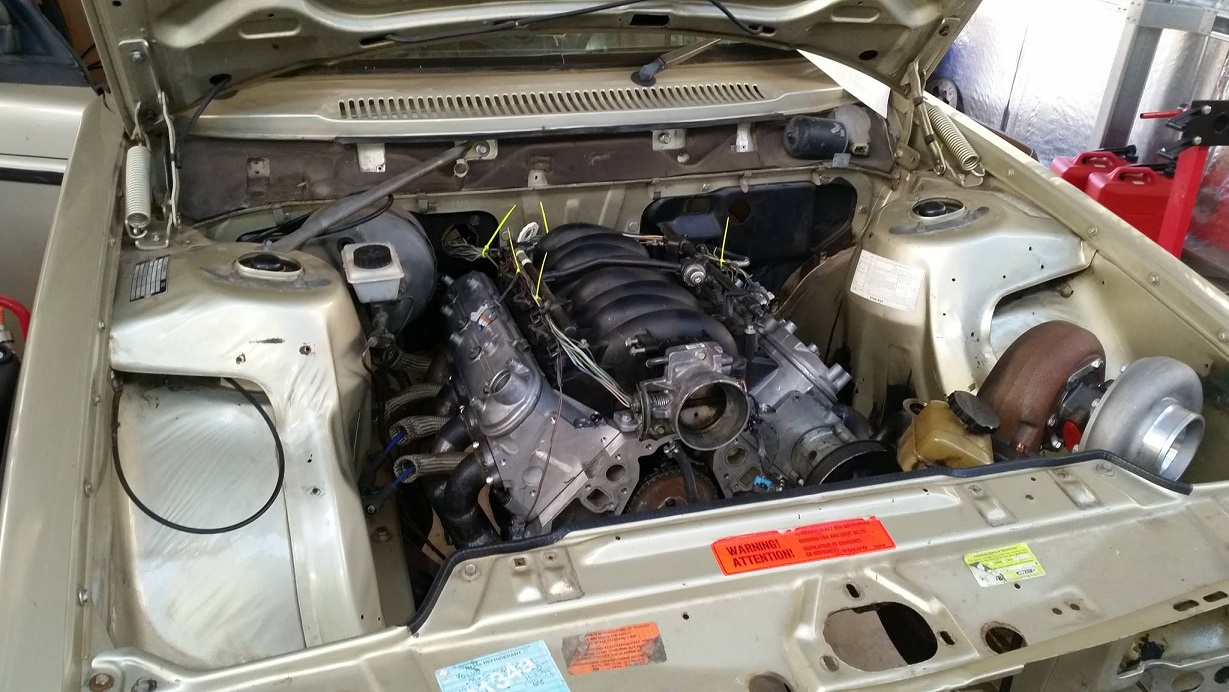
Exhaust clearance, there is heaps! Pretty easy to snake the dump (3" here) around the shock tower and down the rear of the bay. Pretty good clearance everywhere and I haven't even cut the ears off the 4L80e.
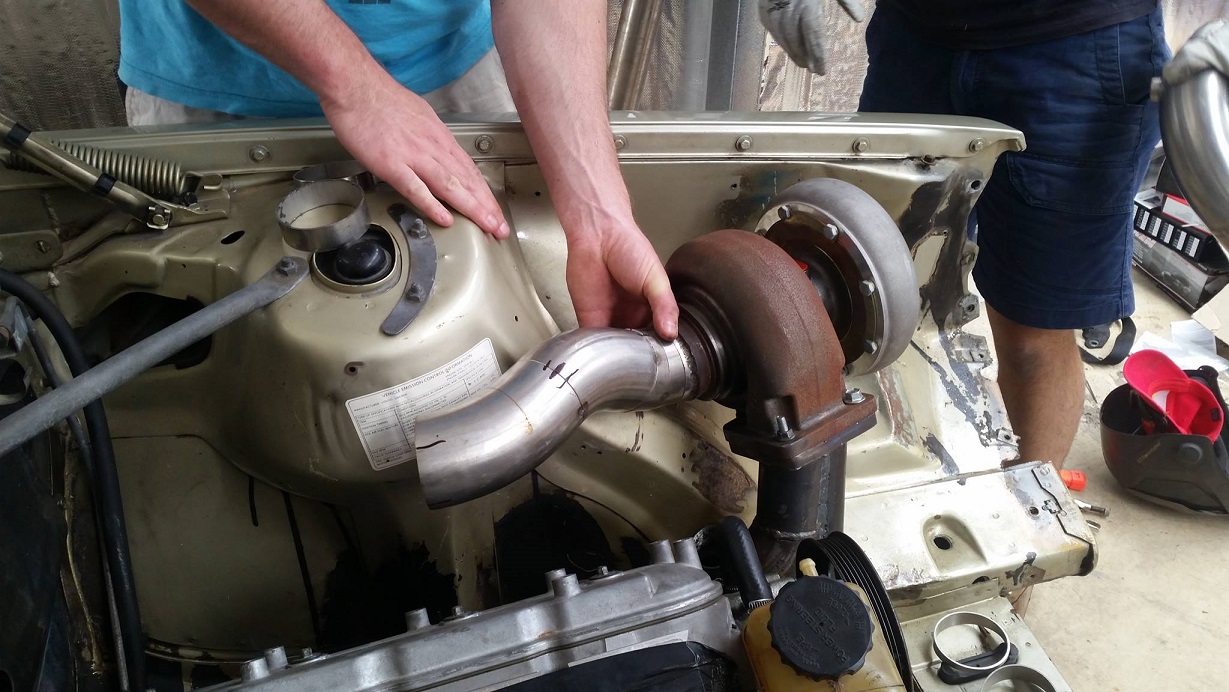
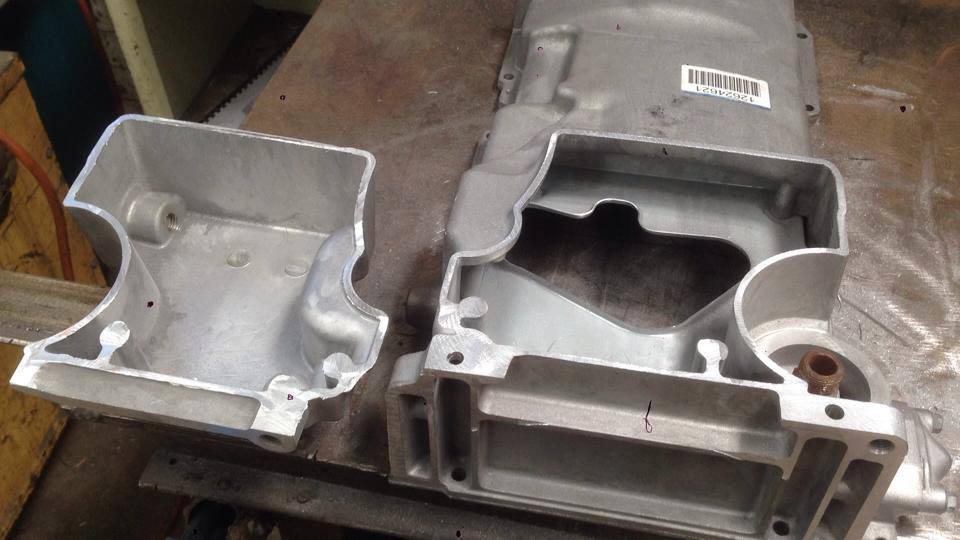
Also started working shortening the pan a little bit.
I liked this photo too.
 01-11-2015, 01:46 PM
#70
Launching!
Thread Starter
More progress.
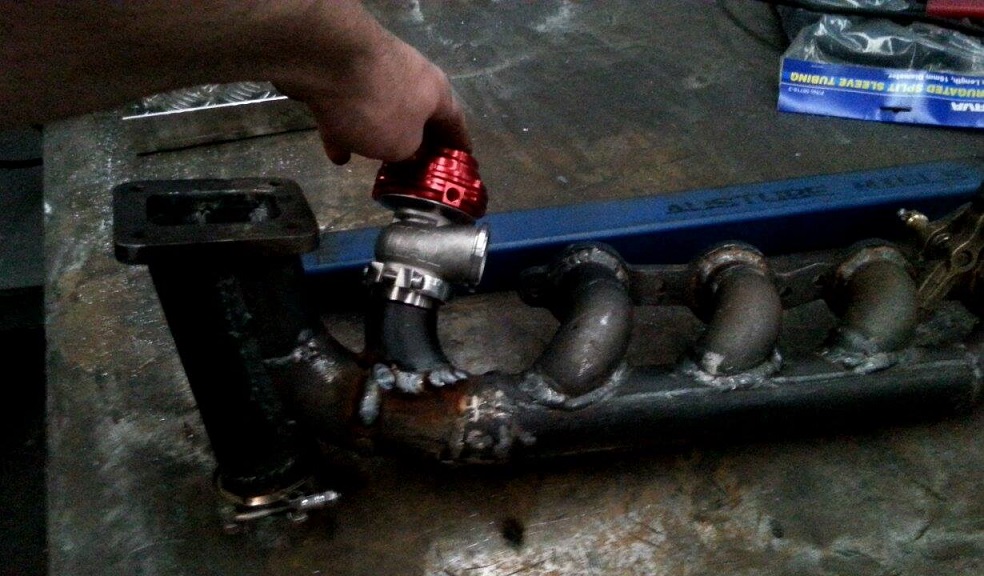
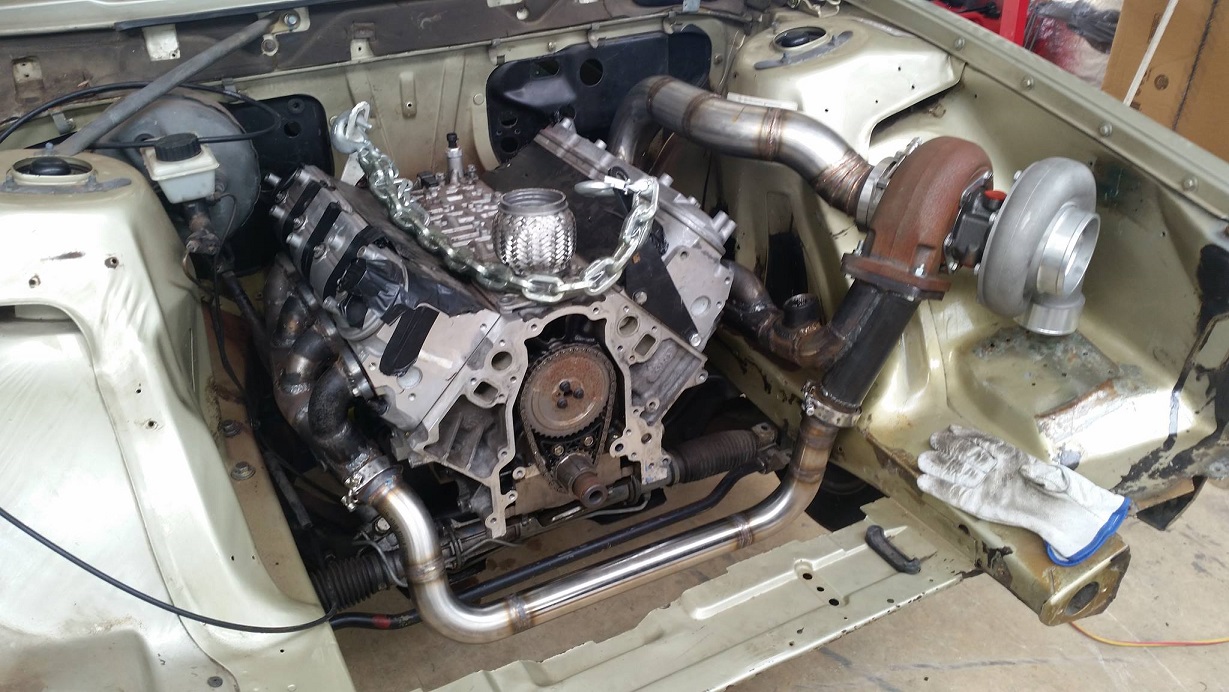
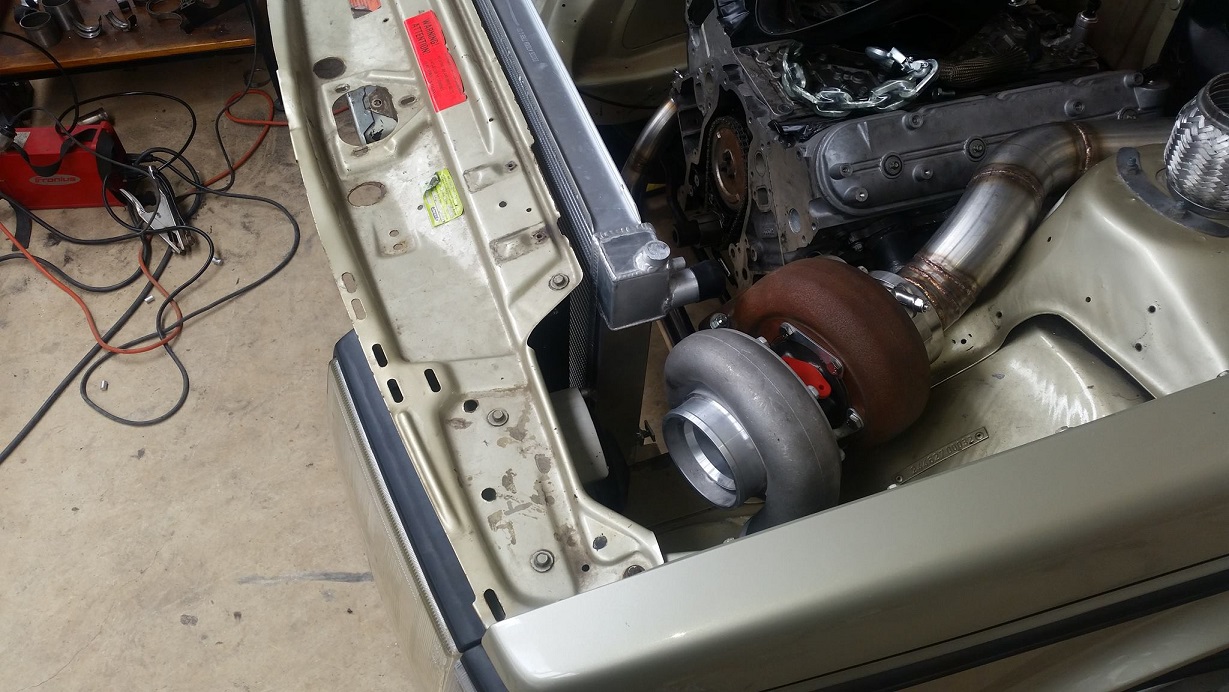
Hotside pretty much done, just need to add some flex and wastegates.
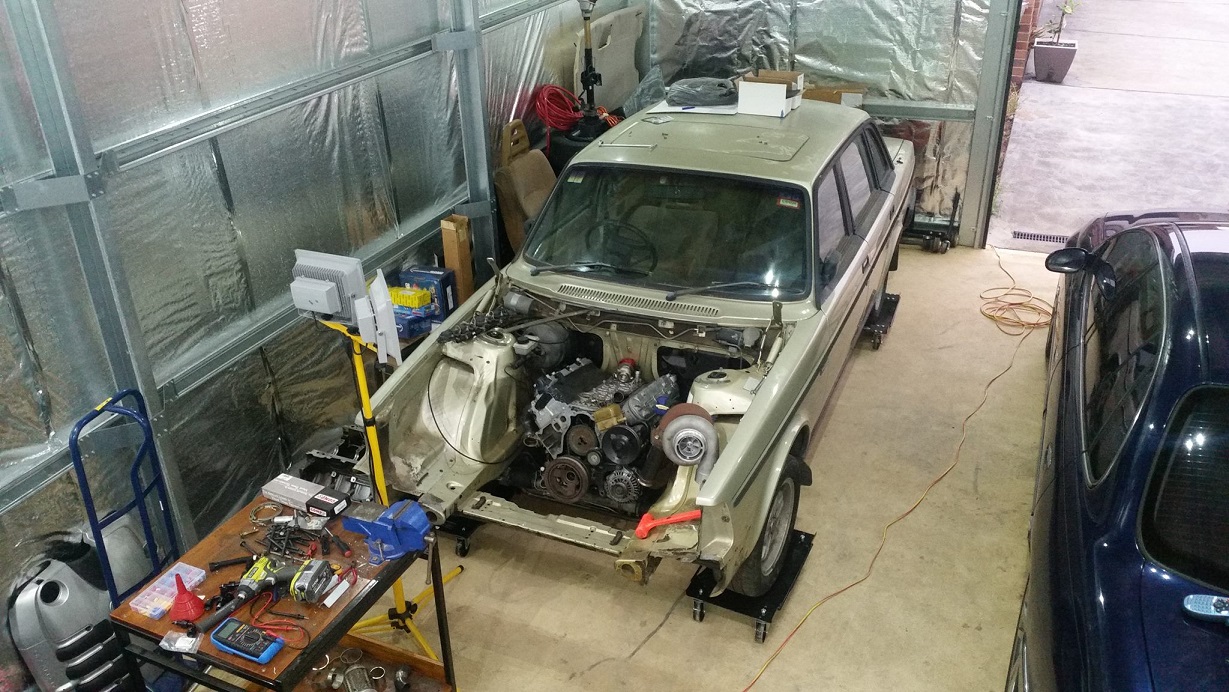
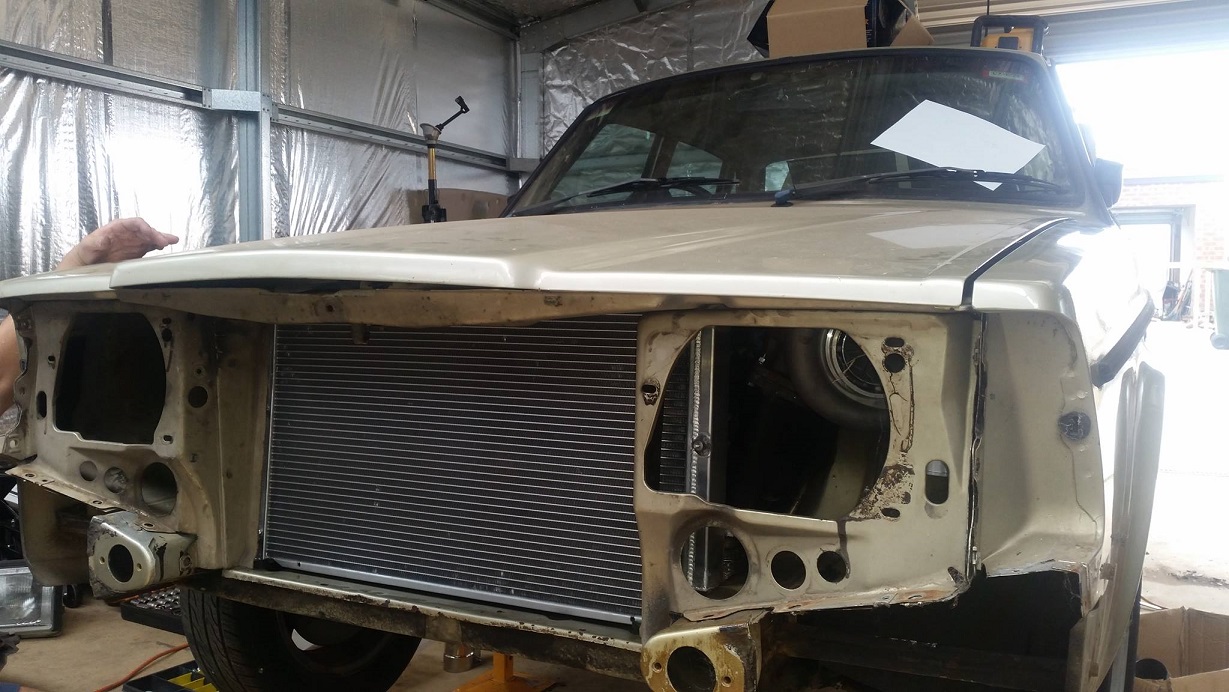
Radiator and headlight fits.
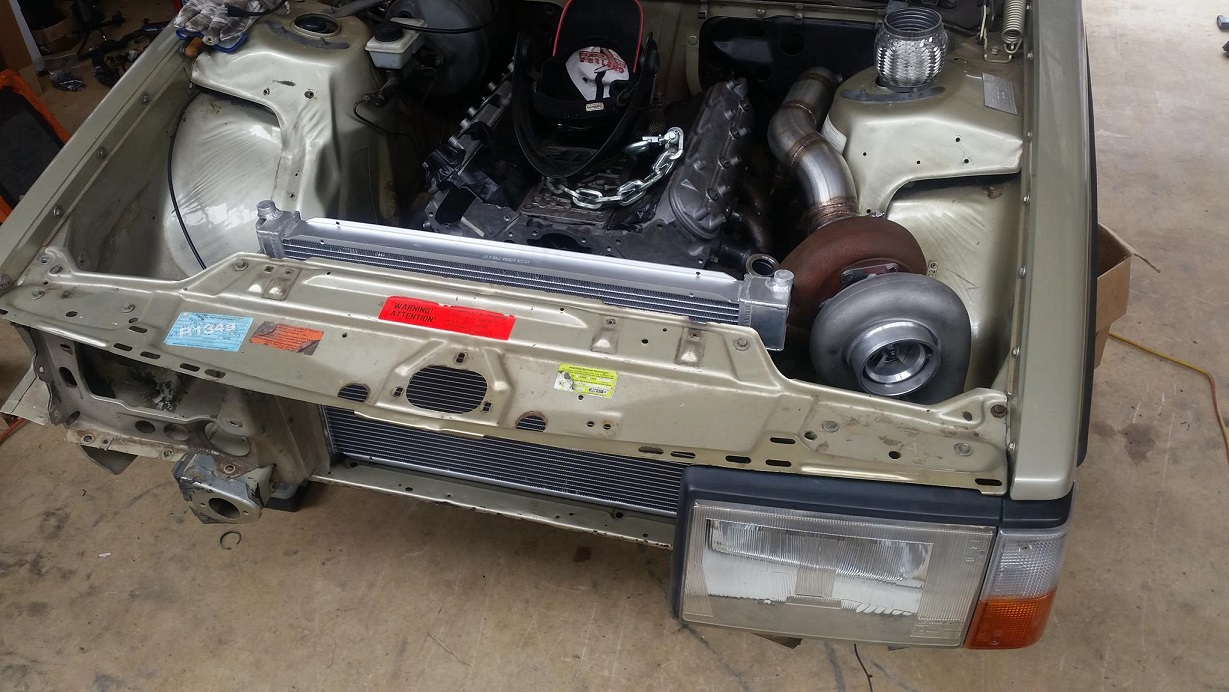
And the bonnet closes with about 15mm of clearance from the radiator. Perfect.


Hotside pretty much done, just need to add some flex and wastegates.
Radiator and headlight fits.
And the bonnet closes with about 15mm of clearance from the radiator. Perfect.
 01-12-2015, 08:41 PM
#72

Great build but may i suggest changing the wastegate placement or add another in the opposite side. I can almost guarantee that you will have some sort of issue with that placement.
01-12-2015, 10:02 PM
#74
Launching!
Thread Starter

Not me, I wouldn't know how to weld anything. I do have a friend that knows what he's doing though
 01-13-2015, 11:56 PM
#76
Launching!
Thread Starter
I don't think the cam sensor itself matters, just the wheel it is referencing. I'm using one of the 2x wheels from an early LS2 (Australia), and a 24x reluctor wheel with the black sensor to suit LS1 computer.
01-22-2015, 10:32 PM
#79
Launching!
Thread Starter
 02-14-2015, 05:59 PM
#80
Launching!
Thread Starter
Little bit of progress. Made a start on the wiring.
Got the diff out of the Volvo and started work making a jig.
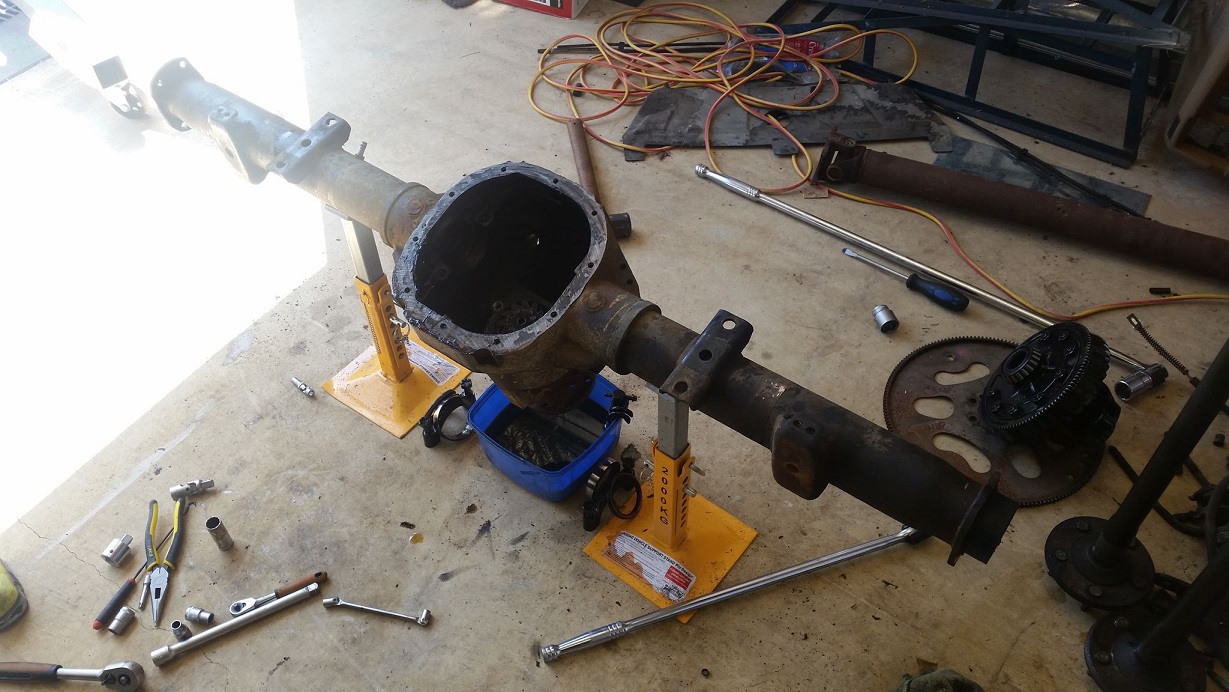
Also got the 8.8 stripped down.
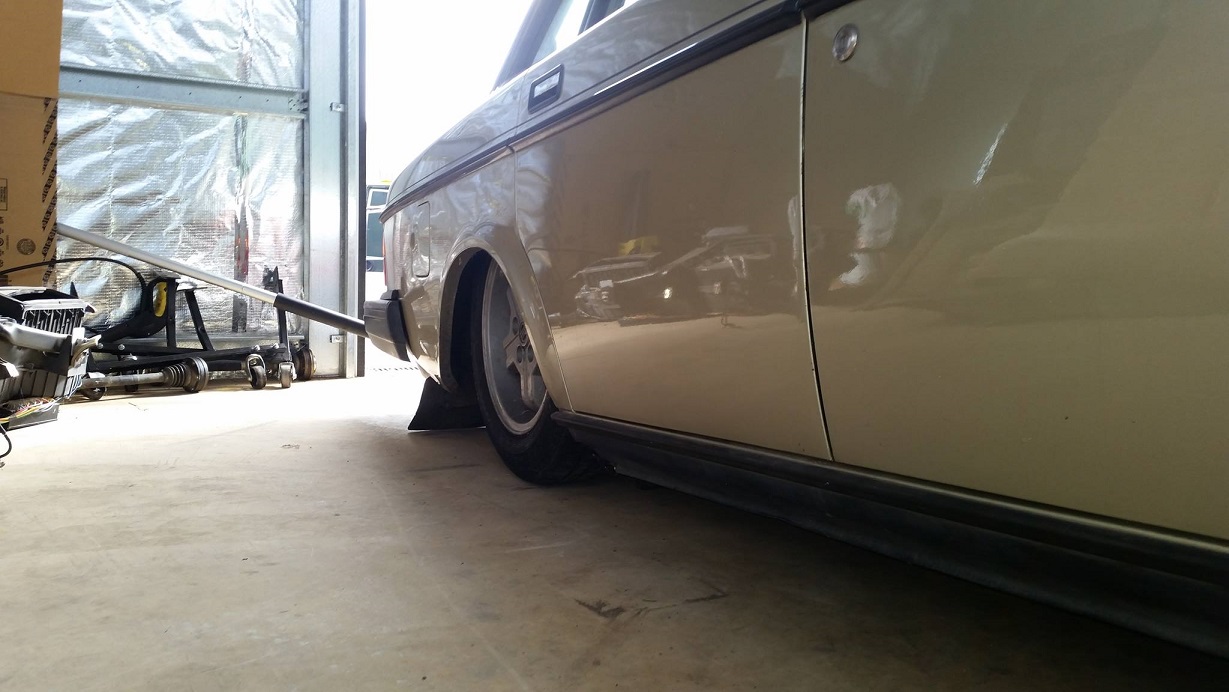
Ran out of stands so just dropped the Volvo down on the fuel tank. She'll be right. Looks good at this height.
Got the diff out of the Volvo and started work making a jig.
Also got the 8.8 stripped down.
Ran out of stands so just dropped the Volvo down on the fuel tank. She'll be right. Looks good at this height.