
My 98 Arctic White T/A Huronspeed No AC Build
 06-30-2013, 04:28 AM
#1
Teching In
Thread Starter
iTrader: (3)

Join Date: Jan 2009
Posts: 47
Likes: 0
Received 0 Likes
on
0 Posts

So I bought this car in August of 2012 from a member on here since I wanted to get back into drag racing. The car came with the following setup.
"Performabuilt level 2 trans with 9.5" 3500 stall
Moser 9" with 3.89 gears
PRC stage 2.5 heads with comp custom grind cam
Longtubes/ory/magnaflow catback
Slp LS6 intake/Fast toys lid/42lb injectors/racetronix pump
Lots of suspension stuff/ sjm abs delete and line lock
TTM wheels 17x9f/17x10.5r
Car has all supporting mods in motor....arp rod bolts installed/timing chain/oil pump etc etc"
Direct copy from the for sale post here:
https://ls1tech.com/forums/vehicle-c...l#post16641024
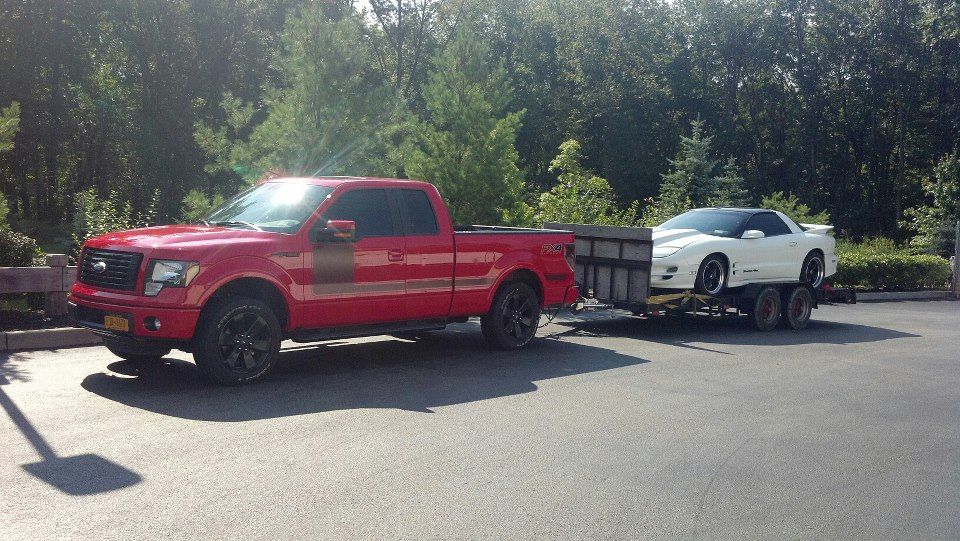
As I picked it up in NY:
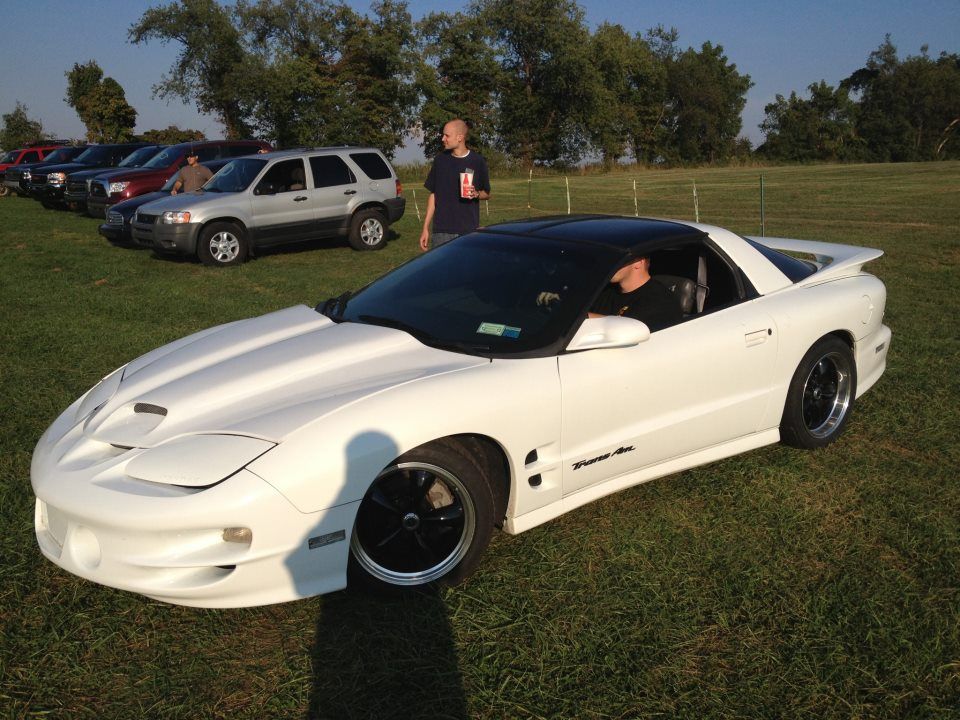
As I pulled it off the trailer from NY at the local drag strip:
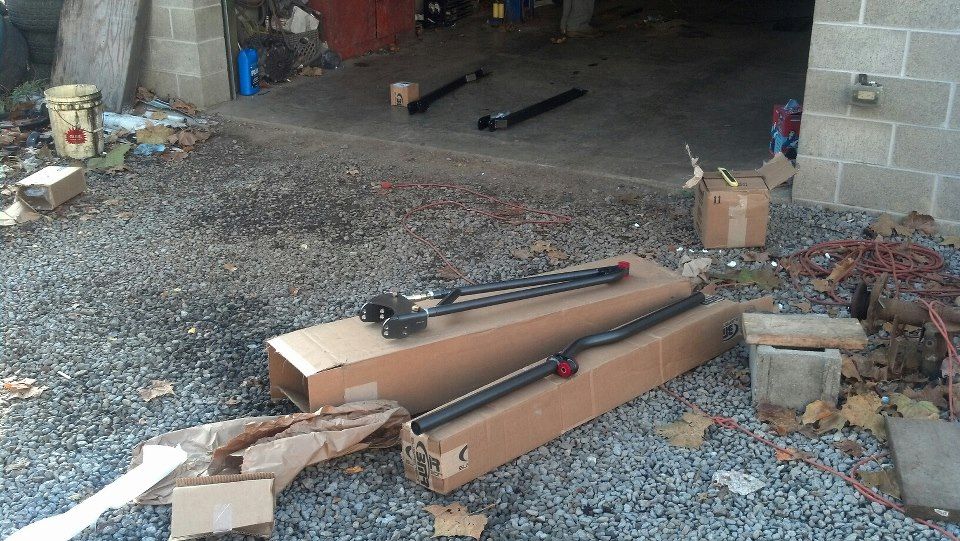
Right before we went to MIR we installed a BMR track pack and subframe connectors and control arm relocation brackets:
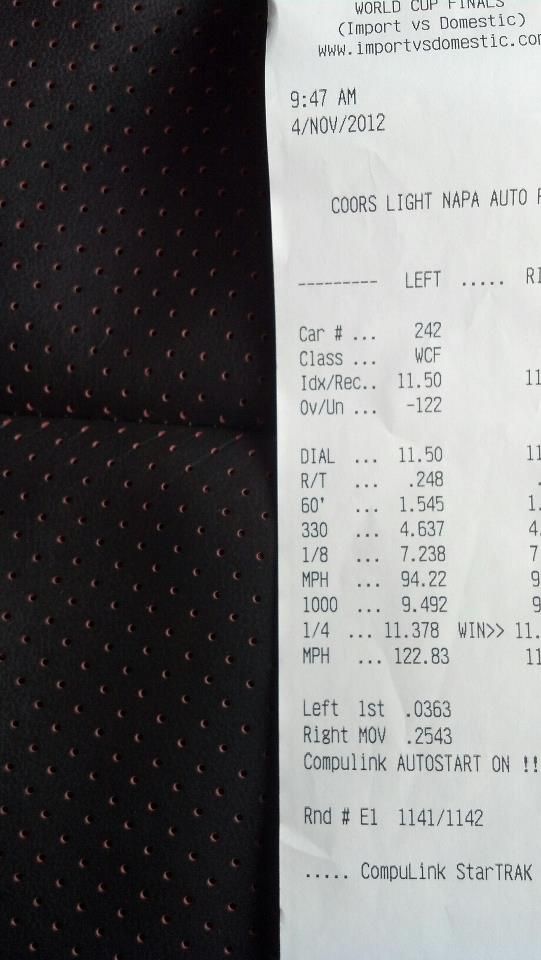
Best run NA with interior removed for cage install (lifted on this pass as it was a index round and still went to a personal best):
The original plan for this year was to just spray the car as is. But at World Cup Finals I got a bug up my *** to turbocharge it after seeing the Huron Speed truck manifold kit group buy.
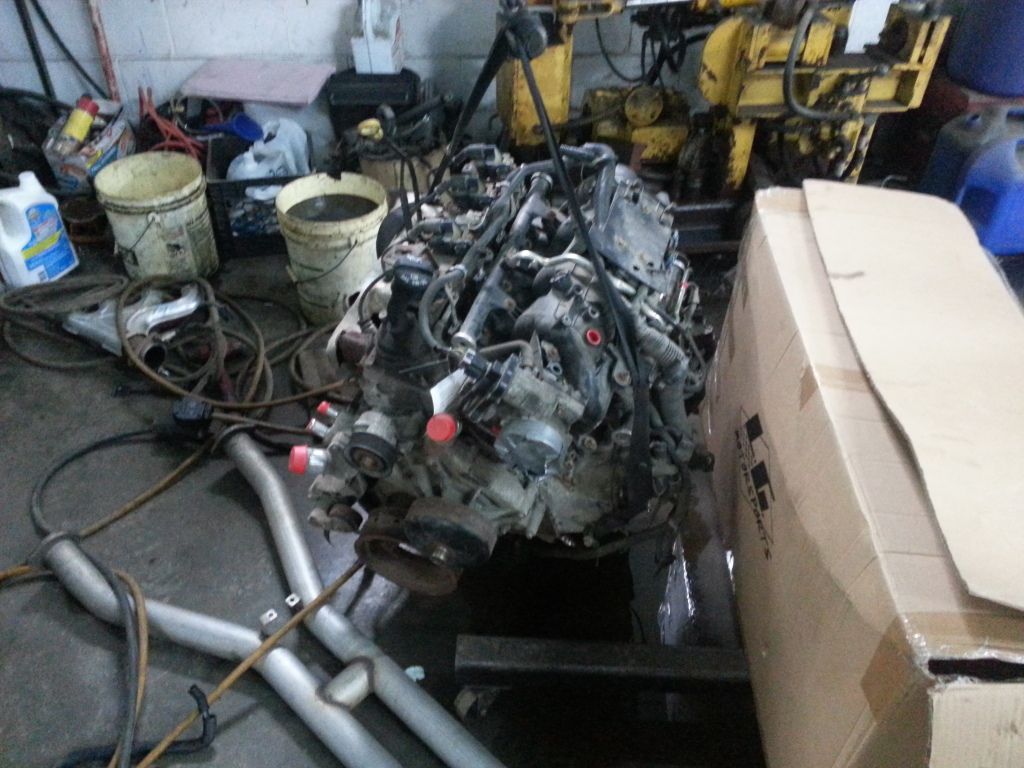
So I started ordering parts and was just planning on turboing the LS1 that was in it. Then right as I was getting ready to install everything a $795 2005 LQ4 shows up at a local junkyard...change in plans.
It is now installed in the car and running but the parts list is as below:
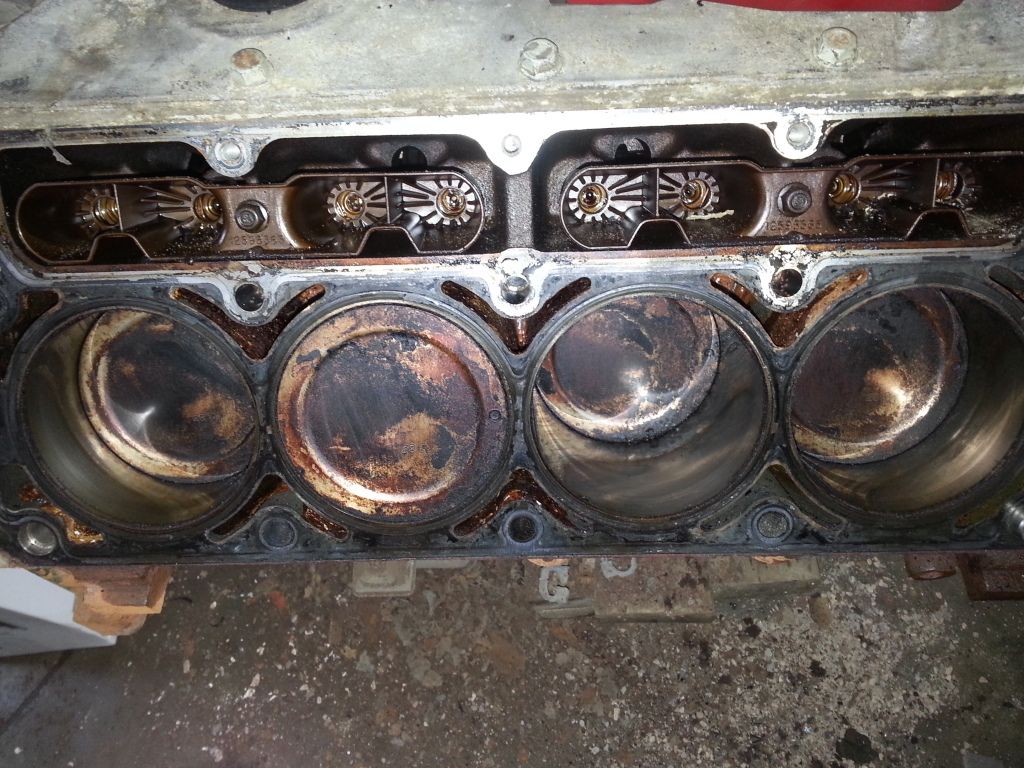
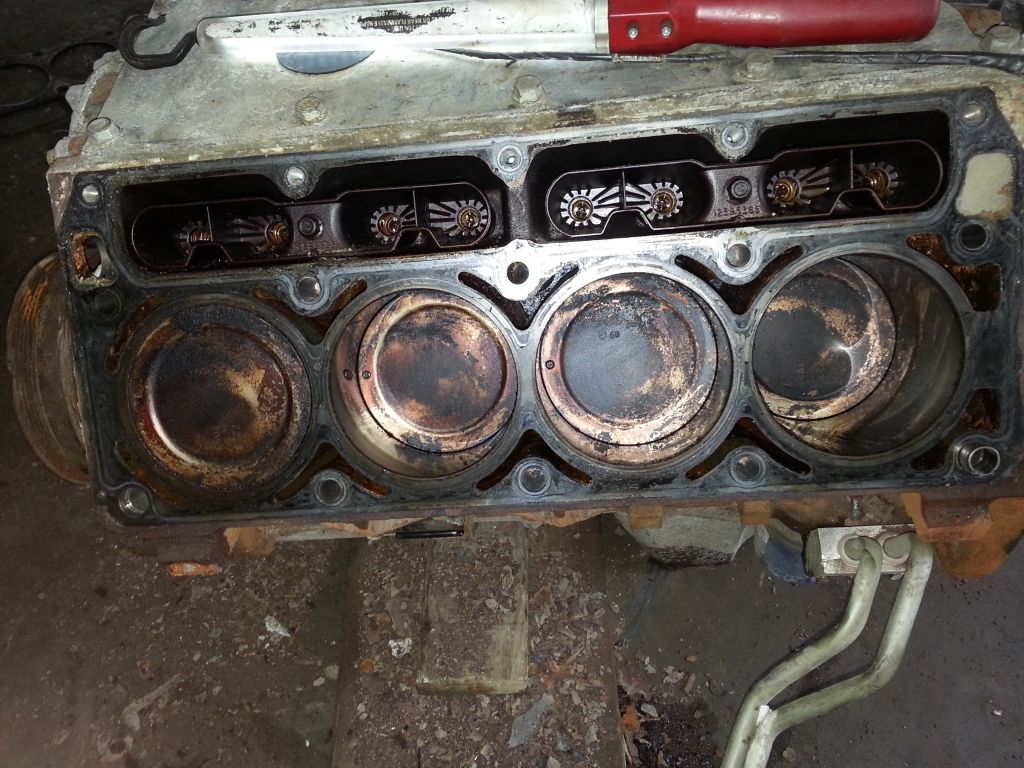
2005 LQ4 with 156k miles
Stock 317s with BTR Valve springs and Ti retainers and 7.4" pushrods
Tick Performance Turbo Stage 2 cam for ls1/6 engines
LS6 Intake manifold
GMPP High volume oil pump
LS9 gaskets
Procomp head studs
B&M Flexplate
Summit Pulley
140amp truck alternator
80lb ls3 style injectors with adapters from racetronix
440lph walbro installed in tank
Aeromotive 1:1 FPR tied into stock rails test port with evap as return
Huronspeed truck manifold kit with Turbonetics TC76 and chinese 50mm BOV and 43mm Wastegate
eBoost 2
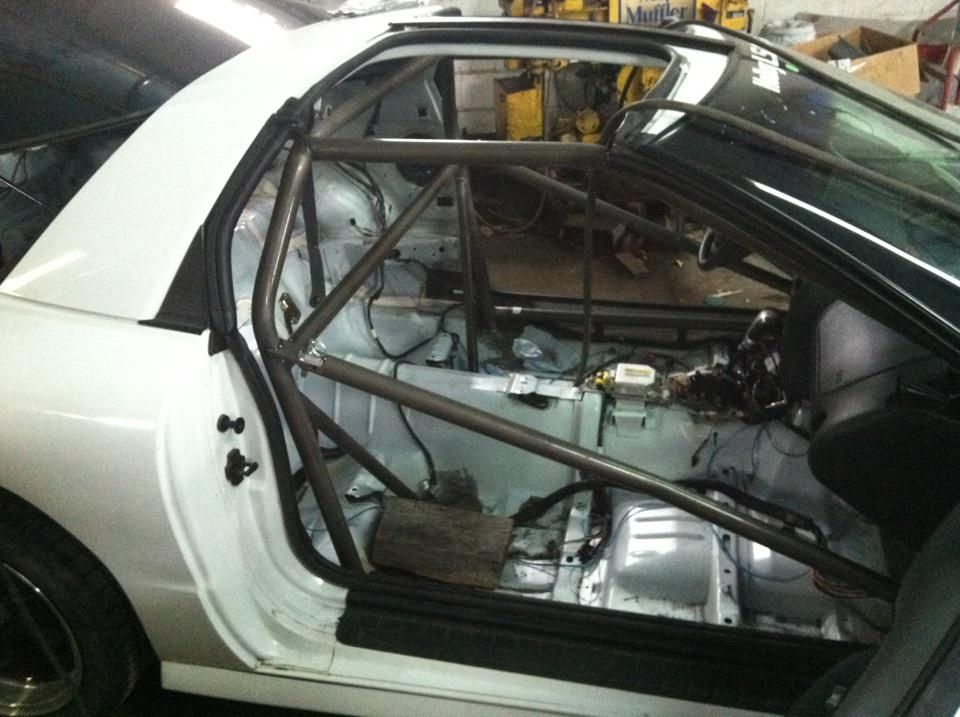
Wolfe 10pt Chromoly Cage with dual swingouts
Kirkey 18" seats with Racecraft brackets on both sides (because with stock seats I didnt fit in the car with the cage)
15" Weld rts in black with 275/60/15 MT and 15" MT radial front runners
Back to stock springs on the suspension
BMR AC delete plate modified to keep heat
MRK Motorsport 98 to 02 pcm swap kit
Twin Derale Pusher Fans
I'm probably missing some small things but you get the gist of things.
Parts I kept in the car:
Performabuilt stage 2 4l60e
9.5" 3500 stall
Moser 9" with 3.89
AGX shocks up front, Belltech in the rear
Trans temp gauge
And now...on with the pictures...and videos
Video of the old engine before we pulled it running open header:
http://s277.photobucket.com/user/djt...11018.mp4.html
And for those that want to bypass looking at all the pictures and reading here is the first start video open downpipe:
http://s277.photobucket.com/user/djt...12634.mp4.html
"Performabuilt level 2 trans with 9.5" 3500 stall
Moser 9" with 3.89 gears
PRC stage 2.5 heads with comp custom grind cam
Longtubes/ory/magnaflow catback
Slp LS6 intake/Fast toys lid/42lb injectors/racetronix pump
Lots of suspension stuff/ sjm abs delete and line lock
TTM wheels 17x9f/17x10.5r
Car has all supporting mods in motor....arp rod bolts installed/timing chain/oil pump etc etc"
Direct copy from the for sale post here:
https://ls1tech.com/forums/vehicle-c...l#post16641024
As I picked it up in NY:
As I pulled it off the trailer from NY at the local drag strip:
Right before we went to MIR we installed a BMR track pack and subframe connectors and control arm relocation brackets:
Best run NA with interior removed for cage install (lifted on this pass as it was a index round and still went to a personal best):
The original plan for this year was to just spray the car as is. But at World Cup Finals I got a bug up my *** to turbocharge it after seeing the Huron Speed truck manifold kit group buy.
So I started ordering parts and was just planning on turboing the LS1 that was in it. Then right as I was getting ready to install everything a $795 2005 LQ4 shows up at a local junkyard...change in plans.
It is now installed in the car and running but the parts list is as below:
2005 LQ4 with 156k miles
Stock 317s with BTR Valve springs and Ti retainers and 7.4" pushrods
Tick Performance Turbo Stage 2 cam for ls1/6 engines
LS6 Intake manifold
GMPP High volume oil pump
LS9 gaskets
Procomp head studs
B&M Flexplate
Summit Pulley
140amp truck alternator
80lb ls3 style injectors with adapters from racetronix
440lph walbro installed in tank
Aeromotive 1:1 FPR tied into stock rails test port with evap as return
Huronspeed truck manifold kit with Turbonetics TC76 and chinese 50mm BOV and 43mm Wastegate
eBoost 2
Wolfe 10pt Chromoly Cage with dual swingouts
Kirkey 18" seats with Racecraft brackets on both sides (because with stock seats I didnt fit in the car with the cage)
15" Weld rts in black with 275/60/15 MT and 15" MT radial front runners
Back to stock springs on the suspension
BMR AC delete plate modified to keep heat
MRK Motorsport 98 to 02 pcm swap kit
Twin Derale Pusher Fans
I'm probably missing some small things but you get the gist of things.
Parts I kept in the car:
Performabuilt stage 2 4l60e
9.5" 3500 stall
Moser 9" with 3.89
AGX shocks up front, Belltech in the rear
Trans temp gauge
And now...on with the pictures...and videos
Video of the old engine before we pulled it running open header:
http://s277.photobucket.com/user/djt...11018.mp4.html
And for those that want to bypass looking at all the pictures and reading here is the first start video open downpipe:
http://s277.photobucket.com/user/djt...12634.mp4.html
Last edited by djt81185; 06-30-2013 at 04:38 AM.

 06-30-2013, 04:42 AM
#3
Teching In
Thread Starter
iTrader: (3)
Join Date: Jan 2009
Posts: 47
Likes: 0
Received 0 Likes
on
0 Posts
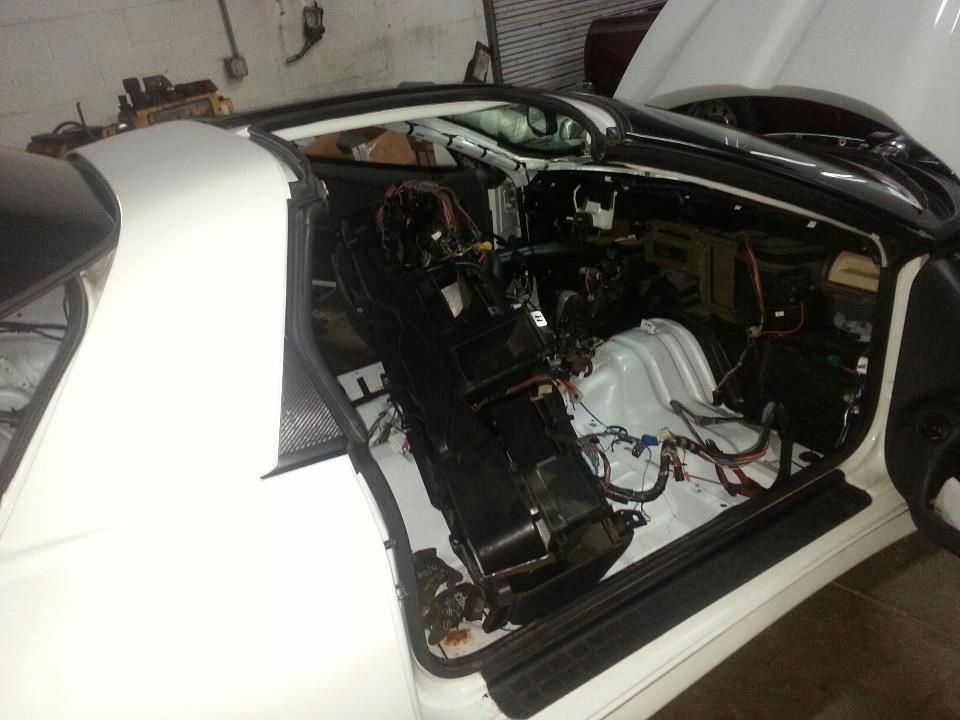
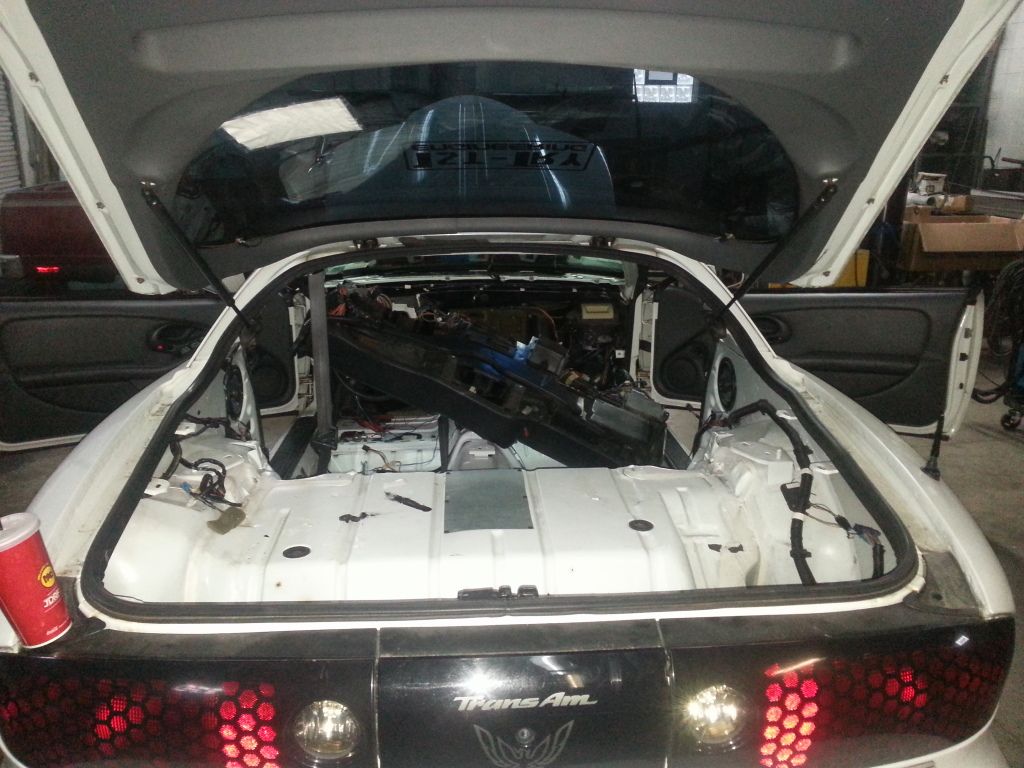
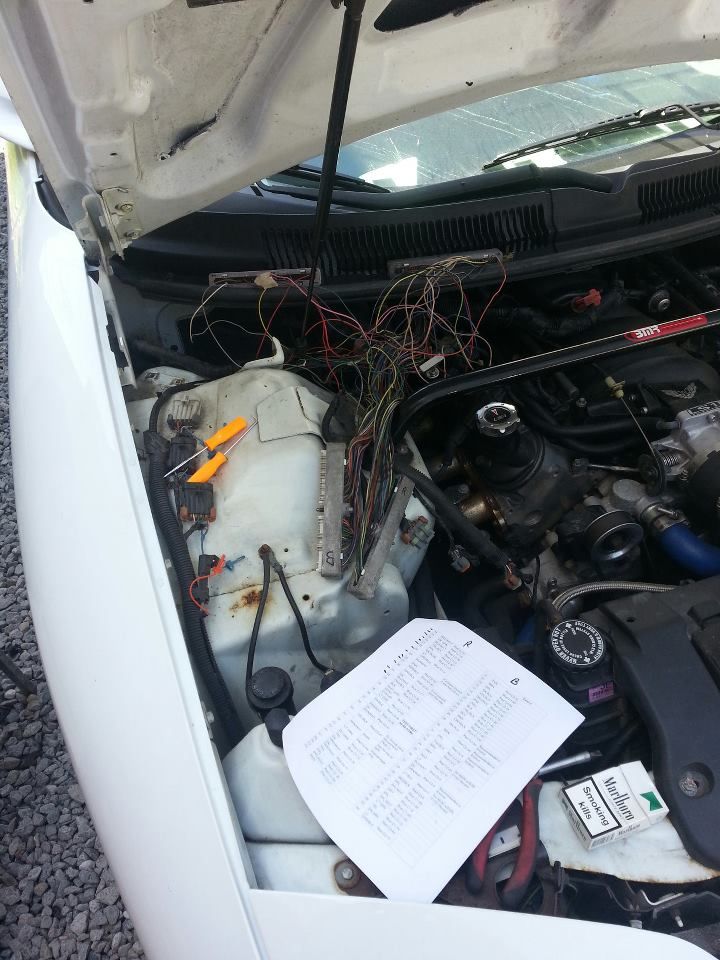
Some pics from the Wiring swap. If you watch the first start video you can see I finally got the rats nest under control...it looks presentable now that I pulled the harness off, rewrapped it and moved a bit of the wiring around. Electrical tape and wire loom are your friends...
Also if any one has any ideas where the 2 black wires on the grounding post on the fender go I could use some help. I know one goes to the battery but I couldnt remember where the other one went and left it off when I put it back together so im probably having issues lol
The Start
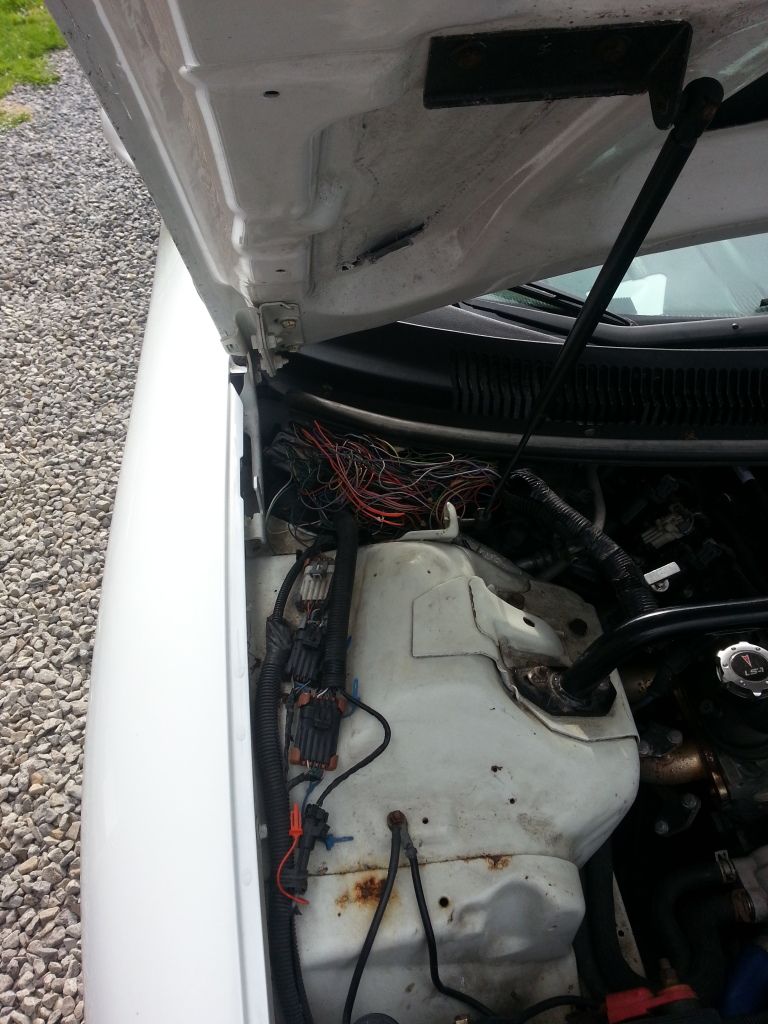
Losing hope in the middle
Completed and ran before making it look nice
Also if any one has any ideas where the 2 black wires on the grounding post on the fender go I could use some help. I know one goes to the battery but I couldnt remember where the other one went and left it off when I put it back together so im probably having issues lol
The Start
Losing hope in the middle
Completed and ran before making it look nice
 06-30-2013, 10:38 AM
#5
Teching In
Thread Starter
iTrader: (3)
Join Date: Jan 2009
Posts: 47
Likes: 0
Received 0 Likes
on
0 Posts
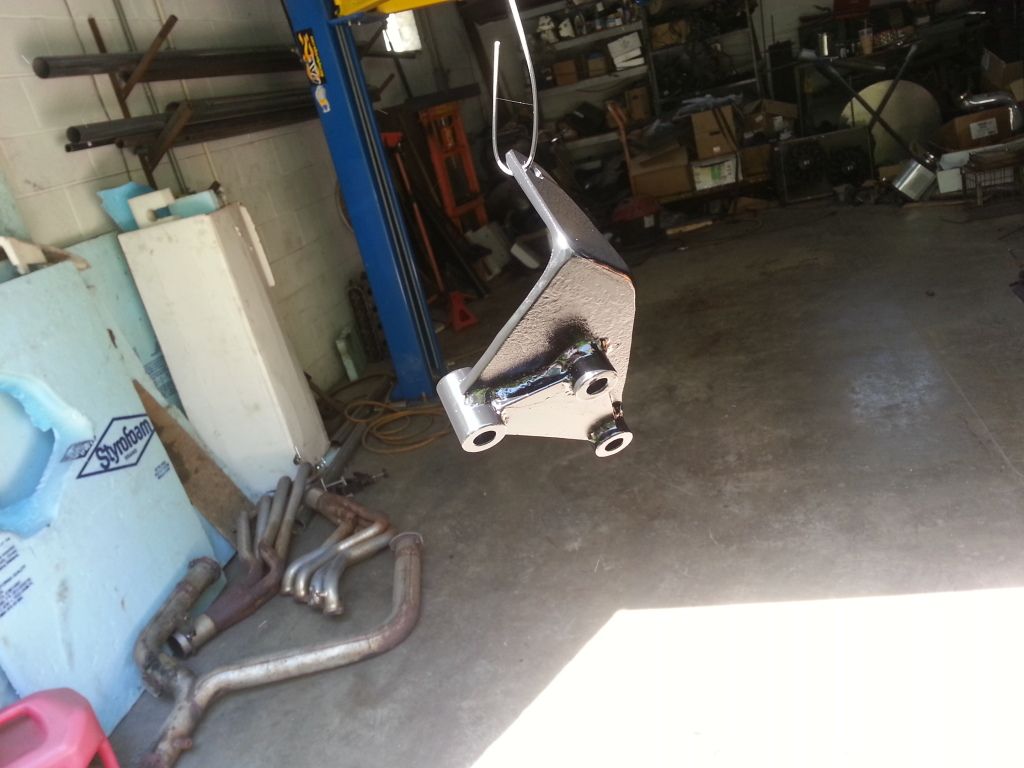
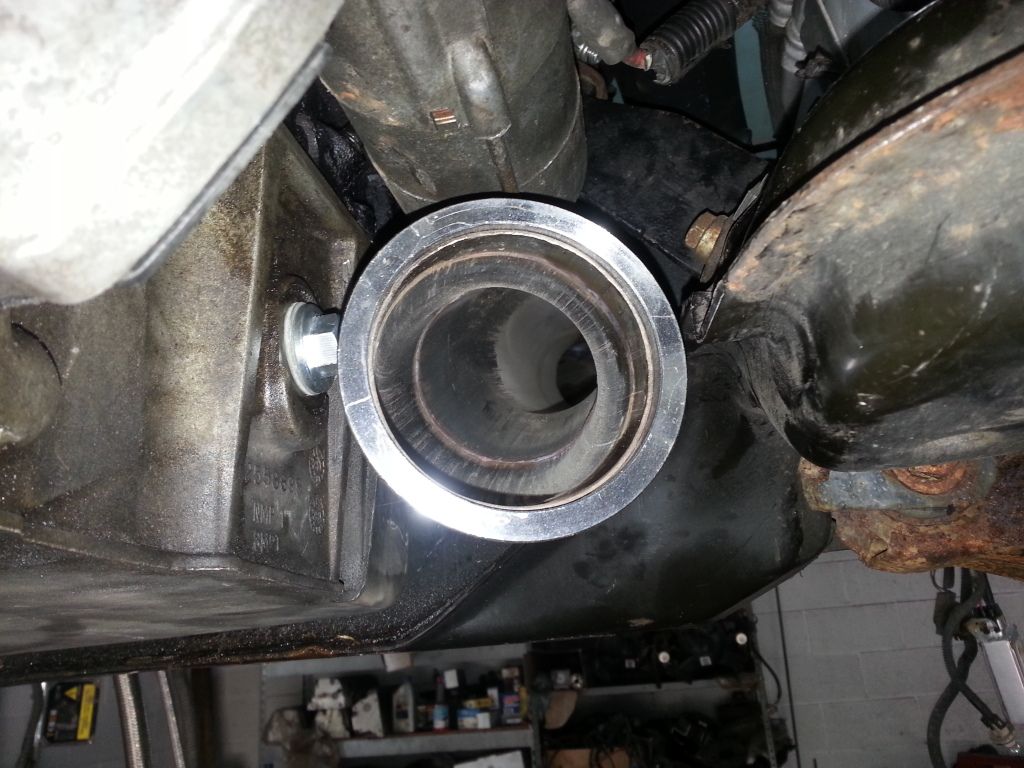
Went to install and the tensioner relocation on the new block and apparently there are difference in bolt holes for a ls1 vs a iron lq4
ls1 block
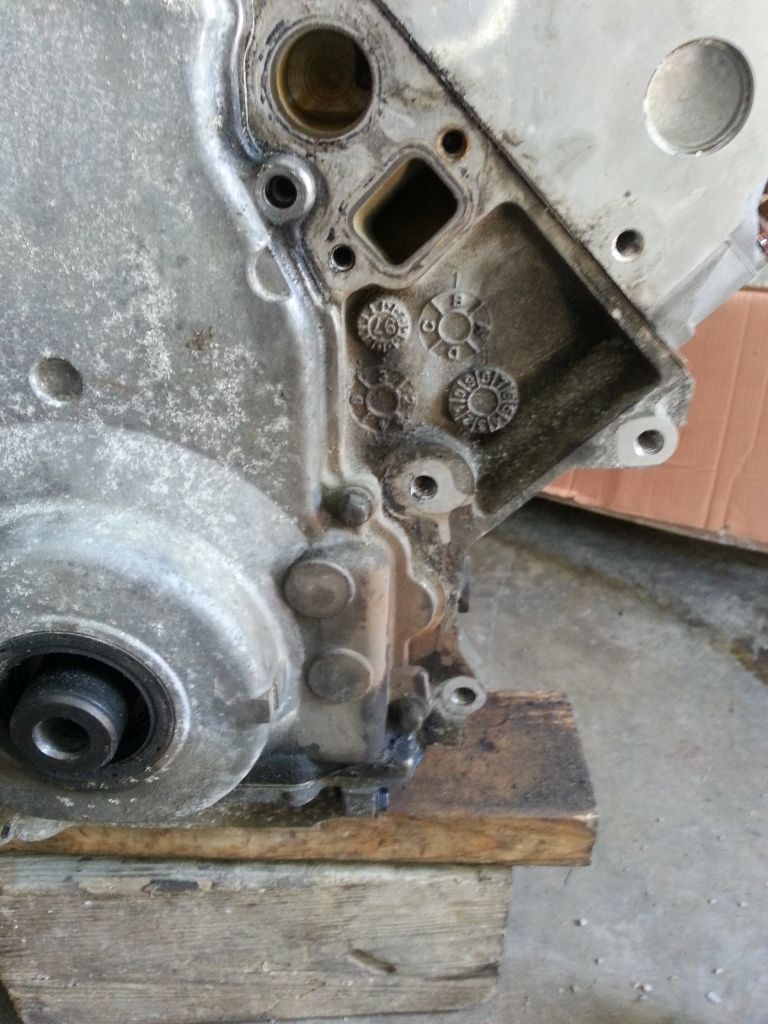
LQ4
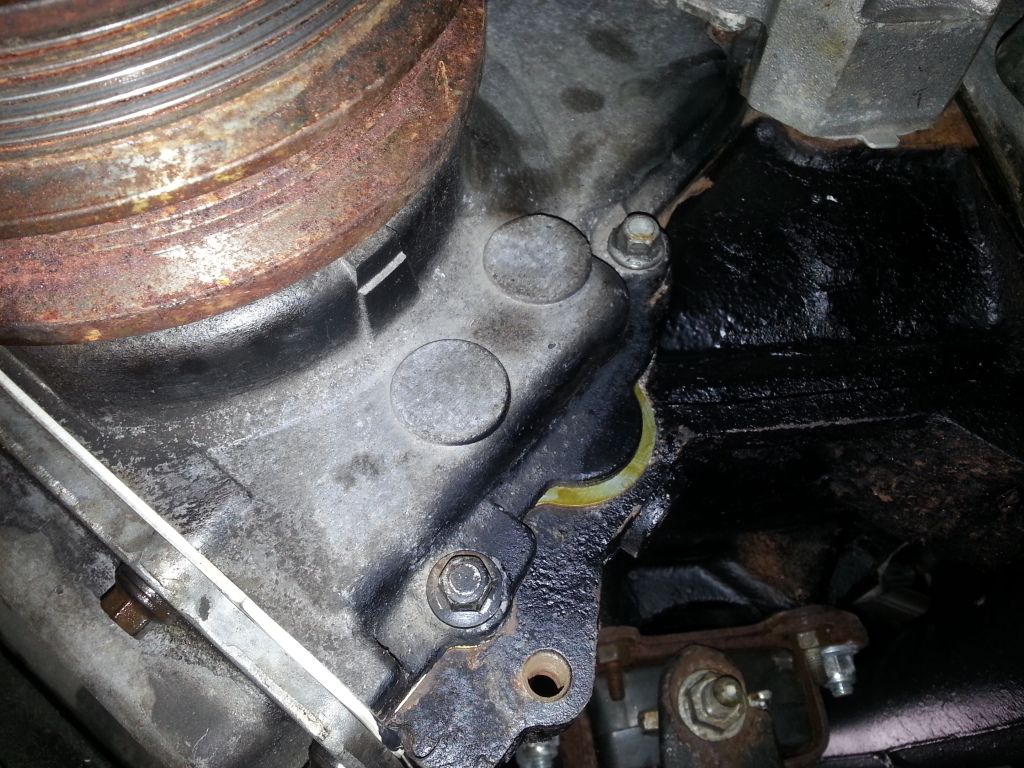
So we modified the tensioner relocation bracket to use a bolt around the side of the block so now it looks like this. The tensioner is hard to get to there but it works
ls1 block
LQ4
So we modified the tensioner relocation bracket to use a bolt around the side of the block so now it looks like this. The tensioner is hard to get to there but it works
06-30-2013, 10:41 AM
#6
Teching In
Thread Starter
iTrader: (3)
Join Date: Jan 2009
Posts: 47
Likes: 0
Received 0 Likes
on
0 Posts
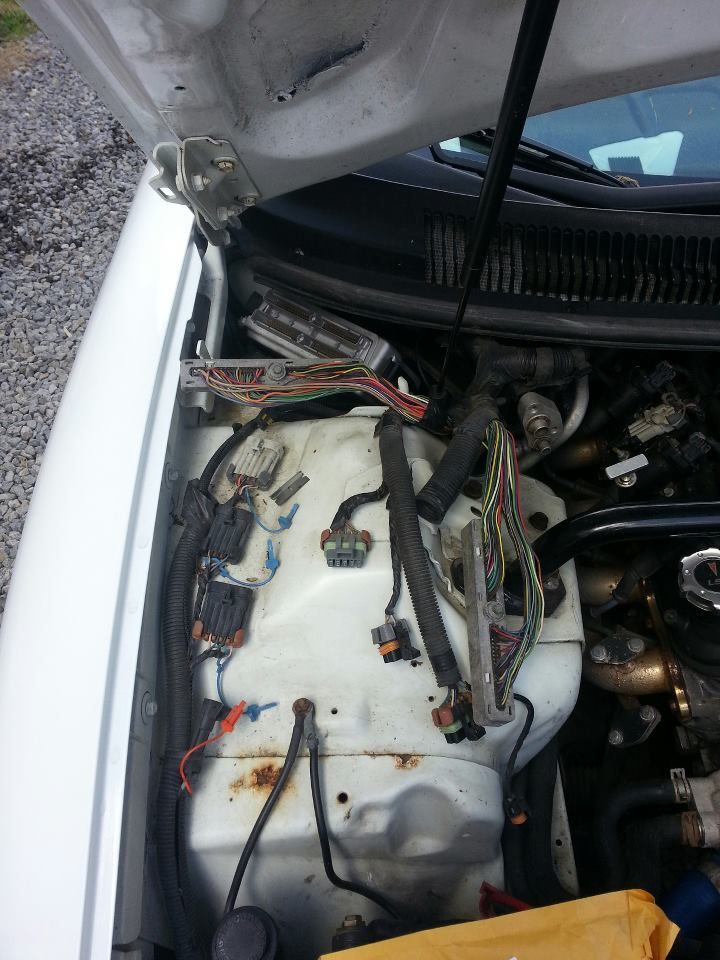
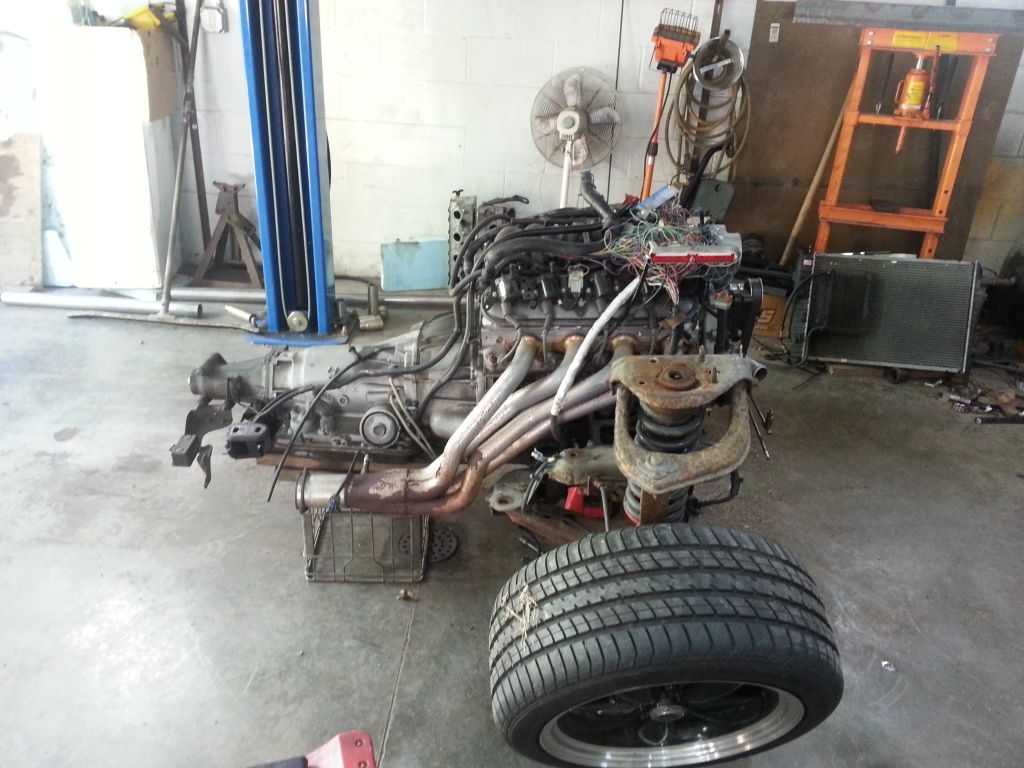
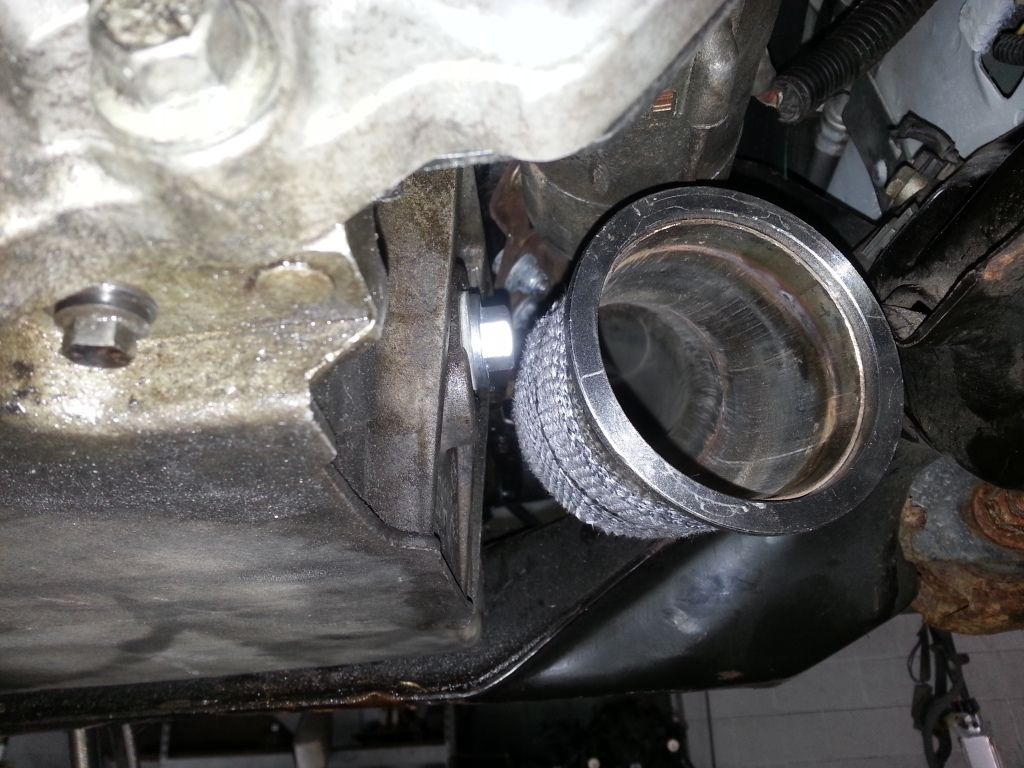
A couple of the install pictures
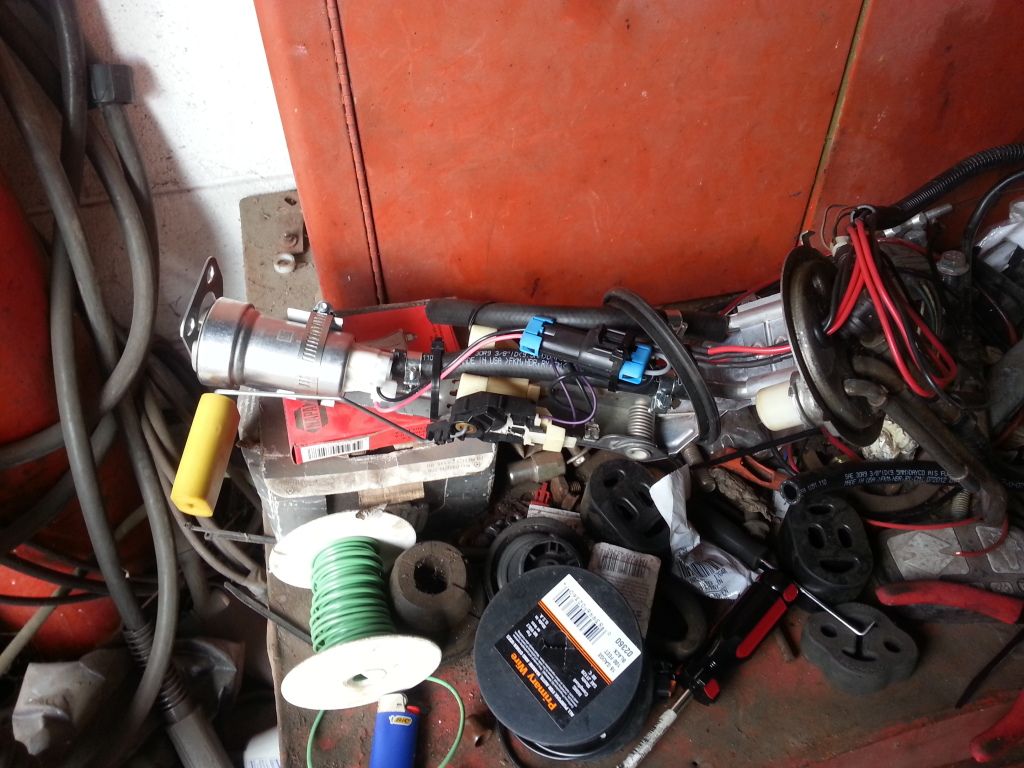
A picture of my modified fuel pump assembly with the Walbro 440 lph
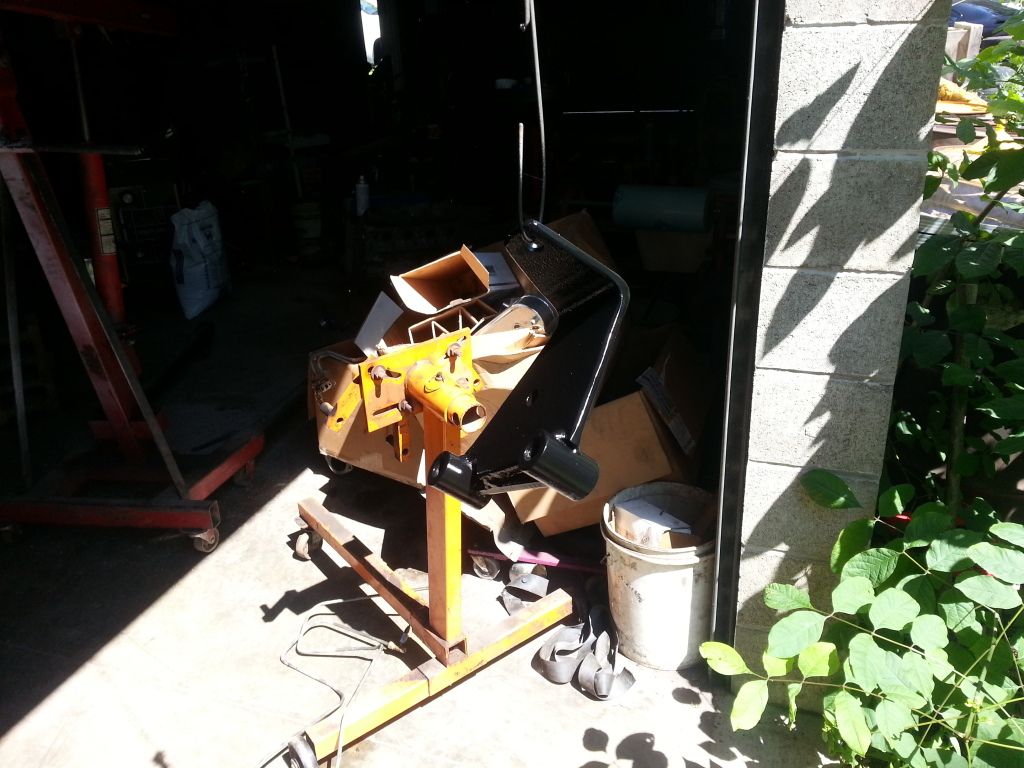
I saw somebody else mount their trans cooler here and I figured if one is good 2 must be better. Welded 2 piece of flat iron onto the bottom mount and drilled holes with some trimming of the coolers
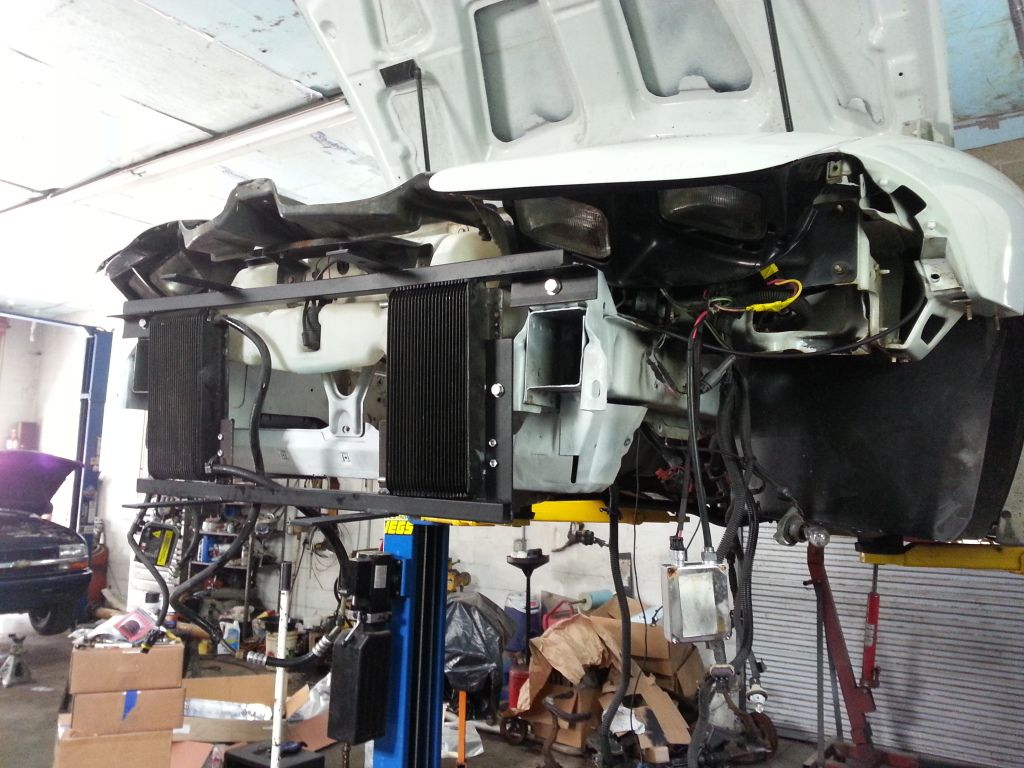
Turbo goodies with 140amp truck alternator alternator fit with 0 modifications to it or shroud removals. Doing it this way requires a 70.5 inch belt just FYI
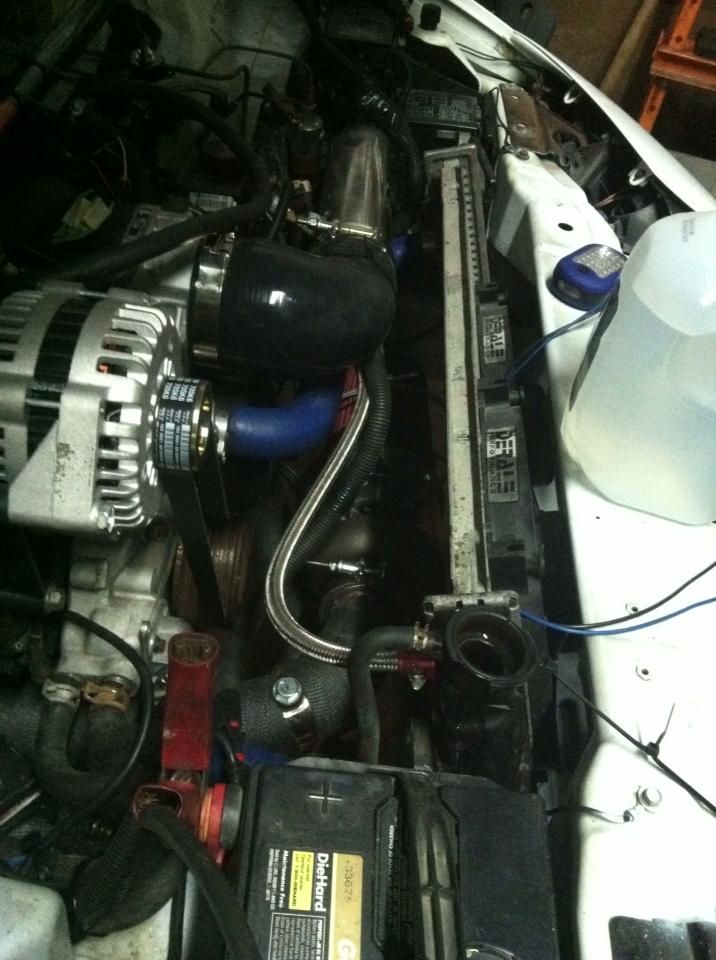
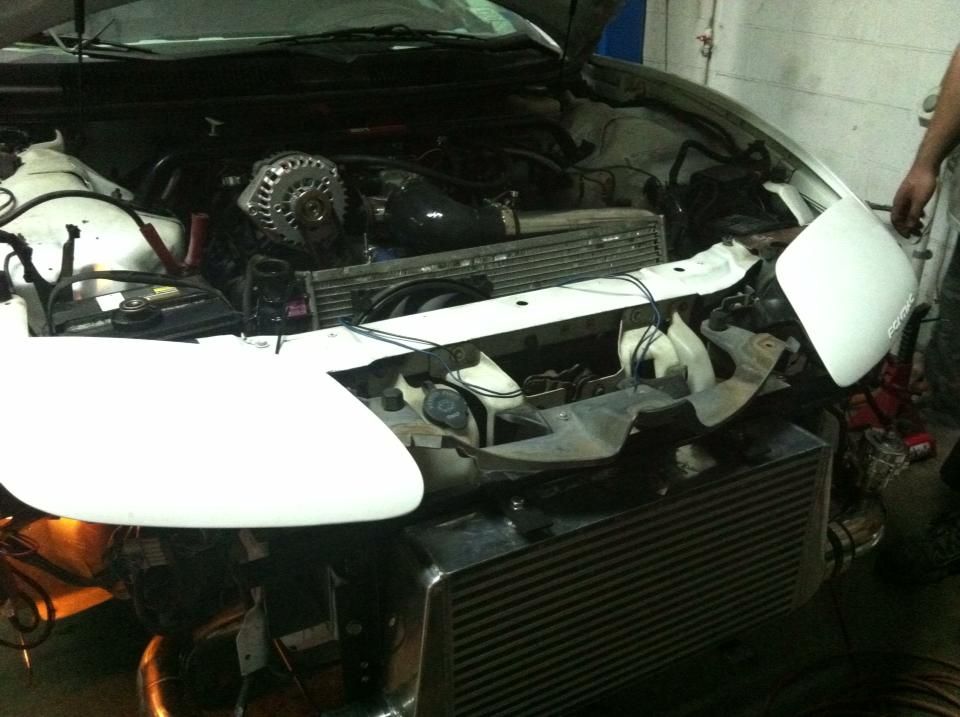
Front end shot
A picture of my modified fuel pump assembly with the Walbro 440 lph
I saw somebody else mount their trans cooler here and I figured if one is good 2 must be better. Welded 2 piece of flat iron onto the bottom mount and drilled holes with some trimming of the coolers
Turbo goodies with 140amp truck alternator alternator fit with 0 modifications to it or shroud removals. Doing it this way requires a 70.5 inch belt just FYI
Front end shot
Last edited by djt81185; 06-30-2013 at 11:02 AM.
06-30-2013, 10:52 AM
#7
Teching In
Thread Starter
iTrader: (3)
Join Date: Jan 2009
Posts: 47
Likes: 0
Received 0 Likes
on
0 Posts
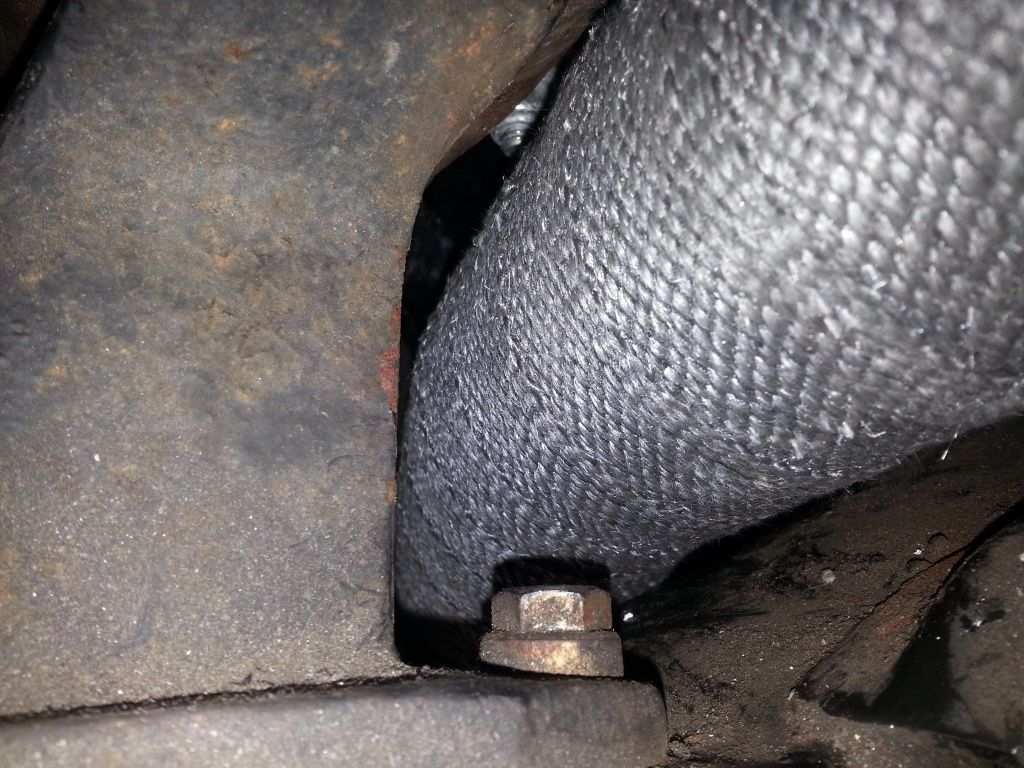
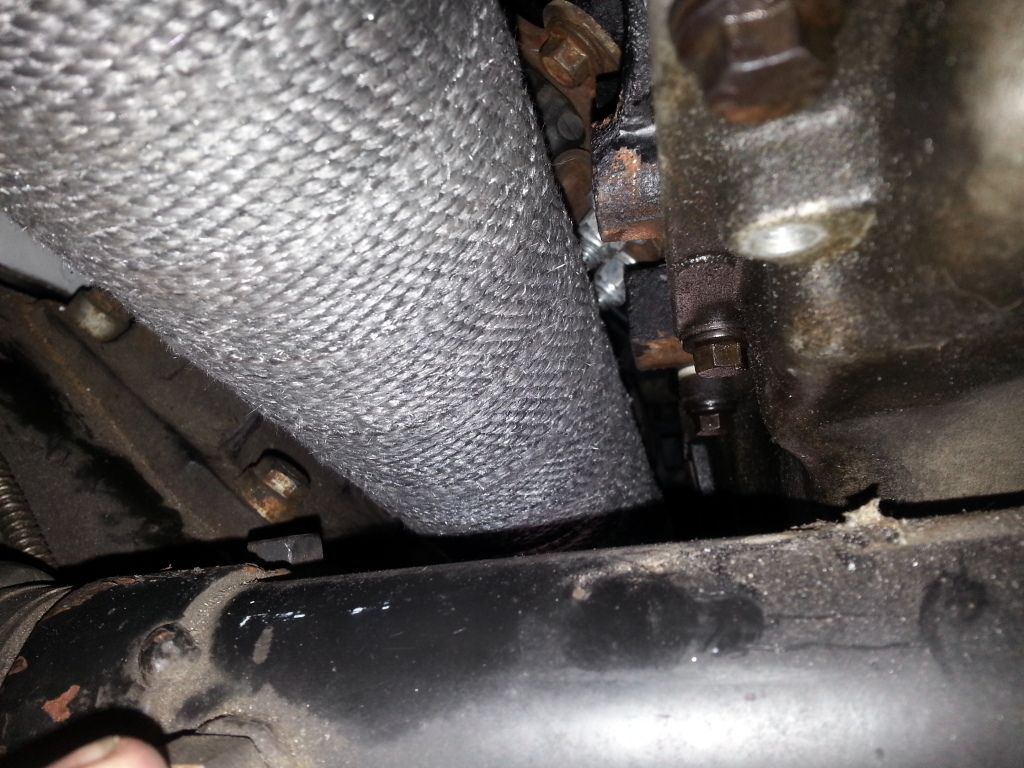
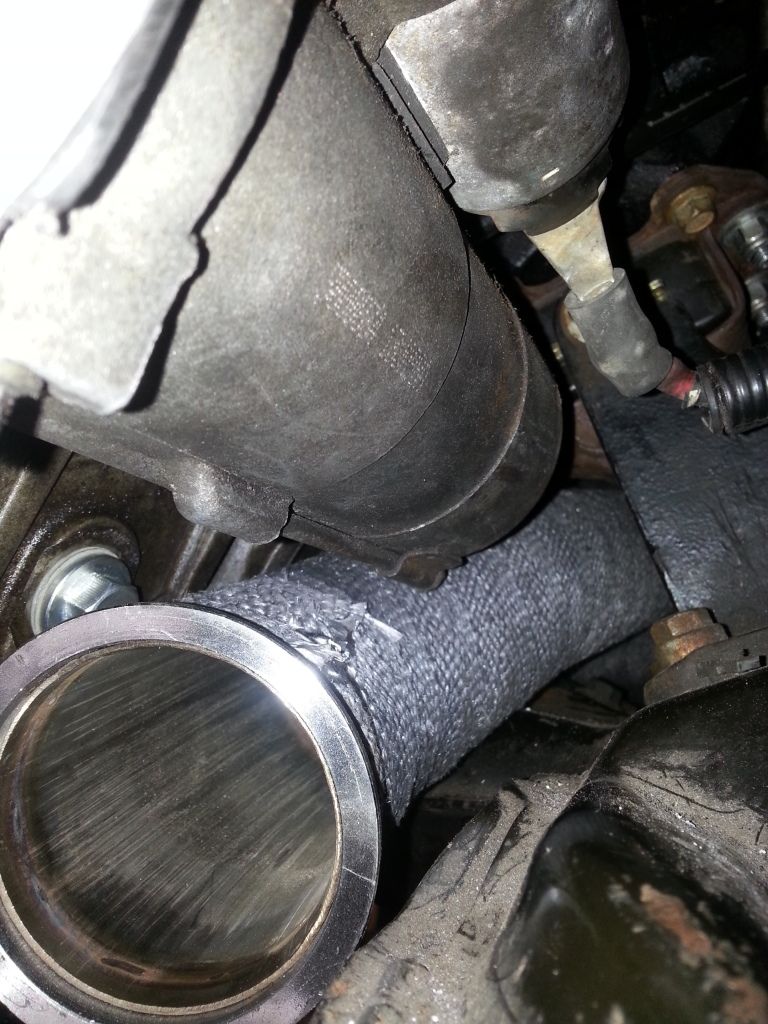
Some notes from the install.
On the charge pipe that comes up from the BOV there is a electronics control box of some type that attaches to the fuse box that has GUIDE written on it. I had to remove it from the fuse box and hack out its plastic mounts to get the charge piping to fit.
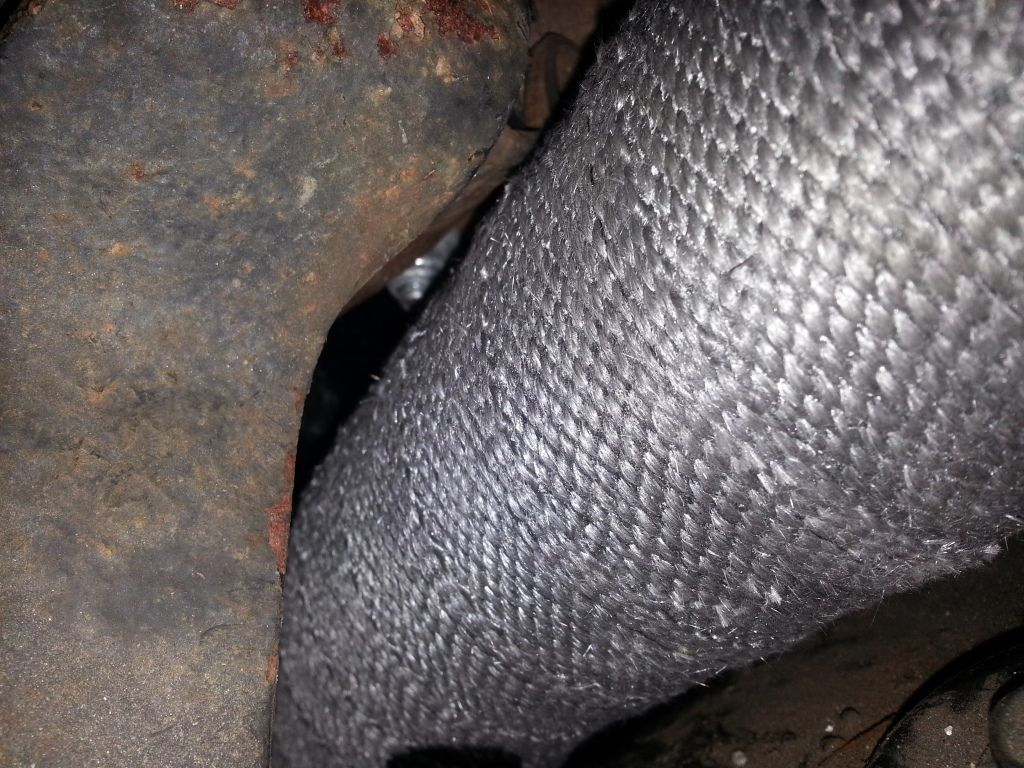
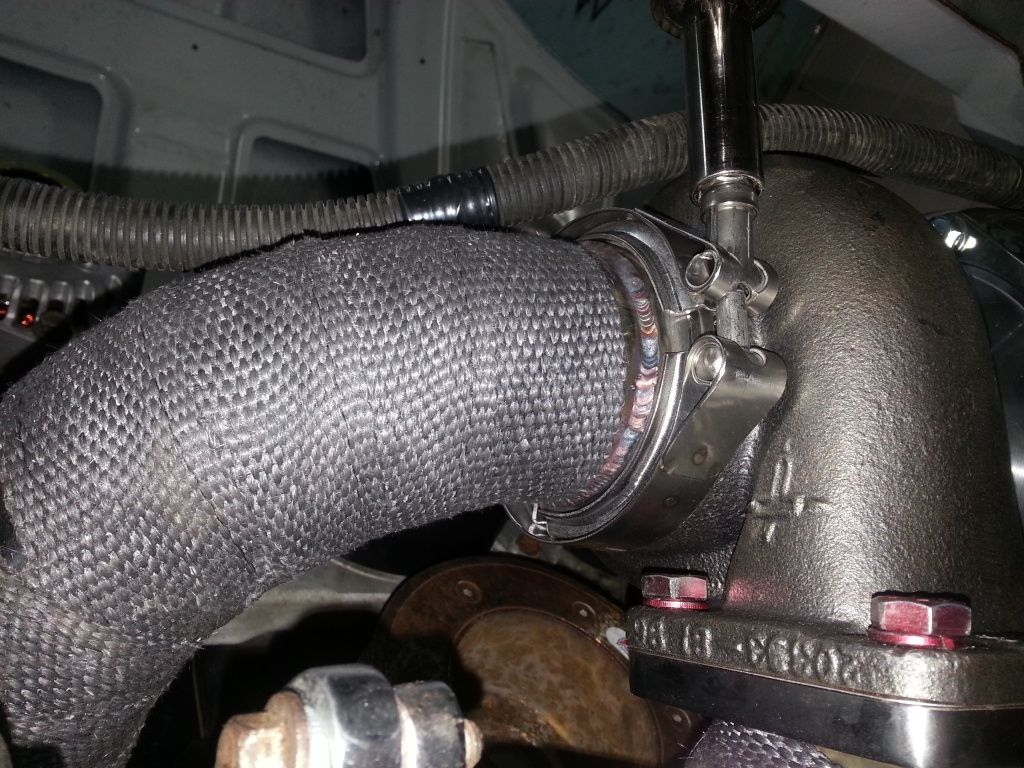
We are going to change the drain line slightly. The one I ordered from Huronspeed was a little long and with the straight 1/2 NPT to -10AN I had to slightly clock the turbo to get it to all fit around the crossover pipe. We are going to change to a 90 deg version with a straight an hose connector and shorten the hose and it should work better.
The hotside and cold side went together flawlessly on the Huronspeed kit props to Jon here
We did have a issue with the DP hitting and when I contacted Jon he was ready to send me a new DP out but by that time we had modified the dp I received to make it fit. He was also always available to answer any and all questions I had during the build. Amazing customer service!!!
Also Martin at Tick Performance was great to deal with in ordering the cam package. I cant wait to see how she does as she sounds healthy.
On the charge pipe that comes up from the BOV there is a electronics control box of some type that attaches to the fuse box that has GUIDE written on it. I had to remove it from the fuse box and hack out its plastic mounts to get the charge piping to fit.
We are going to change the drain line slightly. The one I ordered from Huronspeed was a little long and with the straight 1/2 NPT to -10AN I had to slightly clock the turbo to get it to all fit around the crossover pipe. We are going to change to a 90 deg version with a straight an hose connector and shorten the hose and it should work better.
The hotside and cold side went together flawlessly on the Huronspeed kit props to Jon here
We did have a issue with the DP hitting and when I contacted Jon he was ready to send me a new DP out but by that time we had modified the dp I received to make it fit. He was also always available to answer any and all questions I had during the build. Amazing customer service!!!
Also Martin at Tick Performance was great to deal with in ordering the cam package. I cant wait to see how she does as she sounds healthy.
Trending Topics

 07-02-2013, 10:09 AM
#9

Looks great! Can't wait to see it hit the track! I forsee some low 10 high 9 second passes in this rides future!
FYI this cam in a 5.3 engine made 800rwhp+ on a Dyno Dynamics chassis dyno at Work Turbo and has been 5's in the 1/8th mile. Granted it was a S476 turbo not a TC76, the cam is proven to work well.
FYI this cam in a 5.3 engine made 800rwhp+ on a Dyno Dynamics chassis dyno at Work Turbo and has been 5's in the 1/8th mile. Granted it was a S476 turbo not a TC76, the cam is proven to work well.