1700HP TT Glide 9" C6 Z06 Build
#1
Sooooo just when I thought I was done with builds…. Im doing it again fml….
Build Goals – build reliable Street car capable of daily driving and racing from dig or roll at any time.
I will be breaking this build up into different more detailed sections for everyone to be able to follow along and maybe have discussions about.
Part 1 - Fuel System
Part 2 – Drivetrain
Part 3 - Rolling Gear
Part 4 - Engine
Part 5 - Evac system
Part 6 - Turbo Kit
Part 7 - Heat Management
But below you will find the overall high level build.
07 C6 Z06
RHS 434ci lower
Mast Heads
RPM Glide 9” conversion
DKT Twin Turbo Kit
Part 1
Fuel System
After much research and debate I have opted to go with a FORE Invitations system and ALKY Meth Kit
I will be utilizing the 3 pump system in which 1 pump (walbro 465) will handle normal duty and the 2x AEM 320-e will kit on via hobbs switch at a given PSI. To deliver the fuel to the motor I am also using RSI billet fuel rails and ID2000 injectors and tunneling everything via -10 feed and -8 return. This fuel system will support around 1500rwhp on e85. To cool the charge and provide even more safe guard I will be running 2 M15 nozzles on the ALKY progressive Meth kit.
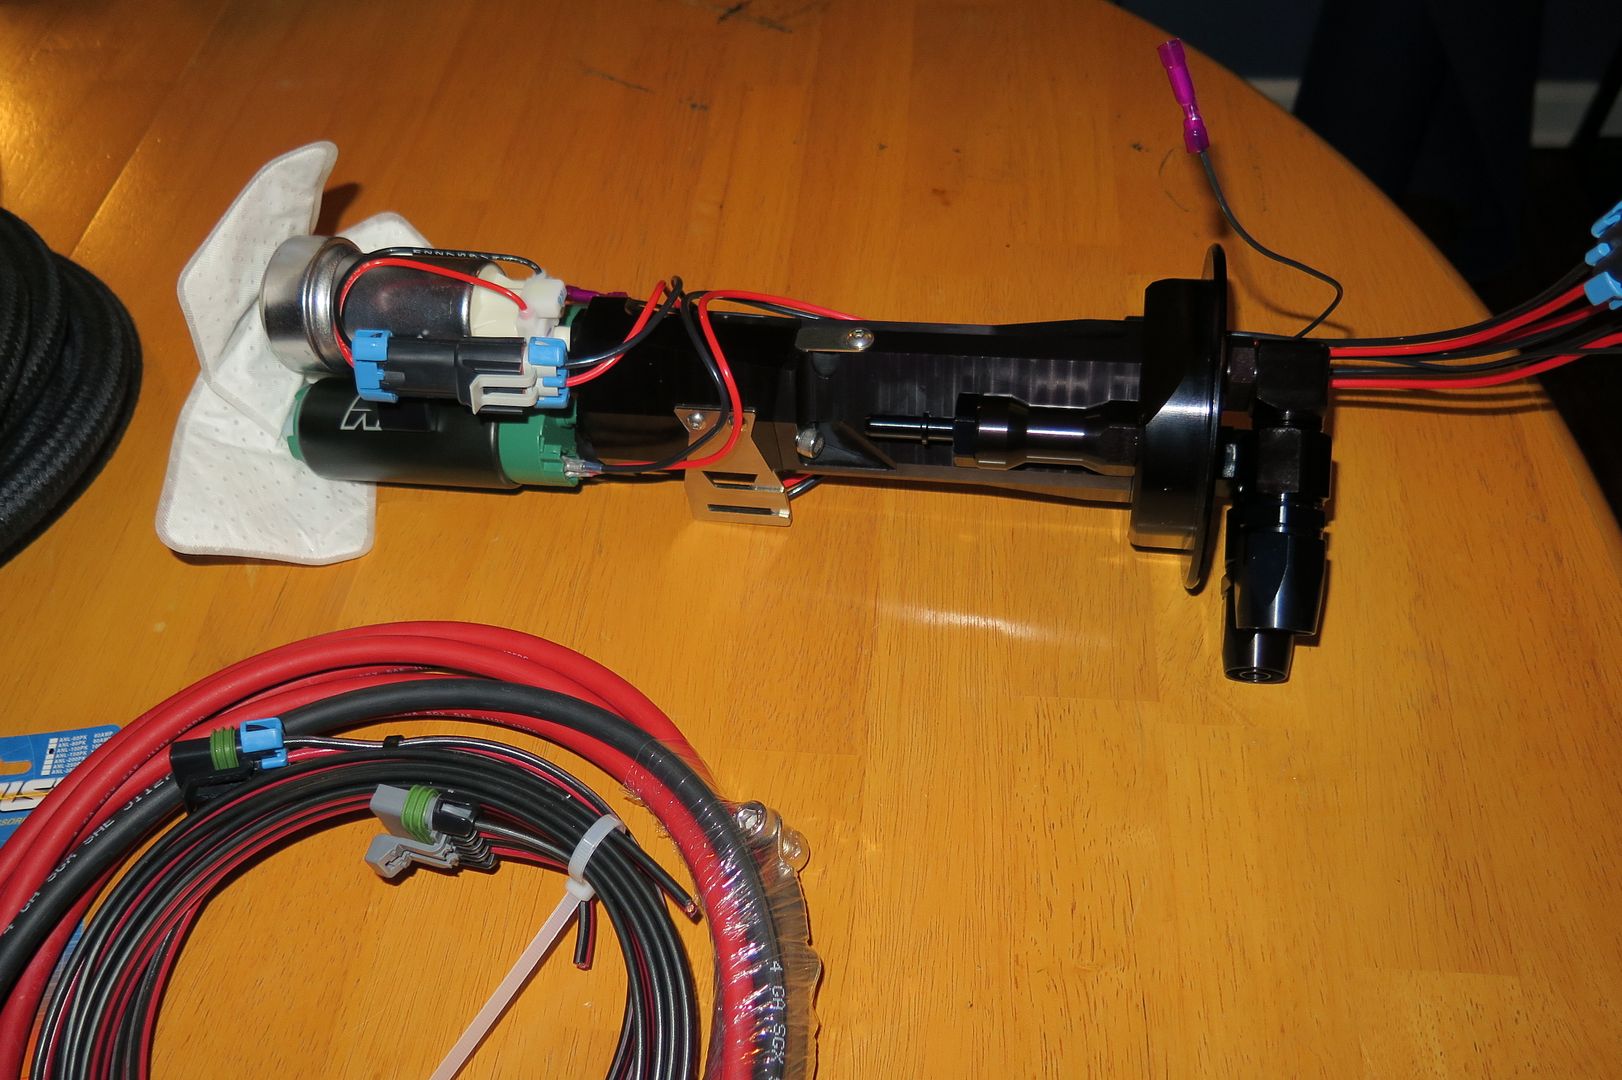
Fore Billet pump hanger! utilizing the 3 pump system in which 1 pump (walbro 465) will handle normal duty and the 2x AEM 320-e will kit on via hobbs switch at a given PSI.
Hefty Wiring to provide good power and ground to support the 3 pumps! Also pictured is the hobbs switch!
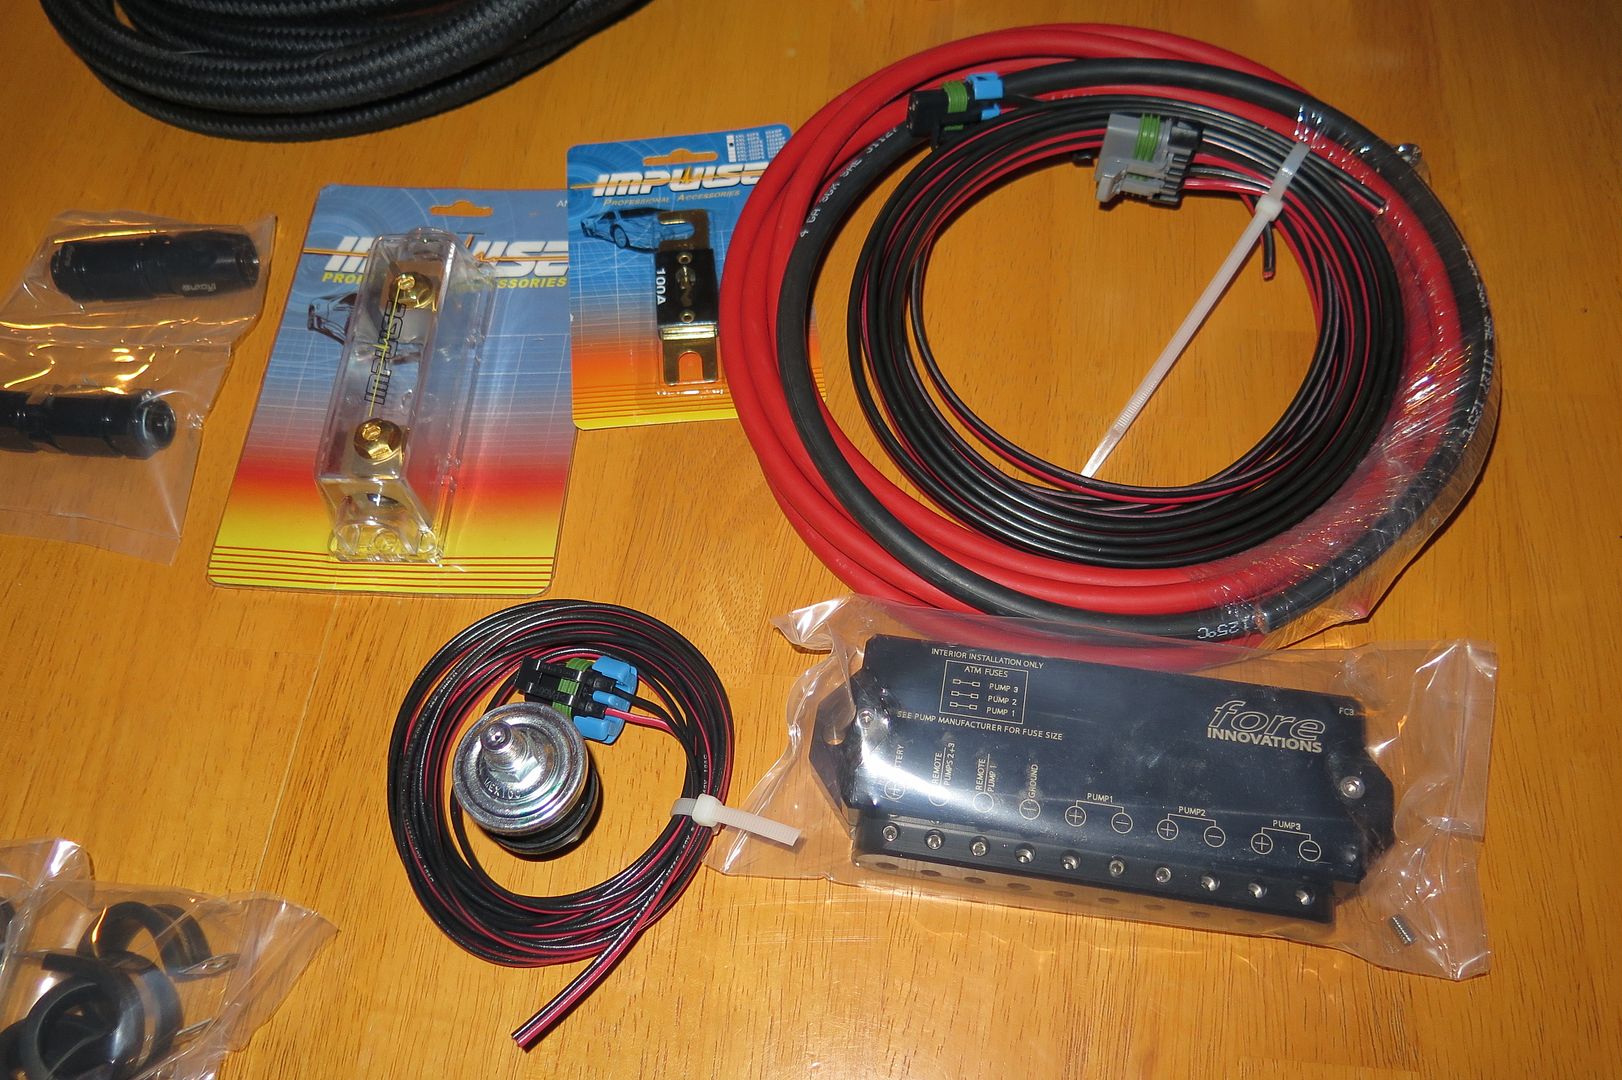
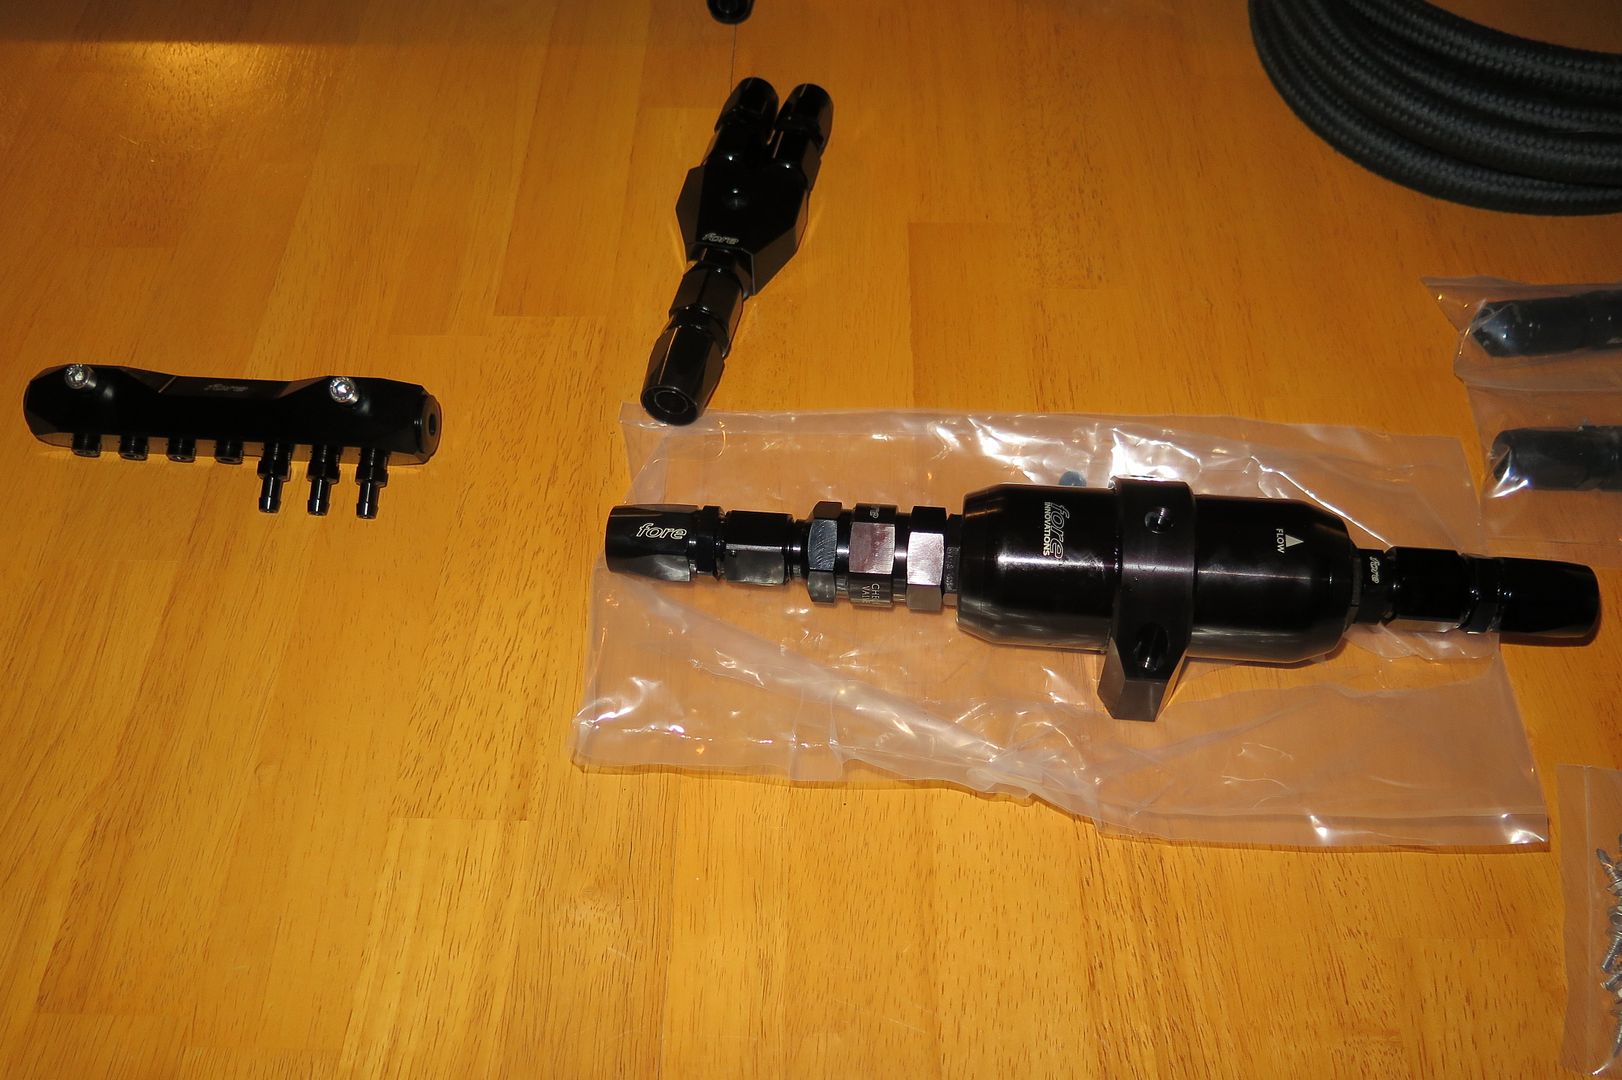
Few billet pieces! Fore billet vacuum manifold, billet Y-block, and filter check valve combo to keep the lines clean.
I opted to use RSI Billet fuel rails as they are big bore and are one of the few offered for the LS7 stock intake which have a very sturdy billet mount to avoid deflection under high boost!
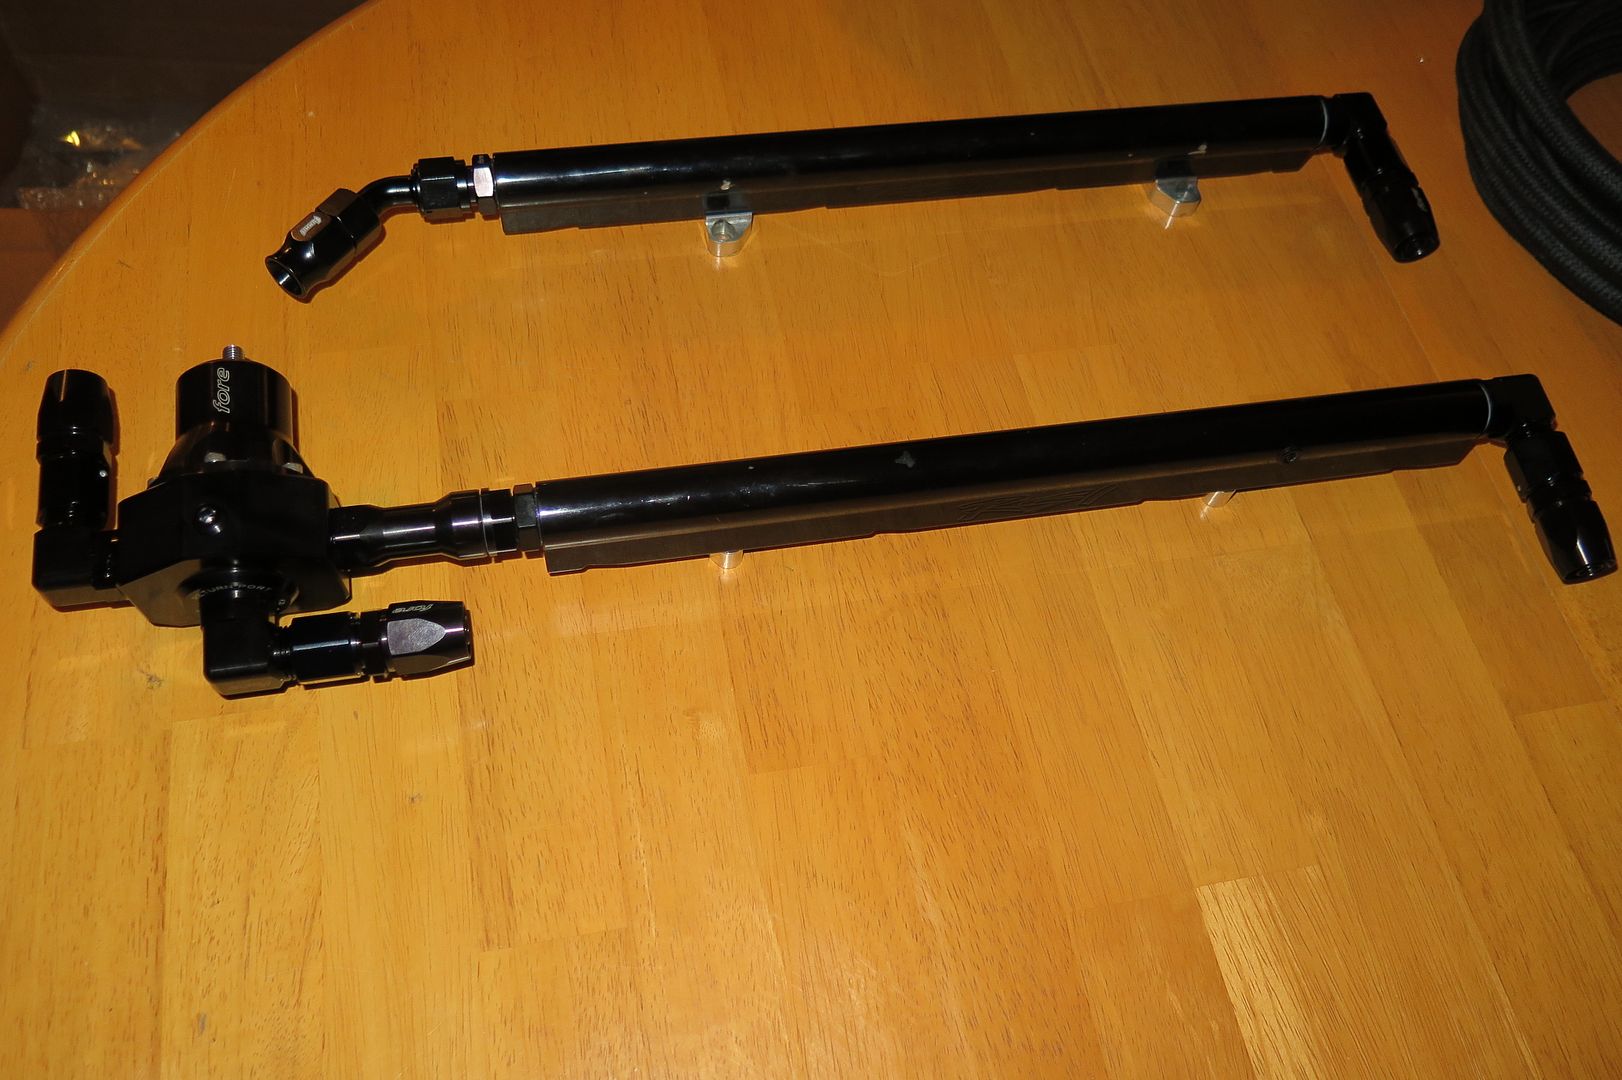
Fore Big FPR will be managing the fuel pressure! We have our system setup at 43lbs static.
I have opted to utilize ID2000 injectors which should support around 1500hp on e85
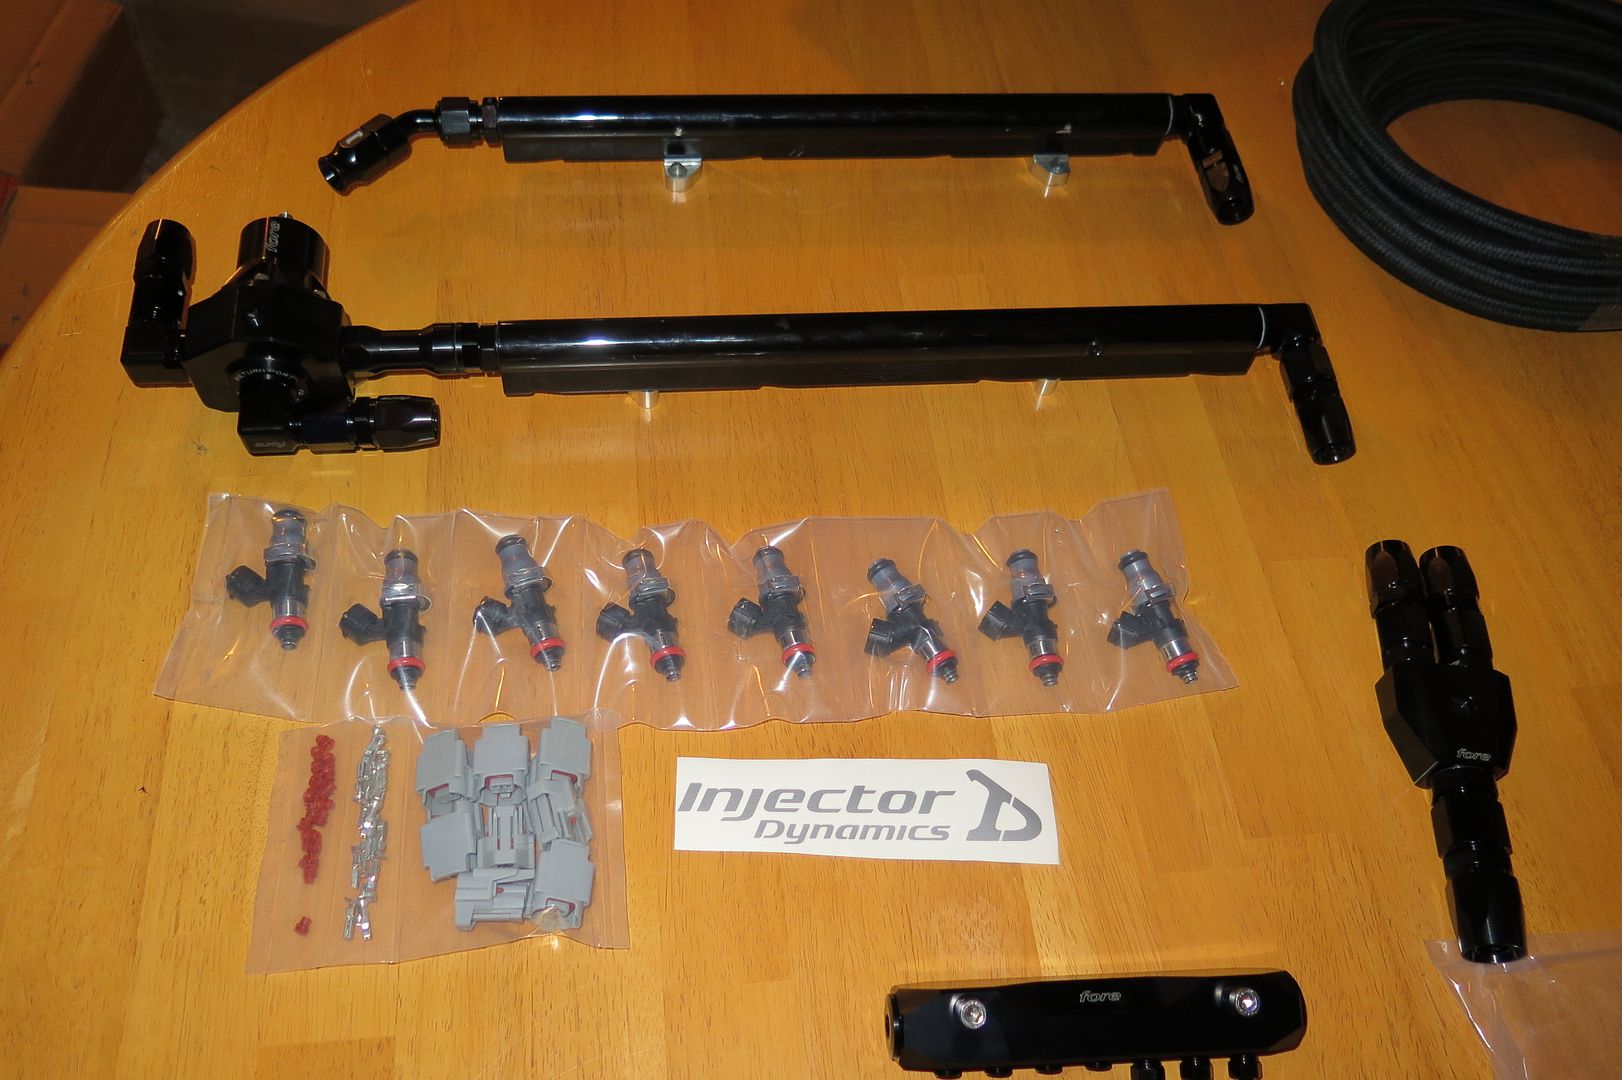
Overall picture of entire assembly
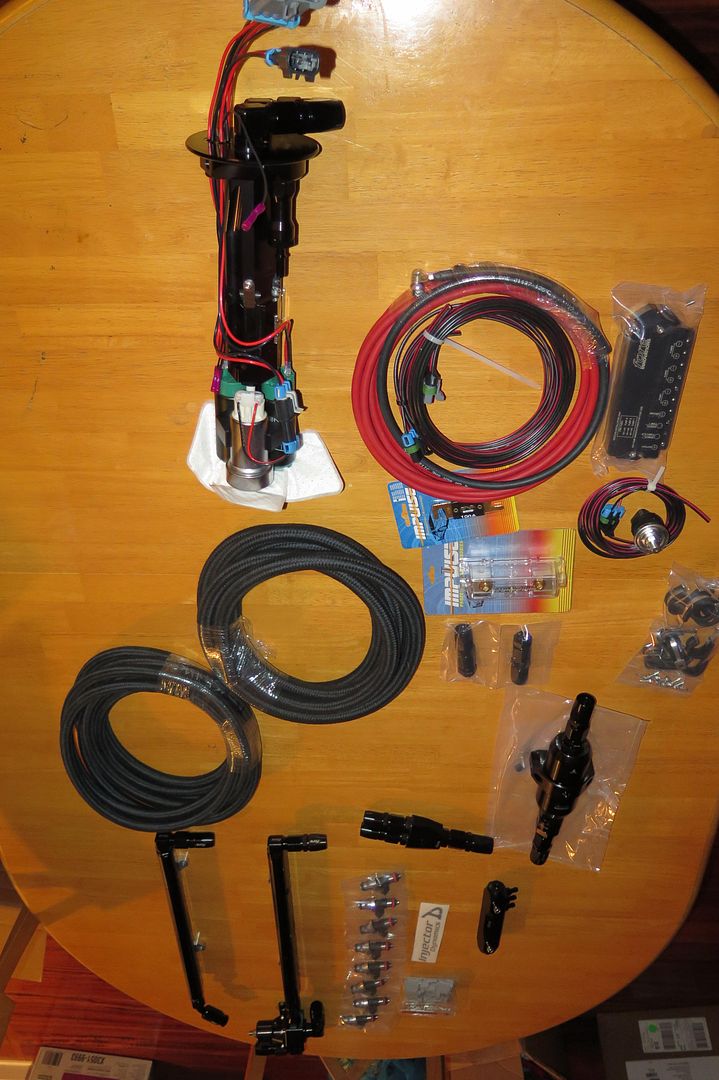
Everything black!
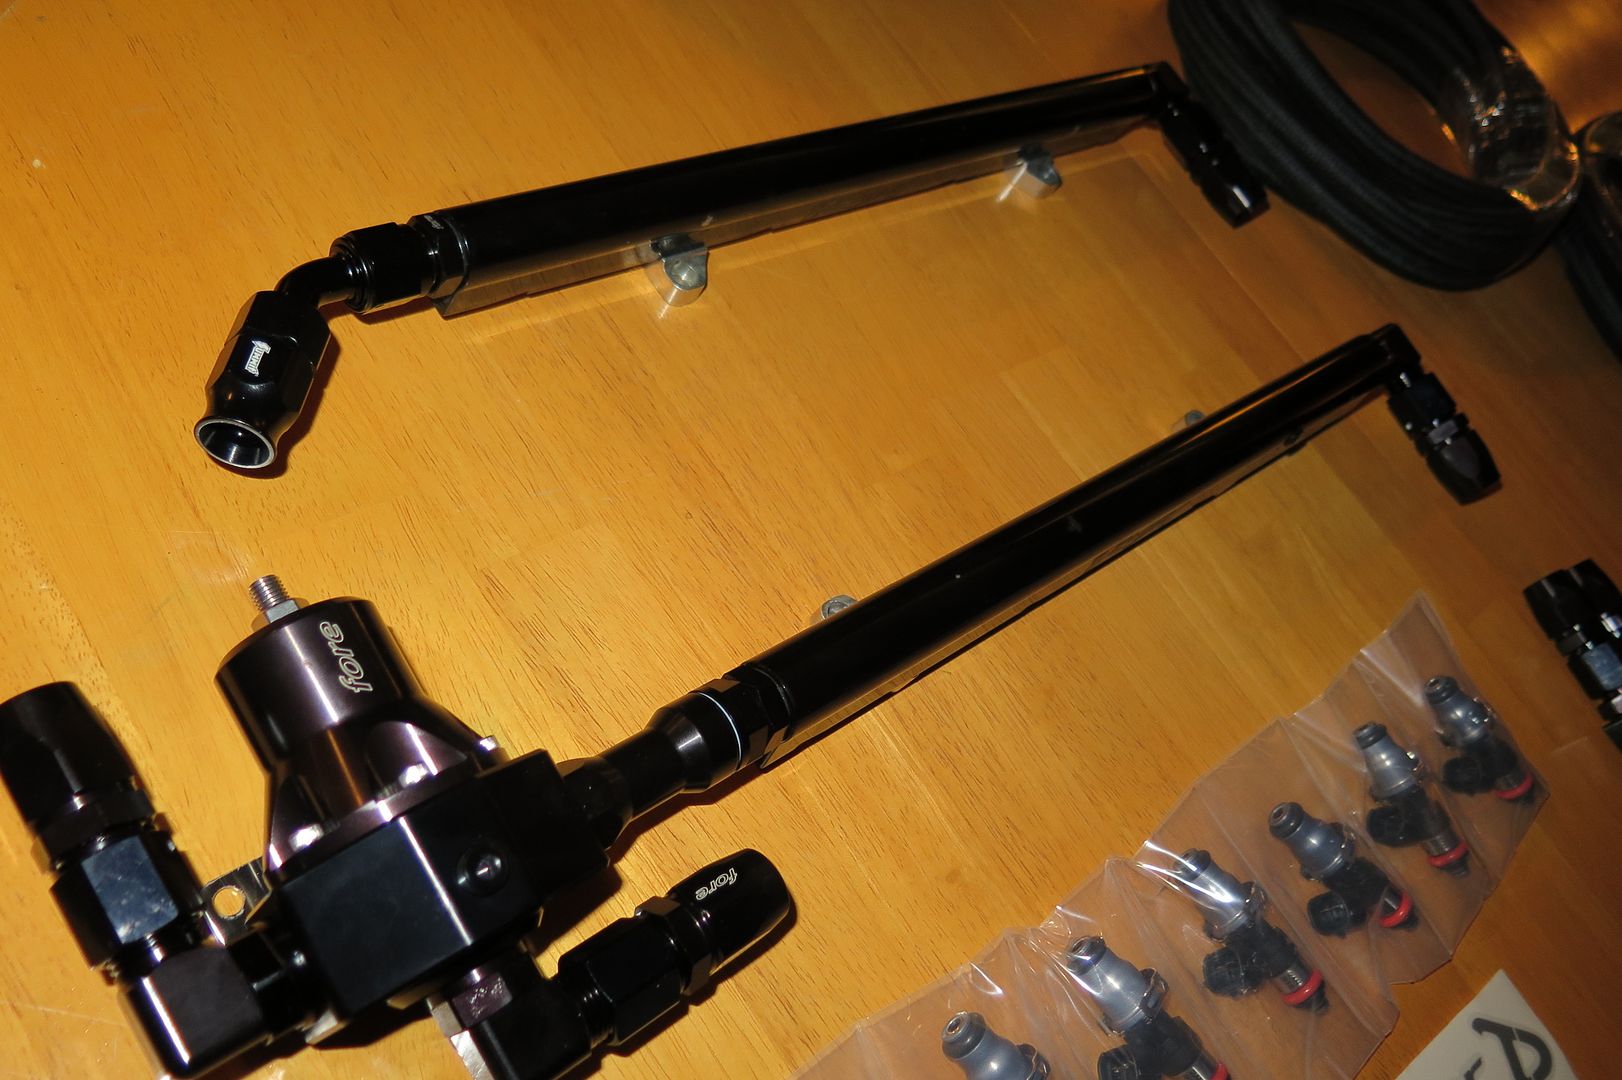
Another shot of the art work
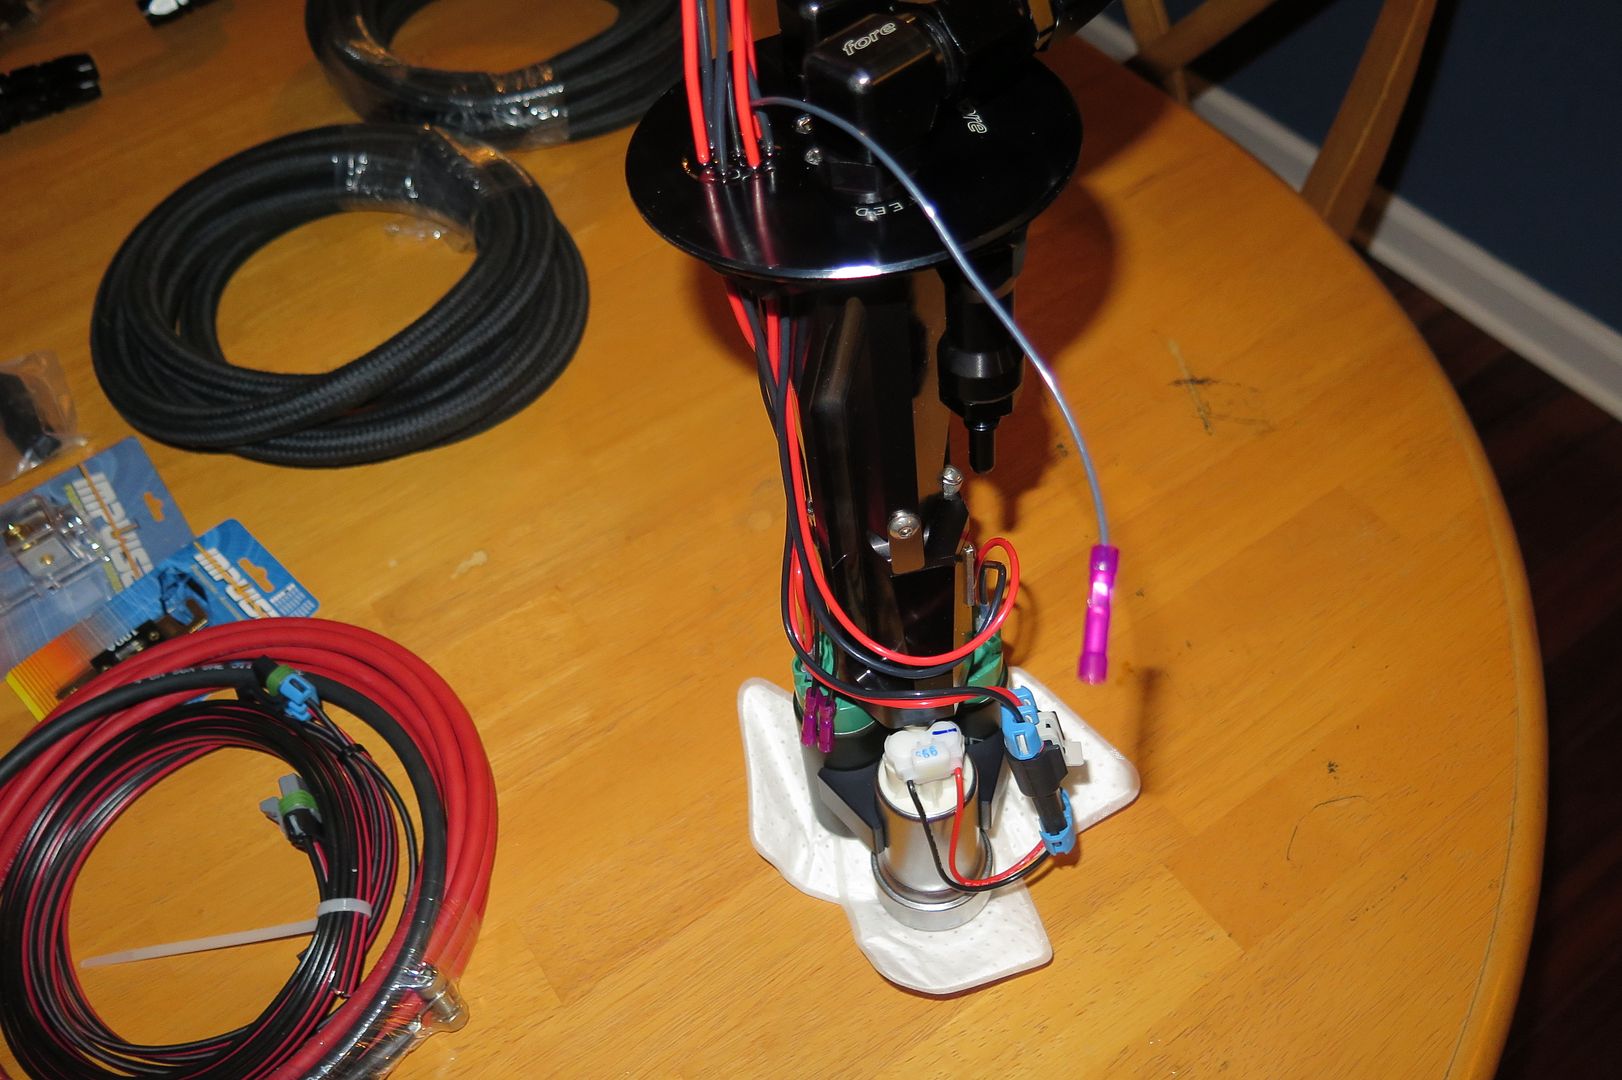
Good picture of the RSI Billet mounts! Super sturdy!
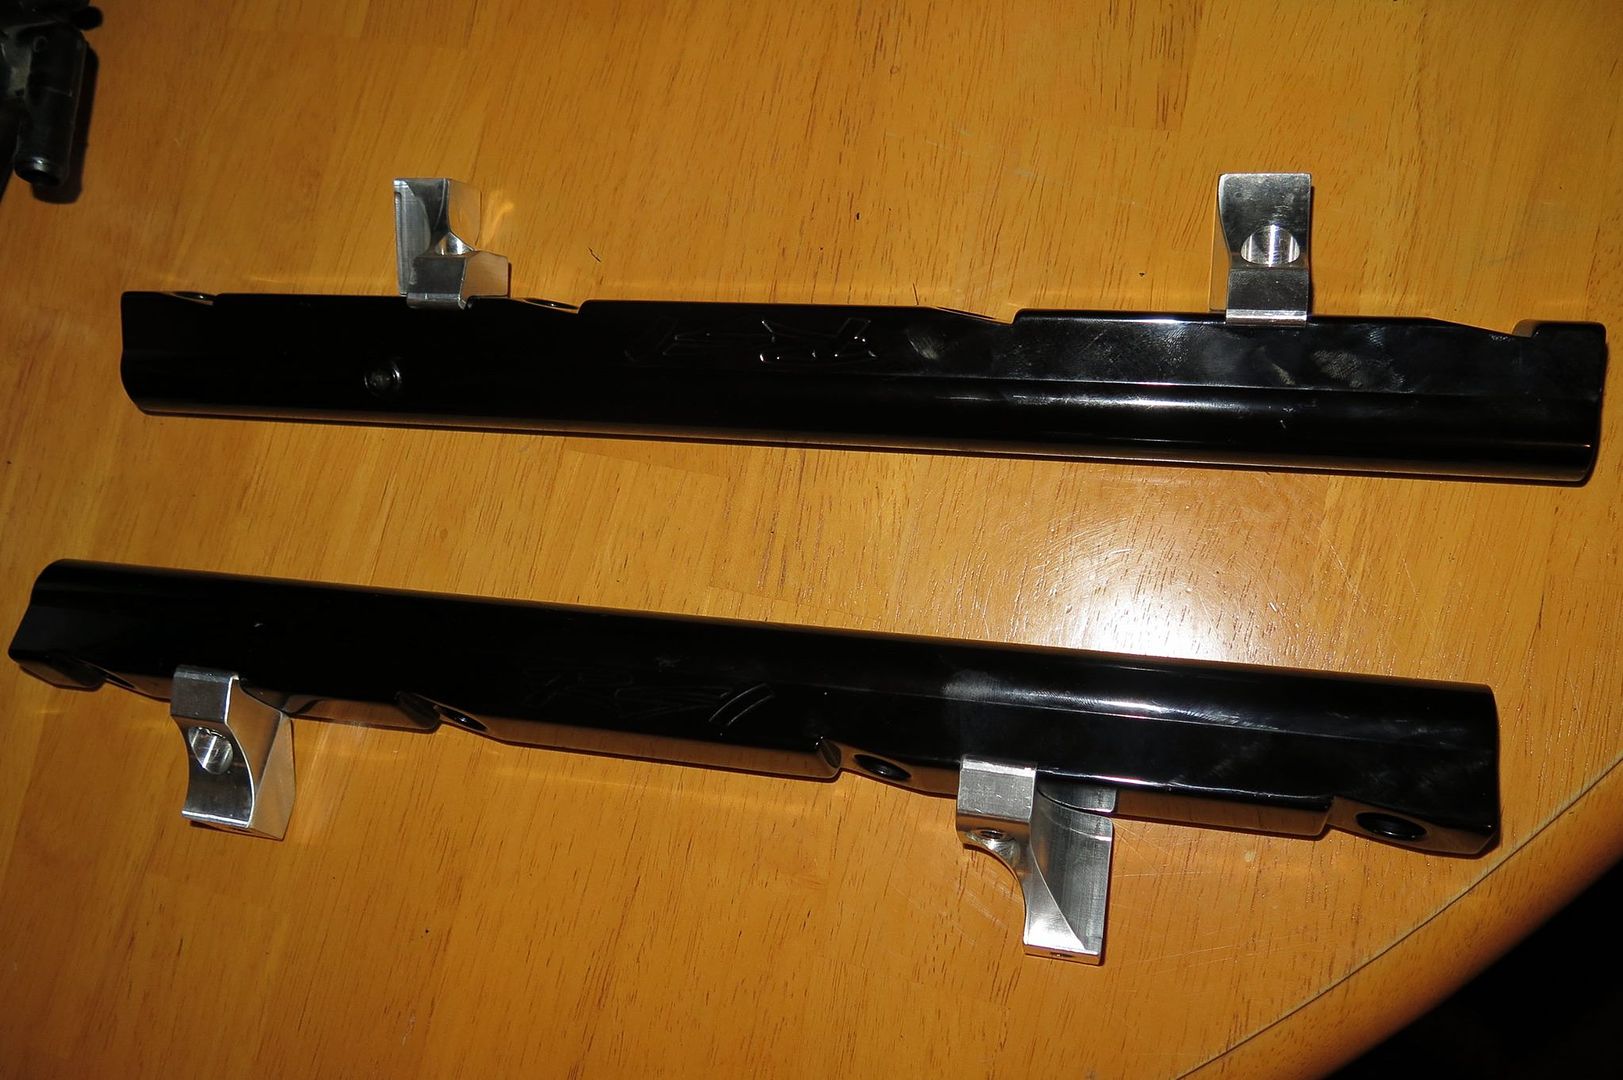
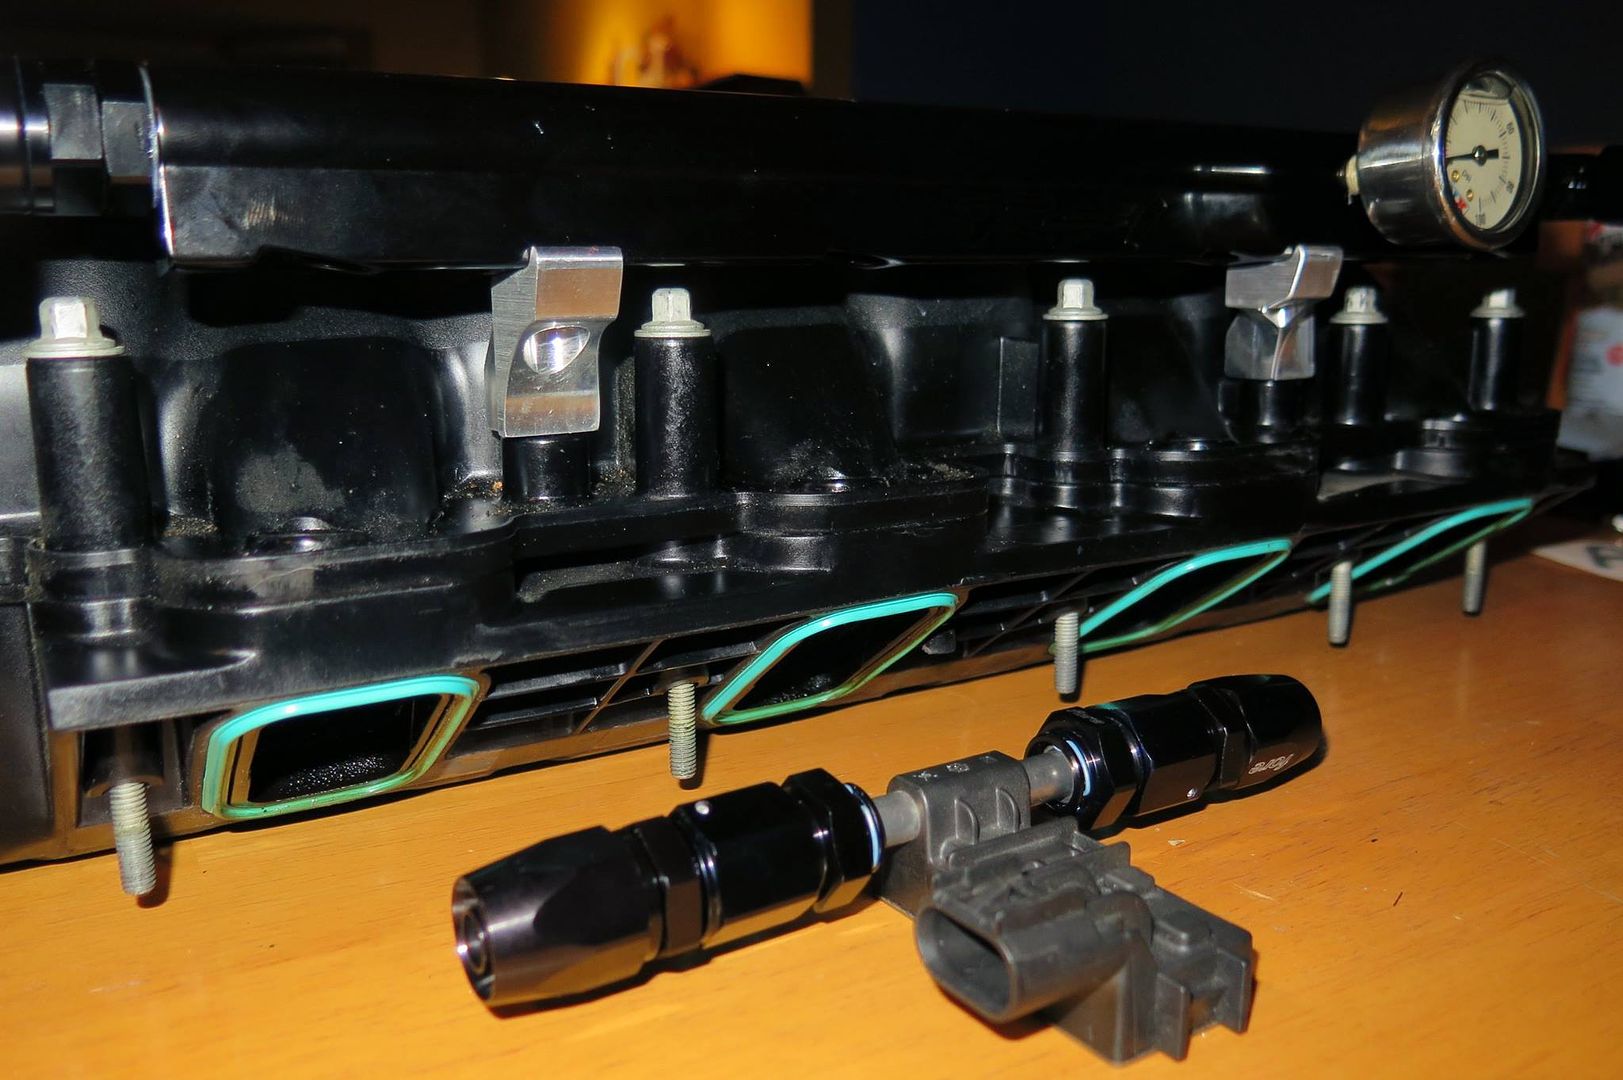
RSI Billet Rails mounted! Also picture is my dsteck flex fuel sensor that will be used on the return line.
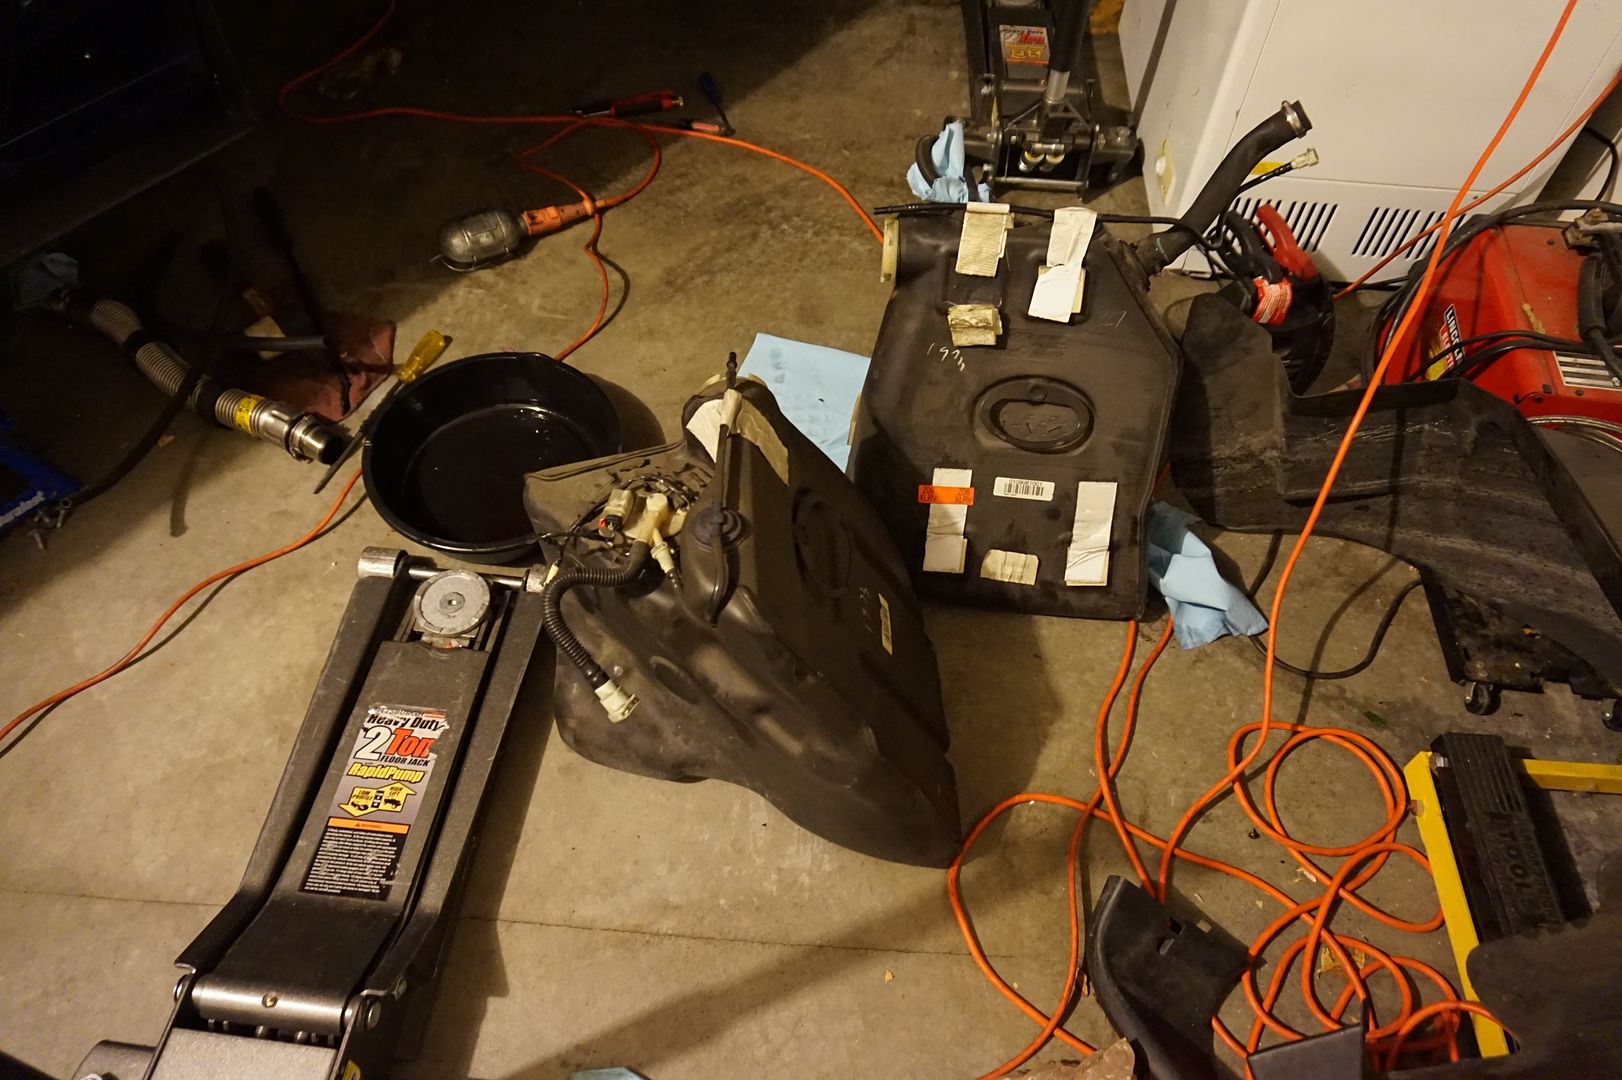
Tanks were easy to drop but I think I ran out of curse words to use on the crossover tube..
Tripple pumps in!
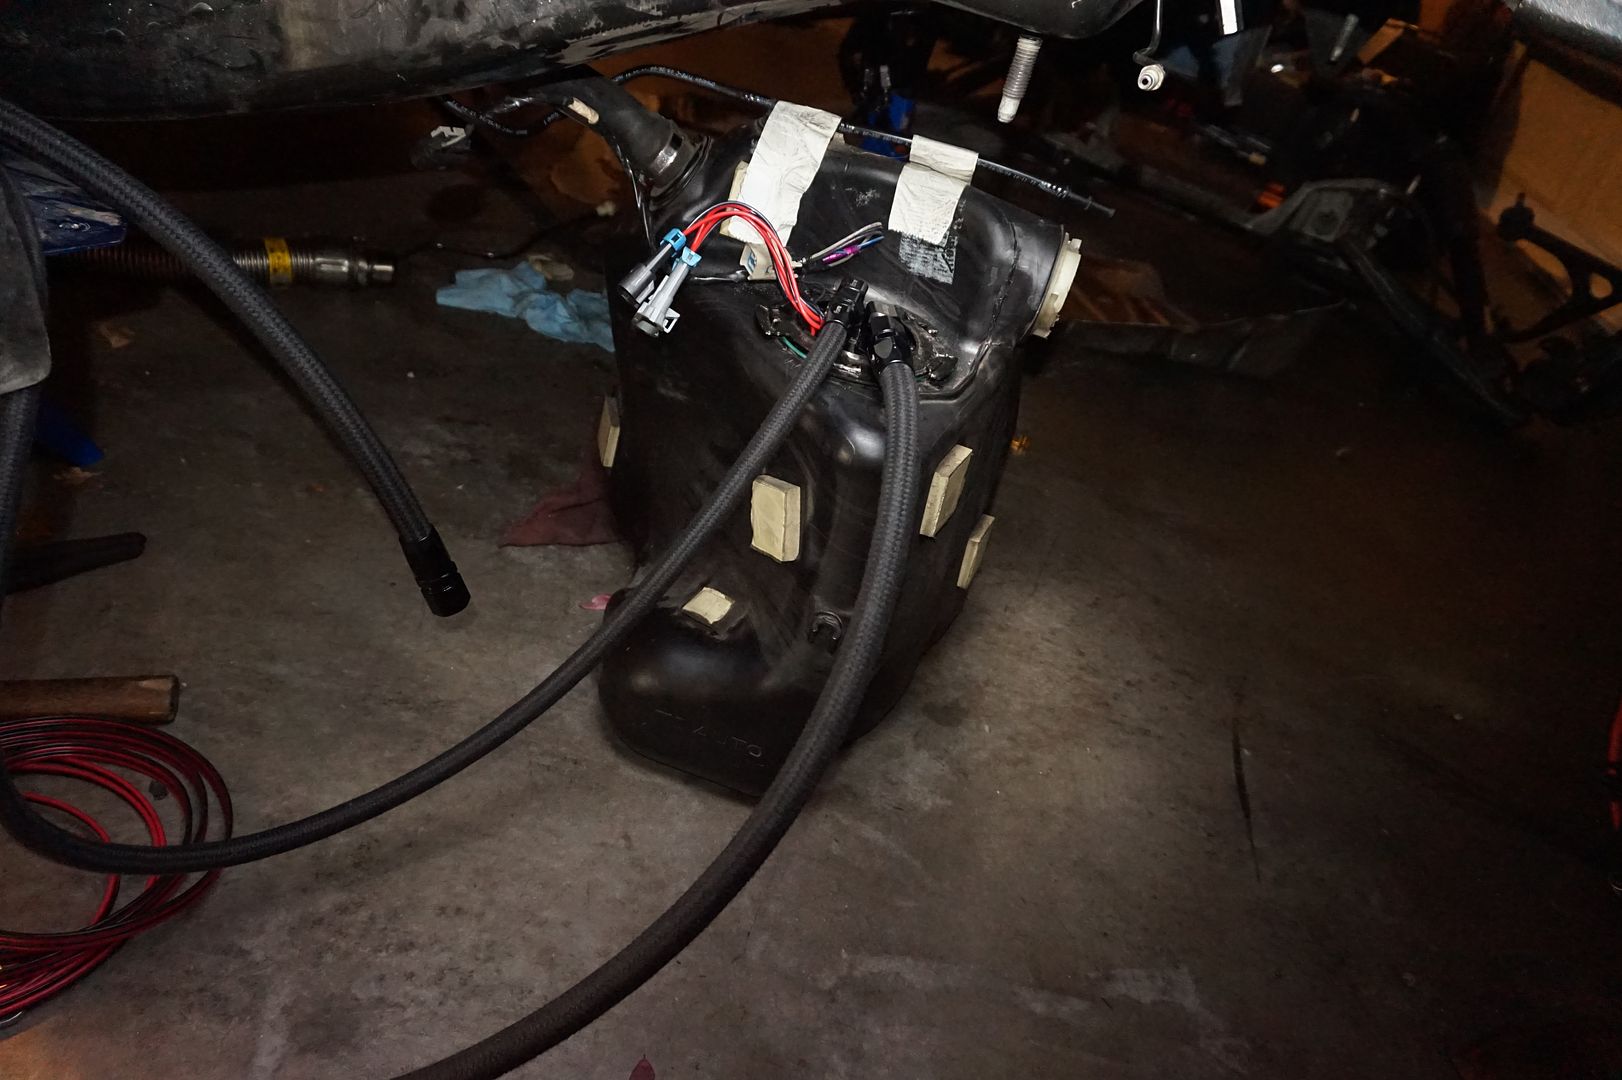
-10 feed and -8 return ran, I will secure them once drivetrain is in.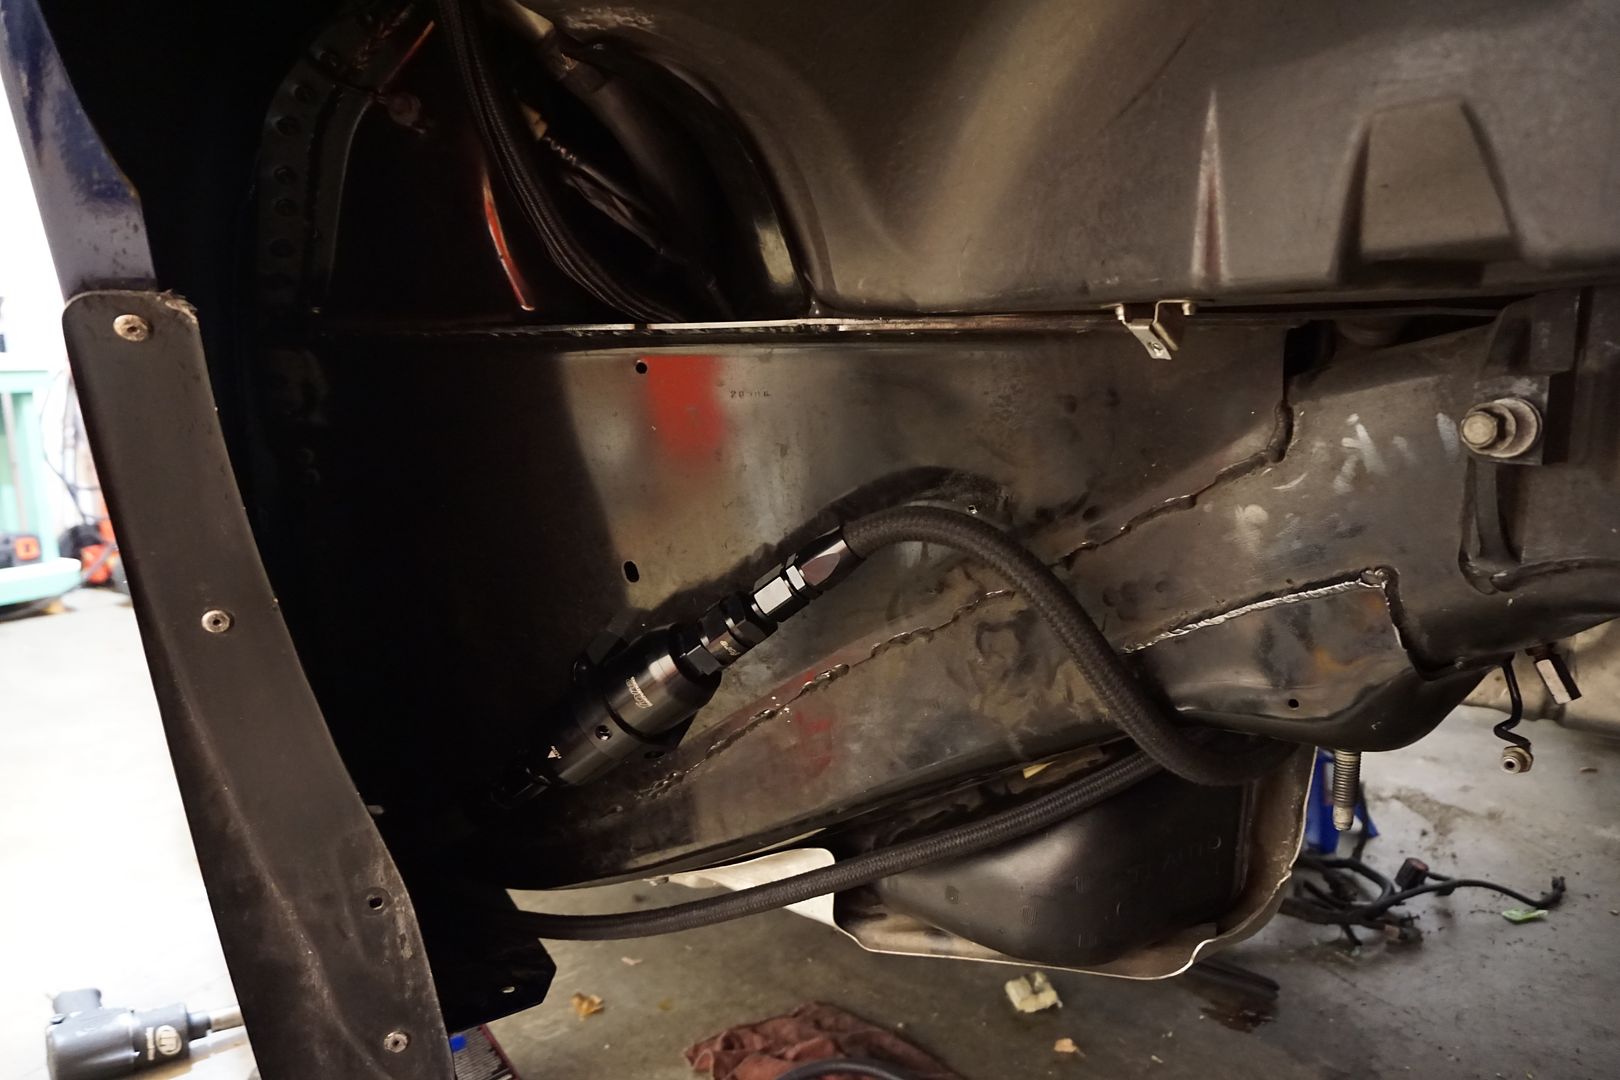
Y-Block routed and place in a position easy to get to.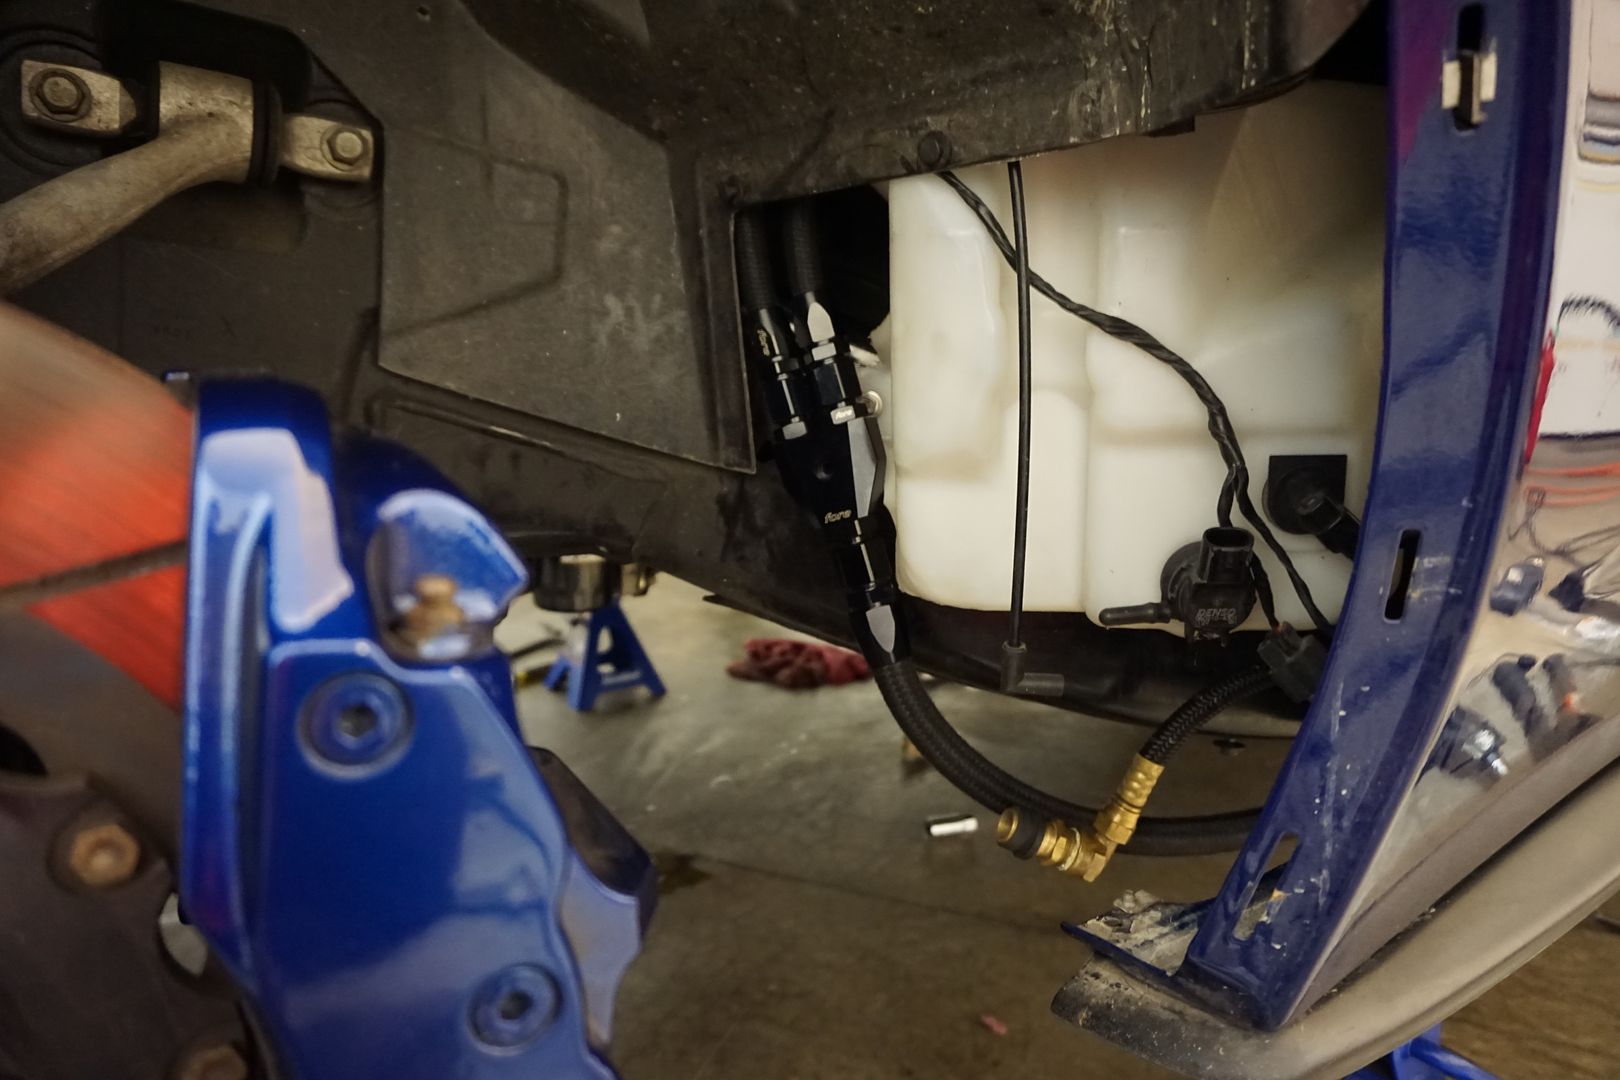
Intake Manifold and rails and lines all mocked up!
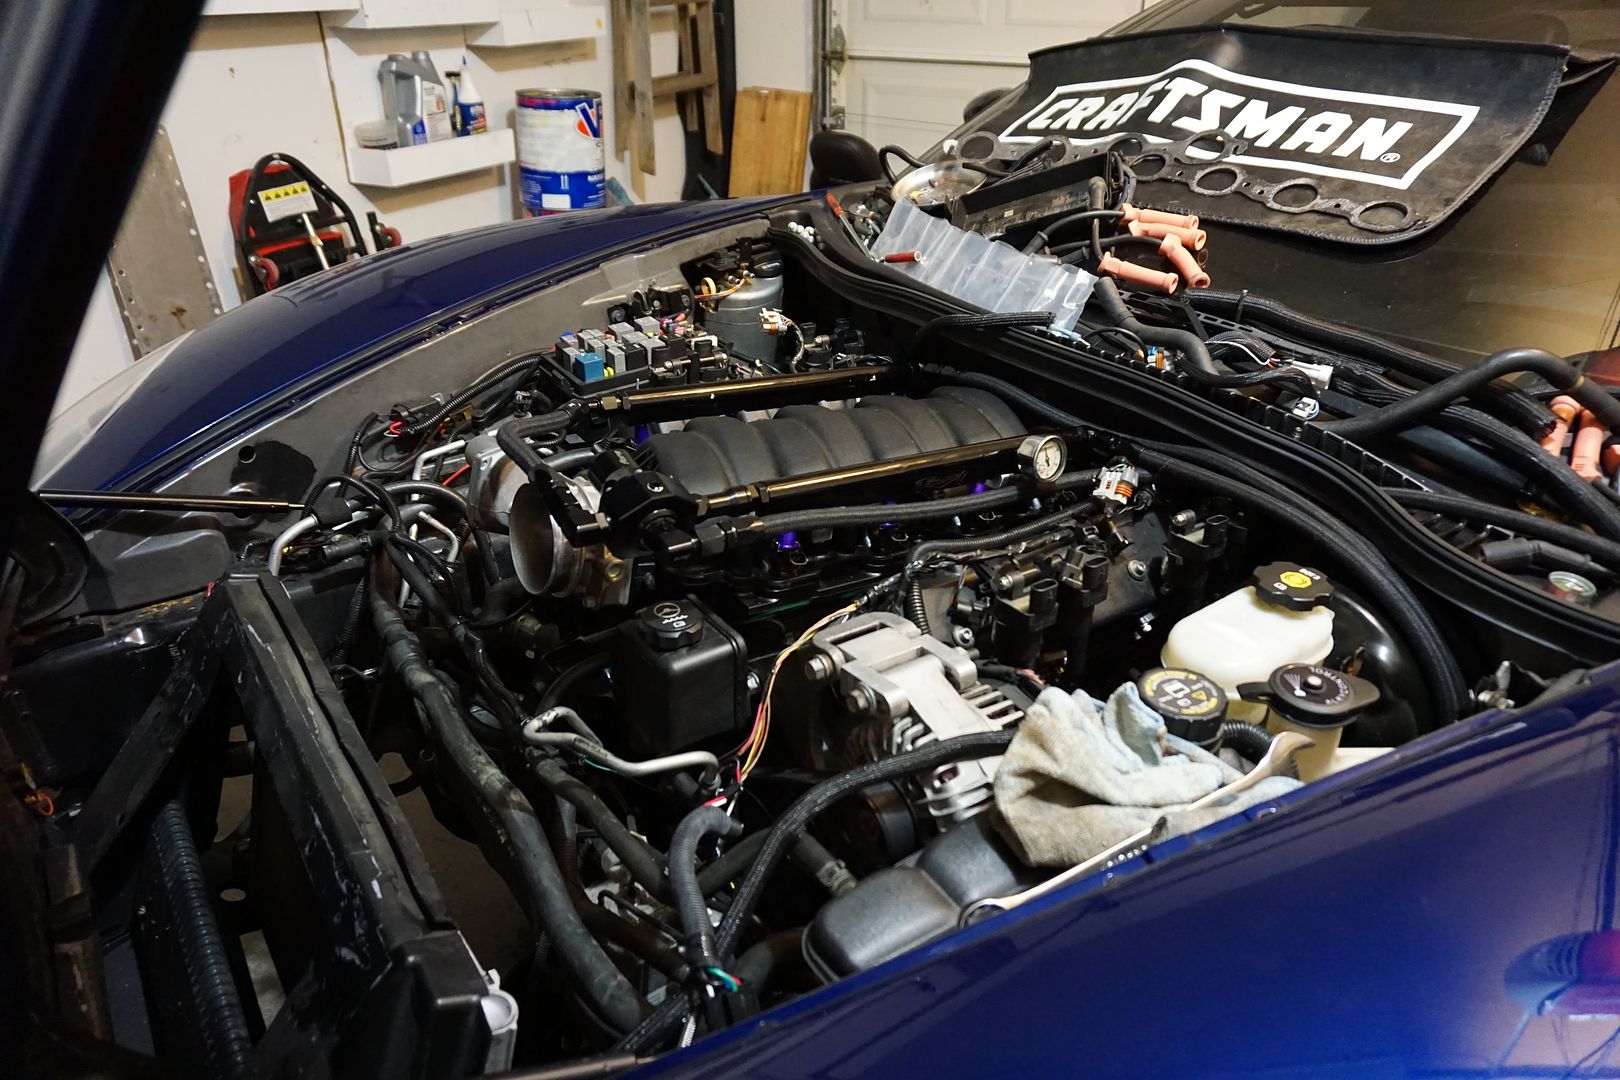
Looks good!
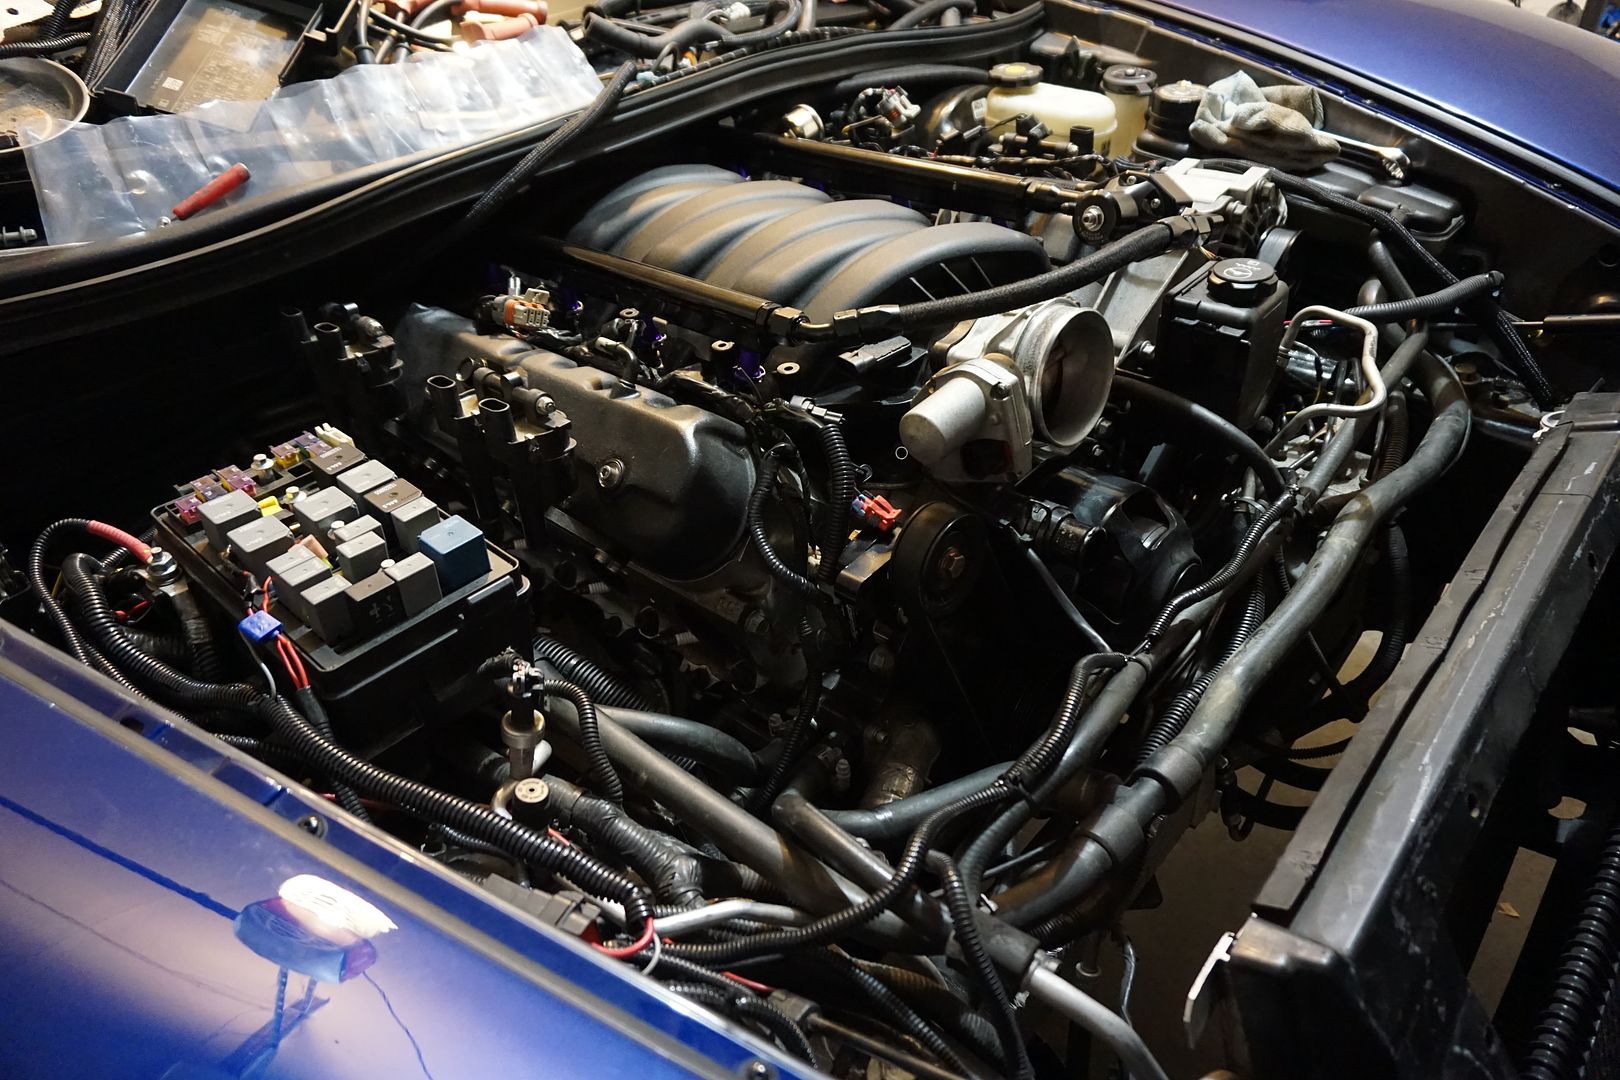
Y-Block mounted and Alky Meth kit completed!
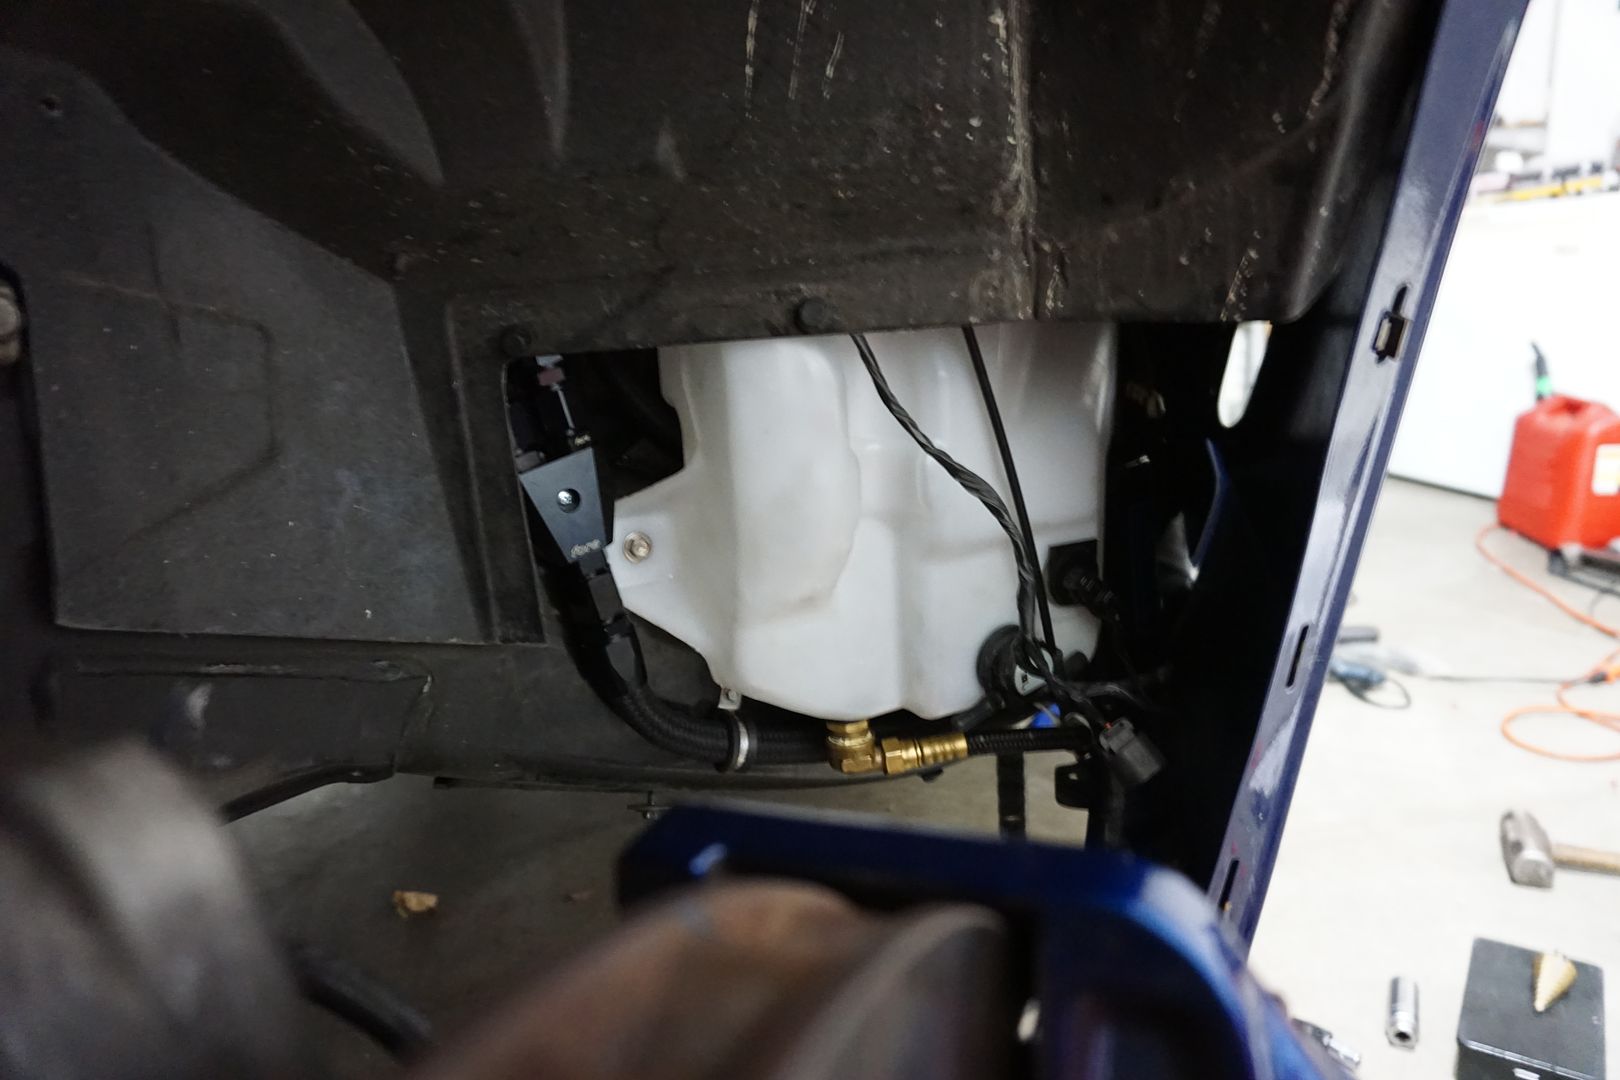
Build Goals – build reliable Street car capable of daily driving and racing from dig or roll at any time.
I will be breaking this build up into different more detailed sections for everyone to be able to follow along and maybe have discussions about.
Part 1 - Fuel System
Part 2 – Drivetrain
Part 3 - Rolling Gear
Part 4 - Engine
Part 5 - Evac system
Part 6 - Turbo Kit
Part 7 - Heat Management
But below you will find the overall high level build.
07 C6 Z06
RHS 434ci lower
Mast Heads
RPM Glide 9” conversion
DKT Twin Turbo Kit
Part 1
Fuel System
After much research and debate I have opted to go with a FORE Invitations system and ALKY Meth Kit
I will be utilizing the 3 pump system in which 1 pump (walbro 465) will handle normal duty and the 2x AEM 320-e will kit on via hobbs switch at a given PSI. To deliver the fuel to the motor I am also using RSI billet fuel rails and ID2000 injectors and tunneling everything via -10 feed and -8 return. This fuel system will support around 1500rwhp on e85. To cool the charge and provide even more safe guard I will be running 2 M15 nozzles on the ALKY progressive Meth kit.
Fore Billet pump hanger! utilizing the 3 pump system in which 1 pump (walbro 465) will handle normal duty and the 2x AEM 320-e will kit on via hobbs switch at a given PSI.

Hefty Wiring to provide good power and ground to support the 3 pumps! Also pictured is the hobbs switch!

Few billet pieces! Fore billet vacuum manifold, billet Y-block, and filter check valve combo to keep the lines clean.

I opted to use RSI Billet fuel rails as they are big bore and are one of the few offered for the LS7 stock intake which have a very sturdy billet mount to avoid deflection under high boost!

Fore Big FPR will be managing the fuel pressure! We have our system setup at 43lbs static.
I have opted to utilize ID2000 injectors which should support around 1500hp on e85

Overall picture of entire assembly

Everything black!

Another shot of the art work

Good picture of the RSI Billet mounts! Super sturdy!

RSI Billet Rails mounted! Also picture is my dsteck flex fuel sensor that will be used on the return line.

Tanks were easy to drop but I think I ran out of curse words to use on the crossover tube..

Tripple pumps in!

-10 feed and -8 return ran, I will secure them once drivetrain is in.

Y-Block routed and place in a position easy to get to.

Intake Manifold and rails and lines all mocked up!

Looks good!

Y-Block mounted and Alky Meth kit completed!

Last edited by dasorcha21; 01-31-2015 at 07:08 PM.
#2
Part 2
Drivetrain
I have opted to change the car from a rpm level X 4l65e to the best of the best RPM Glide Swap with 9” conversion with a 3.25 gear to keep things nice and street friendly. Utilizing this transmission will insure reliability, longevity, and make controlling the power easier. I will also be using DSS axles and hubs along with ECS Axles loops and Torque tamer.
Level X 4l65e Trans and rear coming out! Quick 30 minute job.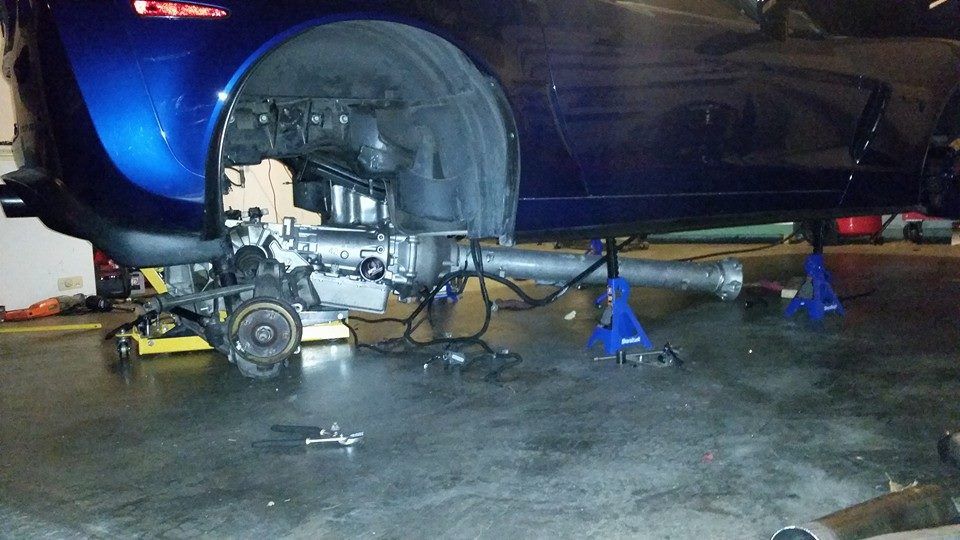
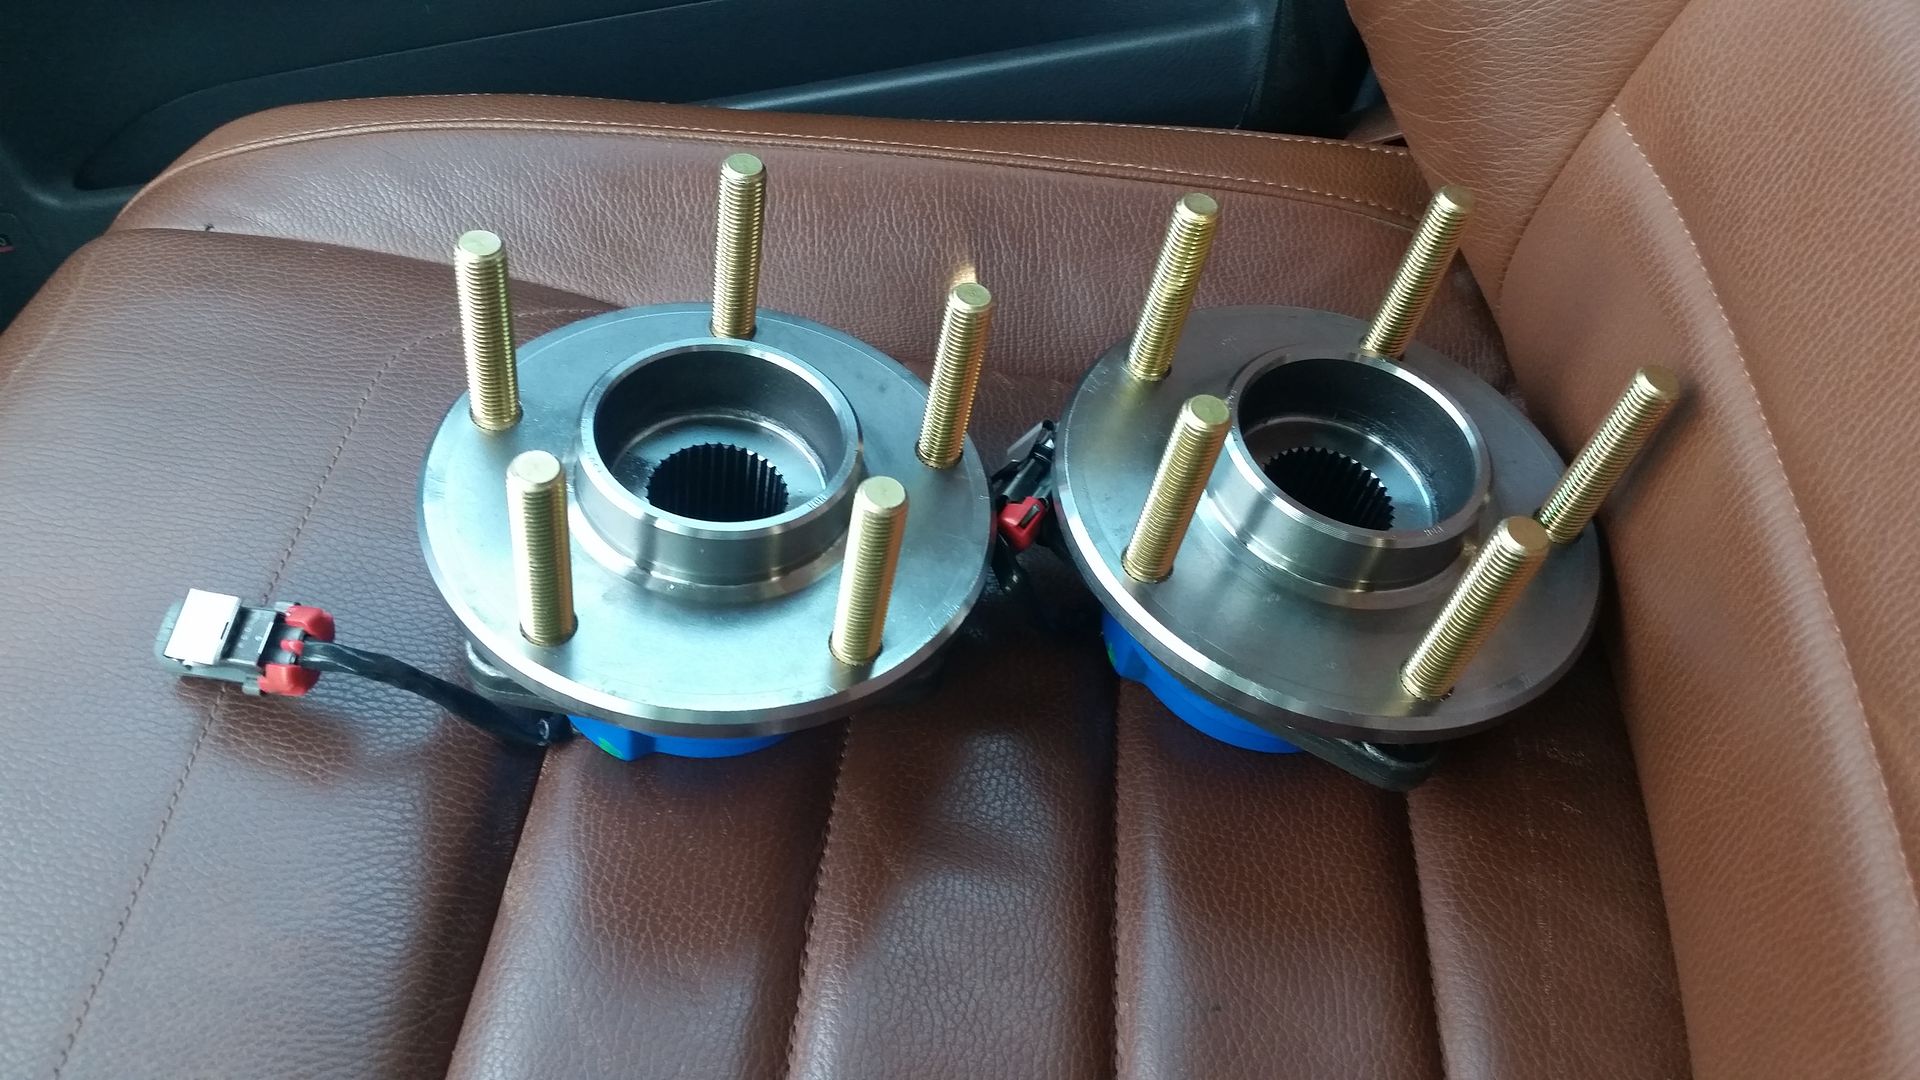
DSS Level 5 Axle and Hub Kit!
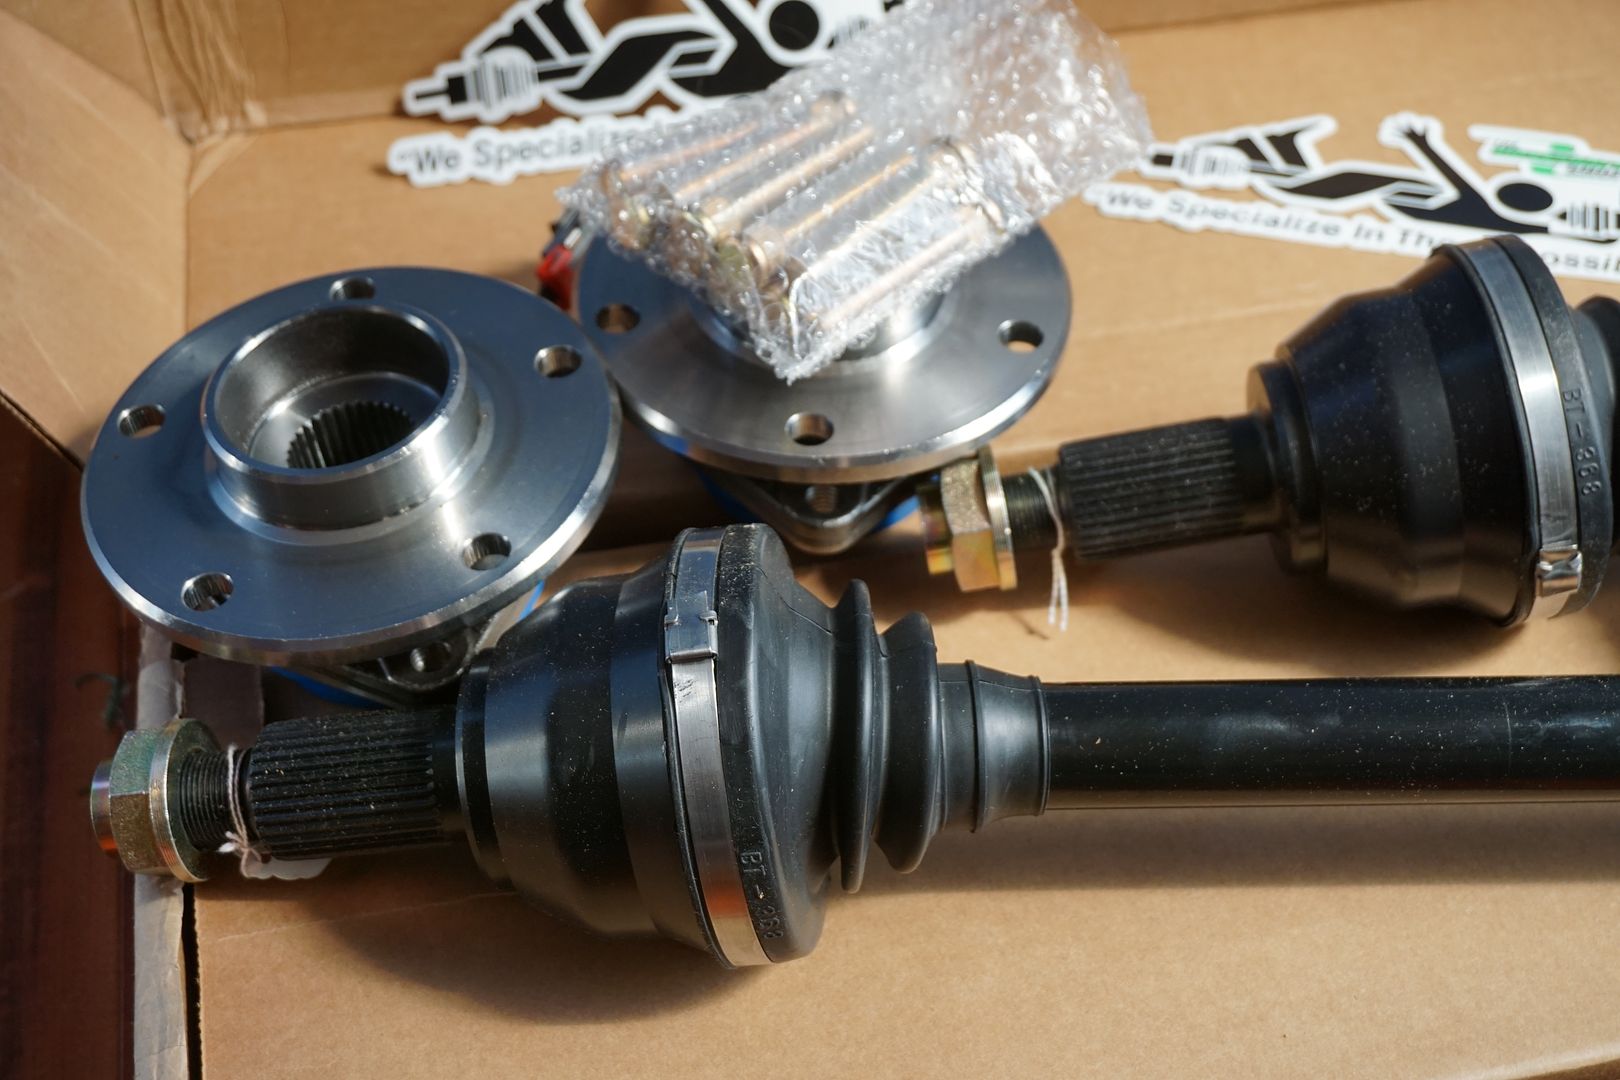
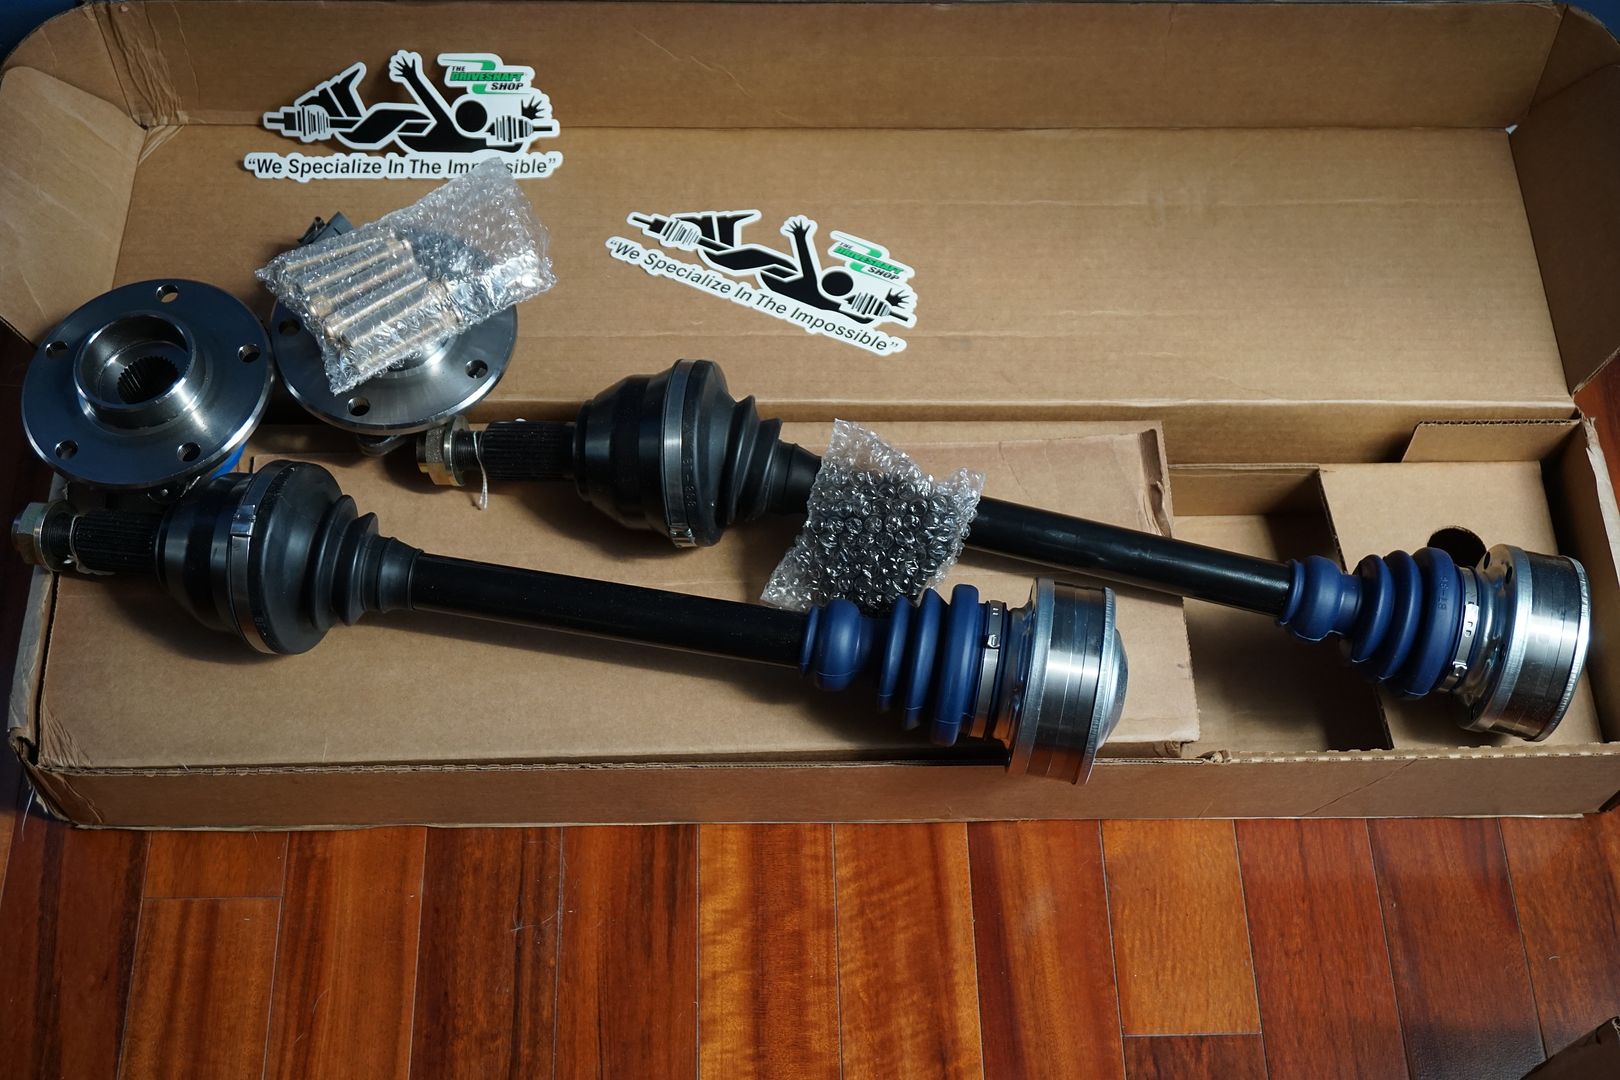
Studs pressed into DSS Hubs
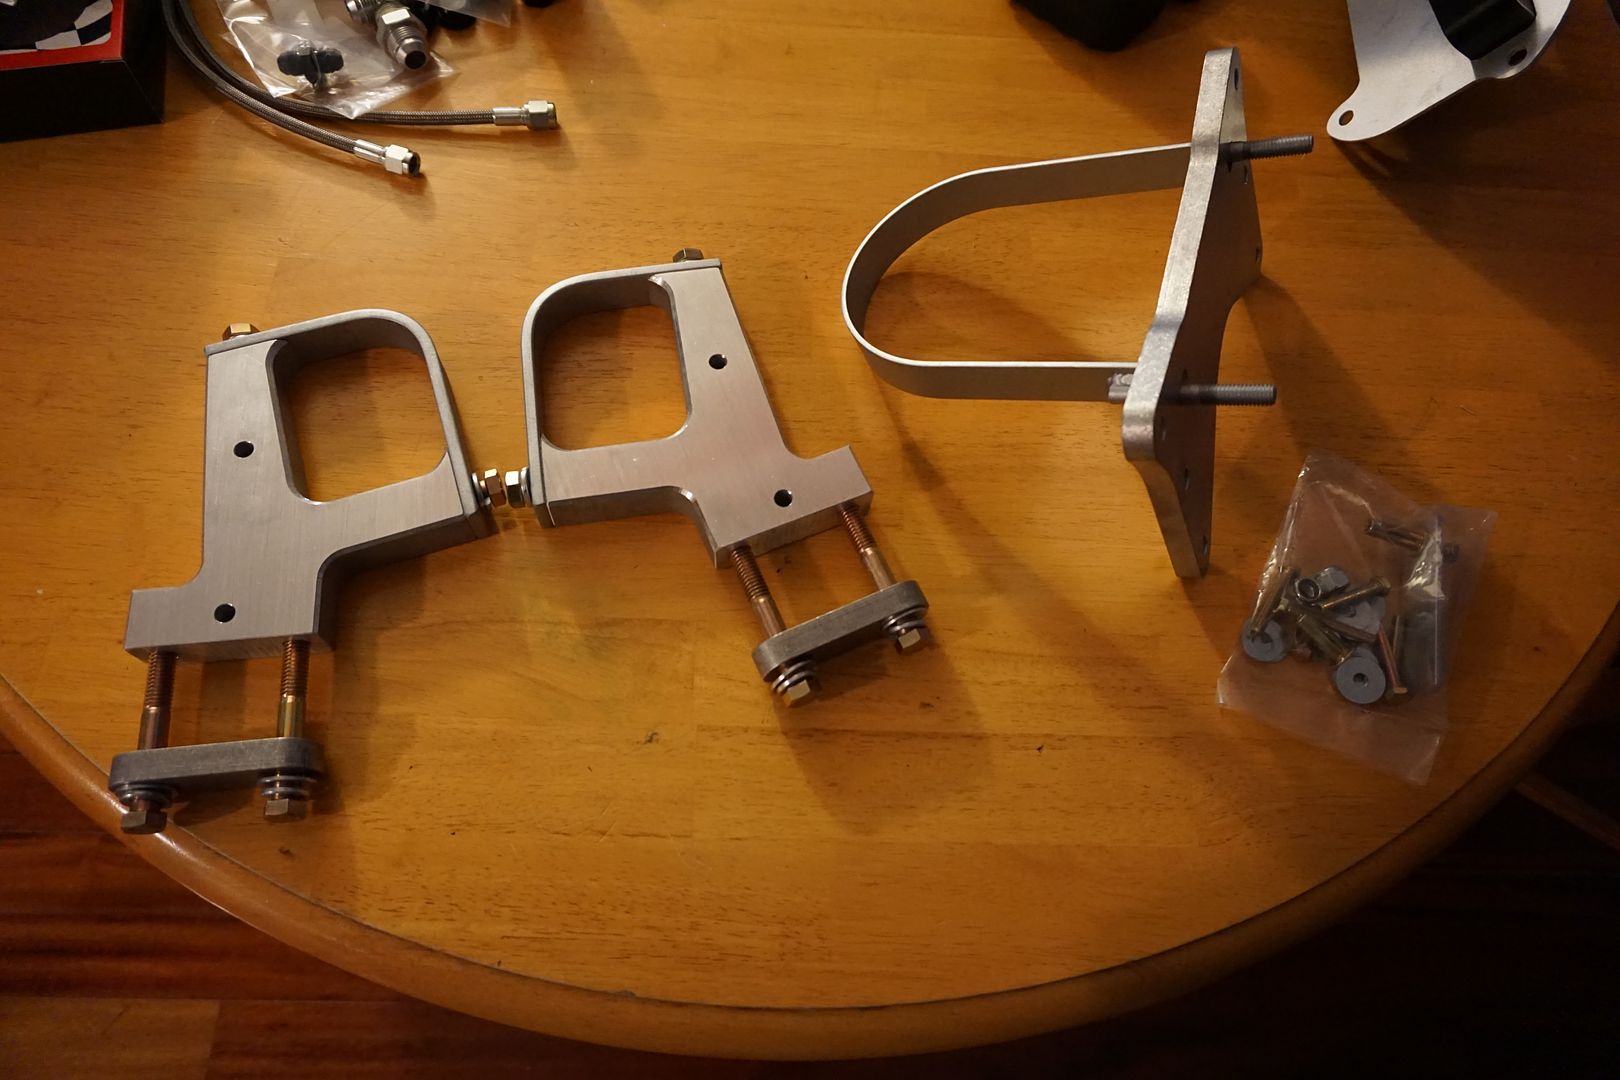
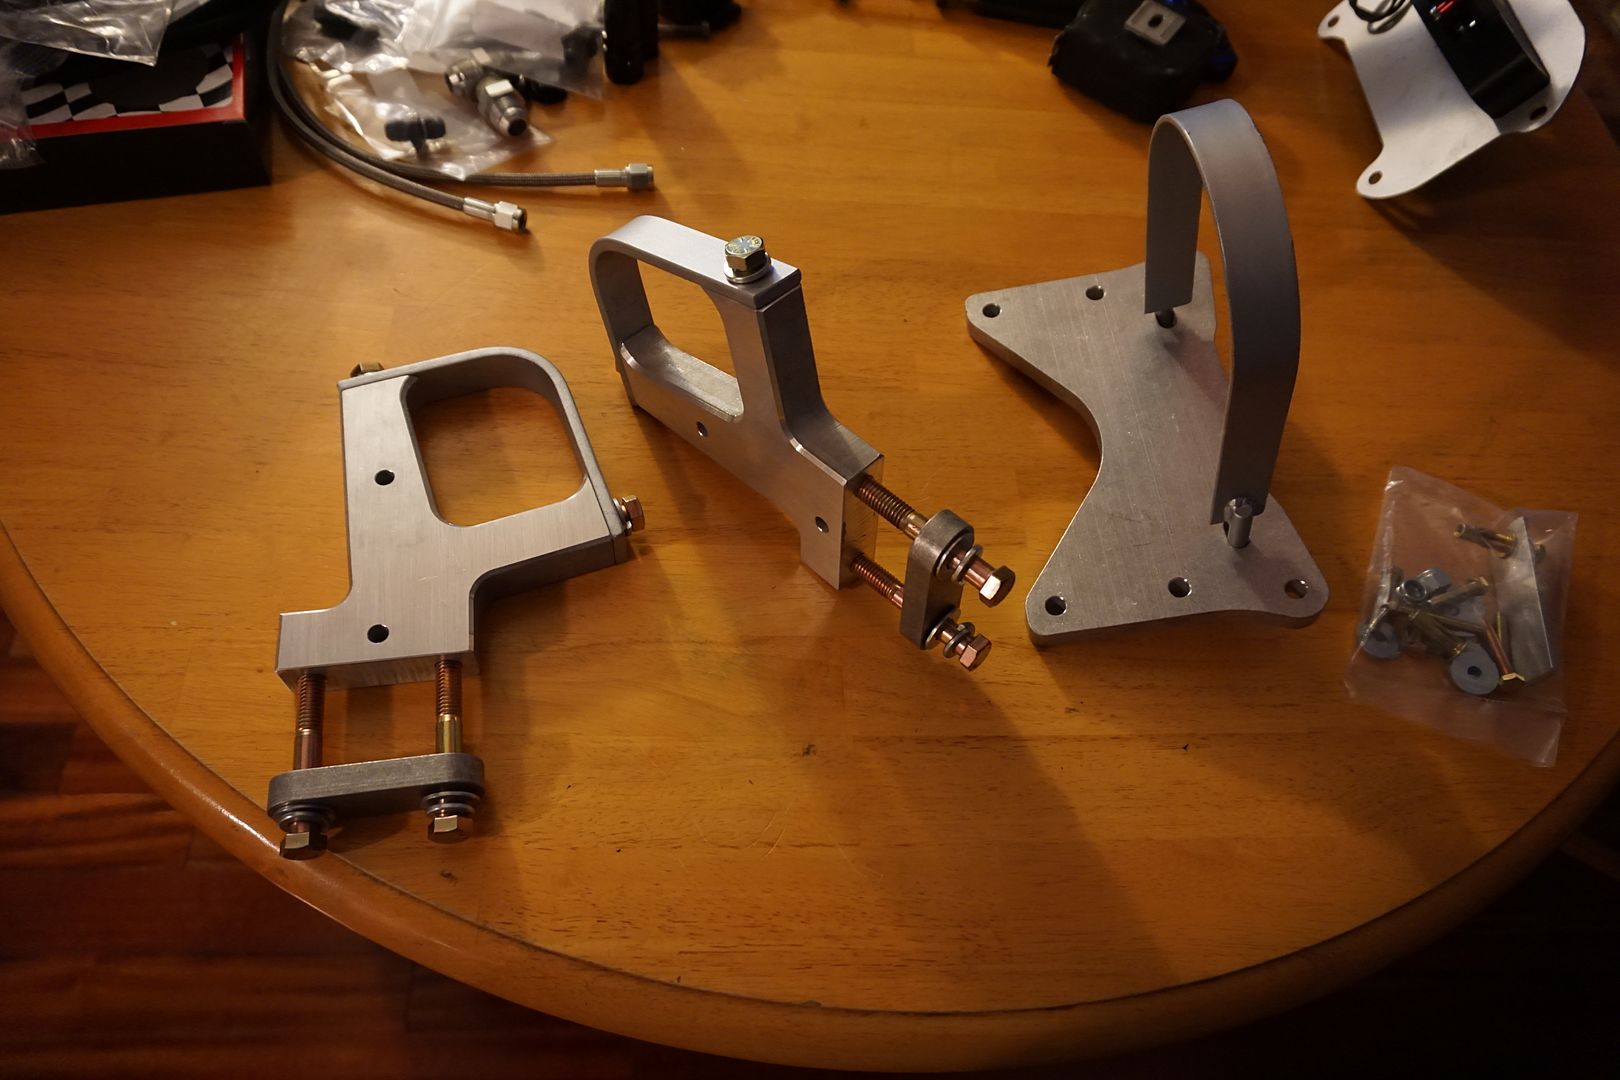
ECS Axle Loops and Torque Tamer! Cheap insurance if you ask me!
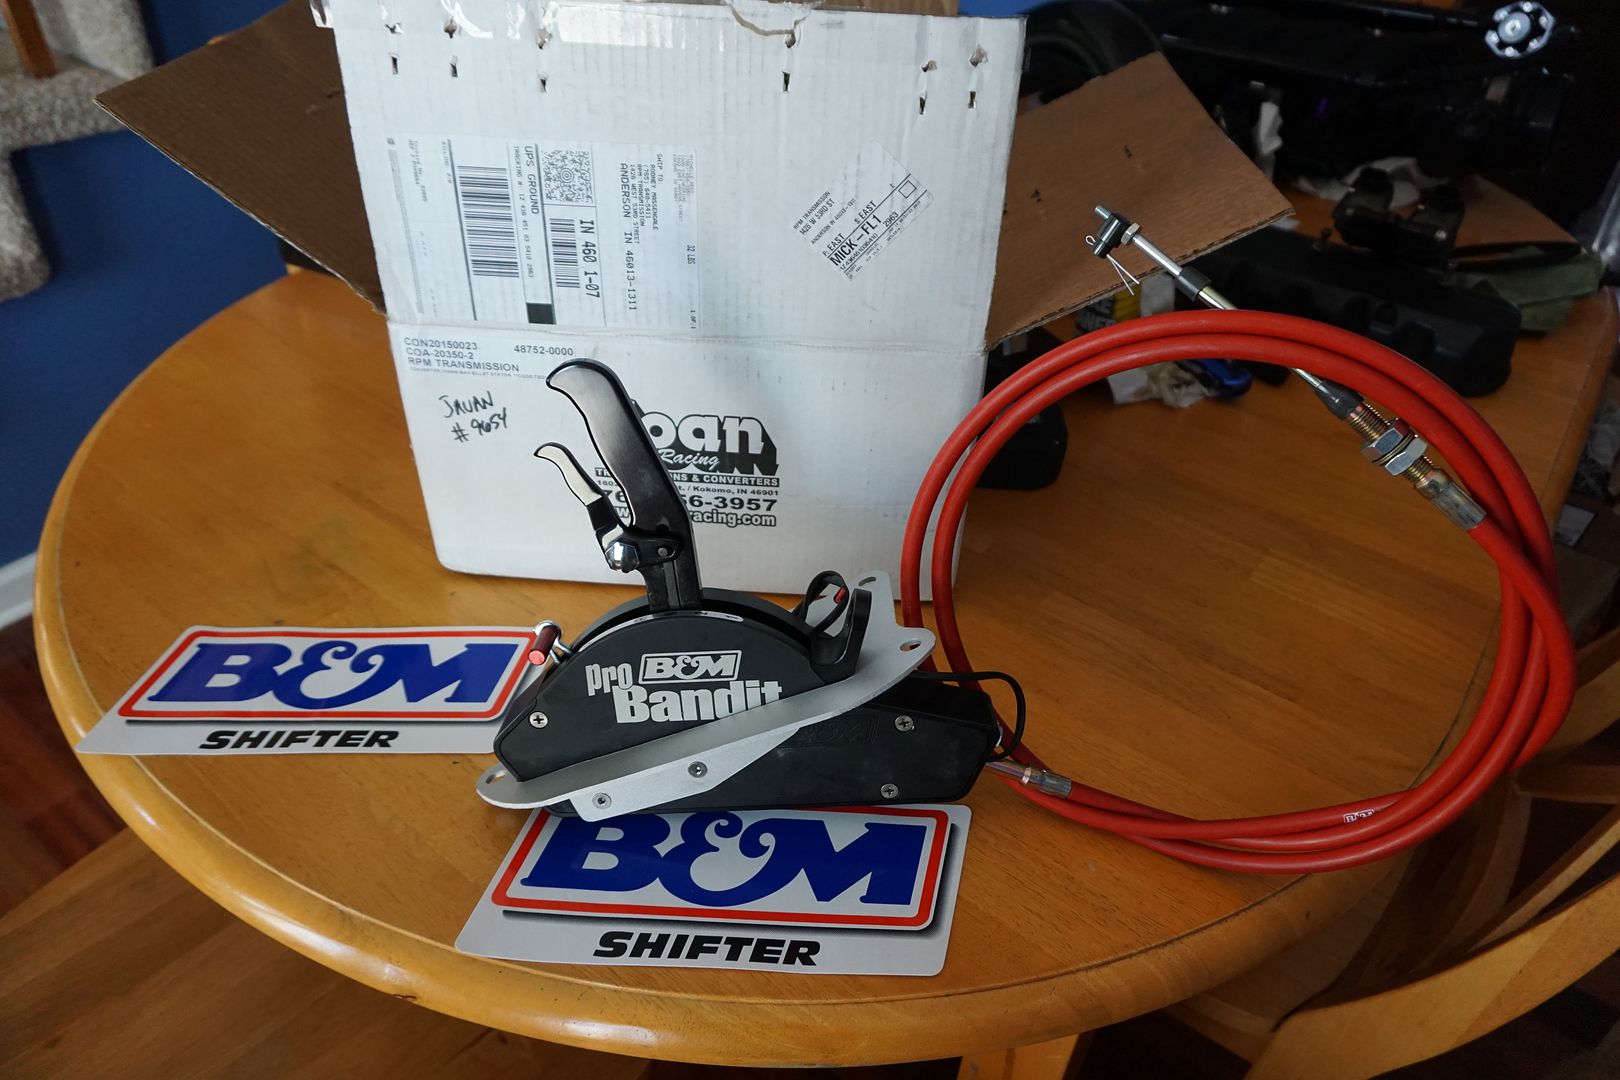
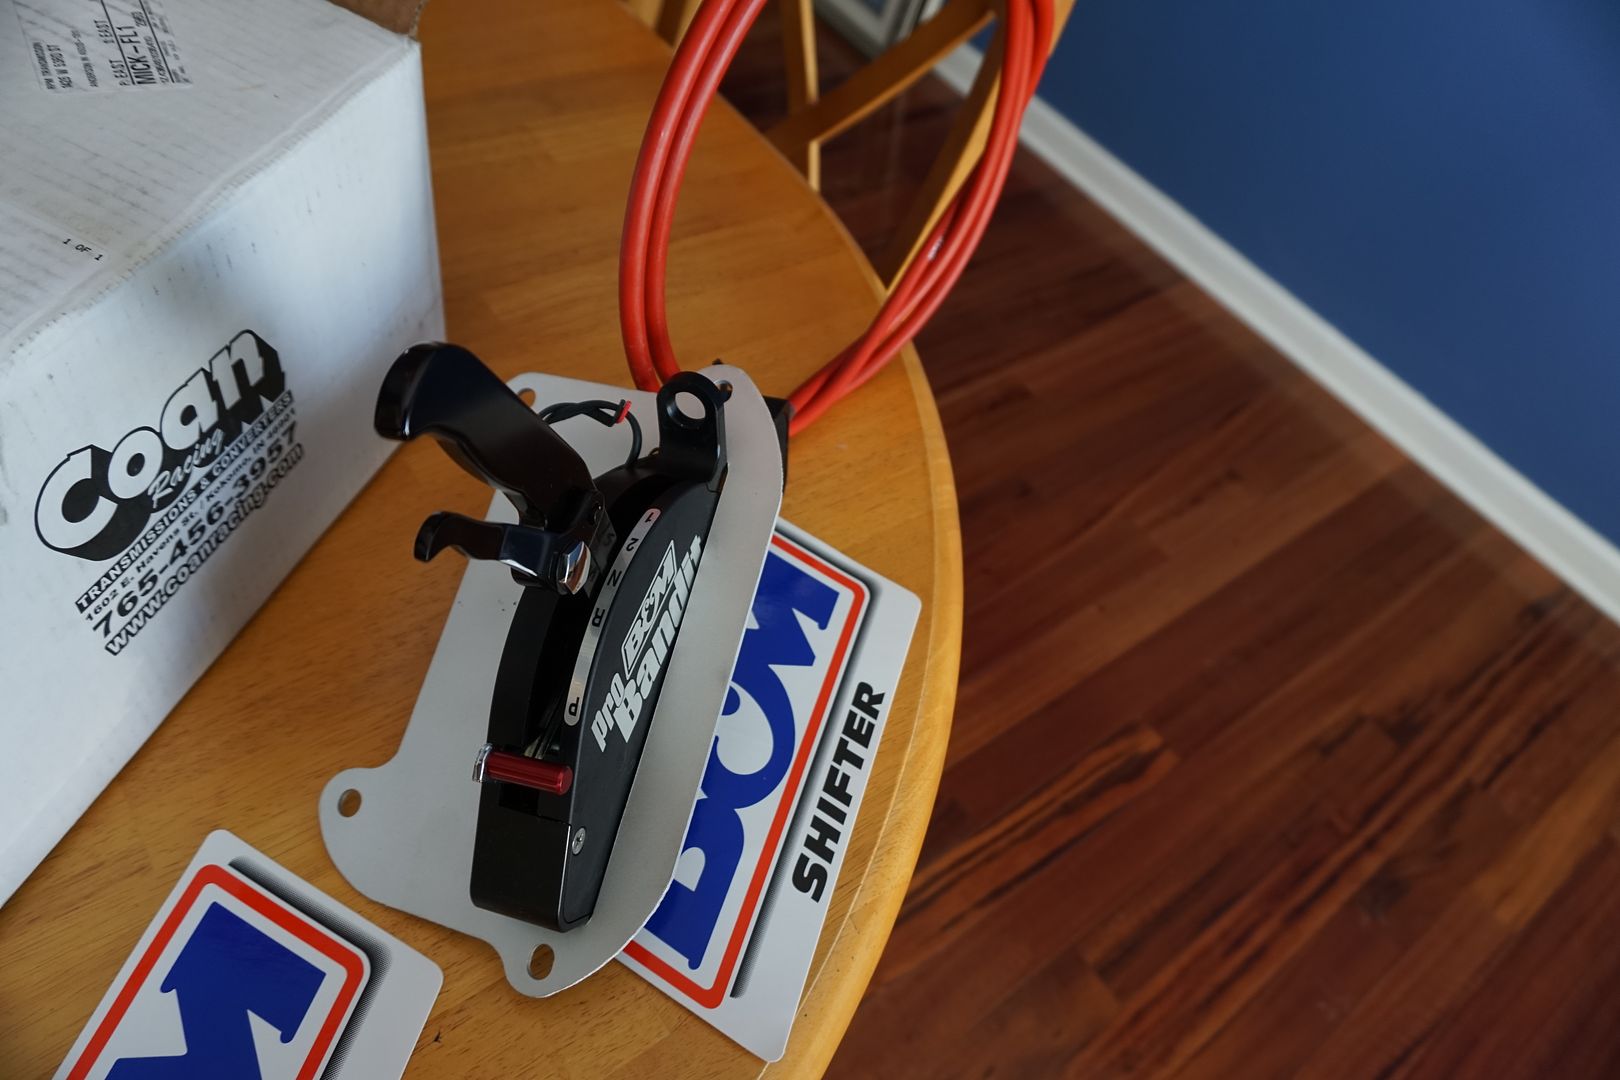
B&M Pro Bandit Shifter!
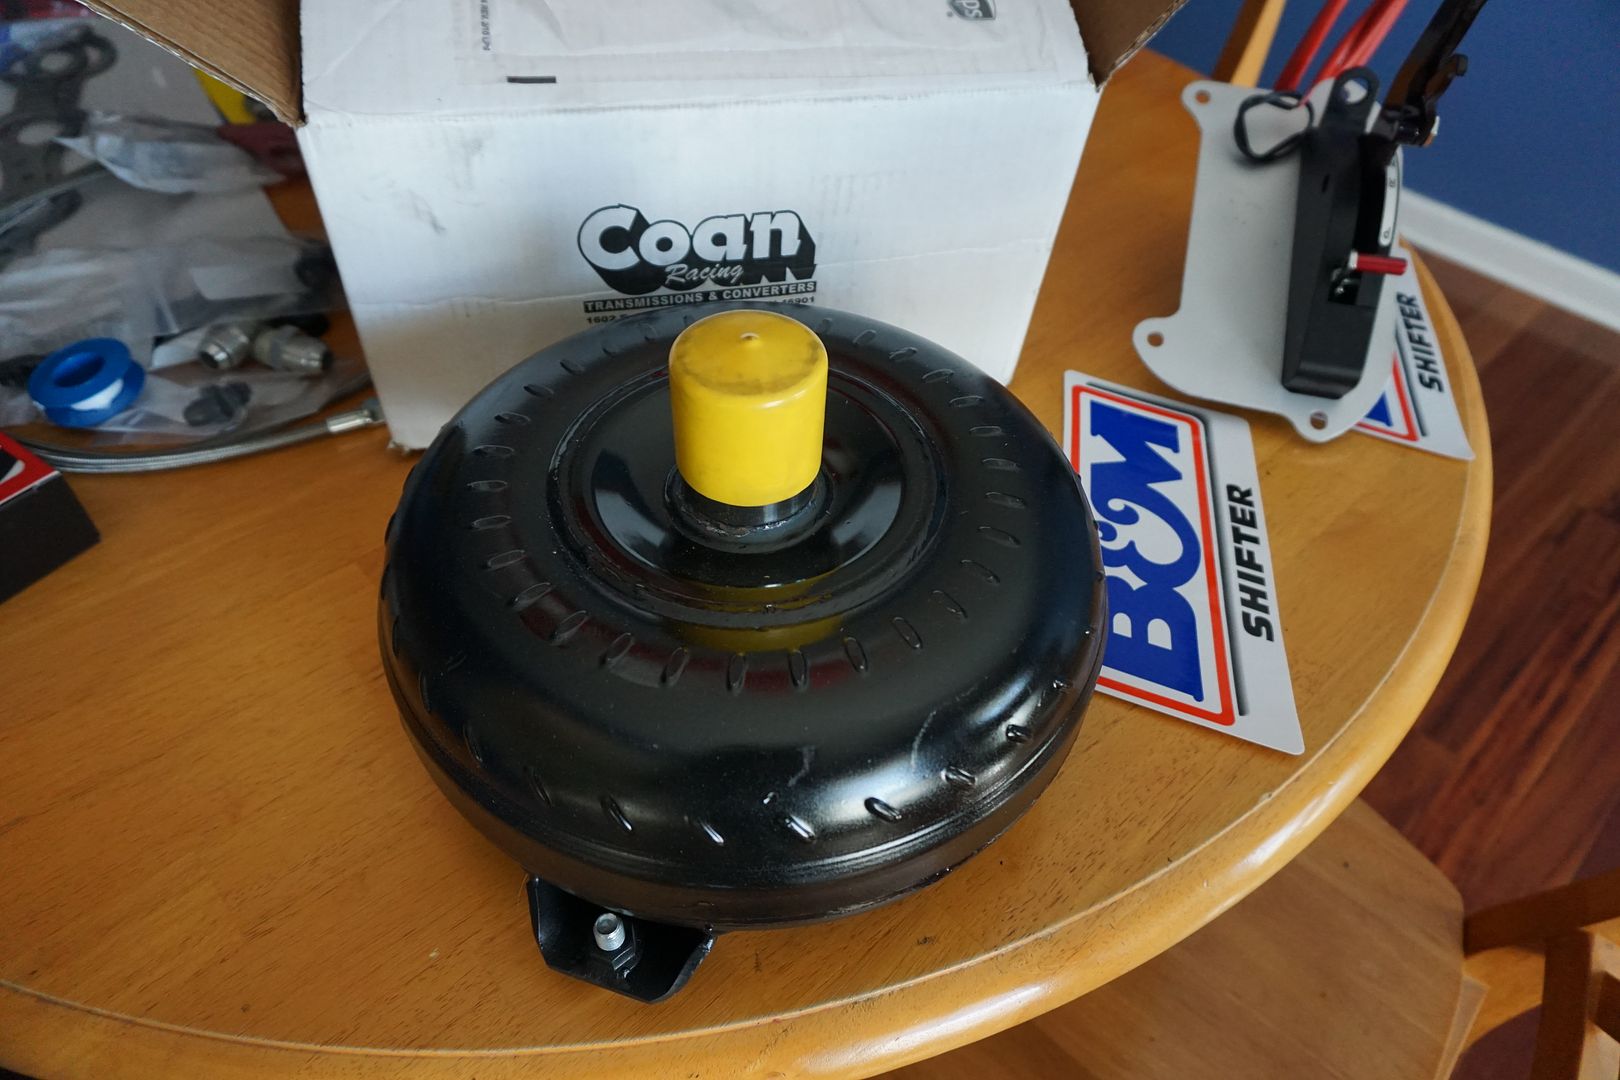
Coan 4k Stall converter!
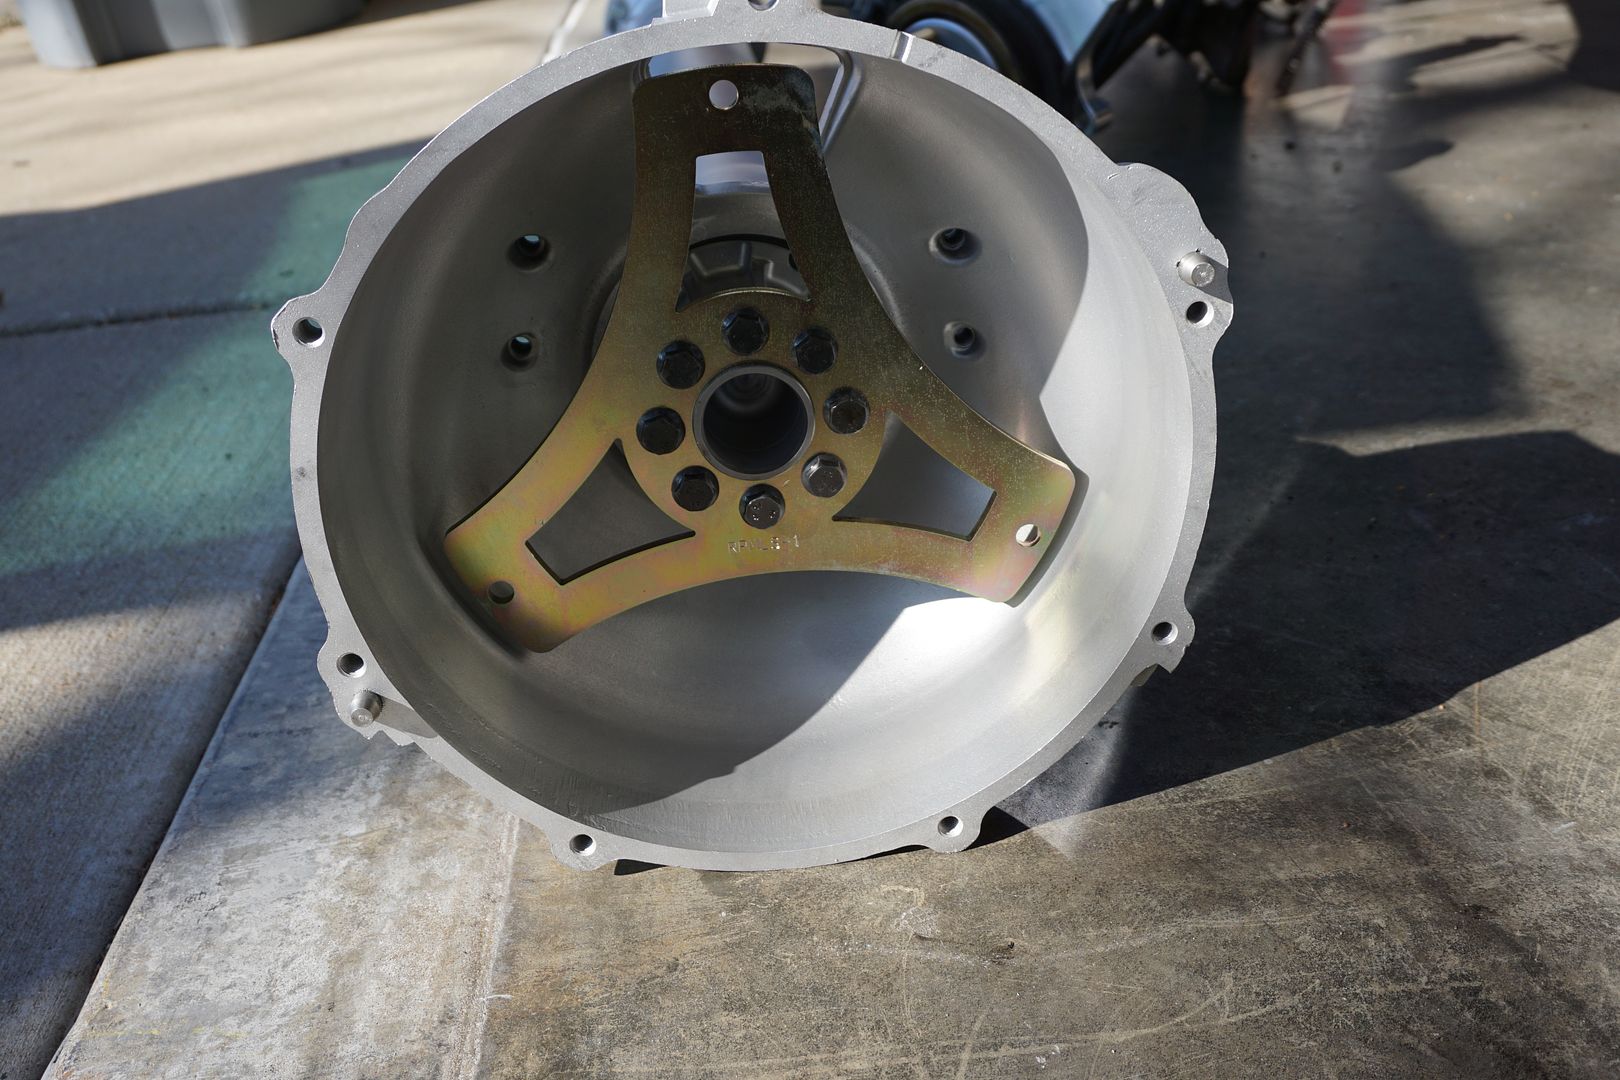
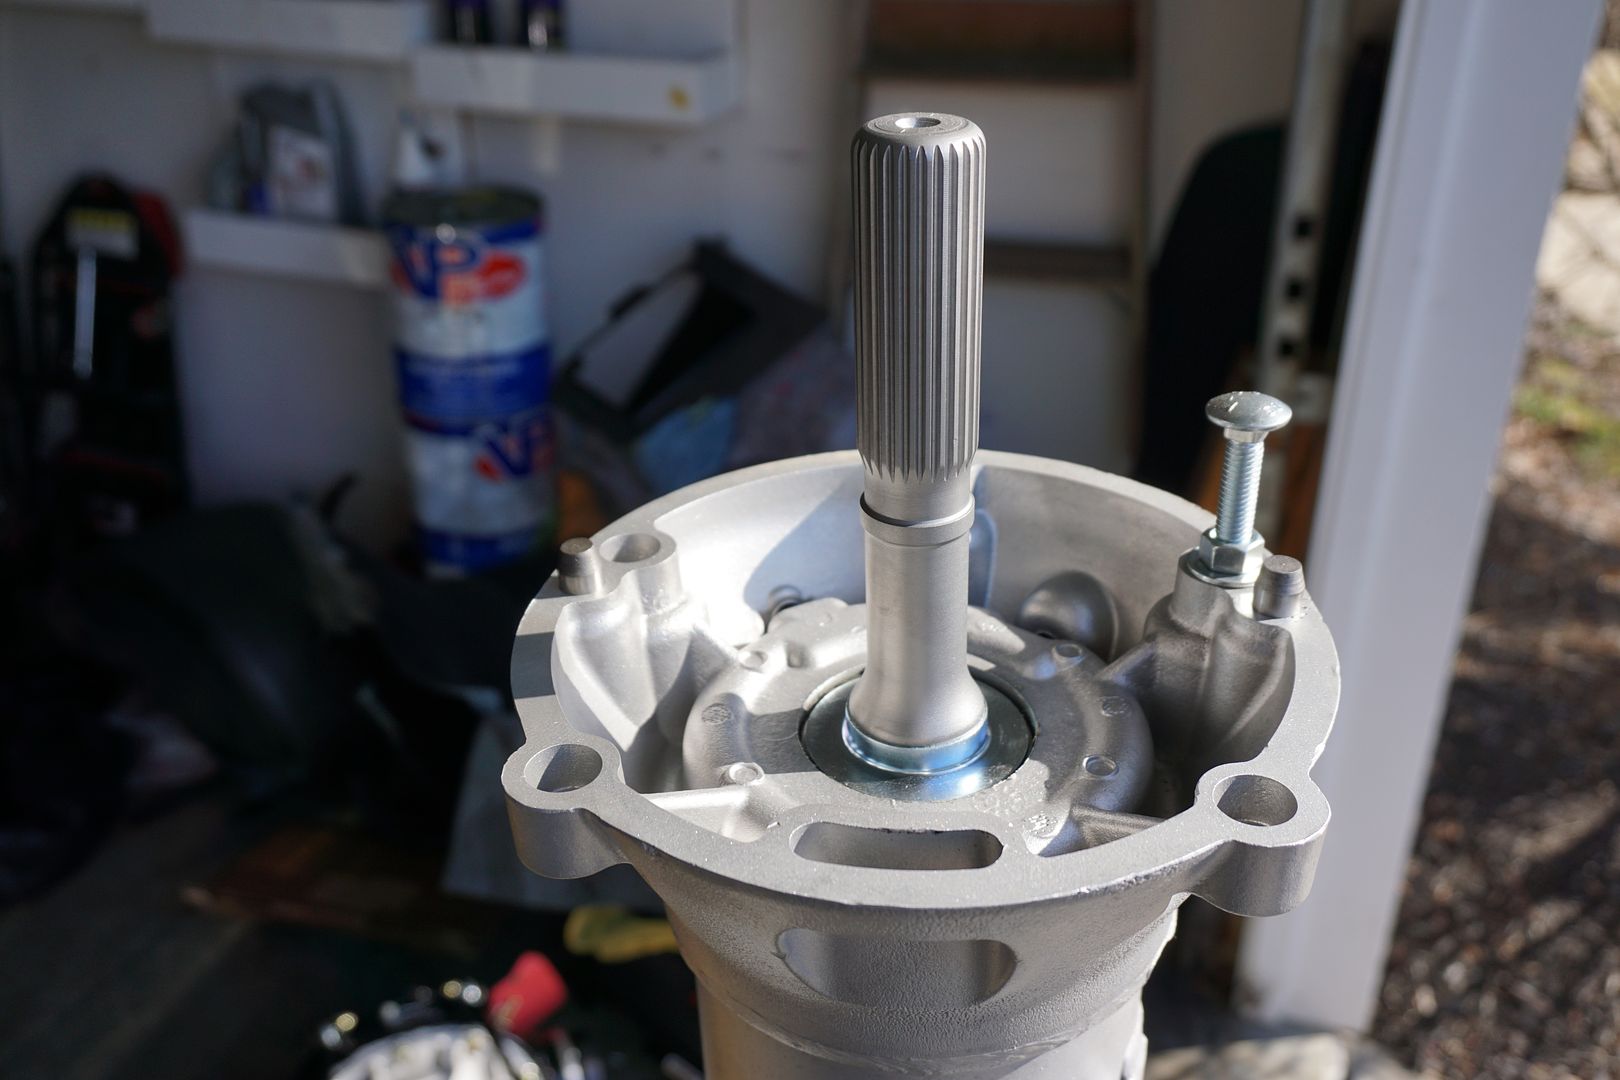
RPM Transmission Powerglide and 9” conversion! Every little nook and cranny of this work of art screams heavy duty!
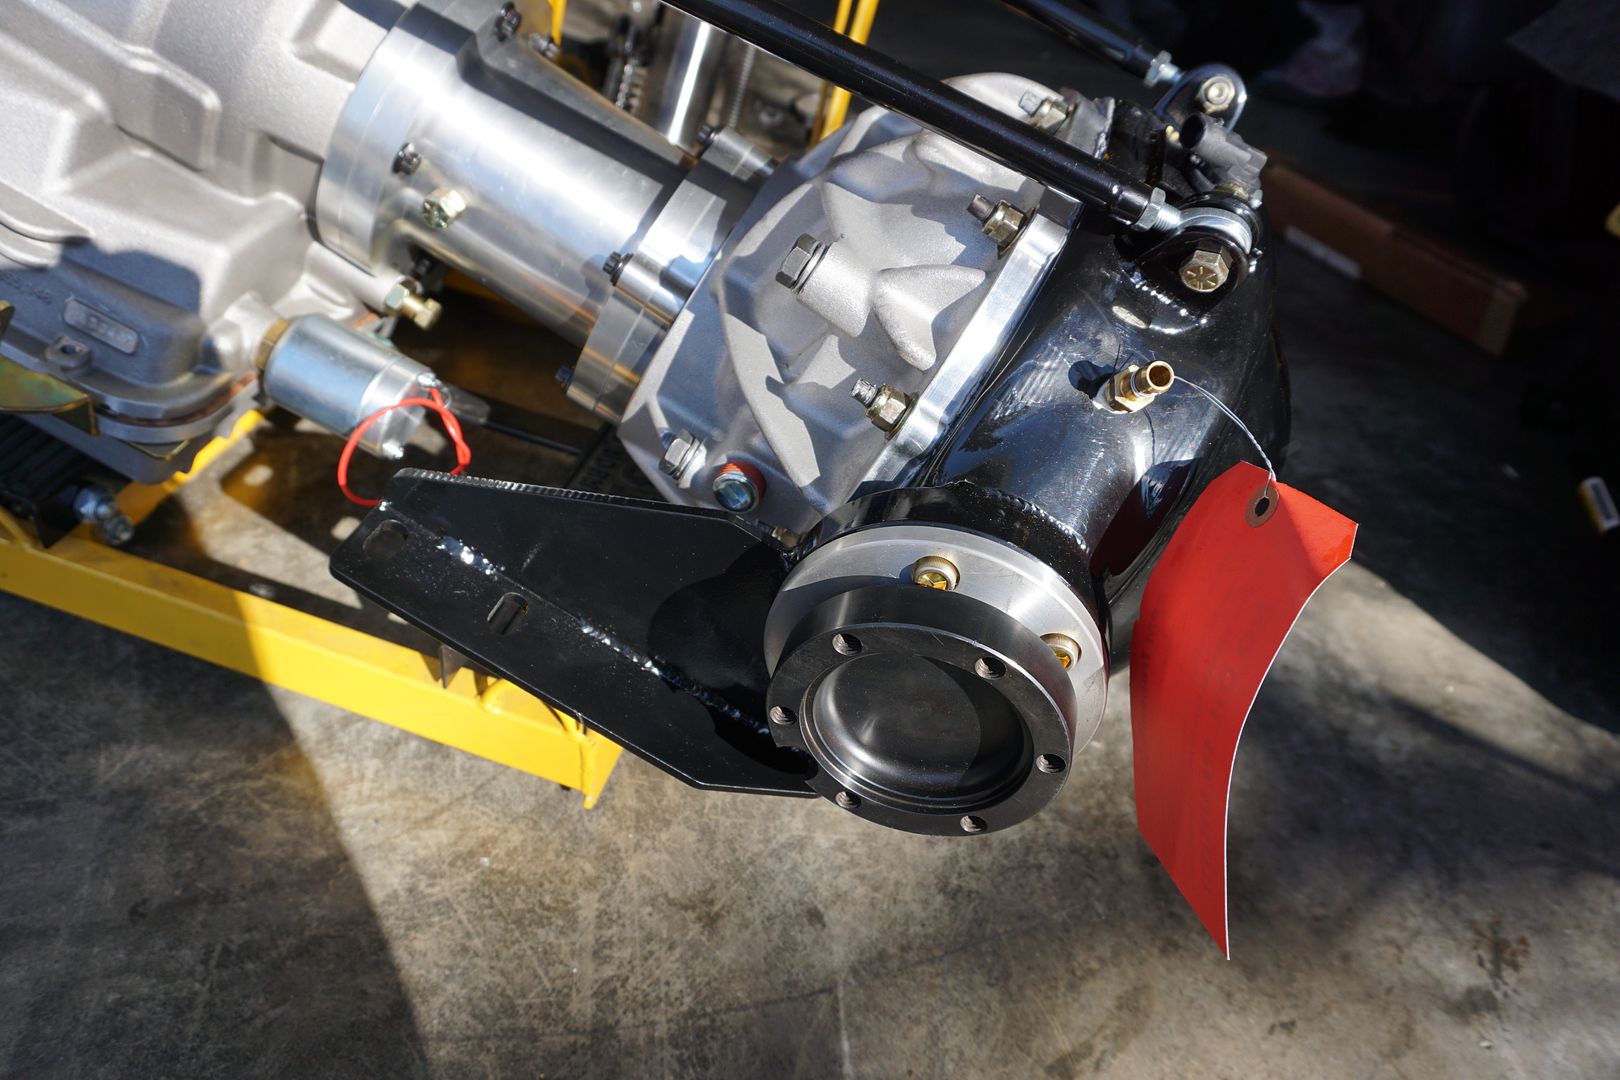
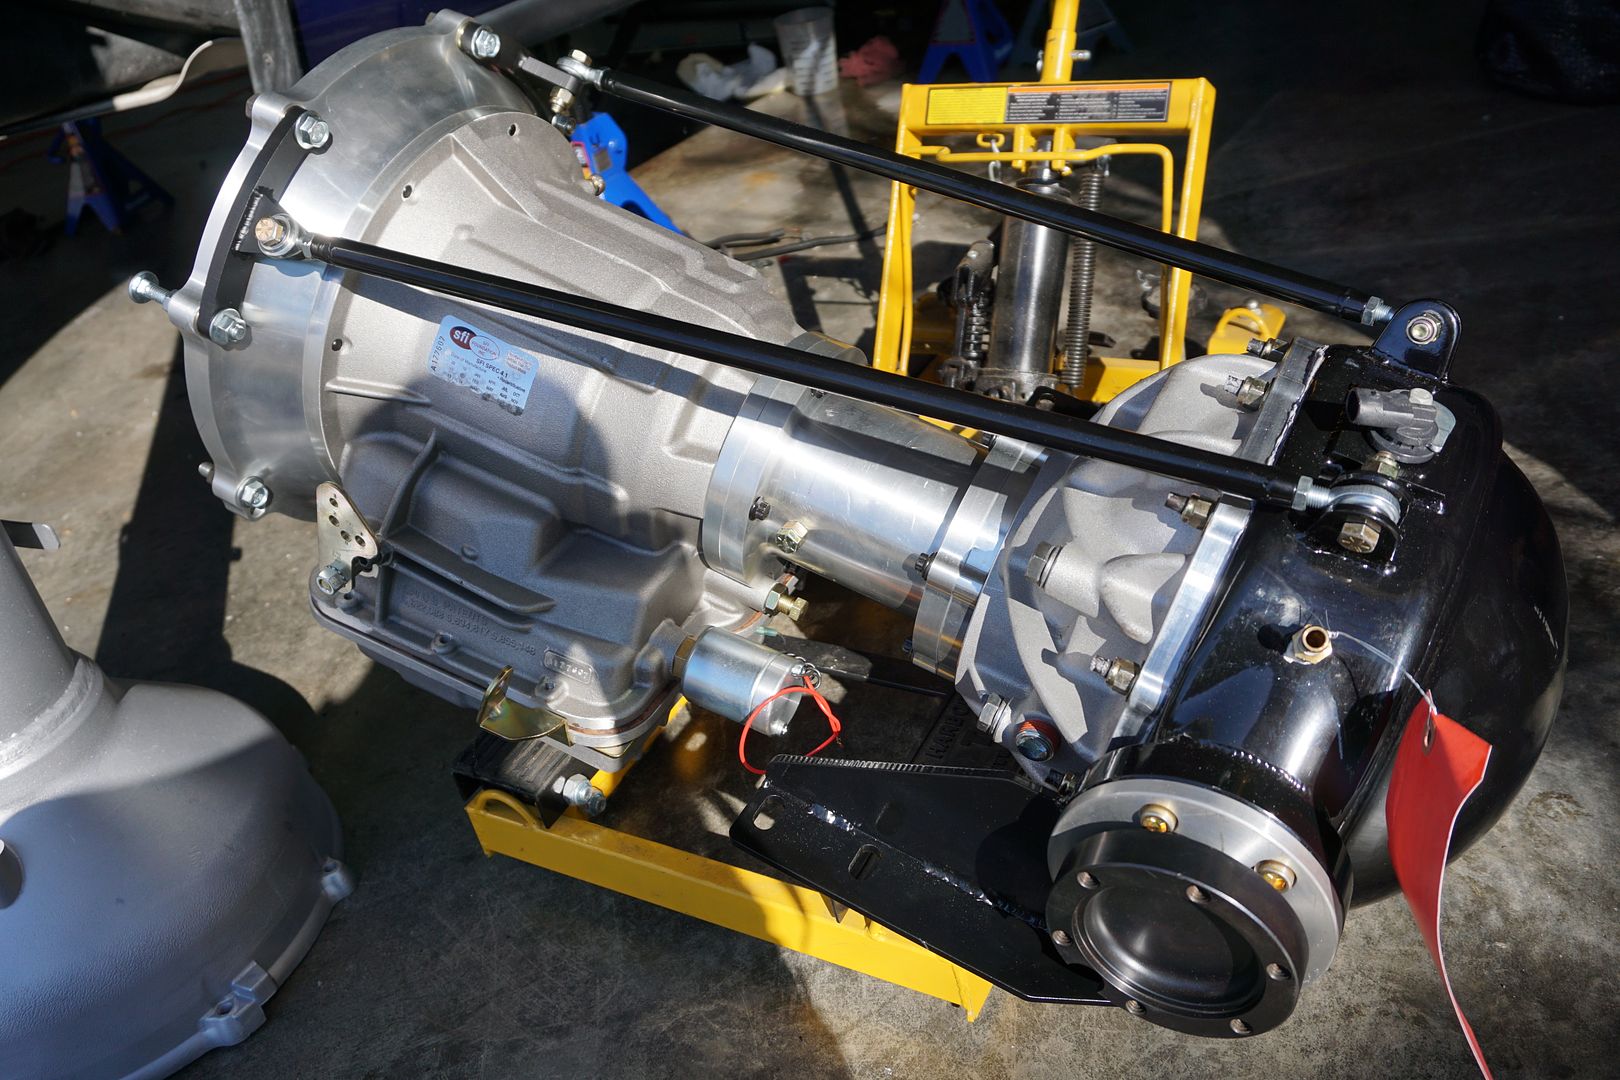
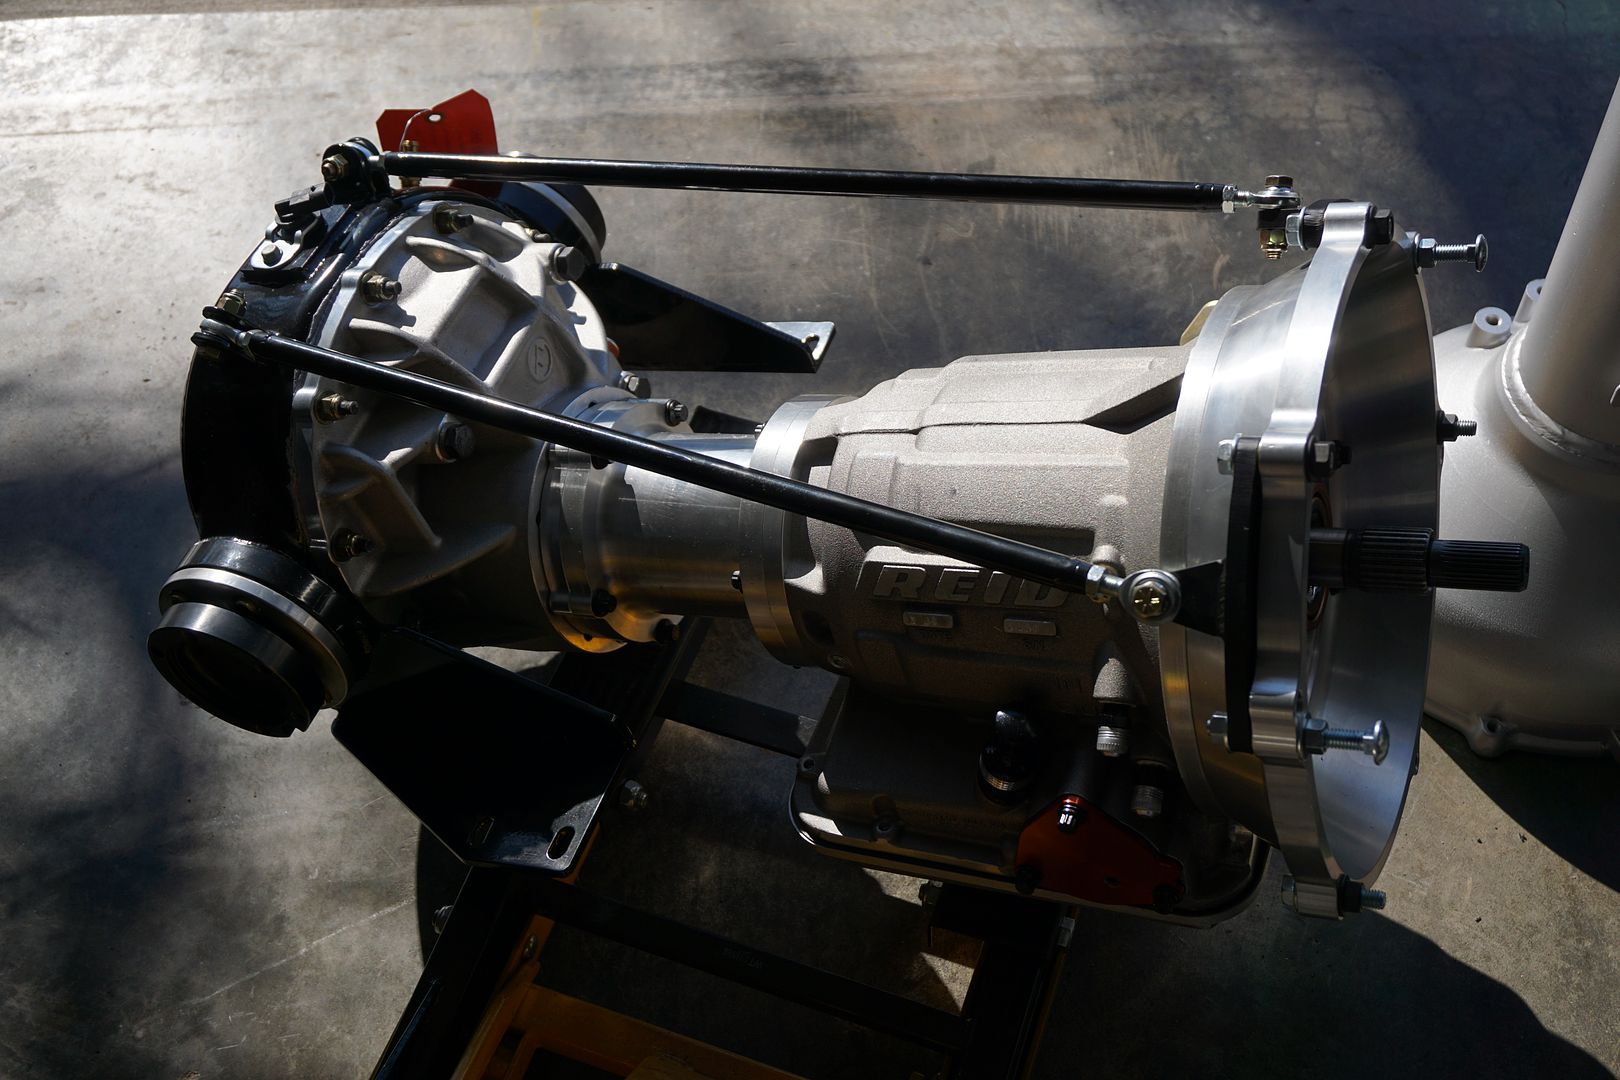
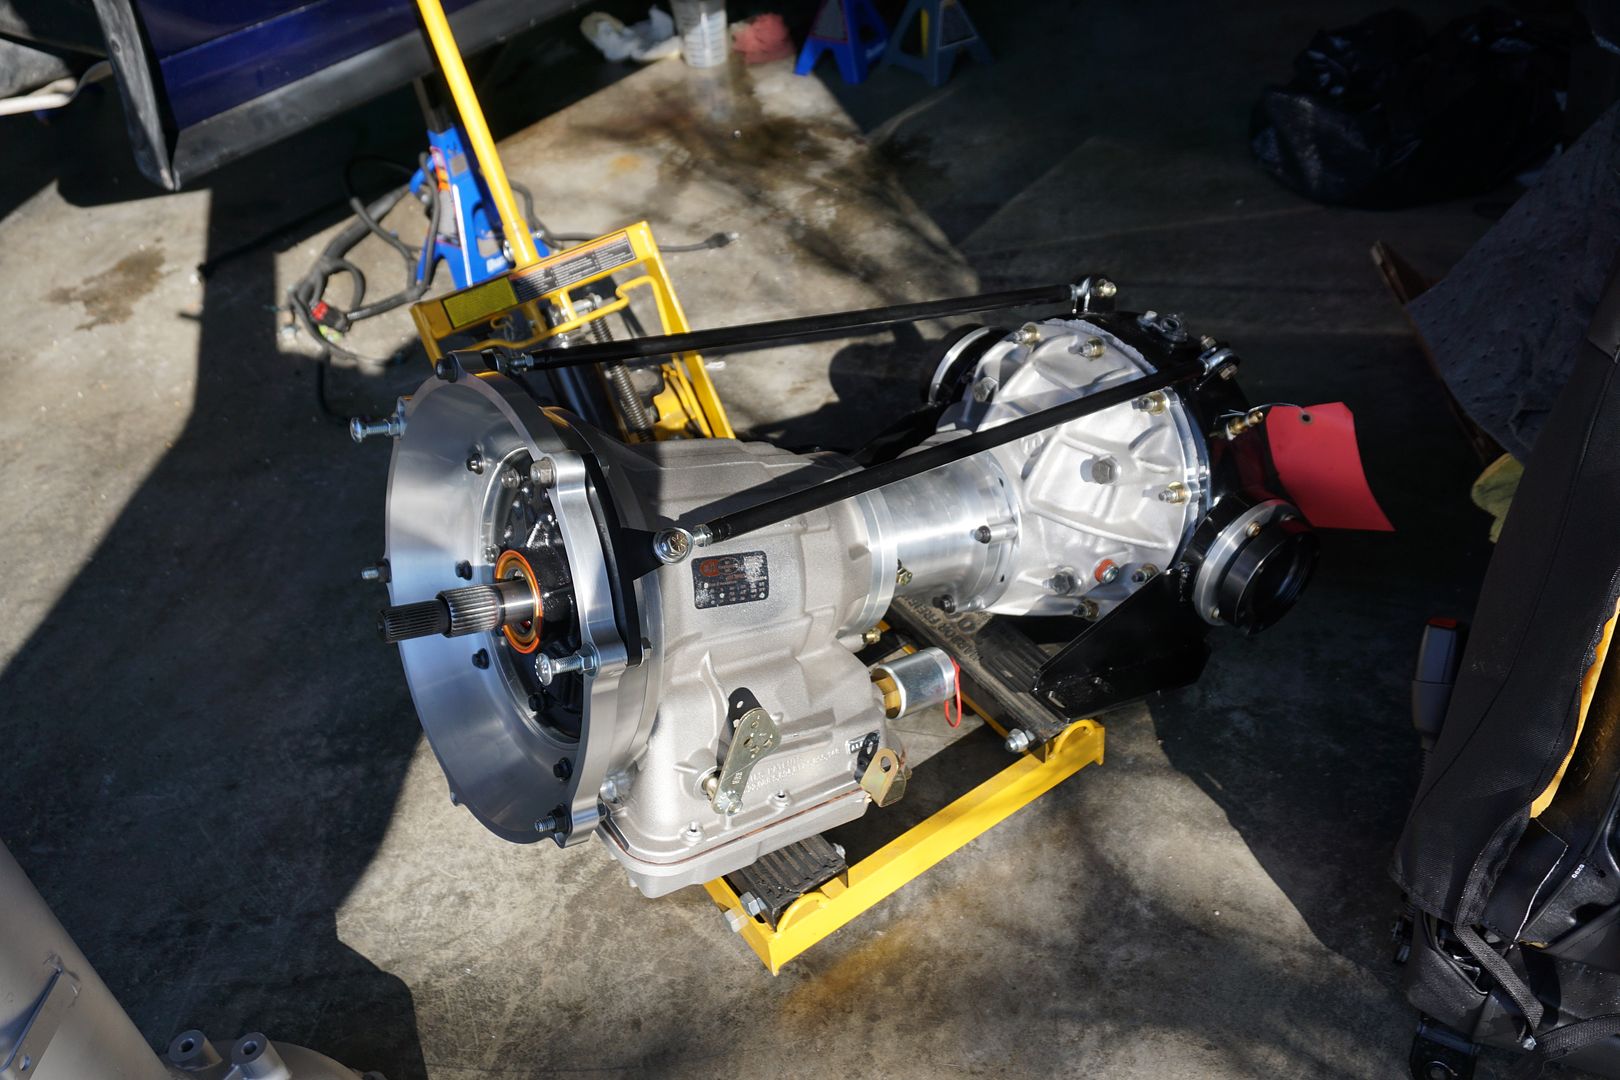
Billet everything! Lol
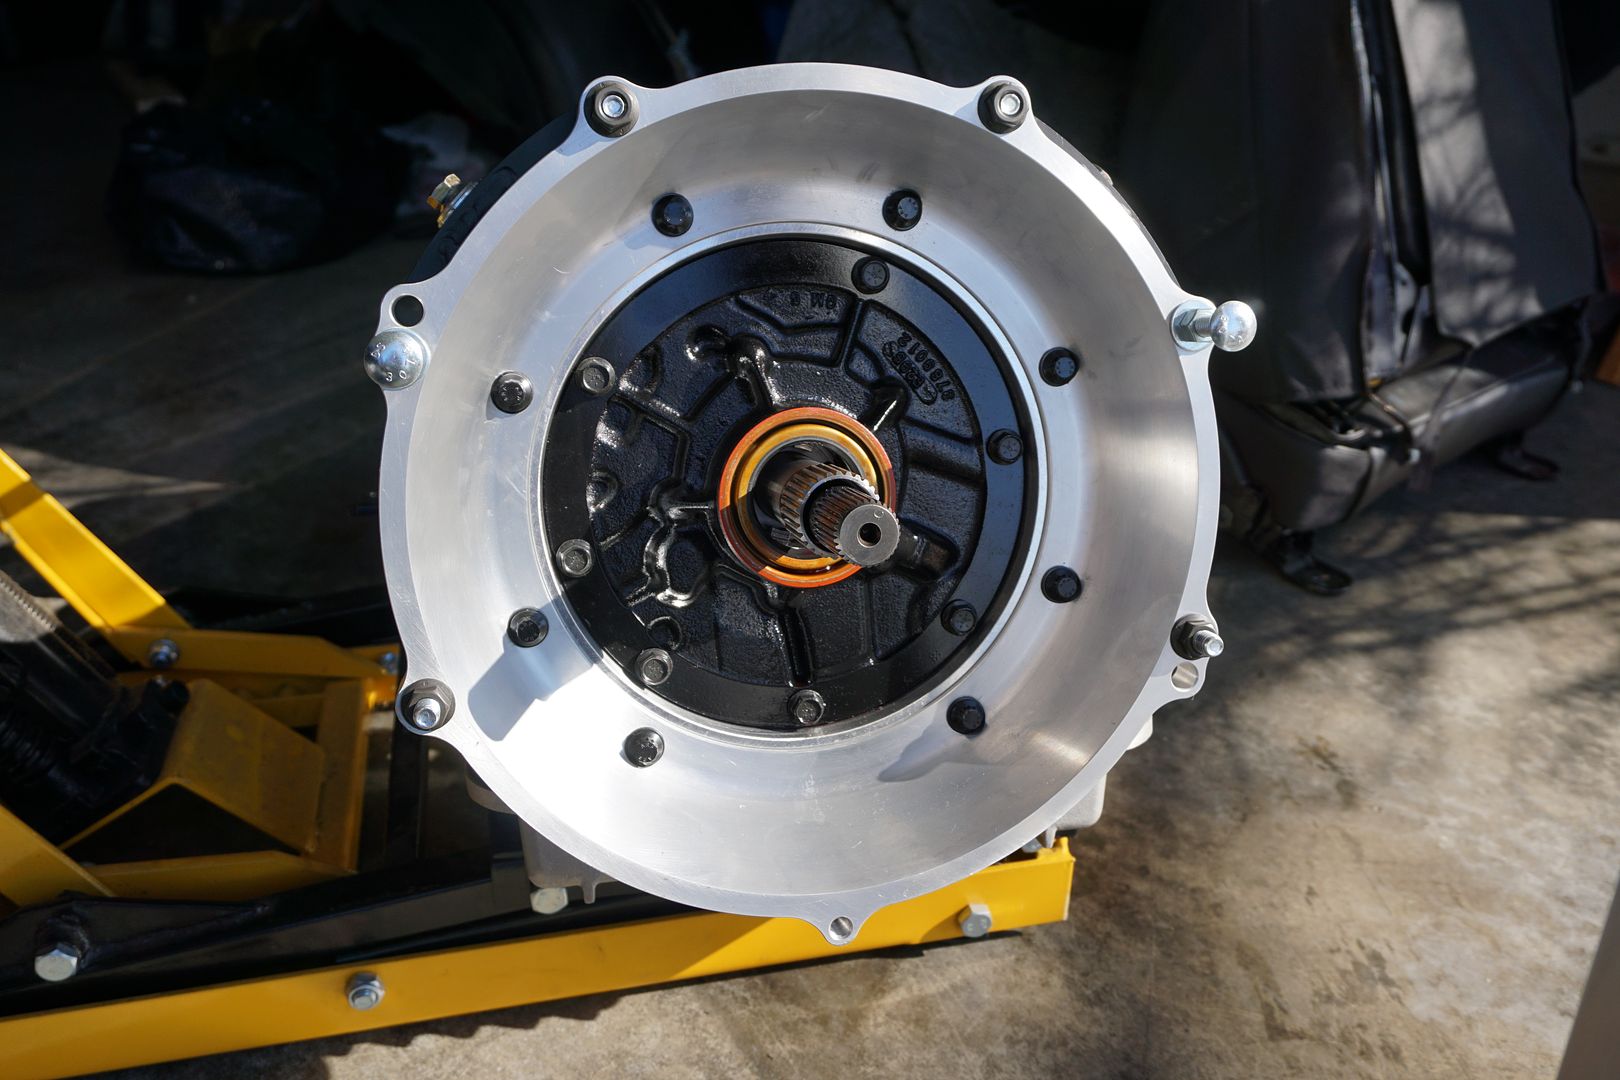
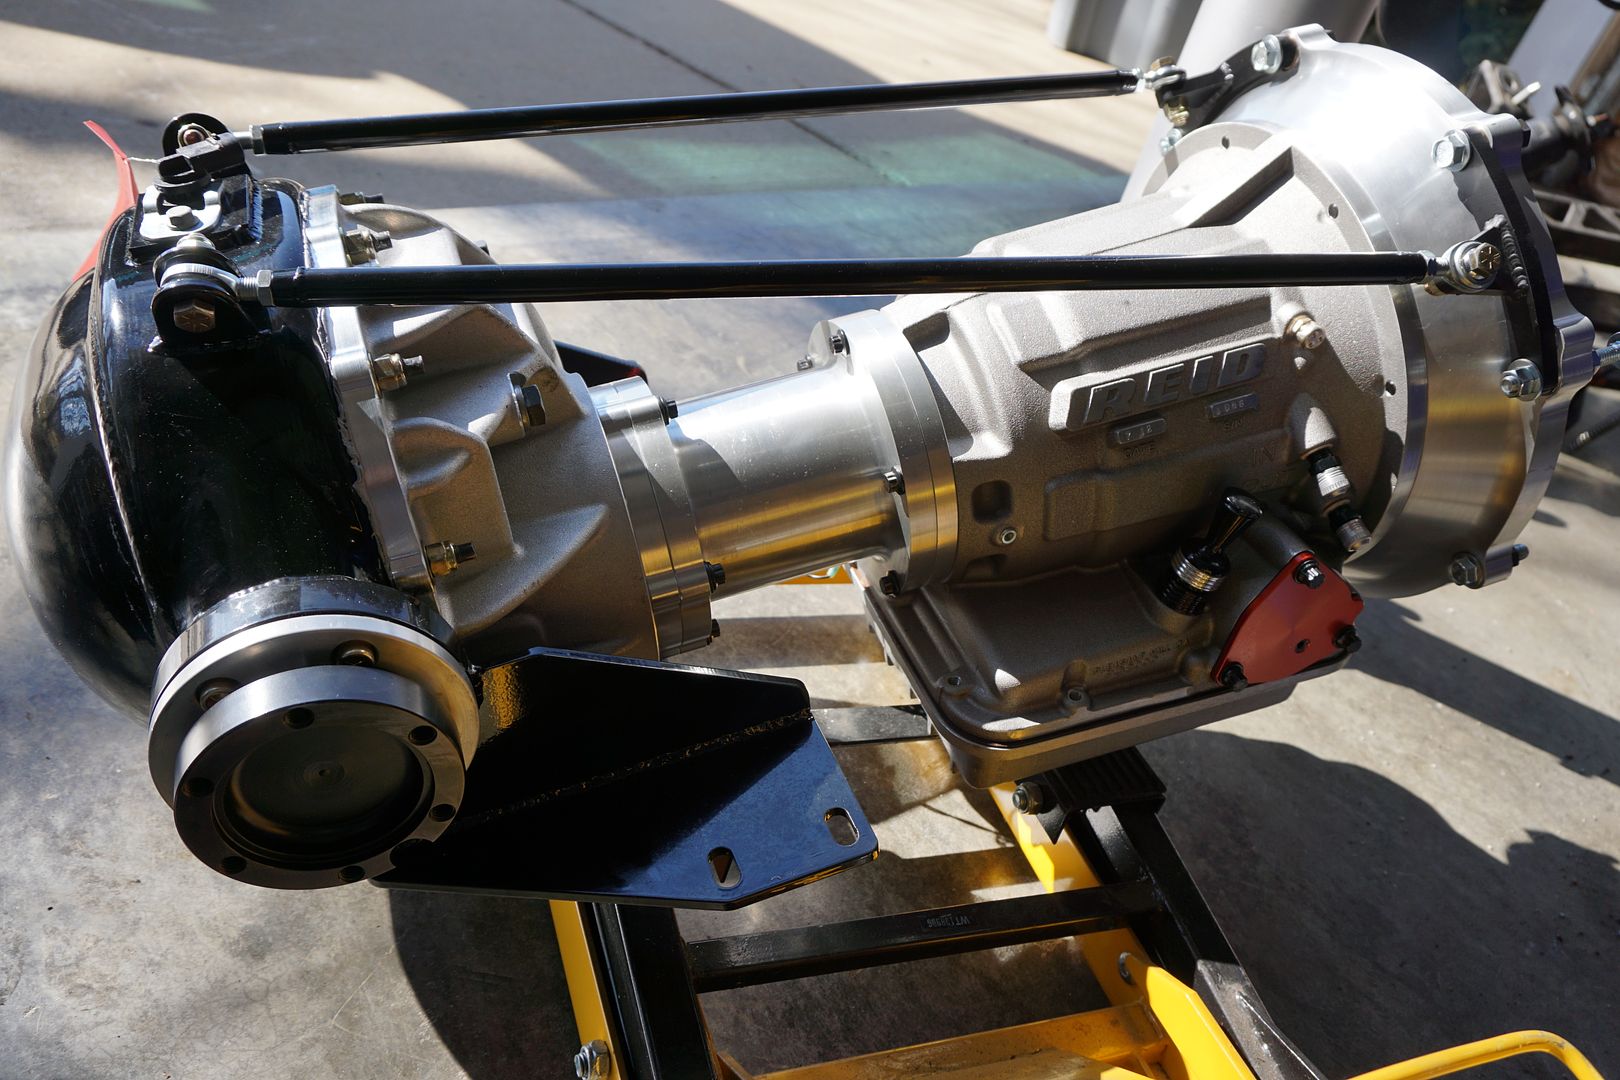
Fully built TQ Tube to handle all the power I can produce!
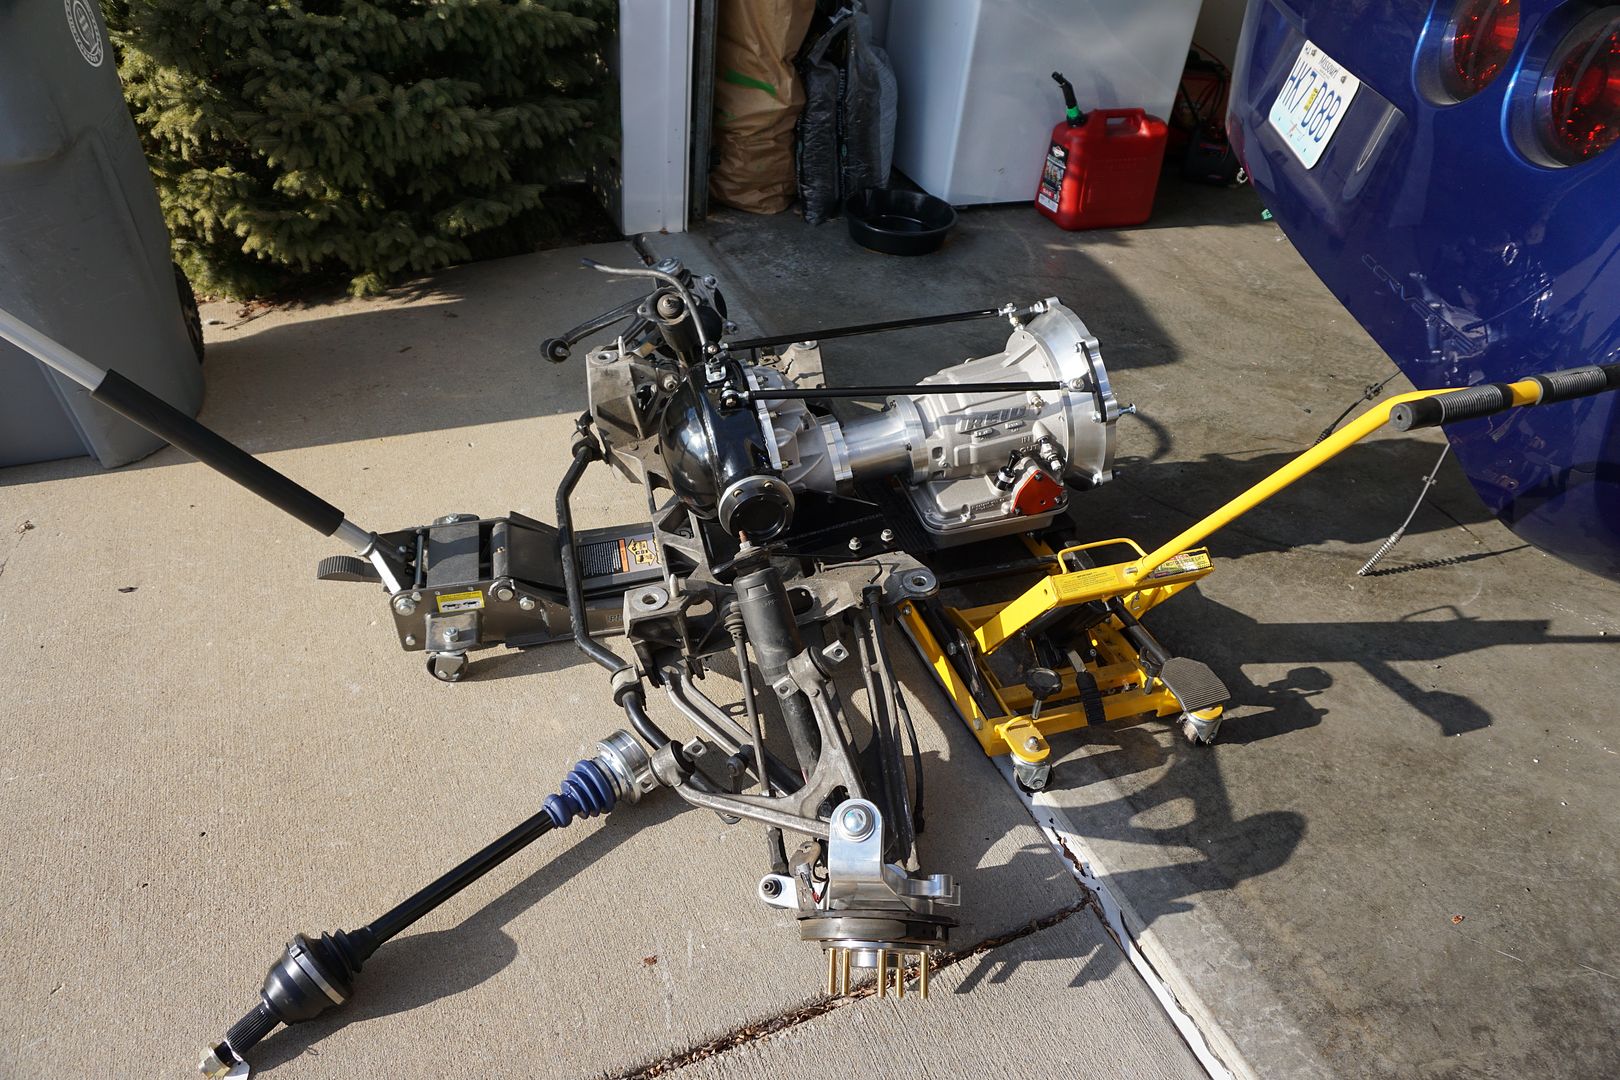
Mocking everything up and bolting axles in!
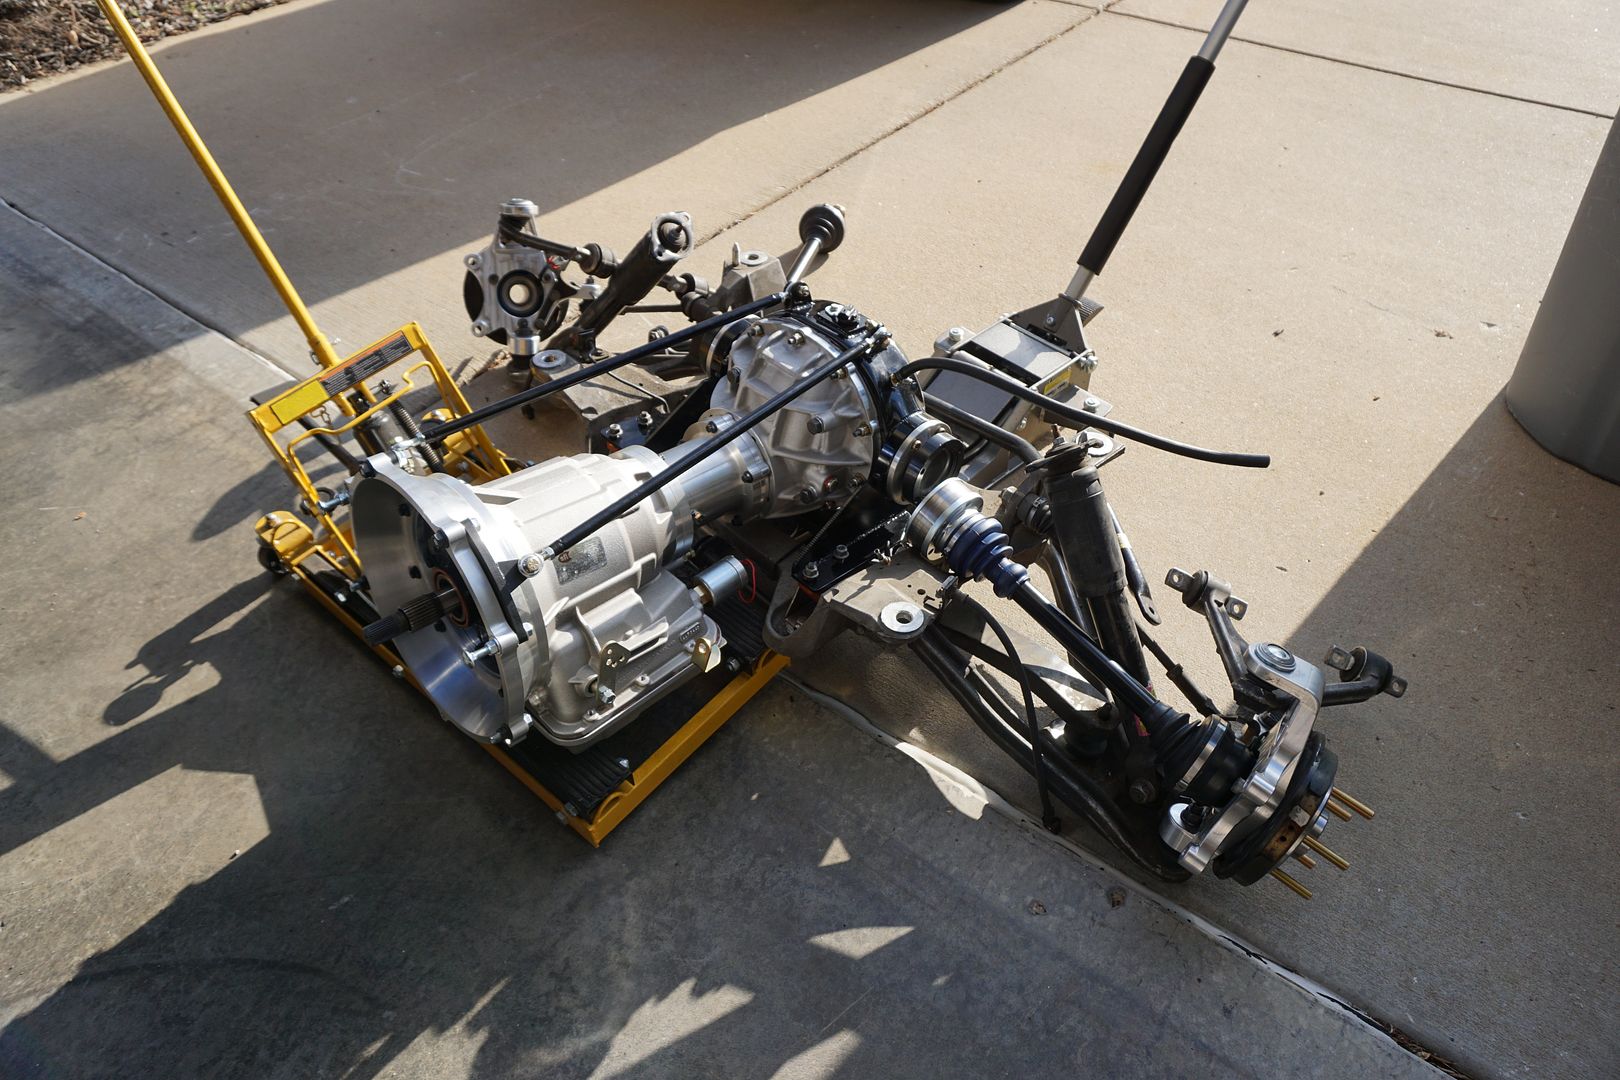
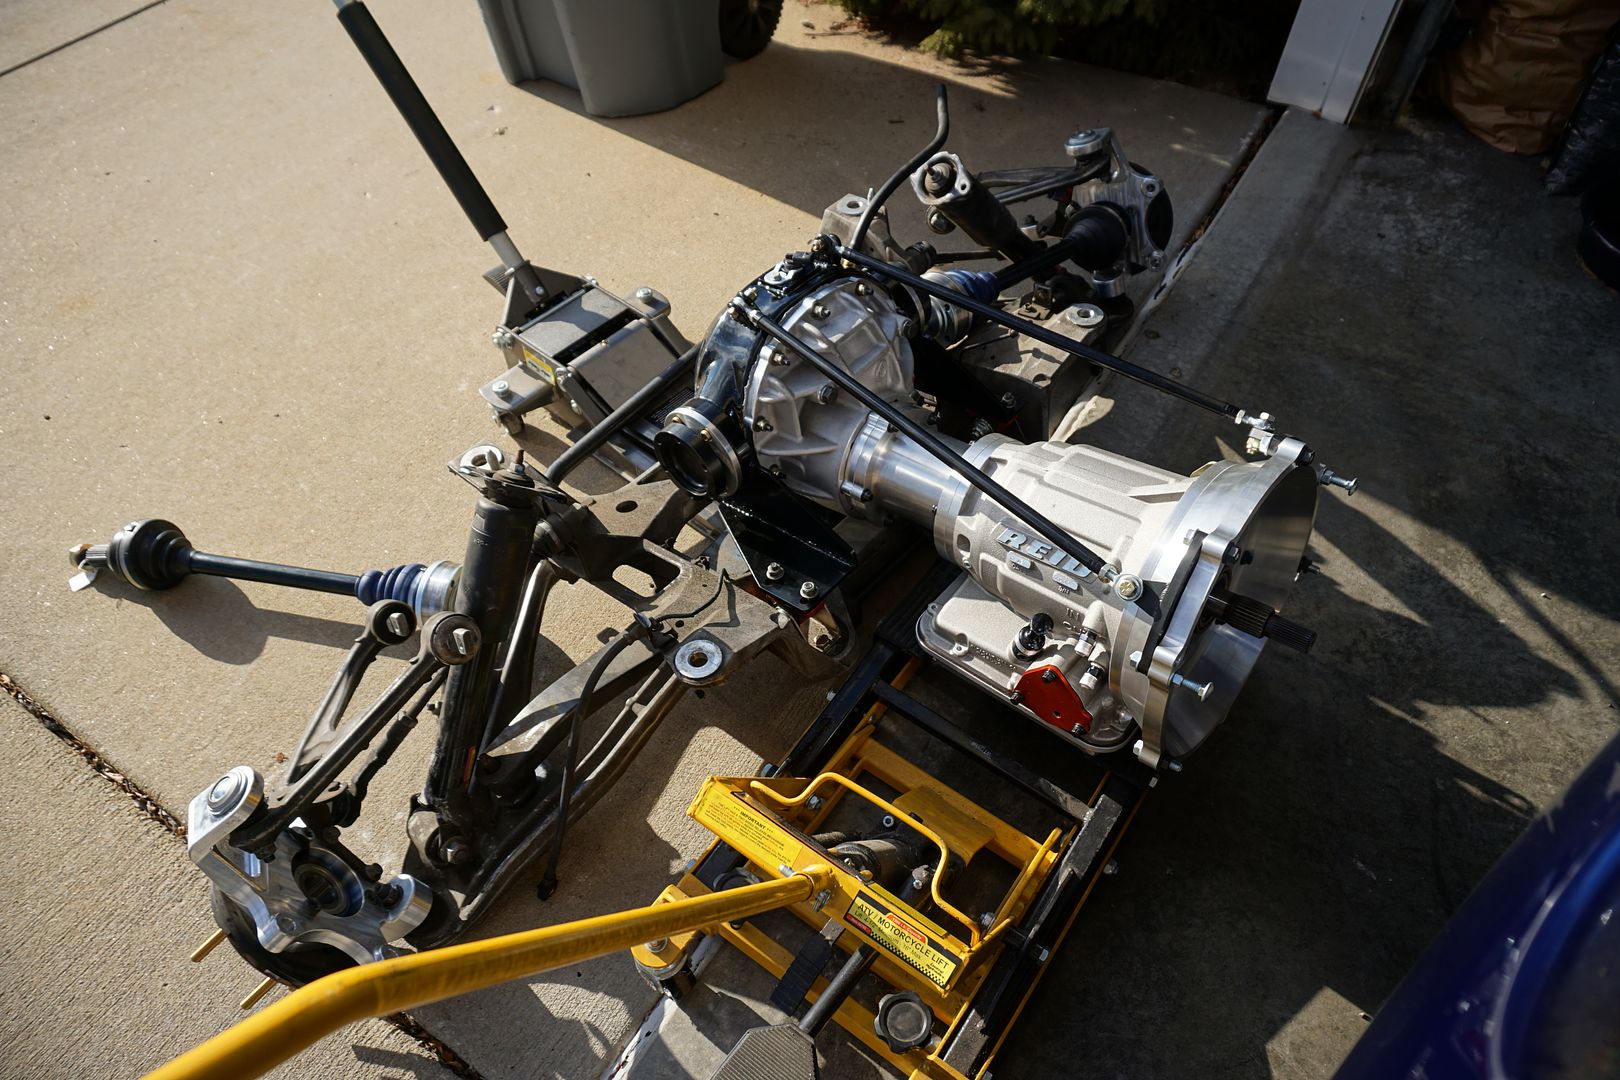
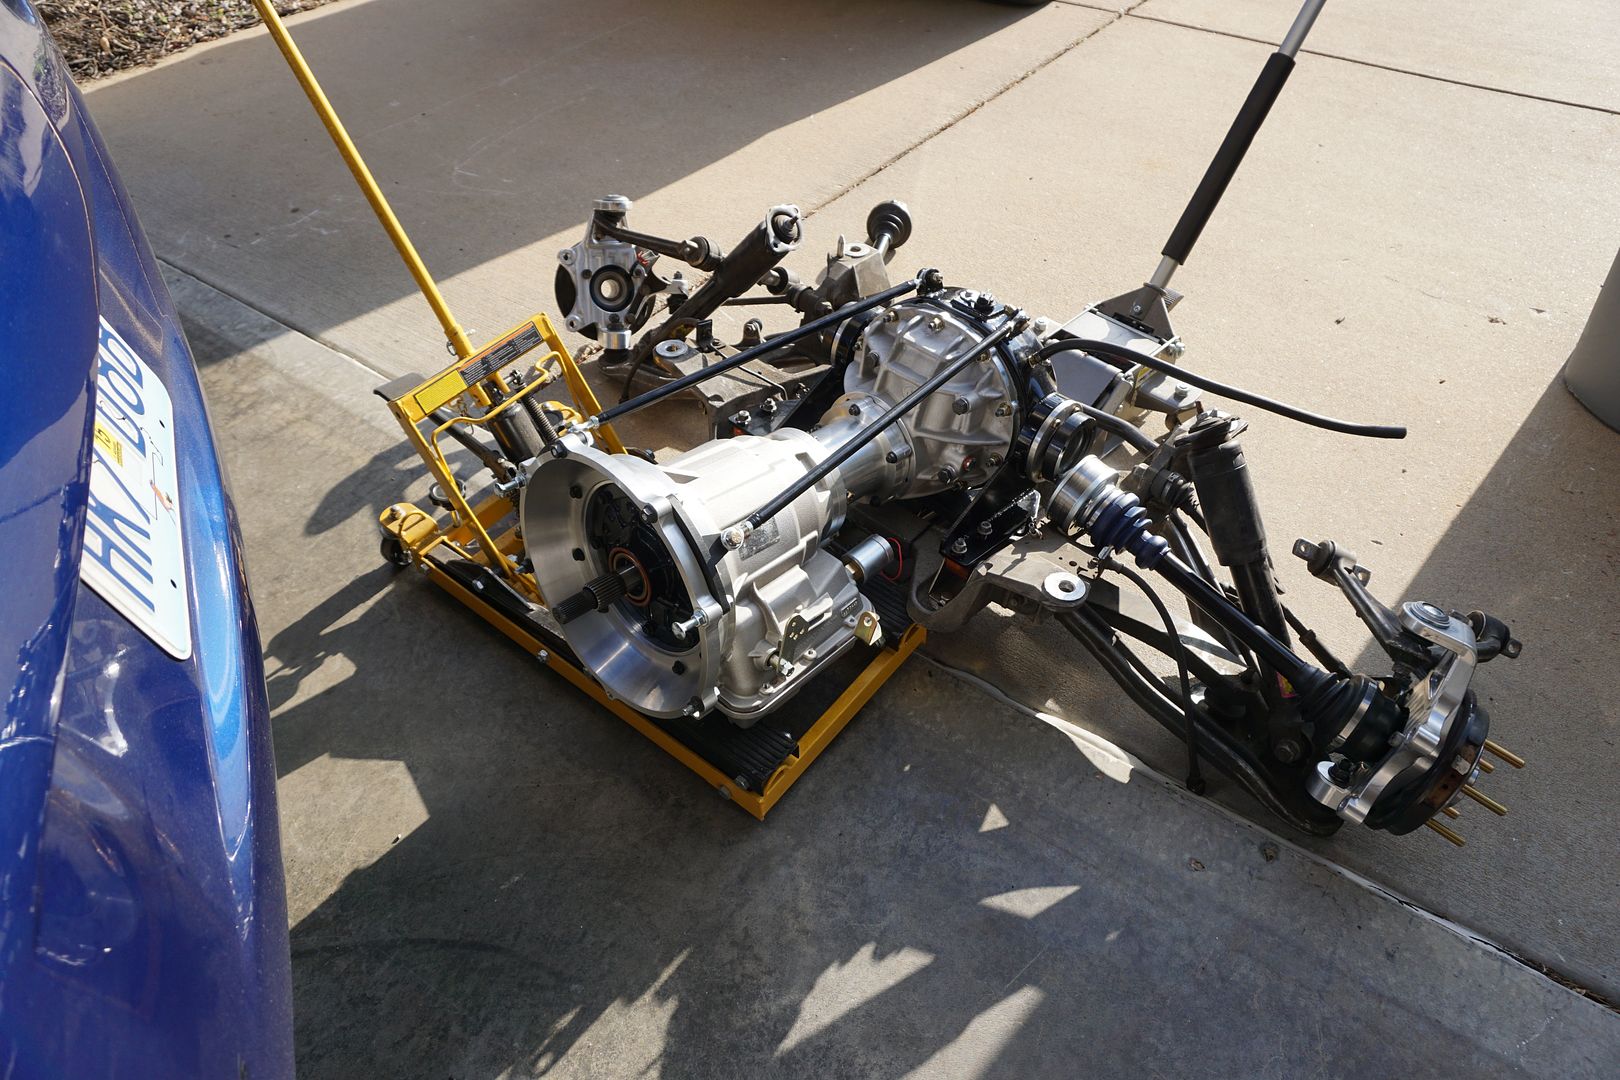
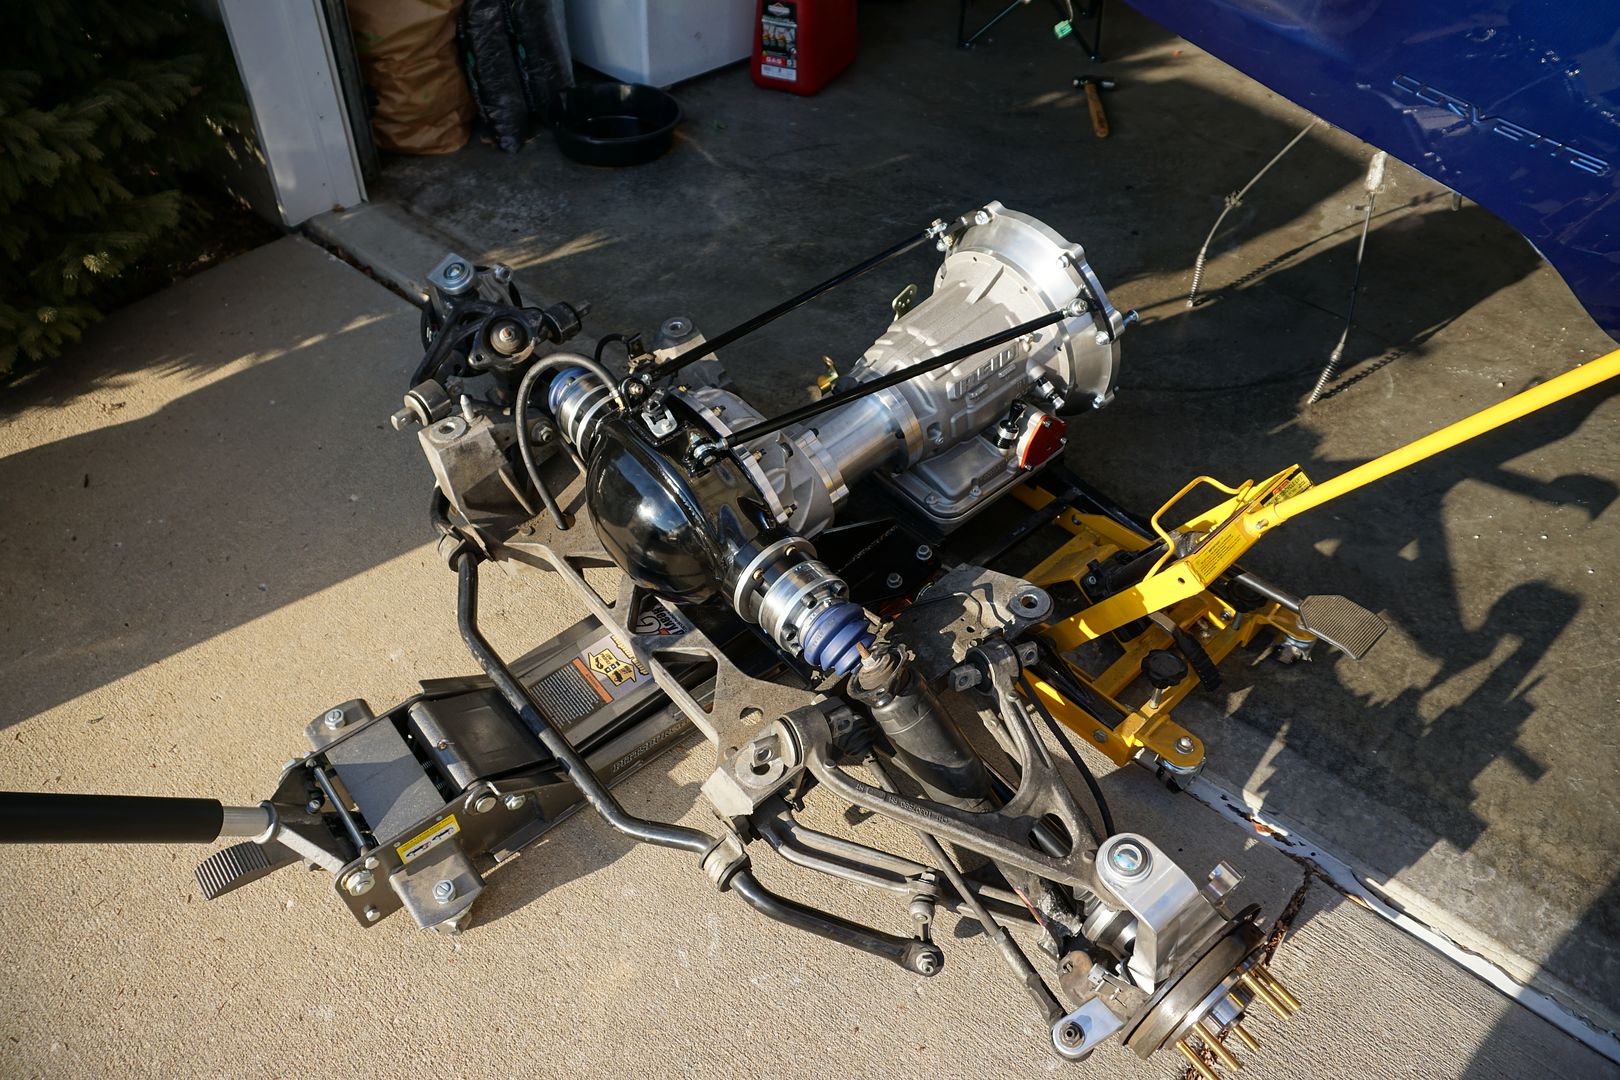
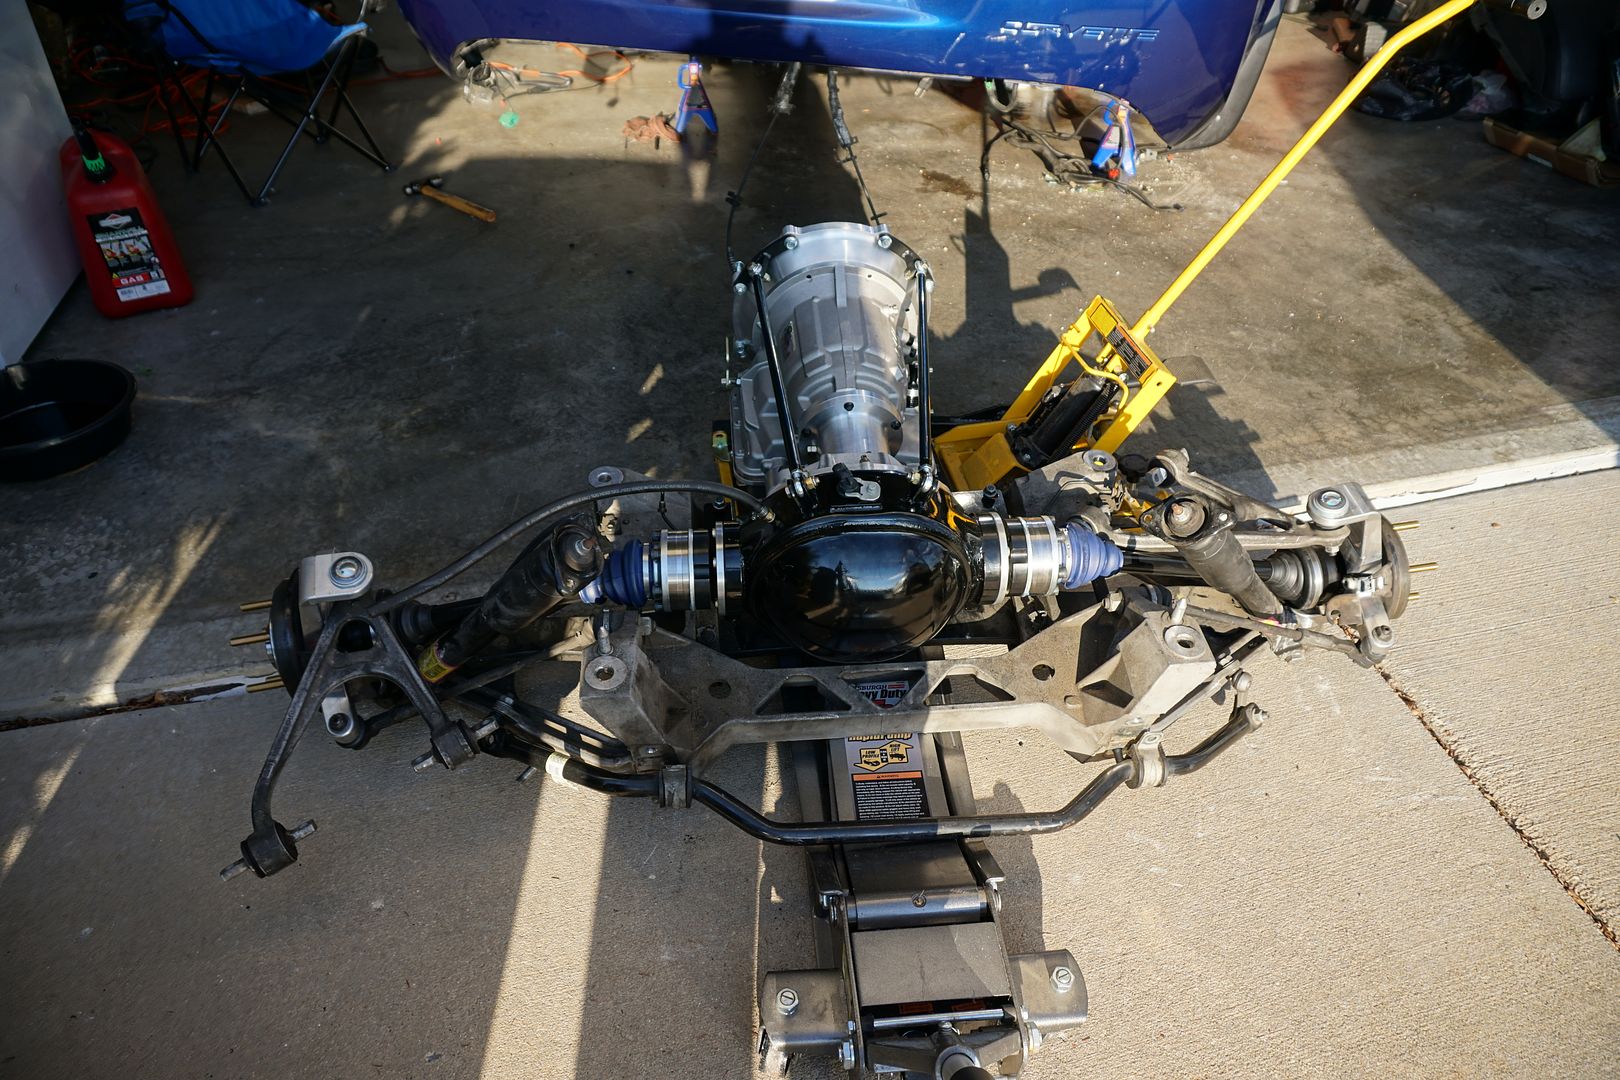
Torque tube on and everything ready to drop back in!
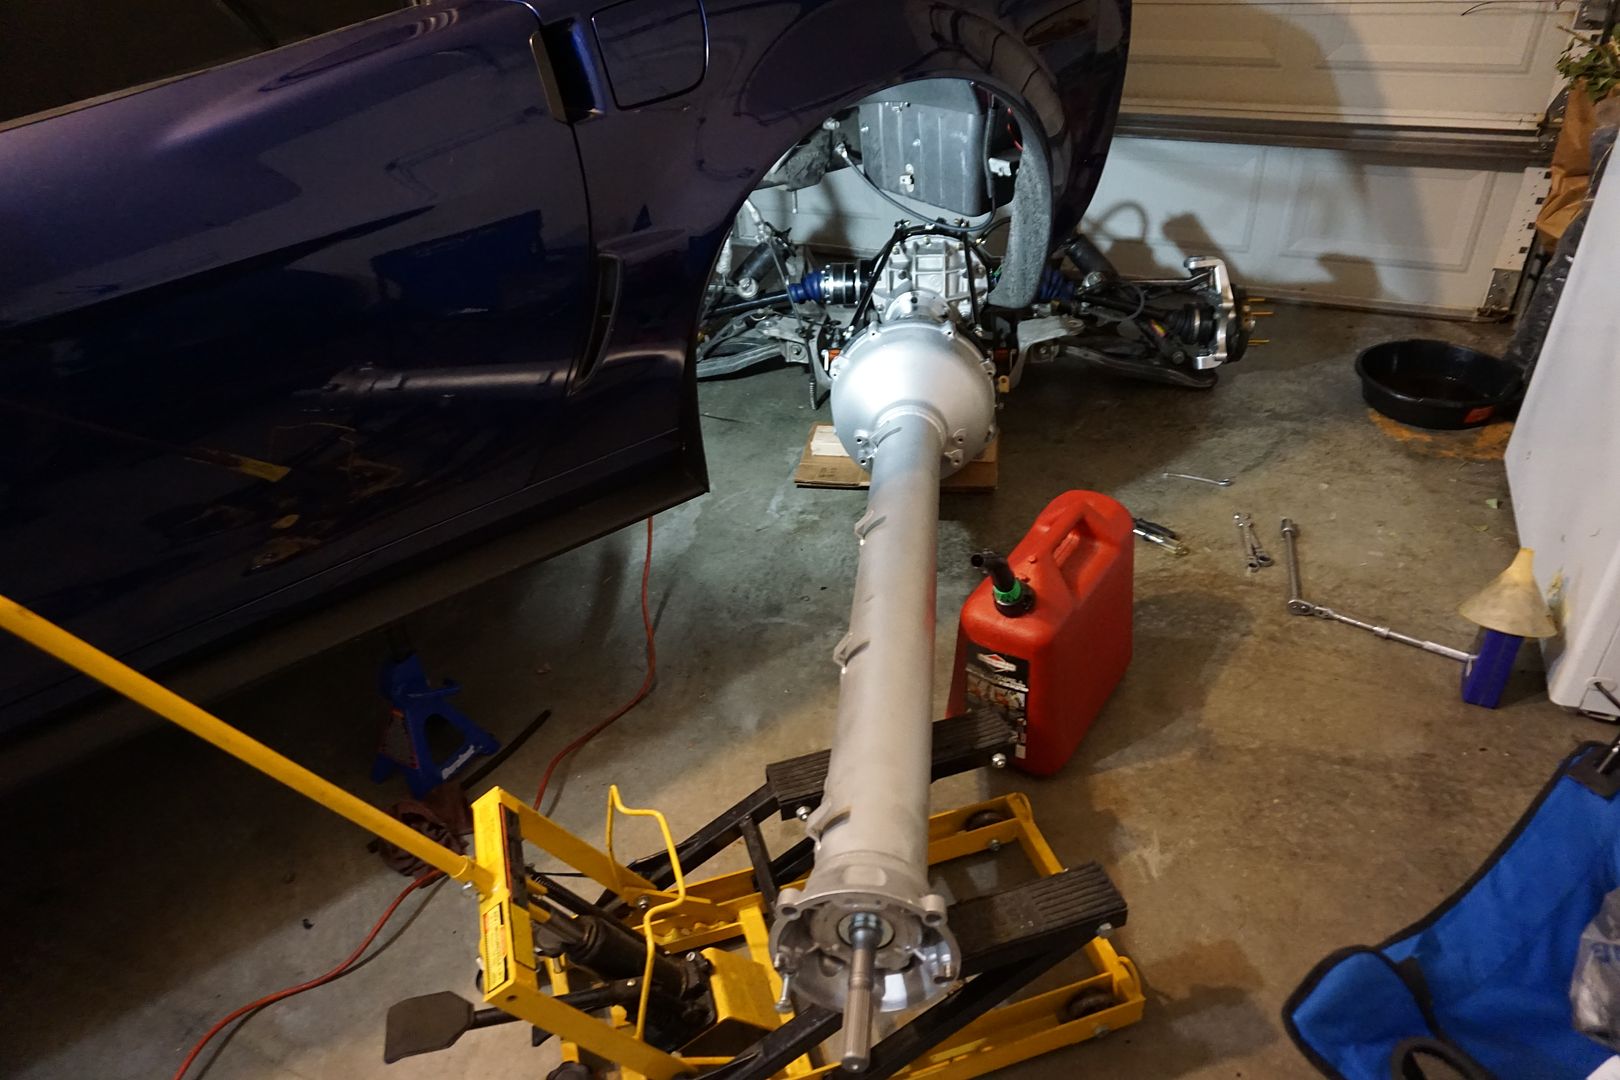
Fits like a glove slipped right in with no issues!
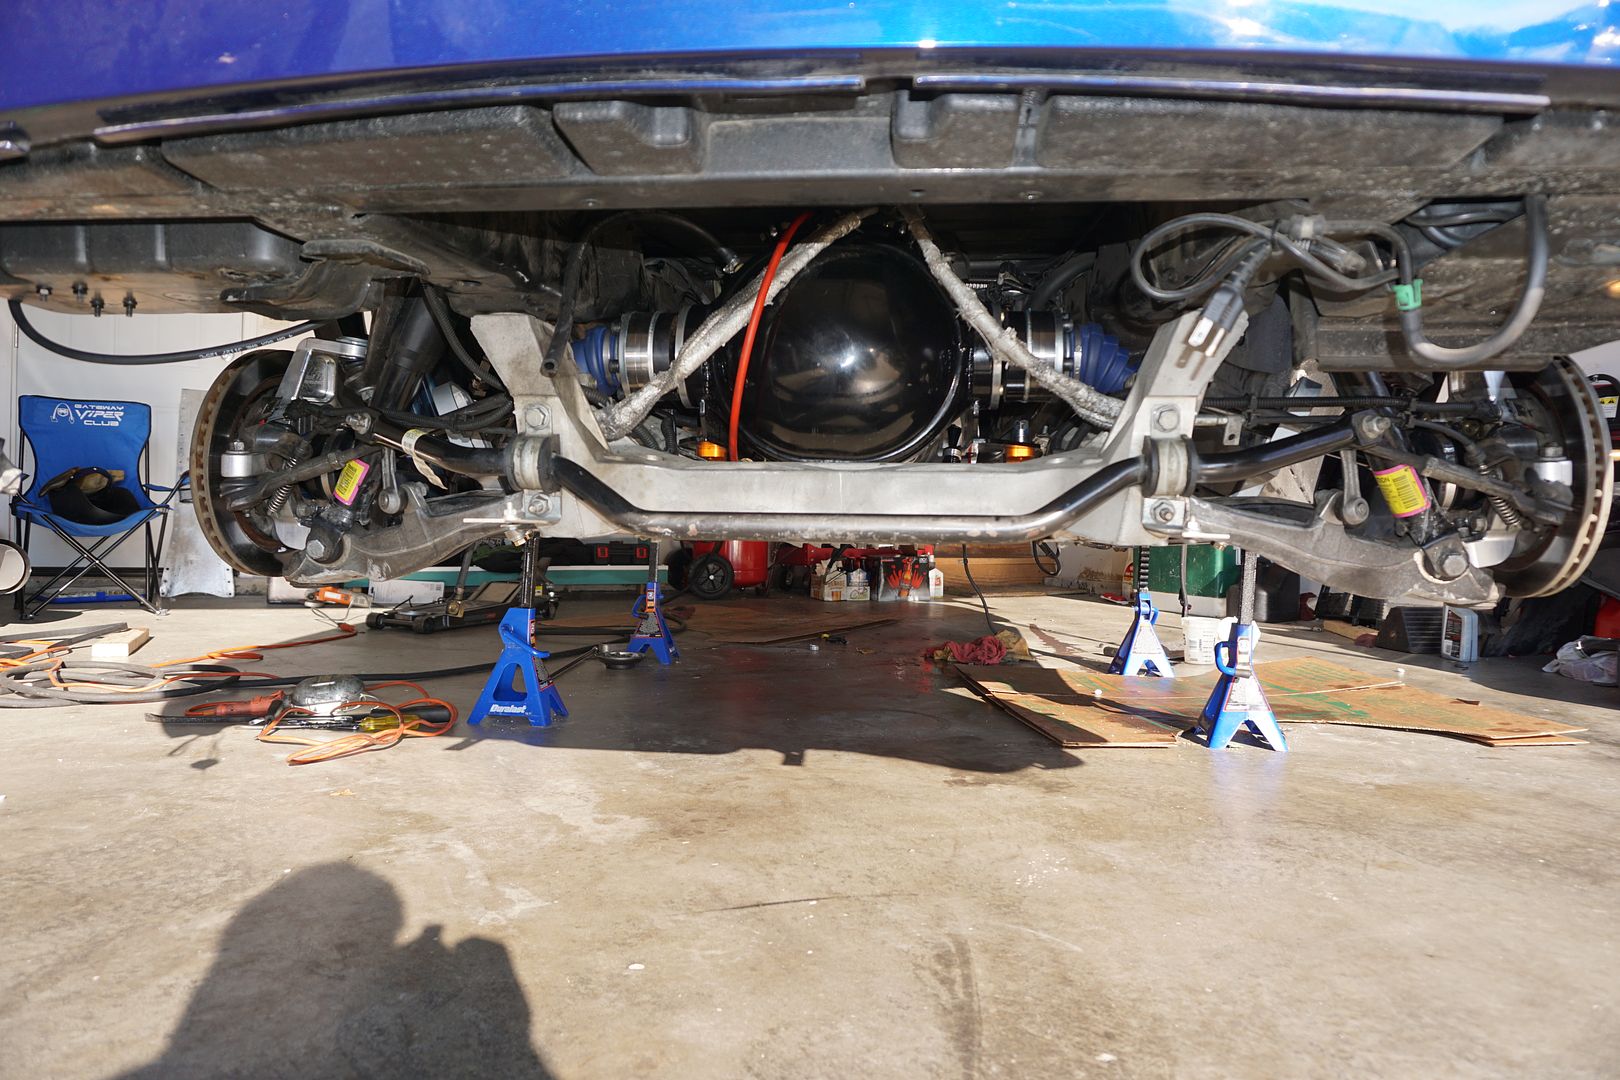
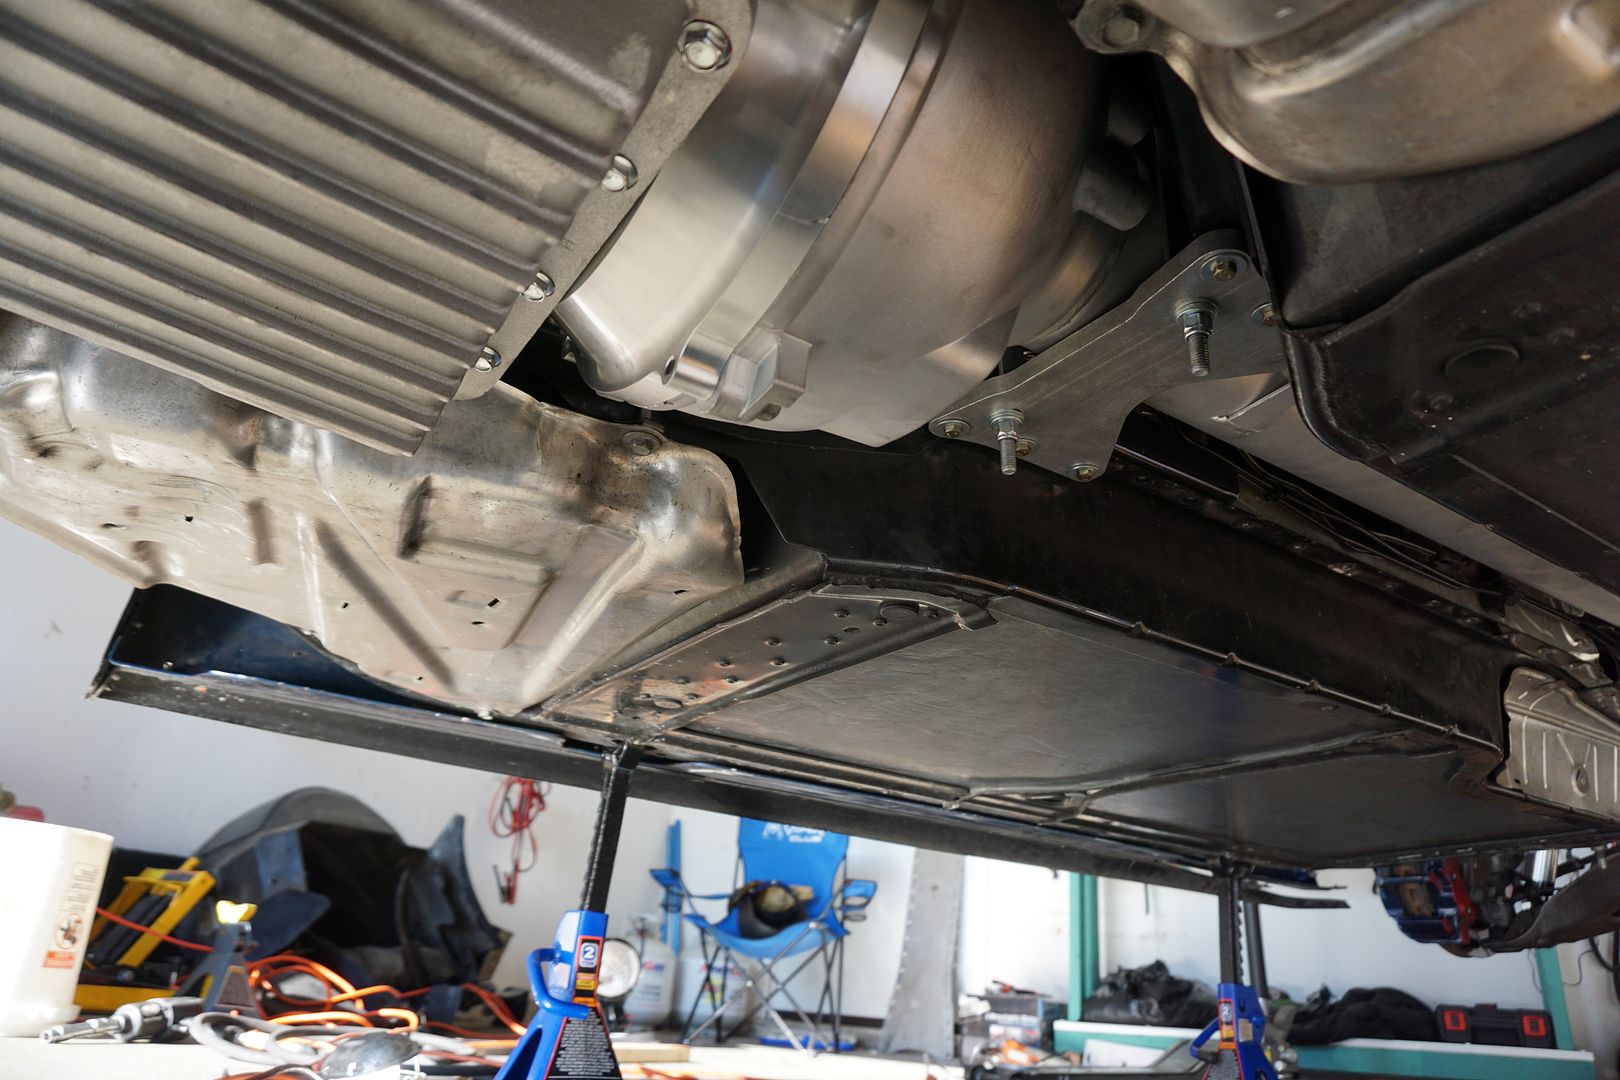
Just look at that huge 9”
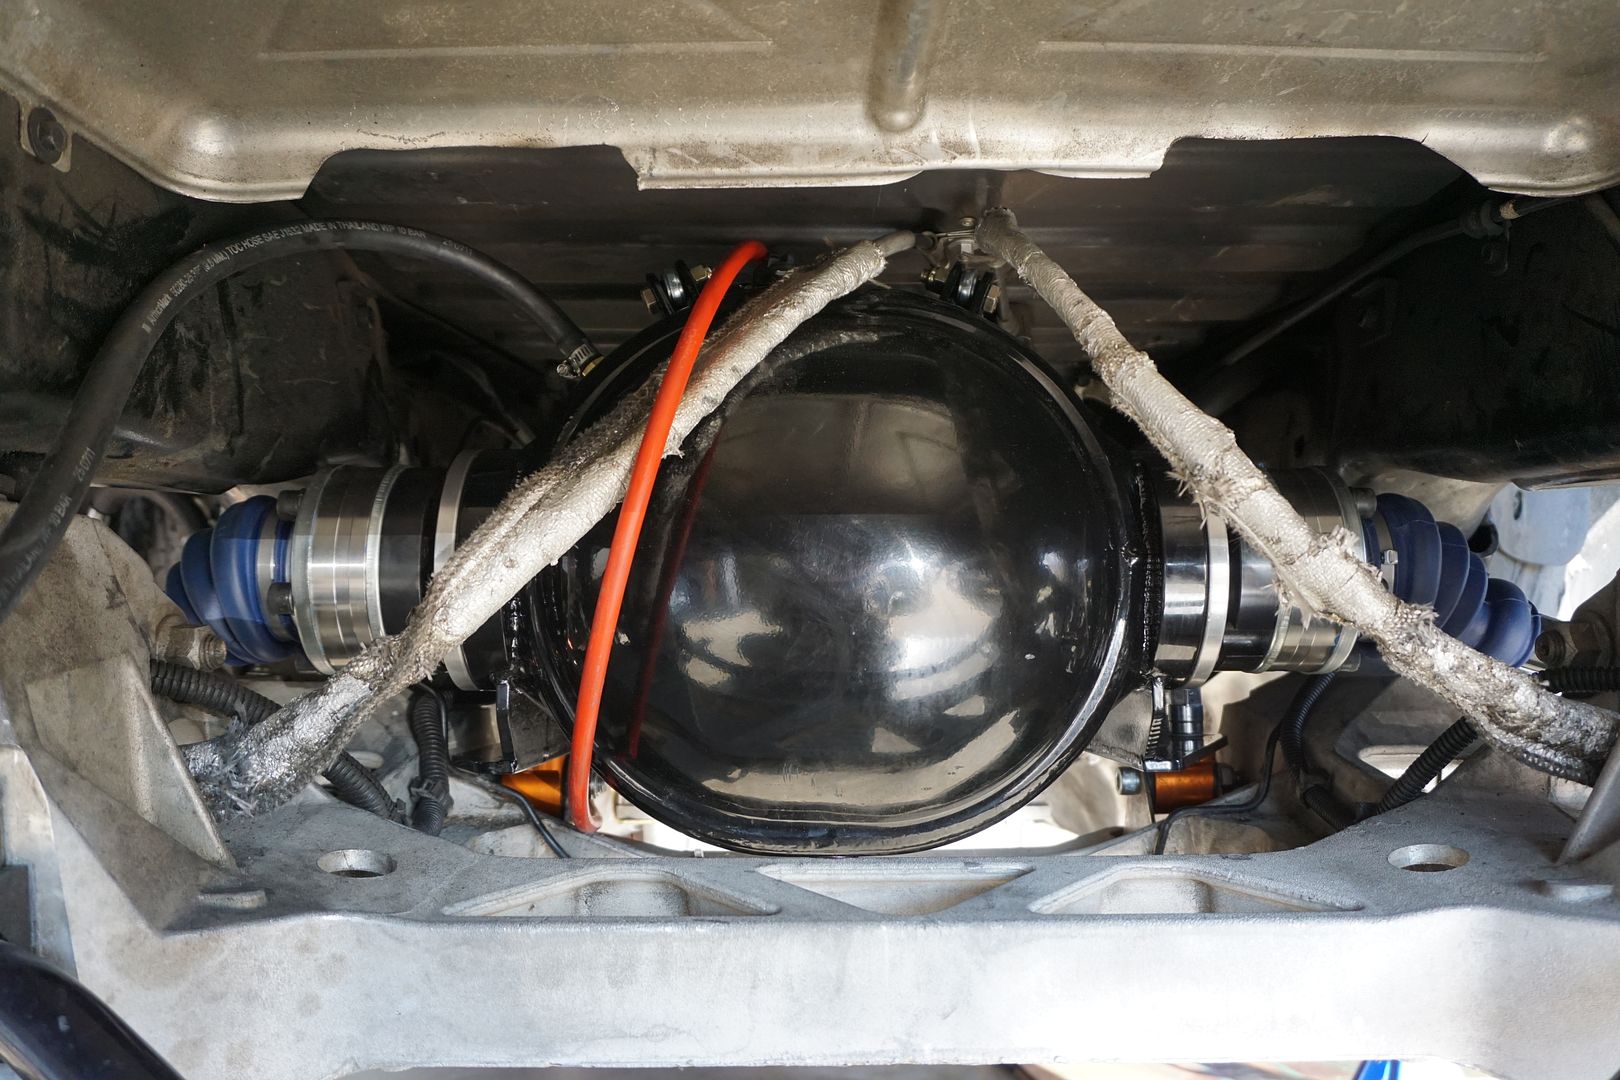
Pictured are the heavy duty axles and axle loop!
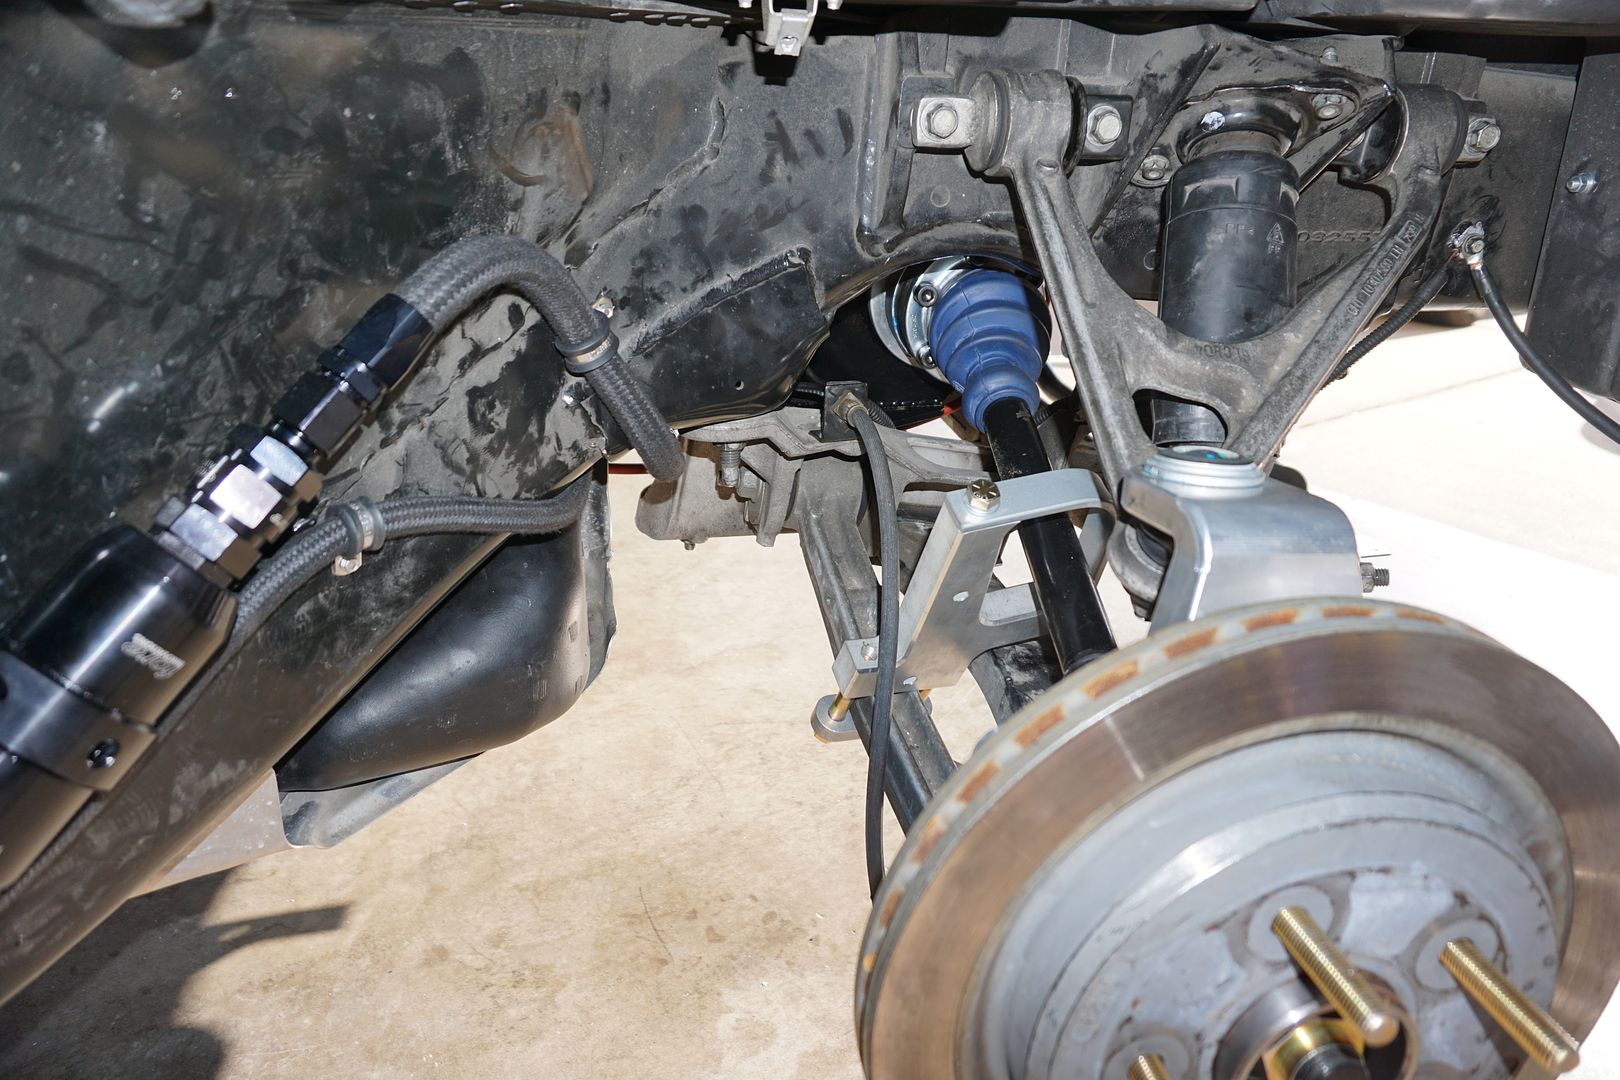
Deep Trans pan and torque tamer can be seen here!
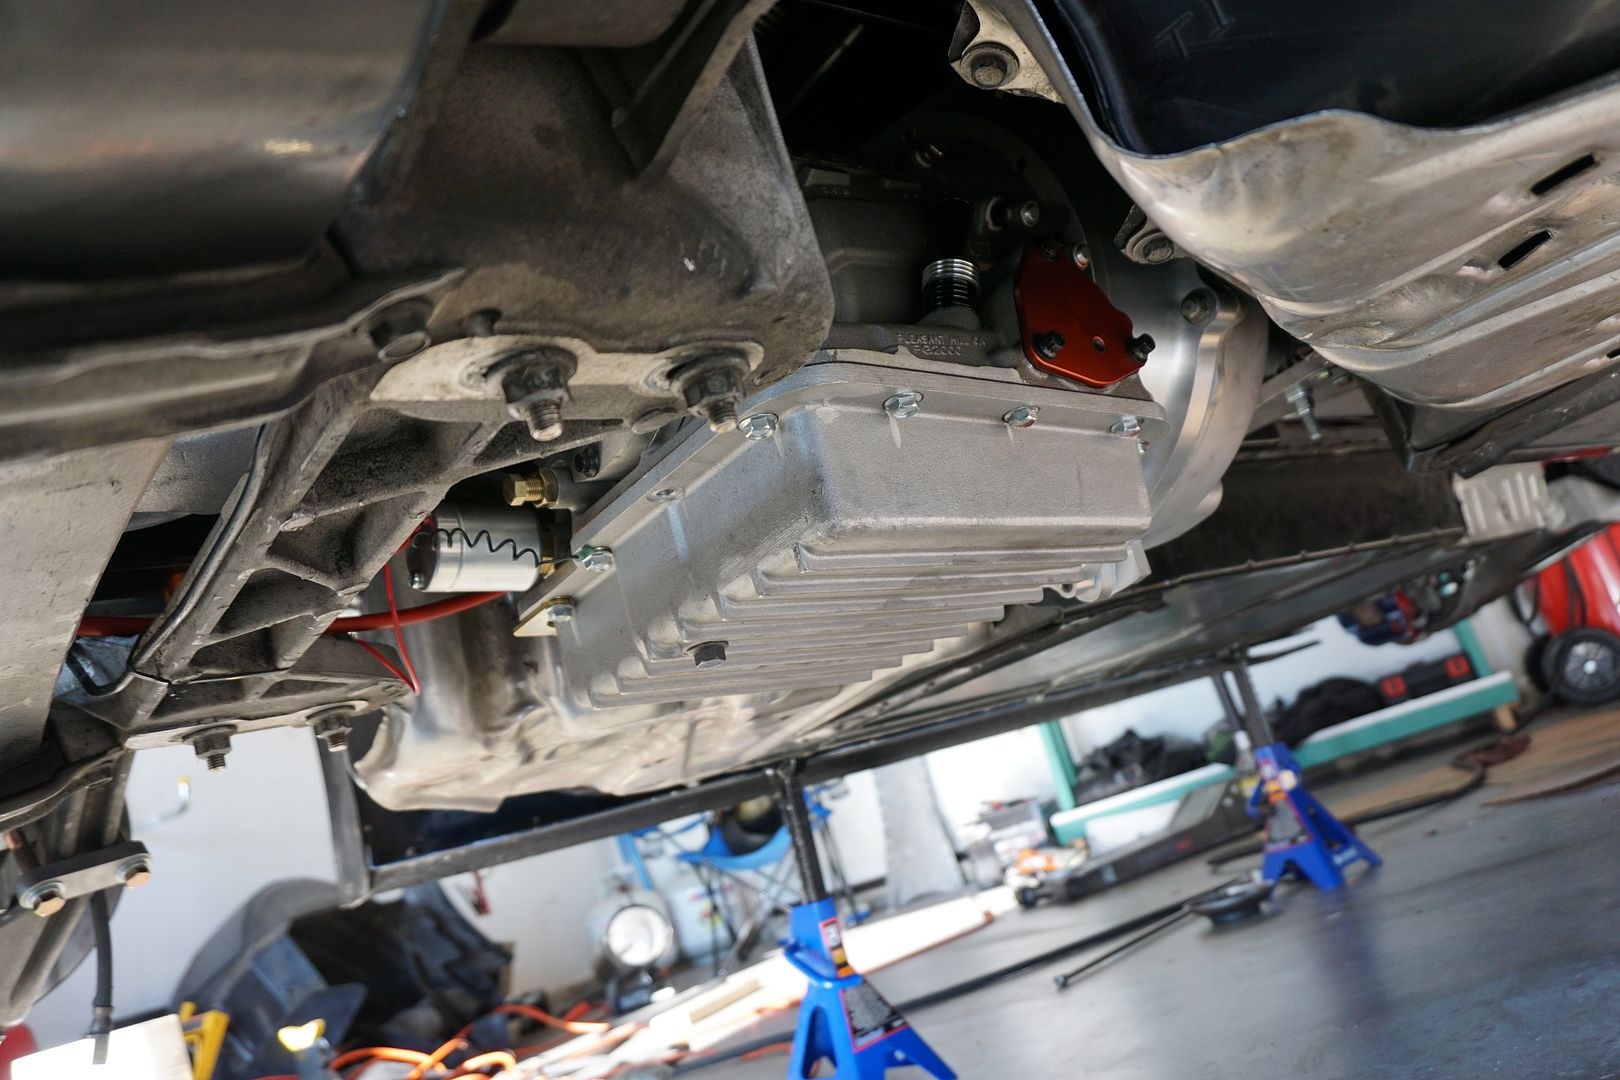
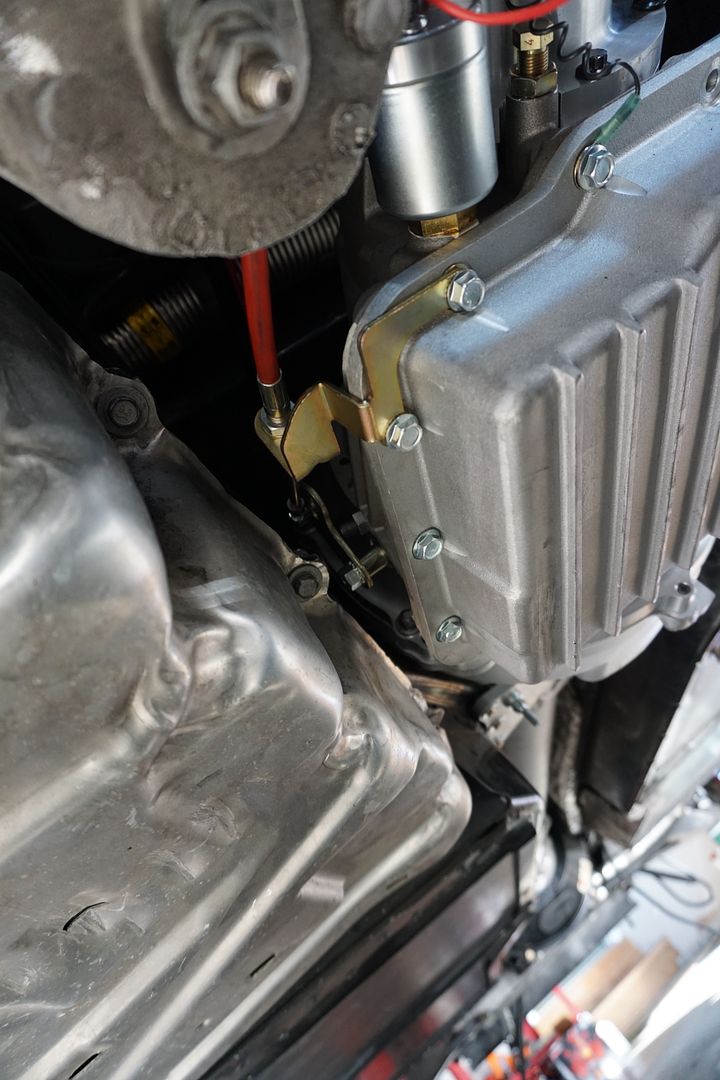
Shifter linkage installed
Shifter installed!
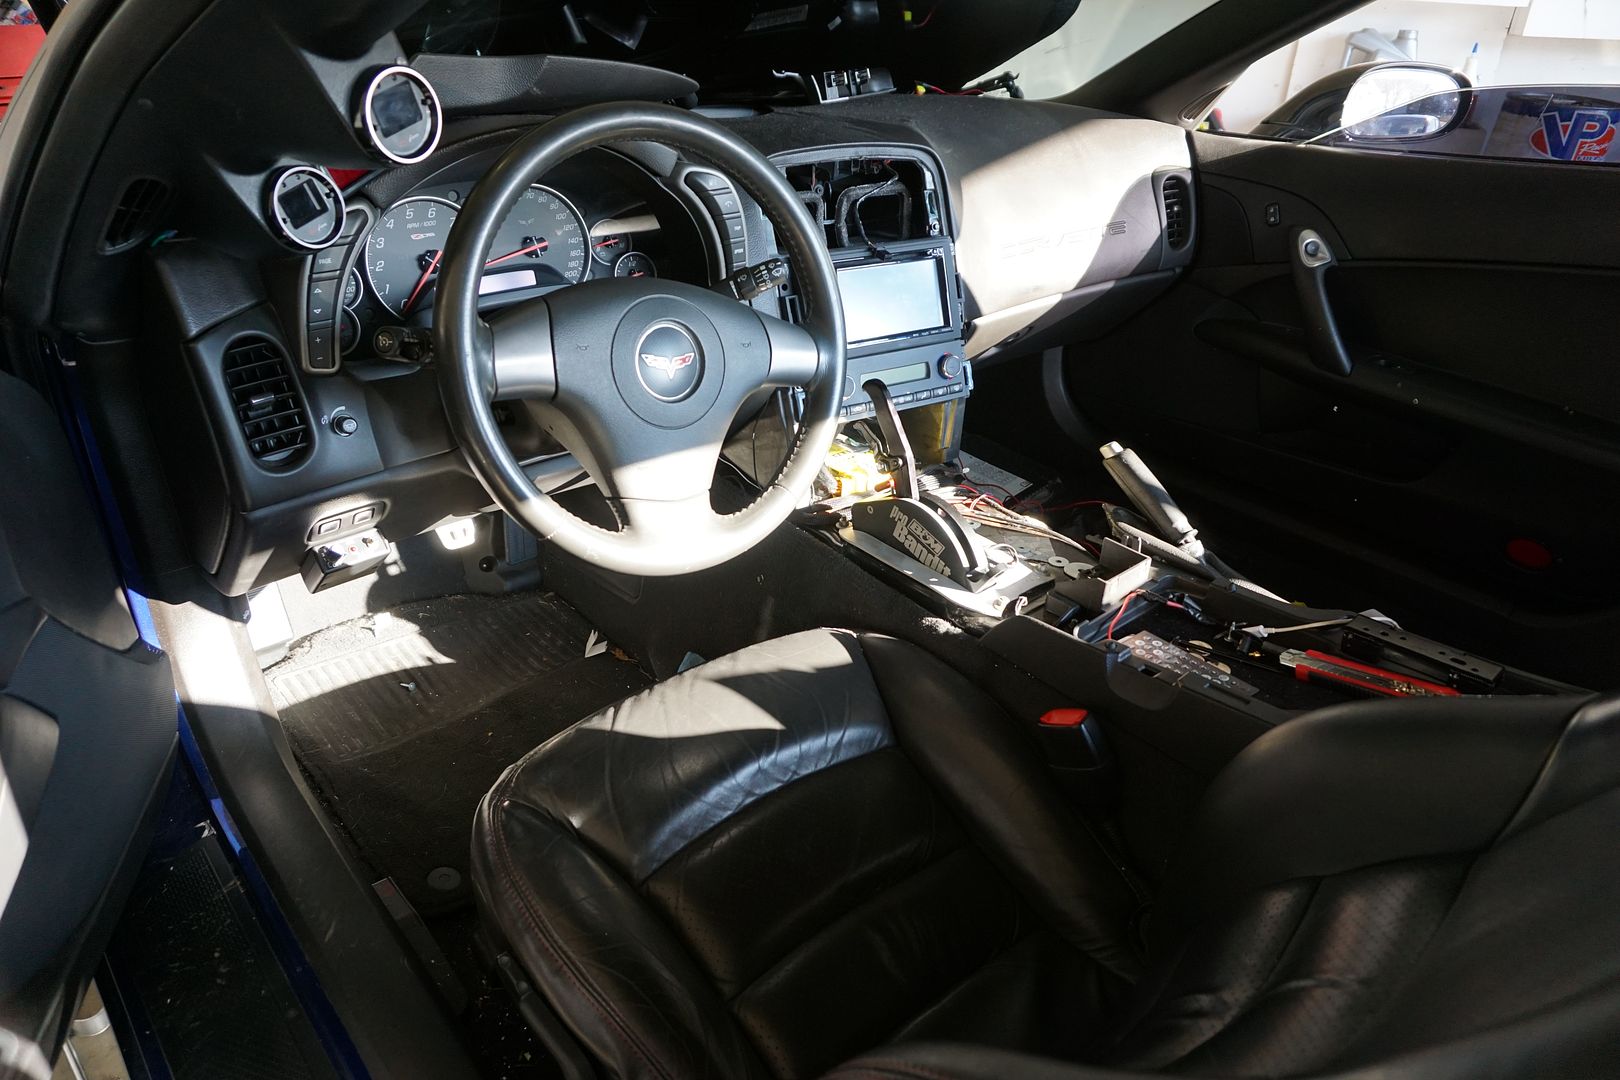
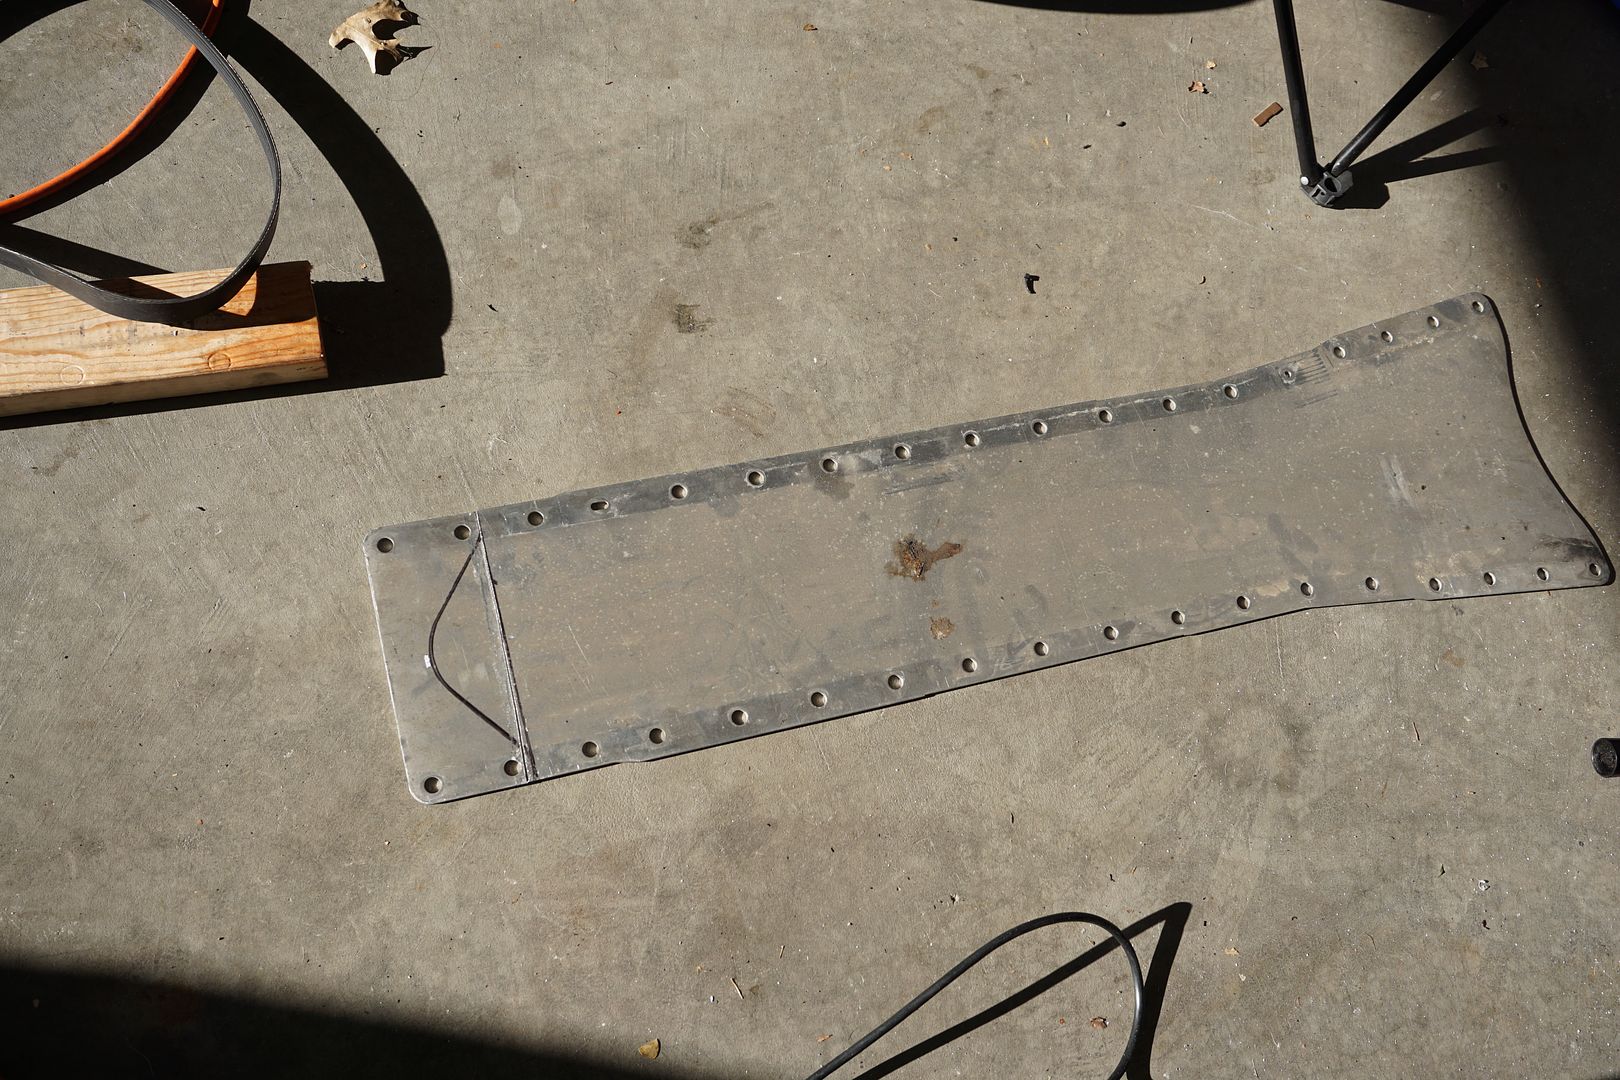
Stock Tunnel plate modified!
Trans lines ran and secured!
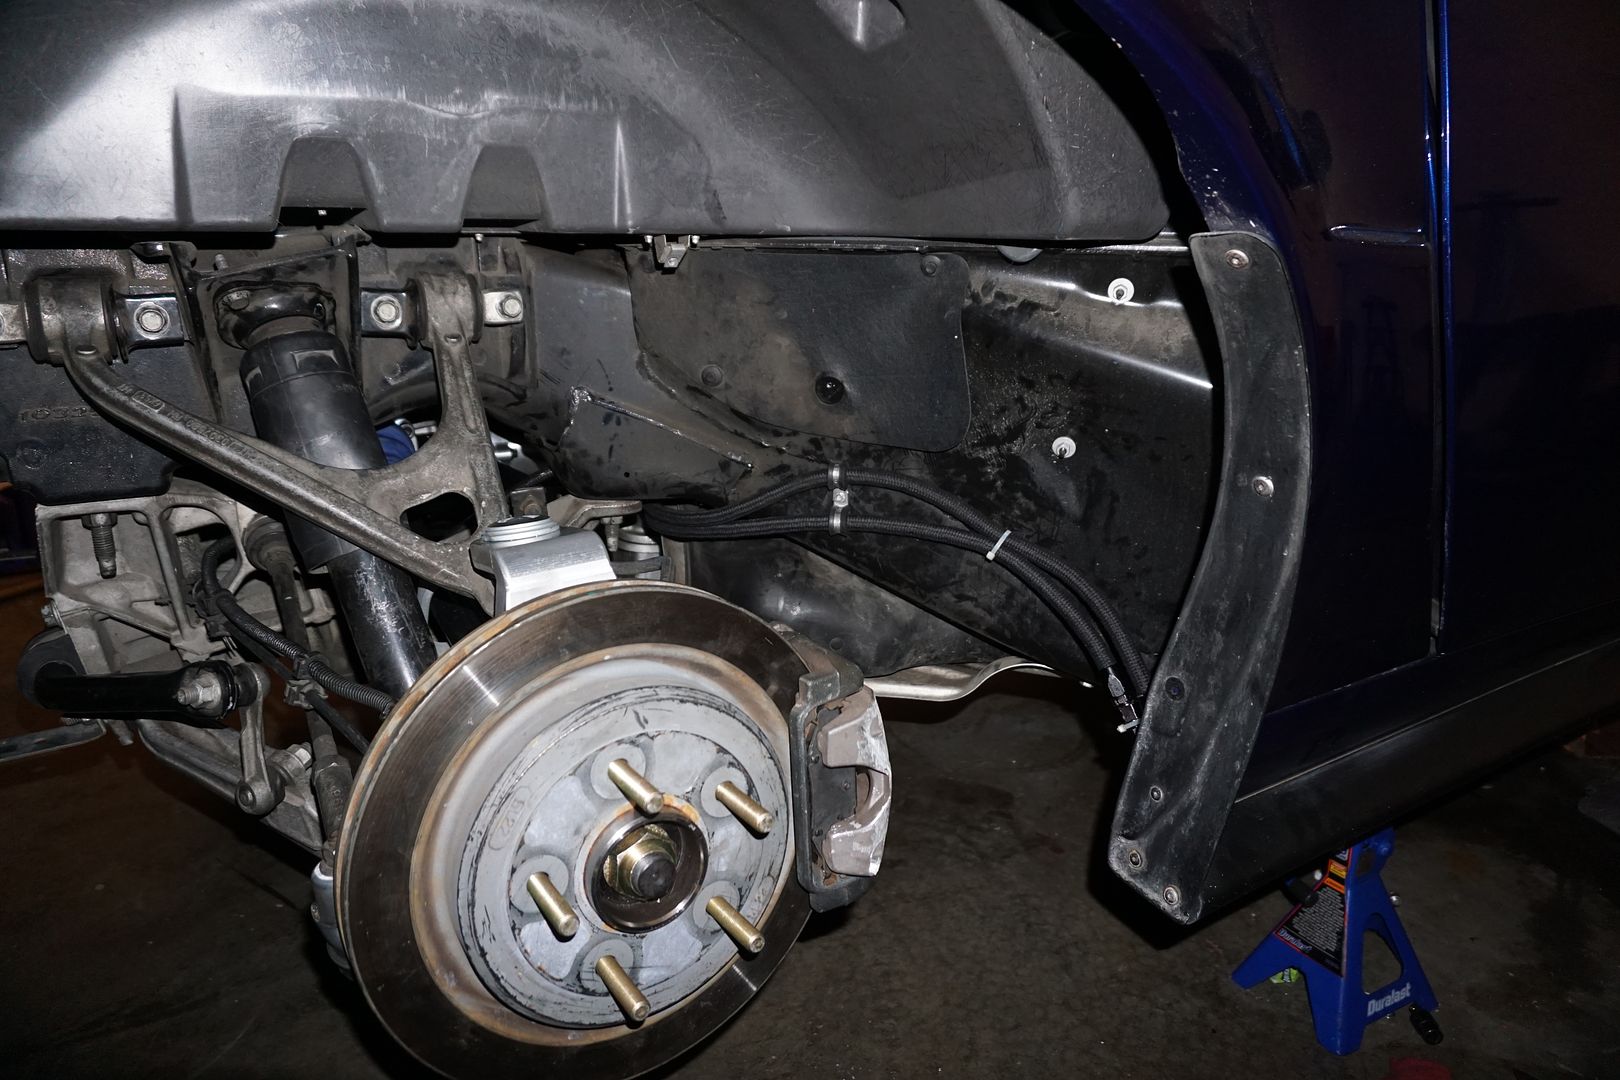
Drivetrain
I have opted to change the car from a rpm level X 4l65e to the best of the best RPM Glide Swap with 9” conversion with a 3.25 gear to keep things nice and street friendly. Utilizing this transmission will insure reliability, longevity, and make controlling the power easier. I will also be using DSS axles and hubs along with ECS Axles loops and Torque tamer.
Level X 4l65e Trans and rear coming out! Quick 30 minute job.

DSS Level 5 Axle and Hub Kit!


Studs pressed into DSS Hubs

ECS Axle Loops and Torque Tamer! Cheap insurance if you ask me!


B&M Pro Bandit Shifter!


Coan 4k Stall converter!

RPM Transmission Powerglide and 9” conversion! Every little nook and cranny of this work of art screams heavy duty!


Billet everything! Lol


Fully built TQ Tube to handle all the power I can produce!


Mocking everything up and bolting axles in!


Torque tube on and everything ready to drop back in!

Fits like a glove slipped right in with no issues!

Just look at that huge 9”

Pictured are the heavy duty axles and axle loop!

Deep Trans pan and torque tamer can be seen here!


Shifter linkage installed

Shifter installed!

Stock Tunnel plate modified!

Trans lines ran and secured!

#3
Part 3
Rolling Gear
I have decided to run Weld RTS 18x5 fronts with M&H tires which will provide a lighter solution yet still have plenty of stability at high speed roll racing. For the rear I have opted to run 15x11 Weld RTS Beadlock in order to do so with a C6 LG Spindles and Base C5/C6 brakes are required, while this is a costly mod it reaps its benefits by 10 fold (the weight savings alone is worth it.) This allows us to run a 275/60/15 MT Radial Pros which is the current king of the hill on traction and provides the best split between a bias ply and radial side wall. It is this very reason Beadlocks were also chosen to eliminate any possibility of the tire spinning on the rim.
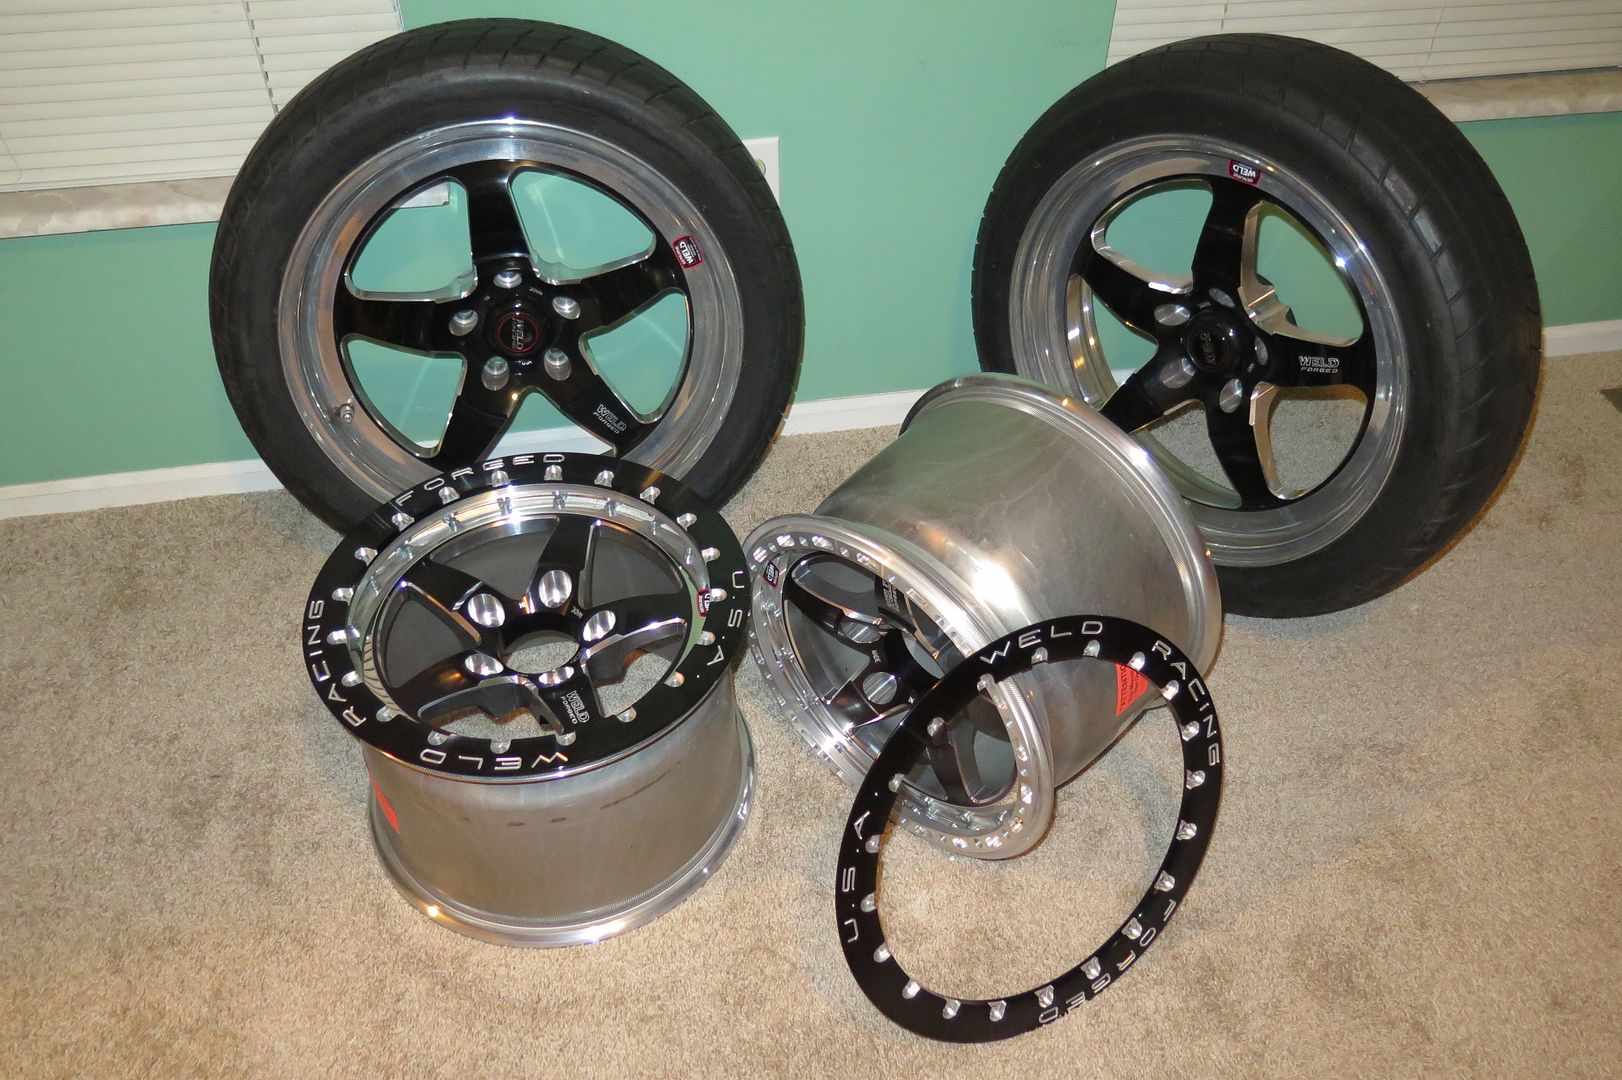
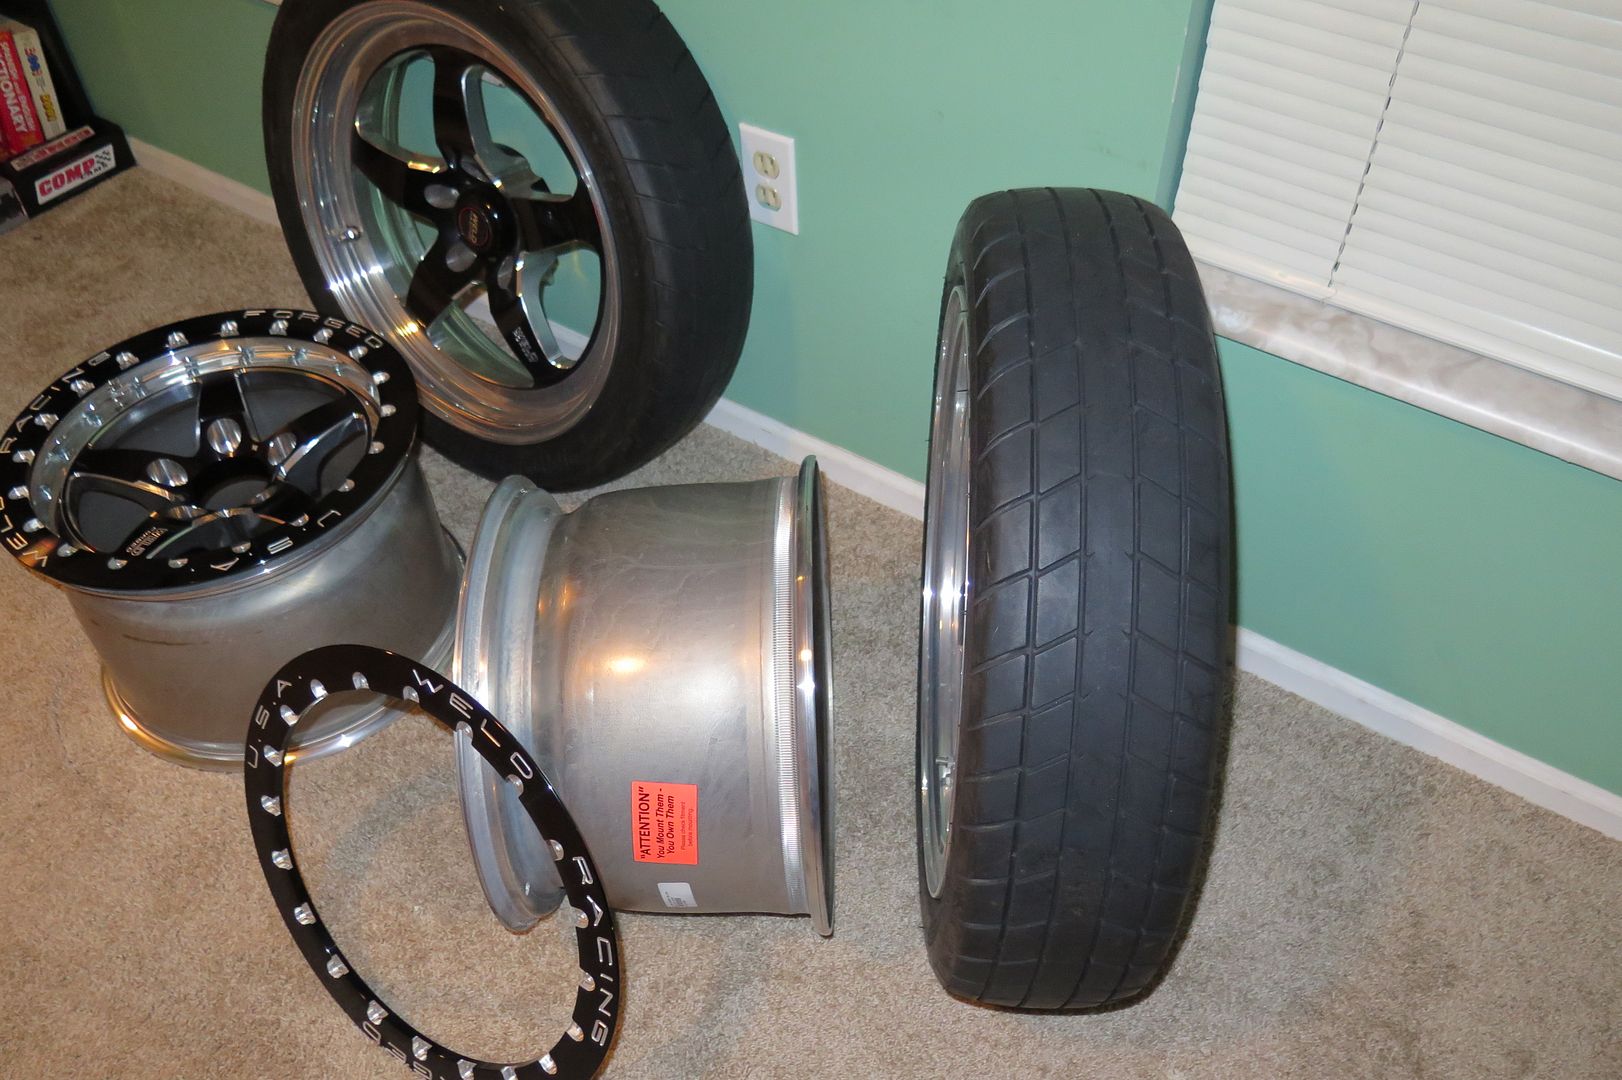
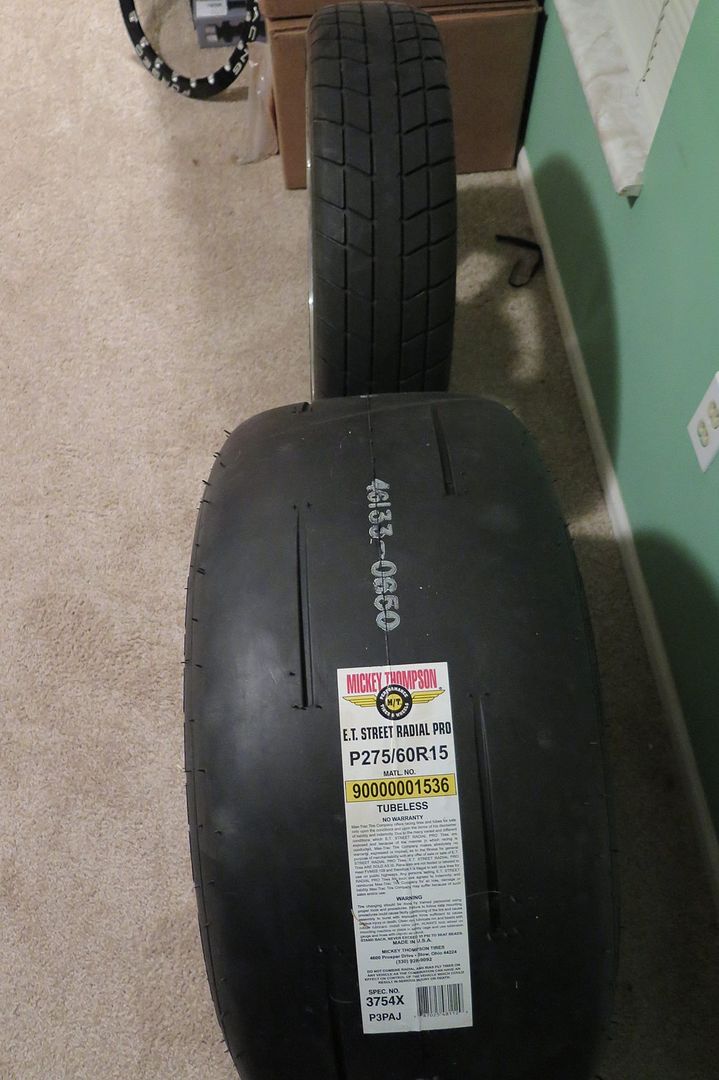
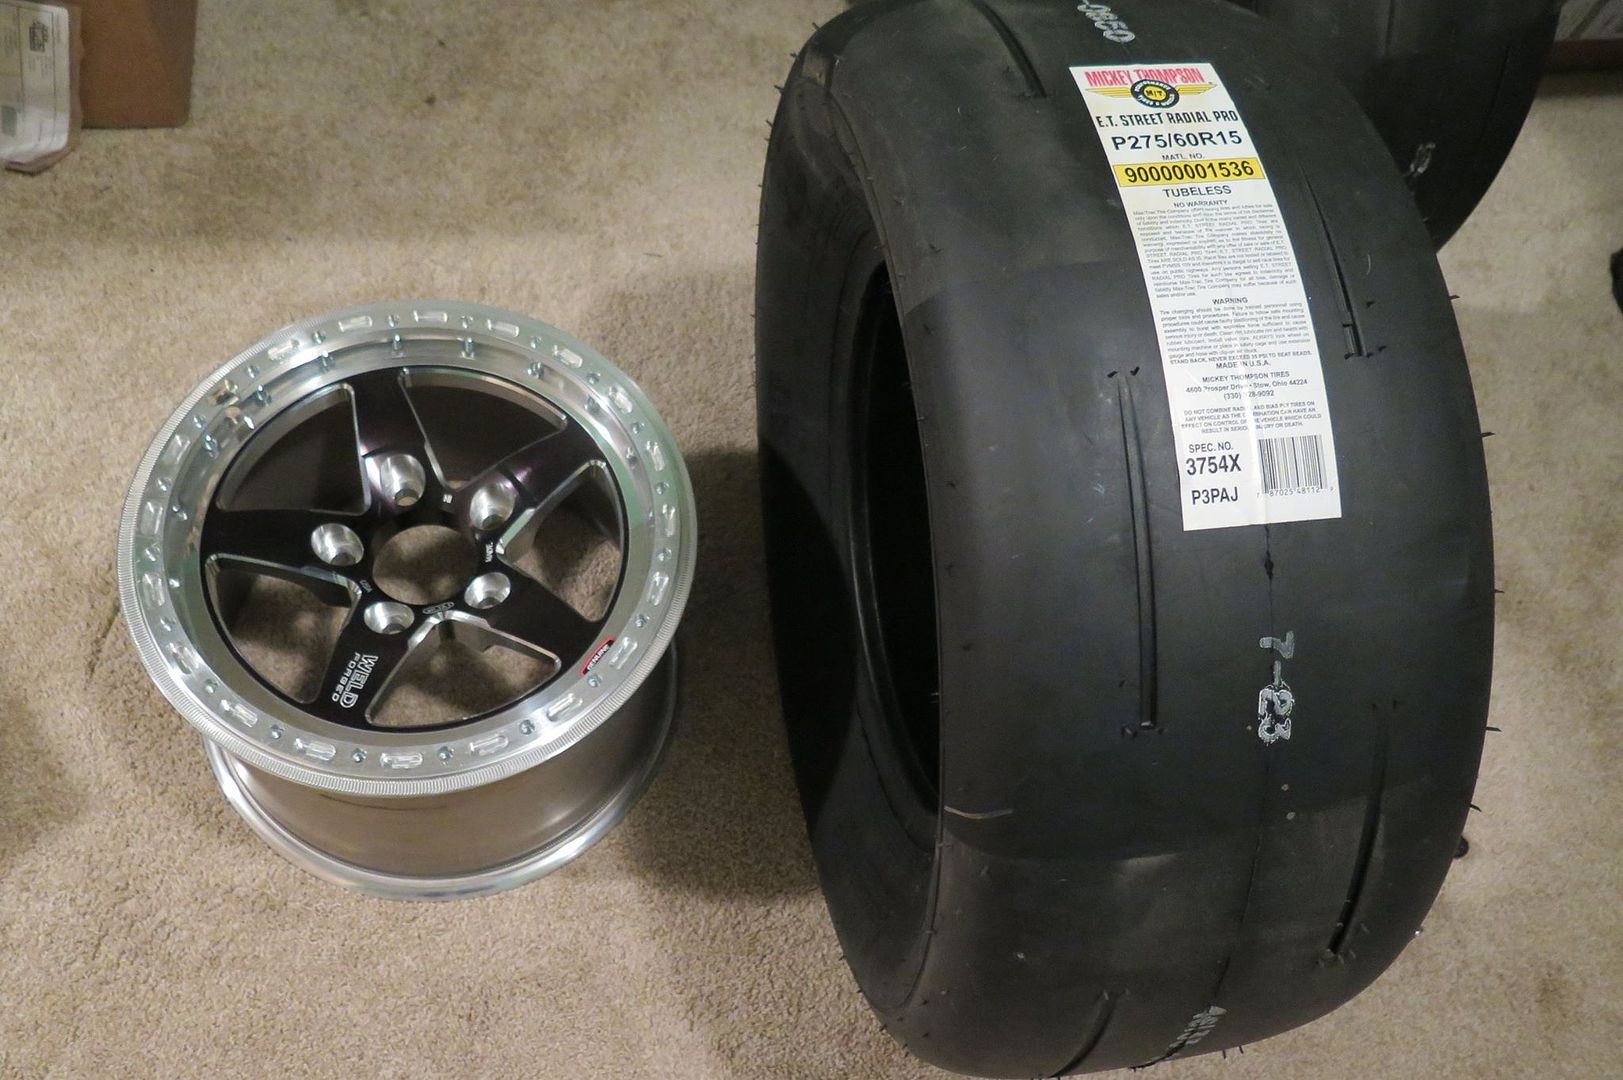
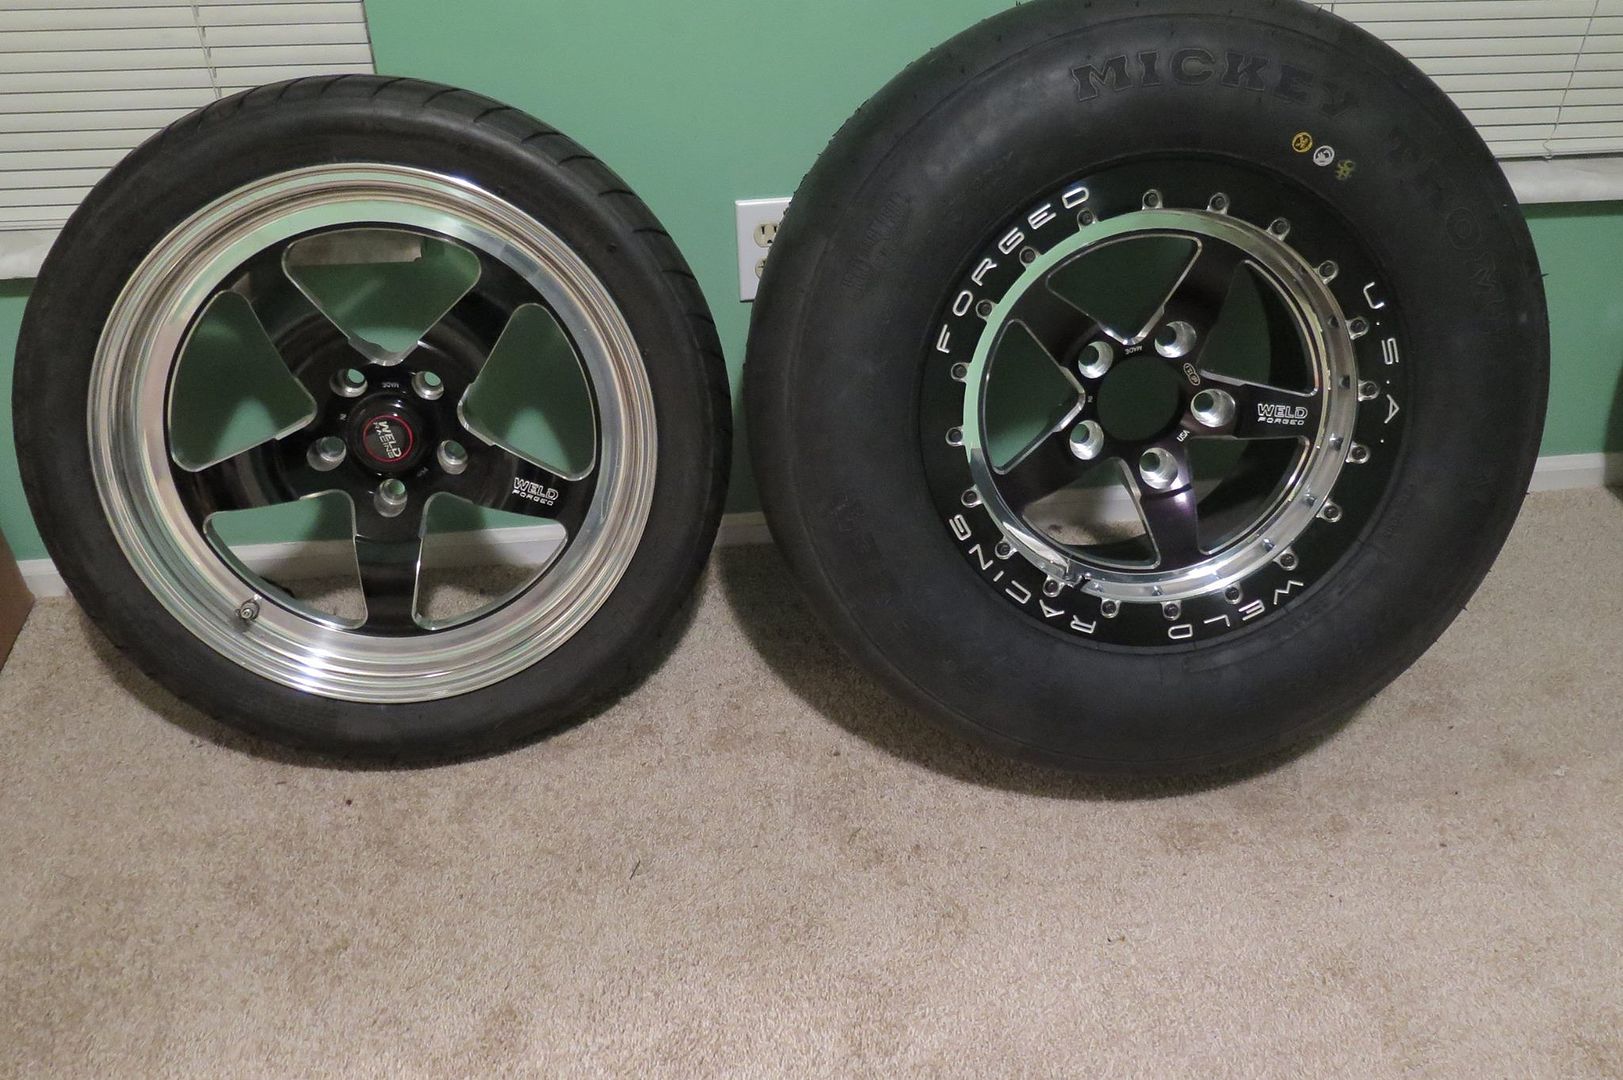
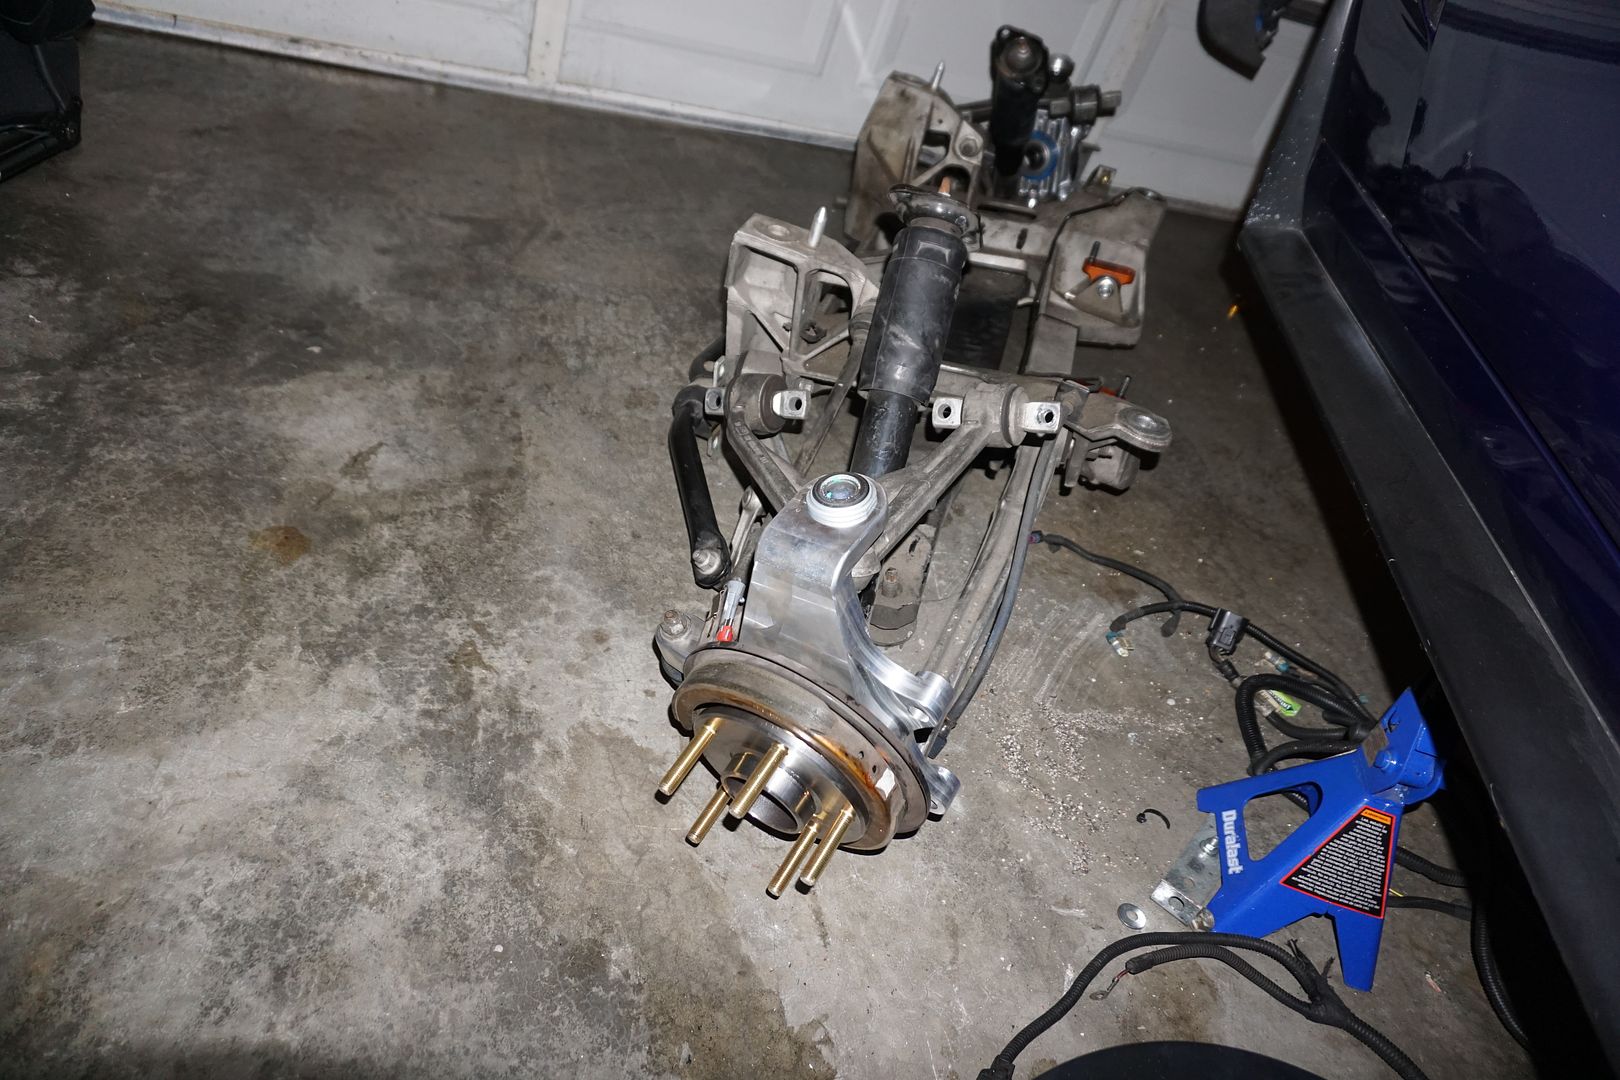
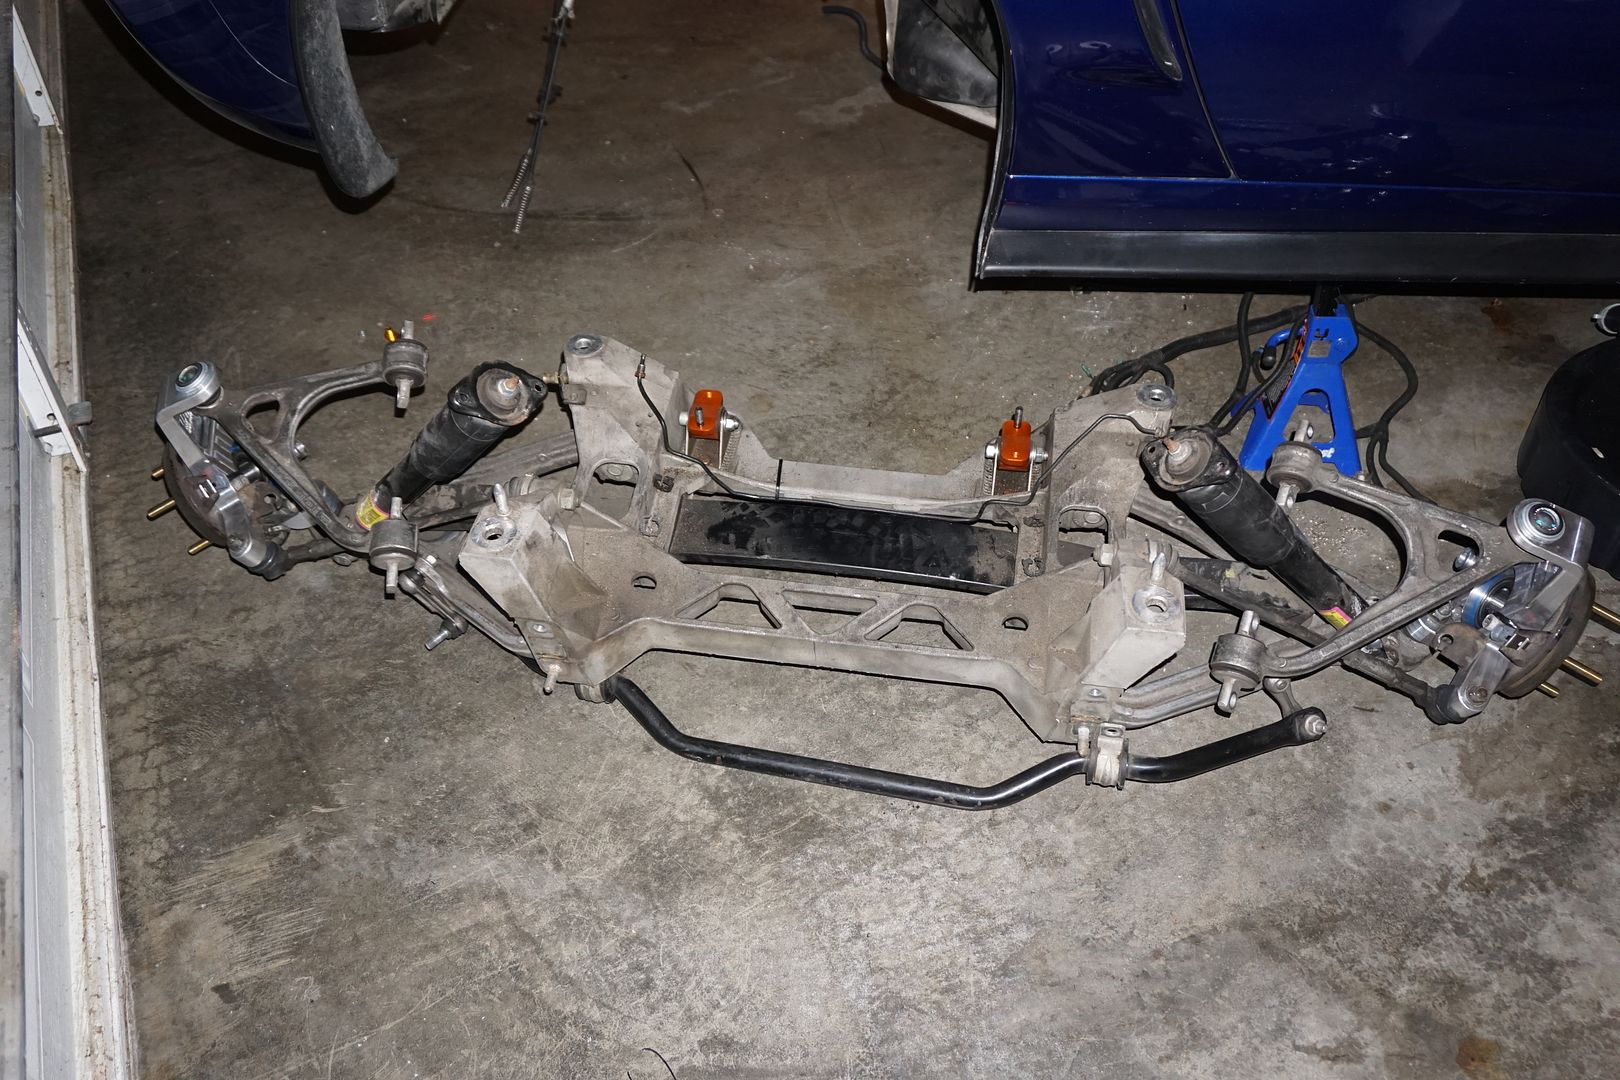
LG Billet Spindles! Wish these didn’t have to be hidden
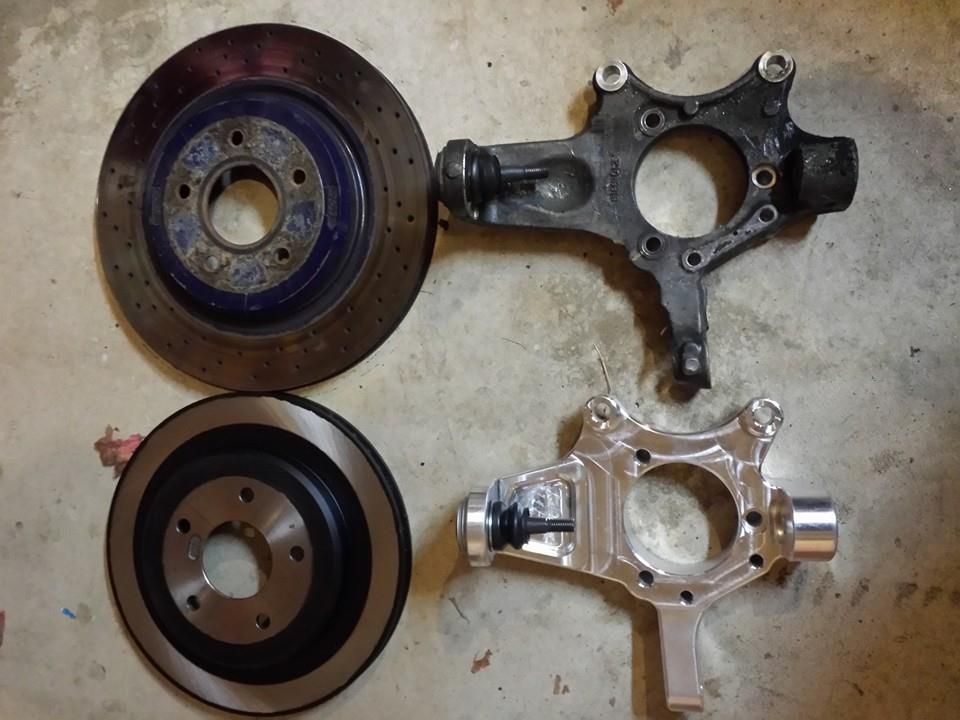
Billet Spindles mounted and Pfadt Trans mounts in place!
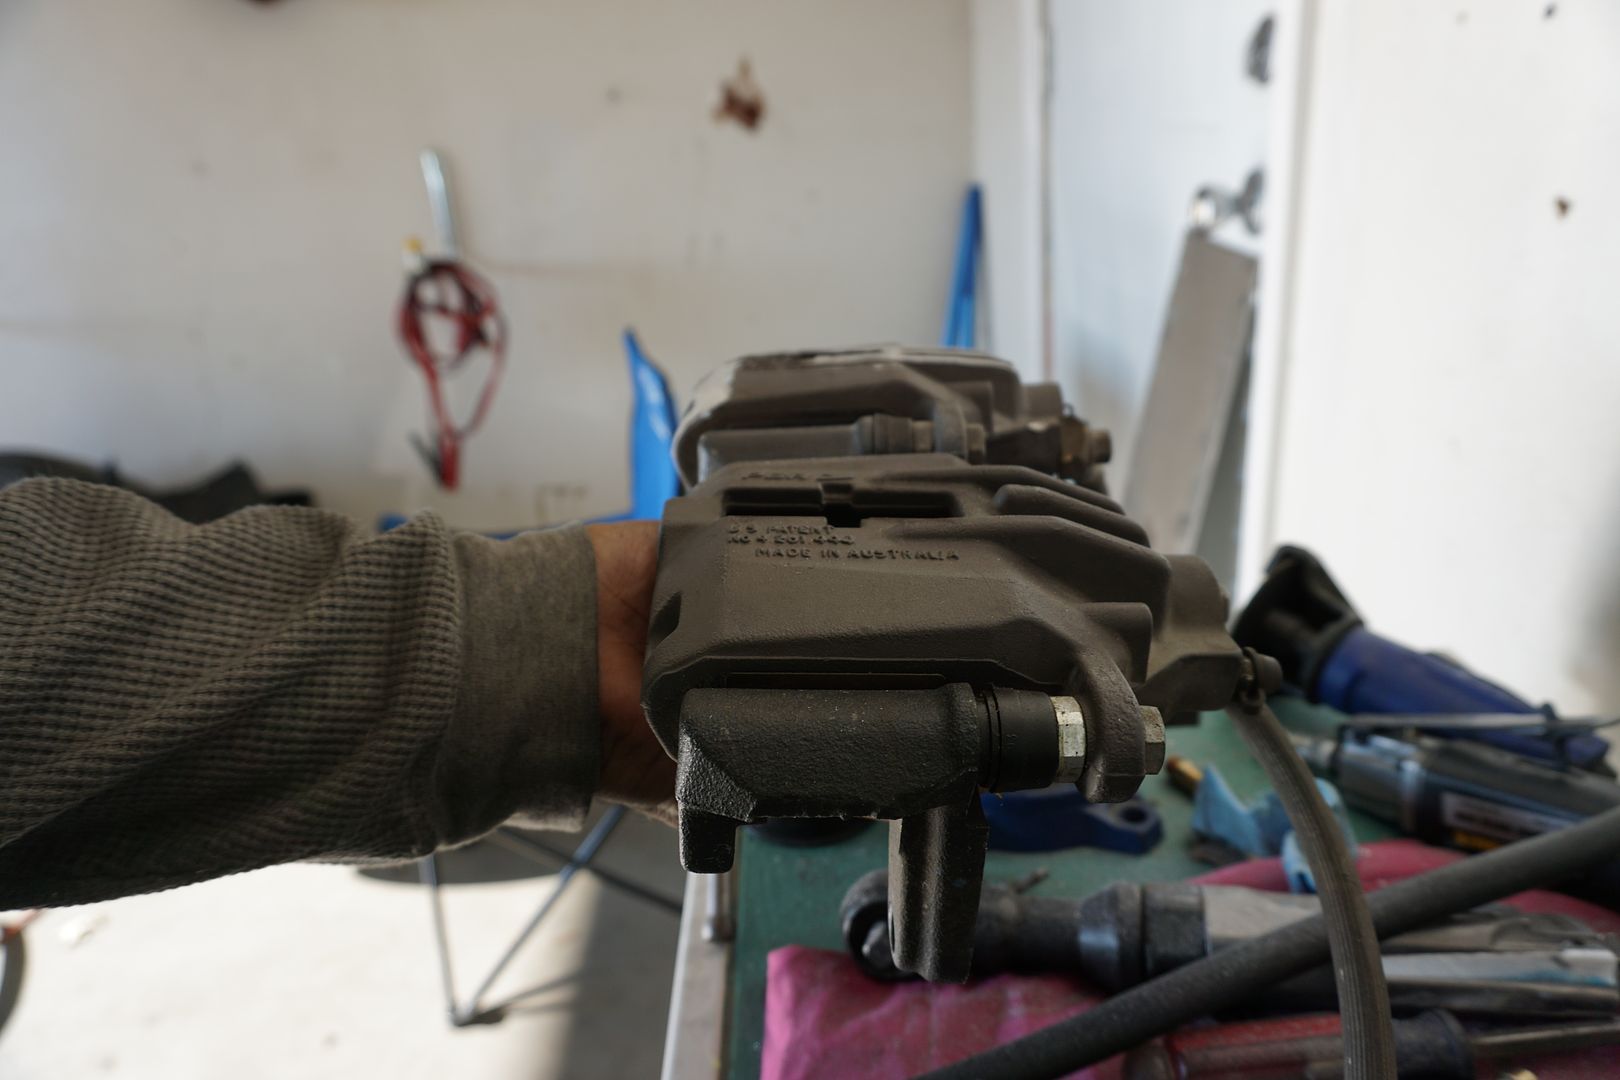
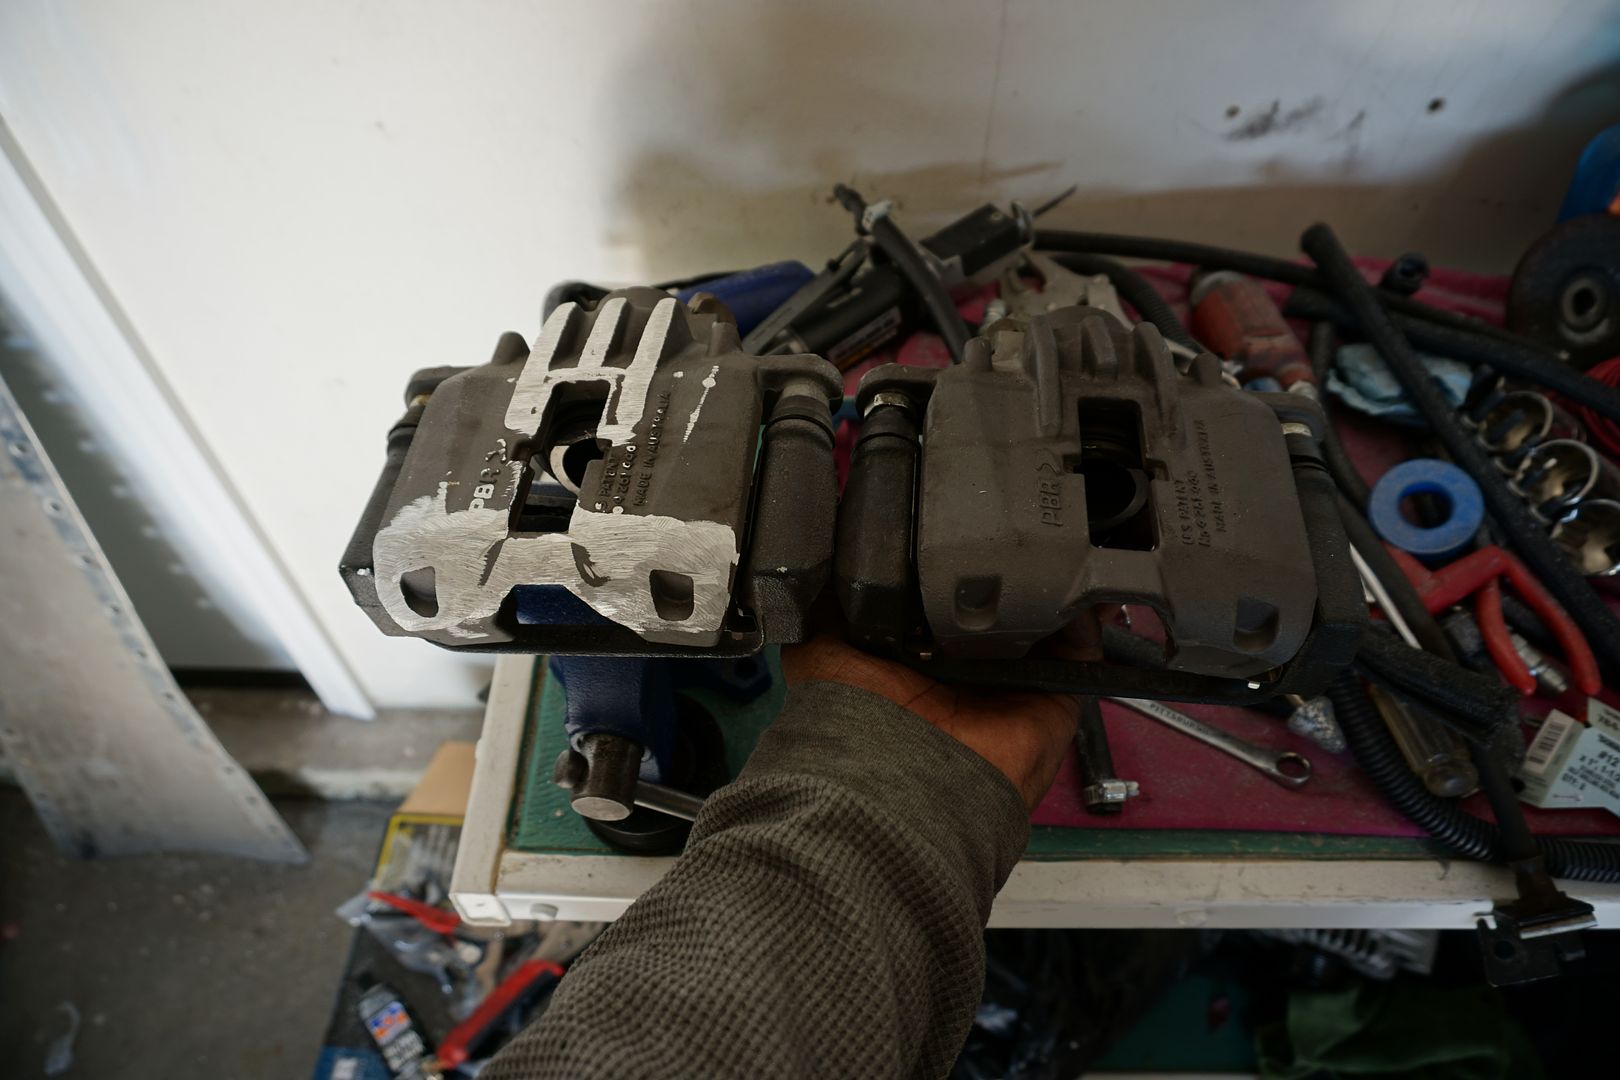
Rear Brake Calipers being massaged!
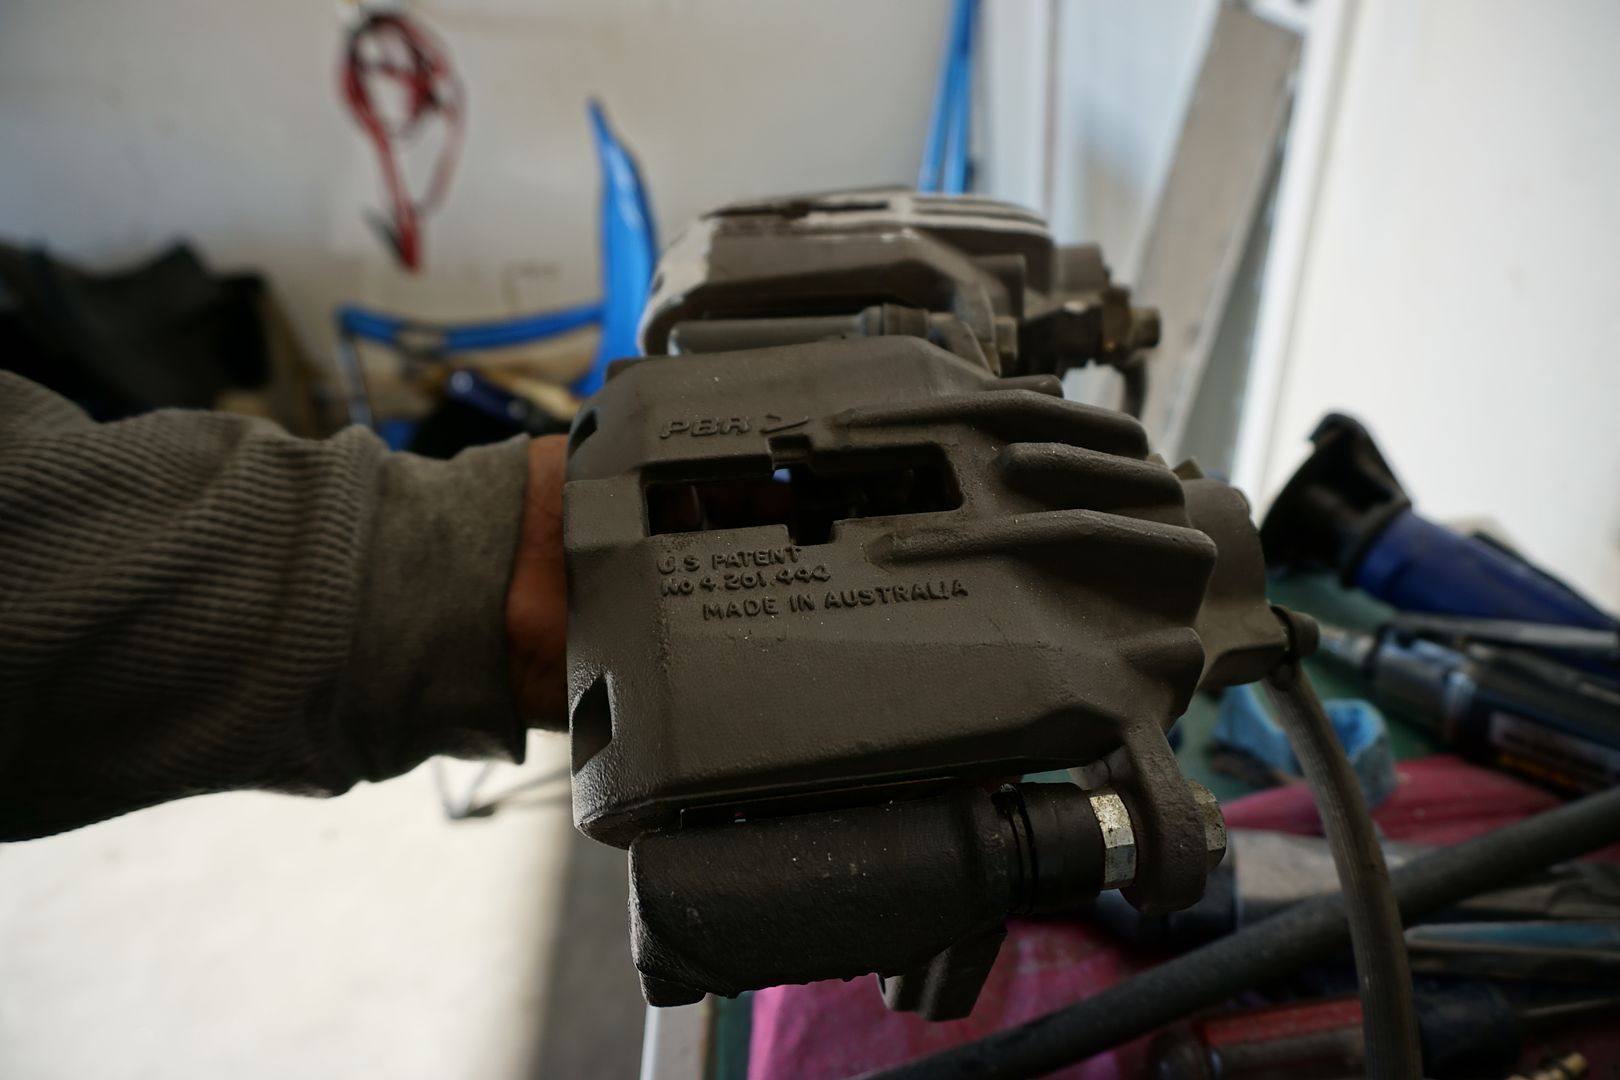
Brakes Mounted!

Little Preview!
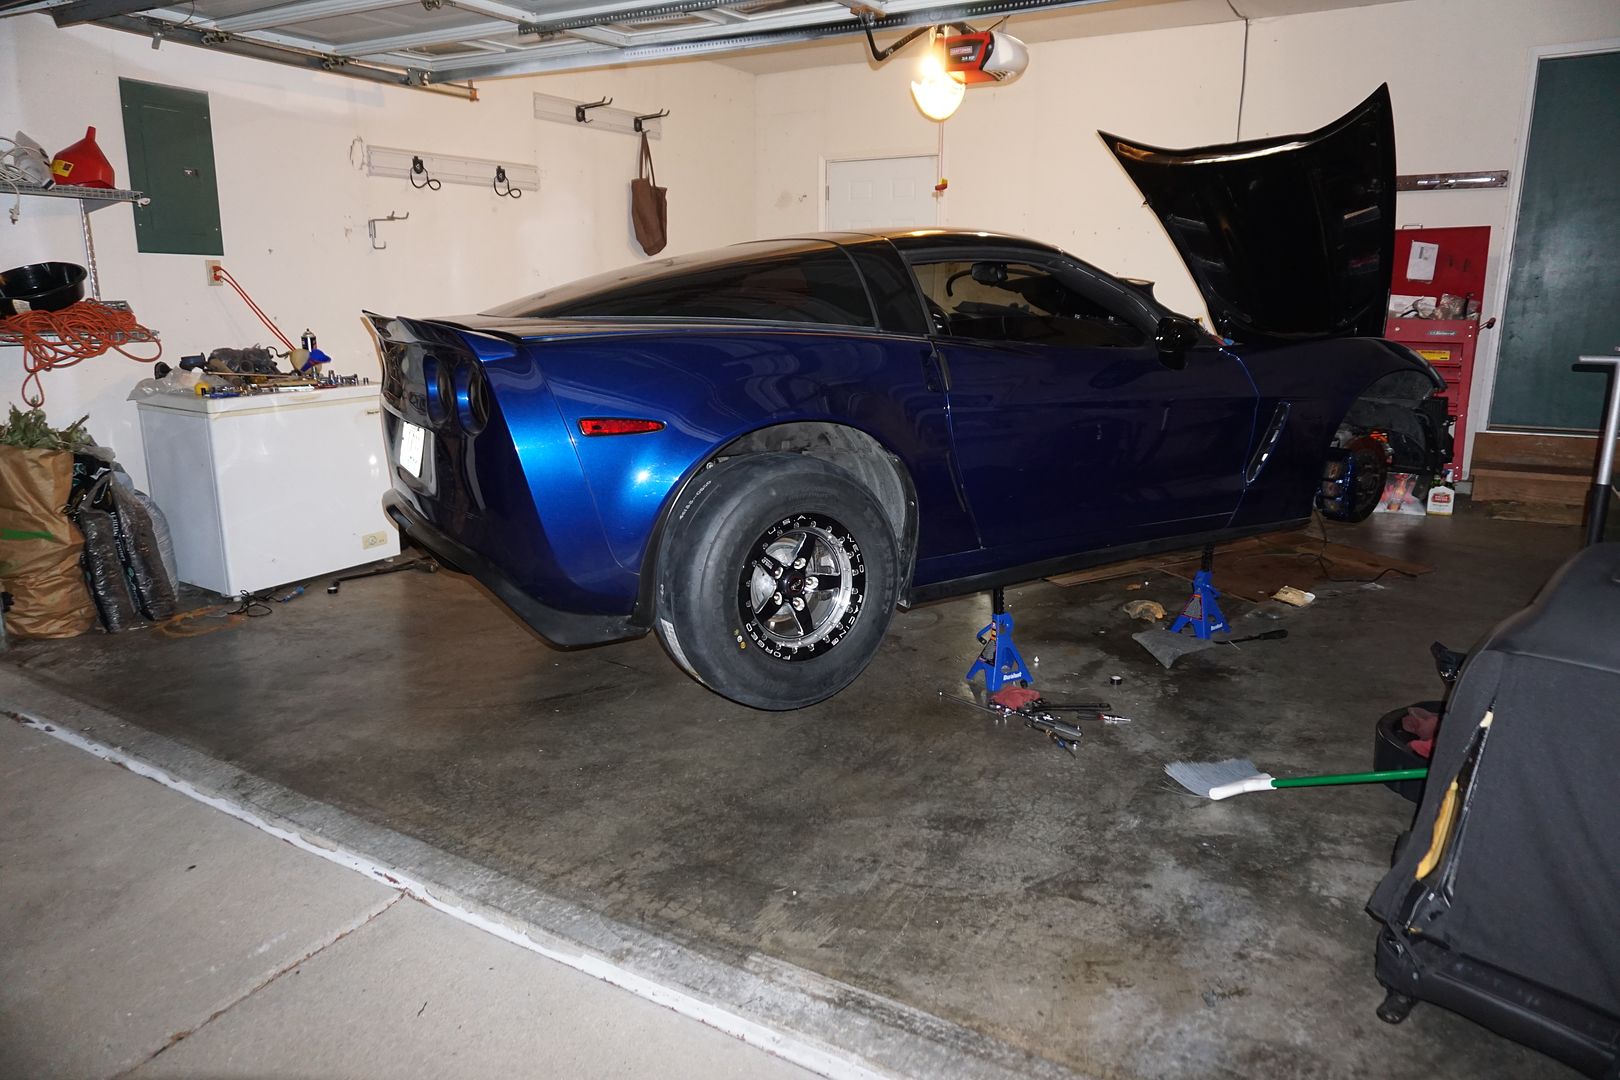
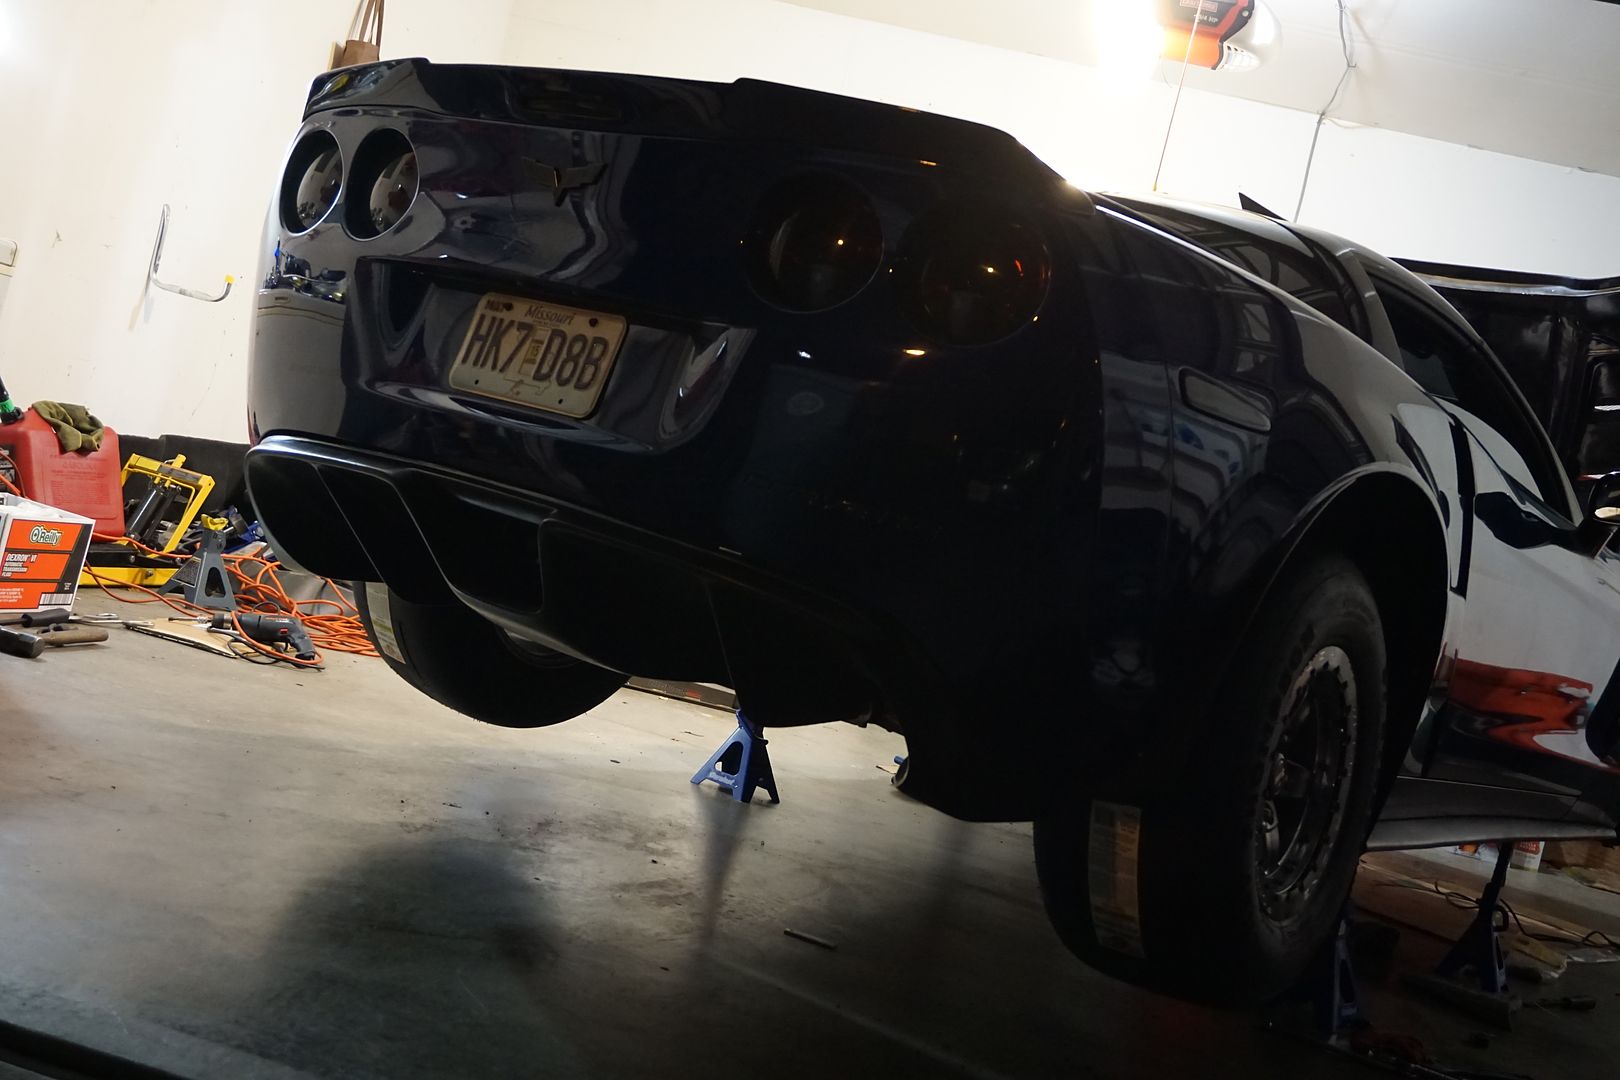
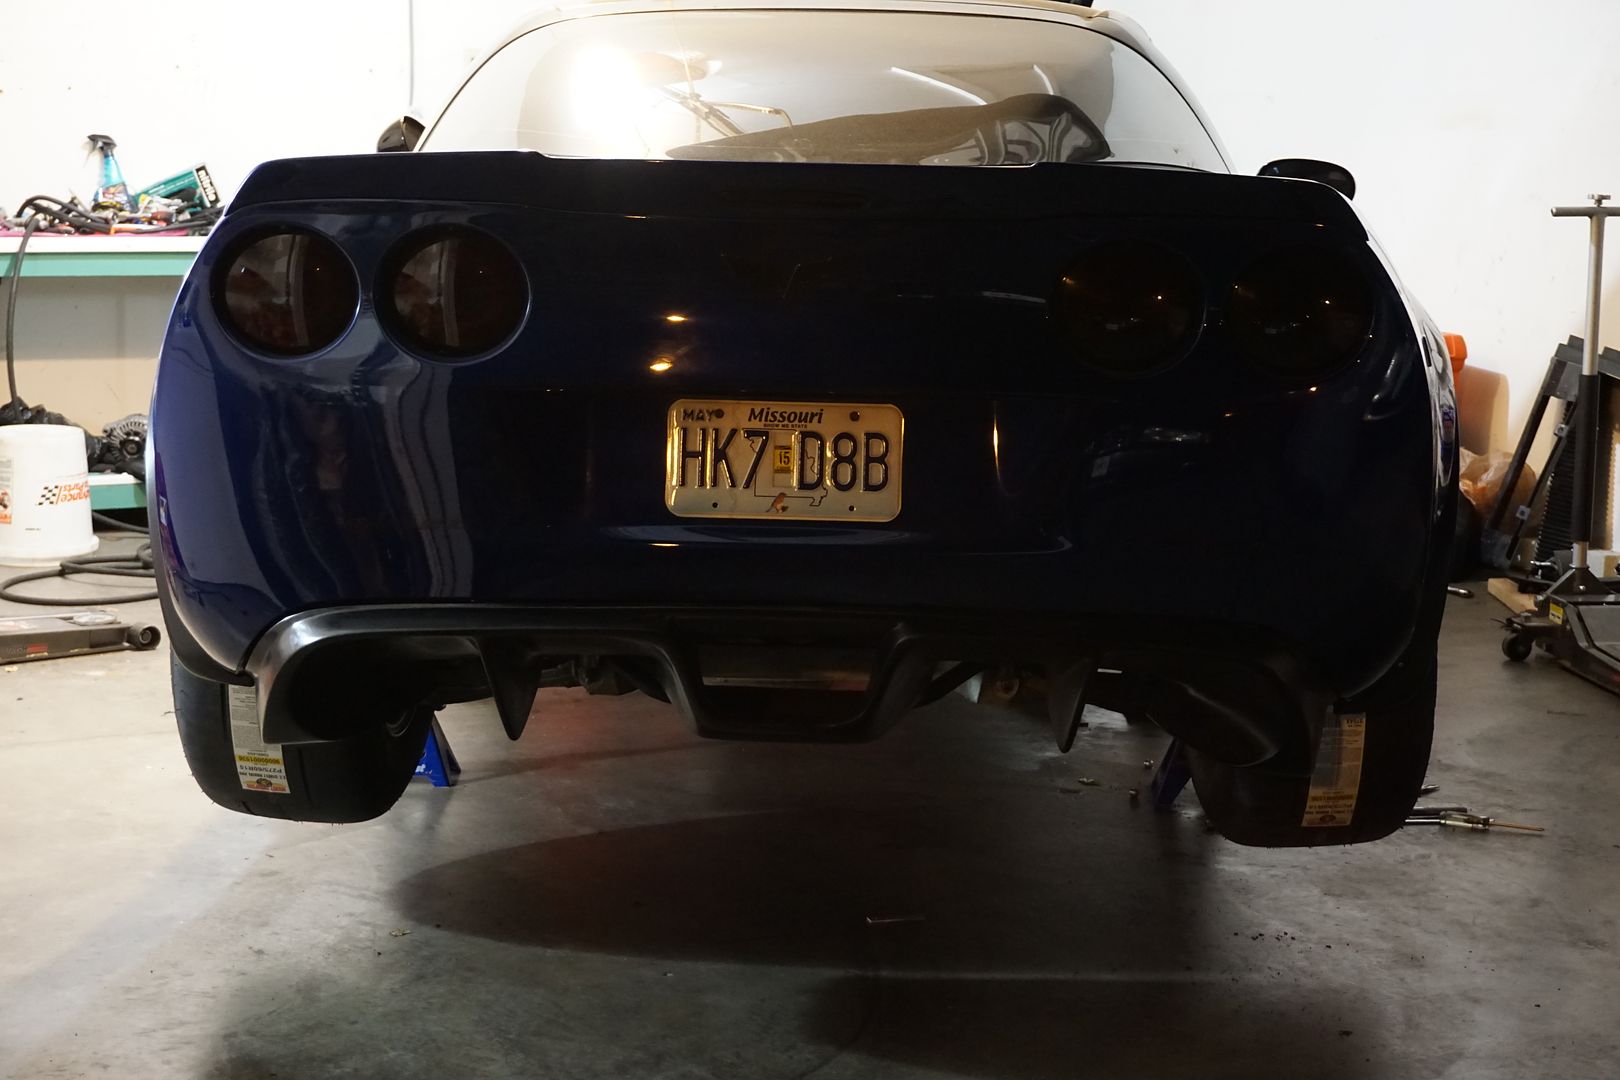
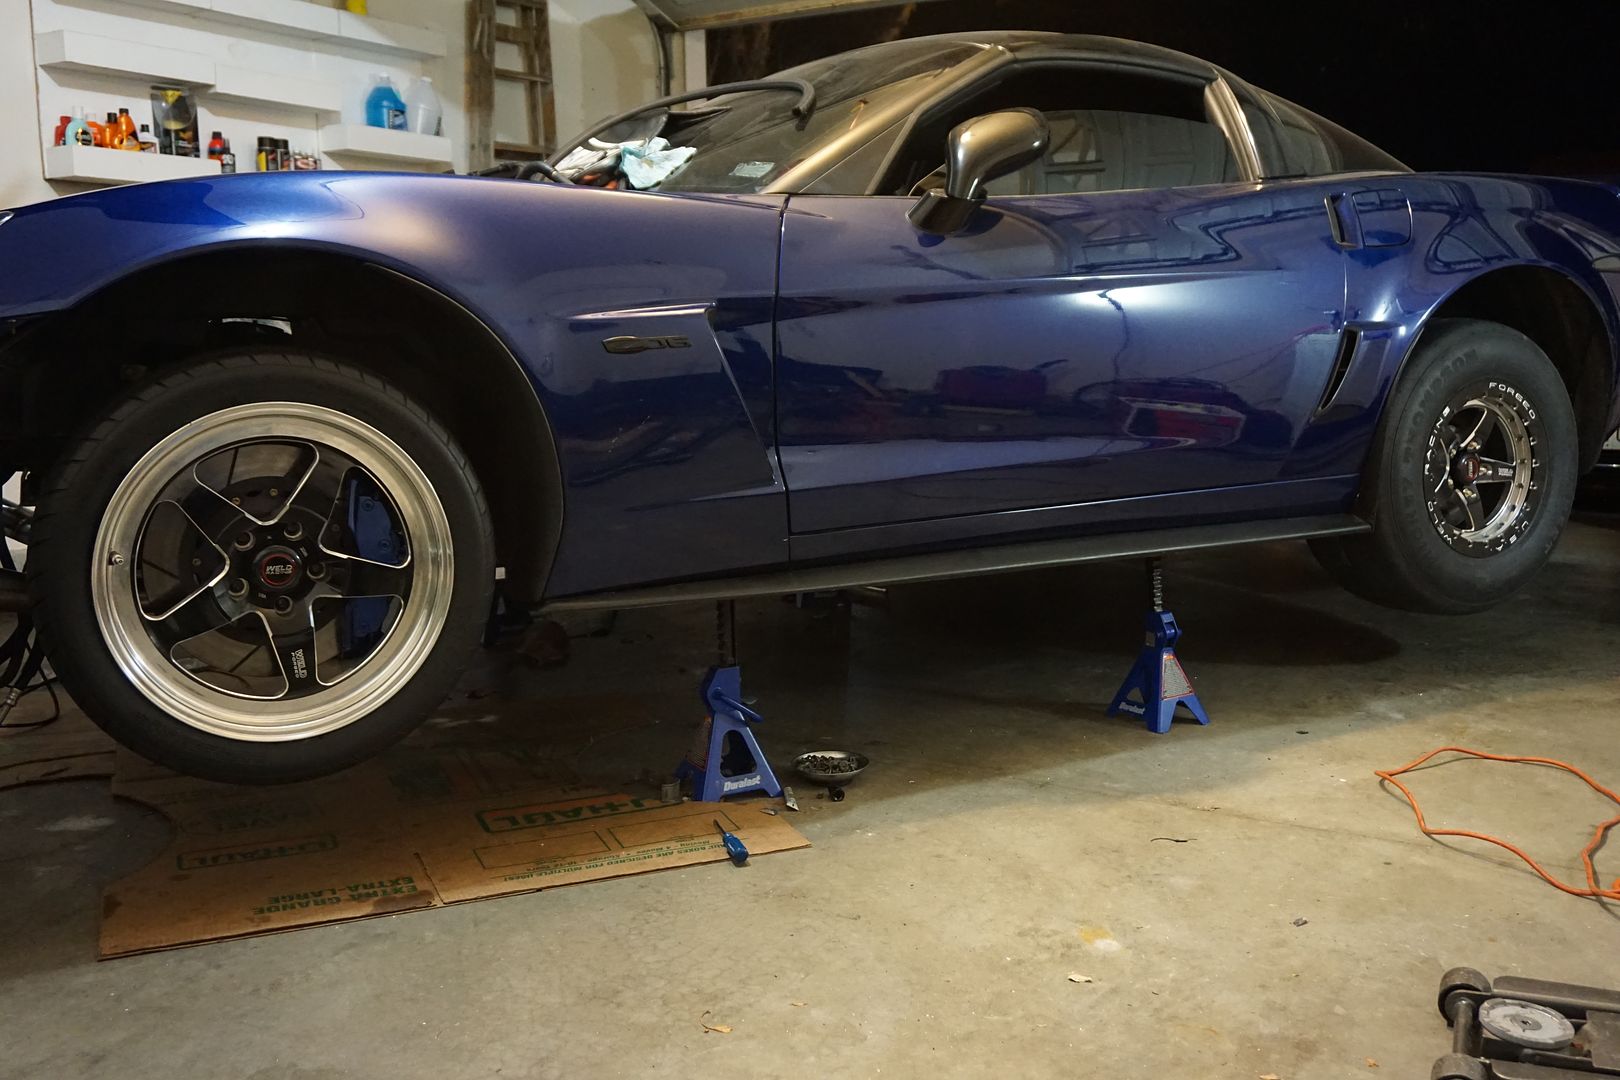
Rolling Gear
I have decided to run Weld RTS 18x5 fronts with M&H tires which will provide a lighter solution yet still have plenty of stability at high speed roll racing. For the rear I have opted to run 15x11 Weld RTS Beadlock in order to do so with a C6 LG Spindles and Base C5/C6 brakes are required, while this is a costly mod it reaps its benefits by 10 fold (the weight savings alone is worth it.) This allows us to run a 275/60/15 MT Radial Pros which is the current king of the hill on traction and provides the best split between a bias ply and radial side wall. It is this very reason Beadlocks were also chosen to eliminate any possibility of the tire spinning on the rim.


LG Billet Spindles! Wish these didn’t have to be hidden

Billet Spindles mounted and Pfadt Trans mounts in place!


Rear Brake Calipers being massaged!


Brakes Mounted!

Little Preview!


#4
Part 4
Engine
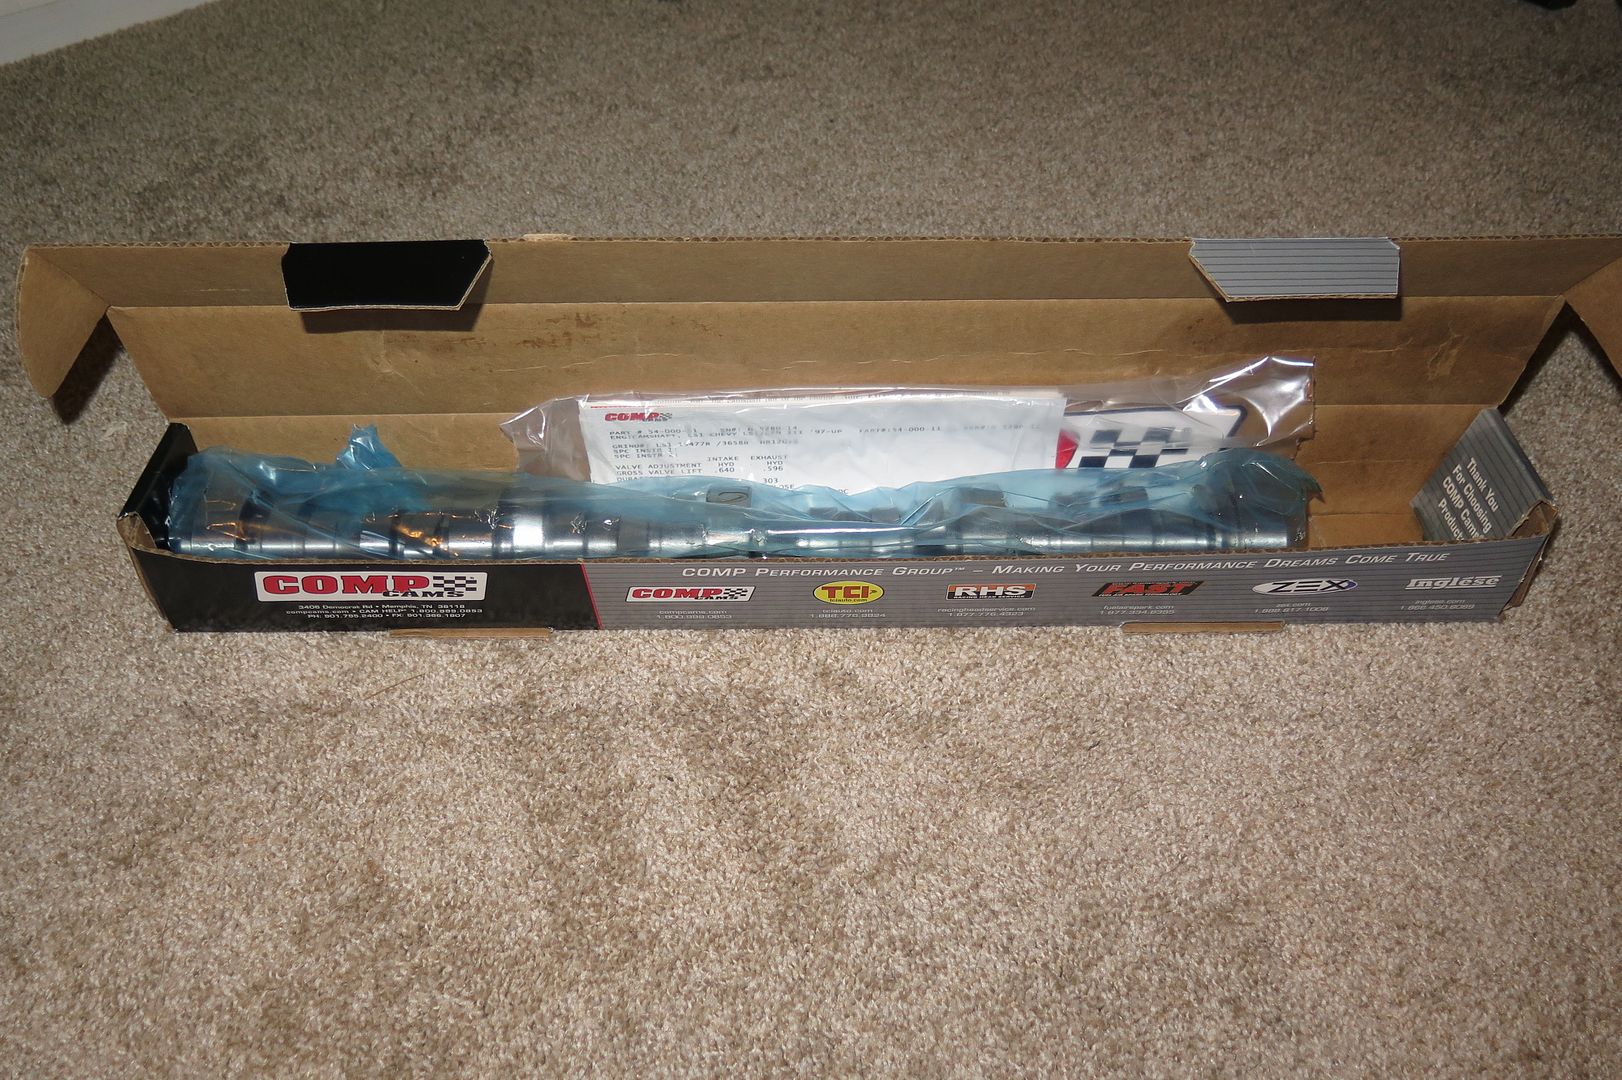
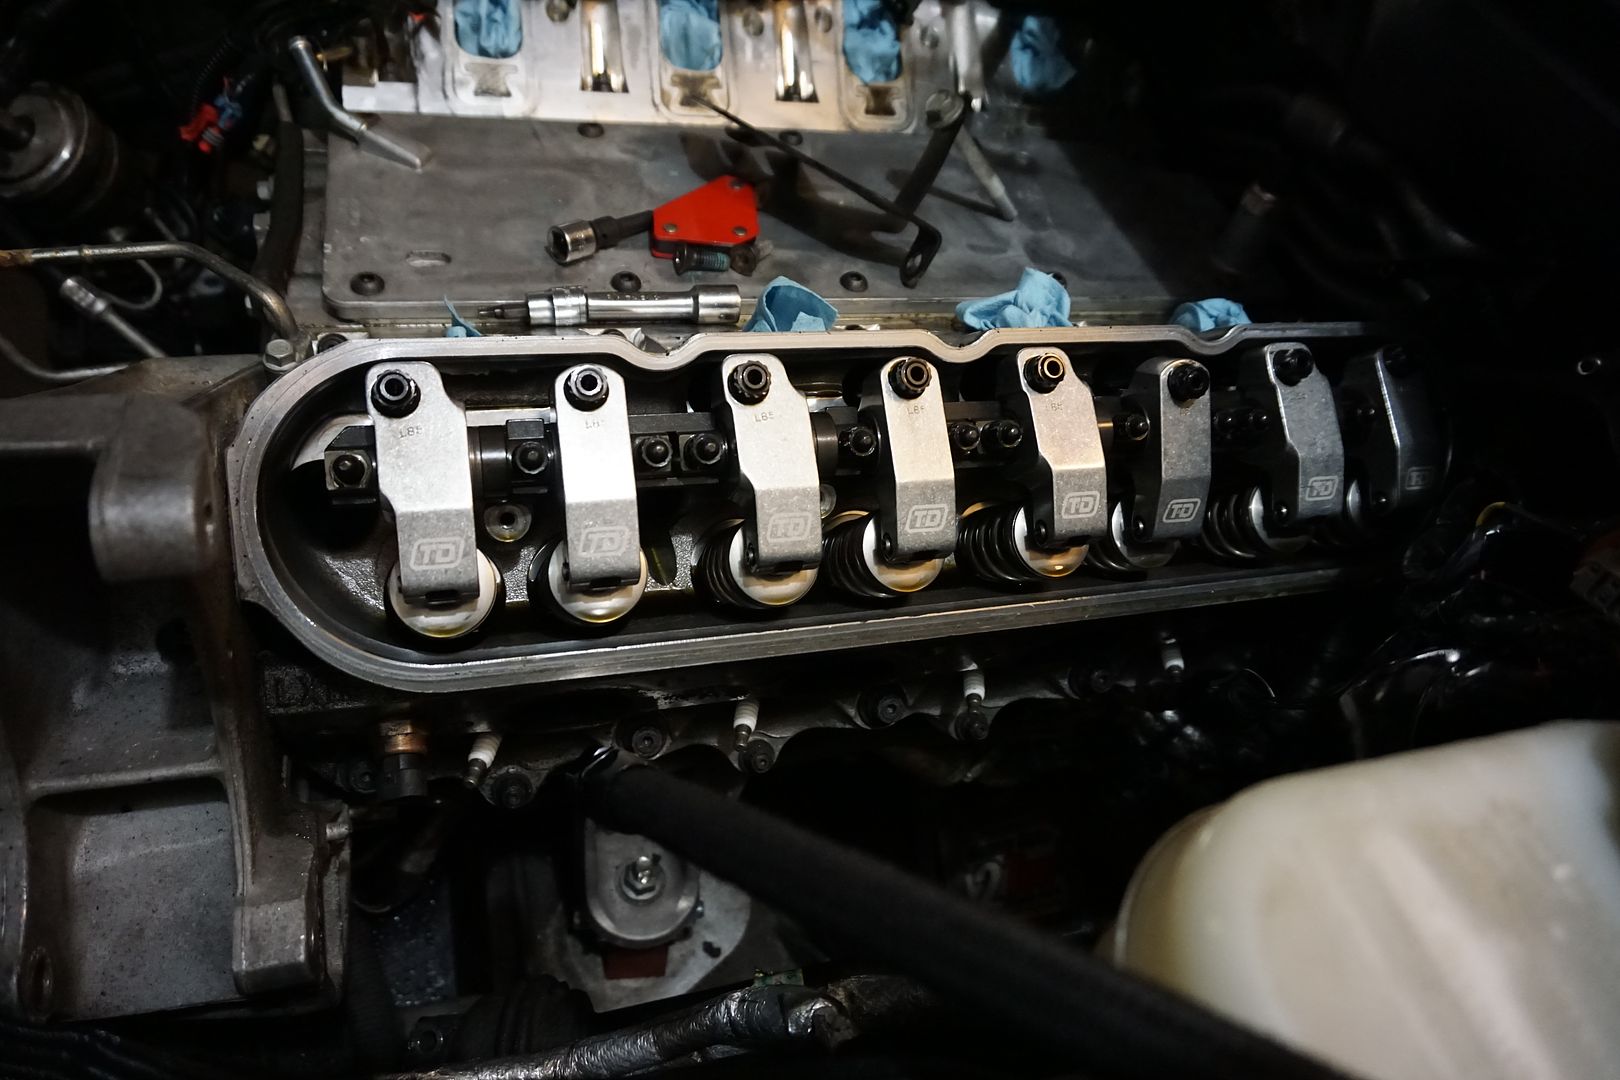
I have opted to utilize an RHS Block for its many benefits including lightweight (aluminum) and priority oiling; This will be a 434ci utilizing a set of custom Mast LS7 heads. The lower end is comprised of CALLIES Magnum Crank, CALLIES Billet Rods, COMP short travel high RPM Roller Lifters, and WEISCO Pistons. The MAST Heads are utilizing TI intake and SS exhaust valves w/ PAC 700 + lift springs and TI retainers and T&D Shaft mount rockers to rake in the control. Of course because of the height of the T&D rockers we have opted to use the MAST Tall valve covers to clear. This is an E85/Meth build therefore we will be using an extremely aggressive static compression ratio of 12:5 but the DCR will be decent per our custom spec LJMS Cam 237/248 .679/.630 120 +5.
LJMS Cam 237/248 .679/.630 120 +5.
T&D Rockers
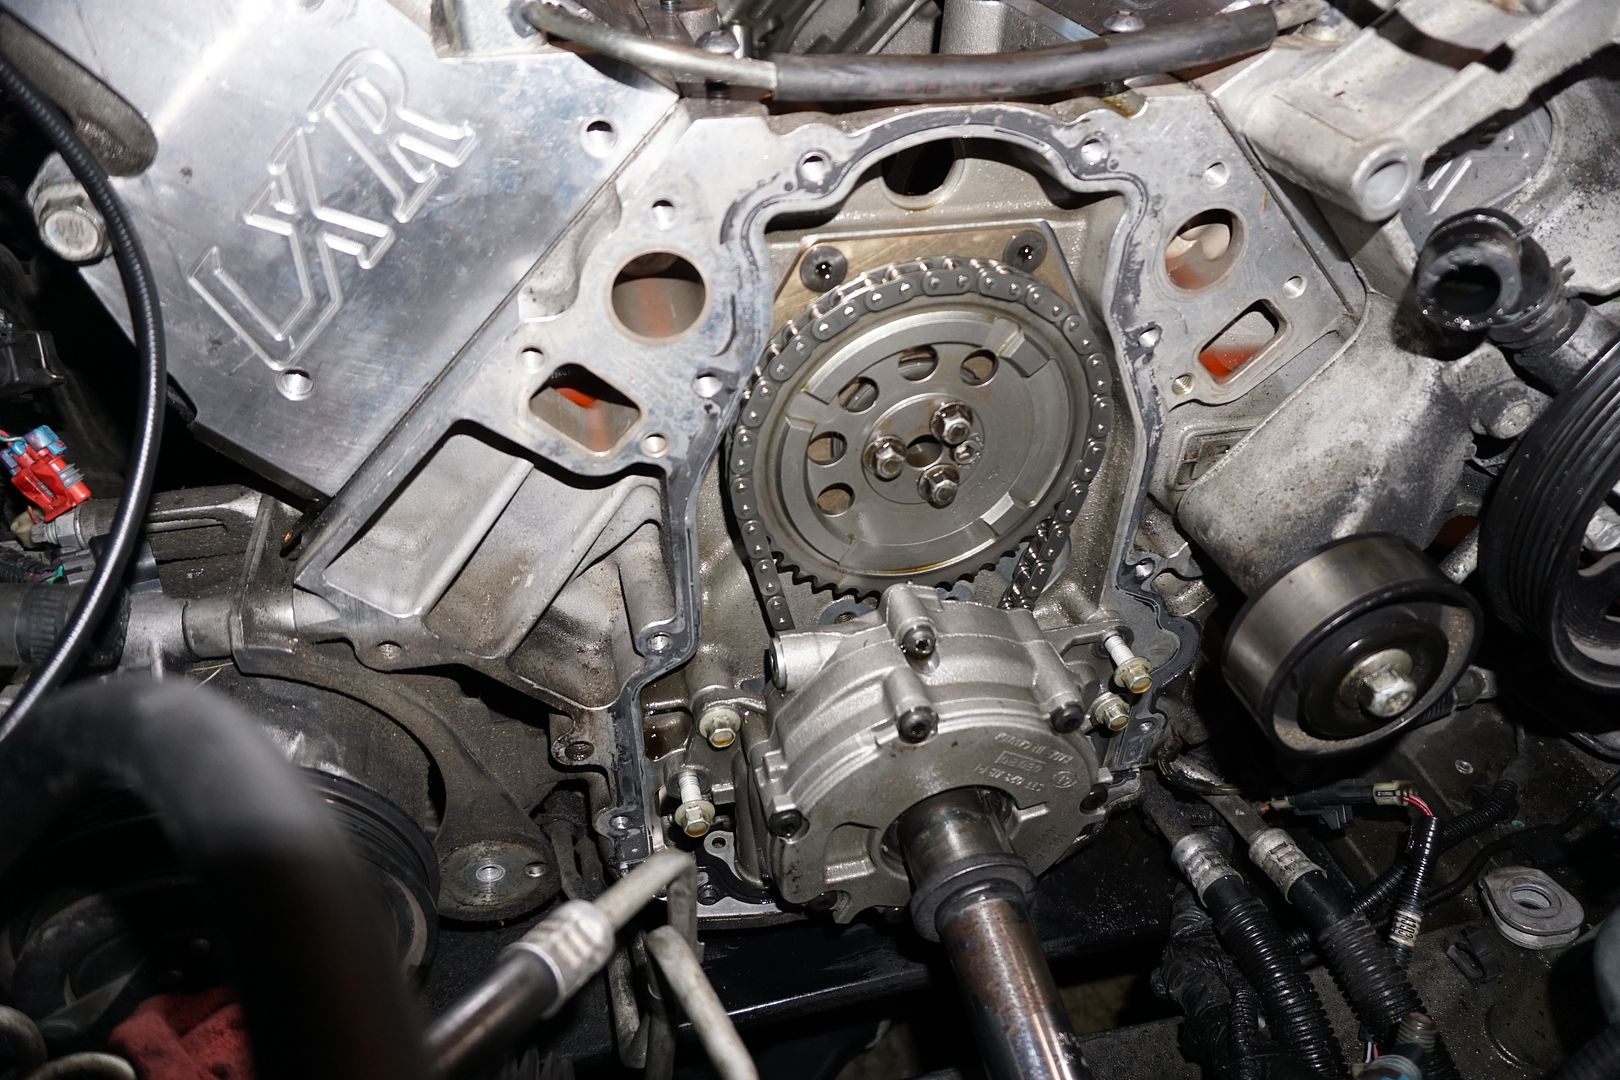
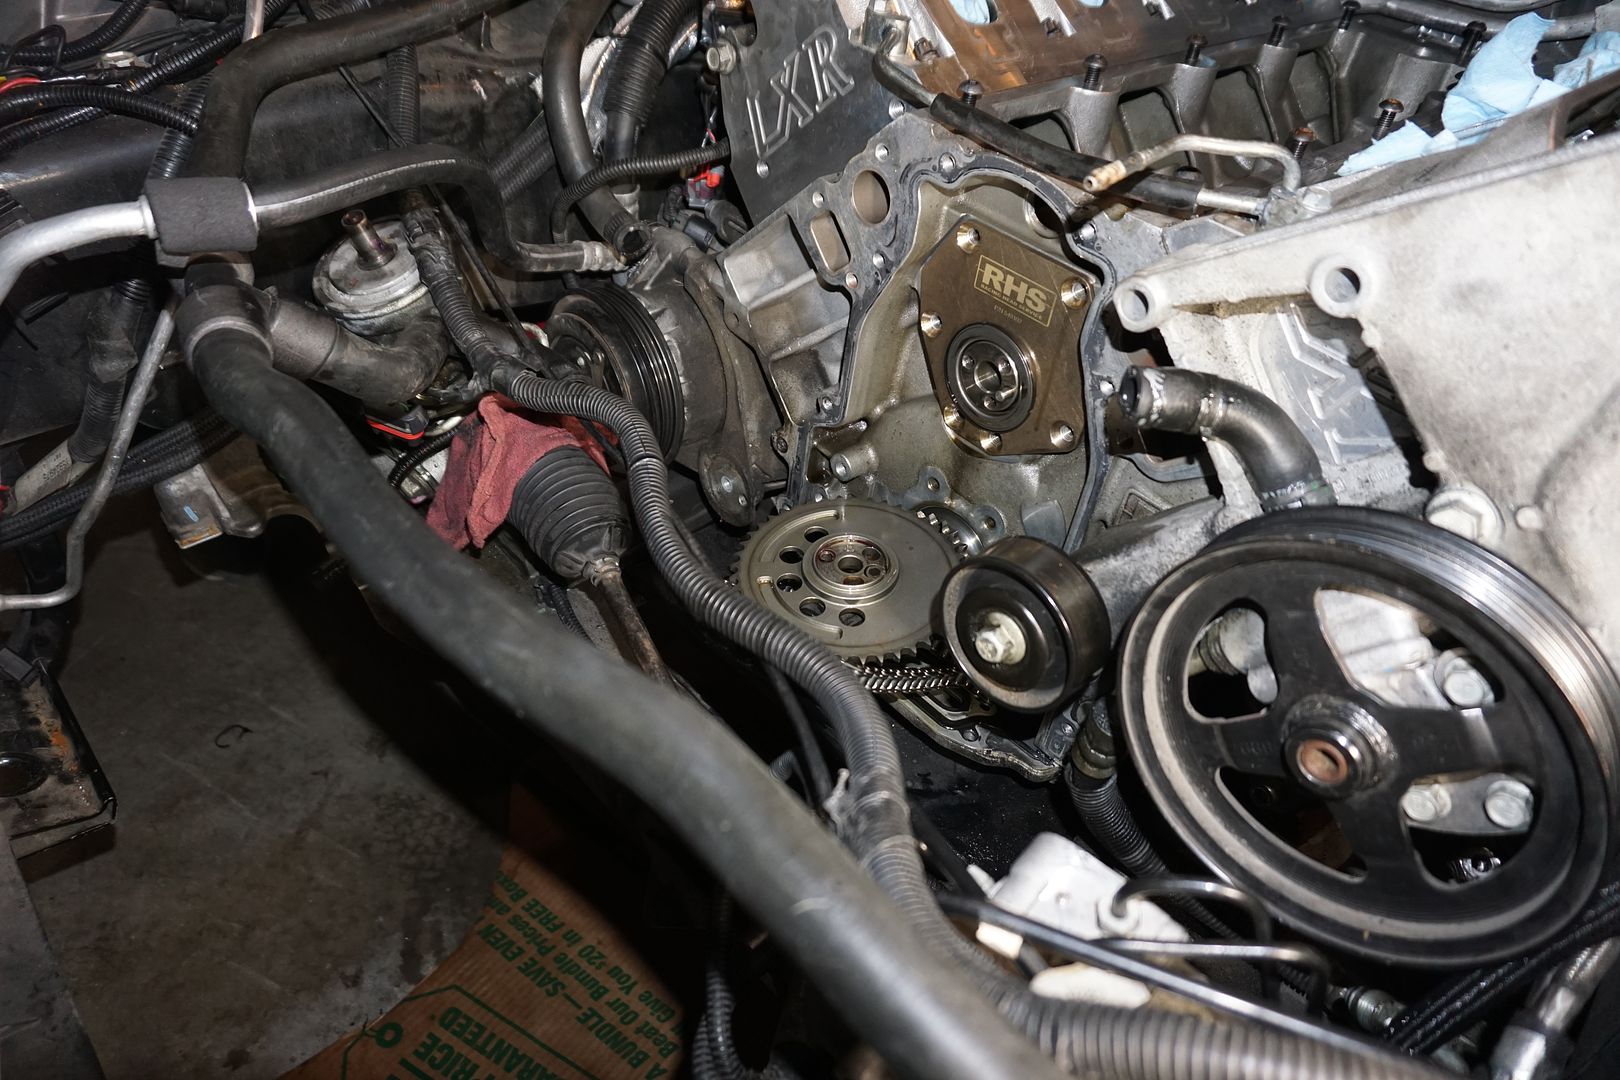
Changing cam

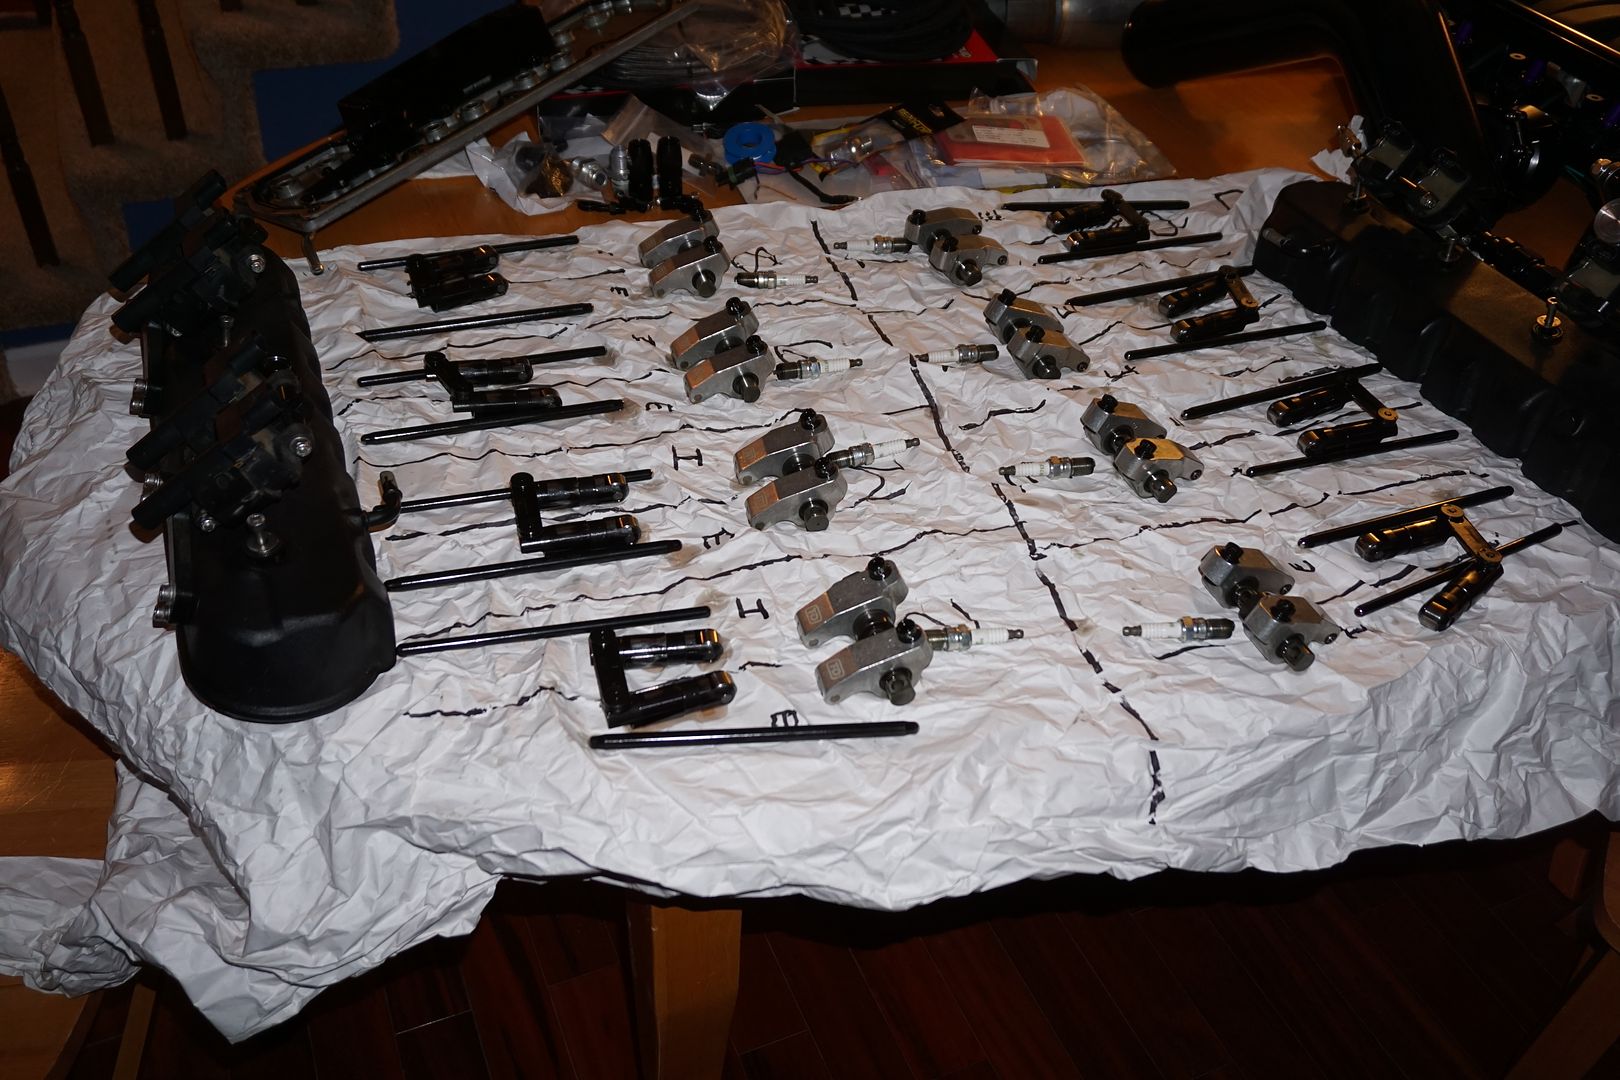
Organization is key! I do this roughly every 6 months just to check over all valvetrain components for wear etc.
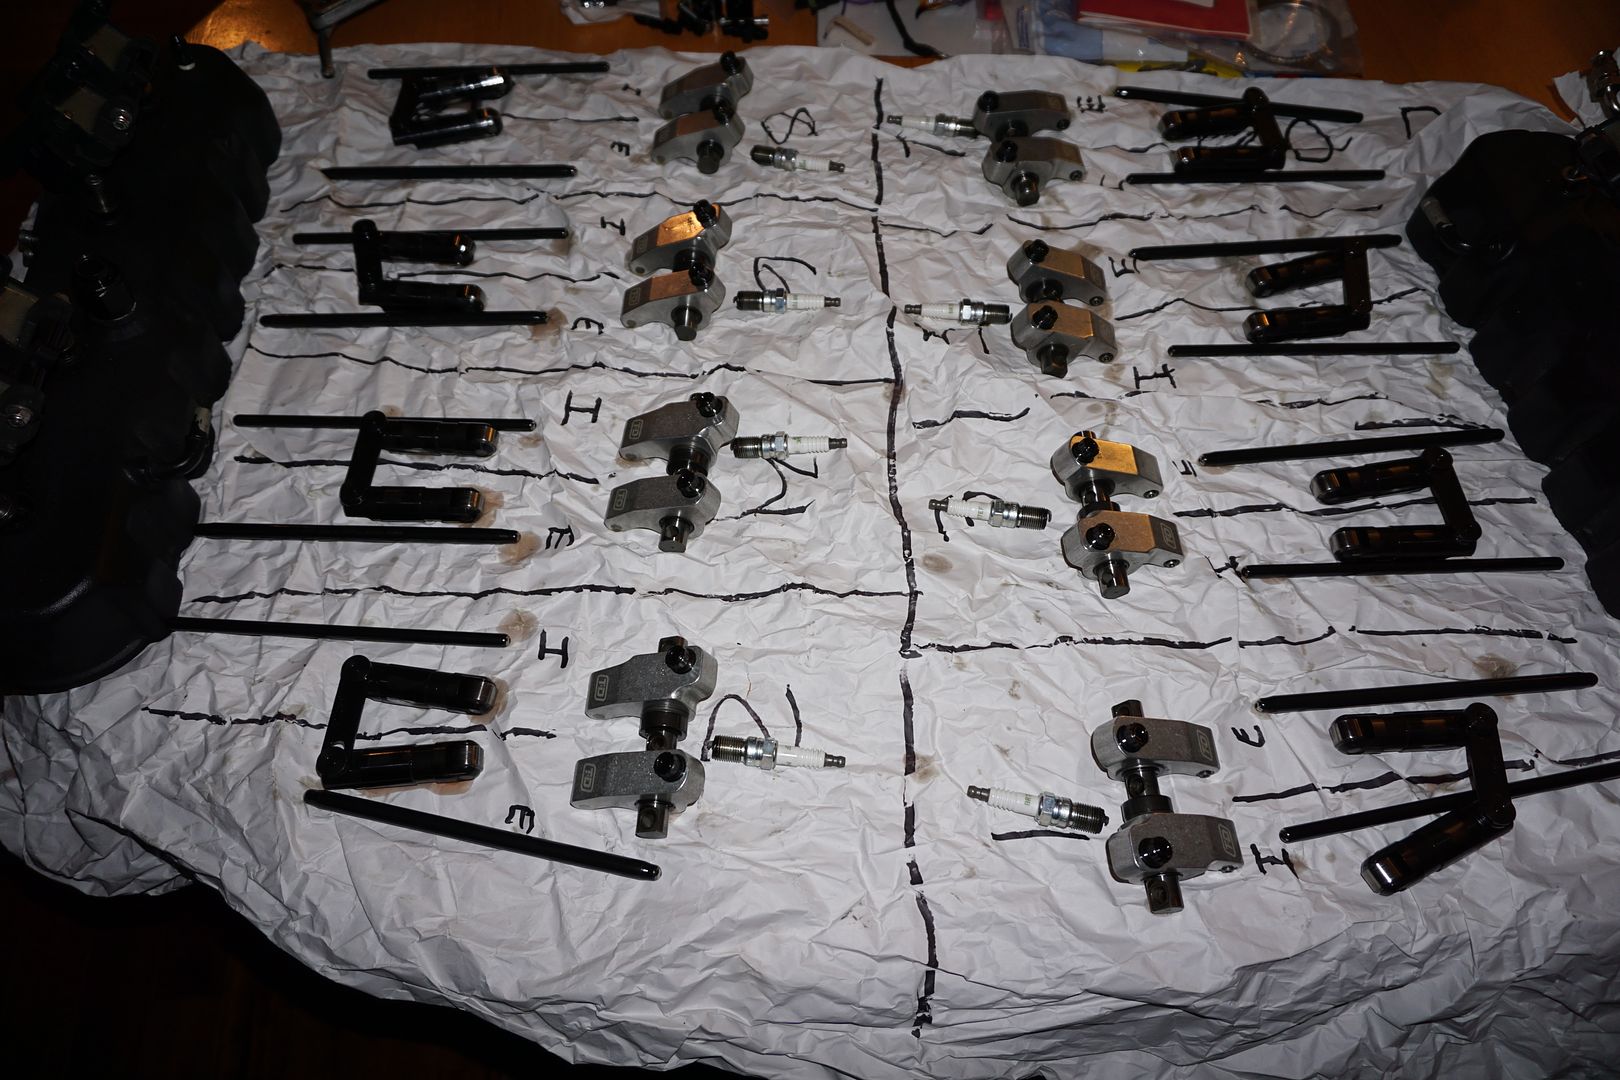
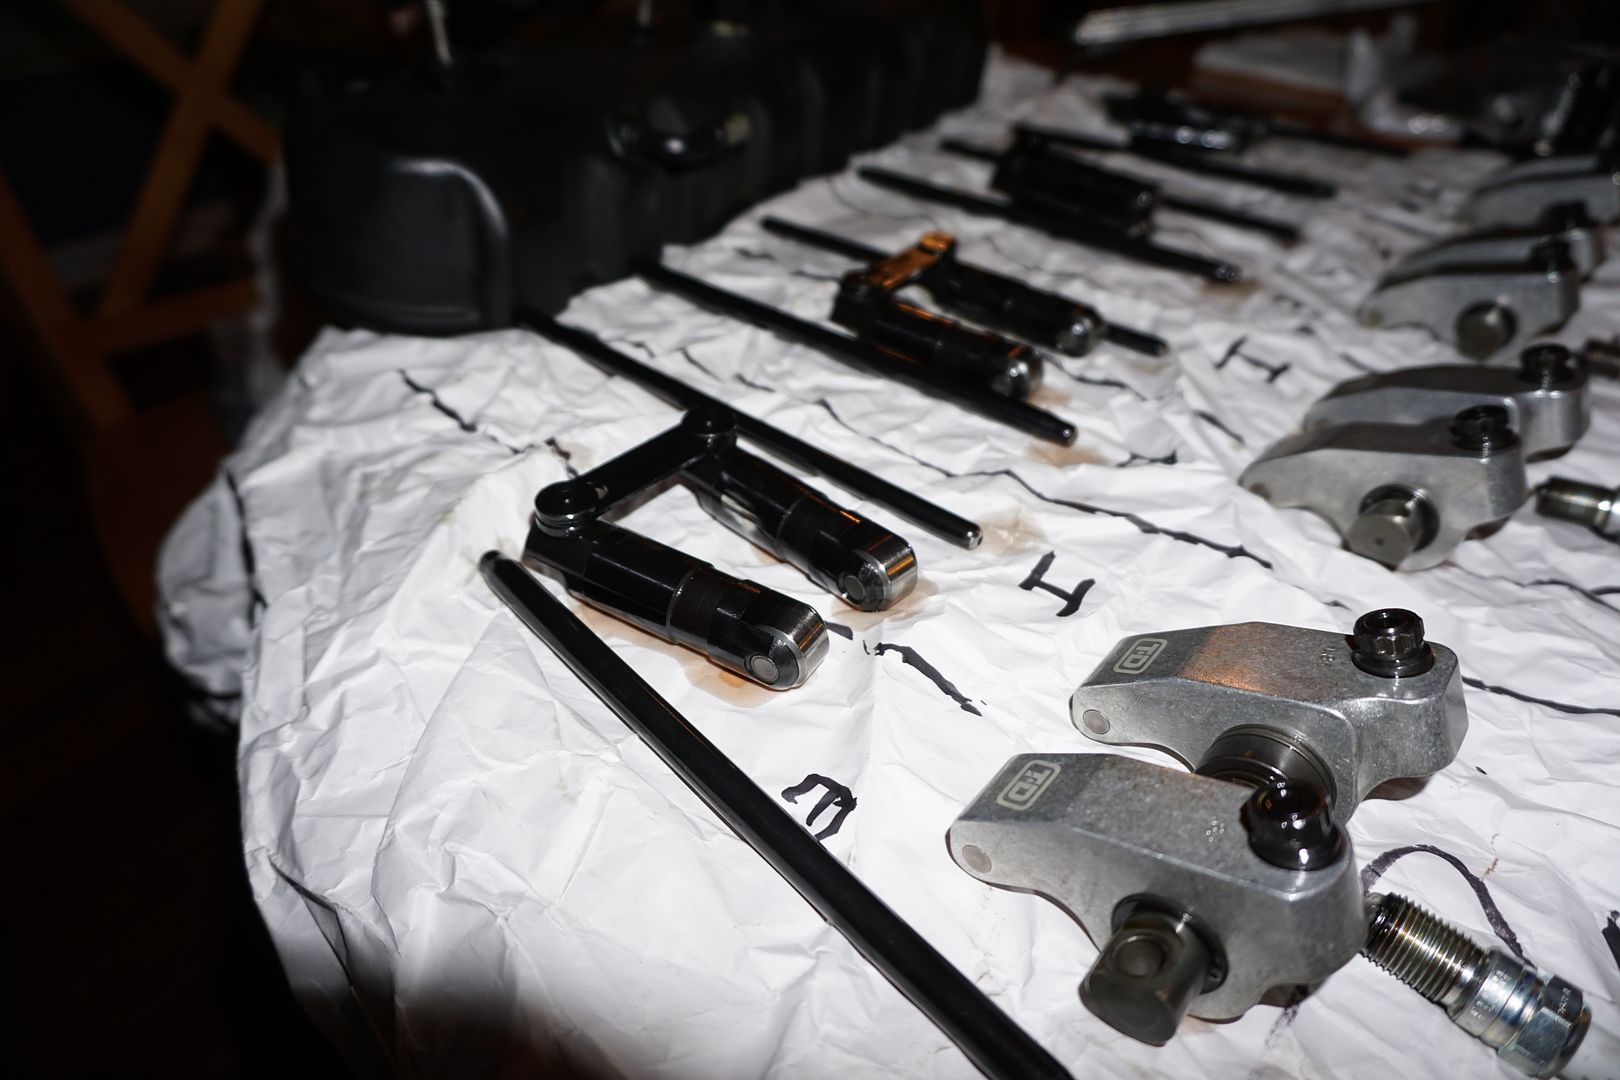
Comp Short Travel Lifters, Must be set at 0 PreLoad!
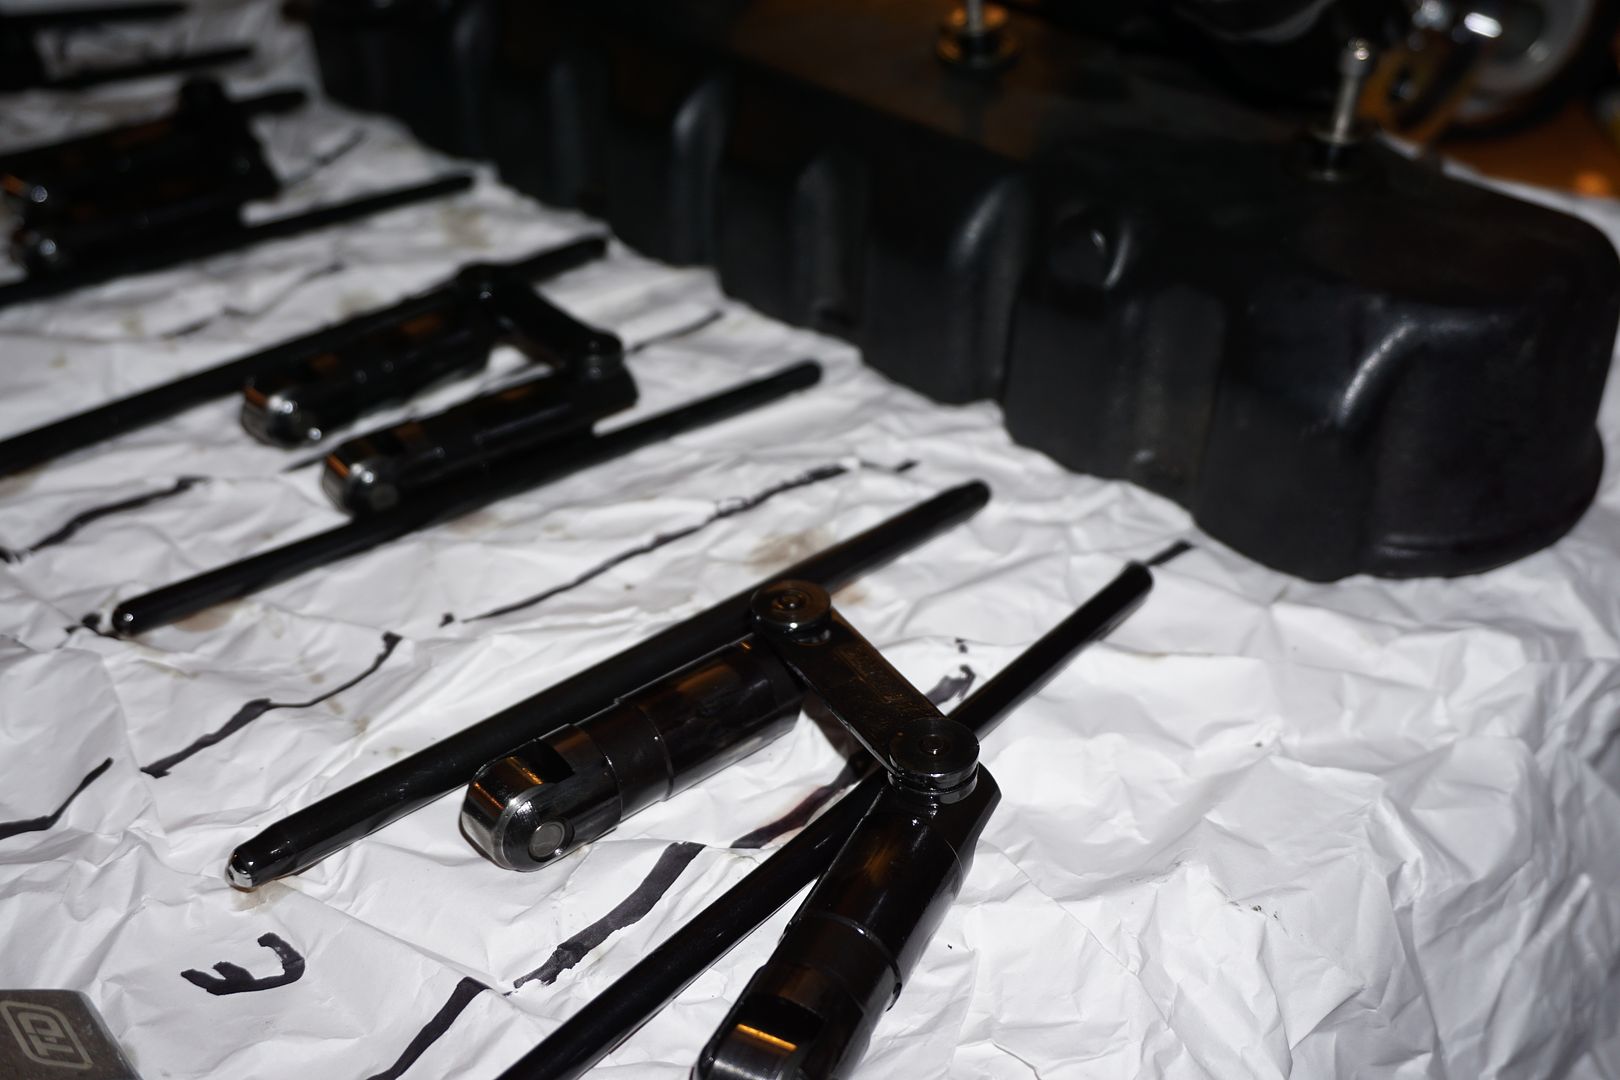
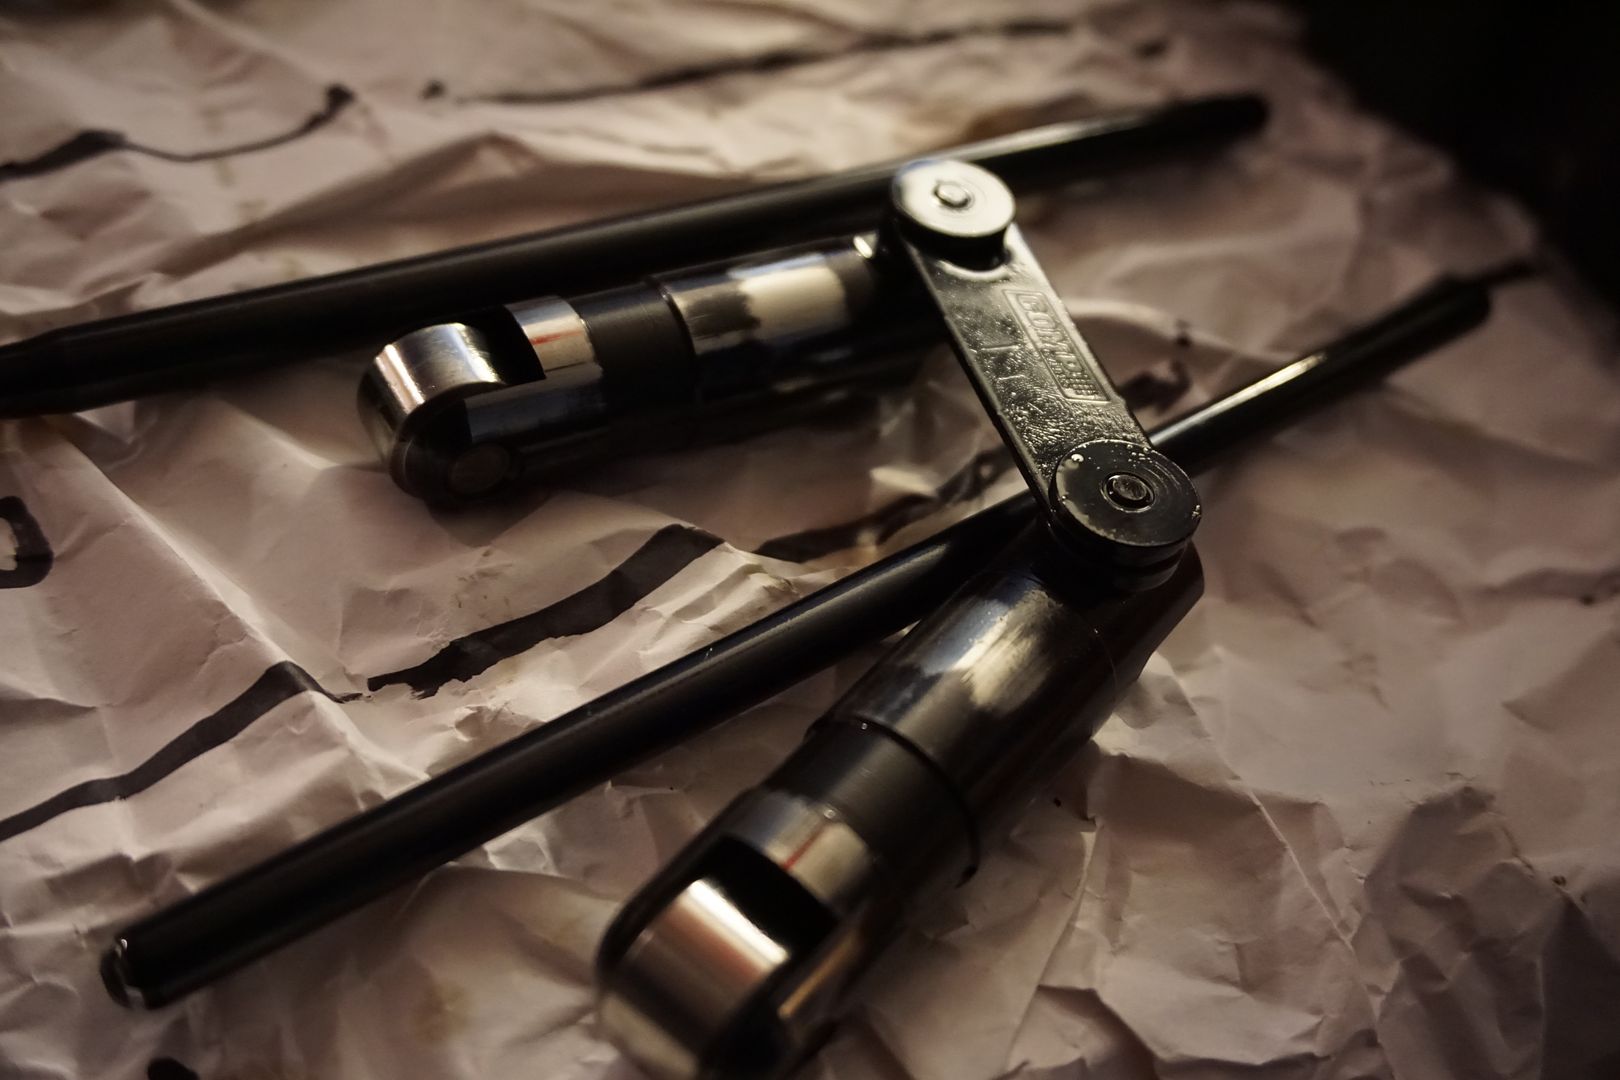
Mast Tall Valve covers to clear rockers
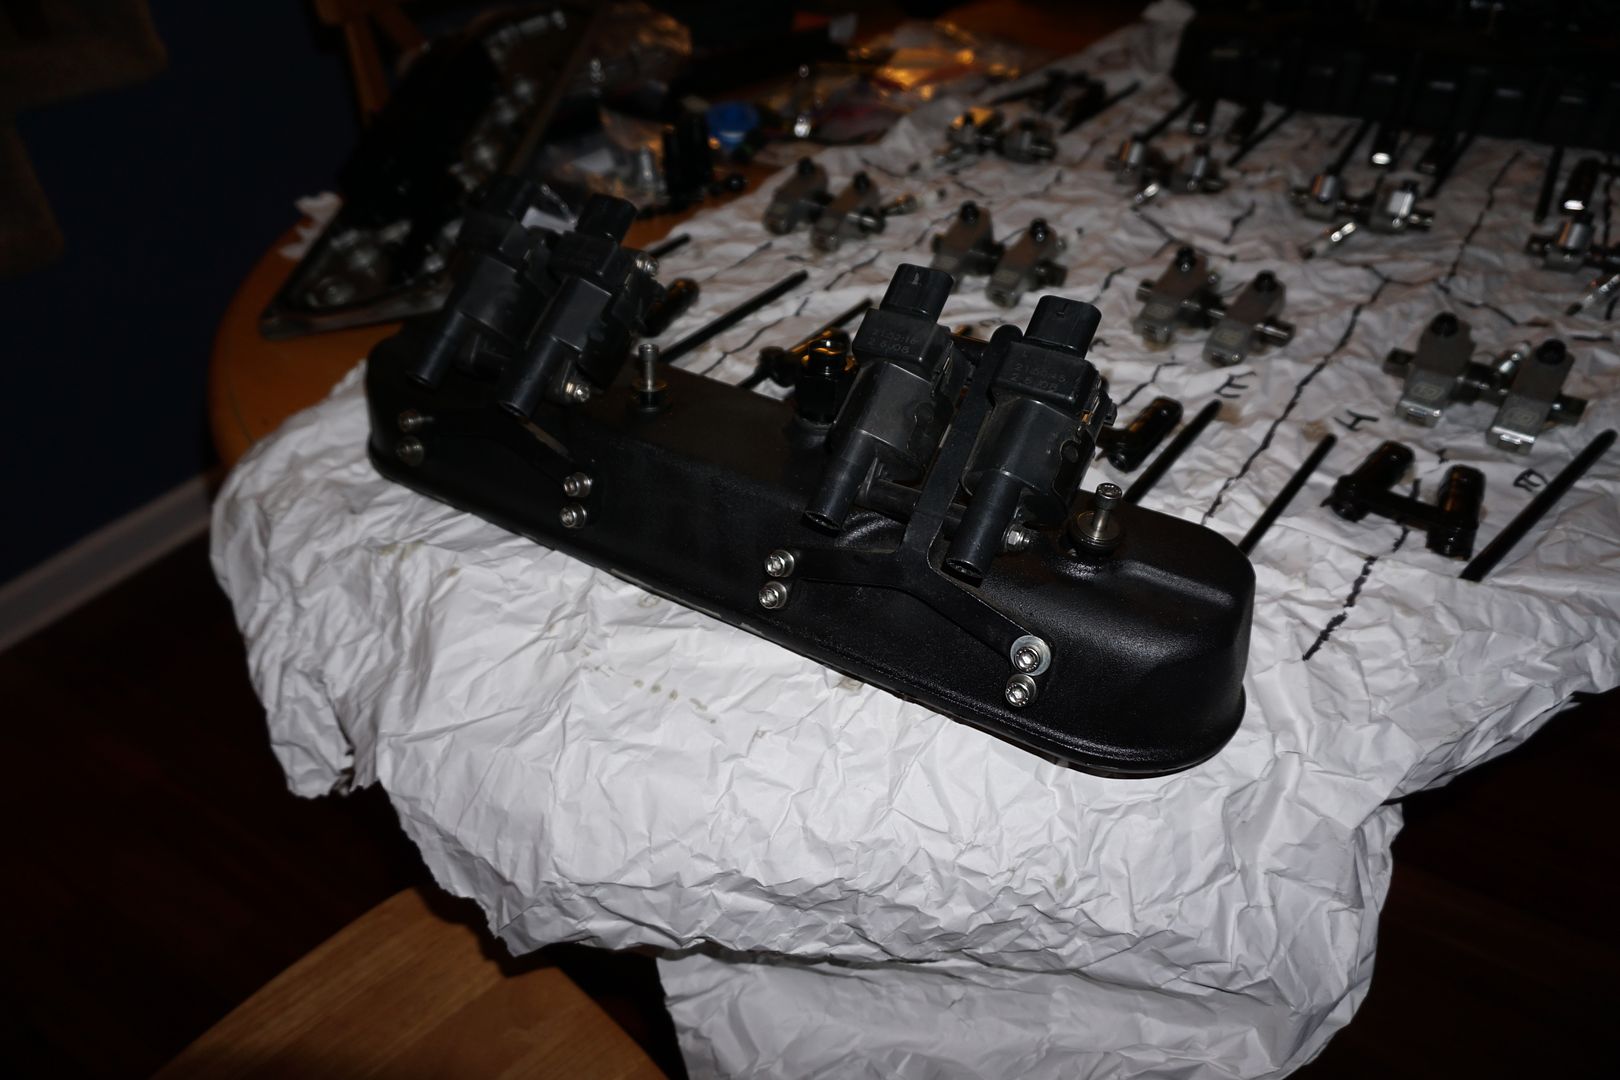
Engine
I have opted to utilize an RHS Block for its many benefits including lightweight (aluminum) and priority oiling; This will be a 434ci utilizing a set of custom Mast LS7 heads. The lower end is comprised of CALLIES Magnum Crank, CALLIES Billet Rods, COMP short travel high RPM Roller Lifters, and WEISCO Pistons. The MAST Heads are utilizing TI intake and SS exhaust valves w/ PAC 700 + lift springs and TI retainers and T&D Shaft mount rockers to rake in the control. Of course because of the height of the T&D rockers we have opted to use the MAST Tall valve covers to clear. This is an E85/Meth build therefore we will be using an extremely aggressive static compression ratio of 12:5 but the DCR will be decent per our custom spec LJMS Cam 237/248 .679/.630 120 +5.
LJMS Cam 237/248 .679/.630 120 +5.

T&D Rockers

Changing cam


Organization is key! I do this roughly every 6 months just to check over all valvetrain components for wear etc.


Comp Short Travel Lifters, Must be set at 0 PreLoad!


Mast Tall Valve covers to clear rockers

#5
Part 5
Evac system
Since we have space in the front and keeping vacuum to the engine is the best thing all around, actually better than any catch can system can compare to, we chose to utilize a VP104 Super Pro Pump GZ Motorsports system! This will support all our needs and a few custom touches which will involve never having to deal with a catch can!
Bling Bling! GZ Motorsports vacuum system! We will be pulling 13-14in. on the motor. Depending on how your rings are setup huge gains can be had from this mod.
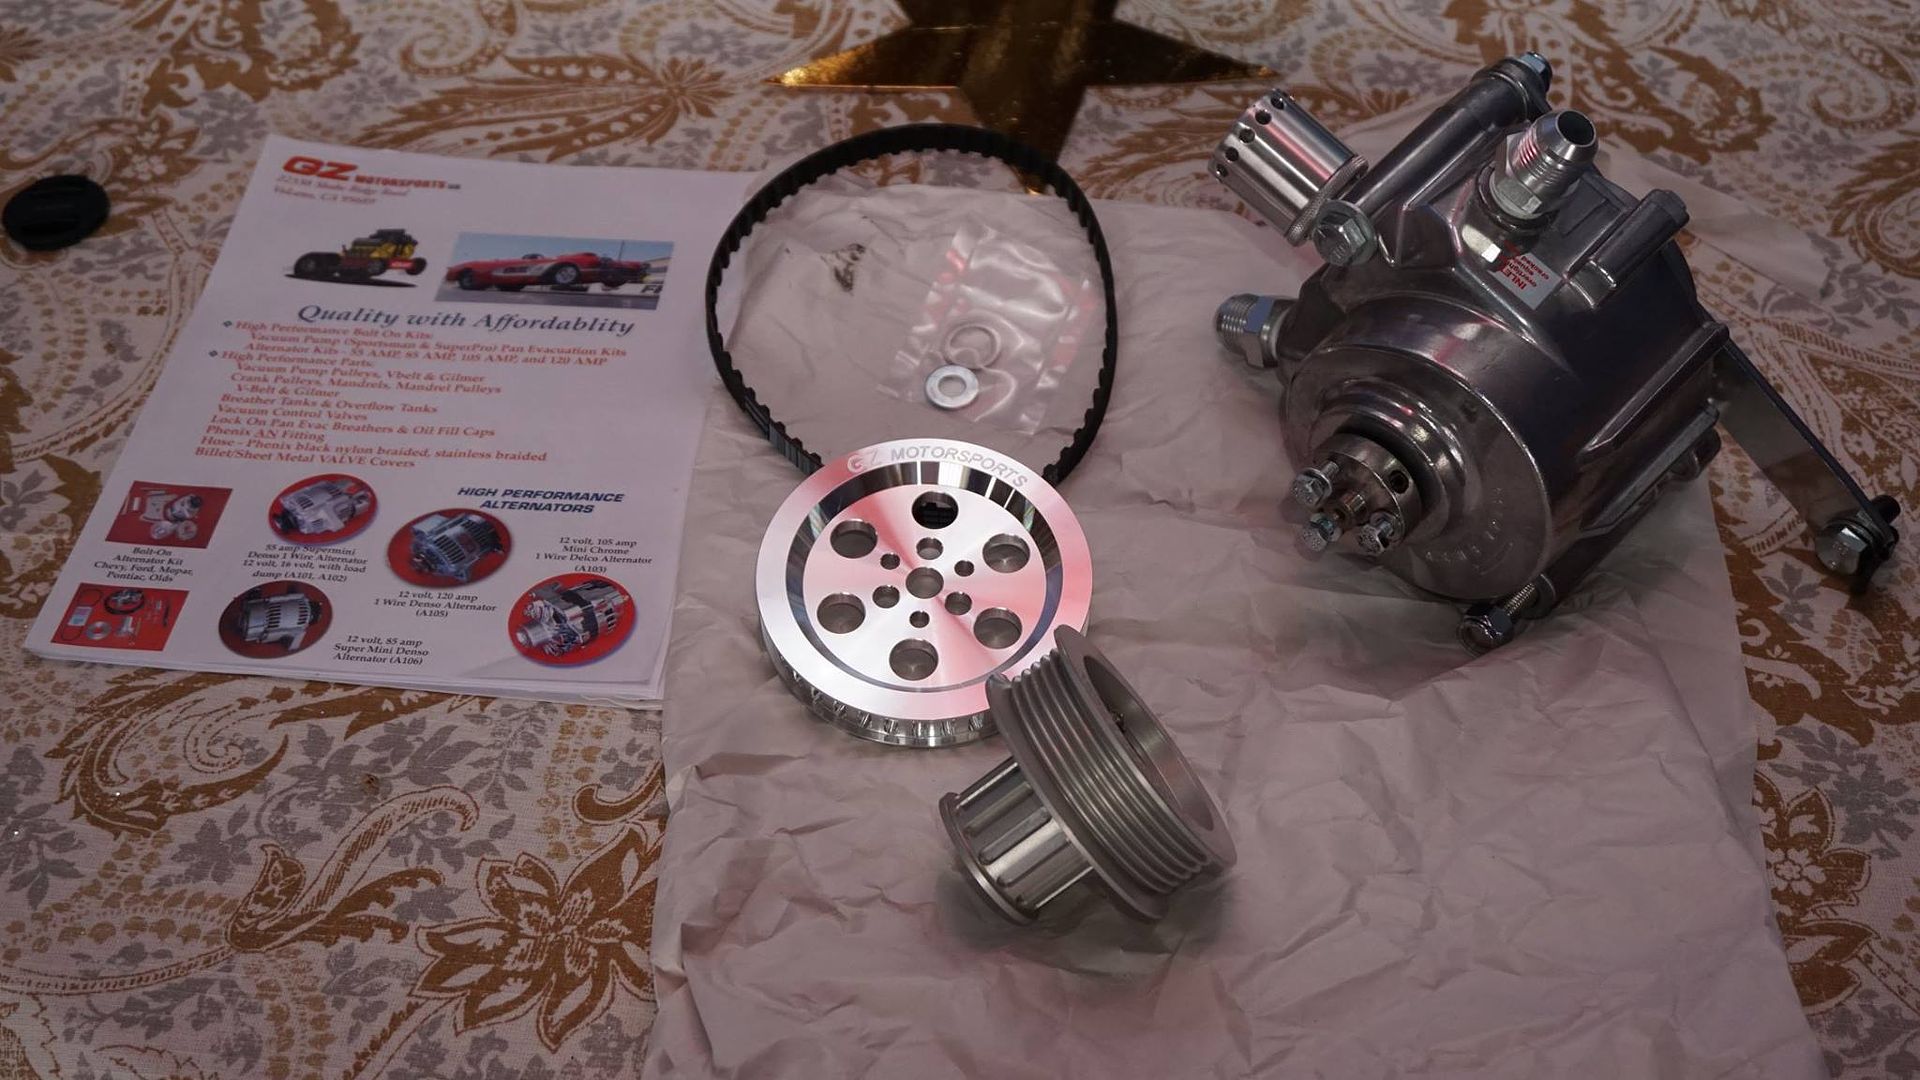
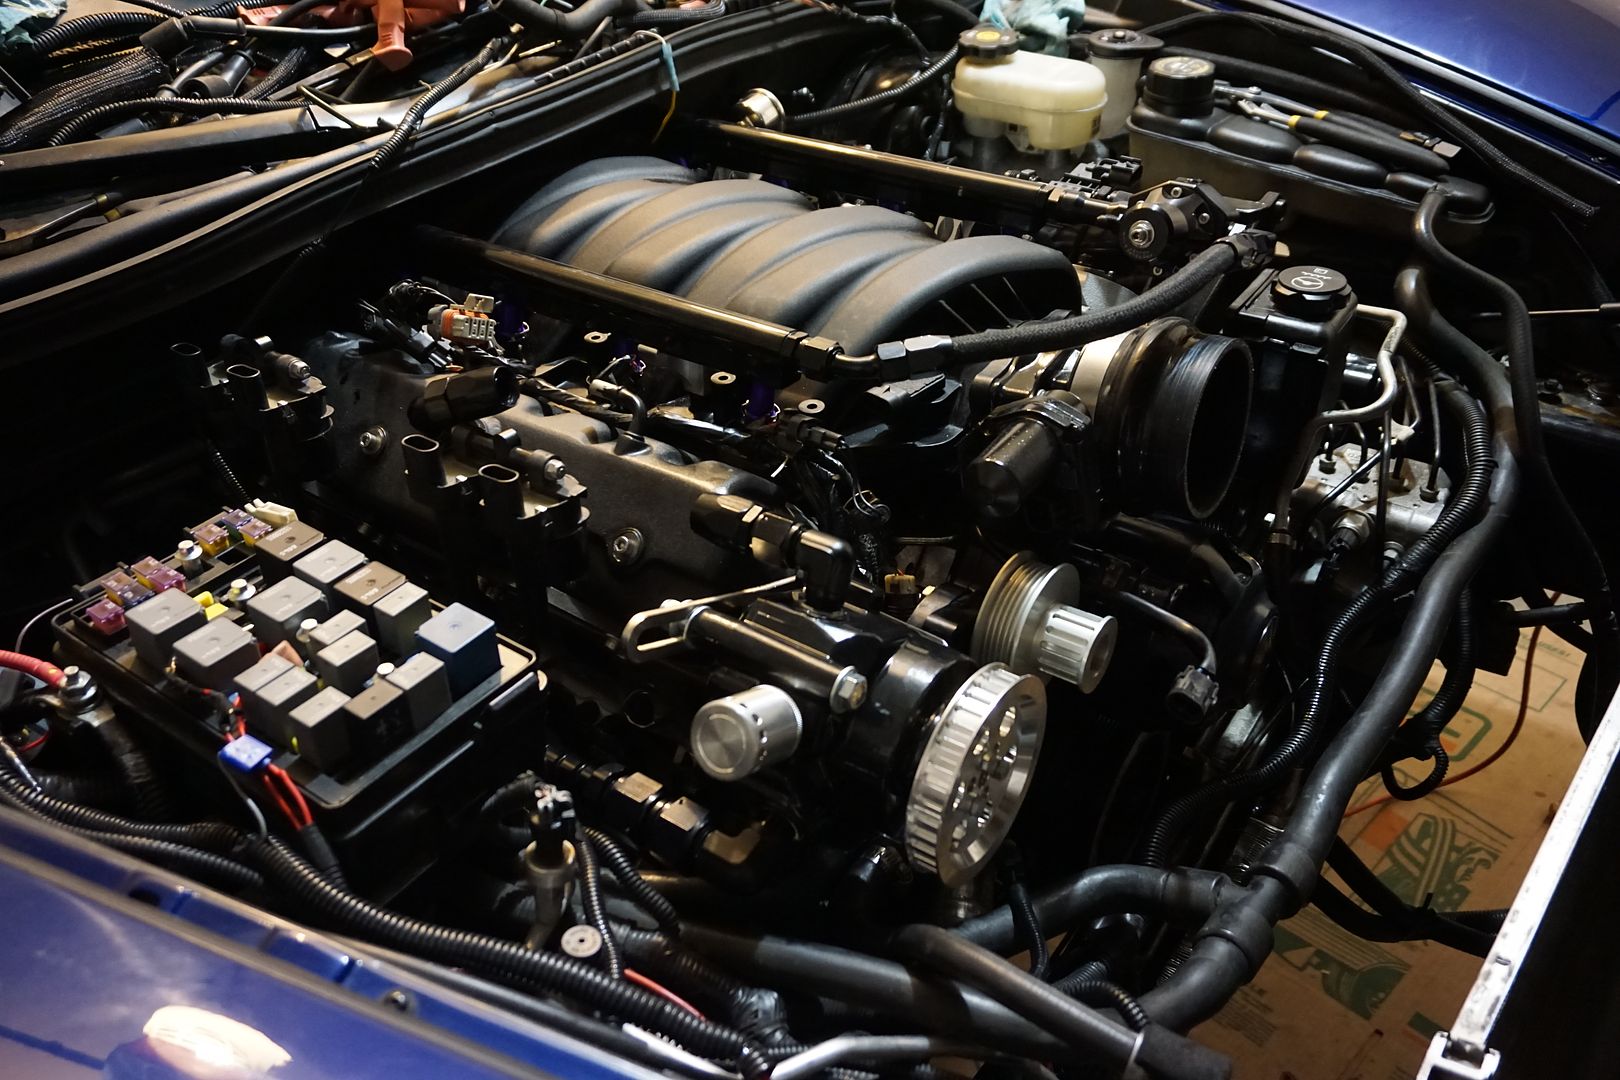
Following the trend in the engine bay the pump will match all black theme I also use a katech manual tensioner to keep everything in check at high rpm. Here’s some mocked up pics, I will be pulling vacuum from the passenger side valve cover through a -10an hose and then expelling those gasses out the rear of car through a 3/4in. hose. You can also see a cylinder looking thing on the pump itself with little holes in it, this little device will allow me to easily adjust the vacuum being applied to the engine.
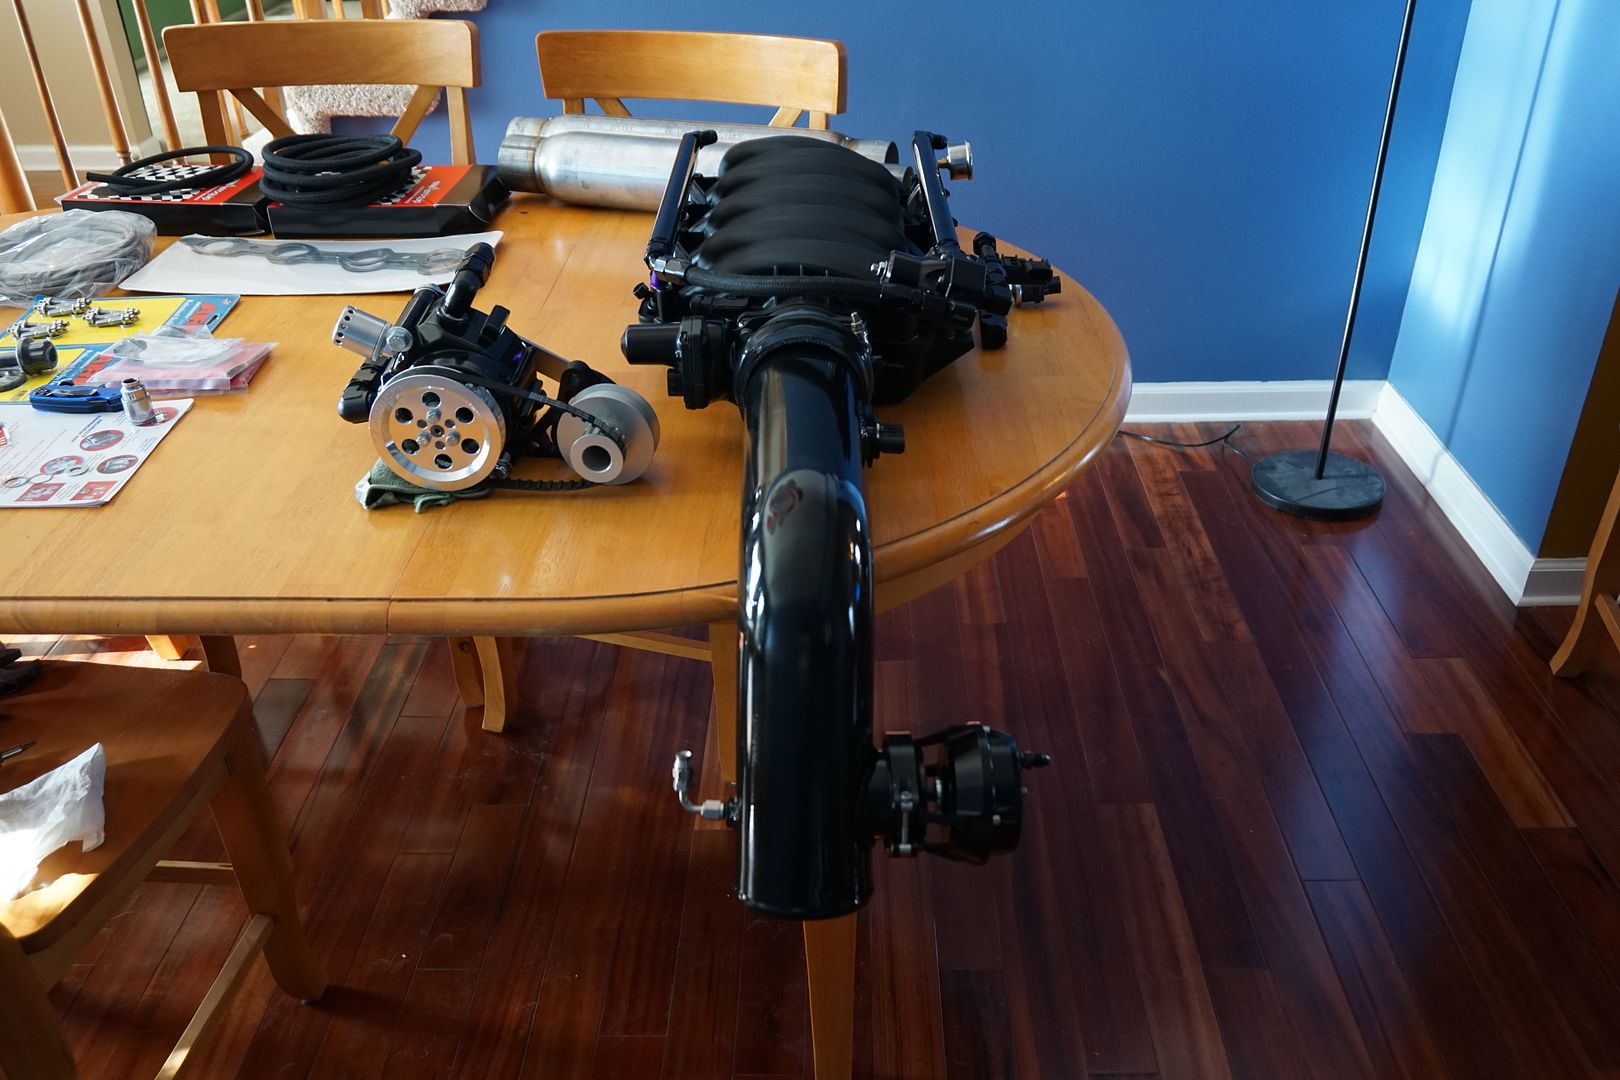
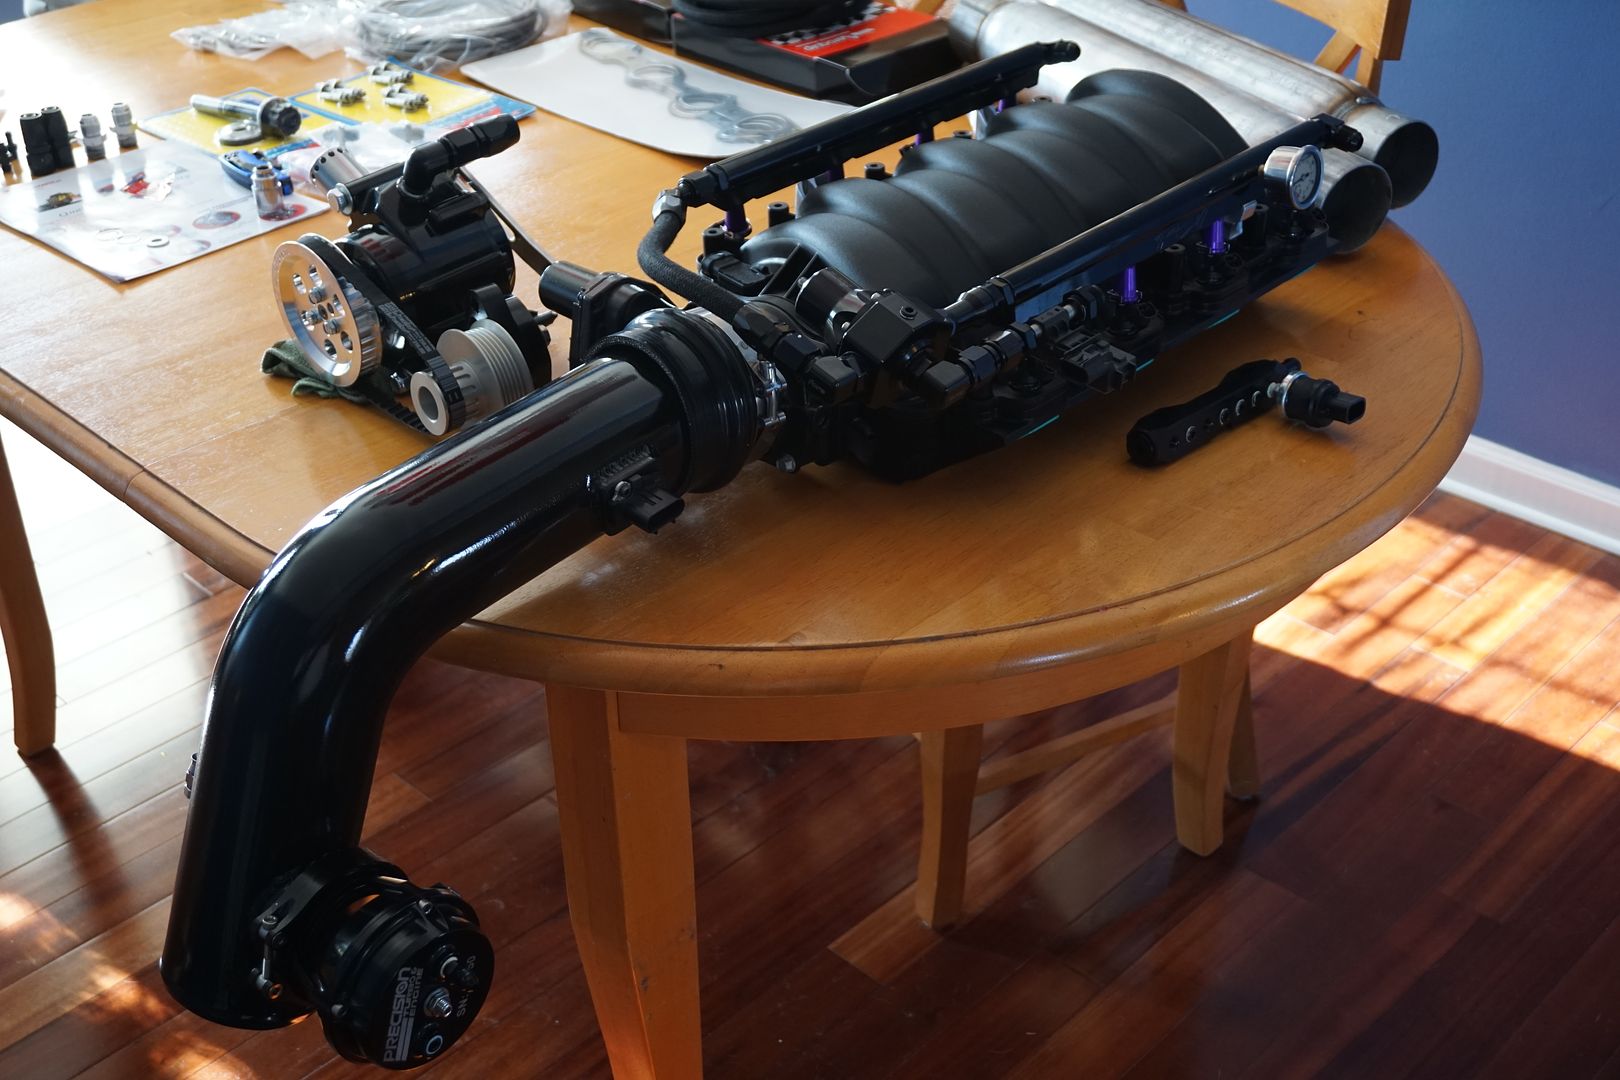
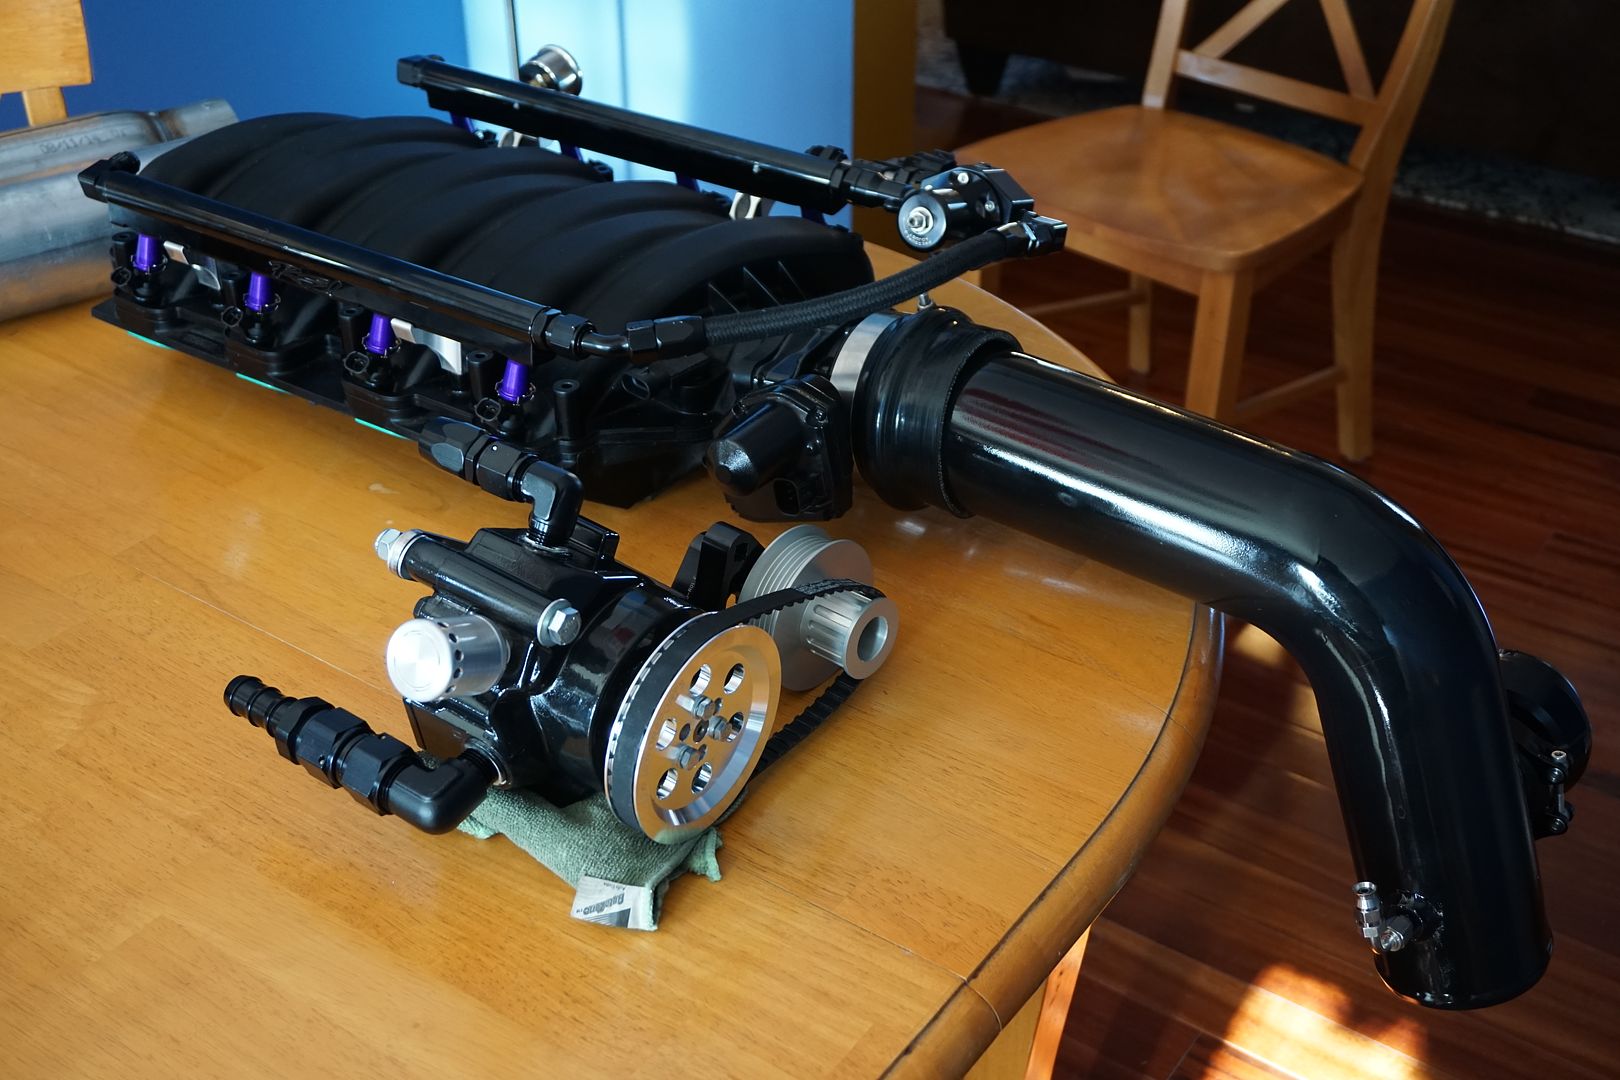
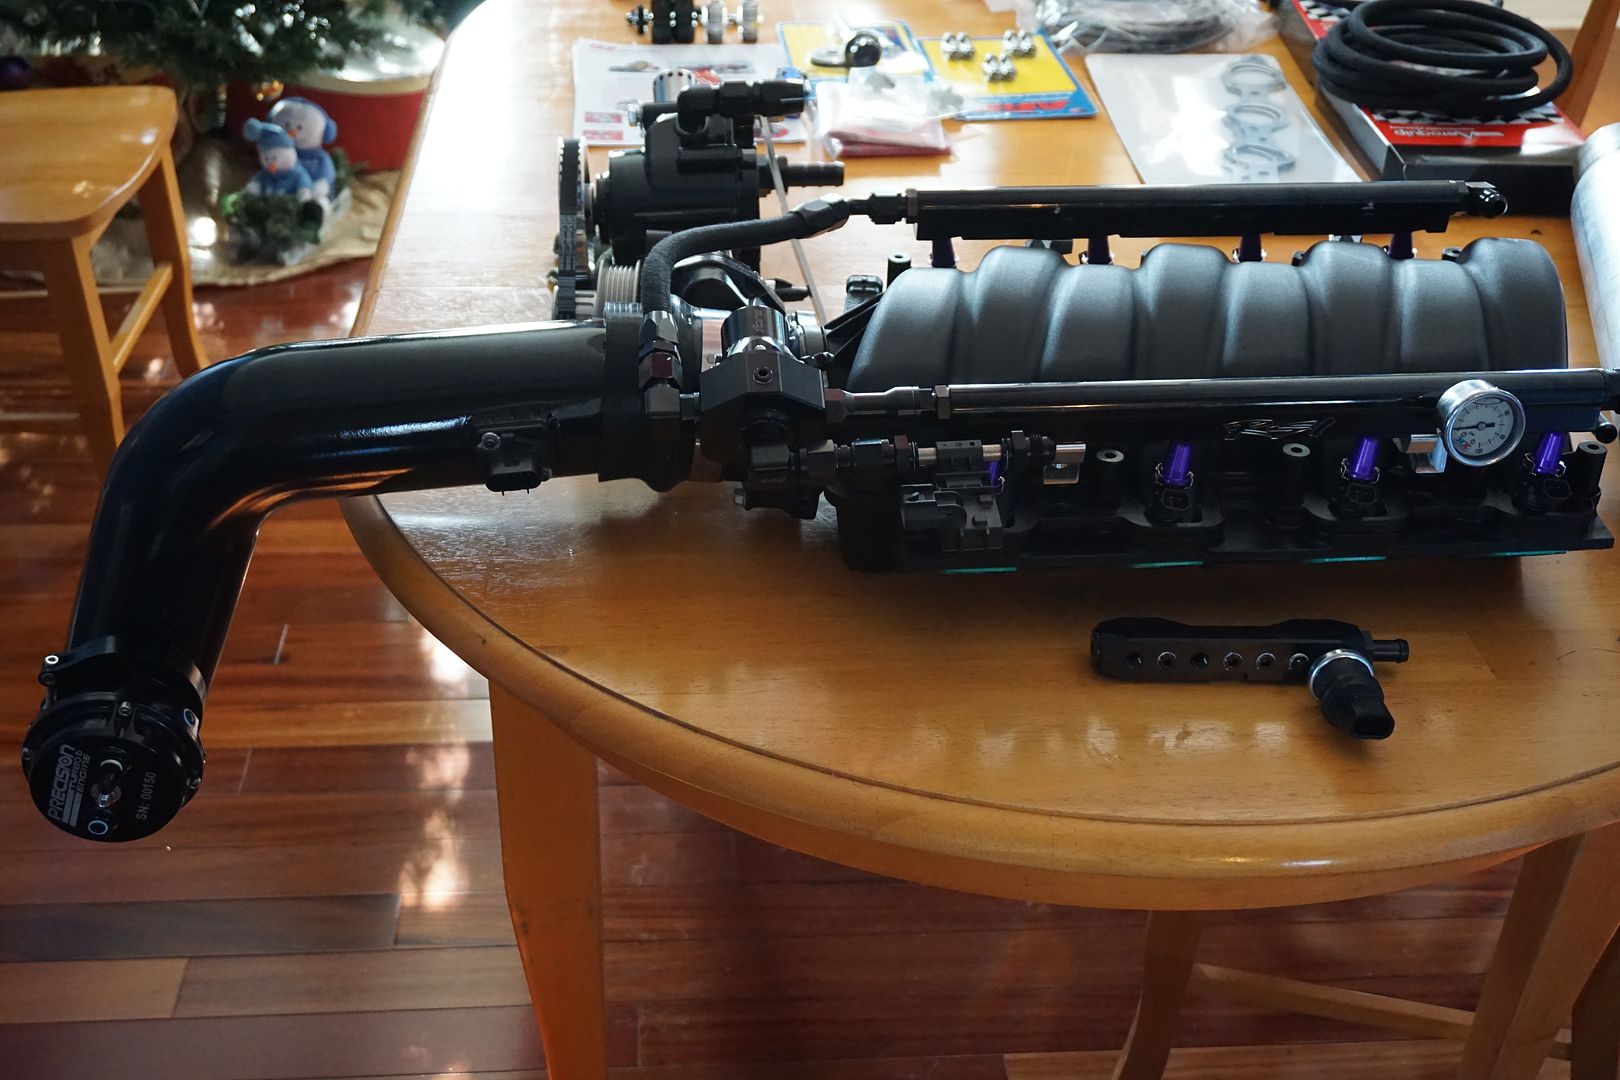
Mocked up on engine!
Evac system
Since we have space in the front and keeping vacuum to the engine is the best thing all around, actually better than any catch can system can compare to, we chose to utilize a VP104 Super Pro Pump GZ Motorsports system! This will support all our needs and a few custom touches which will involve never having to deal with a catch can!
Bling Bling! GZ Motorsports vacuum system! We will be pulling 13-14in. on the motor. Depending on how your rings are setup huge gains can be had from this mod.

Following the trend in the engine bay the pump will match all black theme I also use a katech manual tensioner to keep everything in check at high rpm. Here’s some mocked up pics, I will be pulling vacuum from the passenger side valve cover through a -10an hose and then expelling those gasses out the rear of car through a 3/4in. hose. You can also see a cylinder looking thing on the pump itself with little holes in it, this little device will allow me to easily adjust the vacuum being applied to the engine.


Mocked up on engine!

#6
Part 6
Turbo Kit
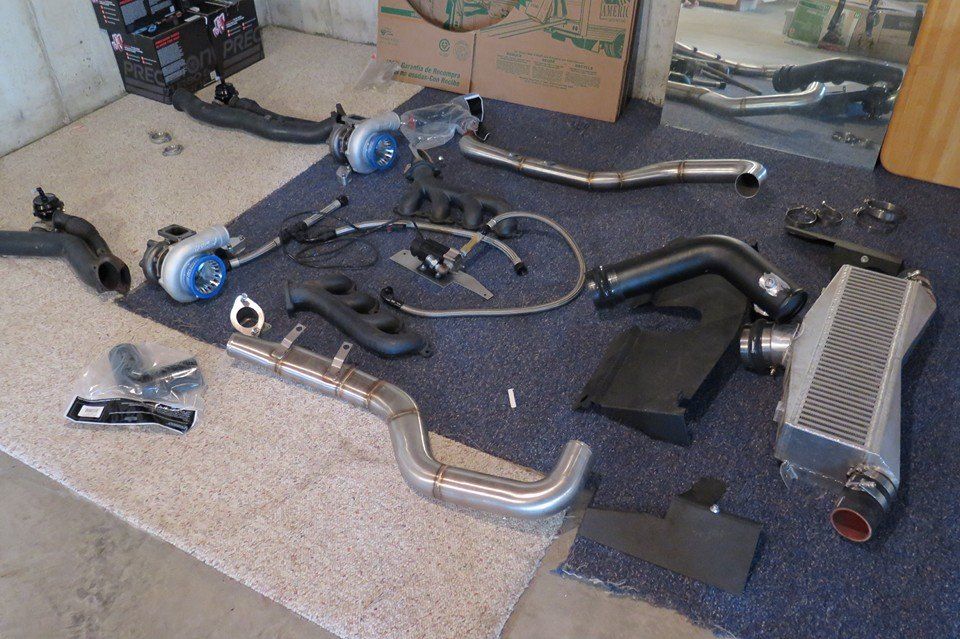
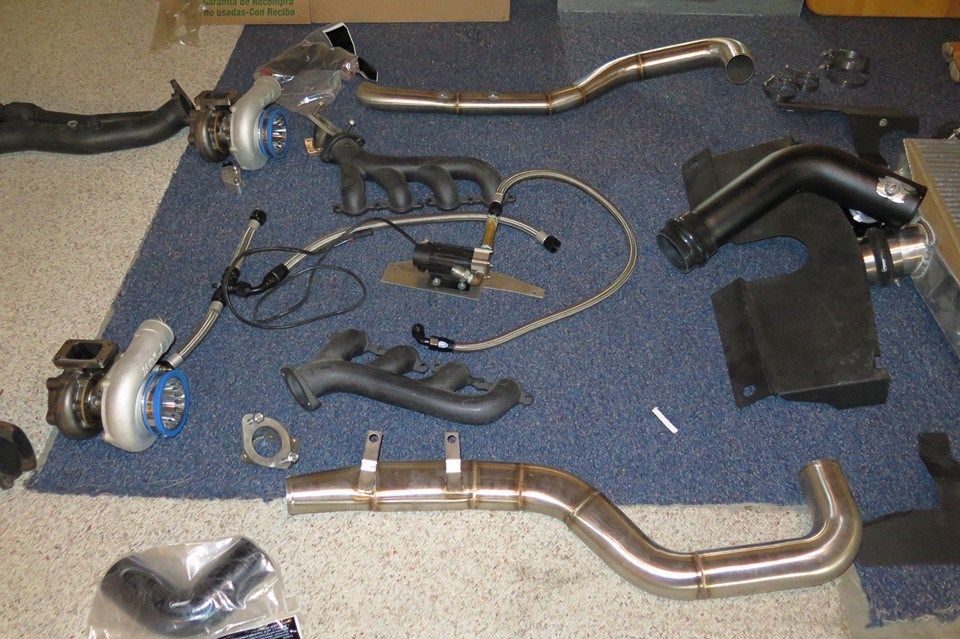
To feed this monster motor I chose turbos and 2 for that matter! DKT was able to provide us with a nice race kit utilizing a race intercooler and couple of other little items….To save time and get things going I went with 6766 which will soon be changed to the new 6870s. a humungous 64mm Precision BOV will handle the cold side of things while two 46mm Precision Wastegates will handle the hot side. I will be utilizing Boostleash boost controller keeping more precise control of the gates through the use of the viaiar kit (c02 substitute) all vacuum an pressure lines will be braided stainless no nylon or rubber hose. Heat management comes via PTP Turbo Blanket and every product they offer!
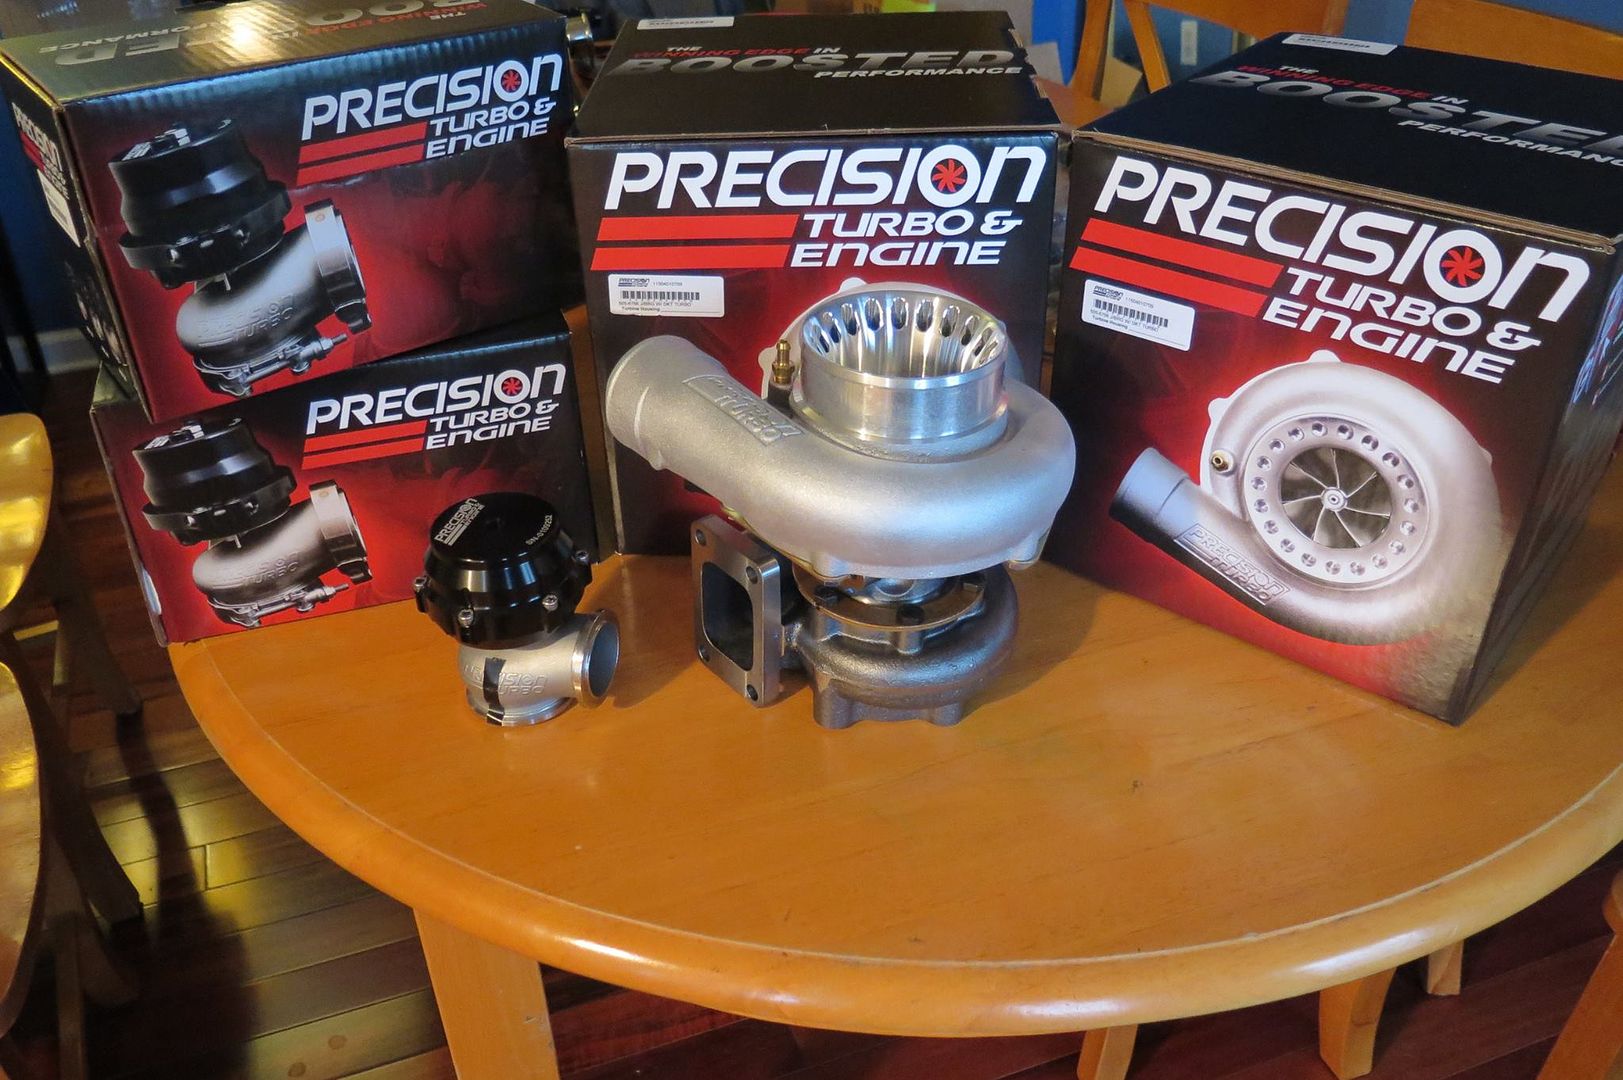
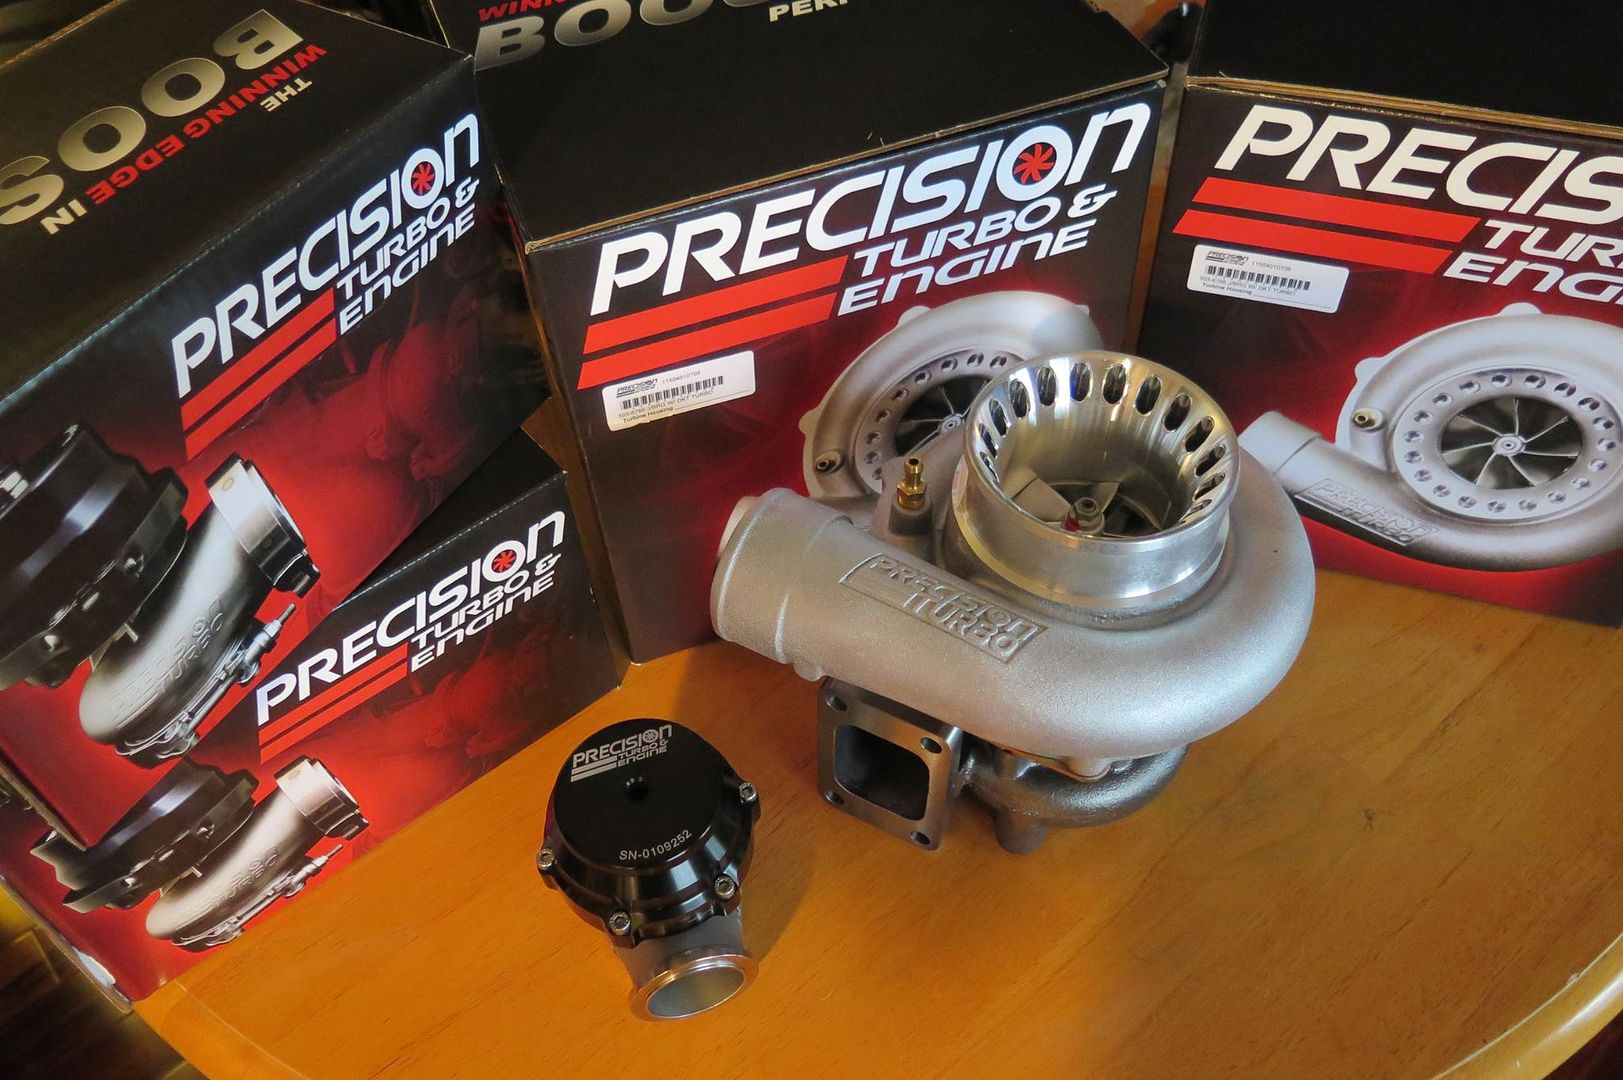
Overall Race Kit Components!
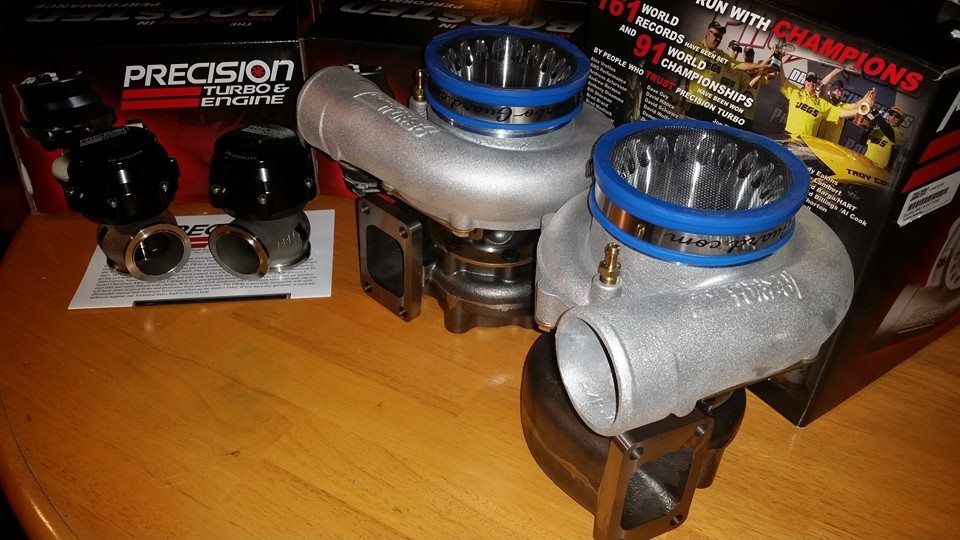
PTE 6766 turbos 1.06AR Ported S Cover and 46mm PTE Wastegates
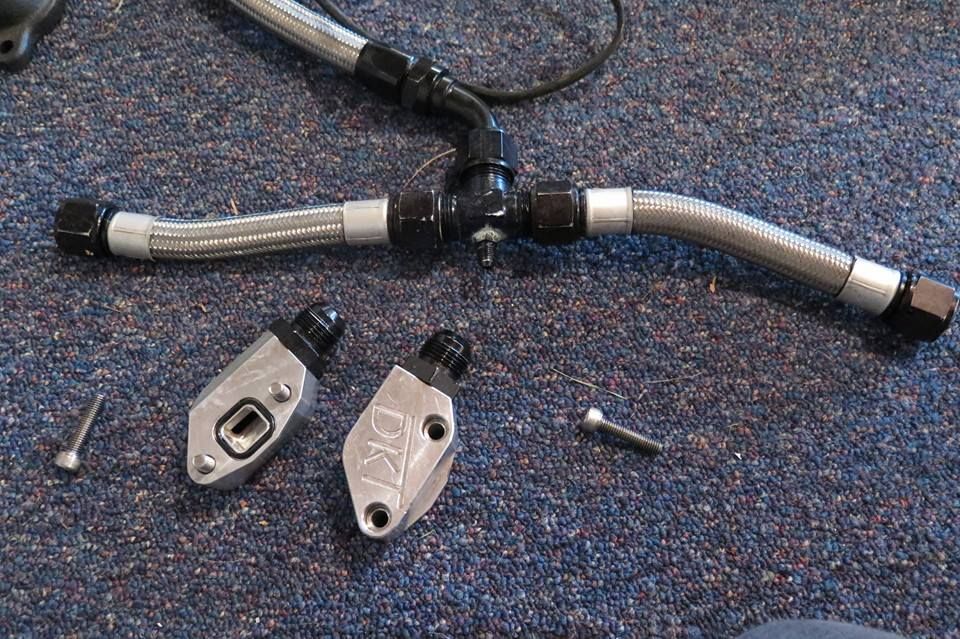
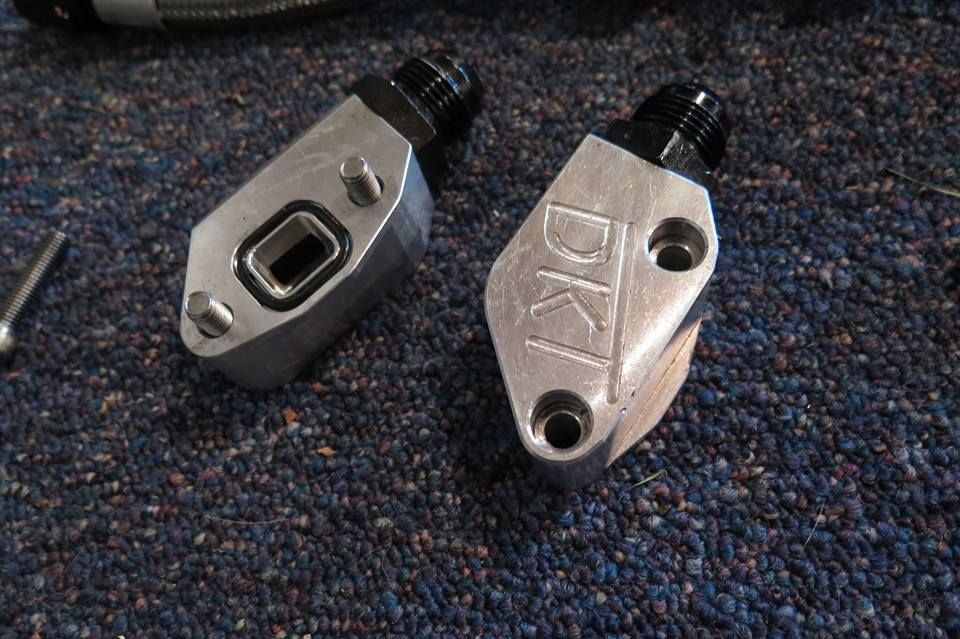
Because of the low mounting I will be utilizing a turborex oil pump to get the oil back to the dry sump! Custom turbo drain adapter with internal filters inside the adpters are being used and -12an back to the pump. Notice the -4an fitting on the T for a vent to operate the pump with no issues. The vent line will be tied back into the passenger side valve cover.
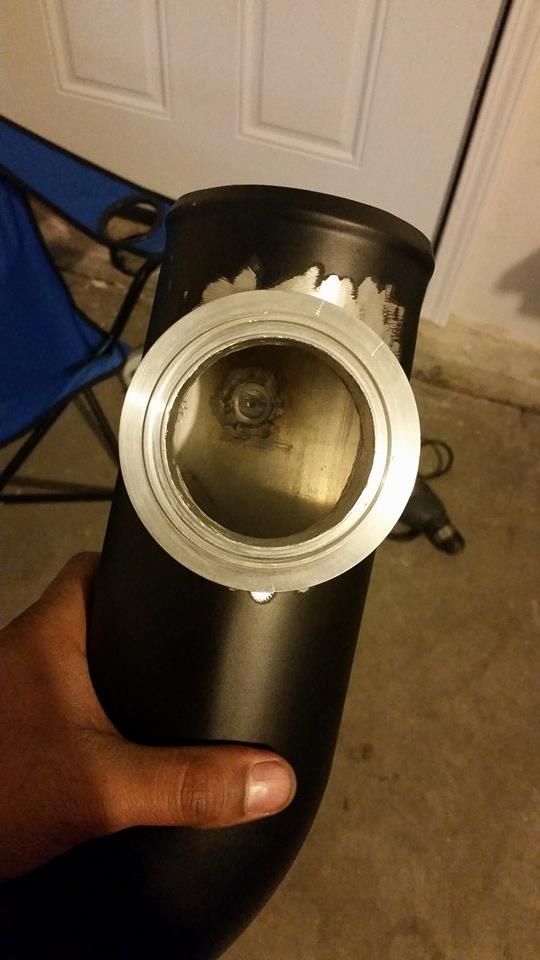
65mm hole in charge pipe to accommodate the PTE 64mm BOV, this should lessen the need to run twin tials.

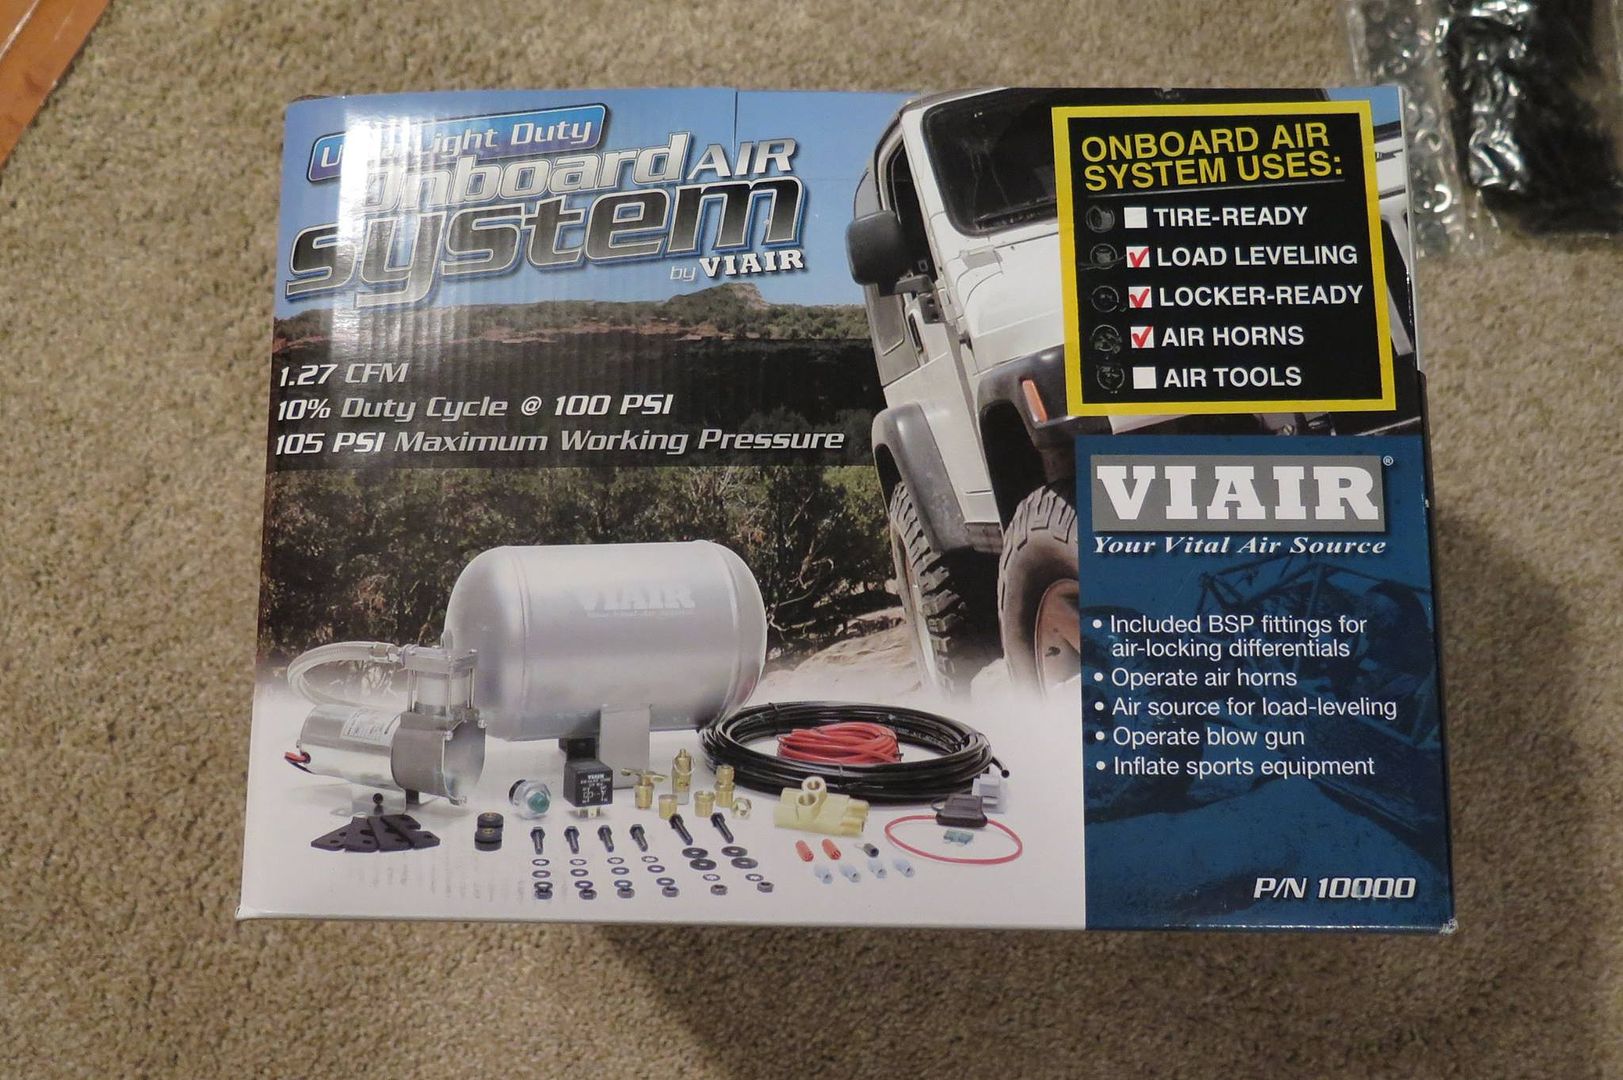
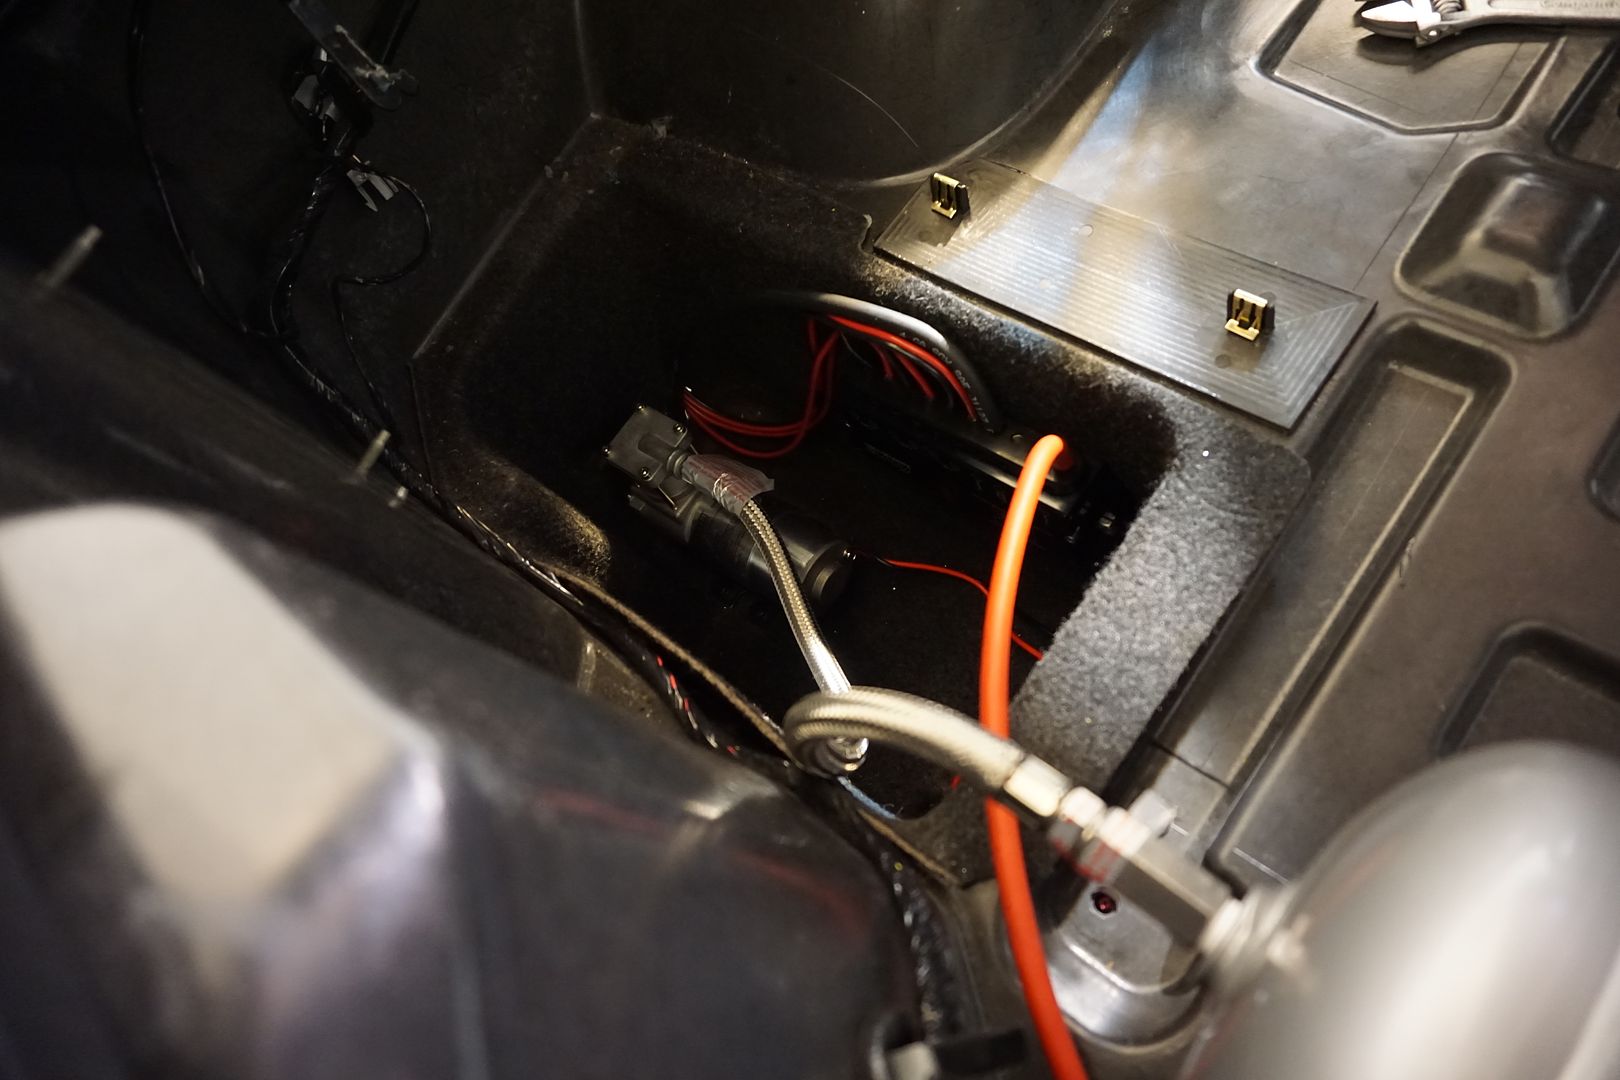
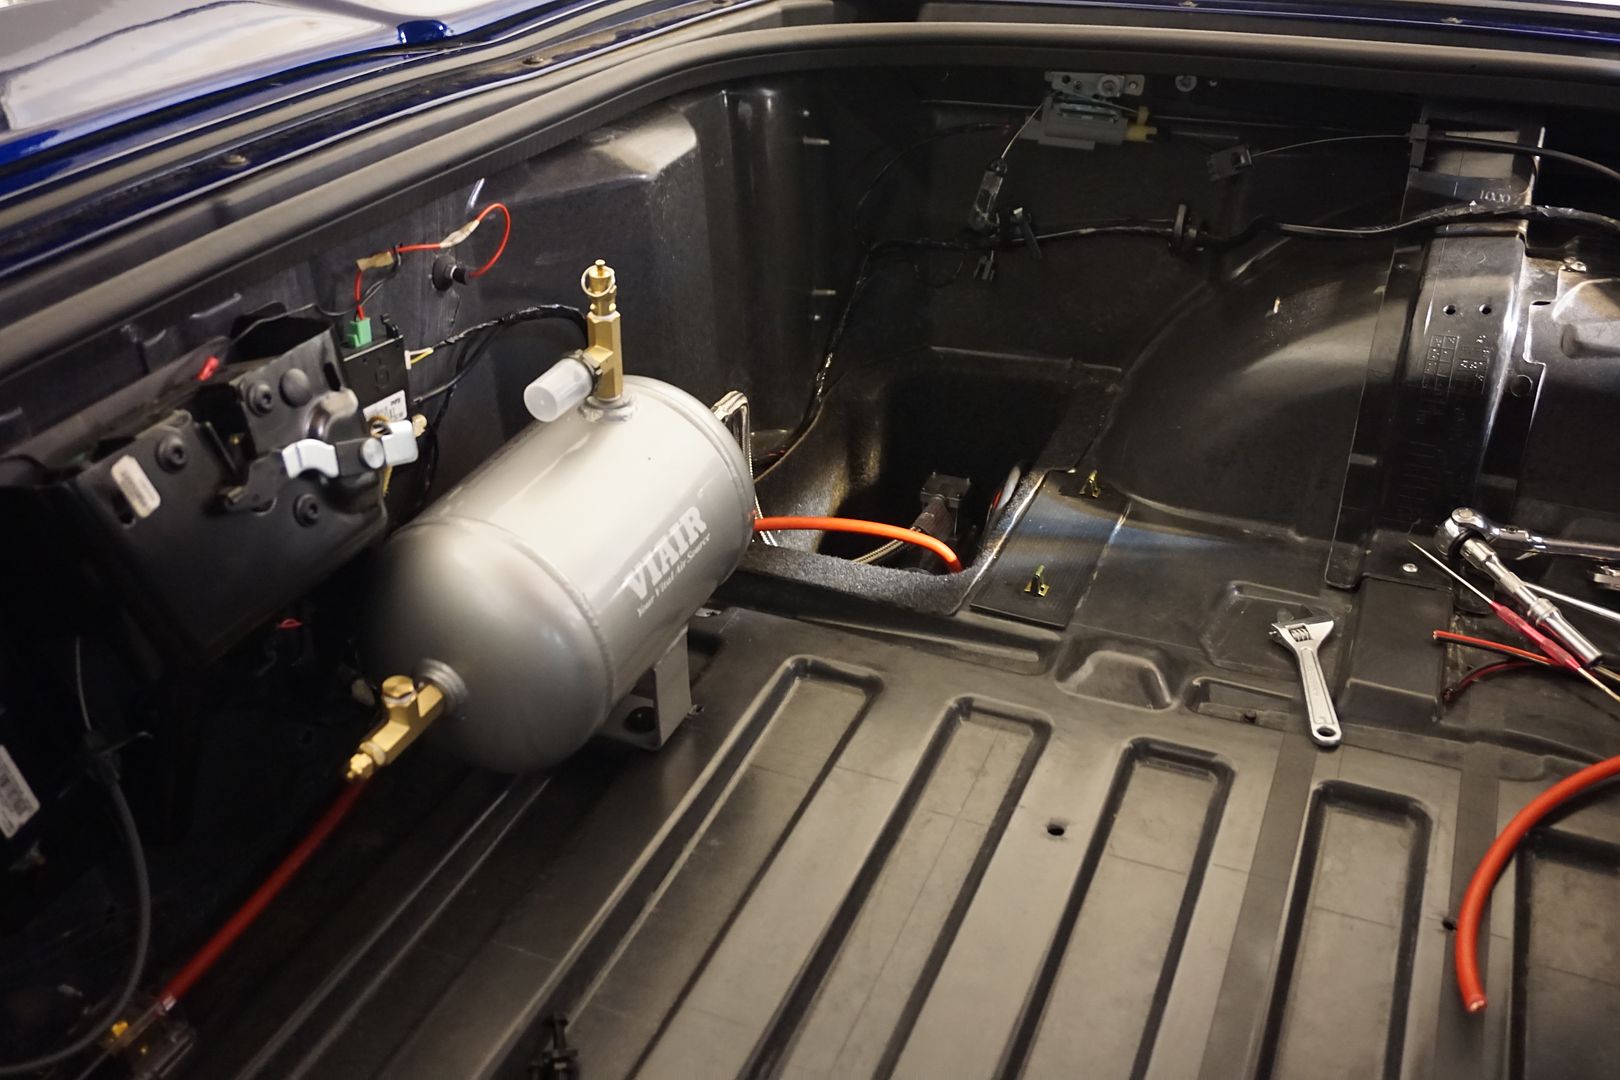
I chose to use the Viair Onboard air system instead of a C02 bottle because I didn’t want to deal with refilling. Also this gives me the option to be able to fill up my tires after airing down to run. It’s a neat little system and doesn’t weigh much so was definitely an easy decision.
Charge piping being mocked up!
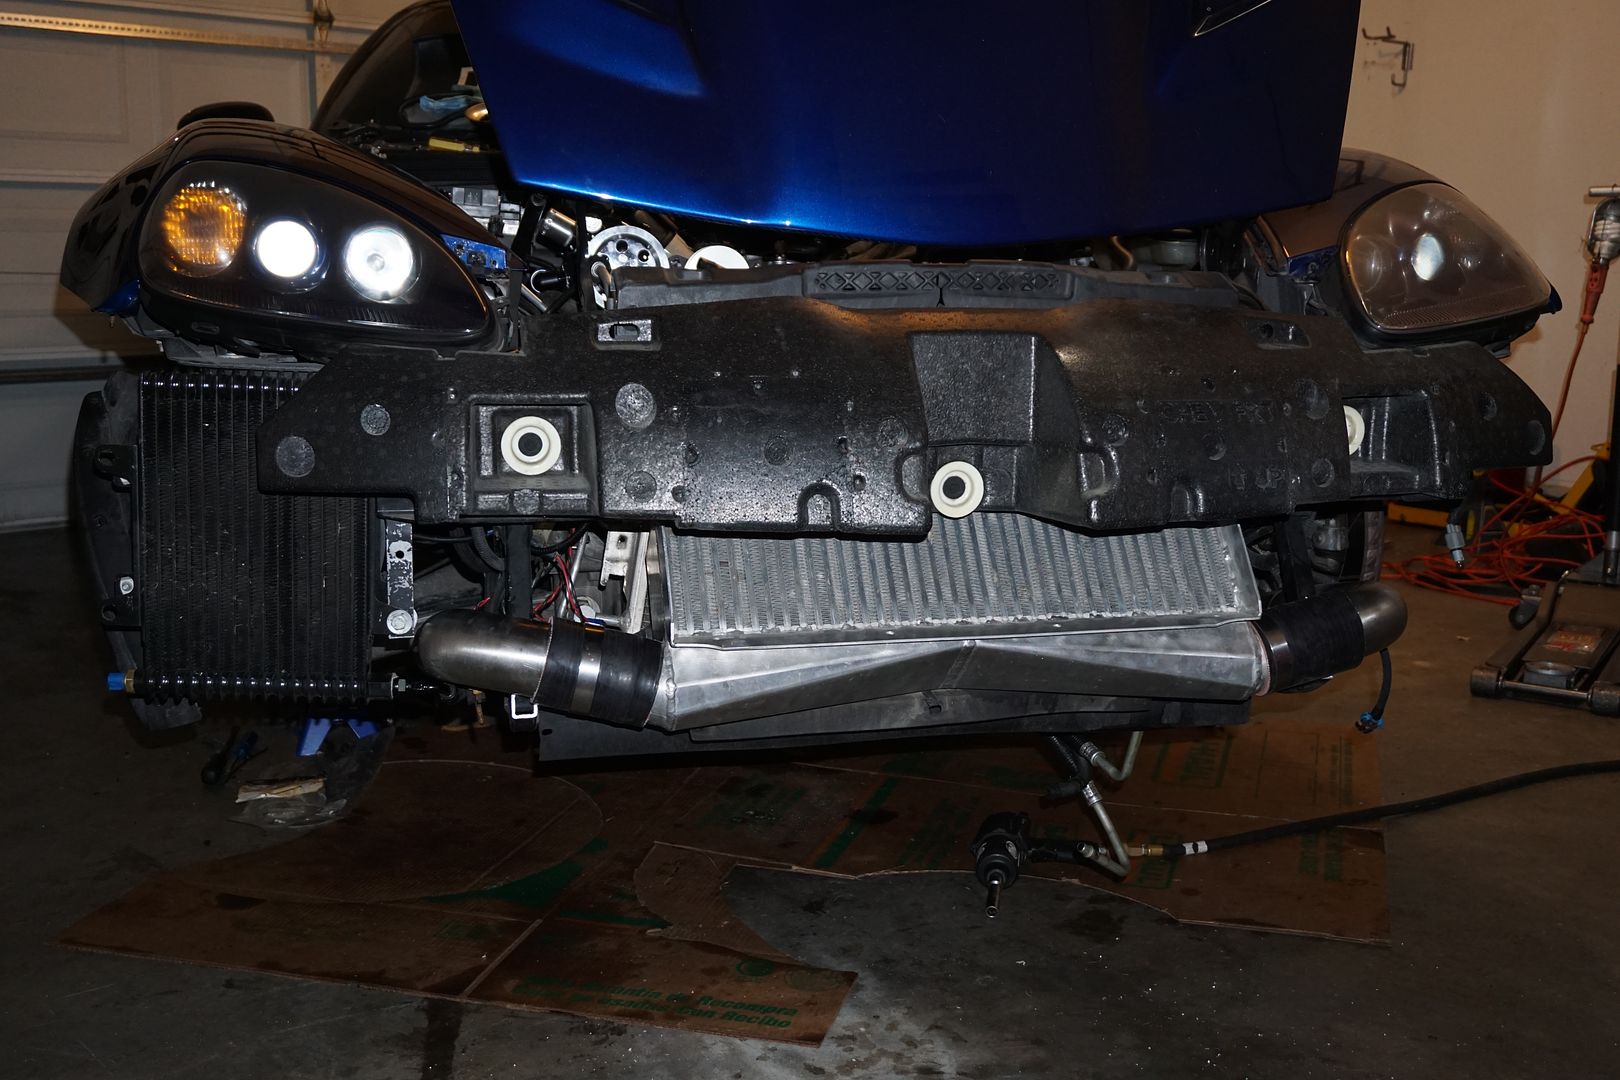
4.5in Race intercooler mounted and B&M transcooler also mounted!
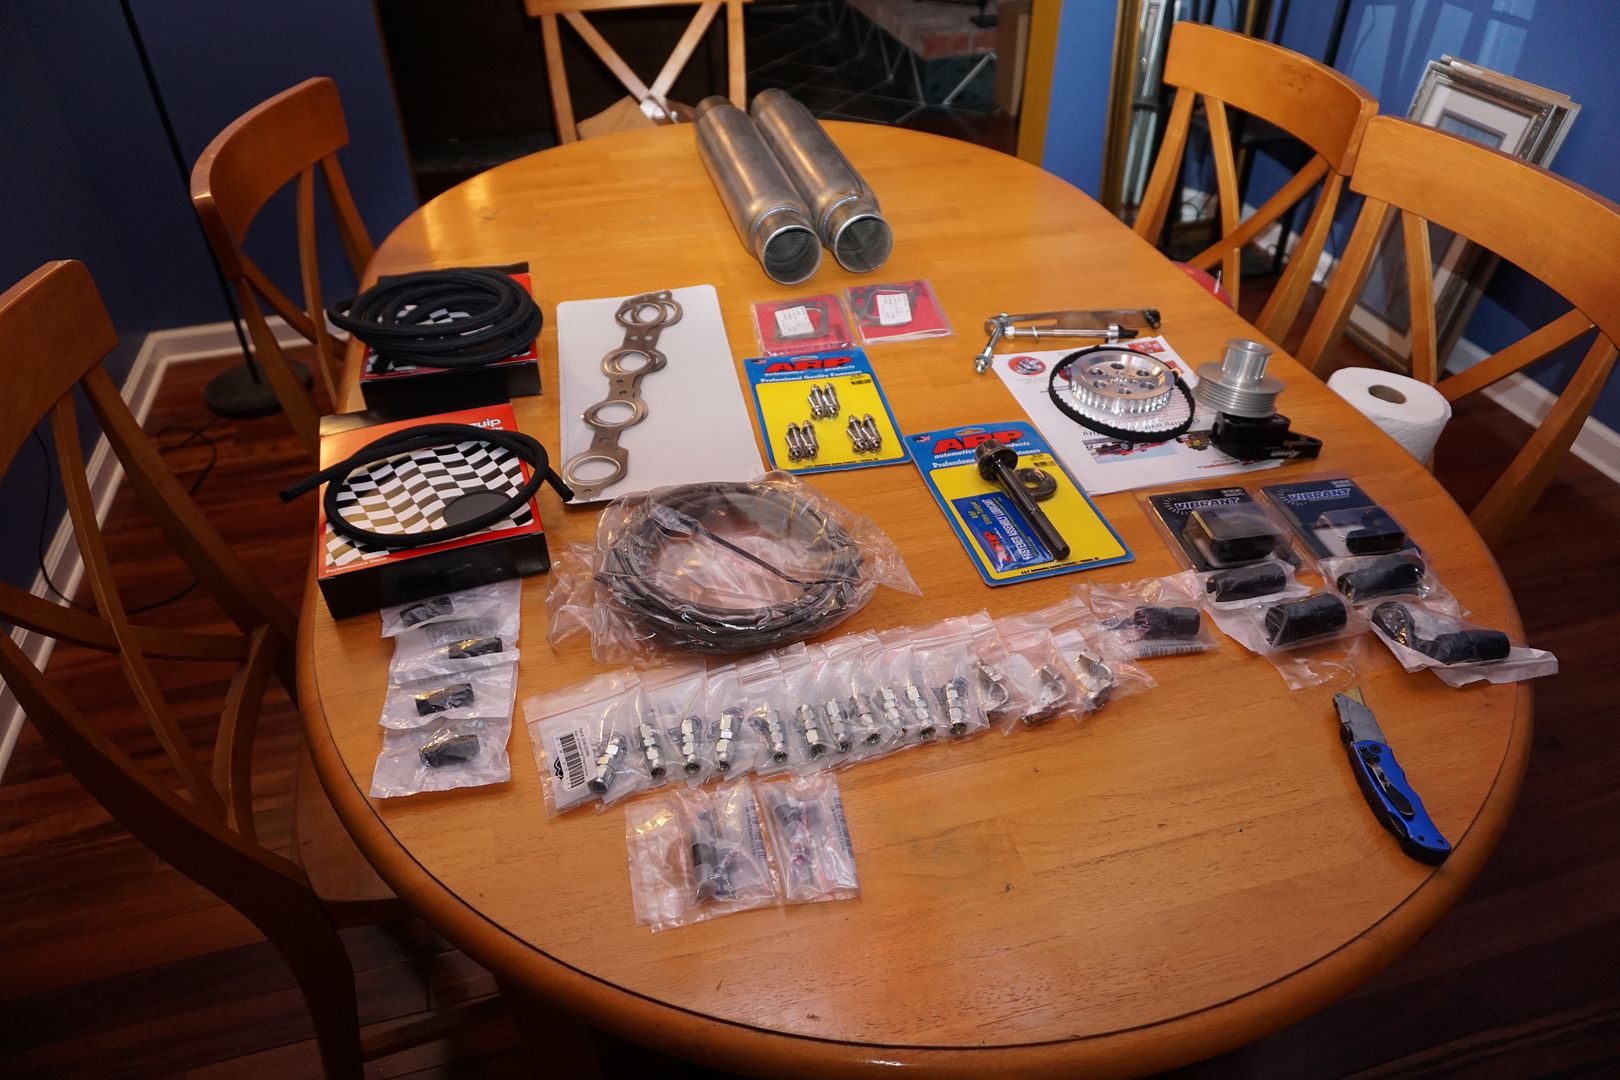
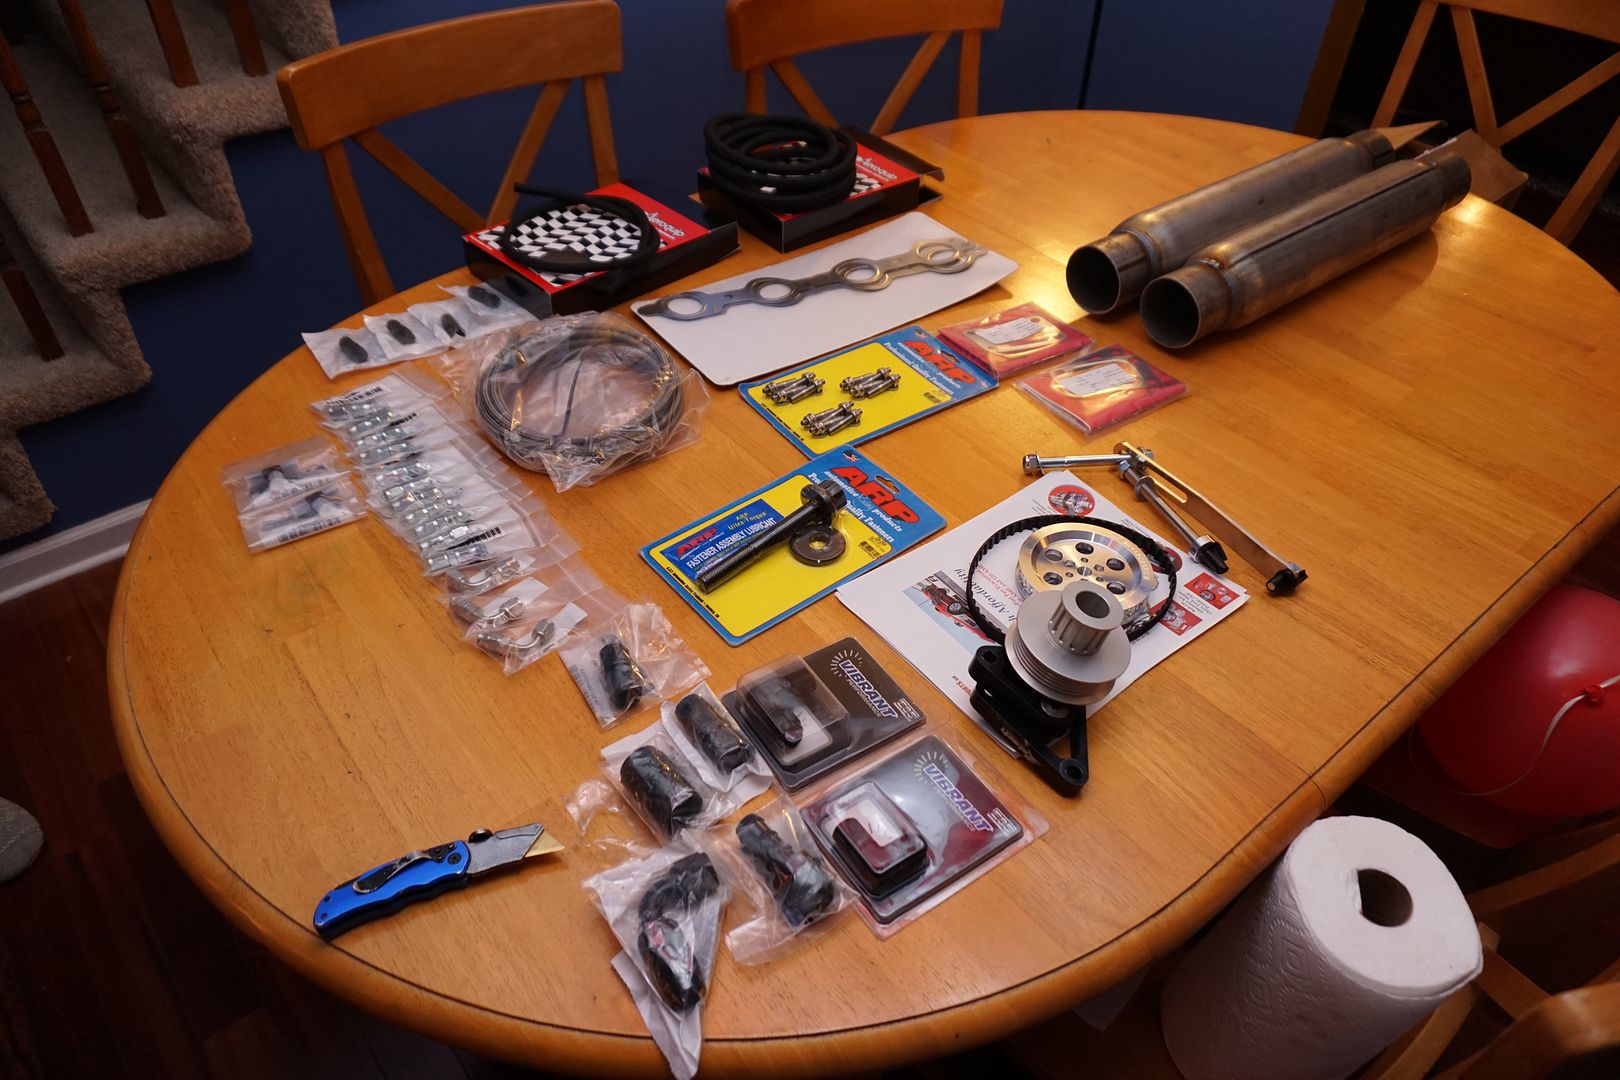
Whats can be seen on the table are a bunch of stainless Teflon fittings that will be used on wastegate setup. You can also see the black -4an hoses and line that will be used for bov and fpr vacuum reference. ARP balancer bolt was used when putting my ATI UD Balancer back on. ARP Stud kit for the manifold to head are being used along with GM stainless gaskets! Basically everything between the head and turbo inlet will be utilizing studs and stainless gasket to insure no leaks ever happen! Also utilizing dynomax bullet mufflers.
More to come!
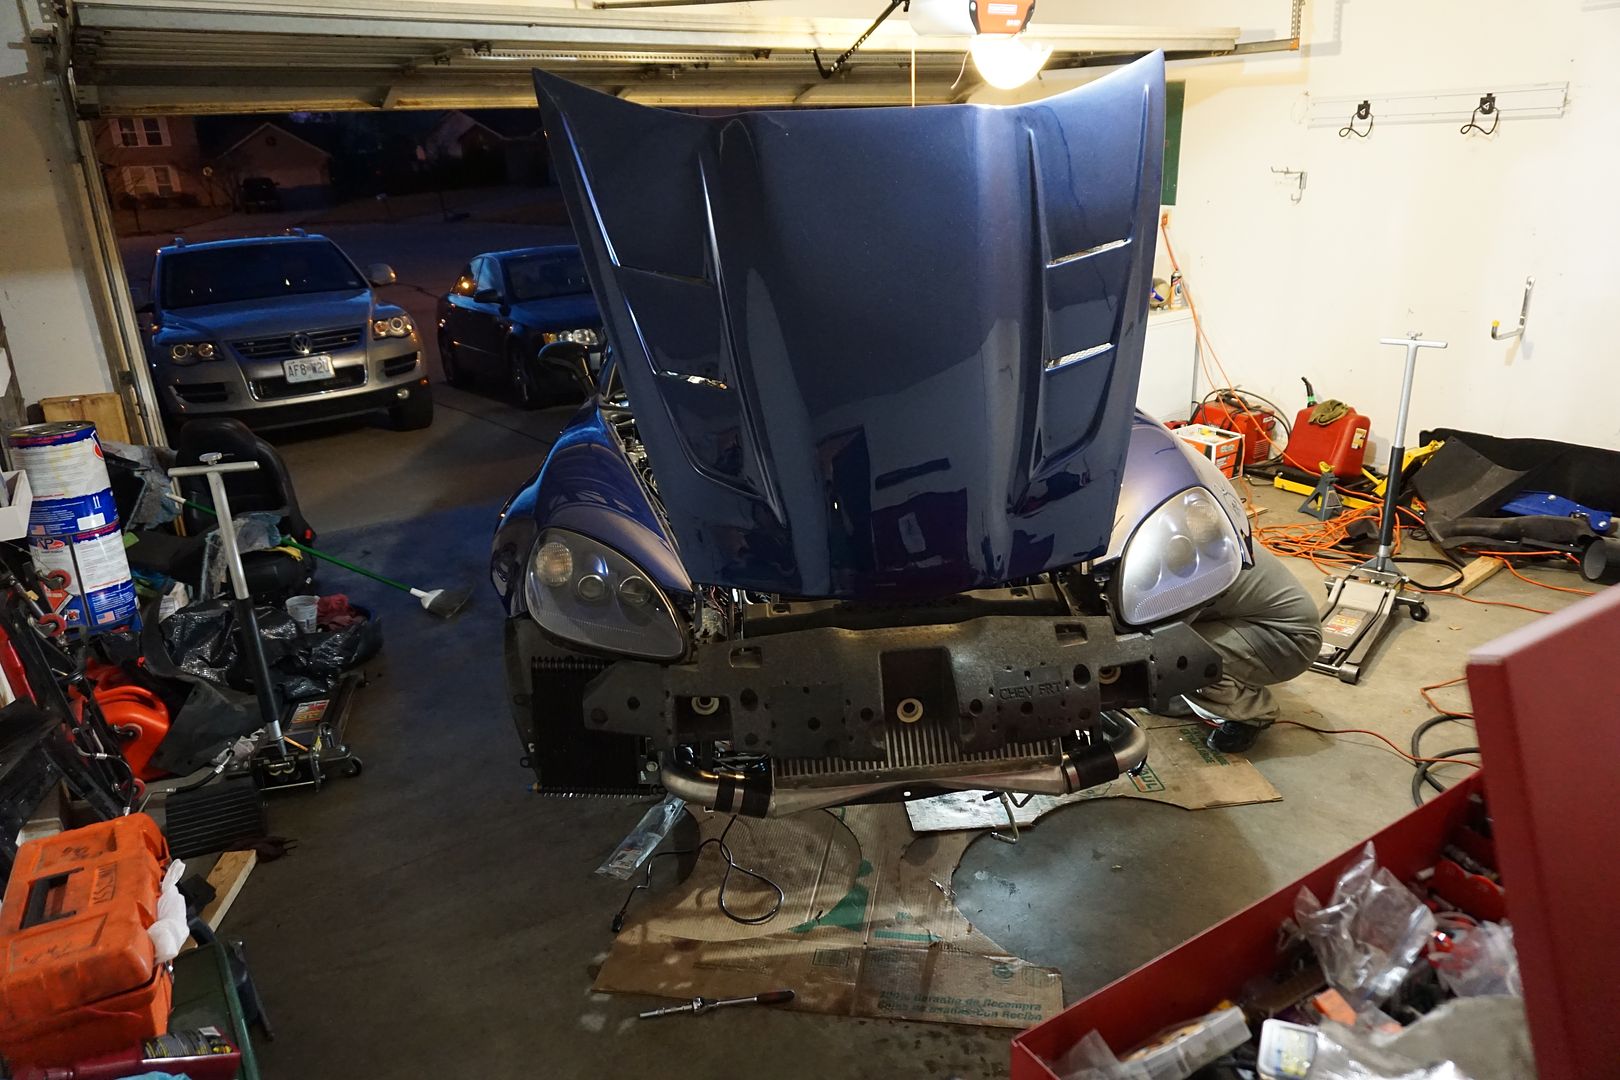
Big Build Little Garage
Turbo Kit
To feed this monster motor I chose turbos and 2 for that matter! DKT was able to provide us with a nice race kit utilizing a race intercooler and couple of other little items….To save time and get things going I went with 6766 which will soon be changed to the new 6870s. a humungous 64mm Precision BOV will handle the cold side of things while two 46mm Precision Wastegates will handle the hot side. I will be utilizing Boostleash boost controller keeping more precise control of the gates through the use of the viaiar kit (c02 substitute) all vacuum an pressure lines will be braided stainless no nylon or rubber hose. Heat management comes via PTP Turbo Blanket and every product they offer!
Overall Race Kit Components!


PTE 6766 turbos 1.06AR Ported S Cover and 46mm PTE Wastegates


Because of the low mounting I will be utilizing a turborex oil pump to get the oil back to the dry sump! Custom turbo drain adapter with internal filters inside the adpters are being used and -12an back to the pump. Notice the -4an fitting on the T for a vent to operate the pump with no issues. The vent line will be tied back into the passenger side valve cover.


65mm hole in charge pipe to accommodate the PTE 64mm BOV, this should lessen the need to run twin tials.


I chose to use the Viair Onboard air system instead of a C02 bottle because I didn’t want to deal with refilling. Also this gives me the option to be able to fill up my tires after airing down to run. It’s a neat little system and doesn’t weigh much so was definitely an easy decision.


Charge piping being mocked up!

4.5in Race intercooler mounted and B&M transcooler also mounted!

Whats can be seen on the table are a bunch of stainless Teflon fittings that will be used on wastegate setup. You can also see the black -4an hoses and line that will be used for bov and fpr vacuum reference. ARP balancer bolt was used when putting my ATI UD Balancer back on. ARP Stud kit for the manifold to head are being used along with GM stainless gaskets! Basically everything between the head and turbo inlet will be utilizing studs and stainless gasket to insure no leaks ever happen! Also utilizing dynomax bullet mufflers.


More to come!
Big Build Little Garage

Trending Topics
#11
my god... looks like some guy rippin his car apart in his garage but in reality.. has like $100k in parts and building a BAD BITCH.. cant wait to see results of a car with the best parts $$ can buy lol
#17
Holy nice build thread. Love the project and all the detail you let us see. Props for everything. One thing I can add as I too have that viair setup. Check the tank for rust inside. I had 2 that were rusted and had to send them back.
#18
Close up the vent and no smoke. But at least it is easy tried one way or the other.


