


Project Thunderturd - A Sloppy Inspired Creation
With the fbody water pump you still need the shims when using any truck style alt/ps bracket. Dirty Dingy has them pretty cheap with OEM style gaskets not the oring style like a lot on ebay.

Thread Starter
TECH Apprentice
iTrader: (2)
Joined: Nov 2011
Posts: 319
Likes: 0
From: Newport News, VA
So finally stopped working 7 days a week, 12 hours a day and had some time to mess around with the car.
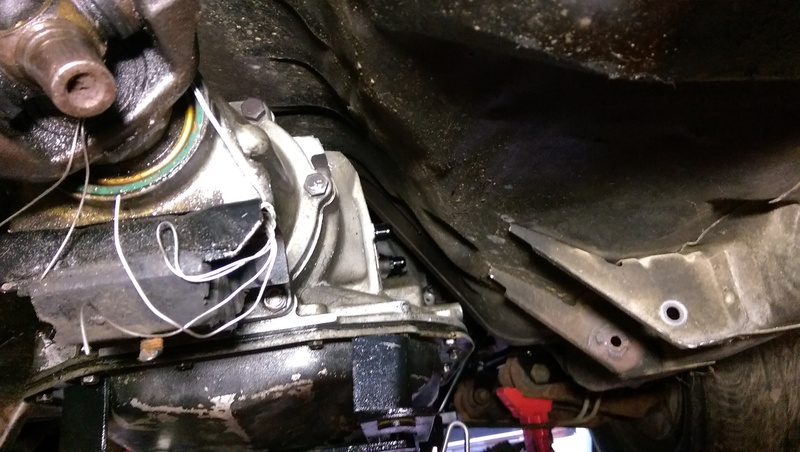
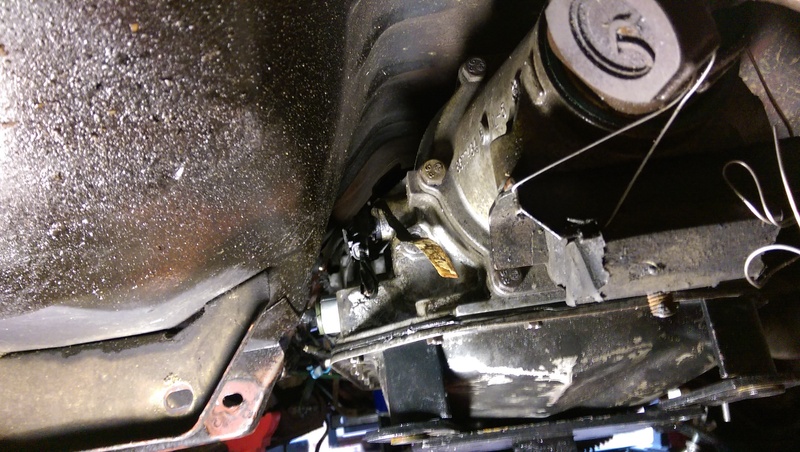
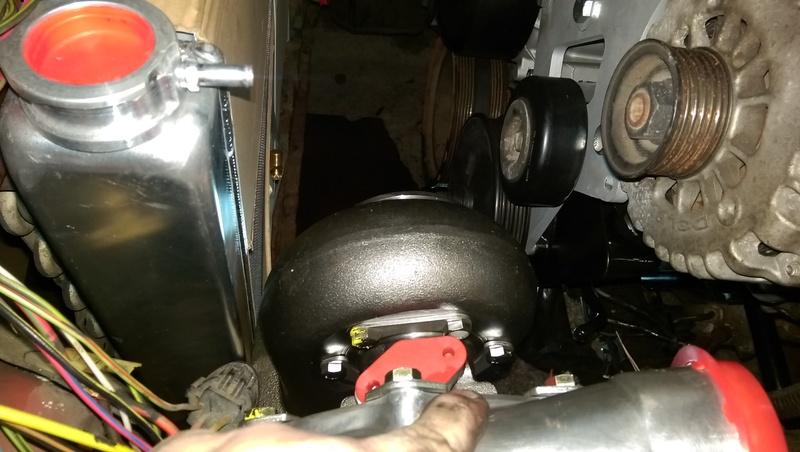
I had the alternator and PS pump relocation brackets mocked up. I ordered a spacer kit for the water pump from Dirty Dingo and was waiting to install it because I needed to drill and tap a hole for the belt tensioner.
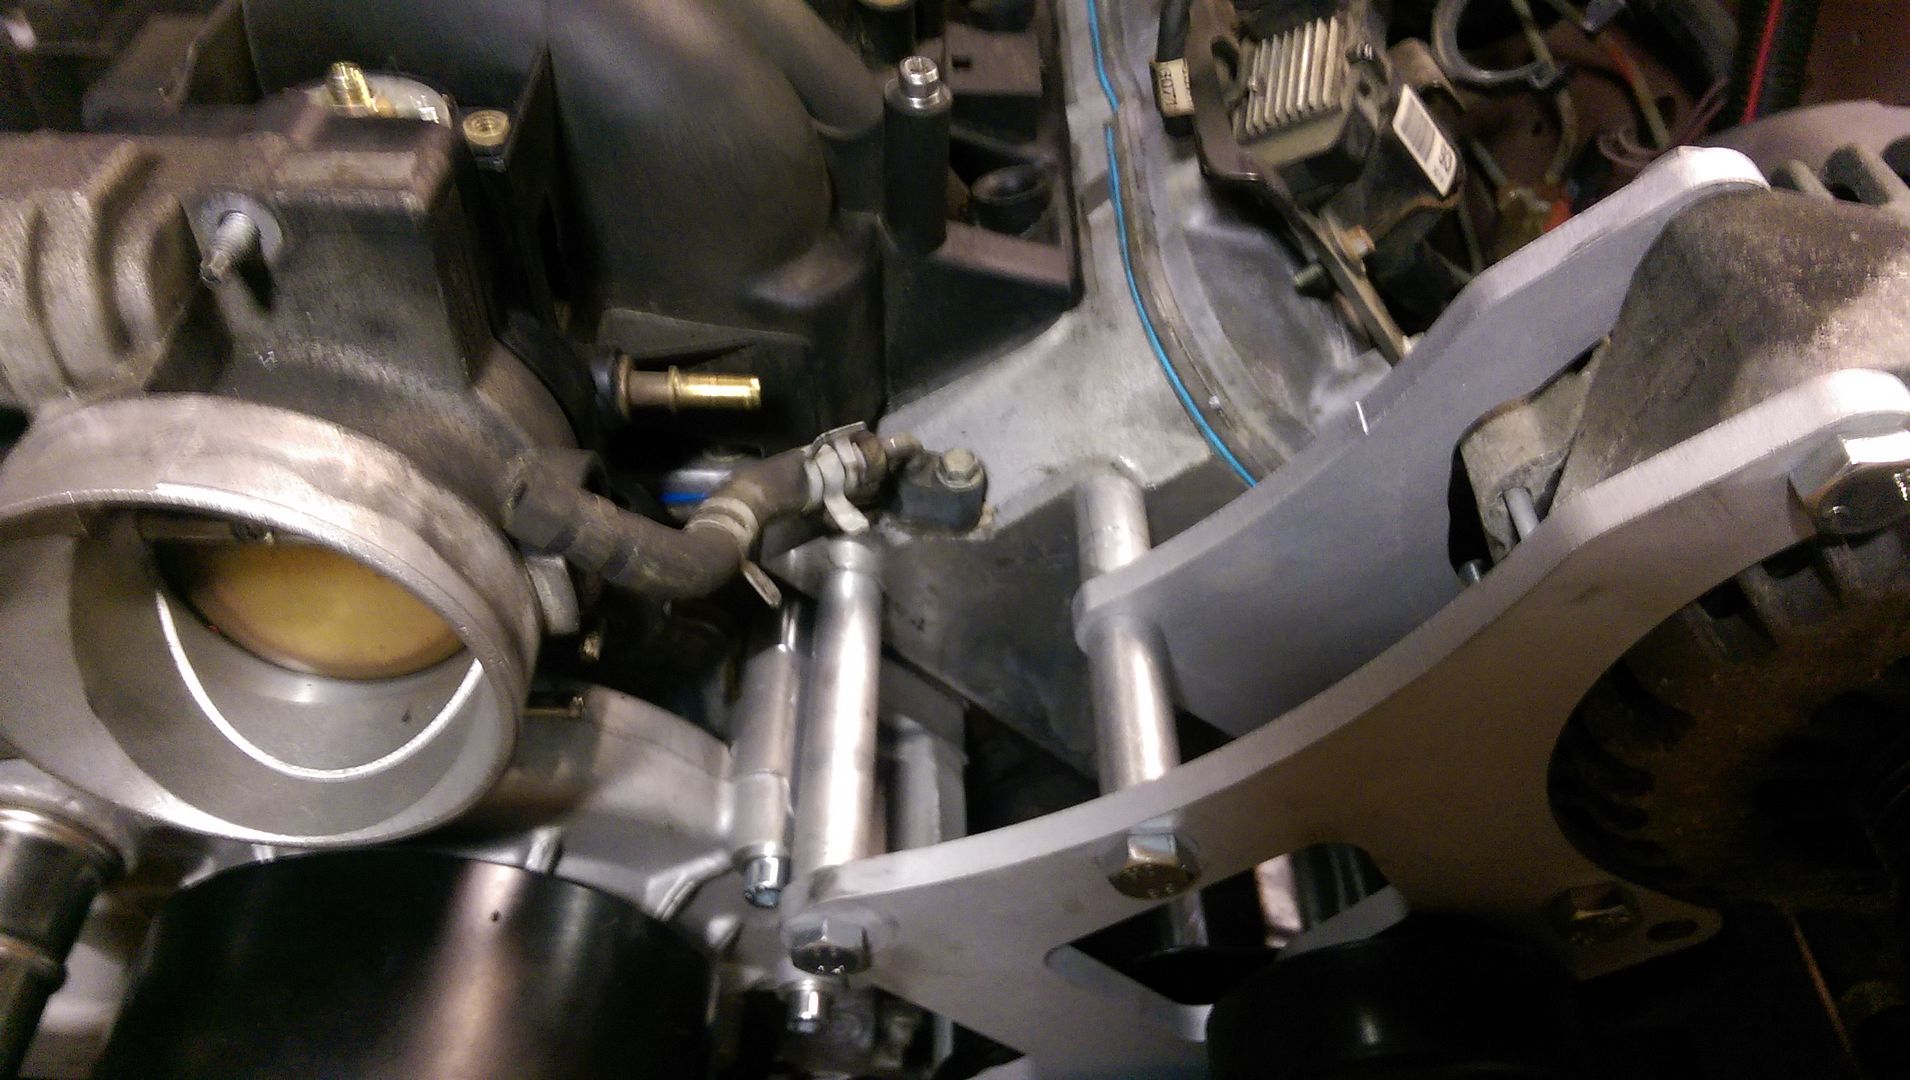
Question. Can I run the steam port line from the drivers side, through the TB, and into this connection in the WP spacers?


Also, here's a little screw up that I'll show you guys. I am adapting the stock 5.3 PS pump to be used with the Ford rack and ordered a kit from Scram Speed that included the hoses and the shim kit to lower the pressure of the stock pump. Essentially what you need to do is remove the pressure line from pressure fitting on the back of the pump, unscrew the pressure fitting from the pump (backside) and remove the pressure oriface. You then use the little tool they supply and take it apart, add shims and slap it back together.
The instuctions included were showing what I needed to take apart inside the reservoir which required separating the pump and reservoir? So I got a case of the dumbass and forgot to remove the pressure port fitting from the back and started hammering away. Once I realized what I did, it was too late for salvation, so I just picked up another pump from O'Reiley's.
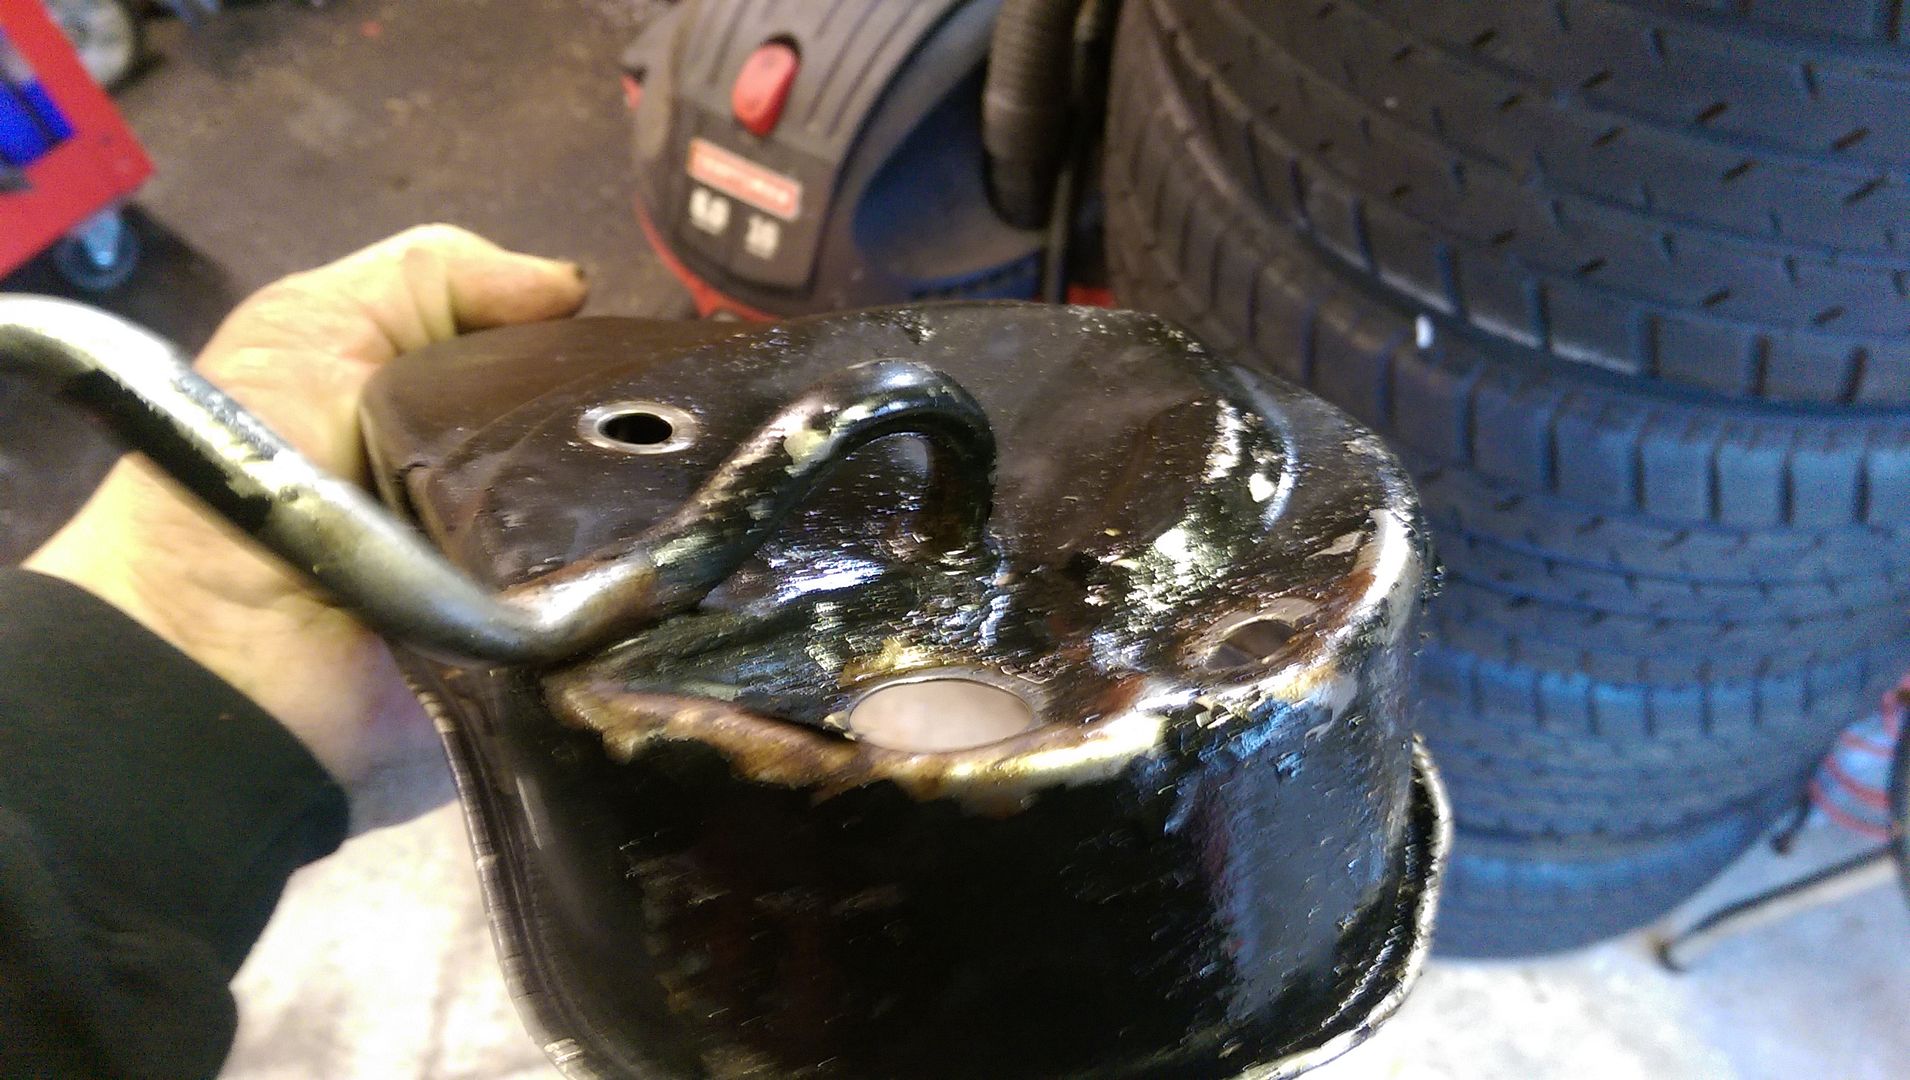
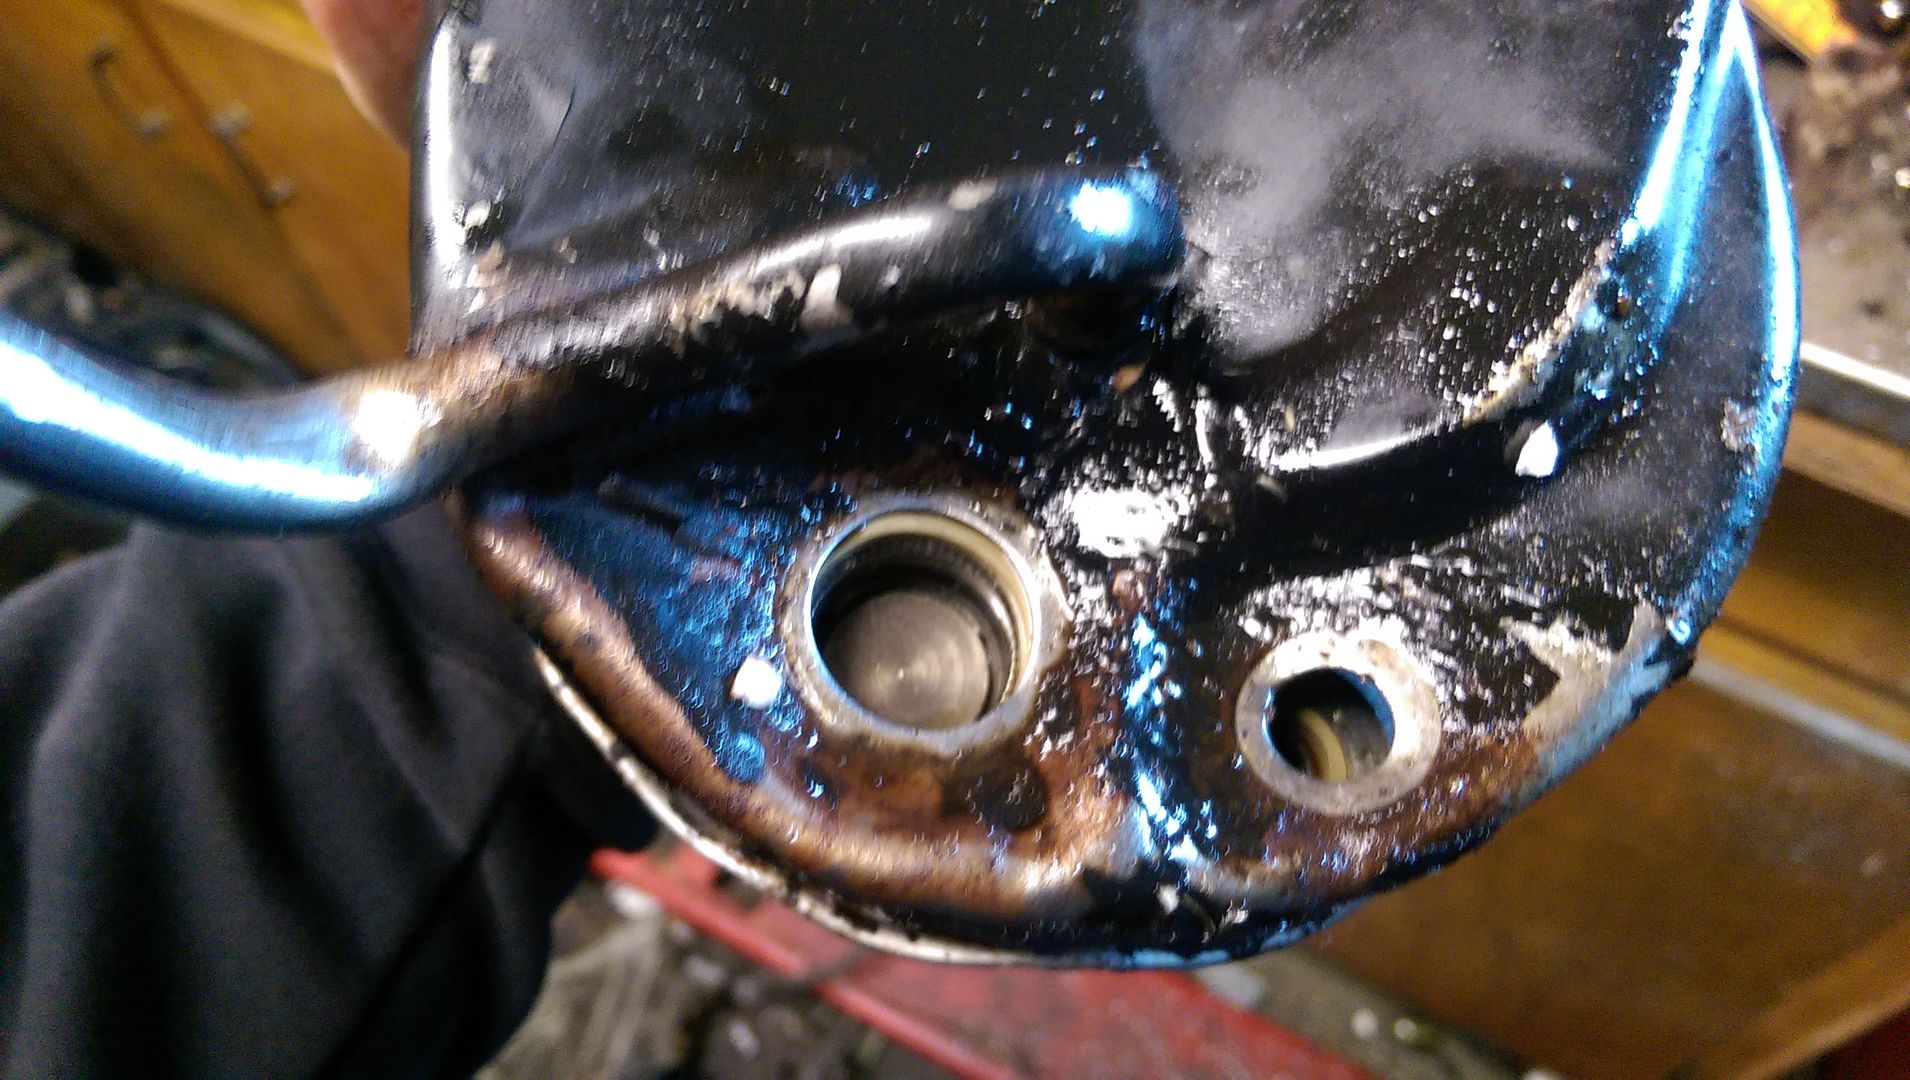
This is supposed to be flat.

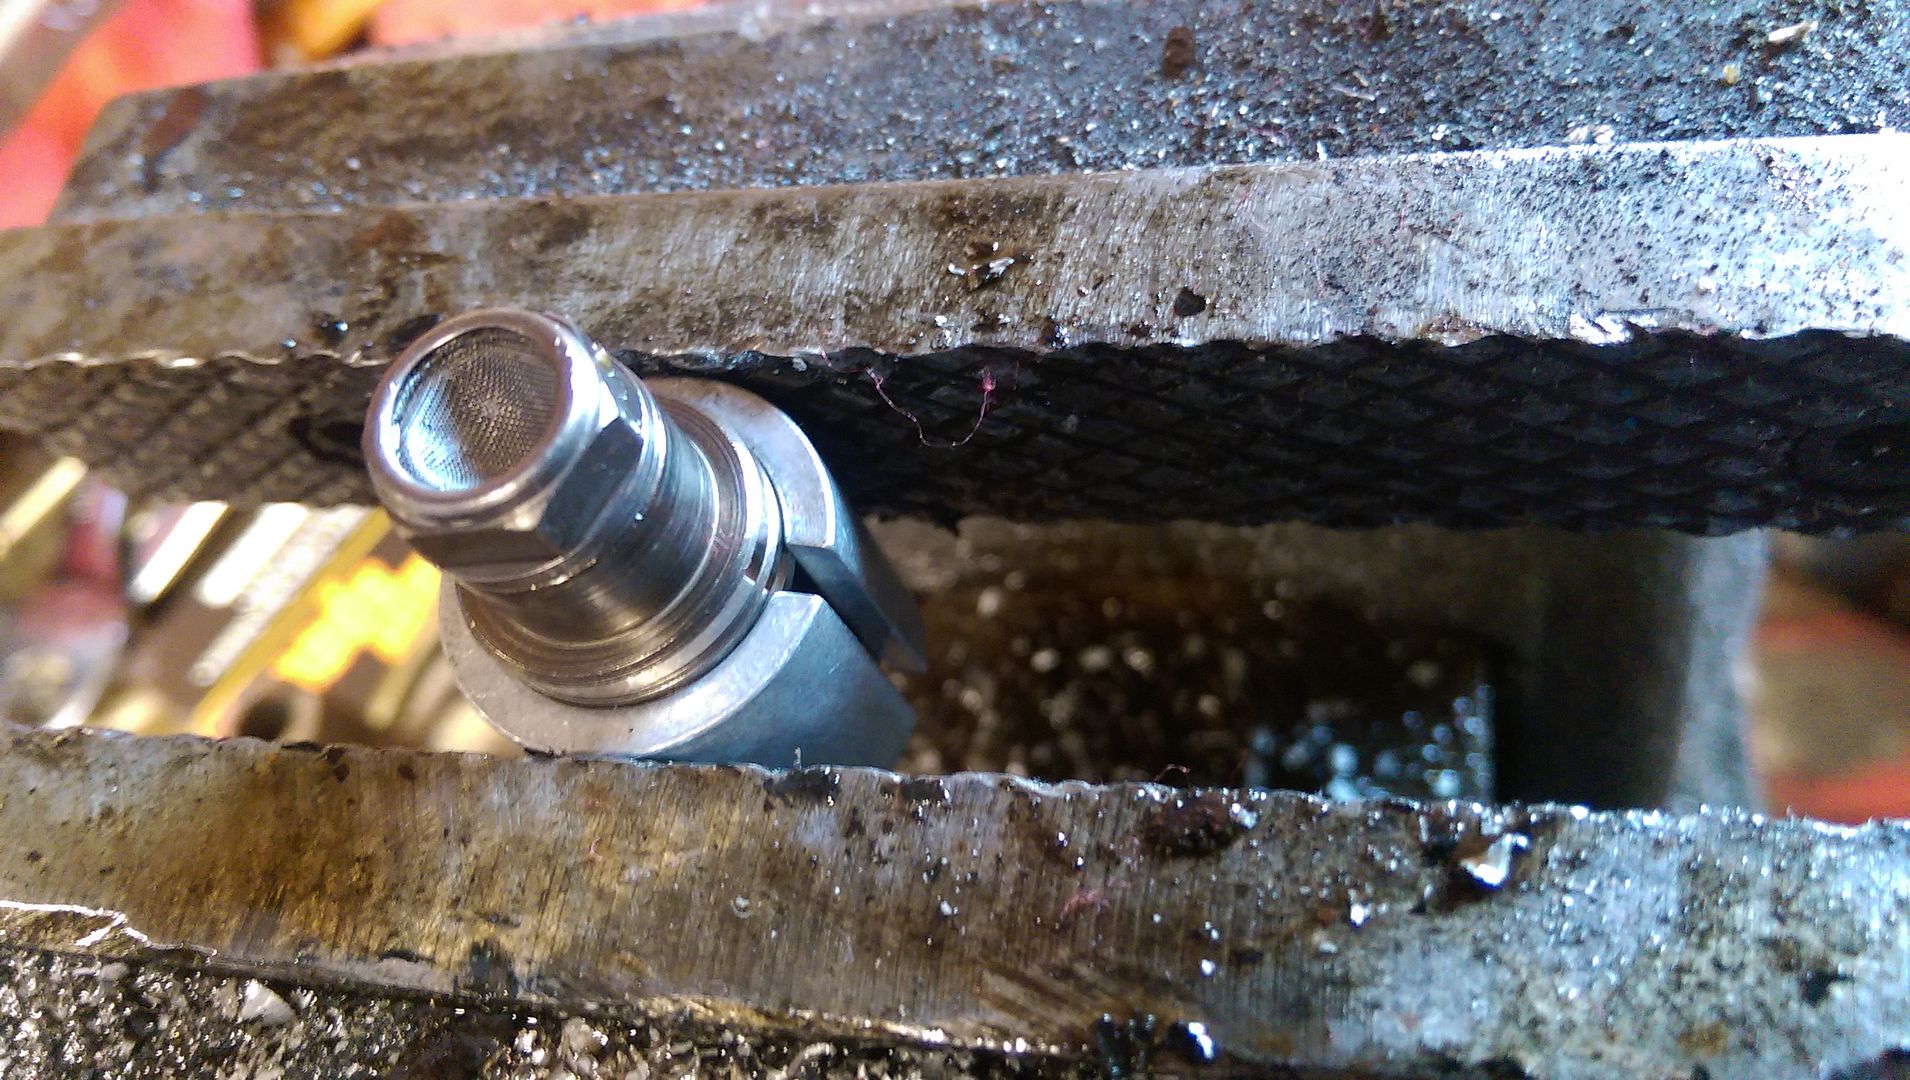
Forgot to remove this.
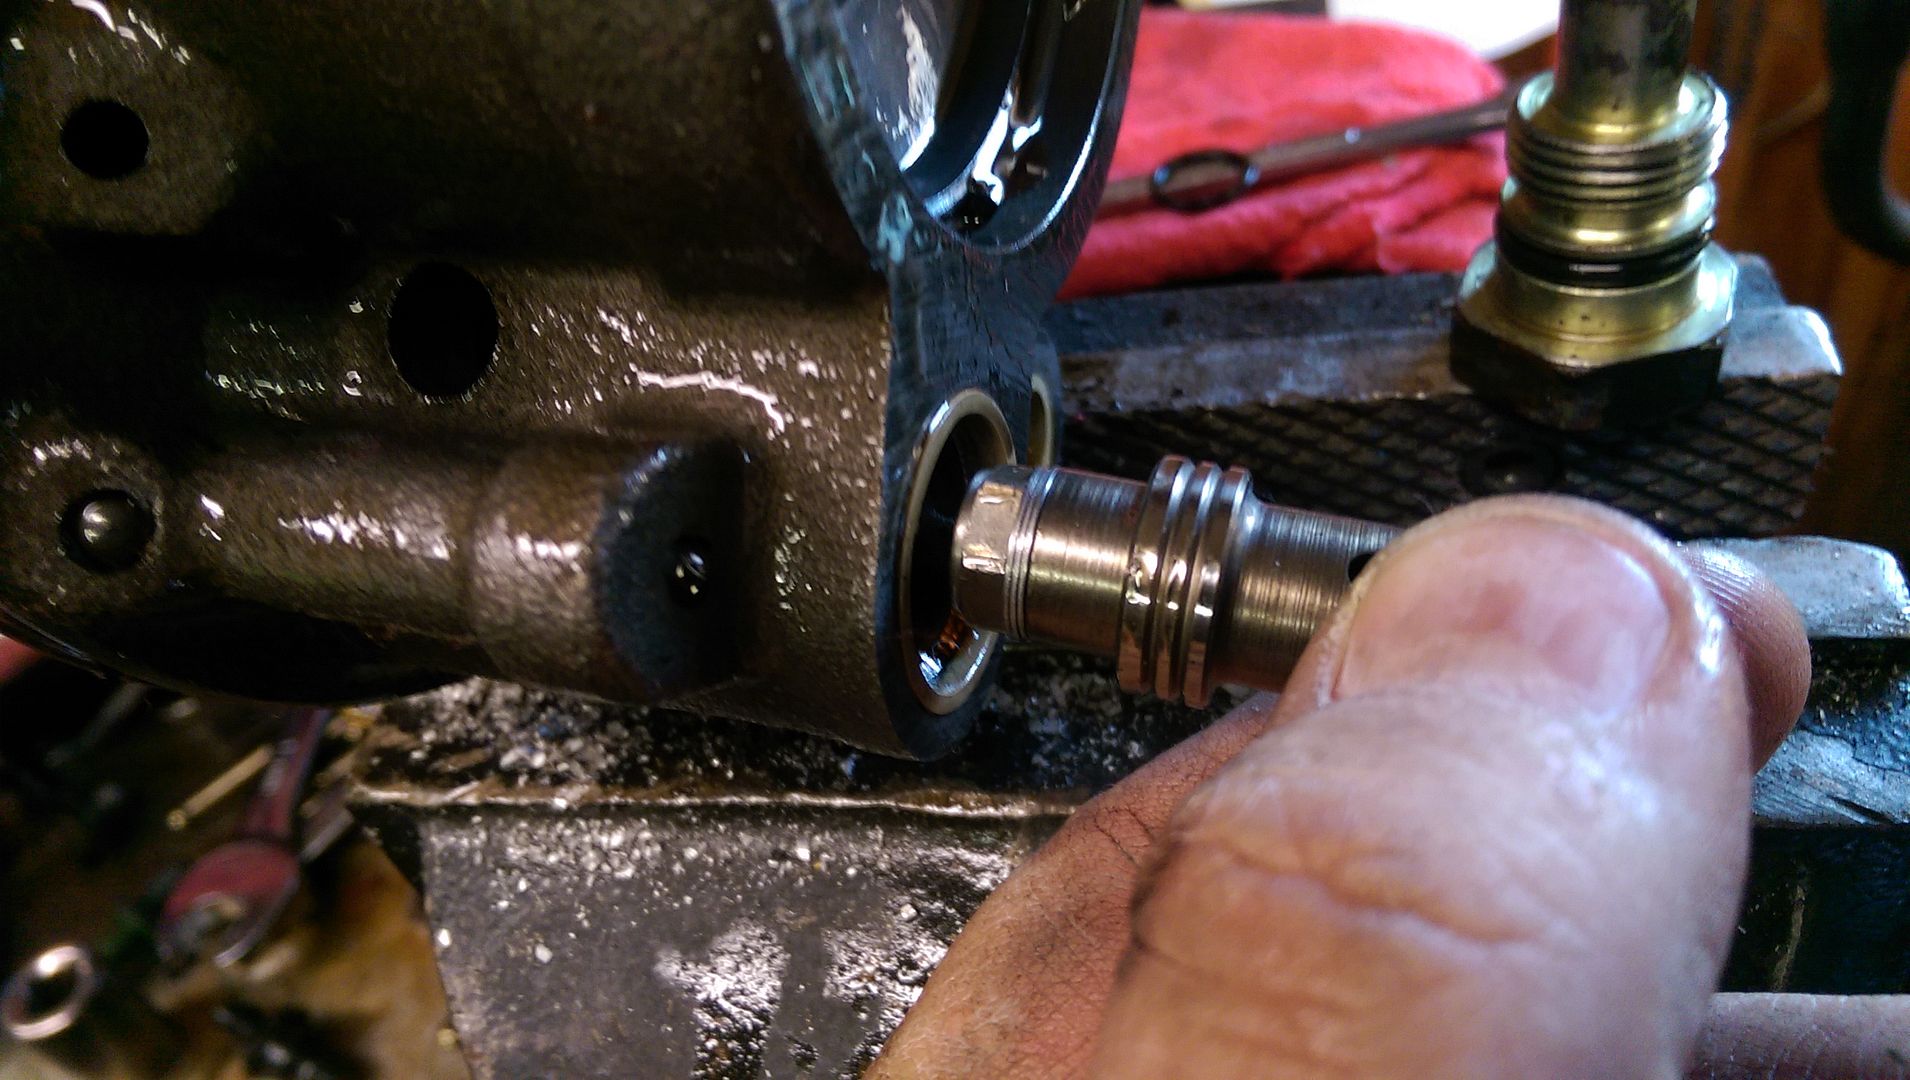
Looking at the oriface piece.

Removing the oriface piece.

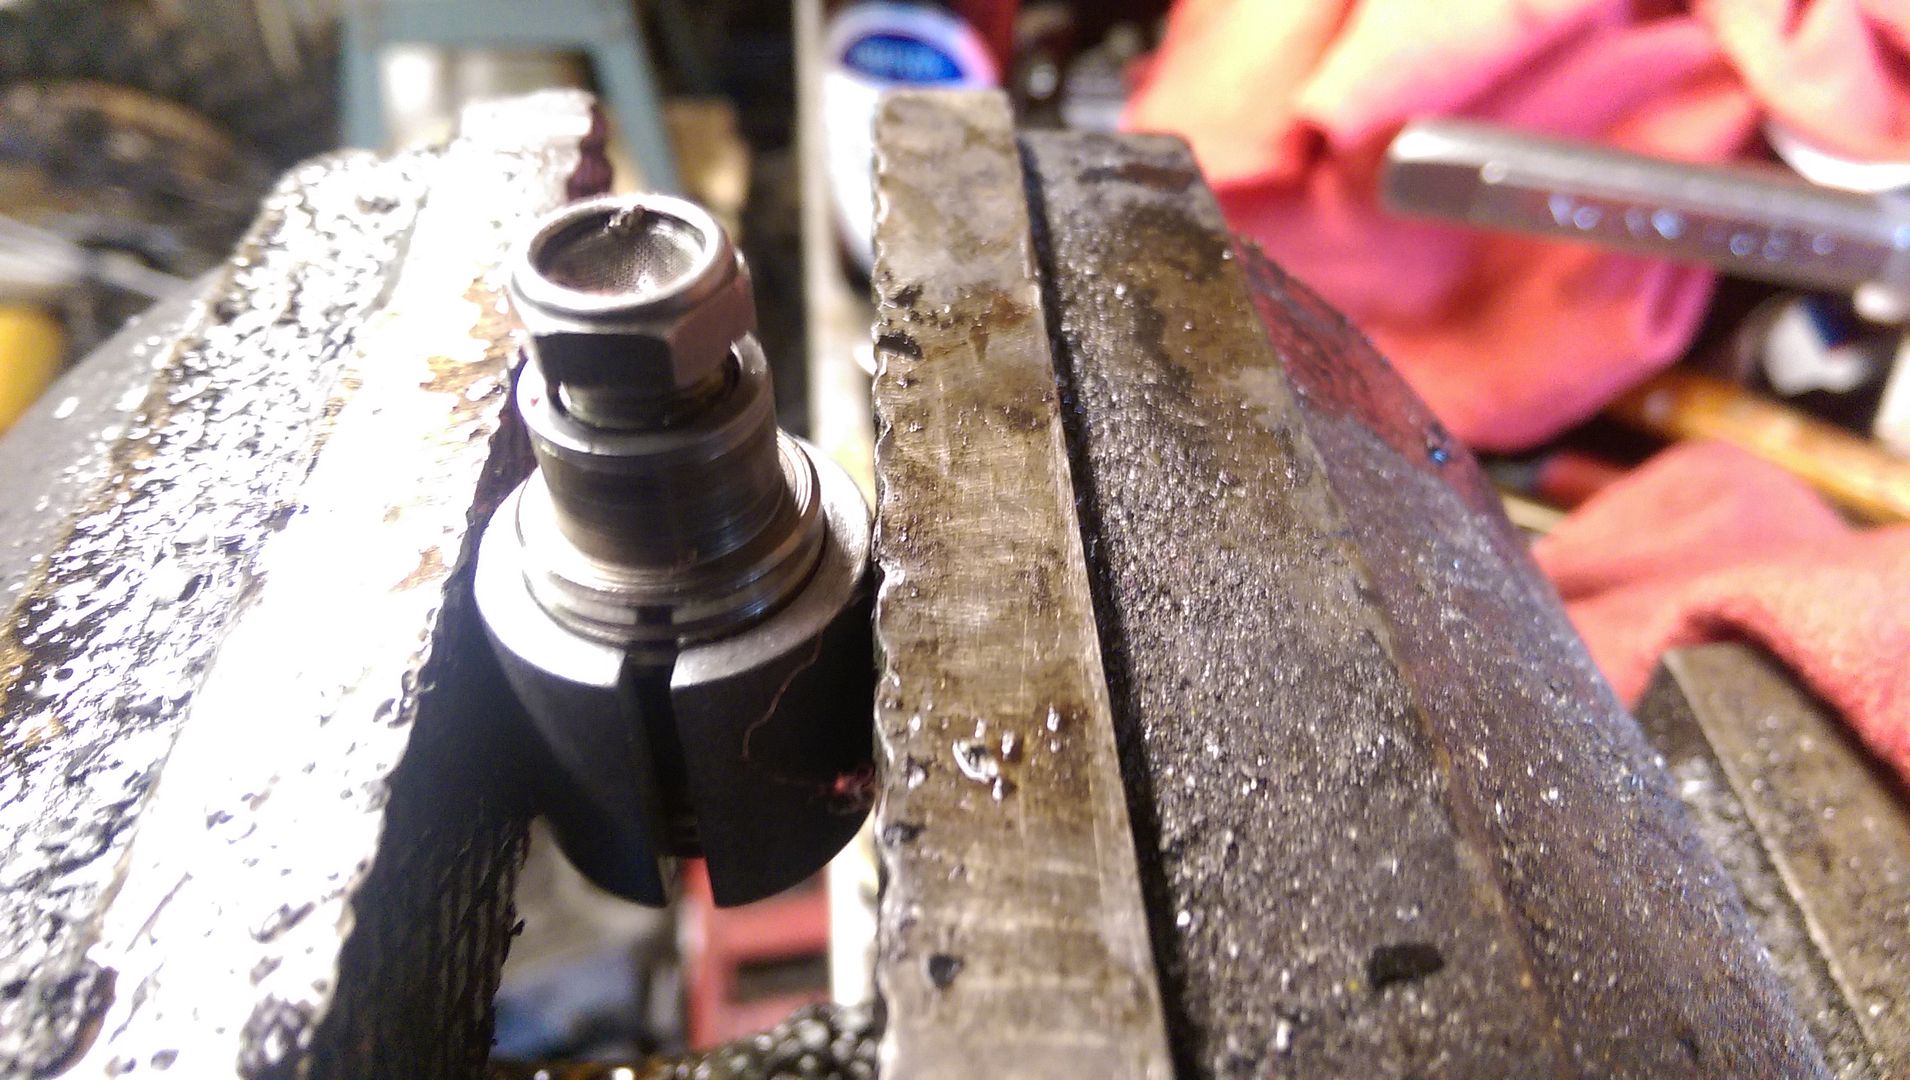
Here's the tool supplied to hold it in a vice to remove the screen/nut combo that holds it all together. DO NOT DO THIS SIDEWAYS. There is a check ball, pin, and spring inside there.

Here's the guts of it all.
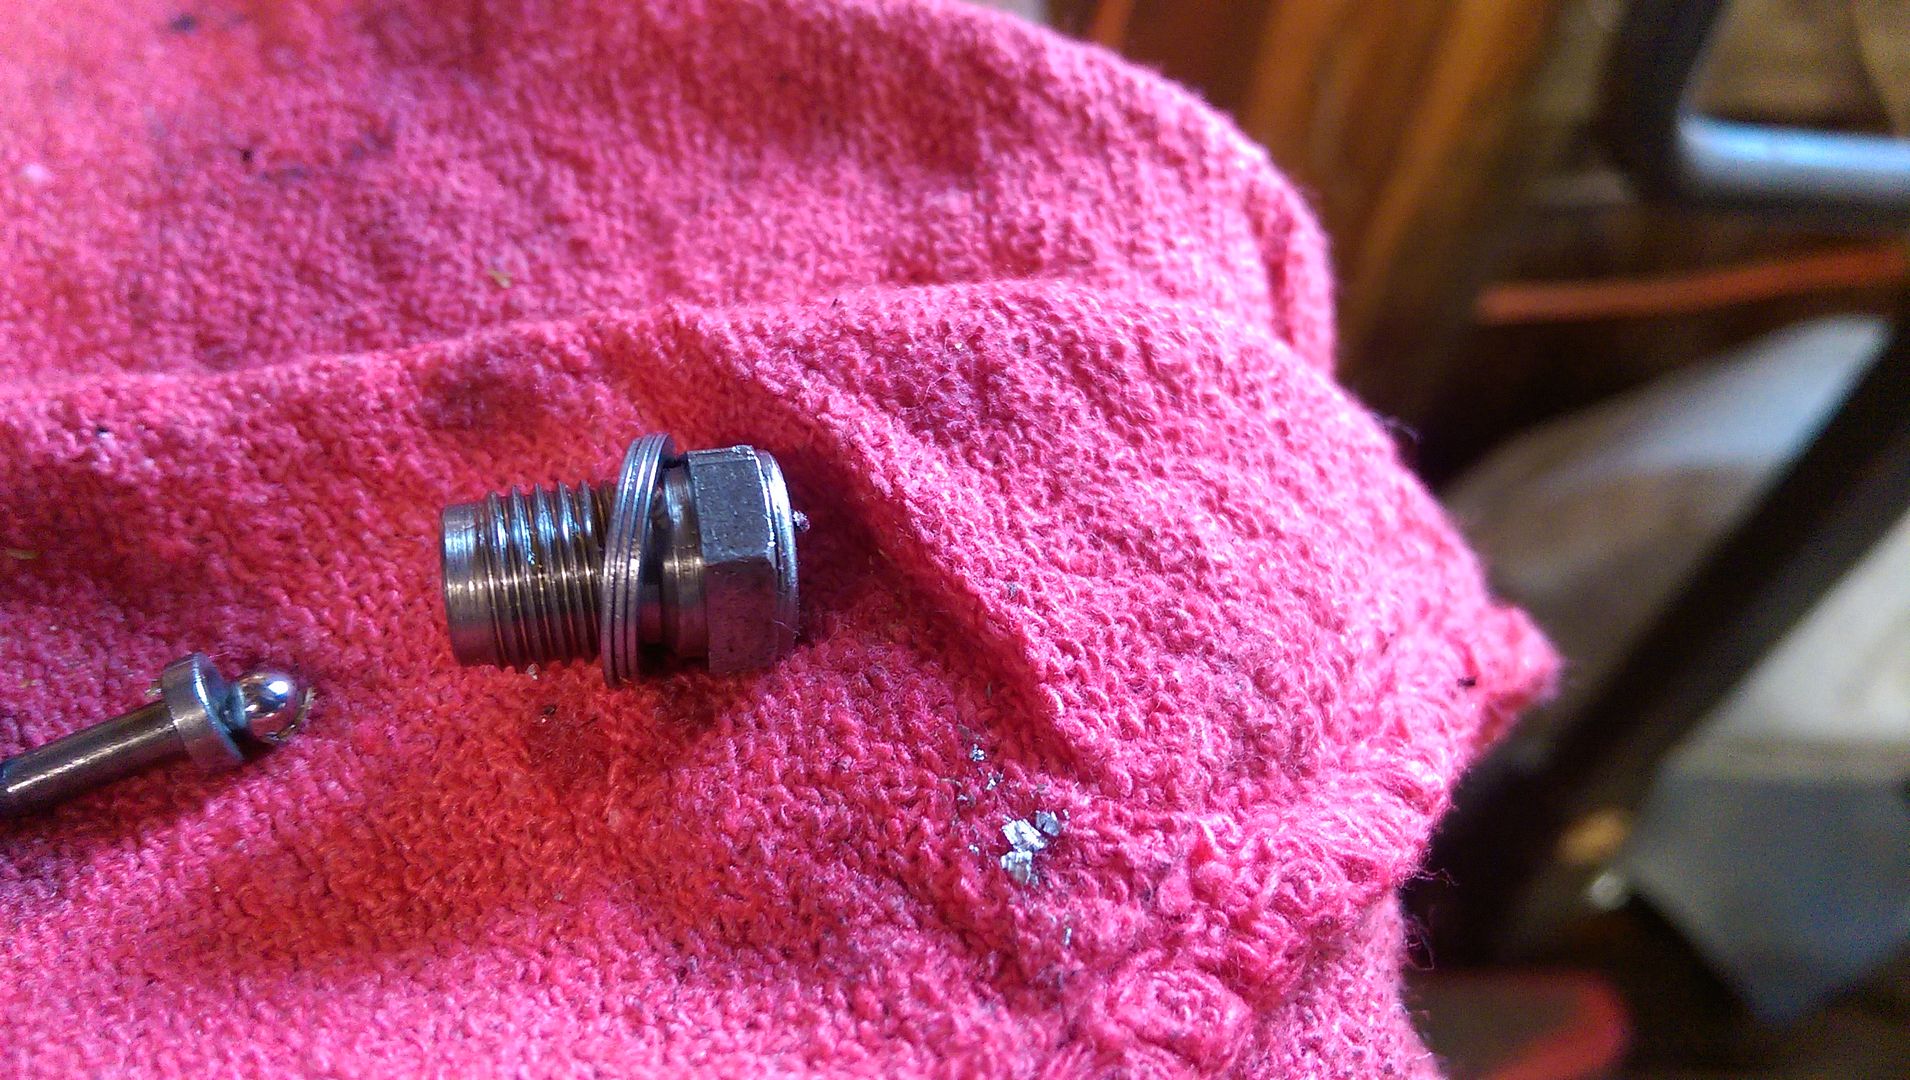
Adding the shims. The kit comes with 5 shims, but since a Ford rack requires approximately 1000 psi of pressure, you only need to add 3.

Going back together. It's literally just opposite of removal. The kit comes with a new o-ring for the pressure port adapter where the line screws into. Also the oriface piece is spring loaded inside so it will take some pressure to reinstall the pressure port.

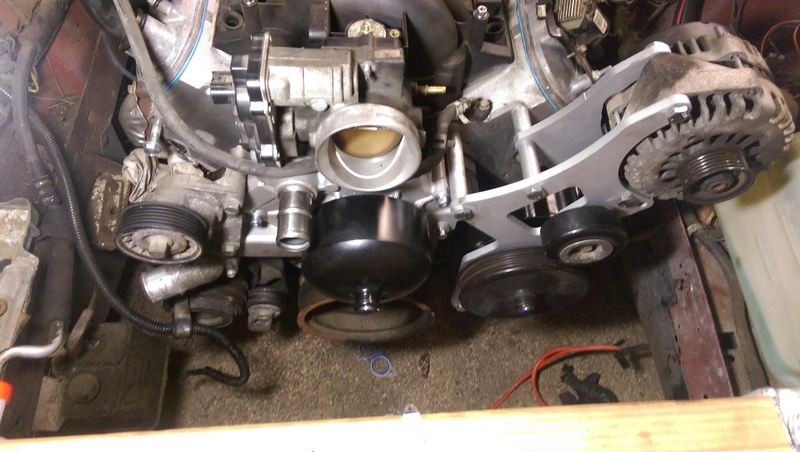
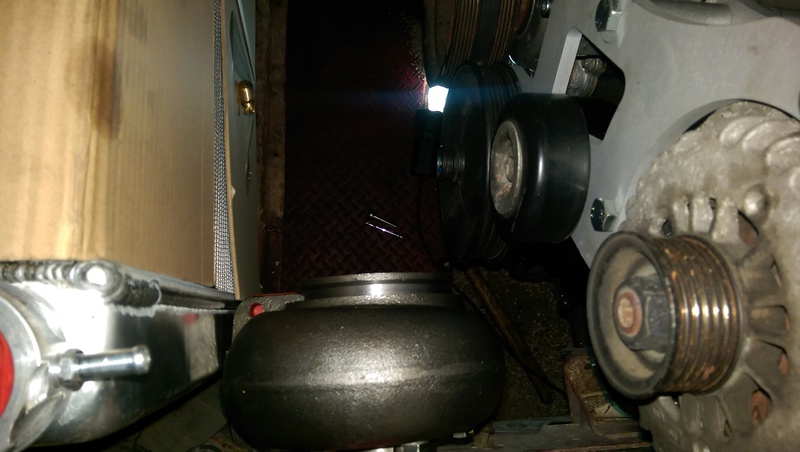
Right now all the accessories are installed. The only problem I noted was that the truck tensioner is a pulley width too far out, so I'll need another tensioner. I'm going to look at the LS1 tensioners to see if that will work.
Tomorrow is fuel pump day I think. I may try to start fitting the transmission in the tunnel. I'm still trying to figure out where the heck to run the exhaust. 3" is too tight on the passenger side. I need to get it back up in the air and look at different routing paths.
I also picked these up on eBay to run the transmission lines.
What are you guys doing for shifters in Foxes? This T Bird has column shift that went to the stock C3 that I doubt I could get working.
I had the alternator and PS pump relocation brackets mocked up. I ordered a spacer kit for the water pump from Dirty Dingo and was waiting to install it because I needed to drill and tap a hole for the belt tensioner.
Question. Can I run the steam port line from the drivers side, through the TB, and into this connection in the WP spacers?


Also, here's a little screw up that I'll show you guys. I am adapting the stock 5.3 PS pump to be used with the Ford rack and ordered a kit from Scram Speed that included the hoses and the shim kit to lower the pressure of the stock pump. Essentially what you need to do is remove the pressure line from pressure fitting on the back of the pump, unscrew the pressure fitting from the pump (backside) and remove the pressure oriface. You then use the little tool they supply and take it apart, add shims and slap it back together.
The instuctions included were showing what I needed to take apart inside the reservoir which required separating the pump and reservoir? So I got a case of the dumbass and forgot to remove the pressure port fitting from the back and started hammering away. Once I realized what I did, it was too late for salvation, so I just picked up another pump from O'Reiley's.
This is supposed to be flat.

Forgot to remove this.

Looking at the oriface piece.

Removing the oriface piece.

Here's the tool supplied to hold it in a vice to remove the screen/nut combo that holds it all together. DO NOT DO THIS SIDEWAYS. There is a check ball, pin, and spring inside there.

Here's the guts of it all.

Adding the shims. The kit comes with 5 shims, but since a Ford rack requires approximately 1000 psi of pressure, you only need to add 3.

Going back together. It's literally just opposite of removal. The kit comes with a new o-ring for the pressure port adapter where the line screws into. Also the oriface piece is spring loaded inside so it will take some pressure to reinstall the pressure port.

Right now all the accessories are installed. The only problem I noted was that the truck tensioner is a pulley width too far out, so I'll need another tensioner. I'm going to look at the LS1 tensioners to see if that will work.

Tomorrow is fuel pump day I think. I may try to start fitting the transmission in the tunnel. I'm still trying to figure out where the heck to run the exhaust. 3" is too tight on the passenger side. I need to get it back up in the air and look at different routing paths.
I also picked these up on eBay to run the transmission lines.

What are you guys doing for shifters in Foxes? This T Bird has column shift that went to the stock C3 that I doubt I could get working.
Thread Starter
TECH Apprentice
iTrader: (2)
Joined: Nov 2011
Posts: 319
Likes: 0
From: Newport News, VA
Ls3/l99 water pump has the same style water neck as the ls1
The bell/pulley on it sticks far enough out that you can use it with truck accessories.
Pretty easy fix for intake swaps with truck accessories
The bell/pulley on it sticks far enough out that you can use it with truck accessories.
Pretty easy fix for intake swaps with truck accessories
So finally stopped working 7 days a week, 12 hours a day and had some time to mess around with the car.
I had the alternator and PS pump relocation brackets mocked up. I ordered a spacer kit for the water pump from Dirty Dingo and was waiting to install it because I needed to drill and tap a hole for the belt tensioner.
Question. Can I run the steam port line from the drivers side, through the TB, and into this connection in the WP spacers?

Also, here's a little screw up that I'll show you guys. I am adapting the stock 5.3 PS pump to be used with the Ford rack and ordered a kit from Scram Speed that included the hoses and the shim kit to lower the pressure of the stock pump. Essentially what you need to do is remove the pressure line from pressure fitting on the back of the pump, unscrew the pressure fitting from the pump (backside) and remove the pressure oriface. You then use the little tool they supply and take it apart, add shims and slap it back together.
The instuctions included were showing what I needed to take apart inside the reservoir which required separating the pump and reservoir? So I got a case of the dumbass and forgot to remove the pressure port fitting from the back and started hammering away. Once I realized what I did, it was too late for salvation, so I just picked up another pump from O'Reiley's.
This is supposed to be flat.
Forgot to remove this.

Looking at the oriface piece.
Removing the oriface piece.
Here's the tool supplied to hold it in a vice to remove the screen/nut combo that holds it all together. DO NOT DO THIS SIDEWAYS. There is a check ball, pin, and spring inside there.
Here's the guts of it all.

Adding the shims. The kit comes with 5 shims, but since a Ford rack requires approximately 1000 psi of pressure, you only need to add 3.
Going back together. It's literally just opposite of removal. The kit comes with a new o-ring for the pressure port adapter where the line screws into. Also the oriface piece is spring loaded inside so it will take some pressure to reinstall the pressure port.
Right now all the accessories are installed. The only problem I noted was that the truck tensioner is a pulley width too far out, so I'll need another tensioner. I'm going to look at the LS1 tensioners to see if that will work.

Tomorrow is fuel pump day I think. I may try to start fitting the transmission in the tunnel. I'm still trying to figure out where the heck to run the exhaust. 3" is too tight on the passenger side. I need to get it back up in the air and look at different routing paths.
I also picked these up on eBay to run the transmission lines.
What are you guys doing for shifters in Foxes? This T Bird has column shift that went to the stock C3 that I doubt I could get working.
I had the alternator and PS pump relocation brackets mocked up. I ordered a spacer kit for the water pump from Dirty Dingo and was waiting to install it because I needed to drill and tap a hole for the belt tensioner.
Question. Can I run the steam port line from the drivers side, through the TB, and into this connection in the WP spacers?
Also, here's a little screw up that I'll show you guys. I am adapting the stock 5.3 PS pump to be used with the Ford rack and ordered a kit from Scram Speed that included the hoses and the shim kit to lower the pressure of the stock pump. Essentially what you need to do is remove the pressure line from pressure fitting on the back of the pump, unscrew the pressure fitting from the pump (backside) and remove the pressure oriface. You then use the little tool they supply and take it apart, add shims and slap it back together.
The instuctions included were showing what I needed to take apart inside the reservoir which required separating the pump and reservoir? So I got a case of the dumbass and forgot to remove the pressure port fitting from the back and started hammering away. Once I realized what I did, it was too late for salvation, so I just picked up another pump from O'Reiley's.
This is supposed to be flat.
Forgot to remove this.
Looking at the oriface piece.
Removing the oriface piece.
Here's the tool supplied to hold it in a vice to remove the screen/nut combo that holds it all together. DO NOT DO THIS SIDEWAYS. There is a check ball, pin, and spring inside there.
Here's the guts of it all.
Adding the shims. The kit comes with 5 shims, but since a Ford rack requires approximately 1000 psi of pressure, you only need to add 3.
Going back together. It's literally just opposite of removal. The kit comes with a new o-ring for the pressure port adapter where the line screws into. Also the oriface piece is spring loaded inside so it will take some pressure to reinstall the pressure port.
Right now all the accessories are installed. The only problem I noted was that the truck tensioner is a pulley width too far out, so I'll need another tensioner. I'm going to look at the LS1 tensioners to see if that will work.
Tomorrow is fuel pump day I think. I may try to start fitting the transmission in the tunnel. I'm still trying to figure out where the heck to run the exhaust. 3" is too tight on the passenger side. I need to get it back up in the air and look at different routing paths.
I also picked these up on eBay to run the transmission lines.
What are you guys doing for shifters in Foxes? This T Bird has column shift that went to the stock C3 that I doubt I could get working.
I have a 4" cowl hood so my 5.3 cleared on my 87 firebird. But I had to swap to a 5" PS pulley and do an idler pulley relocation bracket. Had to get a longer belt but like how the billet bracket looks. Might have to spring for this.
Thread Starter
TECH Apprentice
iTrader: (2)
Joined: Nov 2011
Posts: 319
Likes: 0
From: Newport News, VA
Looks good! Like the new alt and ps bracket. You got a link to where you bought it? What belt number did you use and how much longer than stock?
I have a 4" cowl hood so my 5.3 cleared on my 87 firebird. But I had to swap to a 5" PS pulley and do an idler pulley relocation bracket. Had to get a longer belt but like how the billet bracket looks. Might have to spring for this.
I have a 4" cowl hood so my 5.3 cleared on my 87 firebird. But I had to swap to a 5" PS pulley and do an idler pulley relocation bracket. Had to get a longer belt but like how the billet bracket looks. Might have to spring for this.
http://pages.ebay.com/motors/link/?nav=item.view&id=361297424236&alt=web

TECH Enthusiast
Joined: Apr 2009
Posts: 723
Likes: 4
LS1 Tech Stories
The Best V8 Stories One Small Block at Time

6 Common C5 Corvette Failures and What's Involved In Repairing Them
Pouria Savadkouei
Retro Modern Bandit Pontiac Trans AM Comes With Burt Reynolds' Autograph
Verdad Gallardo
Top 10 Greatest Cadillac V Series Performance Models Ever, Ranked
Pouria Savadkouei
Top 10 Most Powerful Chevy Trucks Ever Made!

Hennessey's New Supercharged Silverado ZR2 Has 700 HP
Verdad Gallardo
Coachbuilt N2A Anteros Is an LS2-Powered C6 Corvette In Italian Clothes
Verdad Gallardo
Awesome K5 Blazer Restomod Comes With C7 Corvette Power
Verdad Gallardo
10 Camaros You Should Never Buy

10 LS Engine Myths That Refuse to Die
Verdad Gallardo Thread Starter
TECH Apprentice
iTrader: (2)
Joined: Nov 2011
Posts: 319
Likes: 0
From: Newport News, VA
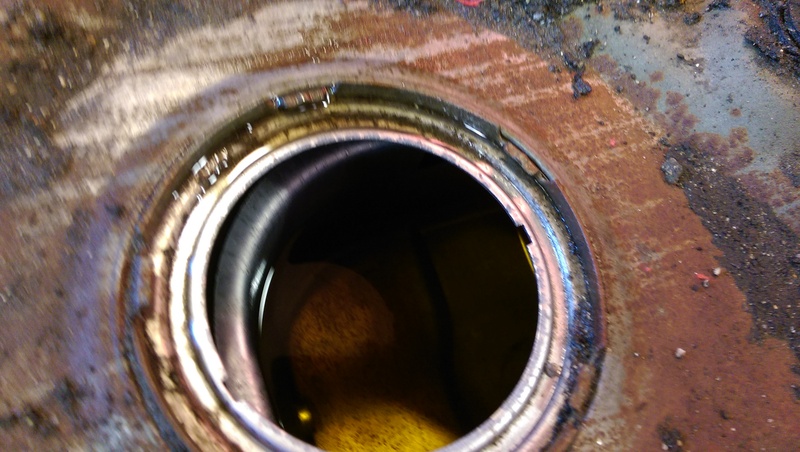
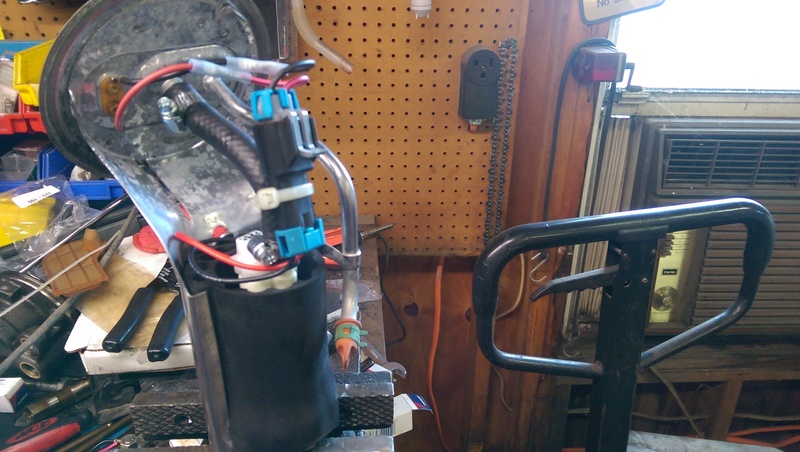
Managed to get the fuel pump installed today. Didn't require any modifications at all. It even fit in the stock rubber insulator around the pump basket. The only think I'm a little concerned with is that the sock on the new pump isn't perpendicular to the bottom of the tank like the stocker. What do you guys think?
Also it looks like the stock tank has a sump of some sort.
BTW it's a Walbro 450. I plan on running 15-16 psi (around 650 whp) so this should do the trick. 93 octane with SD 80 lb injectors.
You can kind of see the sump thing in there.
Stock pump.
New pump in place.

All wired up and secured.
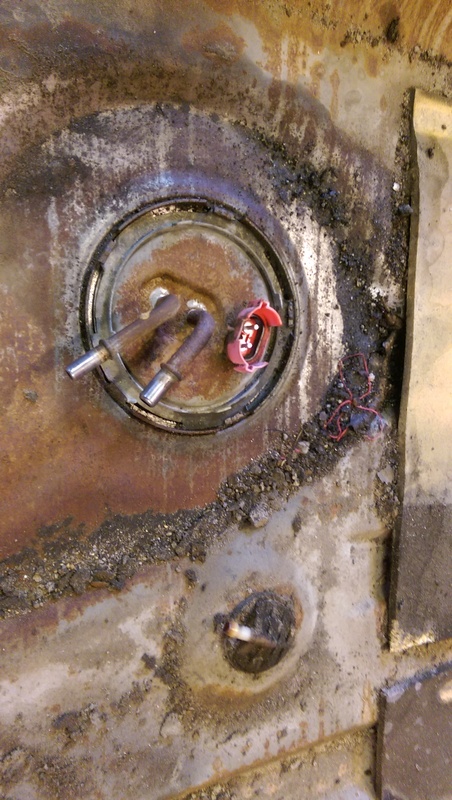
Back in place.
I also did the 4L80E wire swaps at the connectors. Pretty easy job.

Also it looks like the stock tank has a sump of some sort.
BTW it's a Walbro 450. I plan on running 15-16 psi (around 650 whp) so this should do the trick. 93 octane with SD 80 lb injectors.
You can kind of see the sump thing in there.

Stock pump.

New pump in place.

All wired up and secured.

Back in place.

I also did the 4L80E wire swaps at the connectors. Pretty easy job.


Thread Starter
TECH Apprentice
iTrader: (2)
Joined: Nov 2011
Posts: 319
Likes: 0
From: Newport News, VA
So I made some significant progress today I believe. I really didn't expect the transmission to go in as easily it did. The only spot that I can see that needed any persuasion was at the shift mechanism. I believe the cooler lines are going to have plenty of space as well as the trans wiring connector.
I will never install a transmission again with my chest/groin/knees. These things are a godsend.

The only spot that needed attention, albeit quite a bit of it.

Passenger side clearance.
Driver side clearance.
So, since the transmission install went easier than expected, I started looking at places to mount the turbo. Keep in mind this car will be keeping AC. The downpipe is really what has me concerned. Using a 3" pipe, it will not fit between the LS3 manifolds and the frame rail. So I kind of came up with this idea. Running the pipe outside the frame and snake it over the rack and control arm. I know I'm going to have to wrap it and keep a good distance between the pipe and the rack but I think this is going to work. Thoughts?
This is probably going to be where the turbo ends up. It's a tad close to the radiator, but I'm just holding it with my hand so I could probbably move it aft a little bit.
That's it for today's progress. I'd really like to hear you guys' thoughts on piping run and location.
I will never install a transmission again with my chest/groin/knees. These things are a godsend.

The only spot that needed attention, albeit quite a bit of it.

Passenger side clearance.

Driver side clearance.

So, since the transmission install went easier than expected, I started looking at places to mount the turbo. Keep in mind this car will be keeping AC. The downpipe is really what has me concerned. Using a 3" pipe, it will not fit between the LS3 manifolds and the frame rail. So I kind of came up with this idea. Running the pipe outside the frame and snake it over the rack and control arm. I know I'm going to have to wrap it and keep a good distance between the pipe and the rack but I think this is going to work. Thoughts?

This is probably going to be where the turbo ends up. It's a tad close to the radiator, but I'm just holding it with my hand so I could probbably move it aft a little bit.


That's it for today's progress. I'd really like to hear you guys' thoughts on piping run and location.
Thread Starter
TECH Apprentice
iTrader: (2)
Joined: Nov 2011
Posts: 319
Likes: 0
From: Newport News, VA
Thanks for the info. Helps ease my mind running the pipe all through the bay.
Thread Starter
TECH Apprentice
iTrader: (2)
Joined: Nov 2011
Posts: 319
Likes: 0
From: Newport News, VA
Looks good! Like the new alt and ps bracket. You got a link to where you bought it? What belt number did you use and how much longer than stock?
I have a 4" cowl hood so my 5.3 cleared on my 87 firebird. But I had to swap to a 5" PS pulley and do an idler pulley relocation bracket. Had to get a longer belt but like how the billet bracket looks. Might have to spring for this.
I have a 4" cowl hood so my 5.3 cleared on my 87 firebird. But I had to swap to a 5" PS pulley and do an idler pulley relocation bracket. Had to get a longer belt but like how the billet bracket looks. Might have to spring for this.
Thread Starter
TECH Apprentice
iTrader: (2)
Joined: Nov 2011
Posts: 319
Likes: 0
From: Newport News, VA
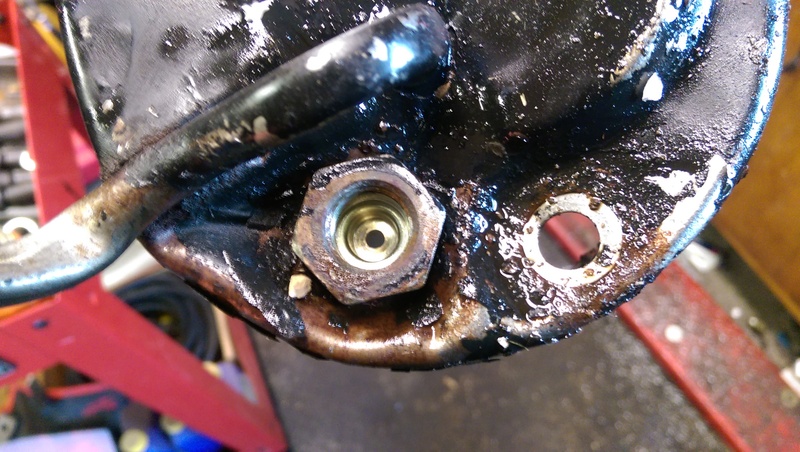
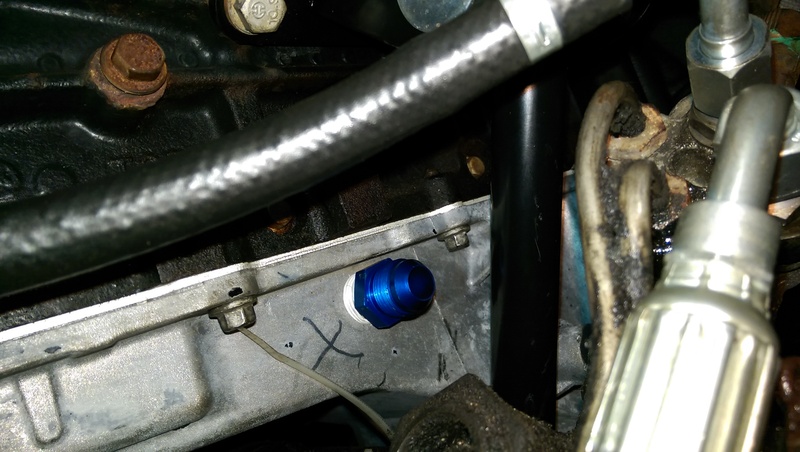
Not a whole lot to update but a little progress. lifted the motor up about 12" and removed the oil pan to drill and tap for the turbo oil drain. Set it back down and that should be the last time it comes out.
The "X" is where I marked it, but there is a support inside the pan right there so I just moved it back an inch. I have a 45� AN adapter that will fit on the fitting perfect.
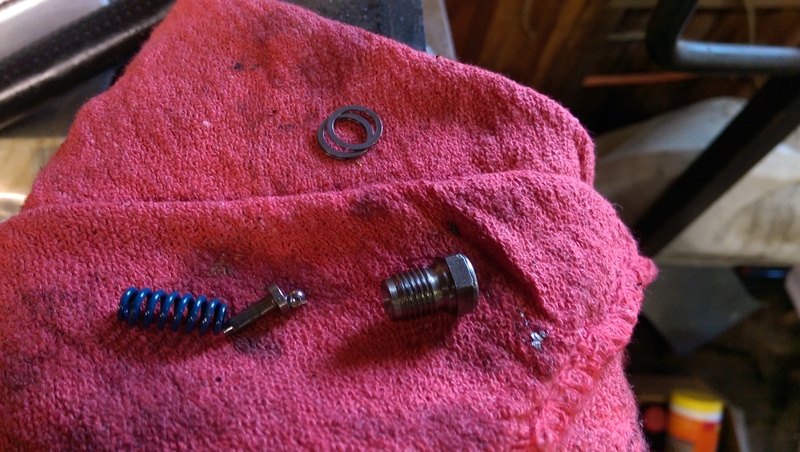
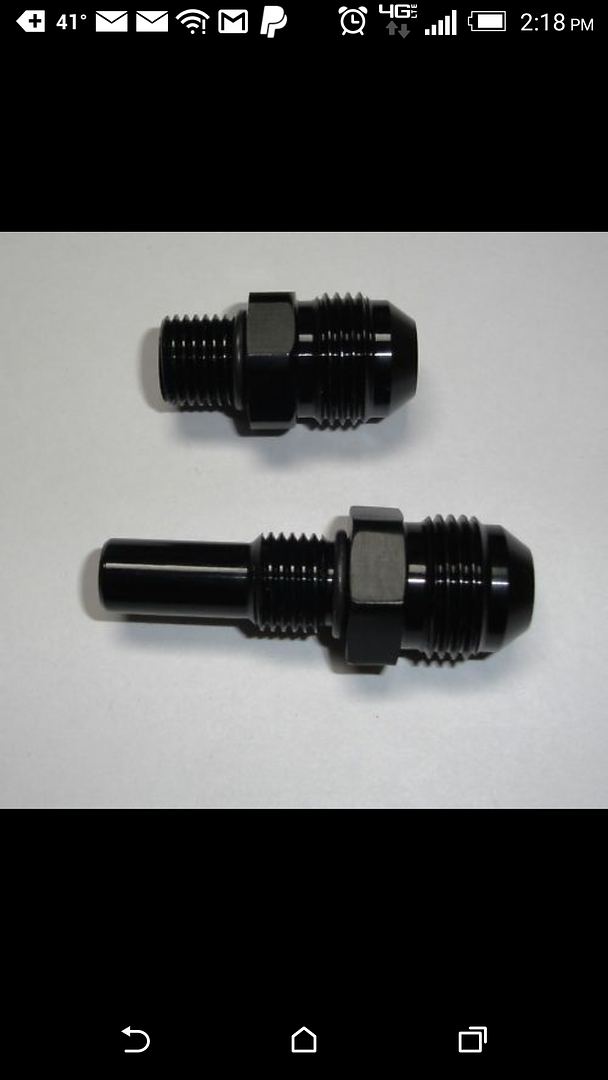
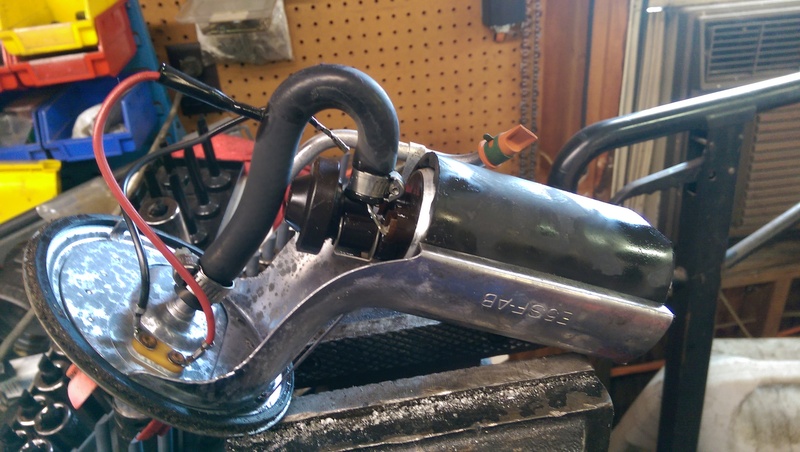
I also installed the Scram Speed PS line adapters. It was a little confusing at first, but I got it all figured out. If you buy this kit, the brass piece goes in the pump, and has to be tapped in place to seat it. Both the aluminum AN adapters go in the rack. The return is larger than the pressure.
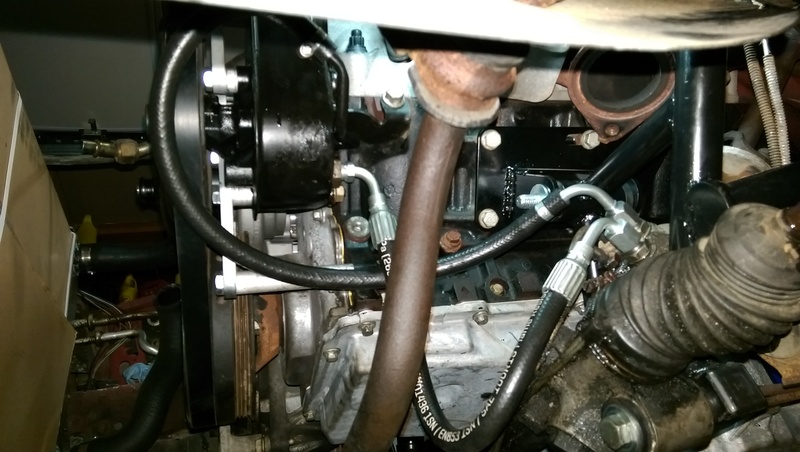
The only major problem so far is that the steering shaft now appears to be about 1.5" too short. It won't go on the rack shaft at all. I don't think the shaft is telescopic, as I've triedd pulling on it pretty hard to no avail. I'll be calling AJE and see if they've heard of this at all since that's the only thing that would have changed the rack position.
The "X" is where I marked it, but there is a support inside the pan right there so I just moved it back an inch. I have a 45� AN adapter that will fit on the fitting perfect.

I also installed the Scram Speed PS line adapters. It was a little confusing at first, but I got it all figured out. If you buy this kit, the brass piece goes in the pump, and has to be tapped in place to seat it. Both the aluminum AN adapters go in the rack. The return is larger than the pressure.

The only major problem so far is that the steering shaft now appears to be about 1.5" too short. It won't go on the rack shaft at all. I don't think the shaft is telescopic, as I've triedd pulling on it pretty hard to no avail. I'll be calling AJE and see if they've heard of this at all since that's the only thing that would have changed the rack position.
Thread Starter
TECH Apprentice
iTrader: (2)
Joined: Nov 2011
Posts: 319
Likes: 0
From: Newport News, VA
Sounds great! I unfortunatley run a 5" dorman PS pulley and have the idler pulley relocated so my lengths would be different. But its good to know in case I dont want to run the idler relocation later. I did to to change the routing of the belt but will have to verify it wouldn't interfere possibly in stock routing.
Thats one of the main deterrents of my future purchase of these. Wish they would make it out of aluminum or at least powder coat them. If I purchased I would then have to send them to be coated which is added cost.