Funkster's 2009 G8 GT
 12-08-2018, 10:22 PM
#1

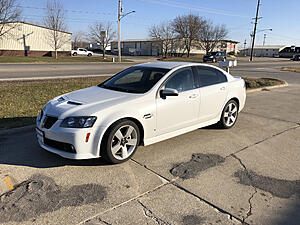
I purchased my G8 on Monday December 3rd 2018. The car was a trade at a local dealership and I stumbled upon it by accident while driving by. I had been looking for one for quite some time and had specific wants. This car actually met and exceeded them. I knew I wanted white with decently low miles, wanted the premium option, but without a sunroof. My plan was to find one and start off easy with a Roto-Fab Intake and a Solo Axle back. This is part of where I lucked out as this car actually had both of those things already. My plans are to build a blower car that I can still put my son in the back of and drive anywhere with some style and comfort. I will go ahead and give the basics.
Car Purchased:
2009 Pontiac G8 GT
Hot White Exterior
Premium/Sport Package
Black/Red Interior
72,240 Miles
Roto-Fab Cold Air Intake
Solo Axle Back
Not one to leave well enough alone I went to my friend's speed shop today and ordered some parts to start off with my build.
ZL1 Torque Converter
American Racing Headers & Midpipe
LS3 Valley Cover/PCV Parts/ Gasket
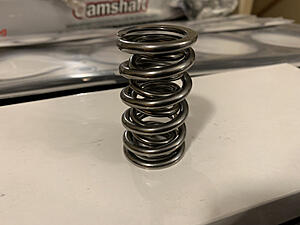
BTR .660 Spring Kit
BTR Stage 3 PDS Cam
Johnson Lifters
LS2 Trays/Chain/Damper/Etc.
Smith Trunion Kit
LS9 Headgaskets
ARP HeadStuds
Melling 10295 Oil Pump
ARP Crank Bolt
Miscellaneous Gaskets & Seals
Once I get everything in I will measure for pushrods and get them ordered up. I will also be ordering some more parts here in the next day or two. Car could stand for some new brakes and I will probably do things like the carrier bearing and driveshaft flex joint while I have the exhaust off. Also eyeballing a set of the Aussie MGT Shocks and King Springs, but I need to do some more research on that first.
Car Purchased:
2009 Pontiac G8 GT
Hot White Exterior
Premium/Sport Package
Black/Red Interior
72,240 Miles
Roto-Fab Cold Air Intake
Solo Axle Back


Not one to leave well enough alone I went to my friend's speed shop today and ordered some parts to start off with my build.
ZL1 Torque Converter
American Racing Headers & Midpipe
LS3 Valley Cover/PCV Parts/ Gasket
BTR .660 Spring Kit
BTR Stage 3 PDS Cam
Johnson Lifters
LS2 Trays/Chain/Damper/Etc.
Smith Trunion Kit
LS9 Headgaskets
ARP HeadStuds
Melling 10295 Oil Pump
ARP Crank Bolt
Miscellaneous Gaskets & Seals
Once I get everything in I will measure for pushrods and get them ordered up. I will also be ordering some more parts here in the next day or two. Car could stand for some new brakes and I will probably do things like the carrier bearing and driveshaft flex joint while I have the exhaust off. Also eyeballing a set of the Aussie MGT Shocks and King Springs, but I need to do some more research on that first.
Last edited by Funkster; 12-08-2018 at 11:24 PM.

 12-13-2018, 06:46 PM
#4
Some of the parts arrived today. Still waiting on the American Racing headers and pipes. I ordered a few more parts as well, but they won't be here for a week or so.
Here is what was waiting at my friend's shop.
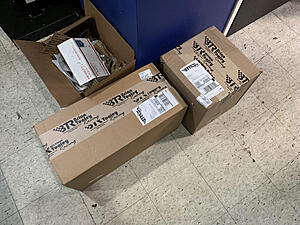
I got the boxes opened up.
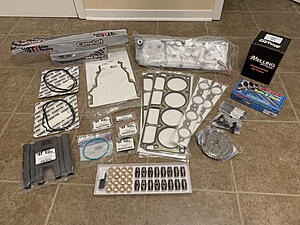
ZL1 Torque Converter

I have seen them several times, but the BTR Springs and Smith Parts are gorgeous.
Here is what was waiting at my friend's shop.

I got the boxes opened up.

ZL1 Torque Converter

I have seen them several times, but the BTR Springs and Smith Parts are gorgeous.

 12-13-2018, 10:36 PM
#5
I had a free night so I wanted to get the rear debadge done. Got started off with just a general wipe down.
Next I grabbed the hair dryer and applied some heat to the badges. Got them all pulled off.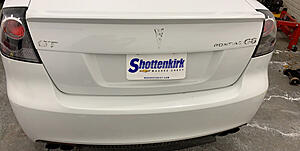
I went over the residue with some adhesive remover to get it all cleaned up.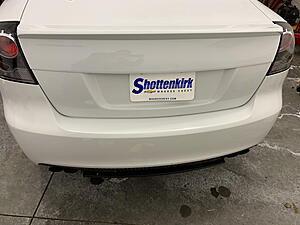
As you can see here to car has been exposed to some rail dust, etc. The car needs a whole clay, but that will have to wait until another night.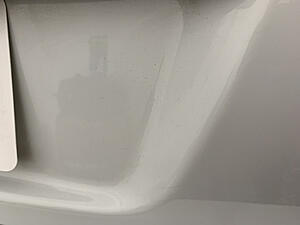
For now I went ahead and clayed the area where the badges were. Here you can see all the contaminants that came off just this small section.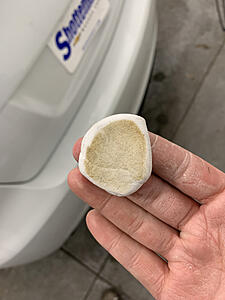
Lastly I put on a coat of wax on the panel I worked and cleaned up.

Next I grabbed the hair dryer and applied some heat to the badges. Got them all pulled off.

I went over the residue with some adhesive remover to get it all cleaned up.

As you can see here to car has been exposed to some rail dust, etc. The car needs a whole clay, but that will have to wait until another night.

For now I went ahead and clayed the area where the badges were. Here you can see all the contaminants that came off just this small section.

Lastly I put on a coat of wax on the panel I worked and cleaned up.
 12-17-2018, 09:12 PM
#7
Had a few more parts arrive today with plenty still on the way. 
Sharkfin Antenna and a set of the Technico engine mounts.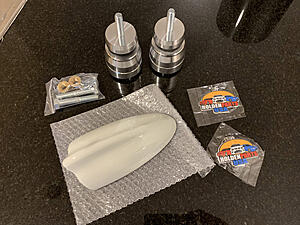
These mounts are quite well built and should hold up to anything I will be able to put them through.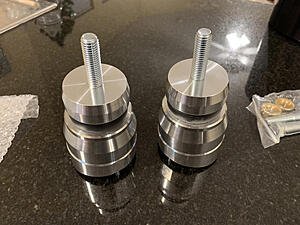
Also, as an added bonus I got a couple keychains from Holden Parts. Very cool.
Sharkfin Antenna and a set of the Technico engine mounts.

These mounts are quite well built and should hold up to anything I will be able to put them through.

Also, as an added bonus I got a couple keychains from Holden Parts. Very cool.

Trending Topics
12-18-2018, 09:54 PM
#11
These mounts are not solid. They have a rubber bushing between them. I also daily drove a vehicle with solid engine mounts for a few years. I'll give these a go and if they end up being an issue, I will swap them out. I appreciate you sharing your experience though.
12-24-2018, 10:15 PM
#13
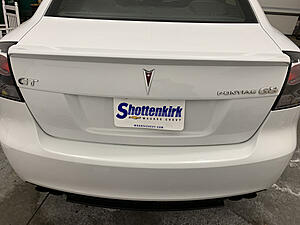
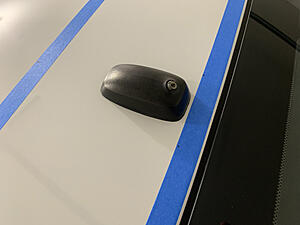
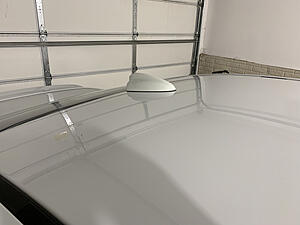
Nothing too exciting, but I had some free time today and figured I would get a small project done so I went ahead and installed the Sharkfin Antenna. I know you guys have seen this a million times, but parts installed are parts installed, haha.
Started off with the big stocker.
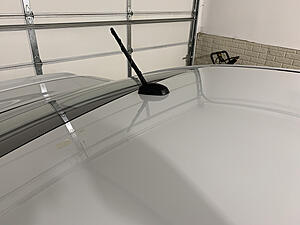
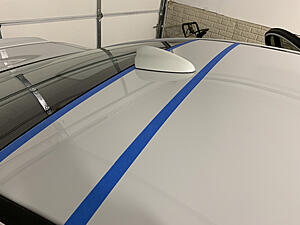
I got the actual antenna removed and put some tape down. I marked the center of the top strip to point the fin at. I subtracted the width of the antenna from the bottom tape total width and then marked where the edges would be.
With everything lined up I removed the gasket, bolted it up and put it in place.
Removed all the tape and got the area cleaned up.
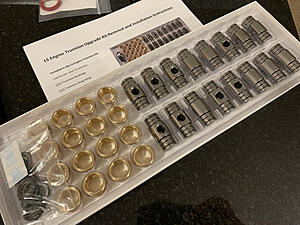
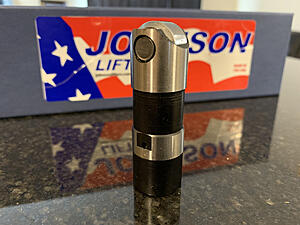
I also had a few more parts delivered. Johnson lifters finally arrived. They are a pretty nice looking piece.
DBA Rotors and Hawk Pads came in as well.

I have ran several sets of these rotors and never get tired of how well put together they are.

Started off with the big stocker.

I got the actual antenna removed and put some tape down. I marked the center of the top strip to point the fin at. I subtracted the width of the antenna from the bottom tape total width and then marked where the edges would be.

With everything lined up I removed the gasket, bolted it up and put it in place.

Removed all the tape and got the area cleaned up.

I also had a few more parts delivered. Johnson lifters finally arrived. They are a pretty nice looking piece.

DBA Rotors and Hawk Pads came in as well.

I have ran several sets of these rotors and never get tired of how well put together they are.

 01-01-2019, 11:34 AM
#16
Finally got the last few parts I was waiting on. I did grab pics of the major ones.
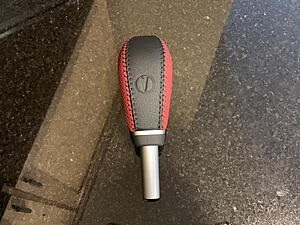
Red/Black Shift **** to match interior:
Adjustable Timing Set:

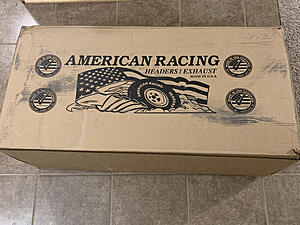
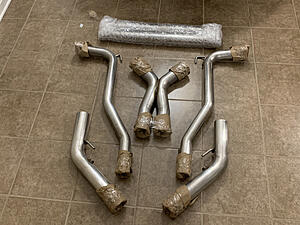
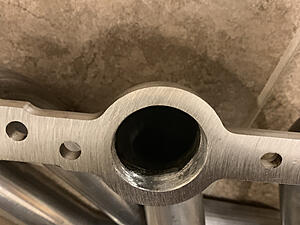
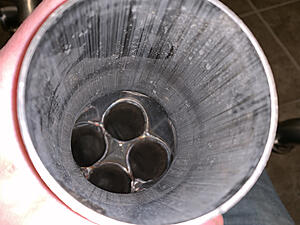
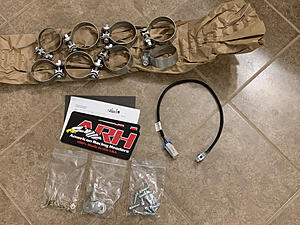
American Racing Headers with Mid-Pipe Setup:
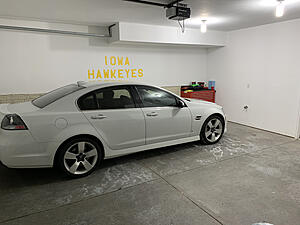
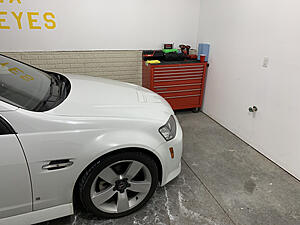
I also got the car pulled in and set up with my tools to get started on the upgrades. I am going to get started here in a couple of hours since I have the day off. (Ignore the Hawkeyes Logo, was there when I moved in and I don't really care about college football )
)
Red/Black Shift **** to match interior:

Adjustable Timing Set:

American Racing Headers with Mid-Pipe Setup:


I also got the car pulled in and set up with my tools to get started on the upgrades. I am going to get started here in a couple of hours since I have the day off. (Ignore the Hawkeyes Logo, was there when I moved in and I don't really care about college football
)
 01-02-2019, 06:34 PM
#17
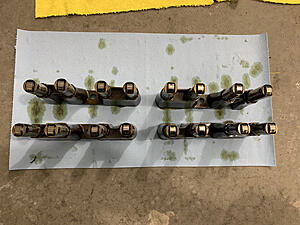
Got started around mid-afternoon yesterday. Made some decent progress, it will be a few days before I have much else for updates though. I have my son for the next few nights and so I won't be doing garage work. Here is where we are so far.
A quick shot before the work starts.

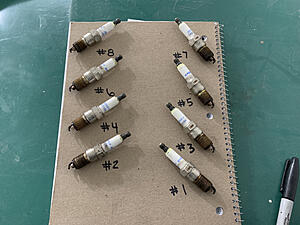
Pulled the plugs out, nothing special here.
After a couple of hours this is where I am at.
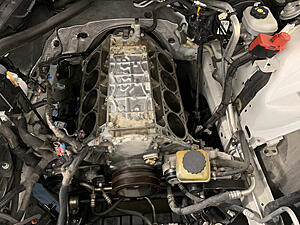
Lifters and cam all looks great.
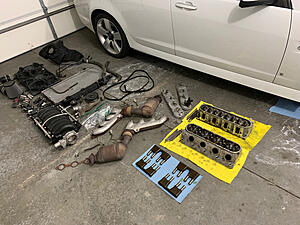
A picture of the parts that have been removed so far.
As one of the upsides of being single is the tear down in the living room. A little warmer, plus there is a TV to watch. haha.
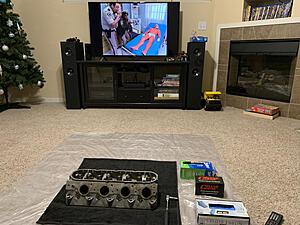
About halfway through taking the heads apart.
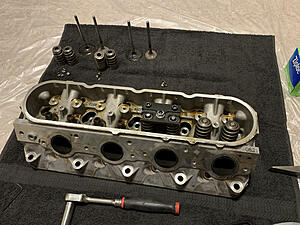
This is where the pictures stop for the time being. Heads are torn down and are soaking in cleaner currently.
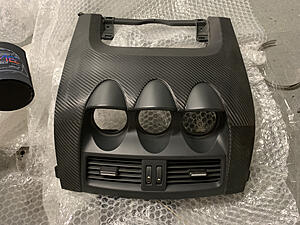
I also received the Holden center gauge swap parts today. The top panel was wrapped in a carbon fiber vinyl so I will probably get that all removed and cleaned up tonight after my son goes to bed. A trio of AEM gauges is on the way to fill the panel as well.
A quick shot before the work starts.

Pulled the plugs out, nothing special here.

After a couple of hours this is where I am at.

Lifters and cam all looks great.

A picture of the parts that have been removed so far.

As one of the upsides of being single is the tear down in the living room. A little warmer, plus there is a TV to watch. haha.

About halfway through taking the heads apart.

This is where the pictures stop for the time being. Heads are torn down and are soaking in cleaner currently.
I also received the Holden center gauge swap parts today. The top panel was wrapped in a carbon fiber vinyl so I will probably get that all removed and cleaned up tonight after my son goes to bed. A trio of AEM gauges is on the way to fill the panel as well.

 01-05-2019, 09:30 PM
#19
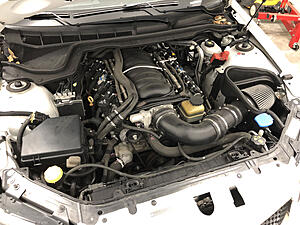
I got the interior parts all cleaned up. The vinyl came off without issue. Unfortunately I forgot to grab pictures, so I'll have to do that later. In the mean time I got a few quick moments to work in the garage yesterday so I got just a couple things done. As the engine comes apart more and more I can't believe how clean it is. Granted I am used to 150,000 mile engines, but at 70,000+ I am surprised to see how clean off oil staining, carbon, etc. everything is. Anyway, on to the new stuff.
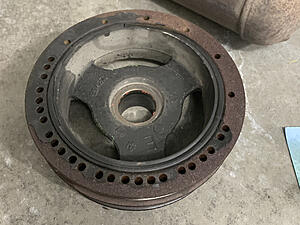
I got the balancer pulled off and quite frankly it looks like ****. I have been debating going ahead with the CTS-V accessories and parts to save some work in the future with the blower. I also have been looking at the ATI and Innovator's West balancer setups.
Above I talked about how clean the engine is. This is kind of what I mean. I pulled the front cover off and immediately took this picture of the inside.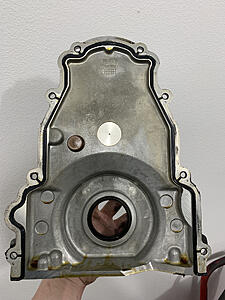
Engine with cover off. I will have to drop the oil pan on my next free night and get the rest of the parts off.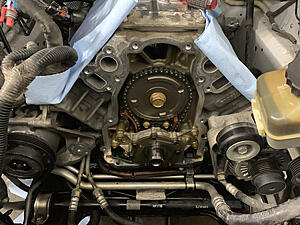
Oh ya...and these showed up.
I got the balancer pulled off and quite frankly it looks like ****. I have been debating going ahead with the CTS-V accessories and parts to save some work in the future with the blower. I also have been looking at the ATI and Innovator's West balancer setups.

Above I talked about how clean the engine is. This is kind of what I mean. I pulled the front cover off and immediately took this picture of the inside.

Engine with cover off. I will have to drop the oil pan on my next free night and get the rest of the parts off.

Oh ya...and these showed up.
