


Another aps build happening now..
I also got the lingenfelter two step right before they changed it a bit to include think nitrous retard function. Now want to sell the current one and get that one since am going with a small shot of spray..small being 75 to 100 most likely.
It may not be as necessary in an auto with good stall but two step is still handy for consistency. I thought there was also an antilag type of thing in the lingenfelter two step as well.
I am used to having two step, antilag and no lift to shift features in software on my dsm cars. Seems ls1 have to do it in hardware unless big stuff 3 or something has it.
Anyway was out and about picking up still more little parts that are needed mostly more little supplies but did have to order a few more parts from gm and to my surprise they actually had the parts in stock! Prices are double US but time is more important than price right now.
I guess found out my callies crank has plug in back already..? at least thats what someone said I can't really see it as its on the engine stand right now. I need of course new pilot bushing and went with the truck one..
Should be seeing some progress on the 408 by end of today with some pics. I am hoping to take my oil pan and oil cooler fitting to buddies speed shop tonite and get that stuff drilled and tapped. Also think should let him blow out my afr 225s just to be safe as it says too in their instructions.
Targeting having engine together by end tommorrow. Not sure how easy it is to strip down the old kmember and transfer stuff over to it..looks fairly basic just not sure if need tool to take out tie rod ?? I have various hammers but no pickle fork guess could buy or rent one if need be. What I really need is a few buddies with some days off to really help me get this thing done. I am lucky that have lots of spare time to work on the car right now. Thats why think it could be done in a week or so.
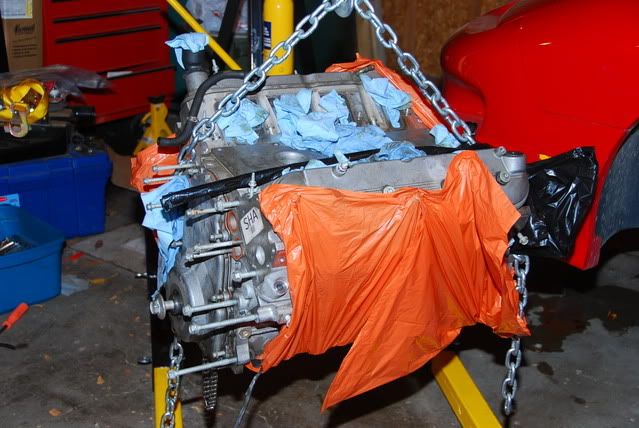
Started as said on 408 build...
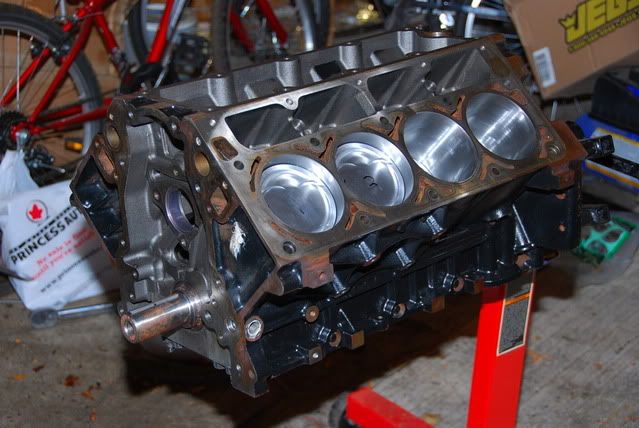
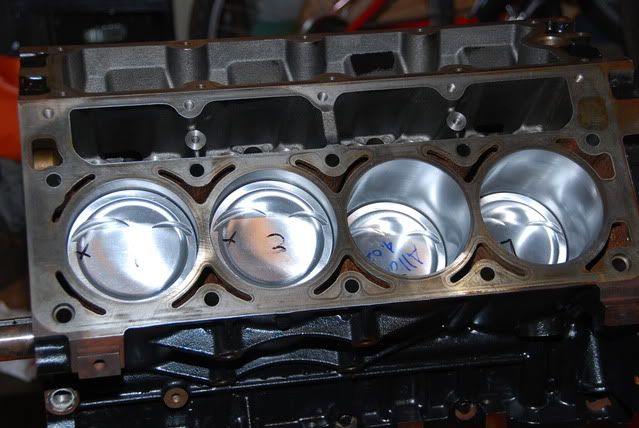
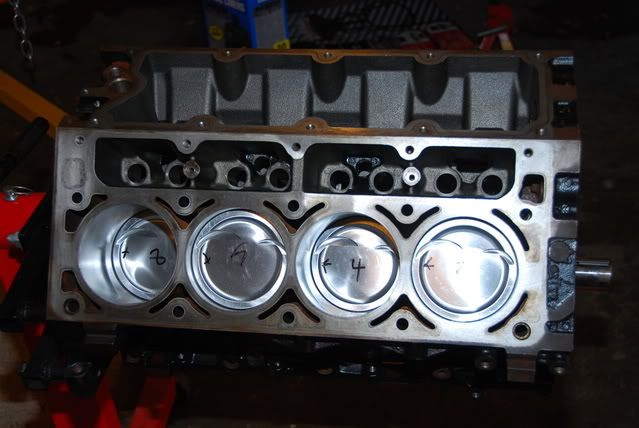
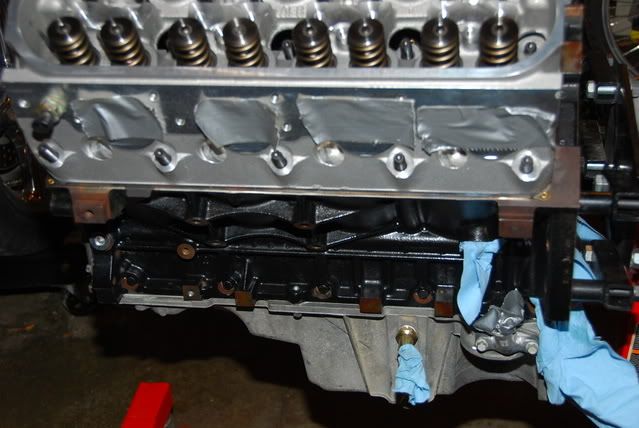
here are pics.bit of rust in coolant passages and unpainted parts is normal this is an iron block and 2003 not brand new block.And that is not rust in the cylinders just the lighting or some reflection in the one pic..
Didn't get too much done today. But bolted on crank sensor, installed head dowel pins, installed some oil galley plugs. The builders installed that critical little under the front cover plug and they put keys in the crank and there is rear plug in callies crank too.So just have to remember that barbell plug in back of the block now.
Might do the cam tonite still. See how it goes. Also have to go buy new 1/2 inch torque wrench now. My old one is fubar think used it as a breaker bar one too many times...OOPS.. At least my inch pound one is ok.
Ok..update.they gave me new torque wrench..lifetime warranty..yeah baby yeah! nicer than last one..I like Canadian Tire now!
First pic is just my now stripped down 346. Following pics are 408 before started on it. Course not much to see yet..Give it a day or so..
Last edited by MY99TAWS6; Oct 14, 2008 at 11:49 PM.
Not sure how easy it is to strip down the old kmember and transfer stuff over to it..looks fairly basic just not sure if need tool to take out tie rod ?? I have various hammers but no pickle fork guess could buy or rent one if need be. What I really need is a few buddies with some days off to really help me get this thing done. I am lucky that have lots of spare time to work on the car right now. Thats why think it could be done in a week or so.
Ok guys question....said would have a few. Did you guys that did your own install just drill the oil pan and the oil cooler housing with a normal drill and tap it yourself? I have never tapped anything is it easy? Do you have to put anything on tap..cutting compound or something?
Should I take my pan and cooler fitting to machine shop to do this. I don't need a drill press? Just maybe a punch..I wonder why they put the hole so close to that angle ridge on the passenger side. You would think they could have went down a bit lower to miss the ridge but guess it don't matter assume the drill goes right thru as the oil pan is pretty soft and easy to drill right?
Should I take my pan and cooler fitting to machine shop to do this. I don't need a drill press? Just maybe a punch..I wonder why they put the hole so close to that angle ridge on the passenger side. You would think they could have went down a bit lower to miss the ridge but guess it don't matter assume the drill goes right thru as the oil pan is pretty soft and easy to drill right?
Its really easy to just drill and tap it yourself. Any hand drill will work fine. Just hold the drill straight when doing it, same with tapping. Just put some used motor oil on it when tapping and you good to go.
Update so far today.lingenfelter gt7 cam installed with slp double chain and sprockets ,next slp oil pump install. Will have to check front cover for clearancing. That slp double roller was tough to get on there.
Now either have to drill and tap pan myself today or take it to some shop or maybe install lifters heads and rockers and pushrods first then oil pan and front and back covers after. Guess it don't really matter .Main thing is not to tip engine upside down if you don't have pushrods and rockers on there.I would think the lifters would come out of their bores and require head removal???
Now either have to drill and tap pan myself today or take it to some shop or maybe install lifters heads and rockers and pushrods first then oil pan and front and back covers after. Guess it don't really matter .Main thing is not to tip engine upside down if you don't have pushrods and rockers on there.I would think the lifters would come out of their bores and require head removal???
Ok..took pan to speed shop buddy .It was still easier to let him do it he has all the tools,bits ,taps..that one oil pan tap is huge..so is the drill..
He put them in nice,threaded a nice distance..etc. All good. Pic possibly later. Installed slp oil pump also and when at shop had him blow out like AFR recommends the heads just in case...they were clean clean but just in case..
So progress today a bit slower than was hoping but at least a lot of important stuff got done. See nothing now preventing assembling the rest of the engine. I have everything here,every gasket,etc.
Oh todays tips..I used my old ls1 oilpump to lightly tap with my rubber hammer the lower sprocket on and the oil pump drive thing, I also reversed it sometimes. I was going to take old sprockets off my old engine but this worked easier.
Tommorrow should really see it starting to look like an engine.. And those afr 225 are sure pretty things.
Oh another tip. we moved the passenger side oil return down slightly so didn't have to cut into the angled ridge of the oil pan. I don't think it will hur anything it maybe got moved 1/8 of an inch or 1/4.
Last edited by MY99TAWS6; Oct 15, 2008 at 06:26 PM.
LS1 Tech Stories
The Best V8 Stories One Small Block at Time

6 Common C5 Corvette Failures and What's Involved In Repairing Them
Pouria Savadkouei
Retro Modern Bandit Pontiac Trans AM Comes With Burt Reynolds' Autograph
Verdad Gallardo
Top 10 Greatest Cadillac V Series Performance Models Ever, Ranked
Pouria Savadkouei
Top 10 Most Powerful Chevy Trucks Ever Made!

Hennessey's New Supercharged Silverado ZR2 Has 700 HP
Verdad Gallardo
Coachbuilt N2A Anteros Is an LS2-Powered C6 Corvette In Italian Clothes
Verdad Gallardo
Awesome K5 Blazer Restomod Comes With C7 Corvette Power
Verdad Gallardo
10 Camaros You Should Never Buy

10 LS Engine Myths That Refuse to Die
Verdad Gallardo Ok todays labor..
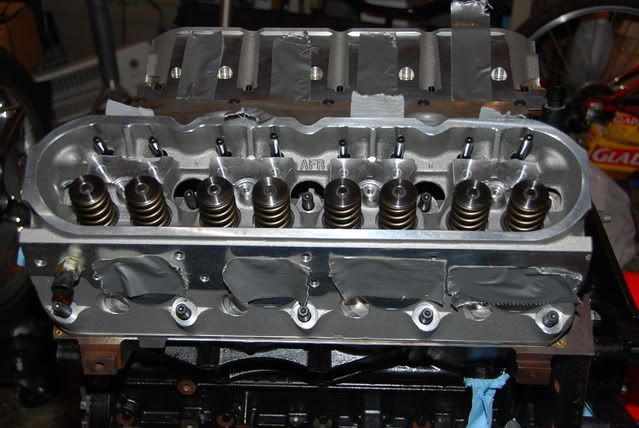
Its a bit deceptive. I put in my ls7 lifters today and my arp headstuds and ls7 head gaskets. Those of course are the very pretty afr 225s.
Put back valley cover and few little things. Was going to put motor mounts on but realize have to muck with the factory mount. Not a huge deal but a bit annoying.
Realize also that my 408 has the coolant plug on the drivers side back of block not in front so not sure if the turbo coolant line to turbo will be too long or too short or no big deal.
Also was trying to figure out how to torque my knock sensors to like 15ft pounds when my 1/2 inch only goes to like 20 ft pounds and my 3.8 goes to 15 of course but dont fit the 1/2 inch sockets that are needed for the knock sensor. Its a fairly big one.
Do they make converter from 3/8 to 1/2 sockets? I of course know they have 1/2 to 3/8.
The oil pan was drilled and tapped yesterday as was the oil filter feed.
Things are going along not too badly but as always a bit slower than had hoped.
Just keep slugging away I guess.

Ok just got back from buddies speed shop. Those motor mounts were a bit annoying to do.
Todays tips ..we had to overdrill the side with the three rivets. Just one size bigger to get rid of the rivets. He took off the other side two rivets with air chisel then drilled out the holes. He didn't use a torch. he took off the residue after simply prying out the rubber mounts with a wire wheel . Worked good. then put them in vice and zapped them in with air ratchet. Done..
Very handy to have access to this guys shop for most of tweaking .Too bad don't have access to his overhead hoists..!
Going to be working hard today working away. Should see more visible progress by end of day. Going to be assembling the turbos soon inside the house I think. They are works of art right? LOL Somehow don't think the wife will think so..
Last edited by MY99TAWS6; Oct 17, 2008 at 04:45 PM.
Ok started working on bolting on the heads after bolted down the valley cover.
First thing that was a bit scary is on the inner bolts on the afr 225s you have a very big window that you can see thru guess for oil return? Still was pretty worried might drop a washer or nut from my arp studs into that window even though engine is on the stand.
I figured out a trick to prevent this..I put allen key in the stud and put washer or nut onto it so it pretty much is captured and has to go on straight.If washer or nut did fall into the engine it would be a nightmare.
Now starting to tighten the head studs but had a bit of problem.. seems my sockets are not up to the task they must be just too cheap. So what is exact size of the sockets that fit on the arp head studs both little and bit. Are the arp nuts metric?
Should I get an impact socket ,of course use it on my torque wrench. 80 or so pounds of torque is pretty up there for cheap sockets.
More updates..
I torqued the heads down with 16mm normal socket for the 11mm studs and 13mm for the 8mm studs..didn't buy an impact.
Did bunch of little stuff as well. Motor mounts are on. Coolant tube ,coolant rear block offs and gaskets are on. Oil pressure sensor on, cam sensor on. Aps water coolant line on drivers side on but a bit worried its left of the motor mount at back side not in front like on the 346..anyone else running a 408 with the aps please tell me if you could still use the same water line as before? Hopefully..
Now went to put fitting on the passenger side the aps fitting with copper washer. Do I torque this to 15 pounds like stock head plugs or do I just tighten it..not sure what to do with crush washers. Any experts on them want to chime in. Aps gives no torque don't think for that fitting and don't think any torque specs for the turbo water line fittings which also use crush washers or the bolts that use copper washers..maybe aps can chime in here ..another reason they need a tech support email department or tech line.Tech line is not too useful with the time change though unless its 24 hour or something.
OK PETER IF YOU ARE READING MY THREAD please tell me what to torque that copper washer fittings to in our kits. Some guys are getting leaks maybe because they are overtightening or under ..
Course anyone that knows the crush washer thing can chime in too. Need to know this asap.
Ok think mostly clean up now tonite and hit it early tommorrow again. I think for pychological benefit going to put on my fast intake next. And likely fuel rails and the injectors. Sort of finish up the top end.
Then down to oil pan..still not sure if need to just shim the windage tray to clear the arp main studs don't really want to dent it but also have to make sure the pickup has think minimum 1/4 inch? from pan floor so car dont' starve?
Still also think have to do slight grindage on front timing cover. Try kids plastercine trick I think on that one.
So not too bad a day..messing on the mounts took longer than expected but such is life.
It gets done when it gets done.
Oh having some trouble with the oil galley plugs. If try to torque them to 44 ft pounds they strip.they are gm plugs and pretty sure my new torque wrench is dead on.
No idea why. Even had trouble taking off the ones on my 346 need to steal one but they are rounding on me. I am using an 8mm socket?? So no idea whats up. Maybe that 44 is excessive? Maybe 20 or 30 might be better?
I guess no pics today. Area needs cleanup super bad and ashamed to show my messy garage. I think wait a day or so and then show engine pretty much complete waiting to go on k member and get trans hooked on.
Oh do you guys think I can intall the aps on the engine from below with engine on kmember. I know its very tight fit.
Not really many other options.Guess could install 408 on old k member then drop kmember and hang turbos but figured easier to just install turbos on engine and put in bmr kmember and drop car on engine and trans? So is it doable that way..think Kelliente did it that way?
Can I use sealant and copper washer on fittings like the one into the head??? sealant wouldn't work on turbo parts too much heat I think.. so thats why they use gaskets or crush washers..
sorry i was talking about something else my bad
for the turbos i ran it down tight and after i drove it for some time i went back and went over every thing really good
i do this to the whole car every oil change or so
for the turbos i ran it down tight and after i drove it for some time i went back and went over every thing really good
i do this to the whole car every oil change or so
Well posted about some questions and problems with the way the cooling lines go into the right hand turbo on our f body kits only. Please refer to that thread it has pics.
As for todays progress got a bit done when enlisted the help of a really good local guy. Guy runs 9s at local track and knows his stuff. Not an ls1 but a big block vega.
We checked wipe on my new yella terras, did the shim test..have ordered a pushrod checker and will check those when it shows up.
Have to grind a bit on my front cover or on the pump a bit. Just slight interference.
Have to mess with windage tray a bit as well do to arp main studs.
After that button up the bottom end and just intake to do and then can start putting accessories on and prep engine and trans for reinstall. Assuming figure out my aps coolant line questions.
I am tempted to move the cooling lines to the same holes the lhs one uses. It seems that the other holes will restrict flow thru the turbos and how can that be a good thing?