Rear Cable Drive Belt Drive Fuel Pump Installed
 12-06-2015, 02:31 PM
#1
On The Tree
Thread Starter
I did a Waterman Cable driven, rear mount, belt drive, MagnaFuel Outlaw 750 fuel pump setup on my 98 Boosted LQ9 (LS1 type) Camaro. Wanted to do a quick write-up on it here as it can be very confusing and overwhelming when you start looking into it.
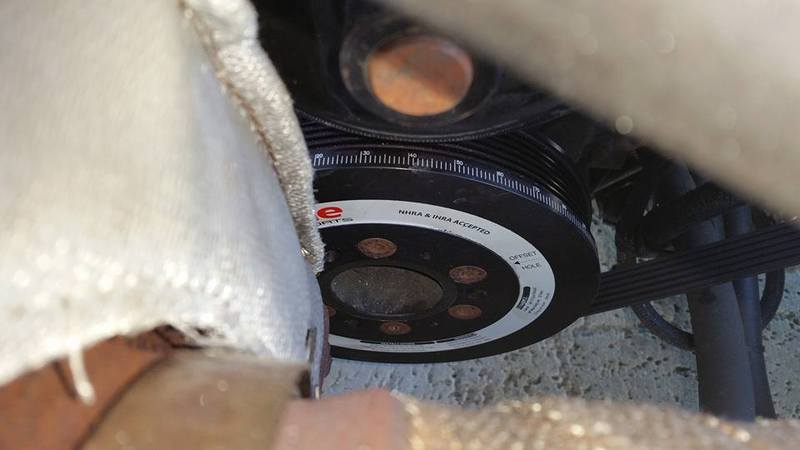
The first challenge that I had was with space out in front of the balancer in order to attach a mandrel to the front.
This would be the easy way.
Here is a Mandrel with cog pulley all in one pictured above.
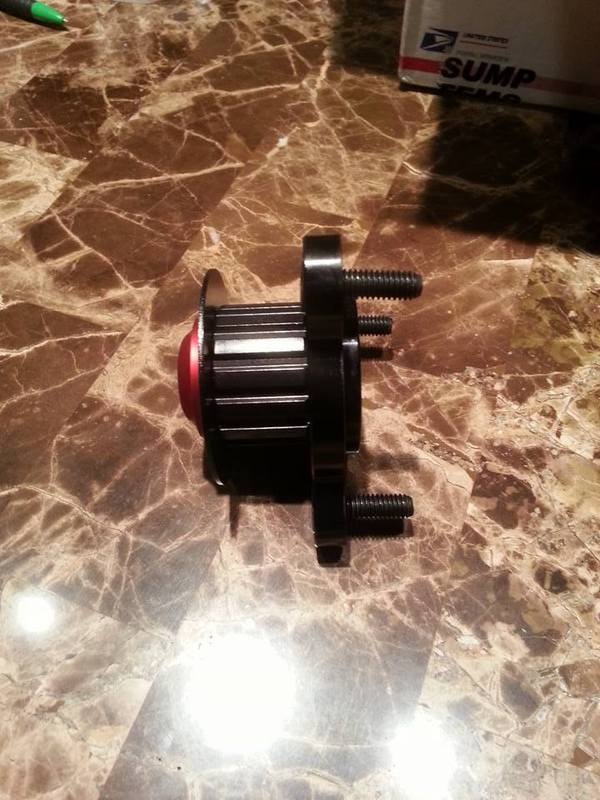
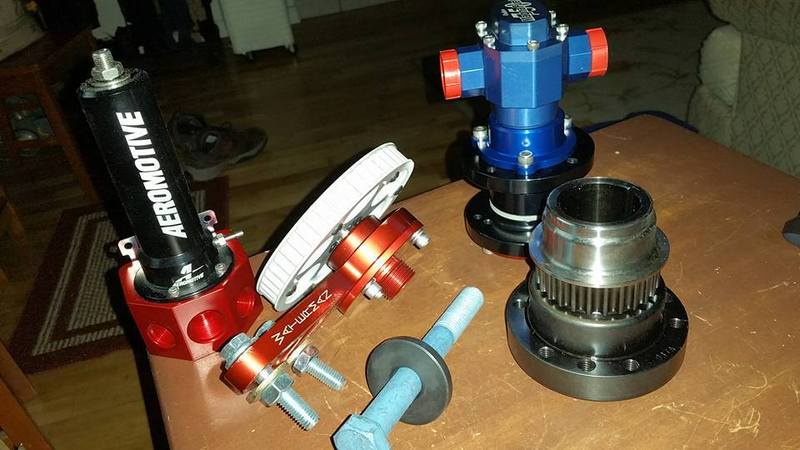
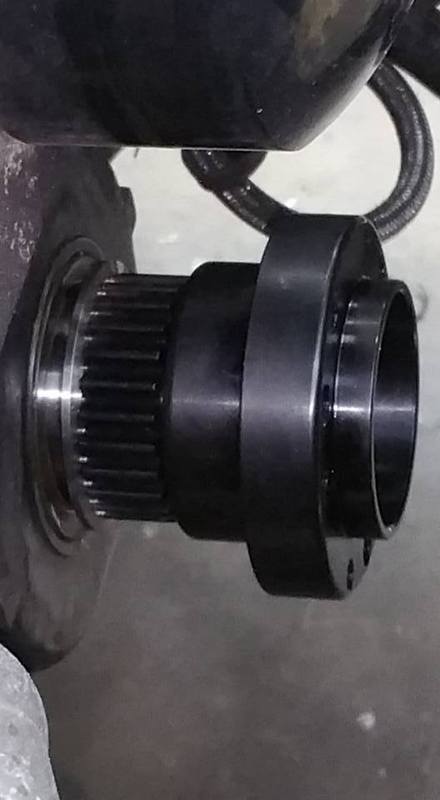
In looking around I stumbled across this hub from ATI with the cog machined into the back where I have plenty of space. The outer shell must be removed from the old ATI Damper if switching over like I did. If not, you can buy it complete from ATI with the Bolt and Washer. The standard length LS1 crank bolt does not work with this hub.
The bolt is like 1.5 inches longer. ARP does not make one in this length. I called.

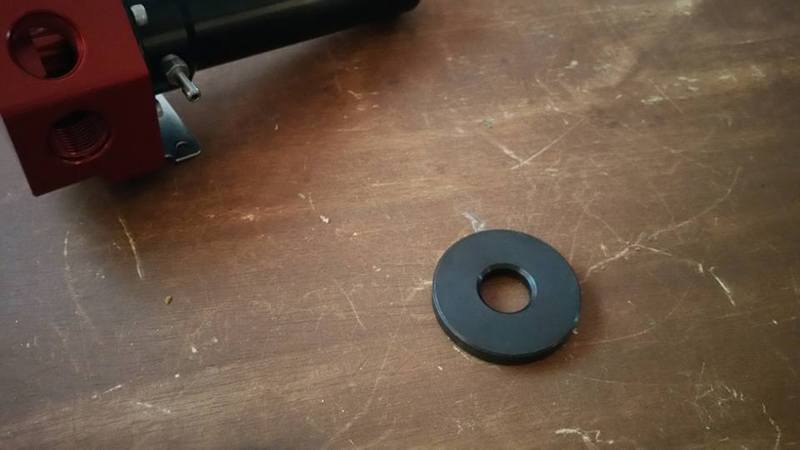
Gotta have that $30 washer that was not included with the $40 bolt.
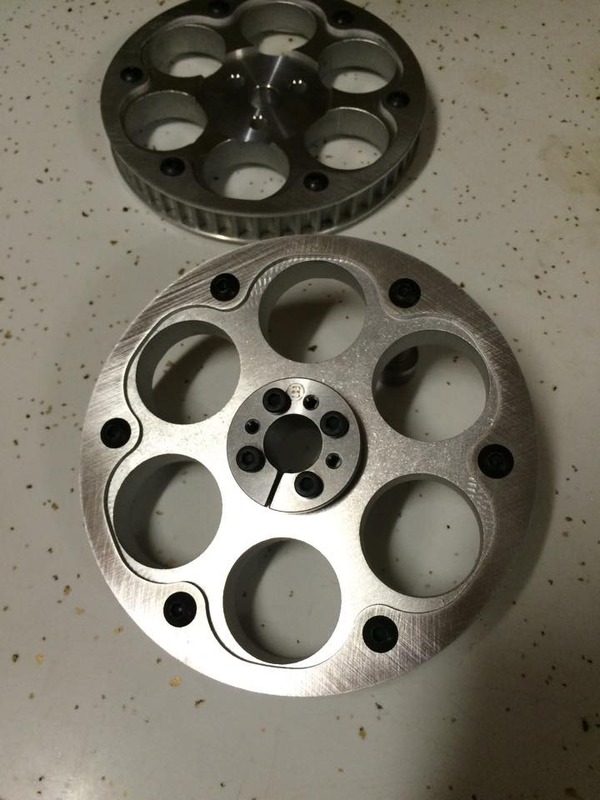
OK, so next you need the correct style and size pulley. I turned to Robert Ette from AEI CNC for that. The pumps want to be driven at 50% crank speed.
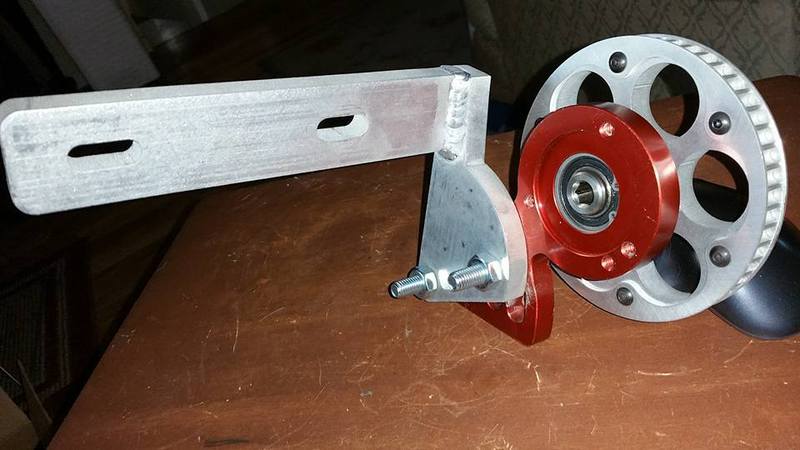
Next you need the drive bracket that holds the pulley. I was fortunate enough to get a slightly bent hand me down from my buddy Steve Smith which I took to my Metal Experts, LLC buddy David Huggins to get flat.

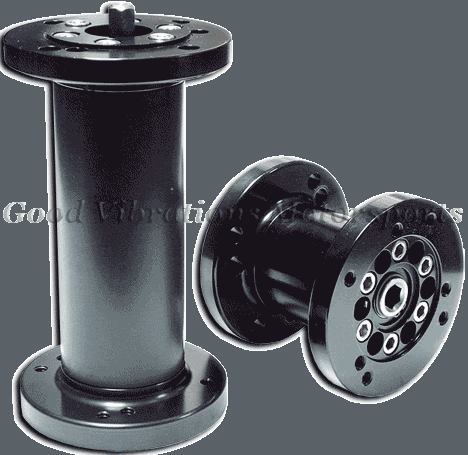
Here is an Enderle version of the same thing more or less.
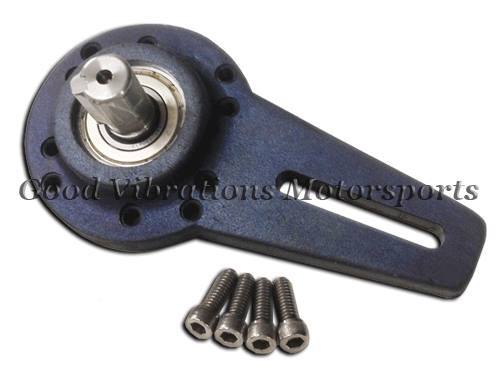
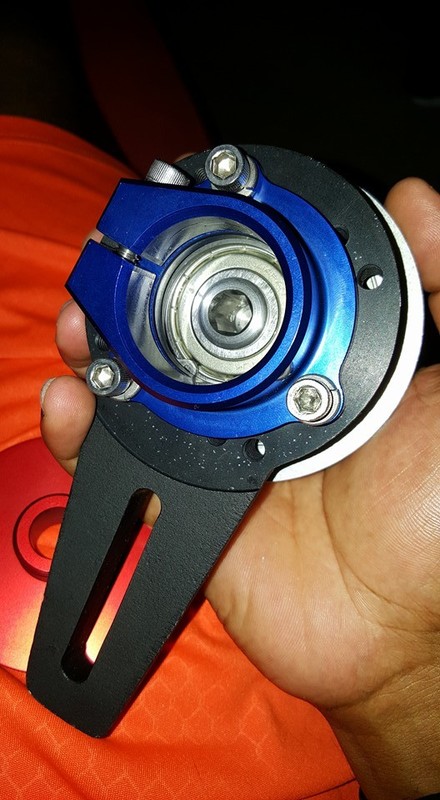
This is the back with the female hex that the pump shaft would slide into or in my case, the Waterman Cable. That blue flange typically comes with the pump and attaches it to the drive bracket.
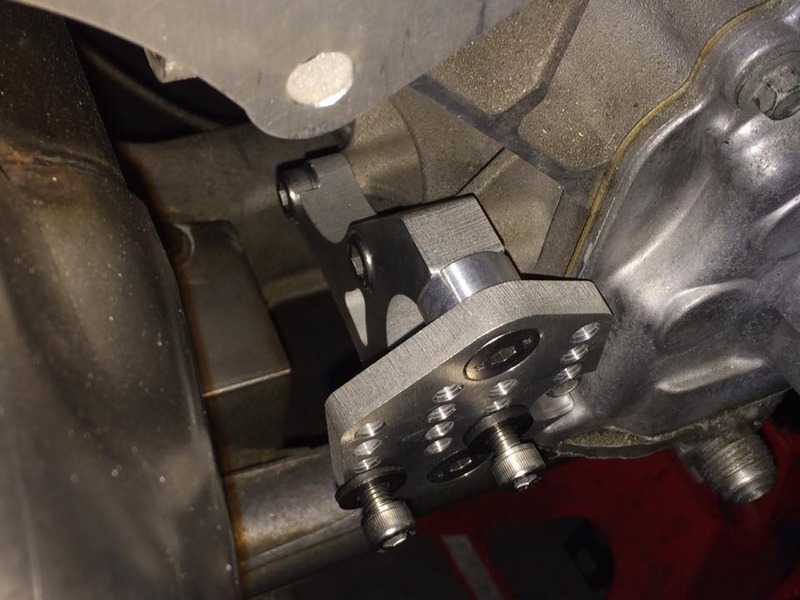
Next you need to attach the drive bracket to the engine. AEI, Mightymouse Solutions and others make these for the LS type motors. Here is the AEI bracket. David Childress please feel free to post pics of yours as well.
The first challenge that I had was with space out in front of the balancer in order to attach a mandrel to the front.
This would be the easy way.
Here is a Mandrel with cog pulley all in one pictured above.
In looking around I stumbled across this hub from ATI with the cog machined into the back where I have plenty of space. The outer shell must be removed from the old ATI Damper if switching over like I did. If not, you can buy it complete from ATI with the Bolt and Washer. The standard length LS1 crank bolt does not work with this hub.
The bolt is like 1.5 inches longer. ARP does not make one in this length. I called.
Gotta have that $30 washer that was not included with the $40 bolt.
OK, so next you need the correct style and size pulley. I turned to Robert Ette from AEI CNC for that. The pumps want to be driven at 50% crank speed.
Next you need the drive bracket that holds the pulley. I was fortunate enough to get a slightly bent hand me down from my buddy Steve Smith which I took to my Metal Experts, LLC buddy David Huggins to get flat.
Here is an Enderle version of the same thing more or less.
This is the back with the female hex that the pump shaft would slide into or in my case, the Waterman Cable. That blue flange typically comes with the pump and attaches it to the drive bracket.
Next you need to attach the drive bracket to the engine. AEI, Mightymouse Solutions and others make these for the LS type motors. Here is the AEI bracket. David Childress please feel free to post pics of yours as well.
 12-06-2015, 02:32 PM
#2
On The Tree
Thread Starter
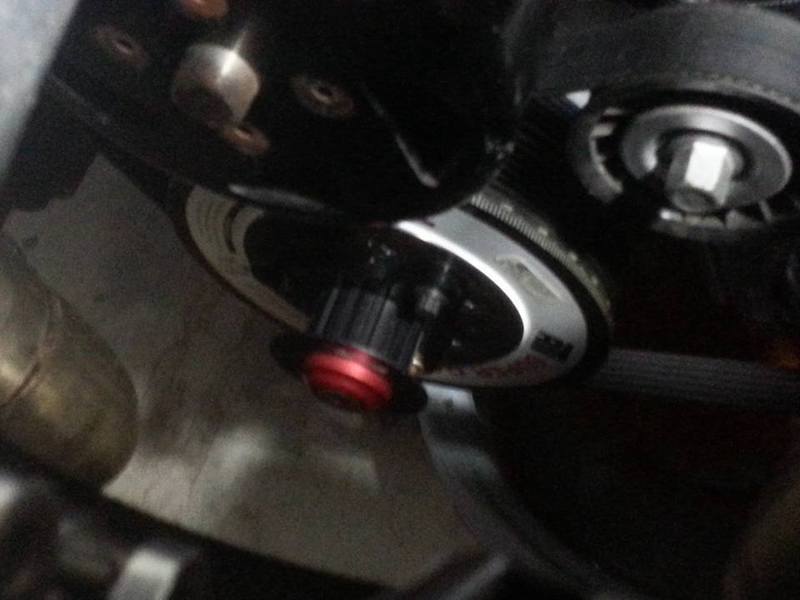
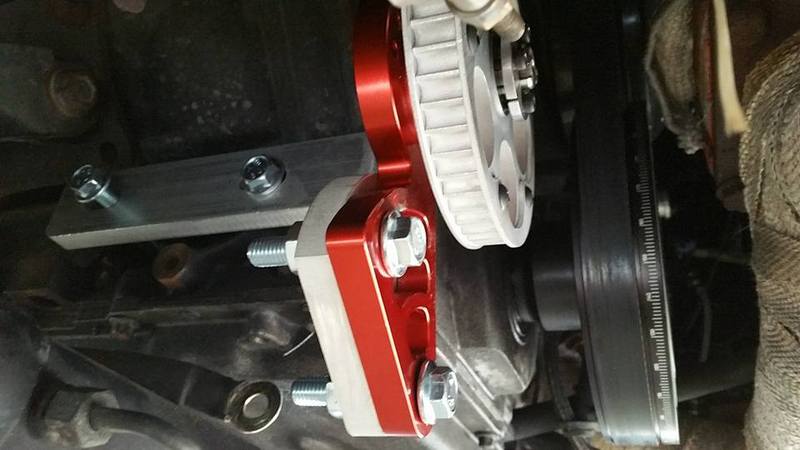
Here is a setup mounted with the AEI.

I opted to make my own with the help of Metal Experts, LLC.
So that's the front in a nutshell. There are some stumbling points here. First, there is an Aeromotive pump that does not use a drive bracket and has the shaft for the pulley right on it. That shaft is a smaller diameter than the standard used by all the rest. Again, All the rest use a hex drive that goes into the back of the pulley drive bracket.
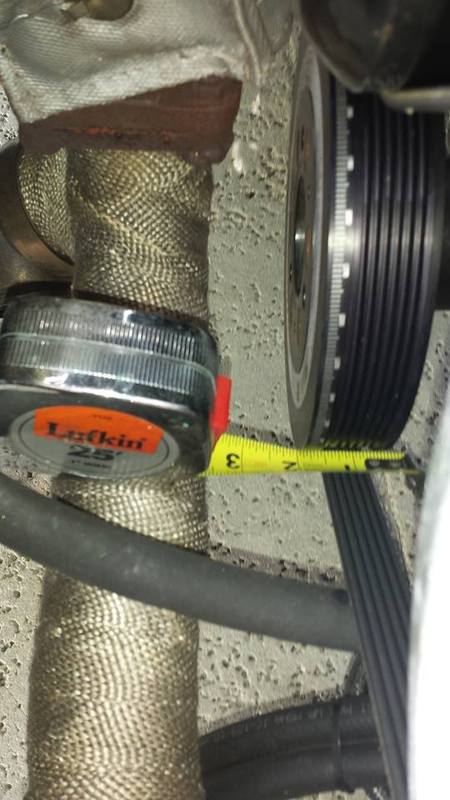
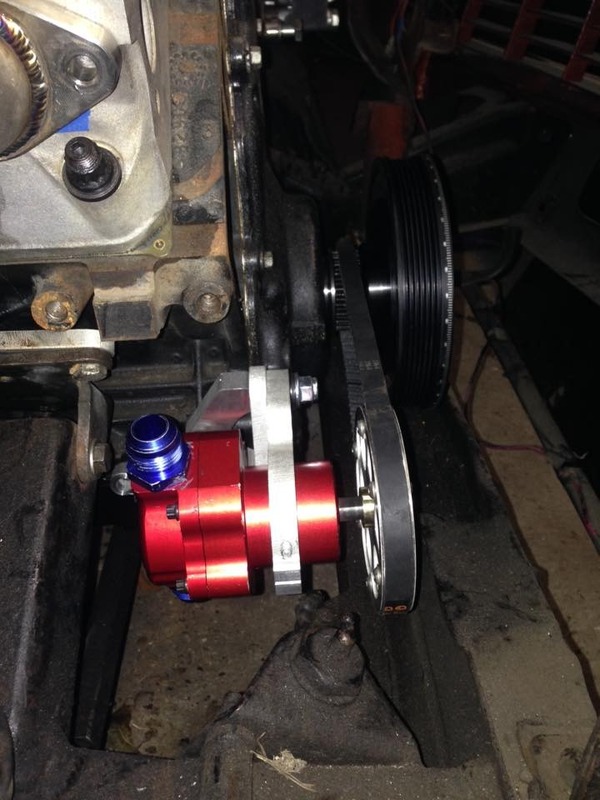
Once the engine bracket is in place and holding the pully drive bracket and your ATI cogged hub or mandrel with crank pulley are installed, you can measure for the belt and get that coming.

On to the back. Because this is a rear mount setup, it adds a little complexity. The Waterman Cable is hex male on both ends.
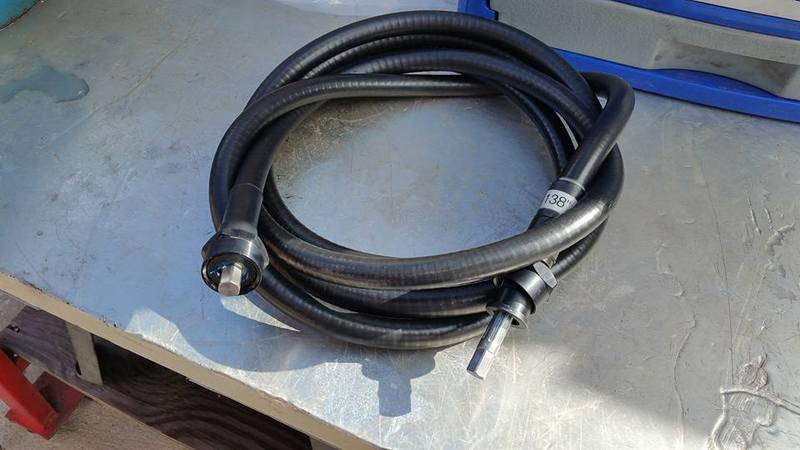
You have a female hex up front already and just require the 3 bolt flange from Waterman with the male threaded ends to attach the cable.

But in the rear, the pump is male hex. So you need a coupler. The coupler must be supported though. The easiest way to do this is to get the complete kit from Waterman for the cable. I did not know this until after I had embarked in an other direction as the information that I originally received from Waterman was either misunderstood by myself or the guy that I spoke to. This bracket setup receives the male hex and allows the cable to screw right on the other side plus give you a mounting option.
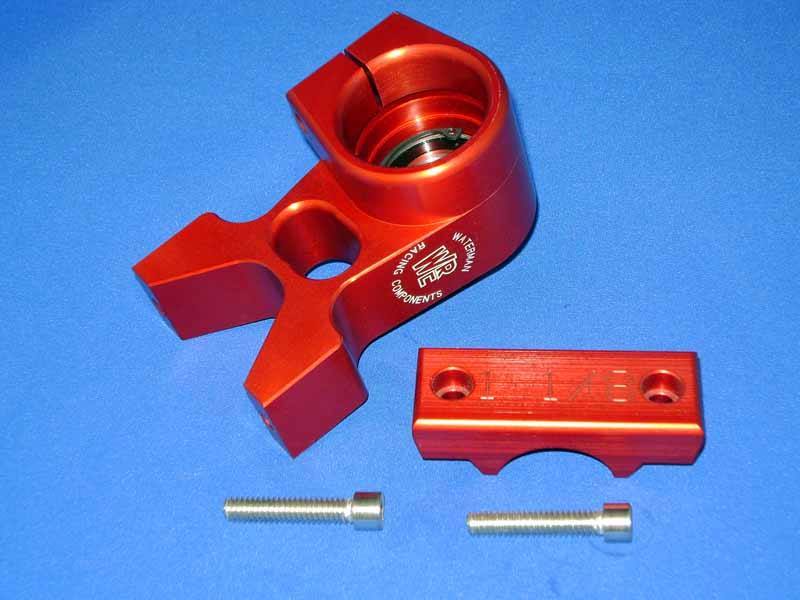
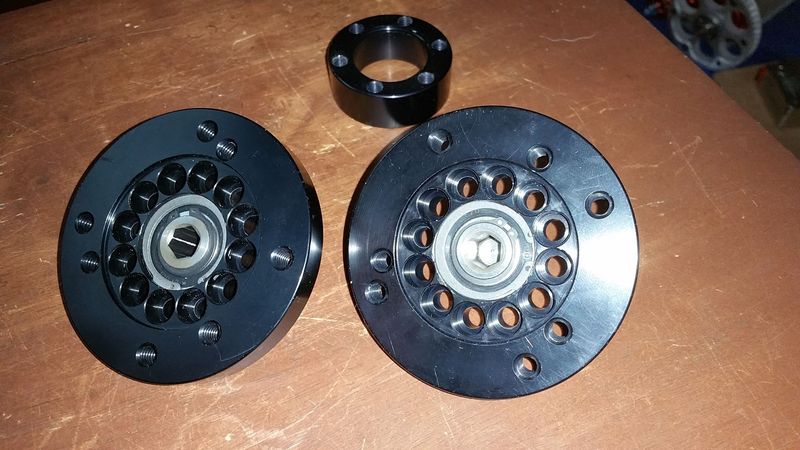
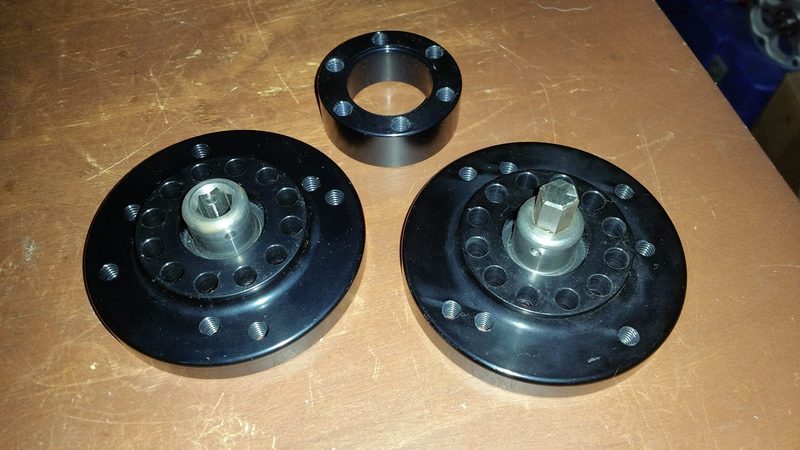
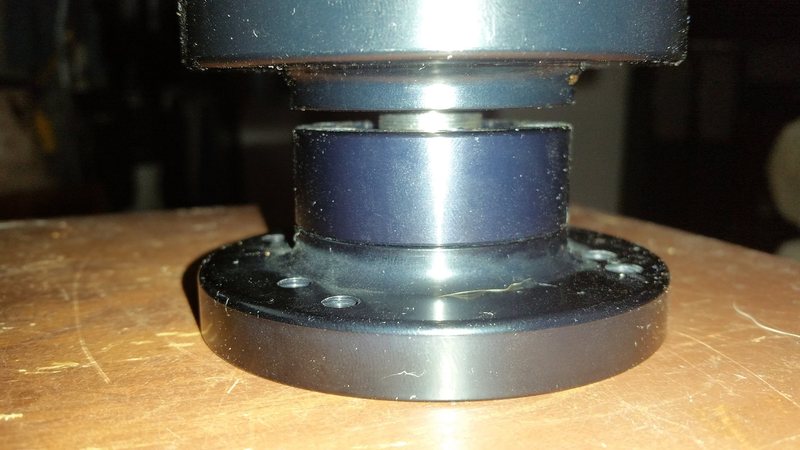
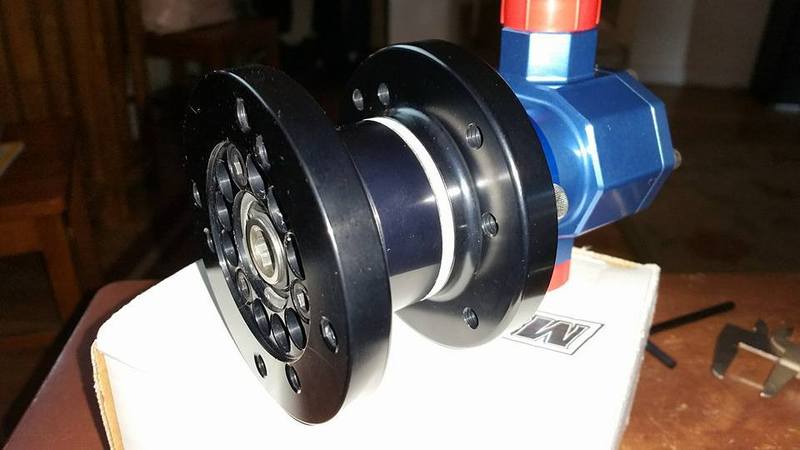
I got a bit more involved in my solution and went with 2 bearing points. I basically converted an Enderle hex extension.......
....into a coupler by buying the pieces and doing some slight modifications.
 [/URL]
Slight hiccup here.
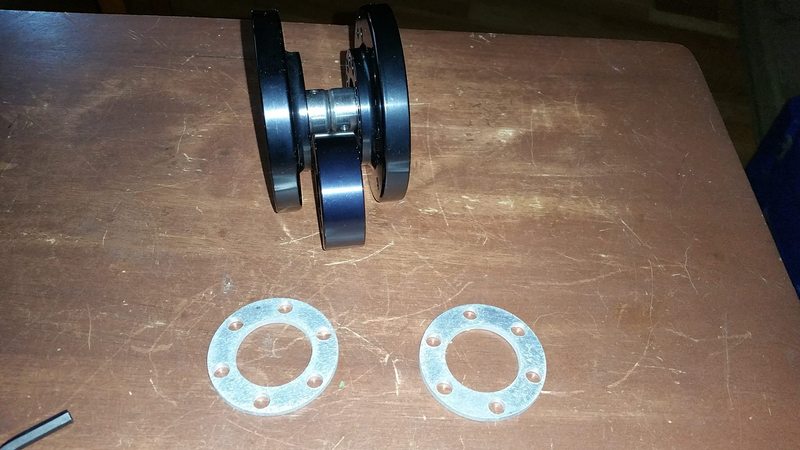
couple shims
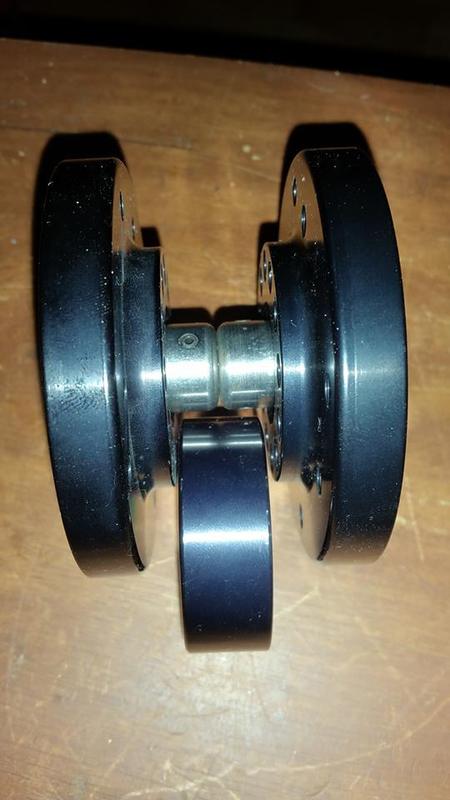
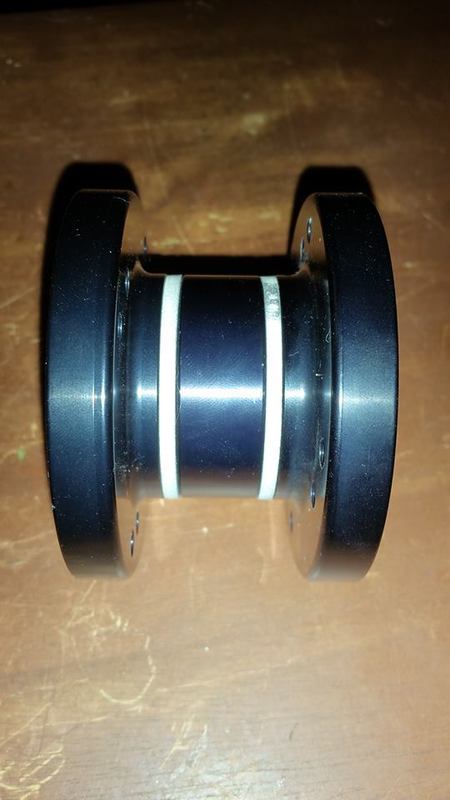
Tadda
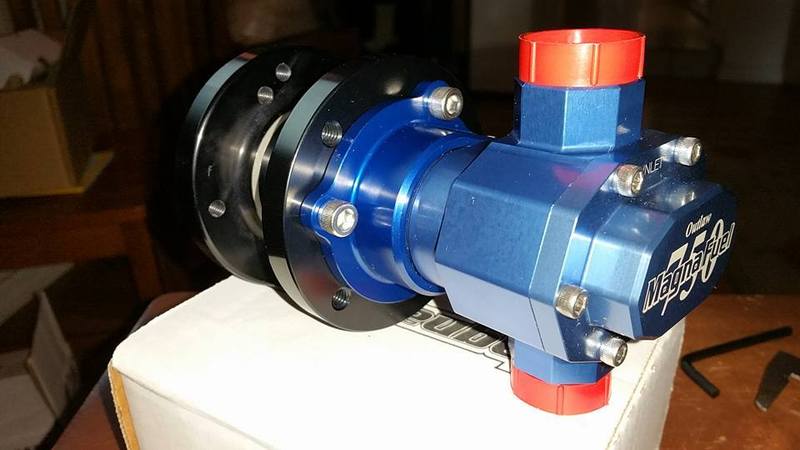
On the pump
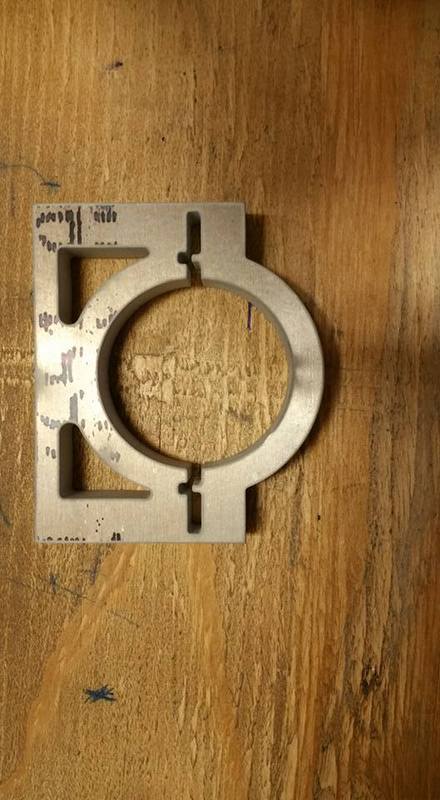
Still had to come up with a mounting solution so cute this on the waterjet. DXF Creations & Vector Services

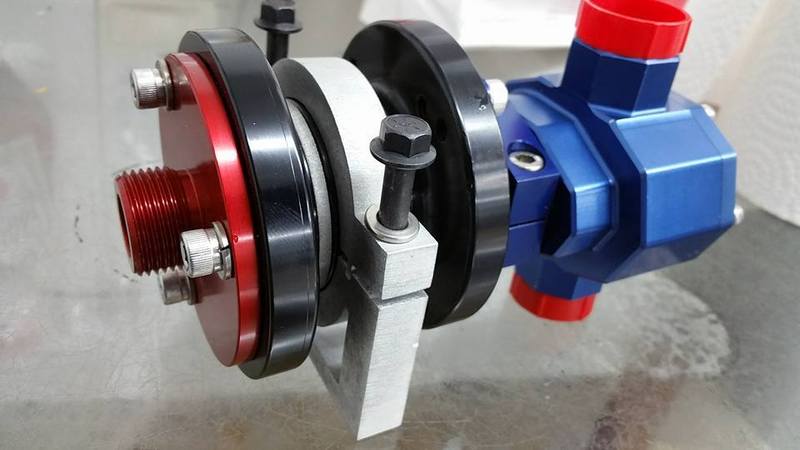
Finished product
Pump mounted and cable screwed in.
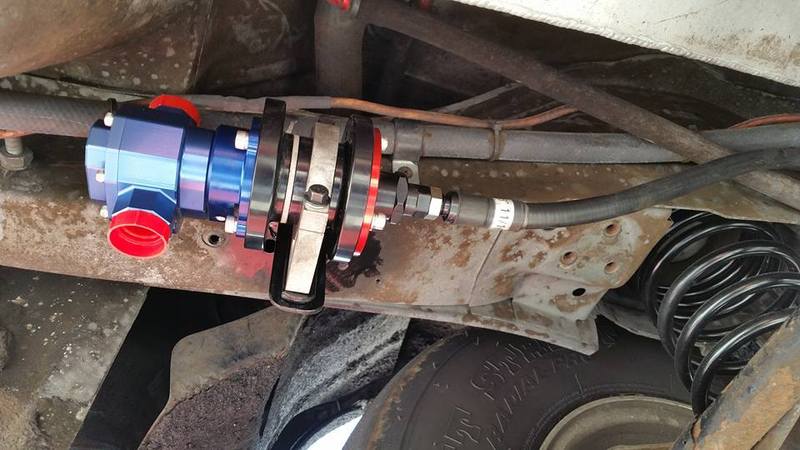
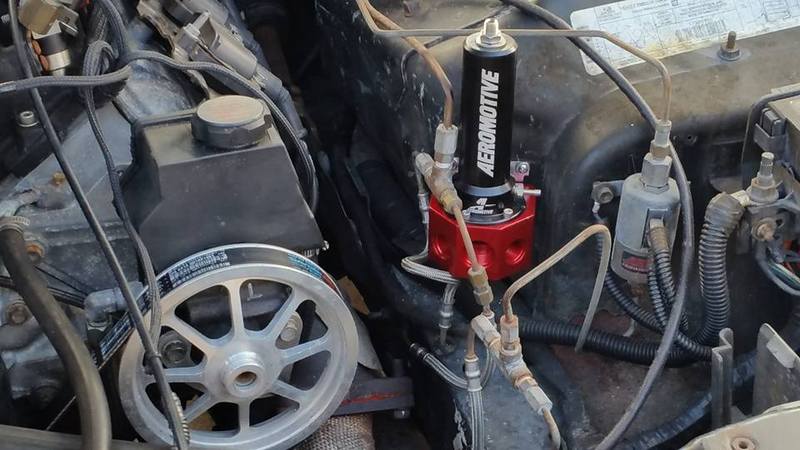
I didn't get a chance to get some shots with the plumbing installed. Hopefully there is a break in the rain tomorrow to get some more pics. Also found a spot for the foot long regulator. These belt driven pumps put out big volume. Mine is rated 7 gpm. That's enough to support 2500 hp on the e85 that I'm running. So you have to use a regulator rated for the volume. This Aeromotive reg is good for 13 gpm.
Here's a video of very first totally cold start with the belt/cable setup. This is without any real tuning besides what I did to get it running initially the other day. No cranks prior to this video in 72 hrs. No check valves.
I opted to make my own with the help of Metal Experts, LLC.
So that's the front in a nutshell. There are some stumbling points here. First, there is an Aeromotive pump that does not use a drive bracket and has the shaft for the pulley right on it. That shaft is a smaller diameter than the standard used by all the rest. Again, All the rest use a hex drive that goes into the back of the pulley drive bracket.
Once the engine bracket is in place and holding the pully drive bracket and your ATI cogged hub or mandrel with crank pulley are installed, you can measure for the belt and get that coming.
On to the back. Because this is a rear mount setup, it adds a little complexity. The Waterman Cable is hex male on both ends.
You have a female hex up front already and just require the 3 bolt flange from Waterman with the male threaded ends to attach the cable.
But in the rear, the pump is male hex. So you need a coupler. The coupler must be supported though. The easiest way to do this is to get the complete kit from Waterman for the cable. I did not know this until after I had embarked in an other direction as the information that I originally received from Waterman was either misunderstood by myself or the guy that I spoke to. This bracket setup receives the male hex and allows the cable to screw right on the other side plus give you a mounting option.
I got a bit more involved in my solution and went with 2 bearing points. I basically converted an Enderle hex extension.......
....into a coupler by buying the pieces and doing some slight modifications.
[/URL]Slight hiccup here.
couple shims
Tadda
On the pump
Still had to come up with a mounting solution so cute this on the waterjet. DXF Creations & Vector Services
Finished product
Pump mounted and cable screwed in.
I didn't get a chance to get some shots with the plumbing installed. Hopefully there is a break in the rain tomorrow to get some more pics. Also found a spot for the foot long regulator. These belt driven pumps put out big volume. Mine is rated 7 gpm. That's enough to support 2500 hp on the e85 that I'm running. So you have to use a regulator rated for the volume. This Aeromotive reg is good for 13 gpm.
Here's a video of very first totally cold start with the belt/cable setup. This is without any real tuning besides what I did to get it running initially the other day. No cranks prior to this video in 72 hrs. No check valves.
