When you click on links to various merchants on this site and make a purchase, this can result in this site earning a commission. Affiliate programs and affiliations include, but are not limited to, the eBay Partner Network.
So recently someone backed in to my driver side door. I found one same color which was not easy that will fit on my car but it is a Manuel window door mine is Power I need to know the steps to switch over and make it power as well any informtion would be be grateful thanks in advance.
Please post your question in to a new thread in this section and you can get some answers. It is more involved and different from the topic of this particular thread.
Looking at the door, it's 2 o'clock on the driver's side and 10 o'clock on the passenger side:
^This is almost how it would look if the driver's side door skin wasn't there, except this whole image should be rotated so the motor end is pointing to around 2 o'clock.
I'm assuming you're image window is completely up?
I thought from over 30 hours reseach that driver wire connection is pointed 2 o'clock I've been fighting this dam thing for going on 3 hours that's on top of the research.
I can't get all the holes lined up, I can get the small provided bolt inserted into the bottom hole but then the one directly upward is a little low and can't even see a possiable 3rd hole I'm about to rebolt it in w/ the bottom then use a self tapper on the top I ca barely shove a self tapper though the top hole then the 3rd where I can't come close to a hole just self tap though whatever.
I started a thread in paint and body I thought those guy's did doors would know motors, maybe I should move here
I think where I'm messing up is starting w/ bottom hole it's the easiest to access here's what I have I call bottom hole #1
doors #1
motors #1
please tell me I'm using correct holes in motor the mushroom part of revit is still on old motor so I use same holes unsuccessfully.
will this motor fit either driver or pass. door?
thanks for advice
please tell me I'm using correct holes in motor the mushroom part of revit is still on old motor so I use same holes unsuccessfully.
will this motor fit either driver or pass. door?
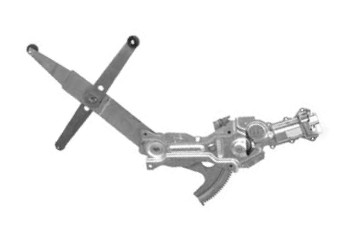
It looks like the cases of your motor are brand new. The rivets won't fit through these new holes and you'll need to ream them out with a drill bit before install. (If you pop out that mushroom and test fit with drill bits - or check some of the other holes, I trust you will find the ones on the new motors are just a little bit small. (Back in the day, when I was changing motors every other month, this was part of the standard procedure.)
^ I think a lot of people don't come across this because they bolt in. I'm happy to see some riveting!
I have a 24' Starcraft that are are built just down the road from you very popular at the great lakes so I'm very familiar w/ aluminum revito w/ steel shanks anyway I use the large like 2 ' handled revitoer that would require reaming out the fiberglass sure would be not loosening w/ revitos right now it's bolted in for first dry run then come back and locknut them w/ premotex.
the motor can go in only one way correct? I've manged to wiggle the dam thing in. the window will roll up & down however the front of the window seams to nose dive right at the top I have to grab the window and pull upward for a complete shut. also this ACT motor is weak probablly half the strenght of the OEM.
this is a second hand door swap the seller told me the cars body only had 20K miles. maybe the regulator needs adjusting.
thanks again for adjust
^ Yes, the holes on the motor should only line up one way. If I remember correctly, the holes in the regulator are sized for a 3/16" rivet. (You should be able to use a hand pop-riverter for this.) Wither way, I'd also ream the motor holes to take a 3/16" bolt for a tight fit to the regulator.
For a new door, the door tracks (and their geometry) are probably off if the window takes an initial dive and goes down at an angle. If I remember correctly, the short track bolted horizontally to the inner door skin controls this angle. For a new door, I'd recommend taking a look at the shbox door adjustment instructions and following them exactly. http://shbox.com/1/adj_window.html (Particularly the bits about the window guides. This part is non-intuitive.)
dam I'm finding you don't just slap a door on and call it a day. the window going upward seams to meet resistance from duck tape residue since then I goofed off residue but still needs adjusting.
maybe this resistance is dirt on tracks or lack of grease, is it OK to shoot new improved WD40 on tracks? I've switched to white litium grease would this WG be better than wd40 also have blasistic oil.
this resistance is seriously straining the already weak motor.
I'm extremely proud of myself for getting this far all by myself of course w/ expert advice like you'res when I can get it.
then next thing on the door list is the power locks would you happen to remember where the electrical wires connect to the new door?image would be great help.
Thanks again WSSix99
dam I'm finding you don't just slap a door on and call it a day.
Sure you do! You are just experiencing the learning curve. The next time you do this, it will be much easier and go much faster.
Originally Posted by badmfkr
I goofed off residue but still needs adjusting.
Maybe there is still some on the felt sweeps? May be you need to goof them off also with the window down?
Originally Posted by badmfkr
maybe this resistance is dirt on tracks or lack of grease, is it OK to shoot new improved WD40 on tracks? I've switched to white litium grease would this WG be better than wd40 also have blasistic oil.
Check the window guides (The two that have one bolt on top of the door and have short felt pads.) I usually back these off all the way until the window is moving smoothly and then adjust them per the shbox instructions last. They can easily bind the glass and slow everything down.
Definitely don't use WD-40! It's a solvent and will dissolve all the other greases. The stock track grease is Syl-Glyde. It's a silicone-based grease. The lithium grease you added is probably compatible and you should be fine as long as it hasn't' turned solid. (Any WD-40 left in there will continue to dissolve and wonk up the grease you do have there and will displace it with the WD-40 oil. (That WD-40 oil will also eventually wash away and leave you with nothing.) BTW - The only thing WD-40 should be used for on our cars is loosening rusty bolts underneath the car. All other uses cause problems...
You might also have a better time if you wipe out all your grease and replace it with Syl-Glyde, but probably not enough to make a big difference for what you are experiencing. (Your problem is probably more mechanical and I'd check those guides first.)
Originally Posted by badmfkr
then next thing on the door list is the power locks would you happen to remember where the electrical wires connect to the new door?image would be great help.
Can you be more specific? I recall that there is a harness that runs back to the lock module with two connectors. They should just be able to go to only one place on the module.
Sure you do! You are just experiencing the learning curve. The next time you do this, it will be much easier and go much faster.
Maybe there is still some on the felt sweeps? May be you need to goof them off also with the window down?
Check the window guides (The two that have one bolt on top of the door and have short felt pads.) I usually back these off all the way until the window is moving smoothly and then adjust them per the shbox instructions last. They can easily bind the glass and slow everything down.
Definitely don't use WD-40! It's a solvent and will dissolve all the other greases. The stock track grease is Syl-Glyde. It's a silicone-based grease. The lithium grease you added is probably compatible and you should be fine as long as it hasn't' turned solid. (Any WD-40 left in there will continue to dissolve and wonk up the grease you do have there and will displace it with the WD-40 oil. (That WD-40 oil will also eventually wash away and leave you with nothing.) BTW - The only thing WD-40 should be used for on our cars is loosening rusty bolts underneath the car. All other uses cause problems...
You might also have a better time if you wipe out all your grease and replace it with Syl-Glyde, but probably not enough to make a big difference for what you are experiencing. (Your problem is probably more mechanical and I'd check those guides first.)
Can you be more specific? I recall that there is a harness that runs back to the lock module with two connectors. They should just be able to go to only one place on the module.
actuelly I taped the window on the outside of the rubber seal but will check inside the rubber.
when I bought this car back in 2000 it had a couple issues the Pontica dealerships shop foreman Harley Kindig best mechanic I've ever known he could dianoise any noise the car made, had the exact same car he helped me w/ some hard stuff I couldn't do w/out the usale advisor anyway the slow window was one of the issues yes the car was less than a year old 20K miles and the driver window was weak pass. was twice the speed.man adviced me to spary the felt inside the rubber seal this helped but made a greasy mess on the window.
I observed the window being kindof floppie like it was leaning inward so w/ window completely up I loosened and shoved those 2 felt guides tight
against window pushing window outward I will loosen a tad and report back.
I don't remember seeing a module for electric locks I'm assuming it's right at the lock cylinder I'll take a closer look.
edit: I think this sly guide in spary can is used to coat boat engines to protect from corrosion rust ect.
wish I labled the wires. I see a white electrical plug w/ 2 terminals must be lock/unlock. also see 2 sets of wires that look like they stretch to the lock. I think the left one plugs into the white plug.
can't see where second wire connects.
No, the Syl-Glyde goes in the window and door regulator tracks where the plastic regulator rollers slide in the metal C-channels. The inside of the door operates in the wet. (Water drains down the glass and then everything inside gets drenched - that's why there are drains/gutters in the bottom of the door and a plastic liner protecting the inner door panel.) The Syl-Glyde really holds up in this environment, where other greases will wash away out of the tracks.
Originally Posted by badmfkr
I observed the window being kindof floppie like it was leaning inward so w/ window completely up I loosened and shoved those 2 felt guides tight
against window pushing window outward I will loosen a tad and report back.
YES! This is your problem. This is a really common, intuitive thing, but it totally messes things up. The shbox instructions will show you how to properly adjust these do they don't drag on the glass.
Originally Posted by badmfkr
wish I labled the wires. I see a white electrical plug w/ 2 terminals must be lock/unlock. also see 2 sets of wires that look like they stretch to the lock. I think the left one plugs into the white plug.
can't see where second wire connects.
The two ports are in there somewhere. One set is for the sensor that tells when the latch is shut. (This turns the interior lights on/off.) The other set of wires actuate the lock mechanism.
No, the Syl-Glyde goes in the window and door regulator tracks where the plastic regulator rollers slide in the metal C-channels. The inside of the door operates in the wet. (Water drains down the glass and then everything inside gets drenched - that's why there are drains/gutters in the bottom of the door and a plastic liner protecting the inner door panel.) The Syl-Glyde really holds up in this environment, where other greases will wash away out of the tracks.
YES! This is your problem. This is a really common, intuitive thing, but it totally messes things up. The shbox instructions will show you how to properly adjust these do they don't drag on the glass.
The two ports are in there somewhere. One set is for the sensor that tells when the latch is shut. (This turns the interior lights on/off.) The other set of wires actuate the lock mechanism.
loosened both guides still same weak roll up at the top.
next I'll clean inside of track w/ lint free cloth (read lint fouls the grease) would like to then lube w/ correct stuff.
maybe you accidentally miss spelled, or google doesn't know Syl-Glyde
like a link would be helpfull.
haven't plugged in either lock wire yet. however when this driver door opens the interior light come on as usual still can't find the second wired port.
what do you think about the CRC silicon spary is it the correct stuff to treat rubber near mirror this is the area of resistance. really don't want to spary the felt and have a greasie mess again.
Thanks
That's the right stuff. I think I must have had an old tube 30 years ago spelled a different way and probably just clung to that...
Originally Posted by badmfkr
what do you think about the CRC silicon spary is it the correct stuff to treat rubber near mirror this is the area of resistance. really don't want to spary the felt and have a greasie mess again.
Should be fine if you spray onto a rag first and then wipe on. However; when the window is properly adjusted, it shouldn't touch much rubber until the end of the movement. You might obse4rve the passenger window and how it contacts the rubber throughout the movement and then compare how the driver's side rides and touches the seals.
That's the right stuff. I think I must have had an old tube 30 years ago spelled a different way and probably just clung to that...
Should be fine if you spray onto a rag first and then wipe on. However; when the window is properly adjusted, it shouldn't touch much rubber until the end of the movement. You might obse4rve the passenger window and how it contacts the rubber throughout the movement and then compare how the driver's side rides and touches the seals.
update on the door:
I was able to squirt the CRC silicon into the rubber behind the mirror, then I observed some southern tree leaf pollen on the front part of felt tried to scratch it off w/ fingernail that **** is nasty and stickie, anyway I cleaned and sprayed (will scratch off the remaining 10%) this was the resistance, I'll thoroughly inspect for the slitest flith.
all this done w/ those 2 guides loose, have yet to grease rails but will before the door cover get's put back on, the window is actuelly leaned inward so there's a 1/8" opening at the window seal. will study shoebox adjustment for final stage of this window.
thanks again for excellent infor. I really need a operational window I rarely drive the car in hot weather so the window is very important.
BTW Chi-town is one of my favorite big citys I miss hanging out in front of 10 canal & monore even at 5am if one lady say's no there's another 2 minutes later that is willing great town and great people in Chi-town. thanks
all this done w/ those 2 guides loose, have yet to grease rails but will before the door cover get's put back on, the window is actuelly leaned inward so there's a 1/8" opening at the window seal. will study shoebox adjustment for final stage of this window.
That's exactly where you want to be. shbox will tighten you up and get you to the correct movement. Just compare the passenger and driver's side when you are done to make sure the glass contacts the sweeps at the same point in the movement.
Originally Posted by badmfkr
BTW Chi-town is one of my favorite big citys
We'll keep holding the fort down for you! I'm 5 minutes from the loop. Close enough I can drive my black Firebird down lower Wacker whenever I want and envision myself in the Batmobile.
Lower wacker was the 2nd scariest almost accident of my life.
I’m cruising underground wasn’t expecting the red lights to be mounted to the side of road,
I’m used to looking for lights in the middle of the road.
Anyway I never saw the redlight was just entering intersection then in a splite second a good sized truck zipped right in front of me missed it by inches if was cruising a tad faster I would have been T-boned and probably killed.
hopefully I can be up in schaumburg for the speed inc. gathering. that looks like my kindof of fun love the burn outs there.
lastly I hate to put door cover back on before connecting the second door lock wire still can't see where it plugs in.
Actually the car is older than the thread this justifies bumping ttt.
I observed a new feature here at end of a thread they suggest similar threads (John keep up the good work) I read a bunch of threads I'll read this to.
thanks
lastly I hate to put door cover back on before connecting the second door lock wire still can't see where it plugs in.
In this picture, your 2 cavity plug should go into the white socket. The 4 cavity plug goes into the black socket to the left. (Probably oriented "up" in the car.) I suspect the black socket is hard for you to see in the door...
I think I see the plug in you're image to the left circled in red I'll use the braille method and feel just above and back of the round section of white plug this plug is recessed.
stop reading here untill I report back.
is this part the same for driver and pass. side? been looking w/ door unlocked.now I look closely at my image above the right side of white plug and darely see black plug.I'm assuming the lock clip is upward?
I don't see this plug on my new door or shoeboxs (his car is a 95camaro maybe his car dosen't have the 2nd wire) now I know where to look/feel. I'll take a close look at the old doors lock device.
edit: my new door is from a 02 firehawk are they different from my 99 TA WS6? please don't tell me I need to swap this piece w/ my old piece that appears very complicated.
BTW is this 2nd wire for the keyless entry? which isn't working at the moment could be a dead FOB battery, will have to wait for the next car rental to switch batteries.thanks


 04-25-2016, 07:02 PM