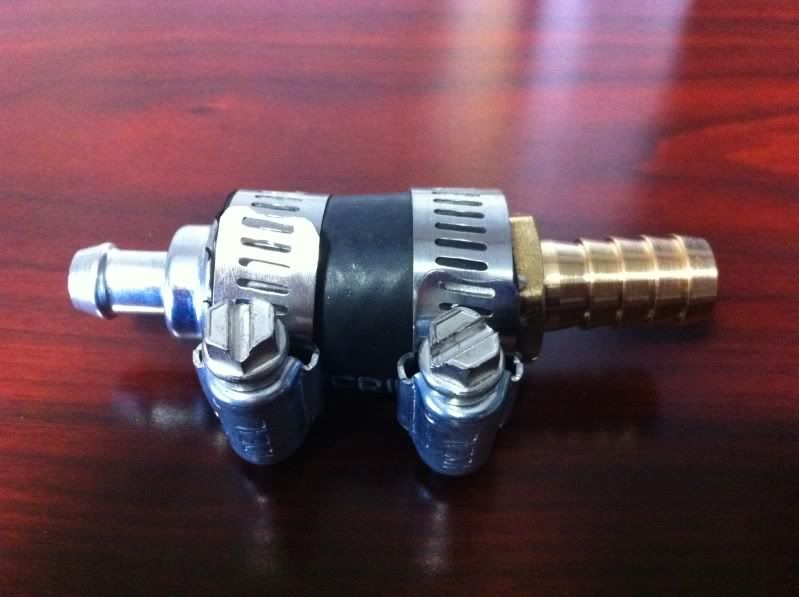
My catch can routing ok?
#362
I've been using Home Depot separators with modified internals made from brass fittings and house hold products, with good results. To prove the results to myself I installed a second can in series with the first. After 1000+ miles on this design ( I've had 2 others) you can see the total amount of liquid that is in the drain tube passage and the primary bowl
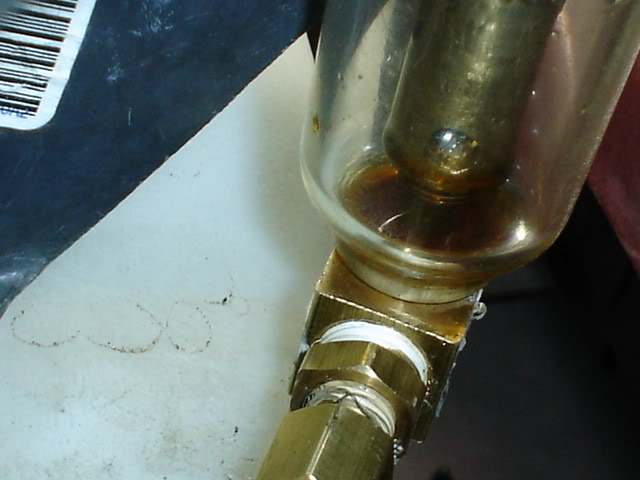
The secondary bowl shows the total liquid amount, because there isn't any drain tube passage involved. If there's any interest I'll try to do a writeup on how I did this
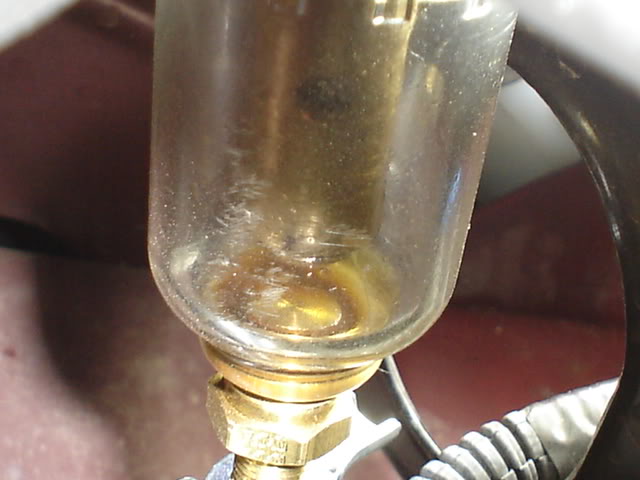
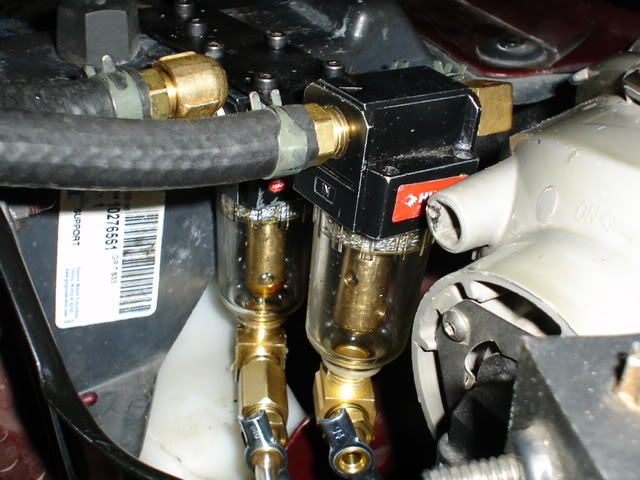
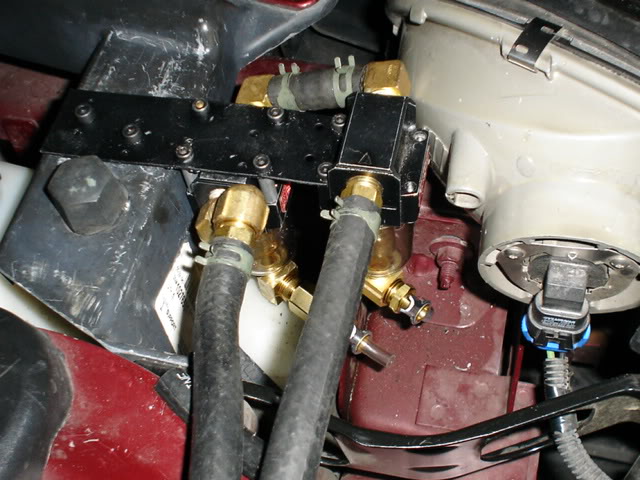

The secondary bowl shows the total liquid amount, because there isn't any drain tube passage involved. If there's any interest I'll try to do a writeup on how I did this


#364
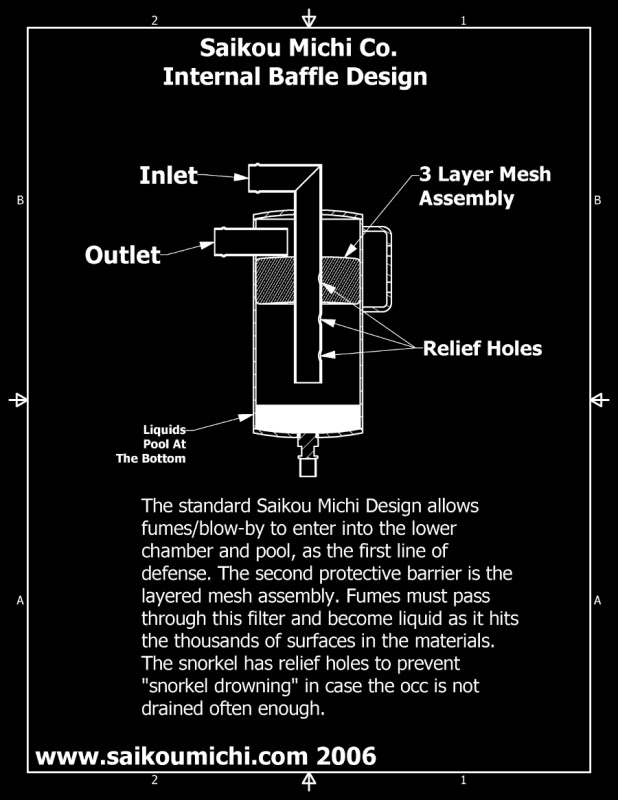
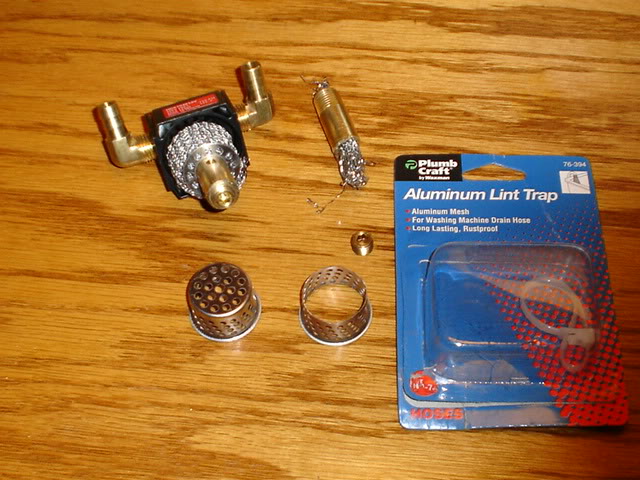
I prefer the aluminum lint filter as the outlet filter. When you unroll it, it looks like a sock, closed at one end and the open end is finished with no loose strands.I folded it in half length wise and wrapped it around the tube, and used the cut disc to hold it in place
I used the chore boy as long strands to go into the down tube to help condensation.
I should have mentioned that the can is hooked up in reverse, the inlet goes to the vacuum hose, and the outlet goes to the pcv hose.
There is some thread tapping and cutting required for this mod
Last edited by jg rider; 03-07-2011 at 08:20 PM. Reason: Because I can't spell
#367
If you plan on keeping the Air/EGR mount it down below the passenger side headlight, then use a hole saw directly under neath it(under the car) so you can drain it easily by reaching under the nose of the car. You can mount it to one of the frame rail mount bolts, so no drilling is needed to mount it.
Last edited by 99Bluz28; 03-14-2011 at 05:50 PM.
#368
I just did option 1, I have not fired up the car yet so I am not sure if this would be the best way. Let me know what you think?
Thanks
#369
If you plan on keeping the Air/EGR mount it down below the passenger side headlight, then use a hole saw directly under neath it(under the car) so you can drain it easily by reaching under the nose of the car. You can mount it to one of the frame rail mount bolts, so no drilling is needed to mount it.
#370
TECH Addict
iTrader: (24)
Joined: Oct 2006
Posts: 2,608
Likes: 0
From: Webb City, MO...out in the garage
i've got some issues with crankcase pressure....figured someone here might be able to help...
the motor is a LSX 454...lots of air moving around in there....the motor is brand new, i'm concerned the rings haven't seated yet, i've got fuel washing the cylinders with my AFR being at or very close to stoich.
I've got enough crankcase pressure to shoot an oil cap 15 feet across the shop if i have both valve covers capped off (GMPP covers, both with breather hole). it also blows the oil dipstick out.
so now i have a breather on the passenger side valve cover with the oil cap on the driver's side. i have a revxtreme catch can as well with a hose going from the LS6/2 valley cover to the top of the can and hose going from the PCV valve on the side of the can to the port on the side of the intake manifold.
i'm wanting to swith up my valve covers to some fabricated covers or newer style GMPP covers. i want to run a different catch can as well, i'm not really happy with mine. Any suggestions? is my current setup working properly? is there a better way to rig it up with different valve covers or catch can(s)? i'd like to relocate the can and have as few hoses running around as possible.
#371
So on a dual saikou michi, the top of each can are the inlets and the 2 sides are the clean outs correct? Just want to fully understand the configuration but on a DBW TB, no nipple to attach. I'm running a ls6 valley so that will go to one top and clean going the intake manifold. My question is for the other can what should I route? Valve covers only have 1 nipple of pass side. What and where should I be routing my second can? I assume from valve cover to cai?
thanks.
Forgot to mention it's ls3 intake and didn't notice but it has 3 nipple ports. One on each side of TB mount and one on the rear. Can anyone specify on what port if for what please.
thanks again
thanks.
Forgot to mention it's ls3 intake and didn't notice but it has 3 nipple ports. One on each side of TB mount and one on the rear. Can anyone specify on what port if for what please.
thanks again
#372
for give me if i'm wrong... but, i didn't see anyone talking about the Mike Norris cans. are they any good??? I'M JUST SO DAMN CONFUSED ABOUT THE SIMPLE ROUTING ON A STOCK 99 CAMARO SS!
PLEASE!!!! shade some light on the CORRECT way on the way i need to hook it up. even if i bought the right catch can
PLEASE!!!! shade some light on the CORRECT way on the way i need to hook it up. even if i bought the right catch can

#373
Dont feel bad Dan, this **** confuses me as well & it seems like it really shouldnt, LOL.
I just sent this PM to the member posting the diagrams but I'm gonna repost this here to get feedback from other members on my line of thinking.
After lookin online I can get the new PCV valve from Advanced auto in a Purolator brand for $1.99 & a one way vacuum check valve for $3.99
Here is what I was thinking...
I have a cheapo ebay catch can with no internals, but I work in the oil/gas industry. Our company designs & builds pressure vessels & the filtering media, so I can get some filter media from our shop to stick on the inside of the can on the outlet side.
My question is about routing. I wanna make sure I get it right the first time. Here is what I gather, please tell me if I'm right or not.
You need the vacuum from the intake to pull the mist/vapors from the engine correct? Now, is just using the driver side sufficient enough for vacuum on a N/A engine & can I just cap the rear passanger port on the valve cover? If so I'm guessing I'd want to buy a replacement PCV valve & put it inline either before the hose from the driver side cover to can or in the line from the can outlet to the intake, is this correct?
Now for the fresh air source, it goes from TB to the front port on the passanger valve cover. Is it suggested to put a one way check valve into that line to allow fresh air in but stop any mist/vapors from re-entering the TB?
In my mind this sounds like the correct way & completes a routing while keeping vacuum on the system but adding a catch can with filtering media to the equation.
#375
I can show you pics of the original PCV Mod (1999). Does a good job of keeping oil out of the intake and only takes about $10 in parts. Different PCV,filter, hoses and clamps.
Well, I don't know the URL of this thing but contact me at my email (jtm5738@yahoo.com) and I can email it to you.
Well, I don't know the URL of this thing but contact me at my email (jtm5738@yahoo.com) and I can email it to you.
#376
Don't feel bad, it took running a LS6 valley cover, RevExtreme CC below ps headlight then into a Mike Norris CC right before going back into the intake side port before I stopped pull oil vapors back into the intake. If you mount the CC/s away from as much engine heat as possible(down below the passenger side headlight) it'll work even better.
I'd try put some type of mesh metal in the can to give it more surface area for the oil vapor to contact and cool instead of the filter media.
I'd try put some type of mesh metal in the can to give it more surface area for the oil vapor to contact and cool instead of the filter media.
Last edited by 99Bluz28; 04-26-2011 at 01:24 PM.
#377
I am slowly proceeding with my idea. I cannot find a check valve locally thats the right size for the hose from the TB/front passenger cover nipple. So I'm gonna look around today for a solution.
My can is a empty Greedy knockoff, I know as it sits its almost useless. I have a super cheap idea to actually make it work. I'll get some pics once I modify the can. Im gonna make a trip to Lowes on lunch today to look around for various parts.
Also found a link to a thread on another forum about how to make your own boot for the PCV valve since GM and parts houses dont sell just the boot by itself, so I'll get a pic of that as well.
#378
I am slowly proceeding with my idea. I cannot find a check valve locally thats the right size for the hose from the TB/front passenger cover nipple. So I'm gonna look around today for a solution.
My can is a empty Greedy knockoff, I know as it sits its almost useless. I have a super cheap idea to actually make it work. I'll get some pics once I modify the can. Im gonna make a trip to Lowes on lunch today to look around for various parts.
Also found a link to a thread on another forum about how to make your own boot for the PCV valve since GM and parts houses dont sell just the boot by itself, so I'll get a pic of that as well.
My can is a empty Greedy knockoff, I know as it sits its almost useless. I have a super cheap idea to actually make it work. I'll get some pics once I modify the can. Im gonna make a trip to Lowes on lunch today to look around for various parts.
Also found a link to a thread on another forum about how to make your own boot for the PCV valve since GM and parts houses dont sell just the boot by itself, so I'll get a pic of that as well.
To make sure it stays together coat the threads on the fitting with liquid electrical tape (brush-on type) then push it into the end of the hose and put a little of it on the PCV valve body before pushing it into the other end of the hose. Give the liquid E tape a few hours to dry and your done!


