

DO NOT try this at home . . . AKA my BUILD thread :)


 02-17-2011 | 11:38 AM
#23
Thread Starter
11 Second Club
iTrader: (103)
Joined: Aug 2005
Posts: 2,633
Likes: 1
From: South of West Point Iowa
I'm still laughing about this happening. It was about 10 degrees or so in the garage... As the pictures show I've since gotten clay and the only thing missing is getting checking springs (might do that today...) Getting the electrical knocked out. Have my relocated coils done (just not tested - i.e. fired up) and need to put the dash electrical all back together and get my disconnect connected to the alternator.
For the record, after the tootsie roll 'error', I gave the bags away
For the record, after the tootsie roll 'error', I gave the bags away
02-18-2011 | 03:30 PM
#24
 03-03-2011 | 07:11 AM
#25
Thread Starter
11 Second Club
iTrader: (103)
Joined: Aug 2005
Posts: 2,633
Likes: 1
From: South of West Point Iowa
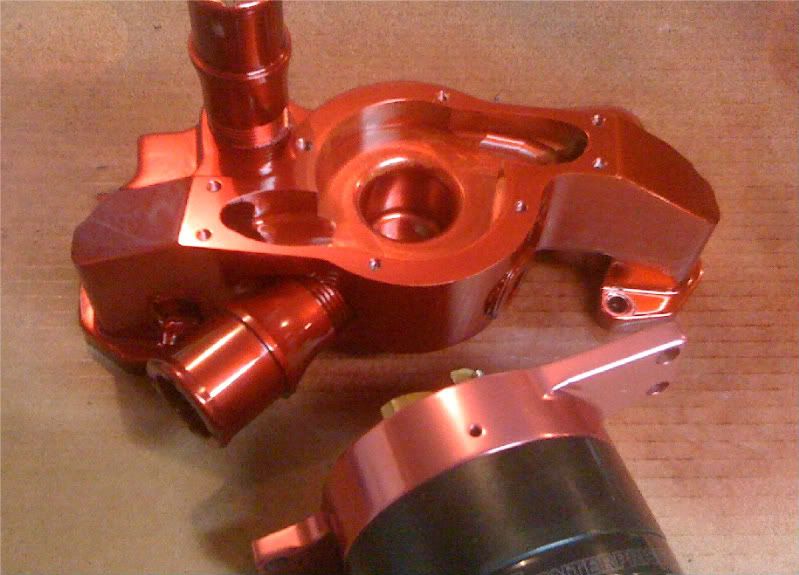
little update . . . Got a good deal on an electric waterpump but after getting it noticed the anodizing was splotchy. Contacted the manufacturer about cleanup/reanodizing and I didn't like the price option! Got me a can of Dupont anodizer & prep... Cleaned the pump housing, prepped the pump housing and sprayed the pump housing. I LOVE the results. The picture doesn't quite show how good it looks, but it shows the initial color and final color pretty well. Now I'm looking for other items to spray 
 03-21-2011 | 07:09 PM
#27
Thread Starter
11 Second Club
iTrader: (103)
Joined: Aug 2005
Posts: 2,633
Likes: 1
From: South of West Point Iowa
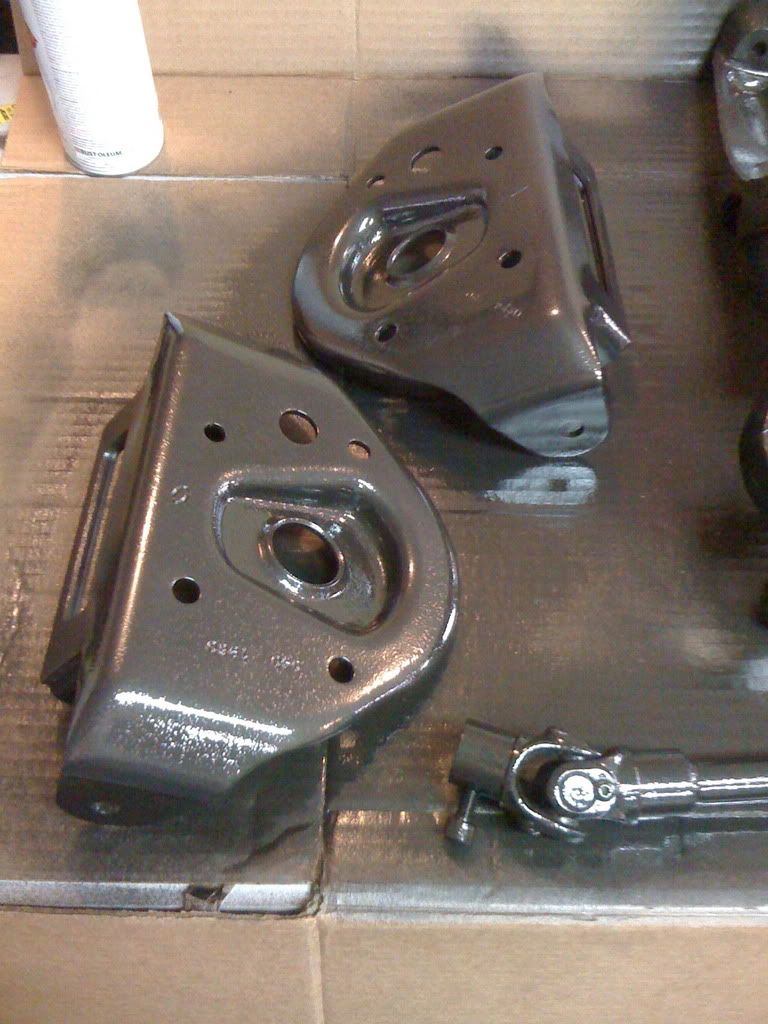
While I am not the first, the fastest, the best or cleanest, I AM the latest to replace my k-member It's in as of 15 minutes ago. That, my lower a-arms and the Madman manual steering rack. All went well once I got my poly motor mounts in today. I've got a little touch-up painting to do with the k-member as bits got scratched with the SYA bars going in and the a-arms. I also put in the shocks/springs from Chris Alston
It's going back together ! ! !
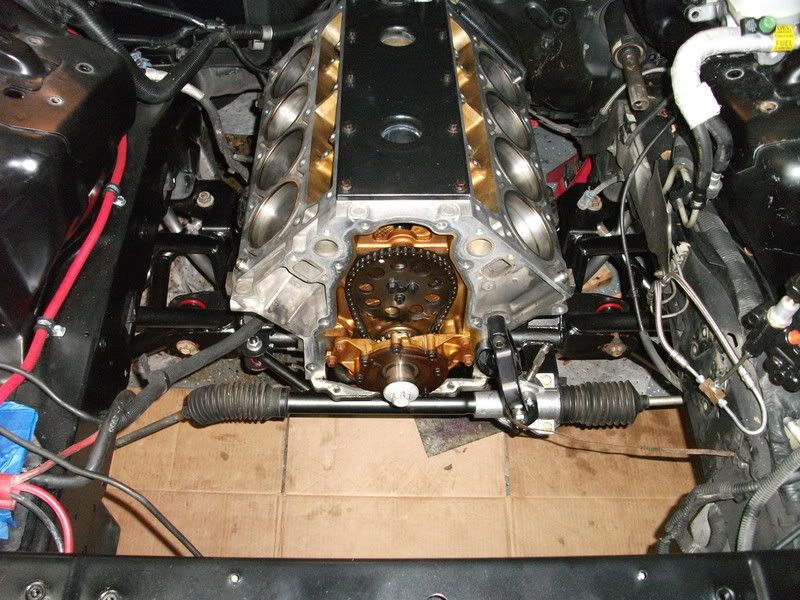


It's in as of 15 minutes ago. That, my lower a-arms and the Madman manual steering rack. All went well once I got my poly motor mounts in today. I've got a little touch-up painting to do with the k-member as bits got scratched with the SYA bars going in and the a-arms. I also put in the shocks/springs from Chris Alston It's going back together ! ! !
03-22-2011 | 03:32 AM
#28
Thread Starter
11 Second Club
iTrader: (103)
Joined: Aug 2005
Posts: 2,633
Likes: 1
From: South of West Point Iowa
Couldn't leave alone so I've been in the garage
I think this is gonna make it 'POP' when I lift the hood off
I rebuilt the lifters and soaked them for days.
I drilled the oil-return holes in the lifter guides.
Prepped the block surfaces after blowing out all the holes and chasing the holes.
Got my poly-motor-mounts in today so I cleaned them up and painted the shells.
Did double-passes at 30# - 50# - 70# for the head bolts following the pattern and went straight to 22# for the smaller 5 bolts.
Installed the timing cover, crank pulley and water pump.
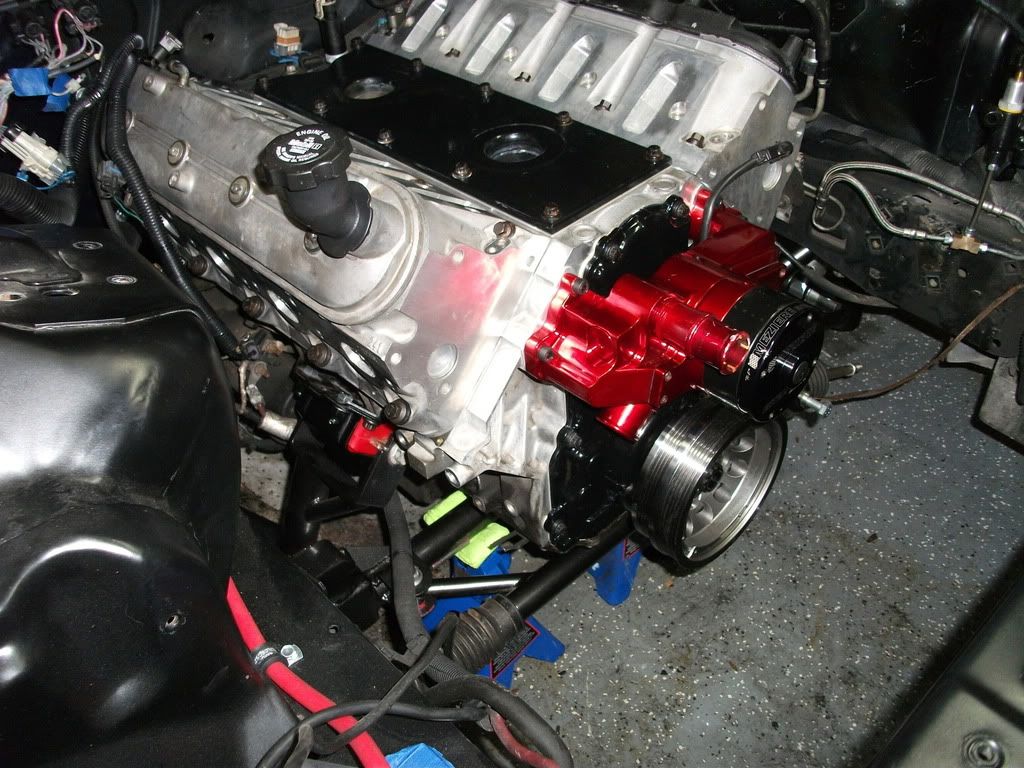
Still toying with the idea of maybe going back to the garage and doing the headers Left the good valve covers off until I'm basically done. Still have the alternator wire from my rear push-off to wire up along with installing the upper a-arms, mounts and tops to the coil overs, catch can, radiator, hoses, fluids, brake lines, intake. . . . you get the hint.
I think this is gonna make it 'POP' when I lift the hood off
I rebuilt the lifters and soaked them for days.
I drilled the oil-return holes in the lifter guides.
Prepped the block surfaces after blowing out all the holes and chasing the holes.
Got my poly-motor-mounts in today so I cleaned them up and painted the shells.
Did double-passes at 30# - 50# - 70# for the head bolts following the pattern and went straight to 22# for the smaller 5 bolts.
Installed the timing cover, crank pulley and water pump.
Still toying with the idea of maybe going back to the garage and doing the headers
Left the good valve covers off until I'm basically done. Still have the alternator wire from my rear push-off to wire up along with installing the upper a-arms, mounts and tops to the coil overs, catch can, radiator, hoses, fluids, brake lines, intake. . . . you get the hint.
03-23-2011 | 11:17 PM
#29
Thread Starter
11 Second Club
iTrader: (103)
Joined: Aug 2005
Posts: 2,633
Likes: 1
From: South of West Point Iowa
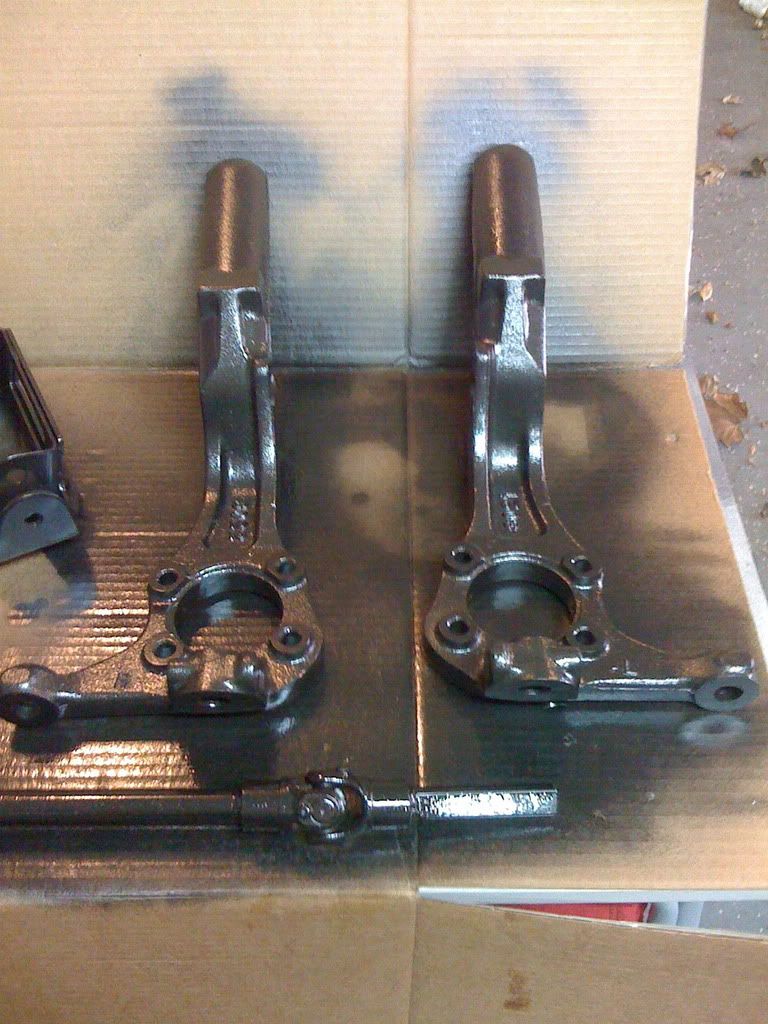
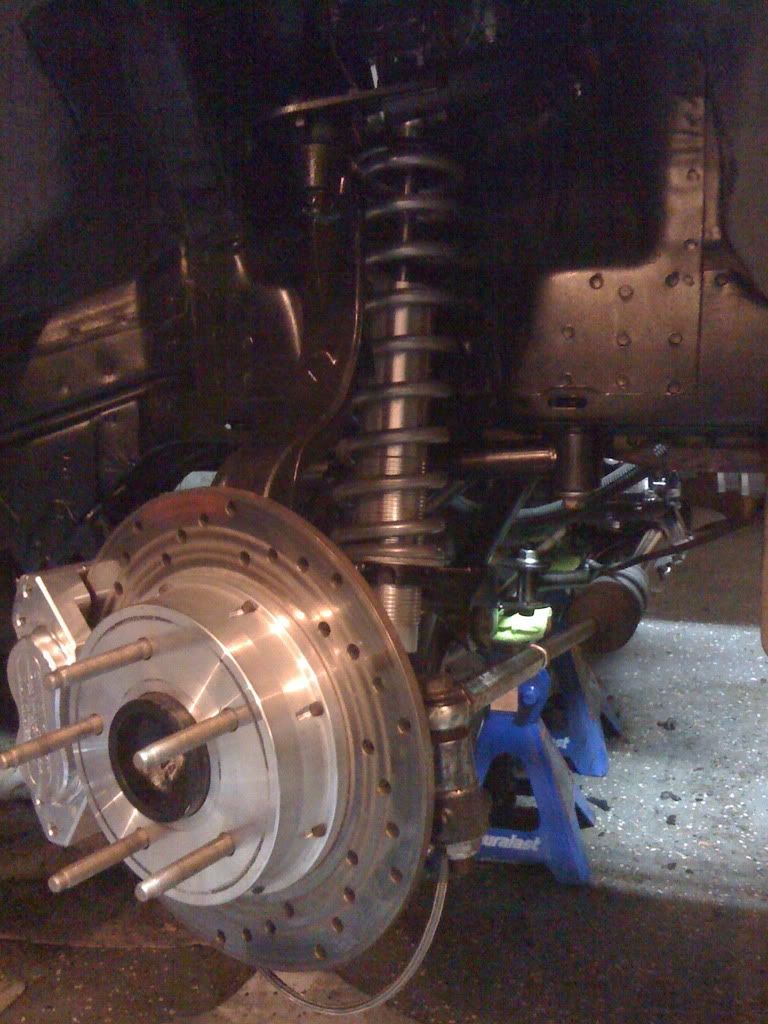
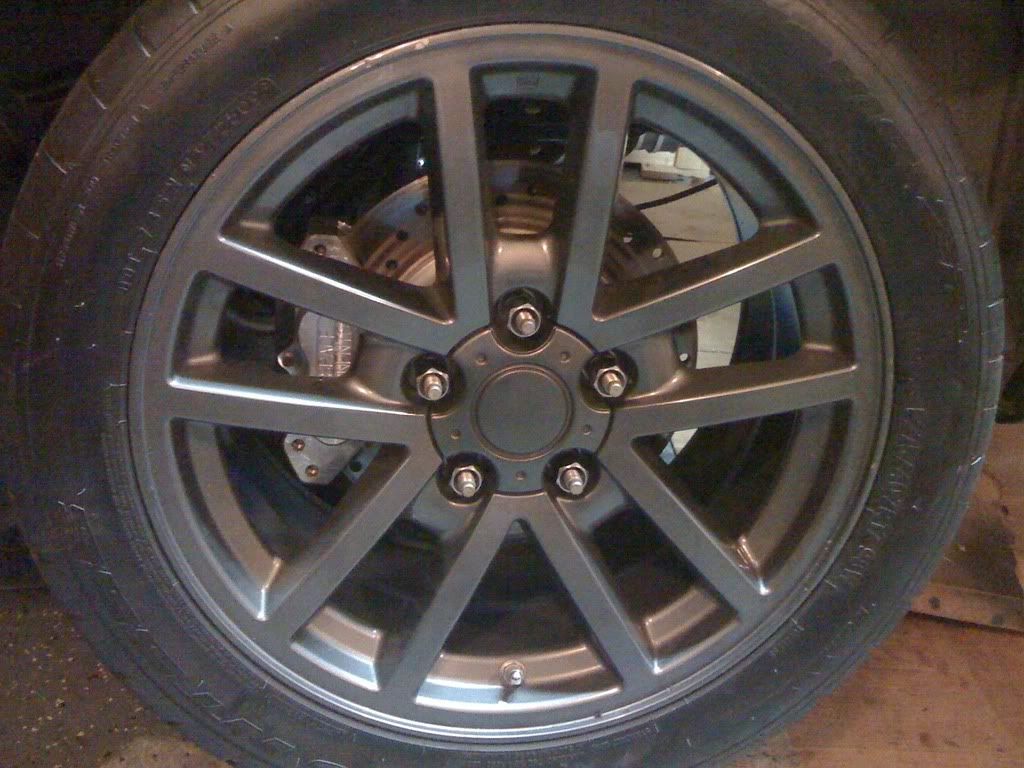
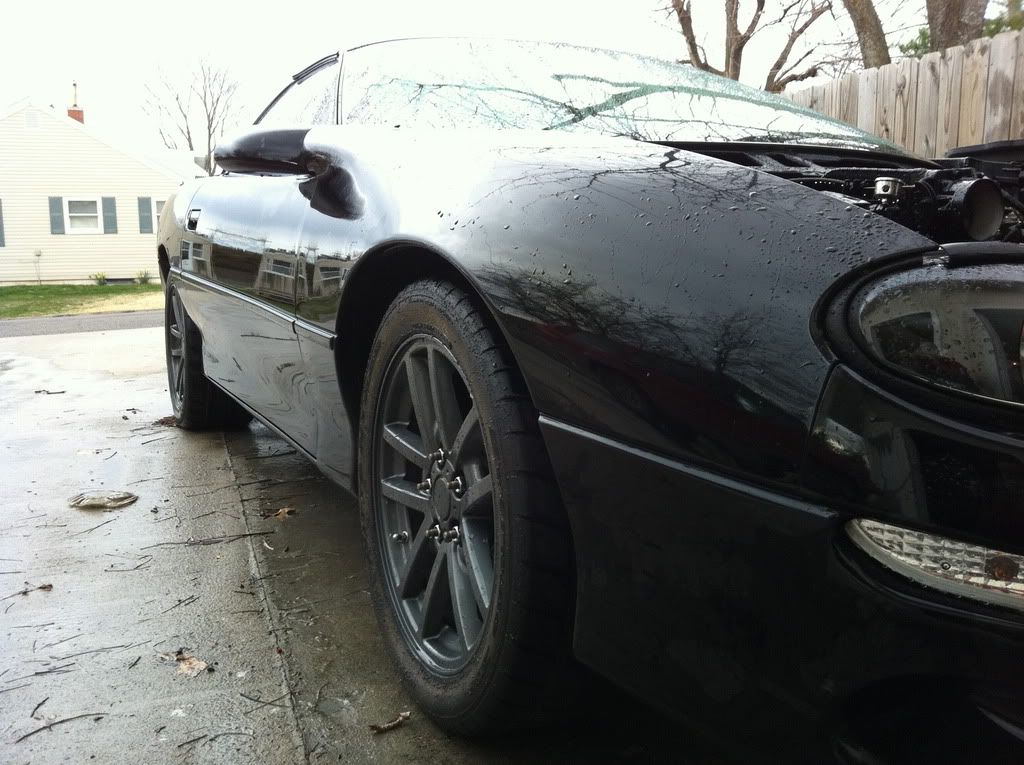
Got my spindles back from the shop today along with the upper a-arm mounts (had them blasted - rust pitting...) and got to work. I love black hammerstone paint
Need to get my skinnies out of storage for the front, but I love the space in the wheels
Need to get my skinnies out of storage for the front, but I love the space in the wheels
04-02-2011 | 12:37 AM
#30
Thread Starter
11 Second Club
iTrader: (103)
Joined: Aug 2005
Posts: 2,633
Likes: 1
From: South of West Point Iowa
Alright. I've taken a few days off and the car is on all 4 wheels with the engine fully assembled for the first time in 6 months! Had to tweak a little with the coil overs as I had the car too low... was about 24 1/2" wheel arch-ground and couldn't get the jack out from under the car 26" seems to be fine and is still 2" lower than I'm used to. Later this morning, it's time for headers, a little electrical, a lot of dash reassembly and exterior cleaning!
Sunday if all goes well, I'll be finishing the wiring and trying a test fire
26" seems to be fine and is still 2" lower than I'm used to. Later this morning, it's time for headers, a little electrical, a lot of dash reassembly and exterior cleaning!Sunday if all goes well, I'll be finishing the wiring and trying a test fire


 04-02-2011 | 06:19 PM
#33
Thread Starter
11 Second Club
iTrader: (103)
Joined: Aug 2005
Posts: 2,633
Likes: 1
From: South of West Point Iowa
MShadow, haven't had the car on the road yet so I can't answer this. I suspect the gear ratio is easy enough to turn at slow speeds.
Fly, after the cam alone I should have been into the 11's easy, and if my rear could have held it, April of 2009 I might have found out... remember that?
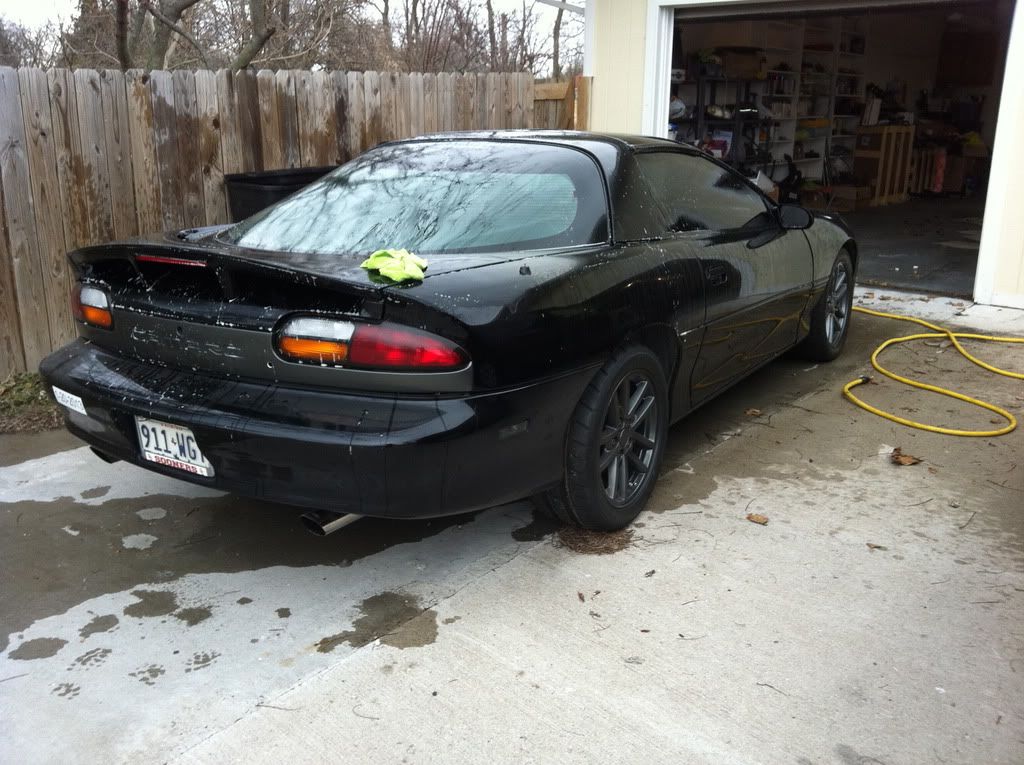
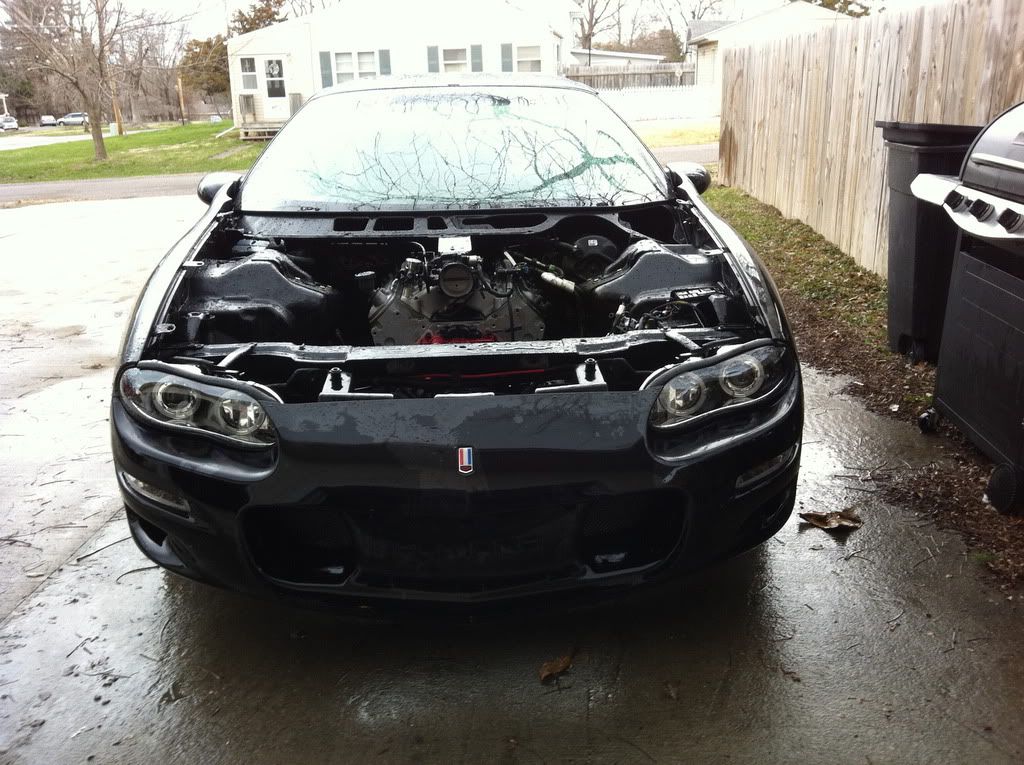
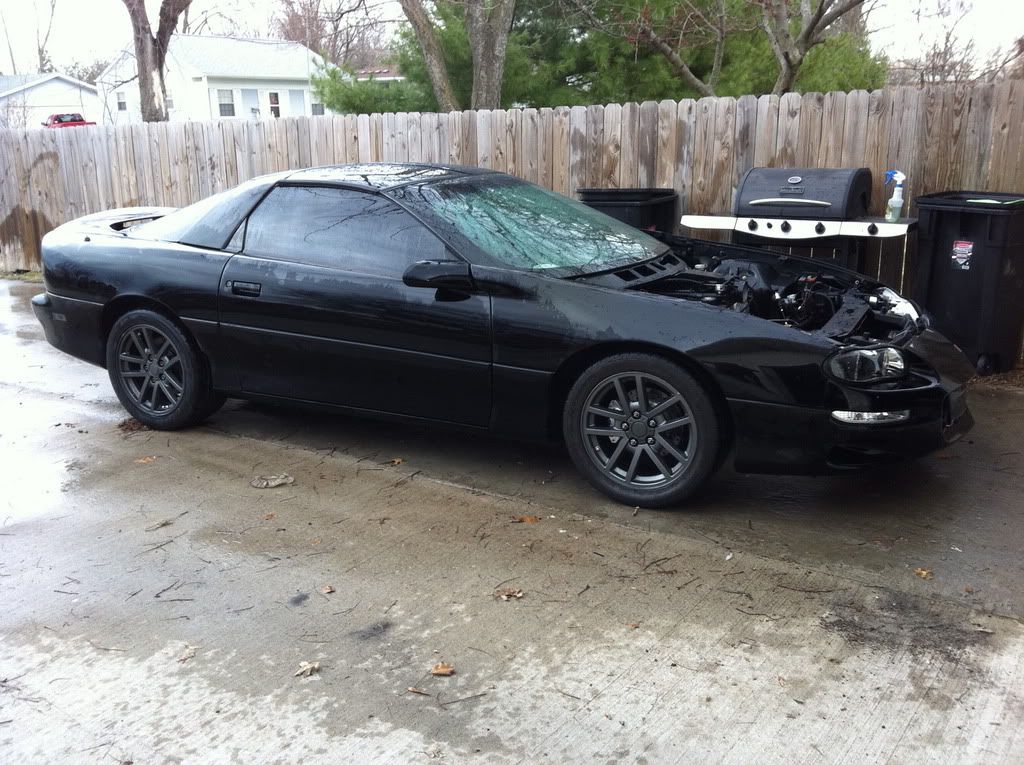
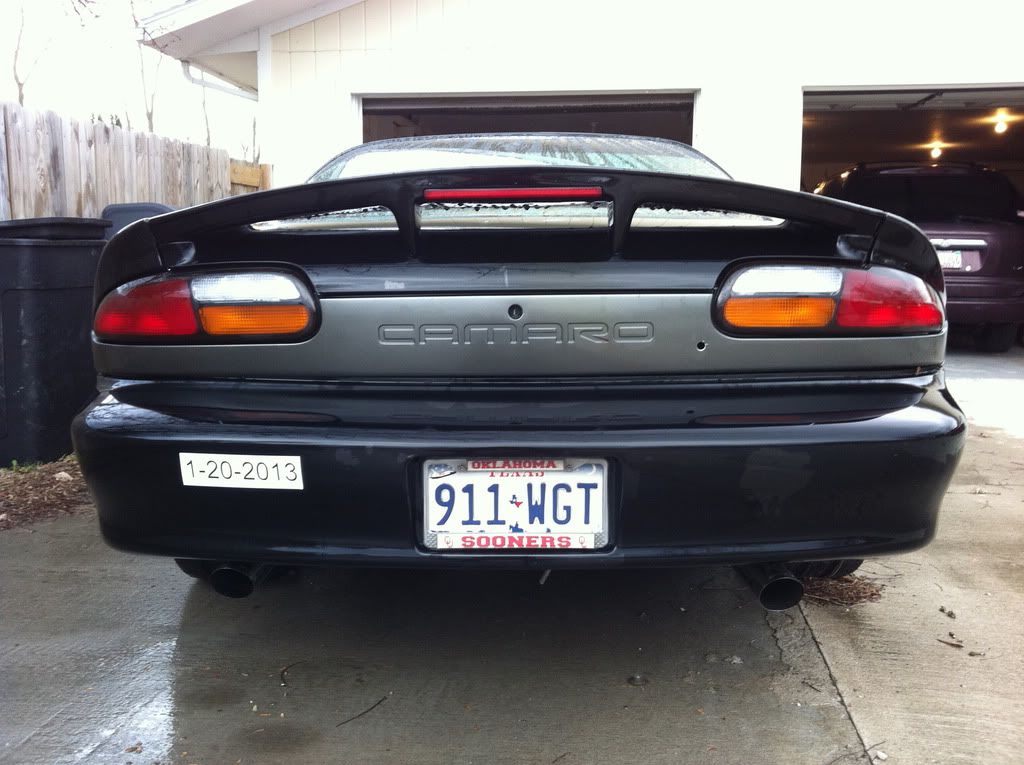
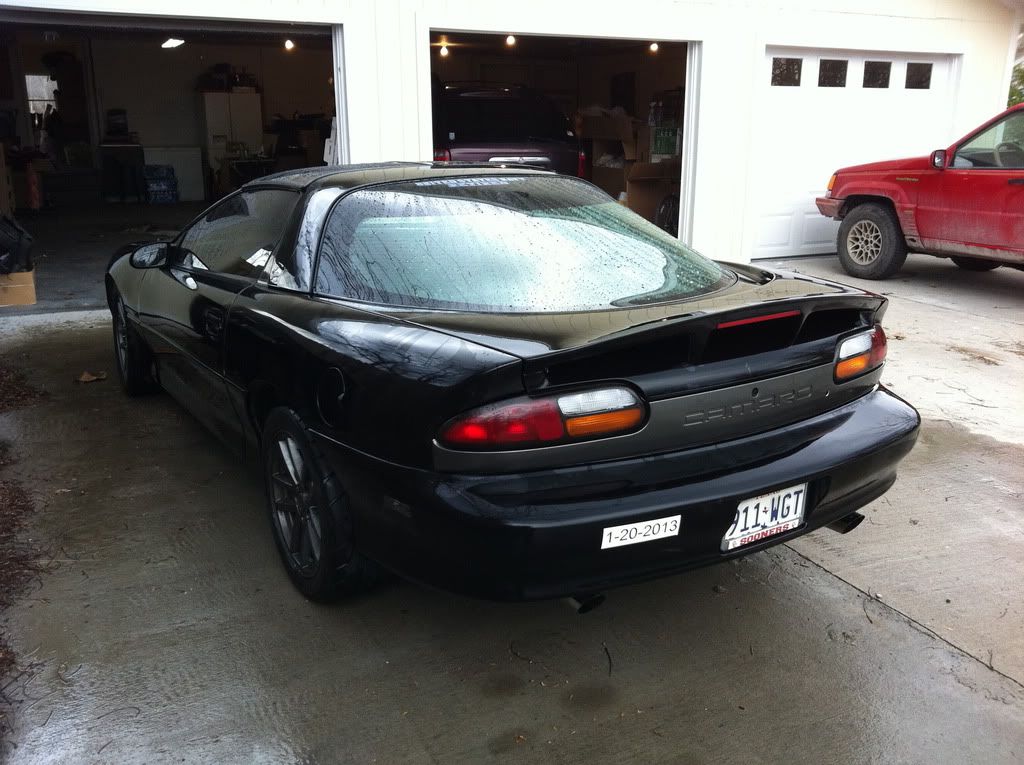
Tried something different today... Car is out of the garage for the first time in just over 6 months! Gave her a good basic washing and snapped a few shots. Had I not needed to replace the wifes brakes today I coulda/woulda/shoulda been starting the car tomorrow. Who knows... might still

Fly, after the cam alone I should have been into the 11's easy, and if my rear could have held it, April of 2009 I might have found out... remember that?
Tried something different today... Car is out of the garage for the first time in just over 6 months! Gave her a good basic washing and snapped a few shots. Had I not needed to replace the wifes brakes today I coulda/woulda/shoulda been starting the car tomorrow. Who knows... might still
04-03-2011 | 03:23 AM
#34
Thread Starter
11 Second Club
iTrader: (103)
Joined: Aug 2005
Posts: 2,633
Likes: 1
From: South of West Point Iowa
I was bored this evening after sitting with the wife & kids... Nickelodeon something or other awards on... joy so I left that scene and went to the garage
Finished installing the headers and connecting to the y-pipe, new gaskets & bolts all around
Dropped her back down and installed plugs and wires... Had a 8-pack of TR6's sitting around for a LONG time and threw them in. Connected up the wires from my remotely located coils and had TONS excess length on those.
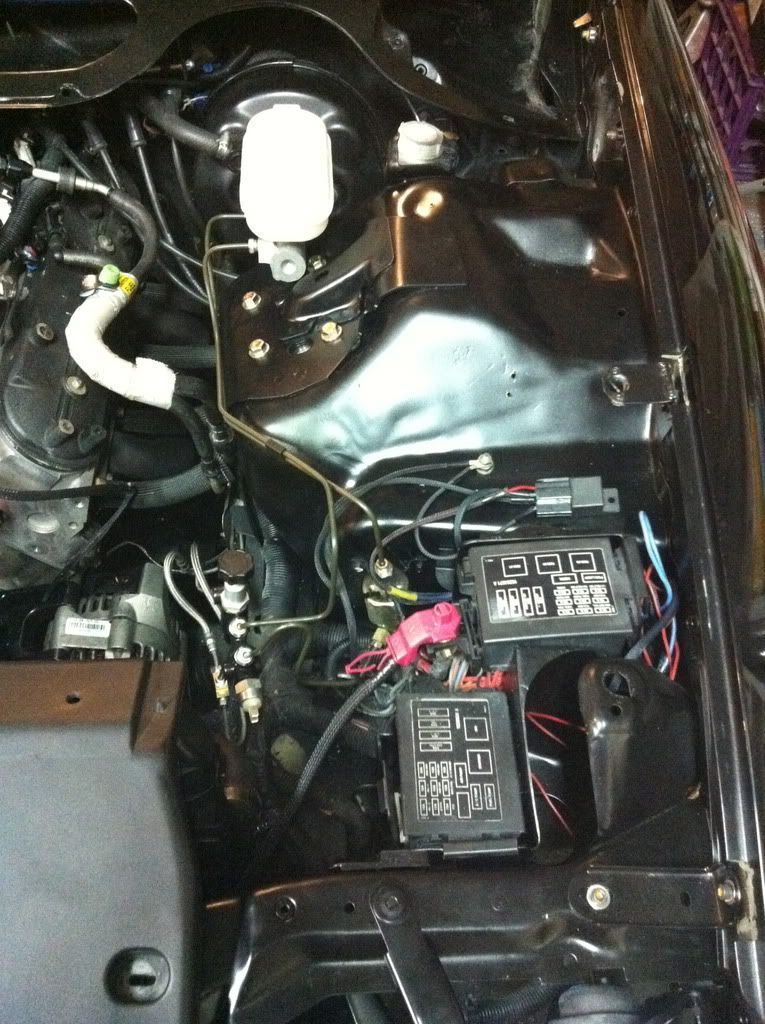
Temporarily deleted the battery relocation idea. I'll switch it to the back later, but this way I don't have to get another cable for the alternator for a bit. Threw the battery on a slow charge just to make sure it's good. Measured 11.7 volts after nearly 7 months!!!
Put the radiator back in with the fans and new upper (power steering cooler delete) hose. Ordered a new lower hose yesterday since my old/current lower feels really oily for some reason. . . . .
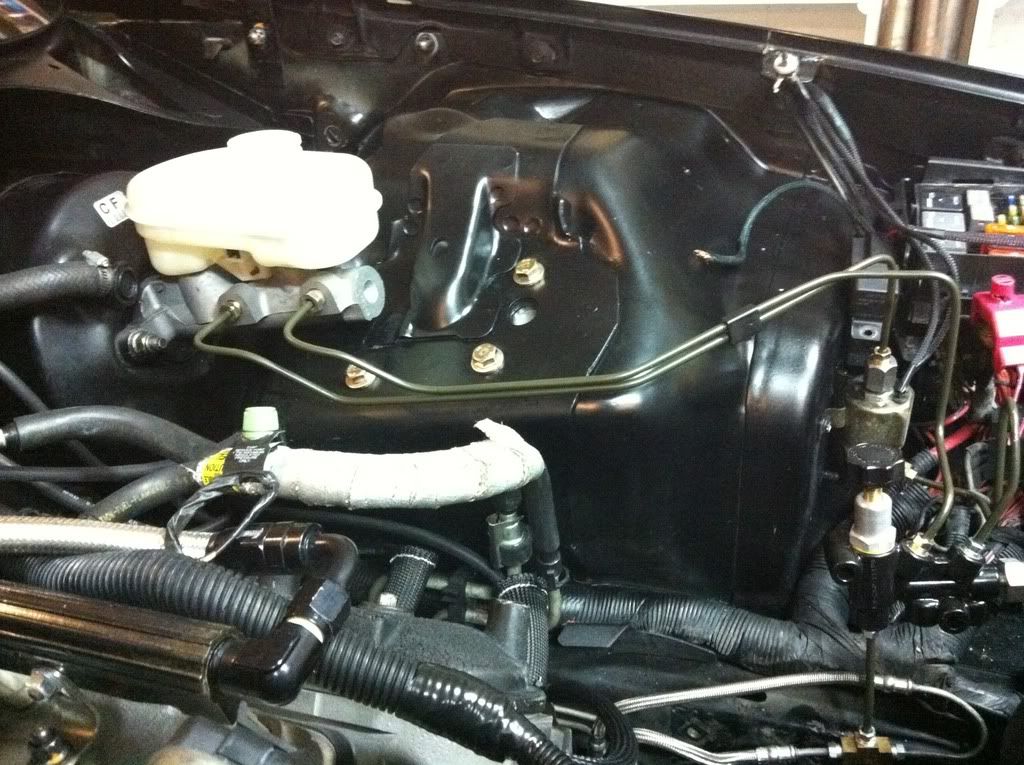
Decided if I'm gonna try to fire up the car tomorrow or so, I better be able to stop so I reinstalled the brake master (no fluid yet but I will when I start bleeding the brakes). Fabricated up a new pair of brake lines from the master to the line lock and to the proportioning valve (AL, you HAVE to miss me) While fabing up, was reminded that the battery was on charge when I got a little arc-spark action . . . . FYI, installed line lock bodies act just like a ground as far as the positive terminal on the fuse block is concerned. . .
Measured the battery and it's charged just fine so I started a trickle charge on the battery in the back while I was at it.
Get this, I put away my tools nearly every night when I'm done!!! Imagine how semi-organized my garage must be.
Thats the highlights...
Maybe some front brakes tomorrow (later today) and a little wiring cleanup for the dash...
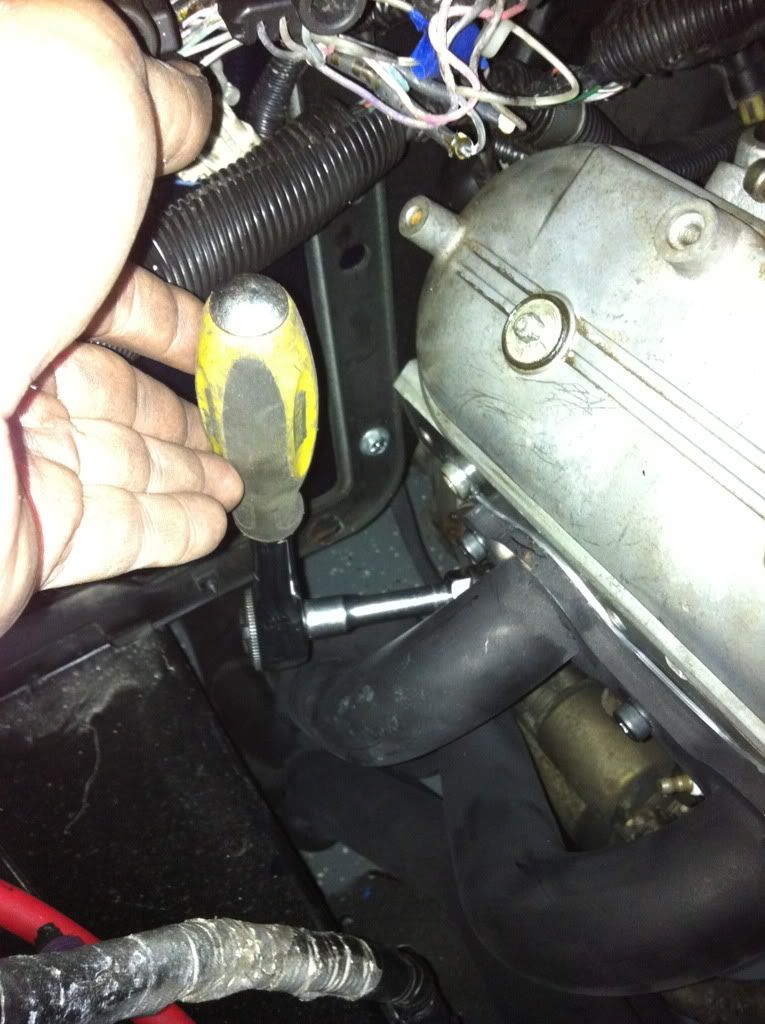
So... How many people can get to their #8 plug this easy?
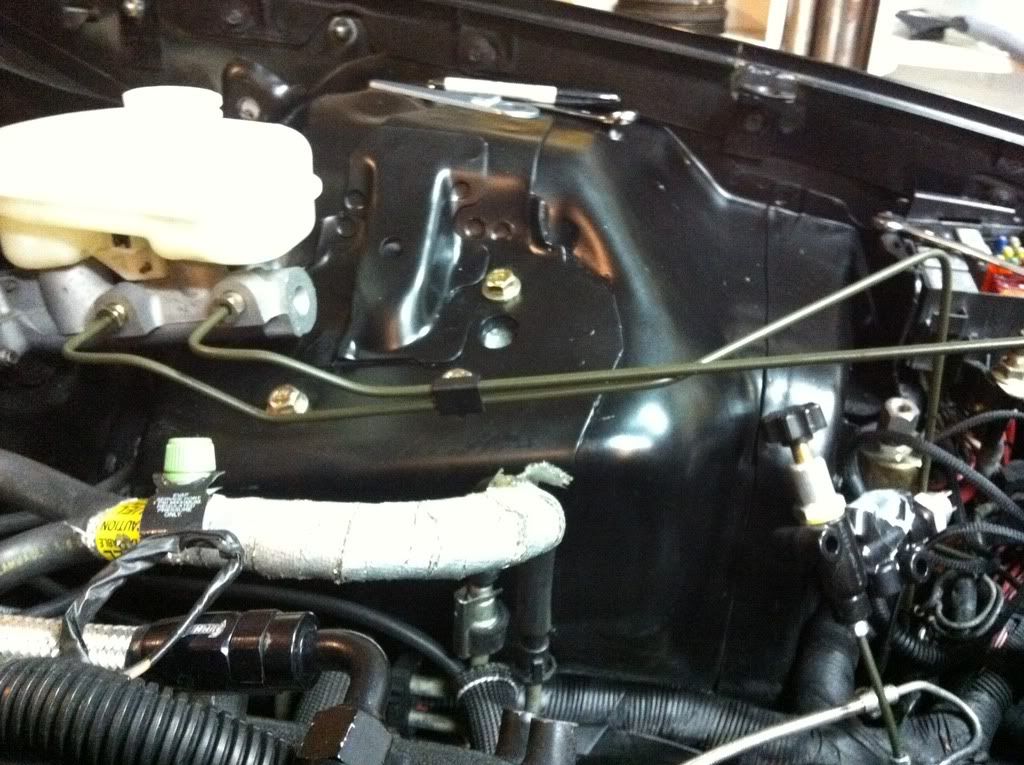
Little of the new brake lines. Tried getting fancy with the routing.
Until tomorrow (later today)
Finished installing the headers and connecting to the y-pipe, new gaskets & bolts all around
Dropped her back down and installed plugs and wires... Had a 8-pack of TR6's sitting around for a LONG time and threw them in. Connected up the wires from my remotely located coils and had TONS excess length on those.
Temporarily deleted the battery relocation idea. I'll switch it to the back later, but this way I don't have to get another cable for the alternator for a bit. Threw the battery on a slow charge just to make sure it's good. Measured 11.7 volts after nearly 7 months!!!
Put the radiator back in with the fans and new upper (power steering cooler delete) hose. Ordered a new lower hose yesterday since my old/current lower feels really oily for some reason. . . . .
Decided if I'm gonna try to fire up the car tomorrow or so, I better be able to stop so I reinstalled the brake master (no fluid yet but I will when I start bleeding the brakes). Fabricated up a new pair of brake lines from the master to the line lock and to the proportioning valve (AL, you HAVE to miss me
) While fabing up, was reminded that the battery was on charge when I got a little arc-spark action . . . . FYI, installed line lock bodies act just like a ground as far as the positive terminal on the fuse block is concerned. . . Measured the battery and it's charged just fine so I started a trickle charge on the battery in the back while I was at it.
Get this, I put away my tools nearly every night when I'm done!!! Imagine how semi-organized my garage must be.
Thats the highlights...
Maybe some front brakes tomorrow (later today) and a little wiring cleanup for the dash...
So... How many people can get to their #8 plug this easy?
Little of the new brake lines. Tried getting fancy with the routing.
Until tomorrow (later today
)
04-10-2011 | 08:36 PM
#35
Thread Starter
11 Second Club
iTrader: (103)
Joined: Aug 2005
Posts: 2,633
Likes: 1
From: South of West Point Iowa
[quote author=duffster board=LS1 thread=7207 post=54829 time=1302485424]Guess 24.5" is a little too low for the car.... I'll have to raise it to about 26.5-27".... I mean the ground to front fender arch...
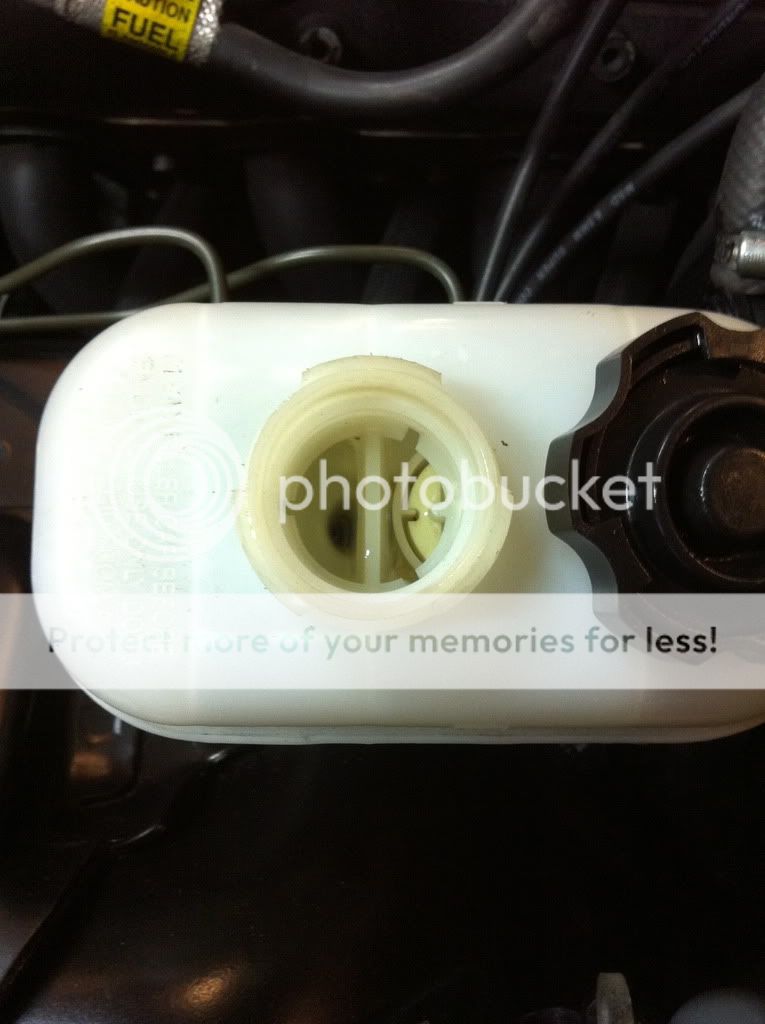
AND out of 14 NEW flare joints I've done for brake lines... ONE leaked It was the 2nd one I did and I didn't mind redoing it. After doing this I think I need to make a video for Youtube how to double-flare brake/fuel lines
Brake fluid IN the reservoir! ! ! First time in nearly 6 months
[/quote]
Tomorrow, dash wiring, maybe dash and more brake bleeding...
AND out of 14 NEW flare joints I've done for brake lines... ONE leaked
It was the 2nd one I did and I didn't mind redoing it. After doing this I think I need to make a video for Youtube how to double-flare brake/fuel lines Brake fluid IN the reservoir! ! ! First time in nearly 6 months
[/quote]
Tomorrow, dash wiring, maybe dash and more brake bleeding...
04-10-2011 | 09:22 PM
#36
i feel your pain. i had to do double flares for my jeep master cylinder when i upgraded from non ABS to ABS style master...it was a bitch, messed up the first two, but after that got the hang of it.
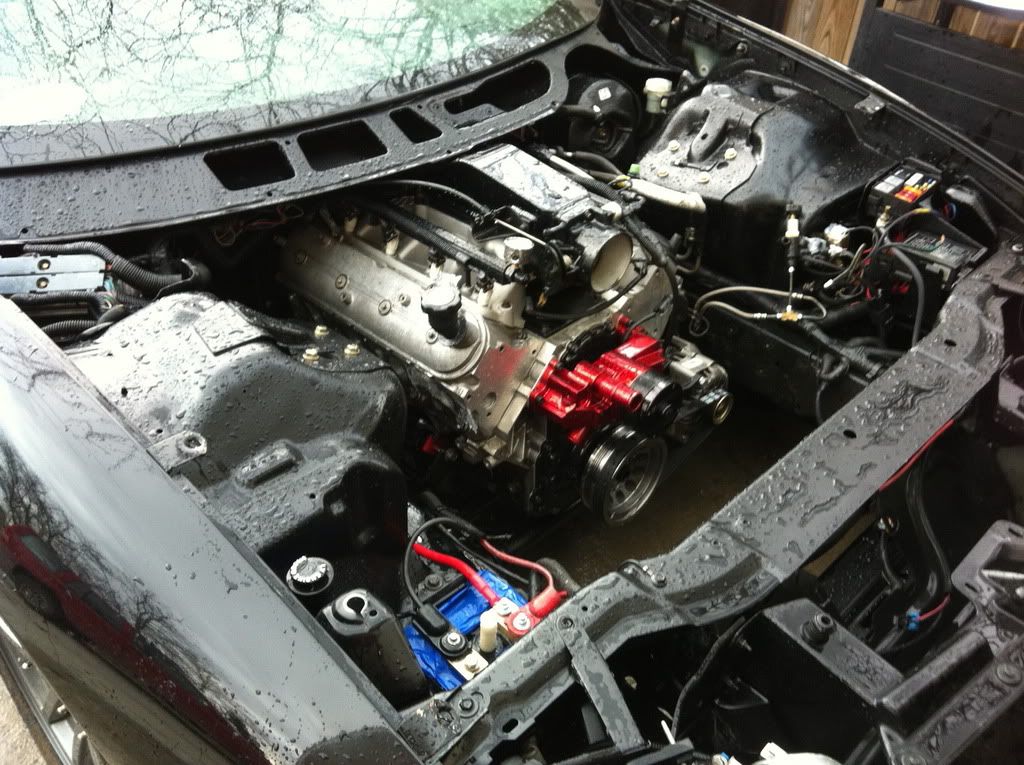
Your engine bay is really pretty...makes me want to clean out mine too!
Your engine bay is really pretty...makes me want to clean out mine too!
04-11-2011 | 02:08 PM
#38
Thread Starter
11 Second Club
iTrader: (103)
Joined: Aug 2005
Posts: 2,633
Likes: 1
From: South of West Point Iowa
Well, putting the dash back in was a whole lot easier than I thought it was going to be...
rough in, wiring into proper places, lift and place on the two door studs, double check no crimps/pinches and start with the screws. OBDII, fuses, block connectors, steering connections, clutch & brakes, air bags, glove box, grounds and DONE! Might have been 30 minutes!!!
Battery connected, key to on, check brakes, headlights, signals, horn, remote door locks locked/unlocked and rear hatch unlatched.
EVERYTHING worked!!!
Key to start - click - click - click - SO. . . Now the fun begins
04-11-2011 | 07:51 PM
#39
Thread Starter
11 Second Club
iTrader: (103)
Joined: Aug 2005
Posts: 2,633
Likes: 1
From: South of West Point Iowa
I've checked fuses under the hood. So far I've got a clutch switch to check, voltage at the starter/solenoid to check and pop the solenoid a couple times to be sure. The little back box behind the stereo spot (little bigger than a couple decks of cards) clicks when I key the ignition. Fuel pressure is good, mirrors, horn, lights, signals, windows. . . everything electric is working, so it shouldn't be terribly difficult. Need to double check grounds in engine compartment I think too...
04-11-2011 | 09:51 PM
#40
Thread Starter
11 Second Club
iTrader: (103)
Joined: Aug 2005
Posts: 2,633
Likes: 1
From: South of West Point Iowa
Alright. . . so I've got a pair of connectors under the steering wheel that aren't connected to anything or each other. I don't see the obvious connection points and the black one only has about 5-6 inches of range with which to swing. The blue connector has about 15-20 inches. Both are pictured below...

Now I found a ground connection of some type from the passenger side stud for the dash down by the feet... If you open the door and look down, you'll probably see it. Where does this heavy gauge black wire go to???
Thanks,
D
Now I found a ground connection of some type from the passenger side stud for the dash down by the feet... If you open the door and look down, you'll probably see it. Where does this heavy gauge black wire go to???
Thanks,
D