porting 799 head questions
 01-25-2012, 11:23 AM
#21
On The Tree
Thread Starter

Join Date: Sep 2011
Location: dayton ohio
Posts: 131
Likes: 0
Received 0 Likes
on
0 Posts

ok thanks guys for the info
i have had walking namonia (or how ever you want to spell it)
so i am about a week behind on this post
last night i went and played.......
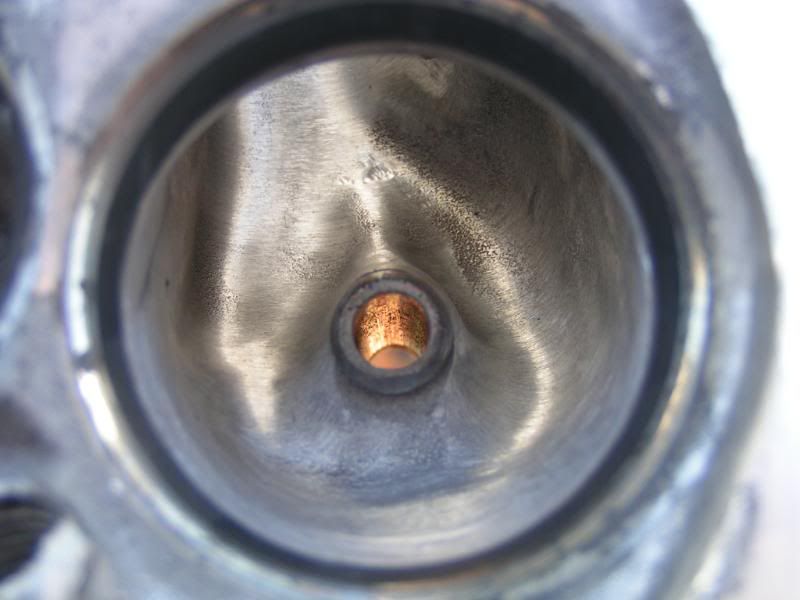
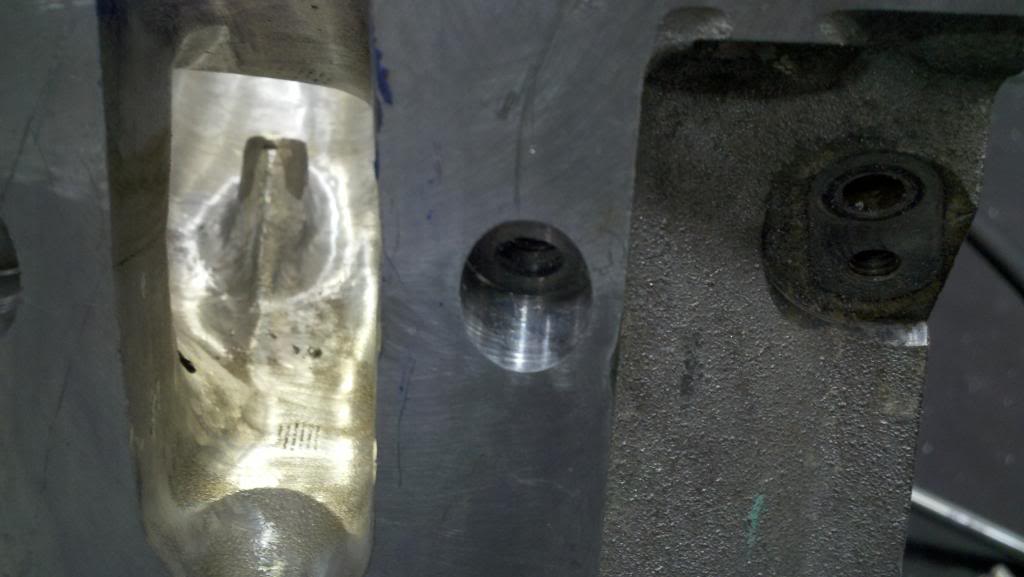
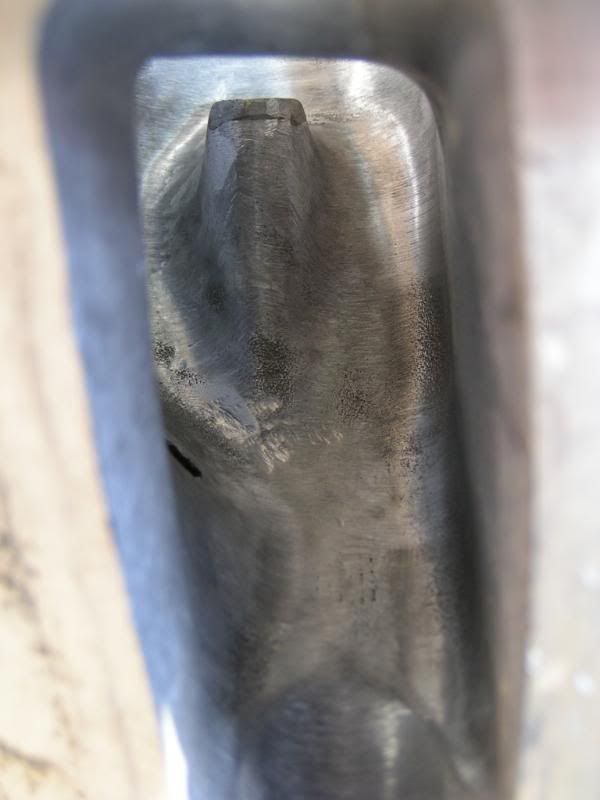
i reflowed the head on the intake side and came up with-----this is only the intake side of a practice head first
240.8@600 on my practice head stock no mod yet
240@400 on practice head with rocker bung mod....then she nose dived
265.8@600 on practice head with rocker bung, knifed guide front and back side.......still had some lumps not entirly smooth but had to see
heres a few pics of where i am at......please look at them and give me your thoughts.......good or bad

i have had walking namonia (or how ever you want to spell it)
so i am about a week behind on this post
last night i went and played.......
i reflowed the head on the intake side and came up with-----this is only the intake side of a practice head first
240.8@600 on my practice head stock no mod yet
240@400 on practice head with rocker bung mod....then she nose dived
265.8@600 on practice head with rocker bung, knifed guide front and back side.......still had some lumps not entirly smooth but had to see
heres a few pics of where i am at......please look at them and give me your thoughts.......good or bad


 01-25-2012, 08:20 PM
#25
On The Tree
Thread Starter
Join Date: Sep 2011
Location: dayton ohio
Posts: 131
Likes: 0
Received 0 Likes
on
0 Posts
ALRIGHT !!!!!!
please let me know as to what you think
mind you this is a practice head
getting ready to start on the real ones here in a few days
flow specs are listed a few posts back
thanks guys in advance
dave
please let me know as to what you think
mind you this is a practice head
getting ready to start on the real ones here in a few days
flow specs are listed a few posts back
thanks guys in advance
dave
 01-26-2012, 11:30 AM
#28
On The Tree
Thread Starter
Join Date: Sep 2011
Location: dayton ohio
Posts: 131
Likes: 0
Received 0 Likes
on
0 Posts
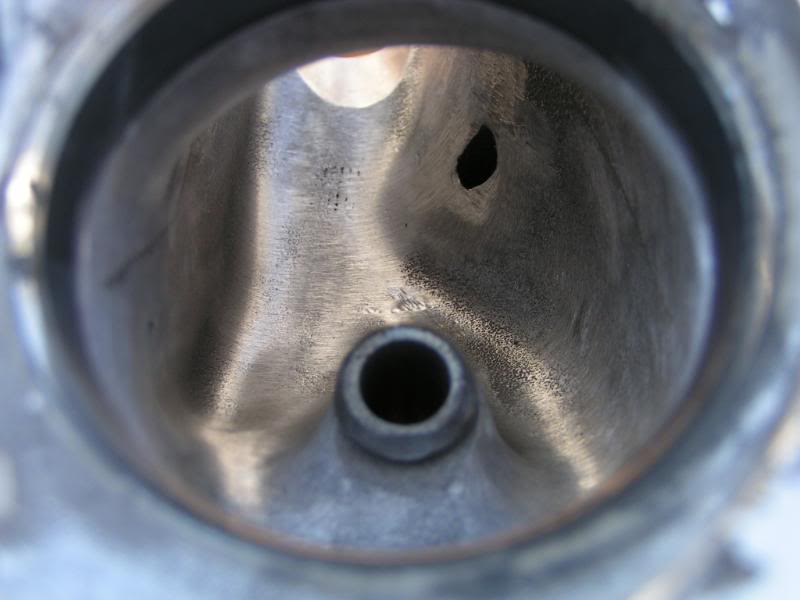
now i see you didnt do the back side of the valve guide or blend the seat into the wall
does it flow better if you dont
i did rework the port to blend the injector now i am just gonna port match and widen the mouth of the inlet and work the quench are tonight and see what the numbers are then
any ideas on quench area for modding
does it flow better if you dont
i did rework the port to blend the injector now i am just gonna port match and widen the mouth of the inlet and work the quench are tonight and see what the numbers are then
any ideas on quench area for modding
01-26-2012, 01:34 PM
#29
We were being conservative with the carbide work around the valve guide. Some material was removed but not as much as some people do.
The seats were blended just a little, the area worked the most was the seat itself on mine left a large lip (not talking hang a nail, you could feel the drop under a finger tip).
We didn't have access to a flow bench so the plan was to work the important areas conservatively to help assure we helped at least some but not risk doing much damage. I went from all my mods with a 230/224 cam to these heads (shaved .010") and the 230/238 cam and the results are impressive everywhere. I expected to lose some low end off idle grunt, but it seemed to pick up as much there as it did at 6500rpm. Considering the porting only cost me a $35 carbide and a $25 sanding roll kit, I am more than satisfied with the results.
Track opens next month, after I go I will be able to verify and quantify the gains. Previous best was a 12.24@111mph w/ 1.77 60ft (7.8@90mph 1/8th).
01-26-2012, 03:48 PM
#33
One time I went 10 hours strait on mine, but when I pulled my heads at other times for different things I'd put some more time into them.....all together if you add it all up I put probably20 hours or so in mine here and there, plus I have a total of .040"+ milled out of them (shaved down to 57cc chambers).
After I was finished I had a cold throbbing hand lol...my compressor is pretty big so it waits for me, i dont wait for it
After I was finished I had a cold throbbing hand lol...my compressor is pretty big so it waits for me, i dont wait for it
01-26-2012, 03:53 PM
#34
I did all but 2 cylinders worth in one setting, the next day I was glad because my hand and arm were cramping bad. Those last 2 seemed like torture.
01-27-2012, 01:17 PM
#35
On The Tree
Thread Starter
Join Date: Sep 2011
Location: dayton ohio
Posts: 131
Likes: 0
Received 0 Likes
on
0 Posts
ok
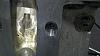
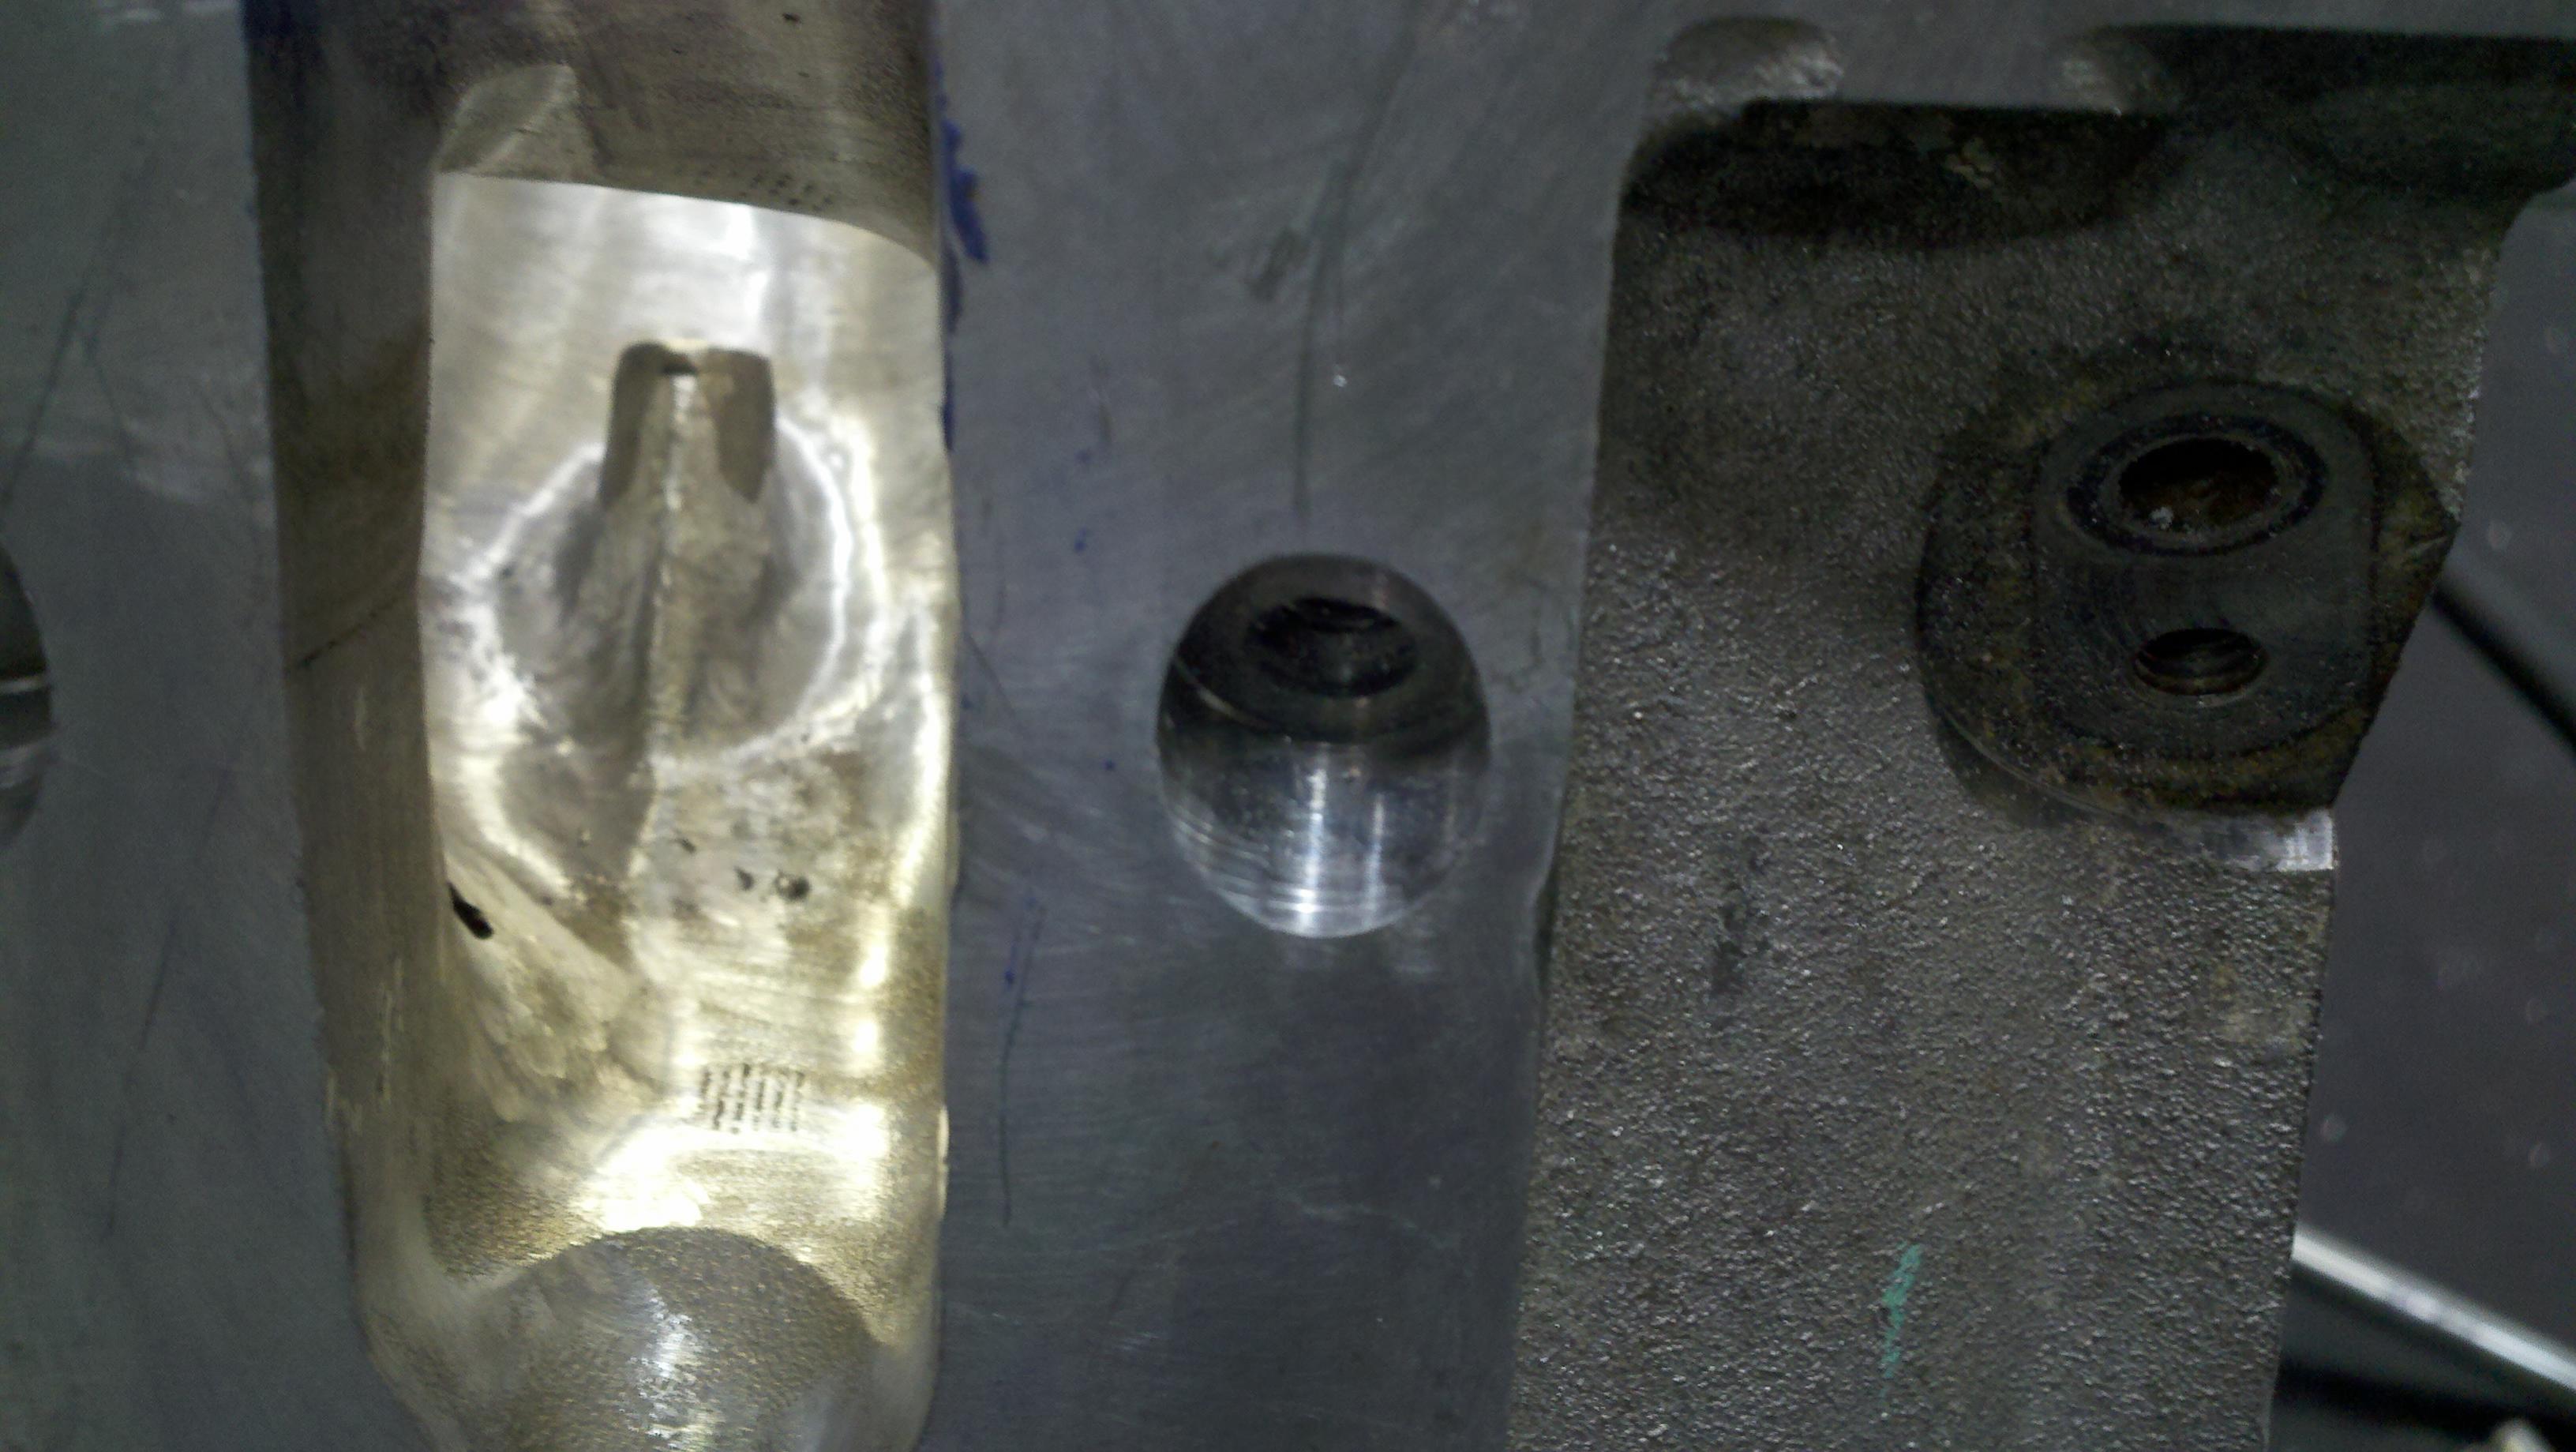
went last night and decided to start port matching
droped a small nut into place on the head to lay the real good steel intake gasket (fel-pro) on the intake side (didnt want the cheap plastic intake gaskets) and gasket didnt line up, was to high. pulled a old plastic intake gasket from another intake and found bosses on back side of gasket to help line up item for porting.
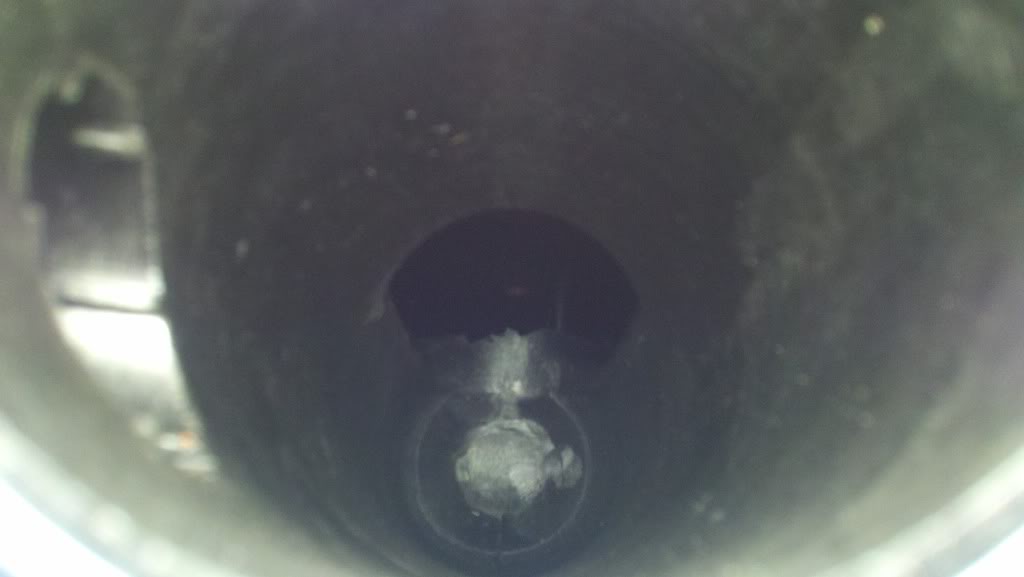
so turned our attention to intake side and i see where i can open the right side of the truck manifold to match gasket, cool beans.
below is a pic of the inside of the truck manifold, should this area where it was cut out on the top side be messed with or should i leave well enough alone.
i just want to get as much air as i can on a budget type of build
i know their are other types of manifold for flowing air real good but i am sorry i just cant seem to pull myself to paying a grand for the manifold and another three hundred for a throttle body
maybe down the road when money is better but just not right now
heres the pic, please let me know
thanks in advance for helping out with info
dave
went last night and decided to start port matching
droped a small nut into place on the head to lay the real good steel intake gasket (fel-pro) on the intake side (didnt want the cheap plastic intake gaskets) and gasket didnt line up, was to high. pulled a old plastic intake gasket from another intake and found bosses on back side of gasket to help line up item for porting.
so turned our attention to intake side and i see where i can open the right side of the truck manifold to match gasket, cool beans.
below is a pic of the inside of the truck manifold, should this area where it was cut out on the top side be messed with or should i leave well enough alone.
i just want to get as much air as i can on a budget type of build
i know their are other types of manifold for flowing air real good but i am sorry i just cant seem to pull myself to paying a grand for the manifold and another three hundred for a throttle body
maybe down the road when money is better but just not right now
heres the pic, please let me know
thanks in advance for helping out with info
dave
01-27-2012, 04:54 PM
#36
What vehicle is this going in? I'm running the Edelbrock proflo xt on my 408....I ported it and it works GREAT but It's 10 3/4" tall so there is no way it would fit an F- body without cutting the cowl or maybe even the windsheild....summit racing for $365
02-05-2012, 12:39 PM
#38
On The Tree
Thread Starter
Join Date: Sep 2011
Location: dayton ohio
Posts: 131
Likes: 0
Received 0 Likes
on
0 Posts
update...............
thursday niight went ahead and flowed my head that i will be using in my build, now that i have big gonads.....lol
this is what they were originally and modified:
these are stock 799 castings using 2.00 / 1.55 vette valves
using 1020 bench, clay, pipe and 4.030 hole @ 28"
---- before work ----- after work
lift - intake exhaust - intake exhaust
.100 --- 63.1 54.9 --- 63.1 56.6
.200 --135.2 112.7 -- 136.0 112.7
.300 --190.4 152.7 -- 202.6 151.9
.400 -- 227.7 179.8 -- 245.9 185.1
.500 -- 232.7 198.0 -- 271.9 210.6
.600 -- 237.8 206.4 -- 256.5 227.6
.700 -- 240.8 210.5 -- 262.9 236.0
.800 --- N/A N/A ----- 266.7 241.3
i did go back in before i went home and hit the intake with a 60 grit drum roll and did a little more cleaning up
i dont have a official number yet but i did see 276 @ .800 on the intake side
thats a gain of almost 40 cfm on intake and 25+ on exhaust
I did some checking and I found a set of CNC stage 1 heads that flowed with a 3.910 hole
.600 @ 313 cfm intake
.600 @ 220 cfm exhaust
so i think i am good on the exhaust side just mirror polish the hell out of them
but can i really hit closer to the 300+ cfm on the intake side
any help would be great
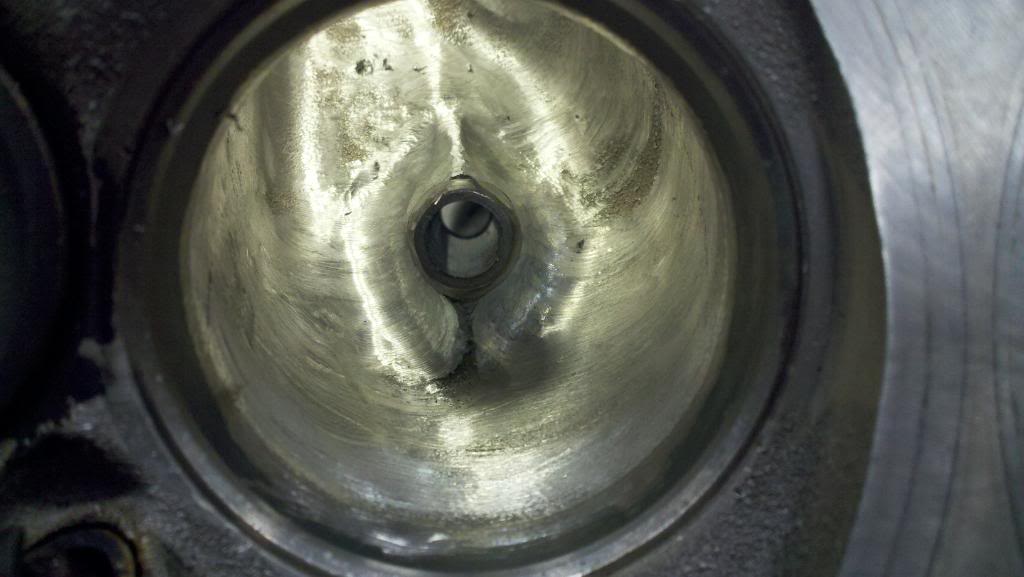
i did the same cut to the real set of heads i am using vs. the practice set of heads i have pictured above so please look at the pics and let me know what i can do to pic up more cfm please
thanks in advance
thursday niight went ahead and flowed my head that i will be using in my build, now that i have big gonads.....lol
this is what they were originally and modified:
these are stock 799 castings using 2.00 / 1.55 vette valves
using 1020 bench, clay, pipe and 4.030 hole @ 28"
---- before work ----- after work
lift - intake exhaust - intake exhaust
.100 --- 63.1 54.9 --- 63.1 56.6
.200 --135.2 112.7 -- 136.0 112.7
.300 --190.4 152.7 -- 202.6 151.9
.400 -- 227.7 179.8 -- 245.9 185.1
.500 -- 232.7 198.0 -- 271.9 210.6
.600 -- 237.8 206.4 -- 256.5 227.6
.700 -- 240.8 210.5 -- 262.9 236.0
.800 --- N/A N/A ----- 266.7 241.3
i did go back in before i went home and hit the intake with a 60 grit drum roll and did a little more cleaning up
i dont have a official number yet but i did see 276 @ .800 on the intake side
thats a gain of almost 40 cfm on intake and 25+ on exhaust
I did some checking and I found a set of CNC stage 1 heads that flowed with a 3.910 hole
.600 @ 313 cfm intake
.600 @ 220 cfm exhaust
so i think i am good on the exhaust side just mirror polish the hell out of them
but can i really hit closer to the 300+ cfm on the intake side
any help would be great
i did the same cut to the real set of heads i am using vs. the practice set of heads i have pictured above so please look at the pics and let me know what i can do to pic up more cfm please
thanks in advance