


ATI Super Damper Install Q

Launching!


Joined: Oct 2003
Posts: 267
Likes: 14
From: Chicago
So, I was going to pop on the ATI damper this morning before dropping the engine back in... and I've hit a snag. It came with three 2" 5/16" bolts and six 1" 3/8" countersunk T40 bolts (as needed).
The problem is I'm not sure I have the right hub for the A/C...
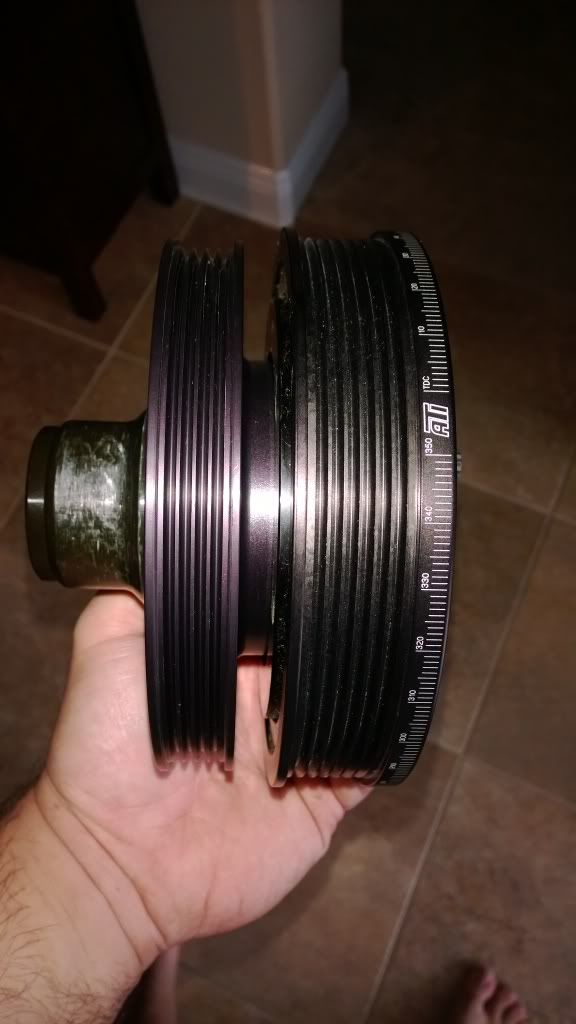
The A/C pulley can go on one of two ways. If you flip it around so that it's flush with the serpentine pulley, the bolts aren't long enough to go through the hub, serpentine pulley, and A/C pulley. So, that leads me to believe it has to go the other way (which would be flush if not for the hub). When I test fit this second way, the A/C pulley nestles nicely inside the serpentine hub with a decent amount of space in between (if no hub is installed). But when you put the hub in between, it's much thicker than the natural space produced by the two flush pullies, and that creates a pretty large gap between the outside of pullies. I can't find what I did with my stock balancer, but I seem to recall my stock balancer didn't have this gap between the serpentine and A/C pulley. Maybe I'm wrong there? If so, everything would be okay...
Note that I have not torqued everything down yet, because if it's the wrong hub, I don't want to have to unseat everything. So maybe some of this goes away, but I'm not sure the gap will go away totally?
Do I have the wrong hub? Seems like it's too thick. Or should there be a sizeable gap between the A/C and serpentine pullies?
See pics, below.
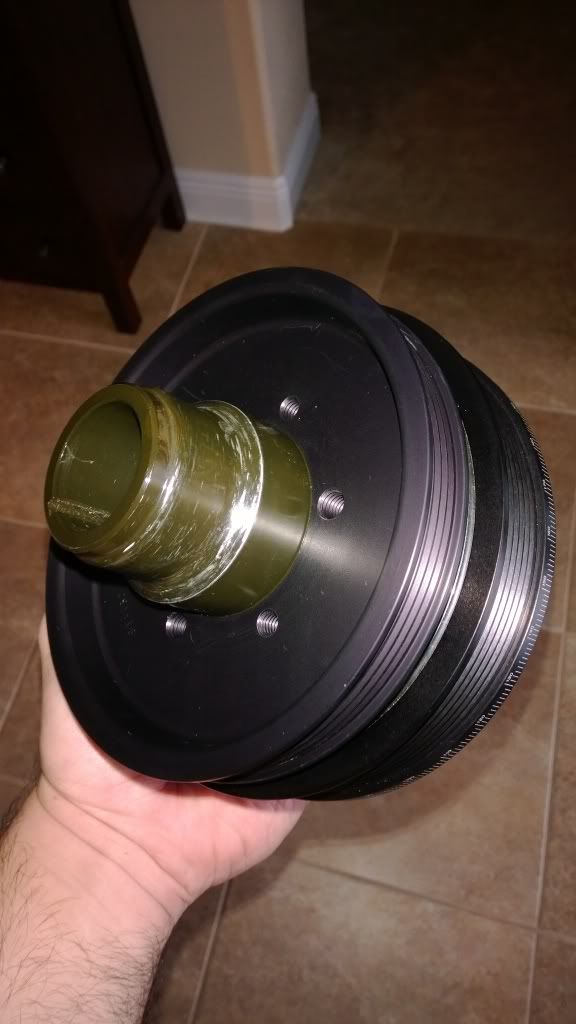
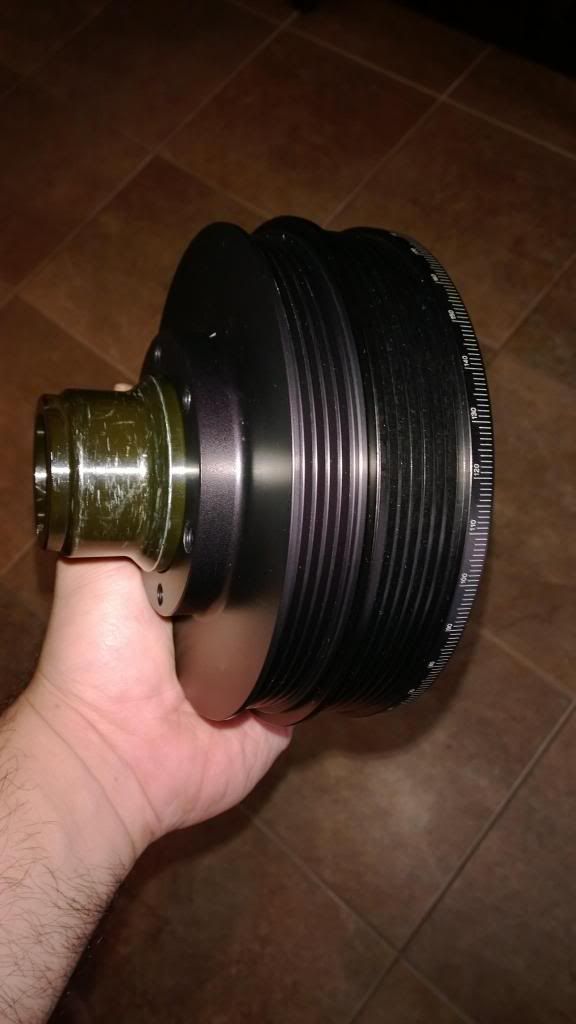
Pulley assembled so bolts can be threaded (and you can see how the lip on the center flange is designed to mate up with the serpentine pulley - but the hub now takes up all the space):
Notice how the center section and outer flange sit in this configuration:
Pulley assembled so it's flush (notice the way the orientation of the pulley center section and outer flange are different that above) Note: this pushes the bolt holes so far away that the 2" bolt cannot be threaded:
The problem is I'm not sure I have the right hub for the A/C...
The A/C pulley can go on one of two ways. If you flip it around so that it's flush with the serpentine pulley, the bolts aren't long enough to go through the hub, serpentine pulley, and A/C pulley. So, that leads me to believe it has to go the other way (which would be flush if not for the hub). When I test fit this second way, the A/C pulley nestles nicely inside the serpentine hub with a decent amount of space in between (if no hub is installed). But when you put the hub in between, it's much thicker than the natural space produced by the two flush pullies, and that creates a pretty large gap between the outside of pullies. I can't find what I did with my stock balancer, but I seem to recall my stock balancer didn't have this gap between the serpentine and A/C pulley. Maybe I'm wrong there? If so, everything would be okay...
Note that I have not torqued everything down yet, because if it's the wrong hub, I don't want to have to unseat everything. So maybe some of this goes away, but I'm not sure the gap will go away totally?
Do I have the wrong hub? Seems like it's too thick. Or should there be a sizeable gap between the A/C and serpentine pullies?
See pics, below.
Pulley assembled so bolts can be threaded (and you can see how the lip on the center flange is designed to mate up with the serpentine pulley - but the hub now takes up all the space):
Notice how the center section and outer flange sit in this configuration:
Pulley assembled so it's flush (notice the way the orientation of the pulley center section and outer flange are different that above) Note: this pushes the bolt holes so far away that the 2" bolt cannot be threaded:
Thread Starter
Joined: Aug 2004
Posts: 11,258
Likes: 146
From: Pace, FL
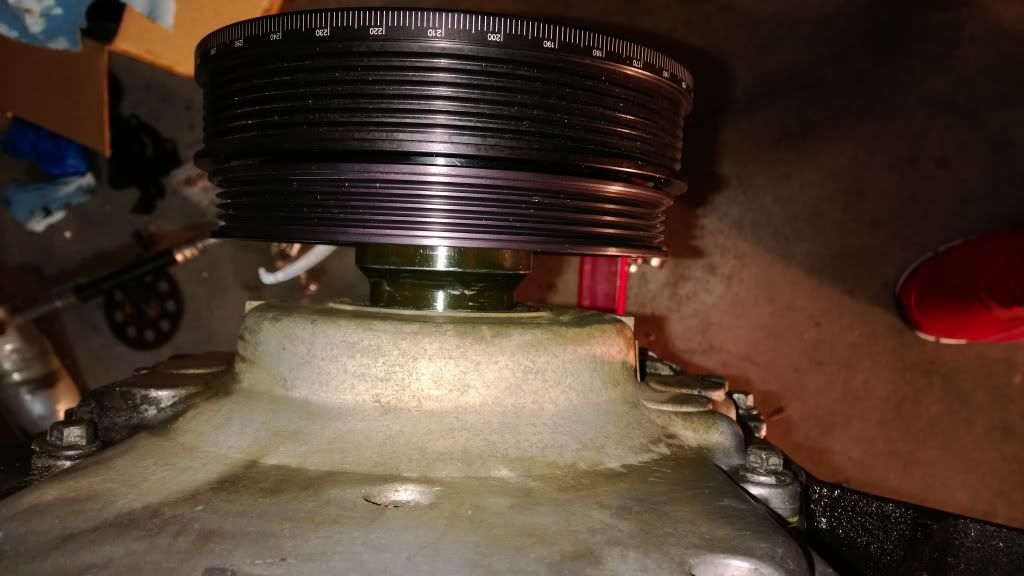
I don't recall what I did there, but there is a small gap when you put it together. The long bolts go all the way through - there are six holes and three are incorrect and three are correct. As you bolt it down in a criss-cross pattern, it pulls the damper onto the hub. It's not an interference fit, but it is a good, tight fit. I verified by comparing to the stock balancer. Everything lined up on the engine and it works flawlessly without any squeal (which I had before). See the pic of how it looks once tightened down.
Thread Starter
Joined: Aug 2004
Posts: 11,258
Likes: 146
From: Pace, FL
I believe so. I don't recall having any left over. The long go through all three pieces. I just went and looked. There were six of them that have the T30 countersunk heads (I think it was a T30) and then the three 12-point with the washers.
Not great pics of when I dropped the motor back in.
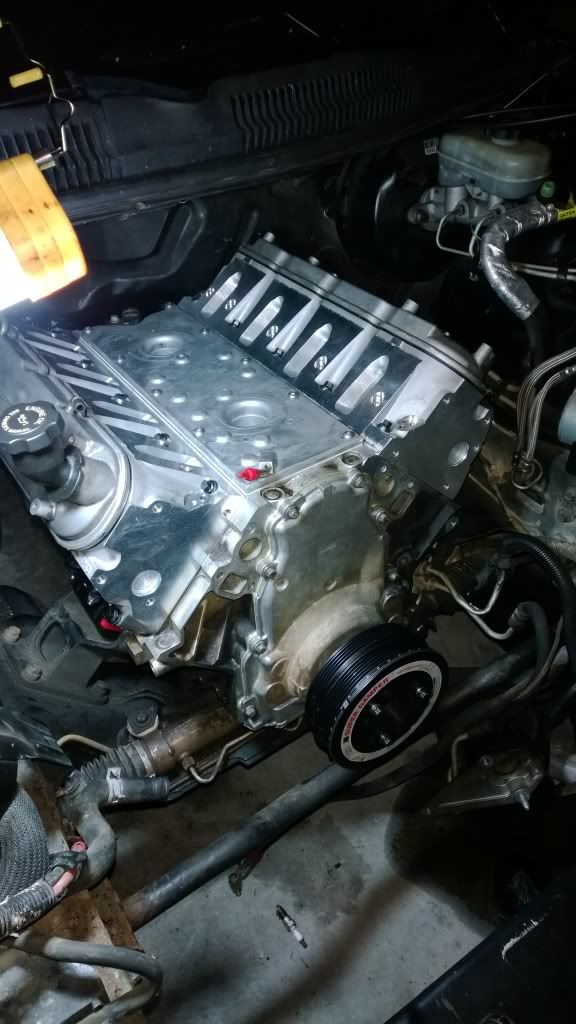
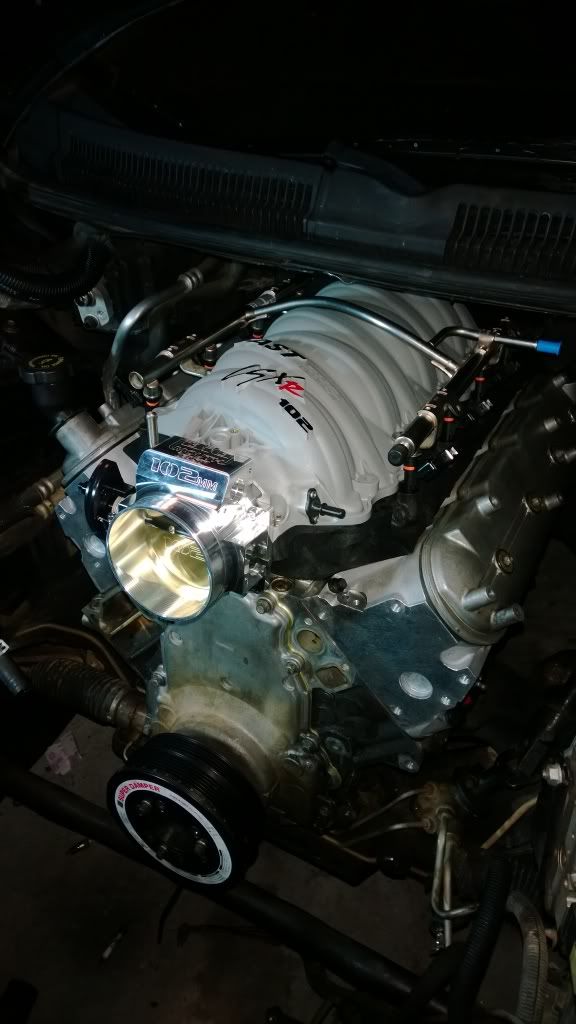
Not great pics of when I dropped the motor back in.
Looking good Jake! How big is this motor?
I'm looking at the ATI Chevy damper page to understand why you needed to add the AC pulley to the damper. The Fluidampr I used for my build came complete and ready to install.
I'm looking at the ATI Chevy damper page to understand why you needed to add the AC pulley to the damper. The Fluidampr I used for my build came complete and ready to install.
Thread Starter
Joined: Aug 2004
Posts: 11,258
Likes: 146
From: Pace, FL
Because they use different size pulley combos. ATI has like 10 different PNs for our cars. You can get without A/C, with A/C, 10% UD, no UD, 25% UD, different kinds of rubber, etc. The hub is pretty similar tho.
It's a 346. Next motor is either a 408+Nitrous or a 370+F1A Procharger. F1A is going to punish everything in the car but be easier to drive... so I'm still debating whether or not I want a 900rwhp car on 93 octane. Who doesn't? But the cash outlay is pretty big for the fuel upgrades and all. And everything becomes a wear item at that level.
It's a 346. Next motor is either a 408+Nitrous or a 370+F1A Procharger. F1A is going to punish everything in the car but be easier to drive... so I'm still debating whether or not I want a 900rwhp car on 93 octane. Who doesn't? But the cash outlay is pretty big for the fuel upgrades and all. And everything becomes a wear item at that level.
LS1 Tech Stories
The Best V8 Stories One Small Block at Time

Topdon ONE vs. Artidiag 800 BT2: Which is the Diagnostic Tablet For You?
Pouria Savadkouei
Gas Monkey Built a 6-Wheel Ferrari Testarossa With a Corvette LT4 Engine
Verdad Gallardo
7 Most Reliable High-Performance Engines GM Has Ever Built
Verdad Gallardo
Amazing '71 Camaro Restomod Is Modern Muscle Car Under the Skin
Verdad Gallardo
6 Common C5 Corvette Failures and What's Involved In Repairing Them
Pouria Savadkouei
Retro Modern Bandit Pontiac Trans AM Comes With Burt Reynolds' Autograph
Verdad Gallardo
Top 10 Greatest Cadillac V Series Performance Models Ever, Ranked
Pouria Savadkouei
Top 10 Most Powerful Chevy Trucks Ever Made!
