


Pics of my DIY ported heads
Thread Starter
TECH Senior Member
iTrader: (28)
Joined: Nov 2005
Posts: 5,556
Likes: 6
From: Rochester, NY
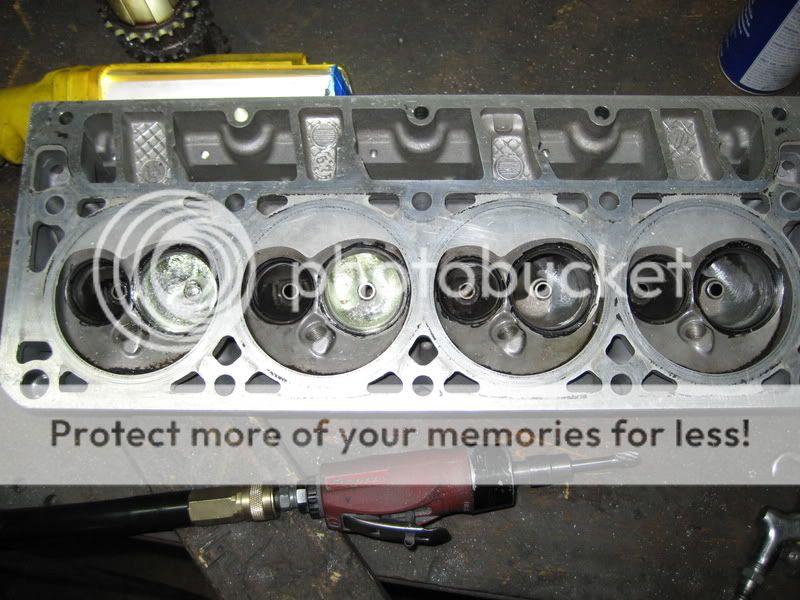
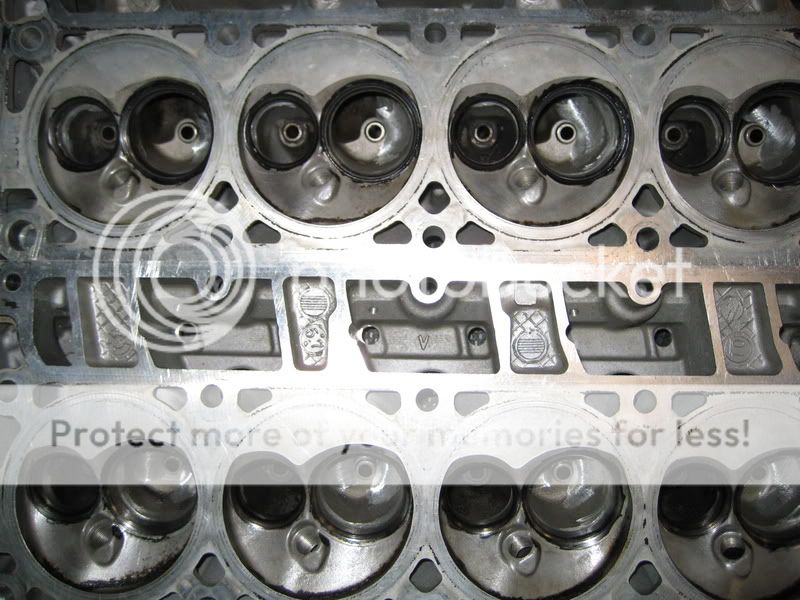
Nothing fancy, just a take off LS1 set. And some work on them, here and there. After hours a few weeks ago. I'm not sure the final plans for them. Just figure I share some pics, and see in there anything I can improve?
stock
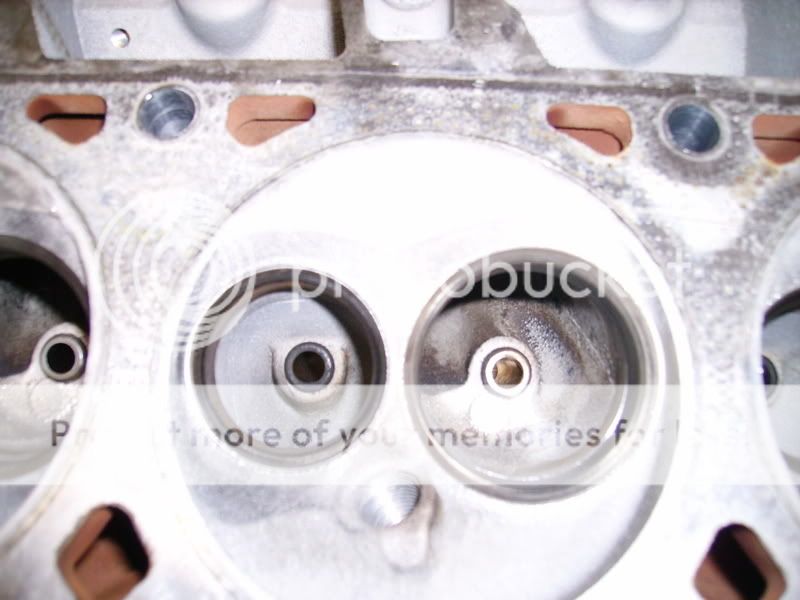
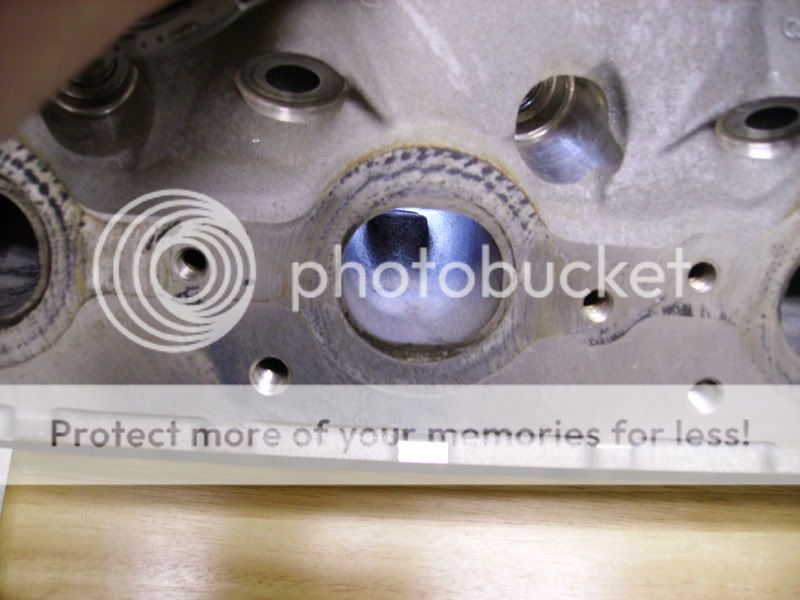
roughing
(1 3/4 qtp LT)
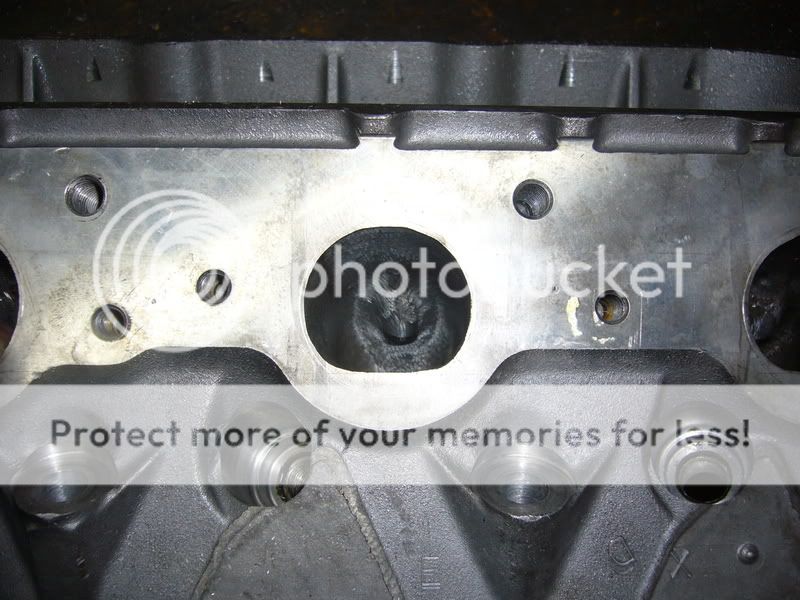
cleaned up better, sand roll


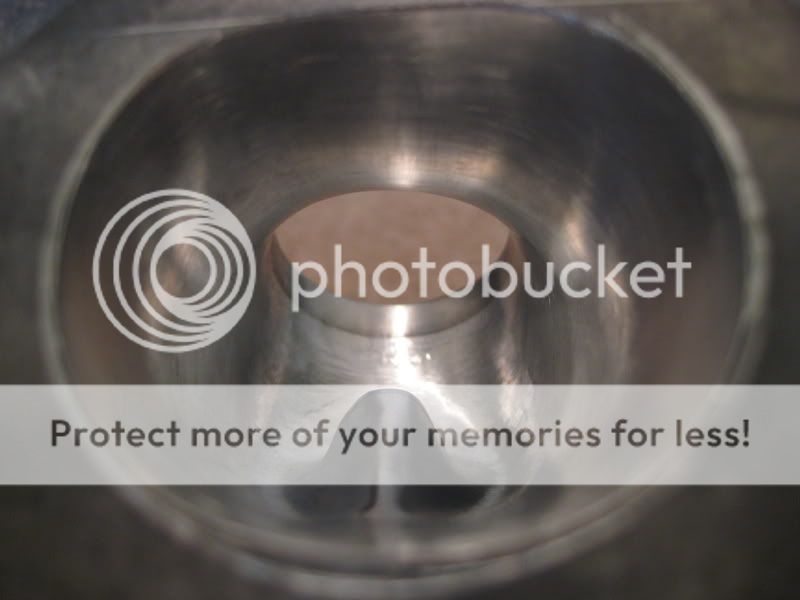


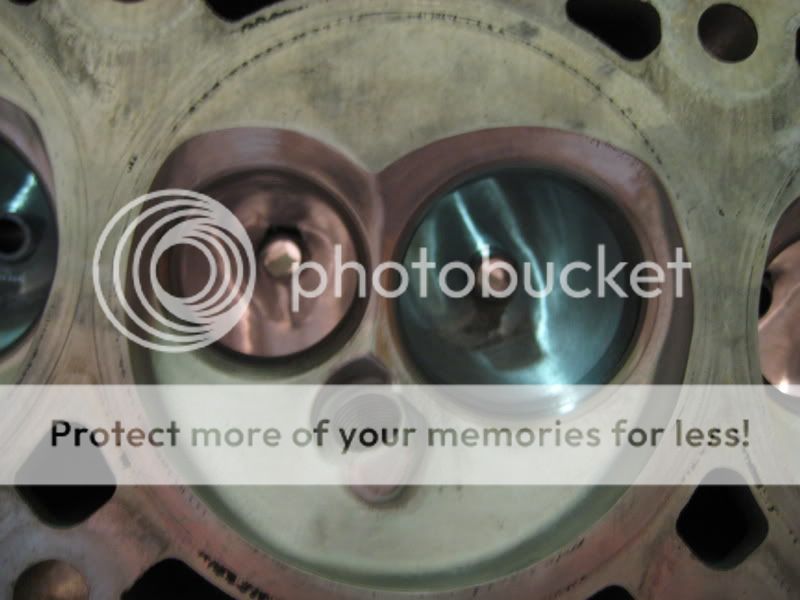
Let me know what you think , and if ther anything I can improve. My 1st set, so looking to.
stock
roughing
(1 3/4 qtp LT)
cleaned up better, sand roll
Let me know what you think , and if ther anything I can improve. My 1st set, so looking to.
Last edited by studderin; Aug 7, 2008 at 03:44 PM.
Do you have a flow bench???
It's a pretty ballsy move.. A lot of people start out doing what you're doing and totally ruin a set of heads... It takes a long time and a lot of flowing air through the heads to figure out a good port.
They look good to me, but I don't know a damn thing about head porting so...
It's a pretty ballsy move.. A lot of people start out doing what you're doing and totally ruin a set of heads... It takes a long time and a lot of flowing air through the heads to figure out a good port.
They look good to me, but I don't know a damn thing about head porting so...
Looks pretty good. I doubt you have a flow bench, but to check how close you ported each chamber lay the head down on something flat and pour water in each chamber with a measuring cup and see how much each hold for accuracy
whats ballsy about it???? u can get 241's (which in my op is a great head) for like 200 bux,,sometimes cheaper!
Kudo's for trying it yourself, i hope you have some great results.
Kudo's for trying it yourself, i hope you have some great results.
TECH Fanatic
Joined: Jul 2006
Posts: 1,179
Likes: 0
From: North Bay, Ontario
i think hes saying that if youre not experienced with porting you can mess up a set of heads by porting too much/messing up the airflow through the head.
I ported a set of 317's myself a few years ago and was able to run 11.30's with them. I thought they turned out pretty well. Your's look very similar to how mine did when I was finished. For your first effort I would say great job! On mine I polished up the exhaust runners like mirrors. I left a pretty rough texture in the intakes. Let us know how it runs.
Trending Topics
i think hes saying that if youre not experienced with porting you can mess up a set of heads by porting too much/messing up the airflow through the head.
LS1 Tech Stories
The Best V8 Stories One Small Block at Time

6 Common C5 Corvette Failures and What's Involved In Repairing Them
Pouria Savadkouei
Retro Modern Bandit Pontiac Trans AM Comes With Burt Reynolds' Autograph
Verdad Gallardo
Top 10 Greatest Cadillac V Series Performance Models Ever, Ranked
Pouria Savadkouei
Top 10 Most Powerful Chevy Trucks Ever Made!

Hennessey's New Supercharged Silverado ZR2 Has 700 HP
Verdad Gallardo
Coachbuilt N2A Anteros Is an LS2-Powered C6 Corvette In Italian Clothes
Verdad Gallardo
Awesome K5 Blazer Restomod Comes With C7 Corvette Power
Verdad Gallardo
10 Camaros You Should Never Buy

10 LS Engine Myths That Refuse to Die
Verdad Gallardo People think too critically alot of times about how precise the work has to be done on a set of heads to get results. What he has done here is fine, it will yield results. I would get a cheap set of telescoping guages and take the width of your exhaust bowl to 1.60" wide all the way out to the opening. Of course while blending it to the seat base. I would take a few more passes our of each side of the intake bowl, both curved and straight wall. Be sure that the transition from the aluminum to the seat is smooth like glass. A roll with eat the aluminum faster than it does the steel. So make as thin a cut with your burr as you can and do a very quick polish to take out any knicks. All in all it looks good.
did you just use a standard porting kit? i just gasket matched a set of old SBC heads and it helped some. Im planning on doing exactally what you just did..hope mine come out like yours.


They look really good for your first set . I have seen heads from places that know what they are doing that loked a little butchered up .Not the case here great job . I would take them to a flow bench just to see where you are at. But all that really maters are track results. Good Luck
Thread Starter
TECH Senior Member
iTrader: (28)
Joined: Nov 2005
Posts: 5,556
Likes: 6
From: Rochester, NY
People think too critically alot of times about how precise the work has to be done on a set of heads to get results. What he has done here is fine, it will yield results. I would get a cheap set of telescoping guages and take the width of your exhaust bowl to 1.60" wide all the way out to the opening. Of course while blending it to the seat base. I would take a few more passes our of each side of the intake bowl, both curved and straight wall. Be sure that the transition from the aluminum to the seat is smooth like glass. A roll with eat the aluminum faster than it does the steel. So make as thin a cut with your burr as you can and do a very quick polish to take out any knicks. All in all it looks good.
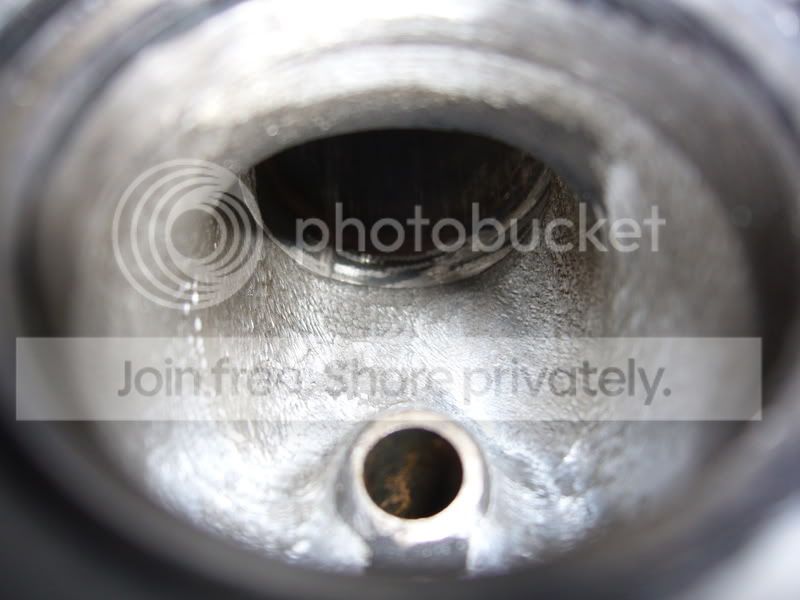
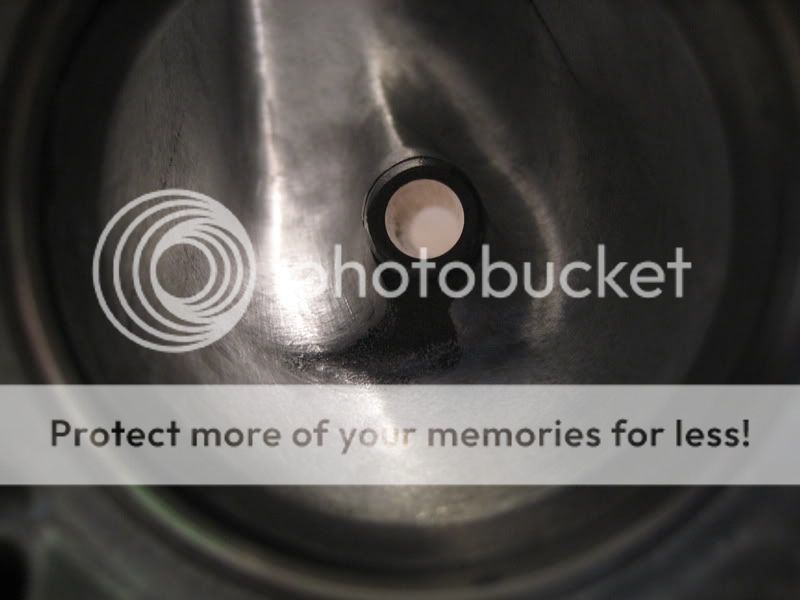
ya, I turned a stock valve down, for a gauge for both bowls. The seat blends fine, ya I used a stone thanks. And a 13mm gear wrench for a 1.01 fixed gauge tool for the min. runner widths, matched to a intake. Also a set of valves removed the margin to protect the seats for chamber work. But I did kiss a the seat on one, I havnt tried to lap the ship out of it. But Im looking into a vavle job specs sence I should have if fixed now, But not sure what to use.
thanks shockway, you wnat to see the pics
 Ill put them up tonight.
ya, I'd like to get some numbers. But not gona invest alot into having it done. There isnt anything I can change with that info really. You dont race flow benches, I had great luck with track inproments. In the DIY 3800 stock valve work Ive done.
Anyone have any help on what I can improve on these?
Last edited by studderin; Feb 15, 2008 at 05:24 AM.

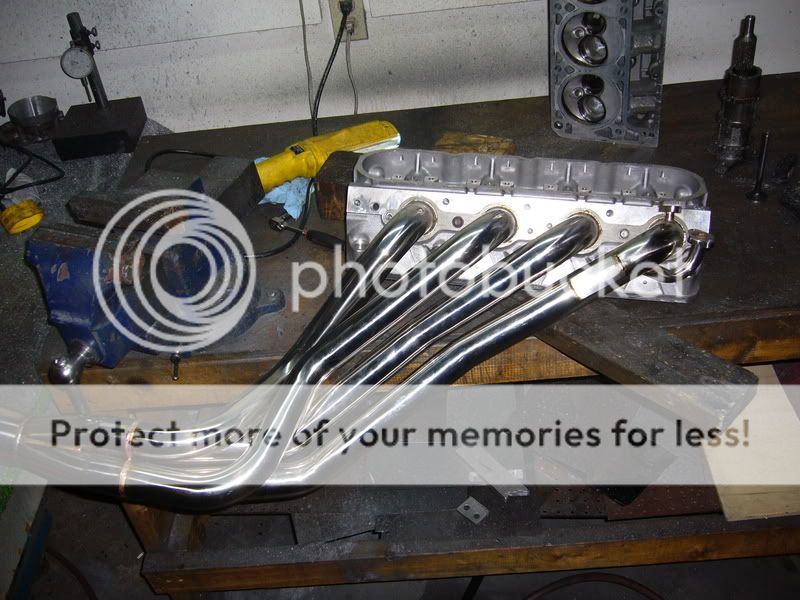
They look good. A trick to keep the aluminum from burring up is to squirt a little wd40 in while your porting. I also took my headers and made a templet with my header gasket to match my exhaust ports. Take very small amounts off at a time! it took me SEVERAL hours but paid off. Im a diy kind of guy and like the pride of being able to say I DID THAT instead of telling ppl i had my work done here. There are a lot of videos and helpful guids online and in magazines. I did my research and used a set of 5.3 heads for my ls set up. I did change out the valves and did a six angle vavle job as well. I got my heads for 75 bucks with 40k on them. My car now pulls very very strong compared to what it used to. Props to you. Im glad im not the only CRAZY one. lol good luck and let us know what your thoughts are when you put them to good use!
I had always heard that you want to have ypur exaust port smaller than your header. It helps keep the heads from sucking exaust back into the heads . Maybe someone who knows a little more about this can chim in here . I think it is called reversion.
Thread Starter
TECH Senior Member
iTrader: (28)
Joined: Nov 2005
Posts: 5,556
Likes: 6
From: Rochester, NY
Yup the single cut (non ferrus I think its called) burrs. Can remove some material wd40 is a must, you can see the can in the pic. The ext port outlets are 1.60 wide, you can see in the pics were I scribed the ID of the header size. GM gaskets had a large 1.9 od I belive, I think it was a dynatech gasket that had a 1.68ish size I used for the scribe that was the same size as most 1 3/4 header ID. I used the flash for the camara on marco to take a close up pic of the match. But you could feel they were samller then the headers. I didnt lower the floor at all.
wd40 is a must, you can see the can in the pic. The ext port outlets are 1.60 wide, you can see in the pics were I scribed the ID of the header size. GM gaskets had a large 1.9 od I belive, I think it was a dynatech gasket that had a 1.68ish size I used for the scribe that was the same size as most 1 3/4 header ID. I used the flash for the camara on marco to take a close up pic of the match. But you could feel they were samller then the headers. I didnt lower the floor at all.