
L92/LY6 truck to LS3/L76/L99 car intake manifold


 09-19-2010, 07:54 PM
#26
On The Tree
Join Date: Jan 2008
Posts: 128
Likes: 0
Received 0 Likes
on
0 Posts

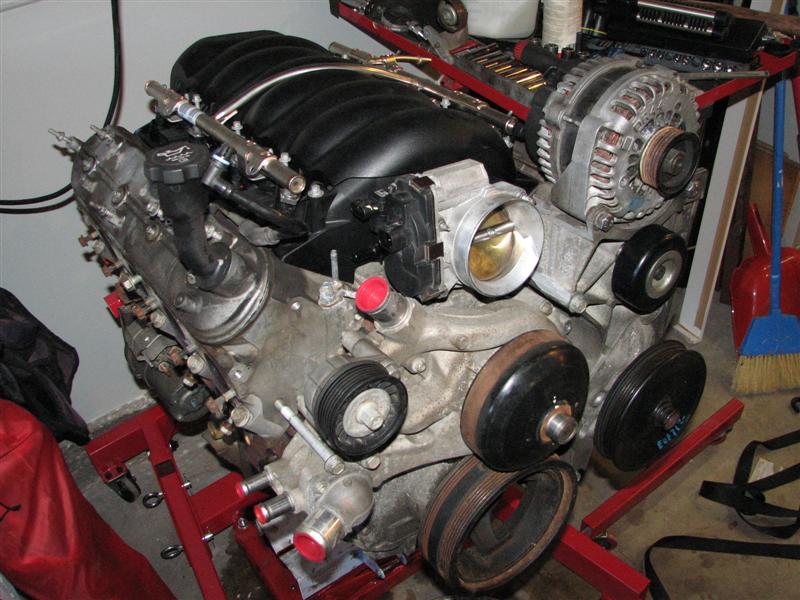
Here's what I did with my LS3 engine using truck asscessories with a LS3 water pump in order for me to use the LS3 throttle body.
I had a custom made 1 1/2 inch LS water pump spacer so the LS3 Corvette water pump could line up with the truck accessories..

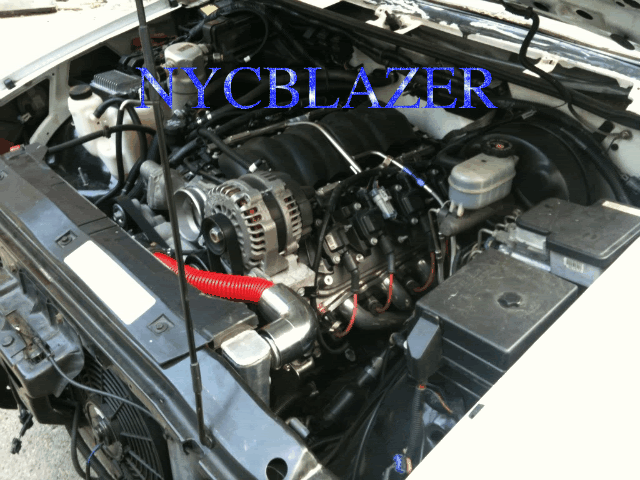


I had a custom made 1 1/2 inch LS water pump spacer so the LS3 Corvette water pump could line up with the truck accessories..
09-20-2010, 11:07 AM
#27

Either the LS2 or the LS1/6 style manifolds would work with your combo. I am fairly certain you have a 4 bolt manifold at which point you would be needing the LS2 intake. Give me a call if you need one, we have a few of them on the shelf right now.
 09-30-2010, 06:22 PM
#29
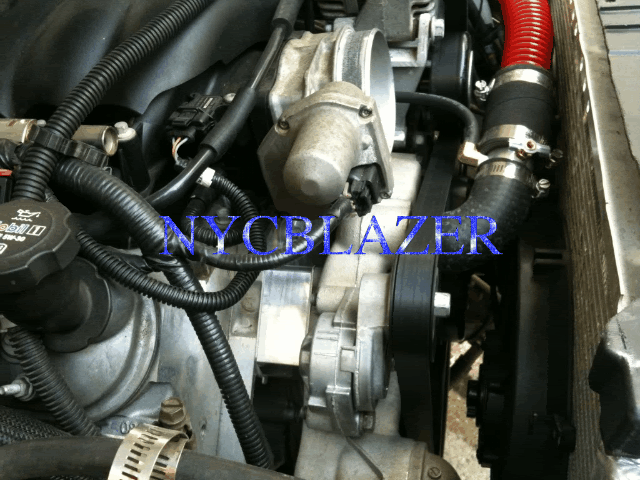
Here is how I relocated the idler pulley and made the truck accessories work with the LS3 intake for under $10. Granted I do still need to buy a belt, but I'm also thinking about scrapping this altogether and making my own brackets from scratch. I don't like how high the alternator sits with this setup.
First off the parts. From Misumi USA (www.misumiusa.com), the spacer is PN KNCLM10-30-20 and cost $5.70. It is nickel plated steel, 10mm ID, 30MM OD and 20MM length. The bolt is PN CB10-160 and cost $2.40. It is M10x160mm length. Total $8.10.

Here you can see that the spacer is the appropriate height to position the idler in line with where it originally was

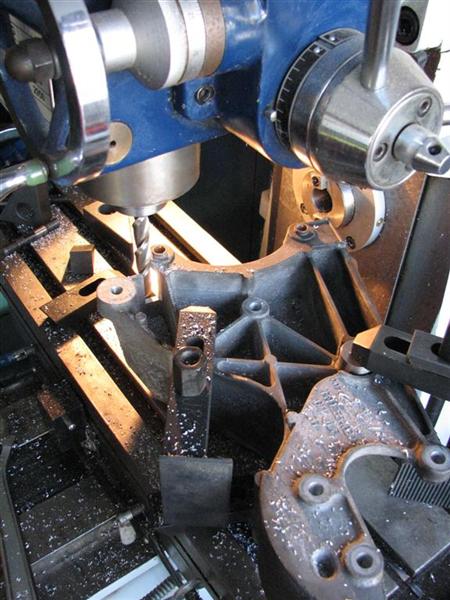
I am spoiled with a mill in my garage, so I used it to cleanly trim down the bracket. You could also do this with a vertical bandsaw or even a hacksaw.
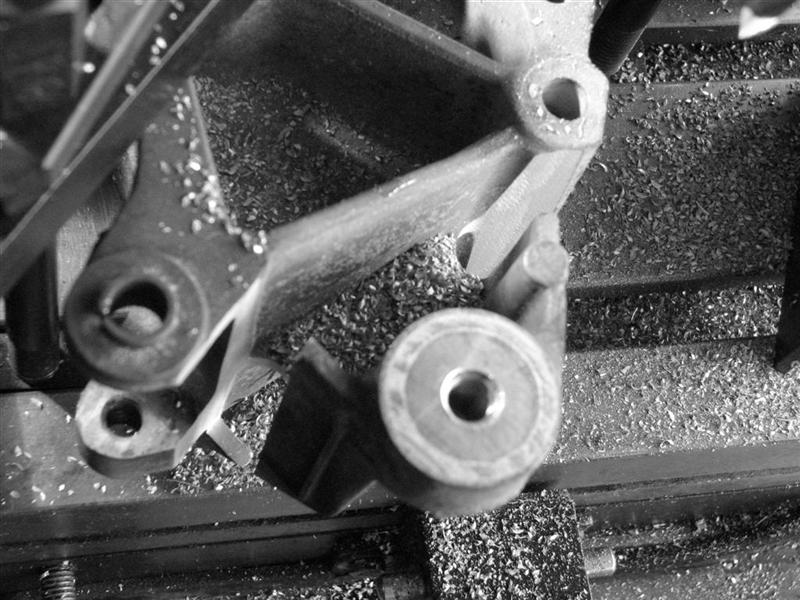

Here is the trimmed bracket around the throttle body

And here you can see a notch I added for the vacuum port on the drivers side of the intake

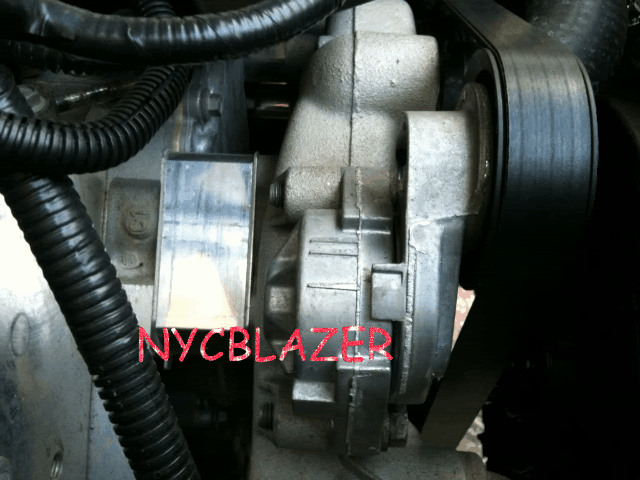
Here is the ilder pulley mounted with a ratchet strap used as a mockup belt

The Misumi spacer installs here:

And this is what the finished accessory drive looks like using a ratchet strap to mockup the belt path.

Sorry about the black & white pictures. Somehow the setting got changed while I was taking pictures.
First off the parts. From Misumi USA (www.misumiusa.com), the spacer is PN KNCLM10-30-20 and cost $5.70. It is nickel plated steel, 10mm ID, 30MM OD and 20MM length. The bolt is PN CB10-160 and cost $2.40. It is M10x160mm length. Total $8.10.
Here you can see that the spacer is the appropriate height to position the idler in line with where it originally was
I am spoiled with a mill in my garage, so I used it to cleanly trim down the bracket. You could also do this with a vertical bandsaw or even a hacksaw.
Here is the trimmed bracket around the throttle body
And here you can see a notch I added for the vacuum port on the drivers side of the intake
Here is the ilder pulley mounted with a ratchet strap used as a mockup belt
The Misumi spacer installs here:
And this is what the finished accessory drive looks like using a ratchet strap to mockup the belt path.
Sorry about the black & white pictures. Somehow the setting got changed while I was taking pictures.
10-08-2010, 08:48 PM
#30
Clint,
That was awesome and I was thinking of something along the same lines... Question though... I know the spacer was only $5.70, but with your mill couldn't you have drilled out the threads from the ilder pulley mount and mill that down for your spacer?
I really like how your ALT mount came out though, really clean!
Kevin
10-11-2010, 03:19 PM
#31
Kevin - Thanks for the comment! I certainly could have made the spacer on the mill, but making it from the old piece didn't cross my mind. For the cost of material, I figured I may as well buy it already machined from Misumi. I have been using them for years on my automation projects (I'm a mechanical engineer), so it was just a gut reaction to use them for this. I honestly don't think it would have been worth my time to cut it either from fresh material or the bracket.
Here are some more pictures of this in a complete form. I may be selling these parts off though as I want to go to an L99 accessory drive.


Here are some more pictures of this in a complete form. I may be selling these parts off though as I want to go to an L99 accessory drive.
10-11-2010, 06:35 PM
#32

That is cool. I did almost the same mod on my 68 camaro as I had hood clearance but the bottom mount alternator was not workable. I did not do the idler pulley and it works fine on an 02 ls6 engine. What engine is that water pump off of? My belt hangs over my car water pump pulley a little but it has not been a problem.
10-22-2010, 11:46 AM
#37
I hate to break it to you, but you're going to have to cut the accessory bracket down whether you use the $10 spacer or the $30 dingo setup. Trimming down the bracket has nothing to do with relocating the idler. It has to be done in order to clear the throttle body. You don't have to do it the way I did with the mill - there are easier ways and even a hacksaw will do the trick. You don't even have to trim as much as I did - I just wanted it to look clean.
12-08-2010, 07:39 PM
#38

This thread has some good pictures showing some of the differences between the LS3 and L76 manifolds. According to this, the LS3 has a screw-down MAP sensore while the L76 has a clip-in style. From the pictures it also looks like the connectors are different between the two.
http://www.digitalcorvettes.com/foru...ad.php?t=79686
L76

LS3

http://www.digitalcorvettes.com/foru...ad.php?t=79686
L76
LS3
This is the map in my LY6 intake:
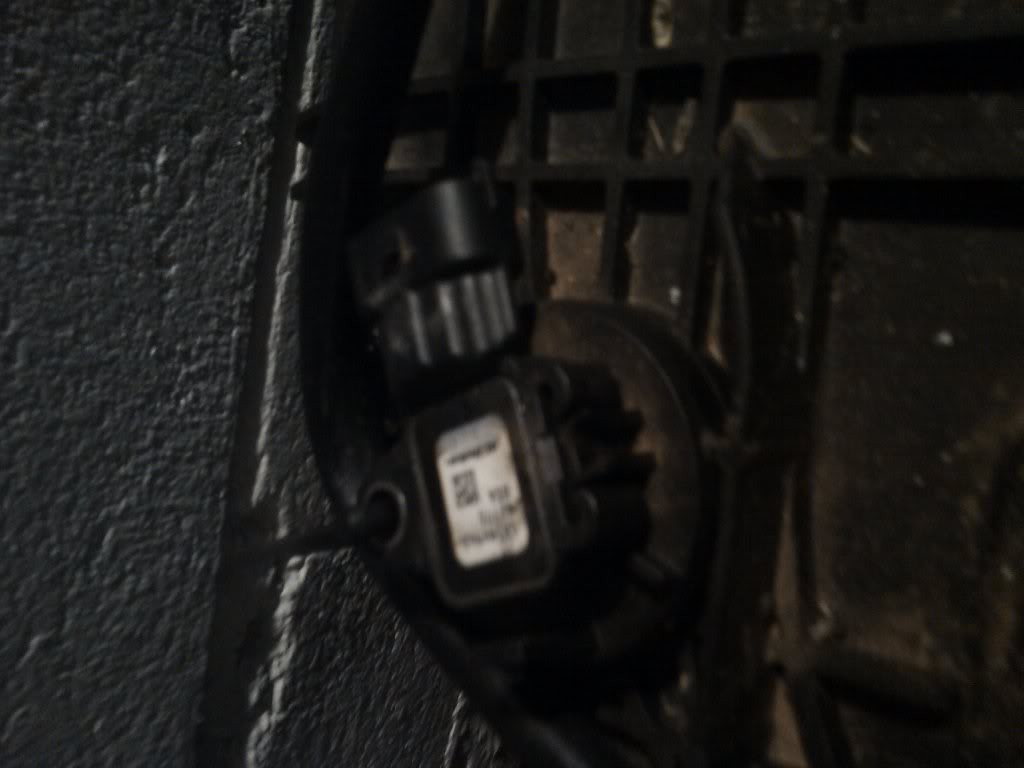
same map in ls3 intake:
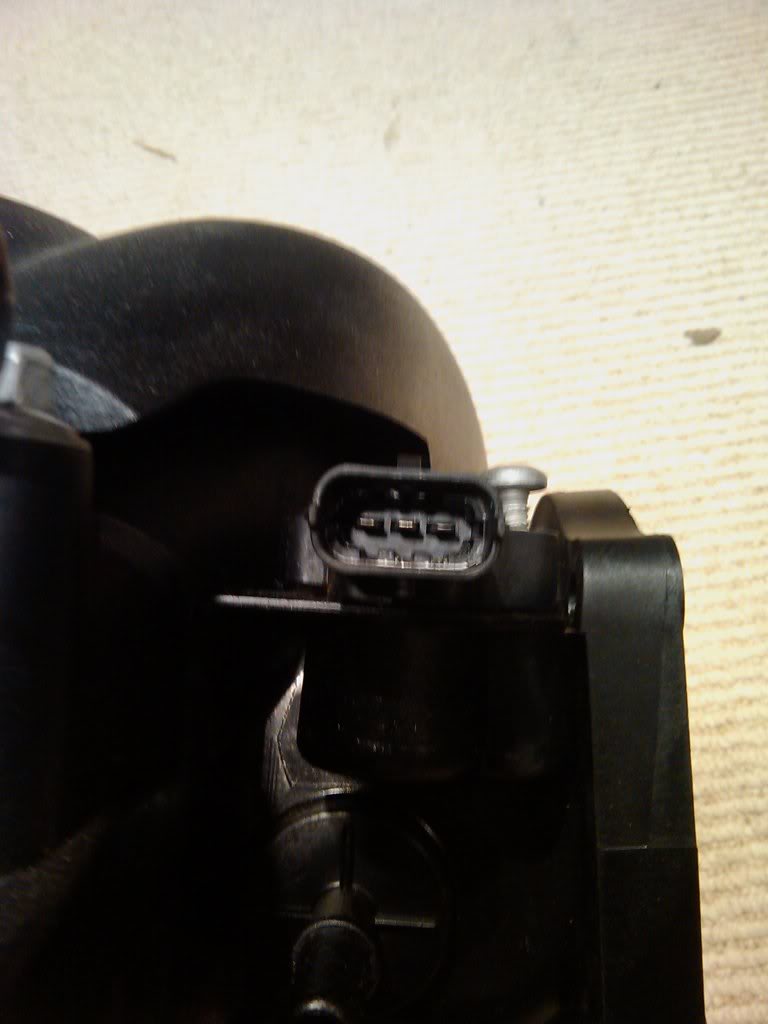
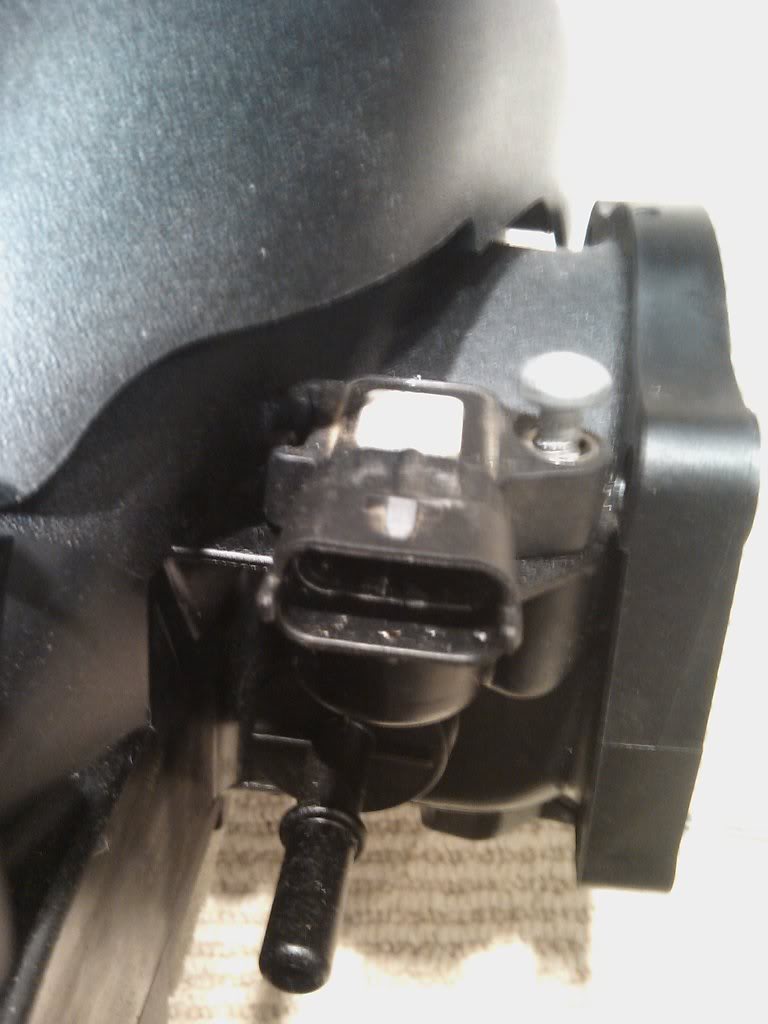
This is a 2009 LY6 map and it appears to be the same as a LS3 map.
Last edited by futureuser; 12-08-2010 at 07:41 PM. Reason: mistake
