Another relative newbie... '04 GTO
 12-13-2006, 11:55 PM
#1
Teching In
Thread Starter
Join Date: May 2006
Location: North Coast, NY, USA
Posts: 10
Likes: 0
Received 0 Likes
on
0 Posts
Newbie here - wandered over to start looking into engine/tuning info. Actually have been lurking a while, and realized I didn't have an intro post.
My car links are in my sig below (or should be).
My DD is my 2004 Pontiac GTO, now in the process of being converted to a Holden VY/VZ Monaro mutt.
As for my current mods, here's a list:
Engine:
* K&N AirCharger intake & baffle (IAT sensor placed in filter)
* Hand ported/polished throttle-body w/ coolant bypass
* NGK TR55IX Iridium Spark Plugs (gap to 0.055 inch)
* Taylor "409" 10.4mm wires
* EFILive street tune in progress
Transmission:
* B&M Ripper short-shifter kit
* Speed Inc's CAGS eliminator
* Royal Purple Synchromax (transmission fluid)
Exhaust:
* DynaTech long-tube headers w/ cats
* SLP Power-Flo stainless cat-back
Suspension/Brakes/Wheels:
* Pedders front "radius rod" bushings
* Delco Durastop front pads (Corvette C5 size)
* Front PowerSlot rotors w/ painted calipers
* (summer) Voxx MG 17x8 wheels / 245/45/R17 BFGoodrich g-Force T/A KDWS (needing replacement now)
* (winter) Stock 17x8 wheels / 225/50/17 Bridgestone Blizzak WS-50
Body:
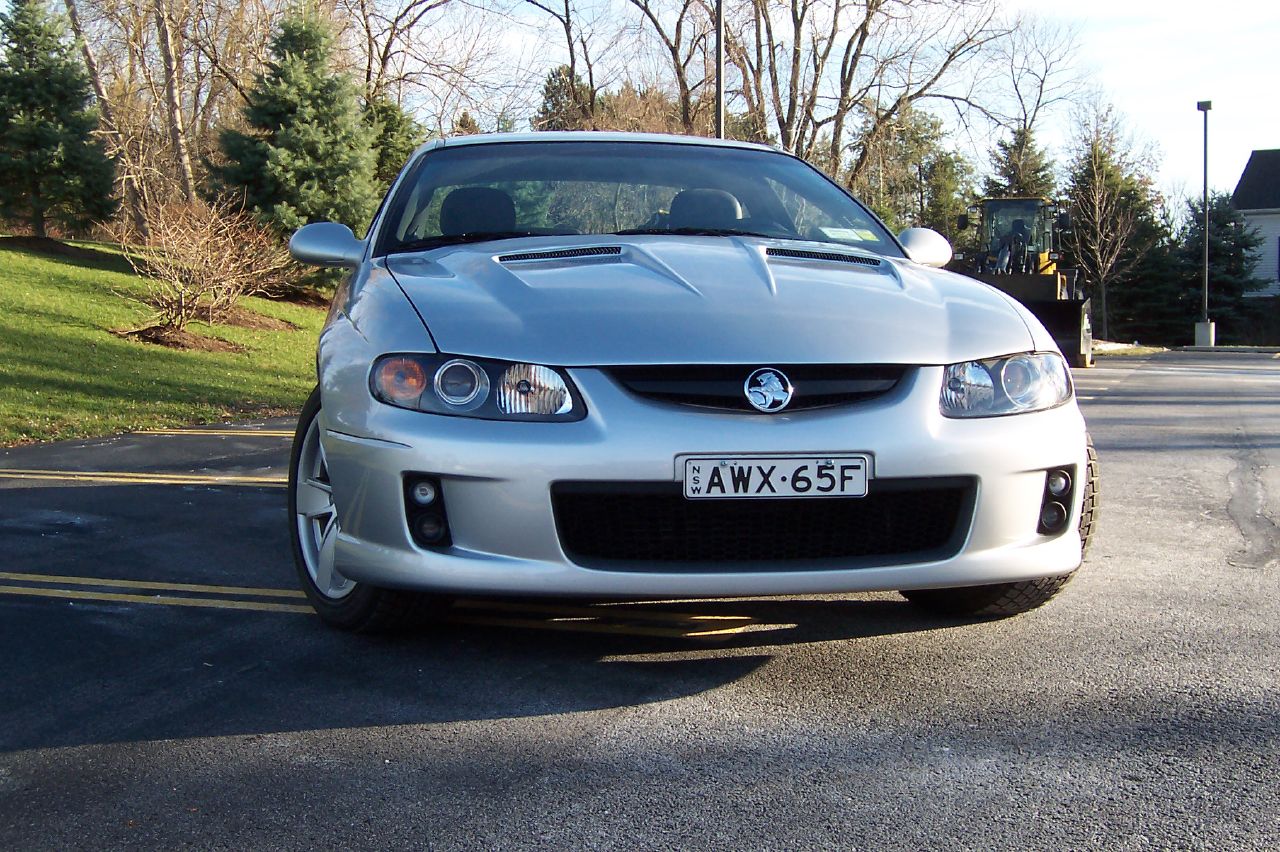
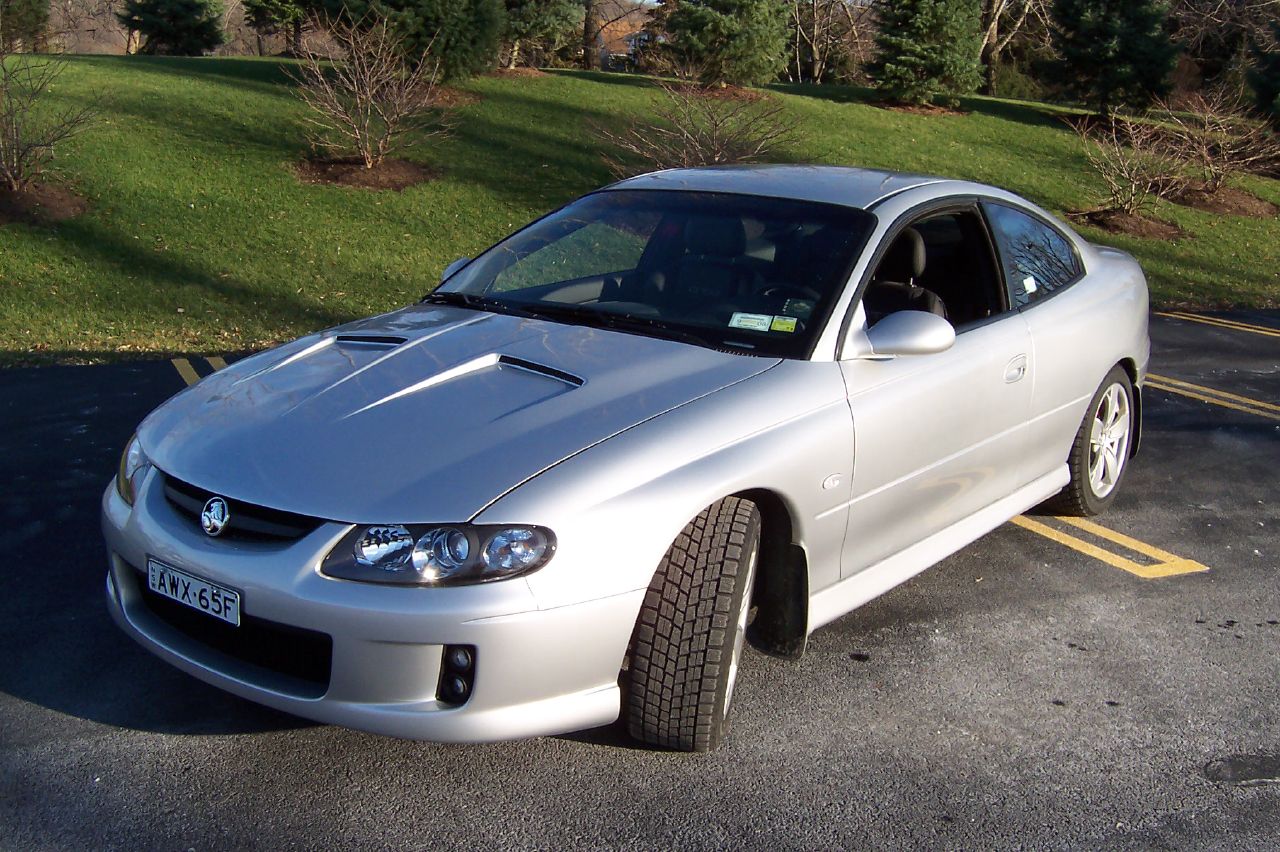
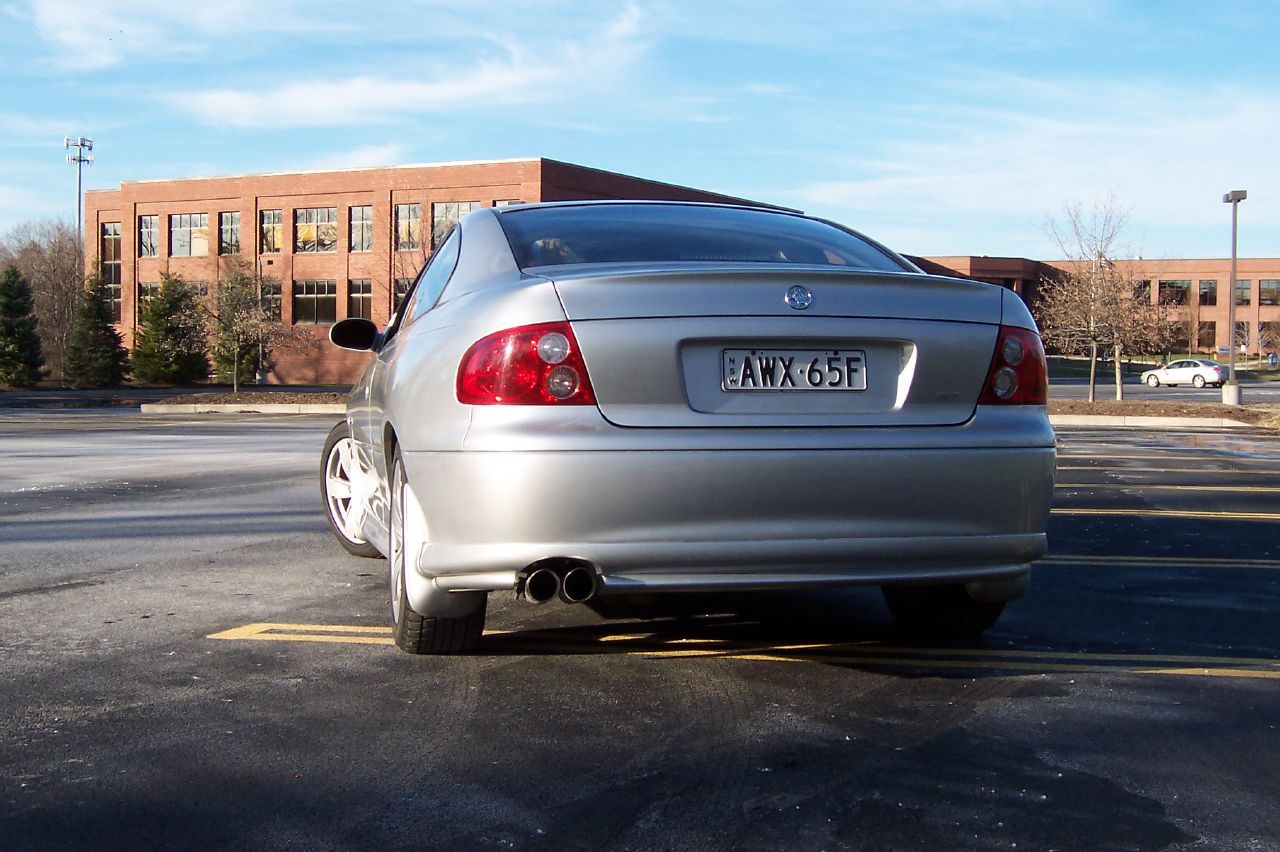
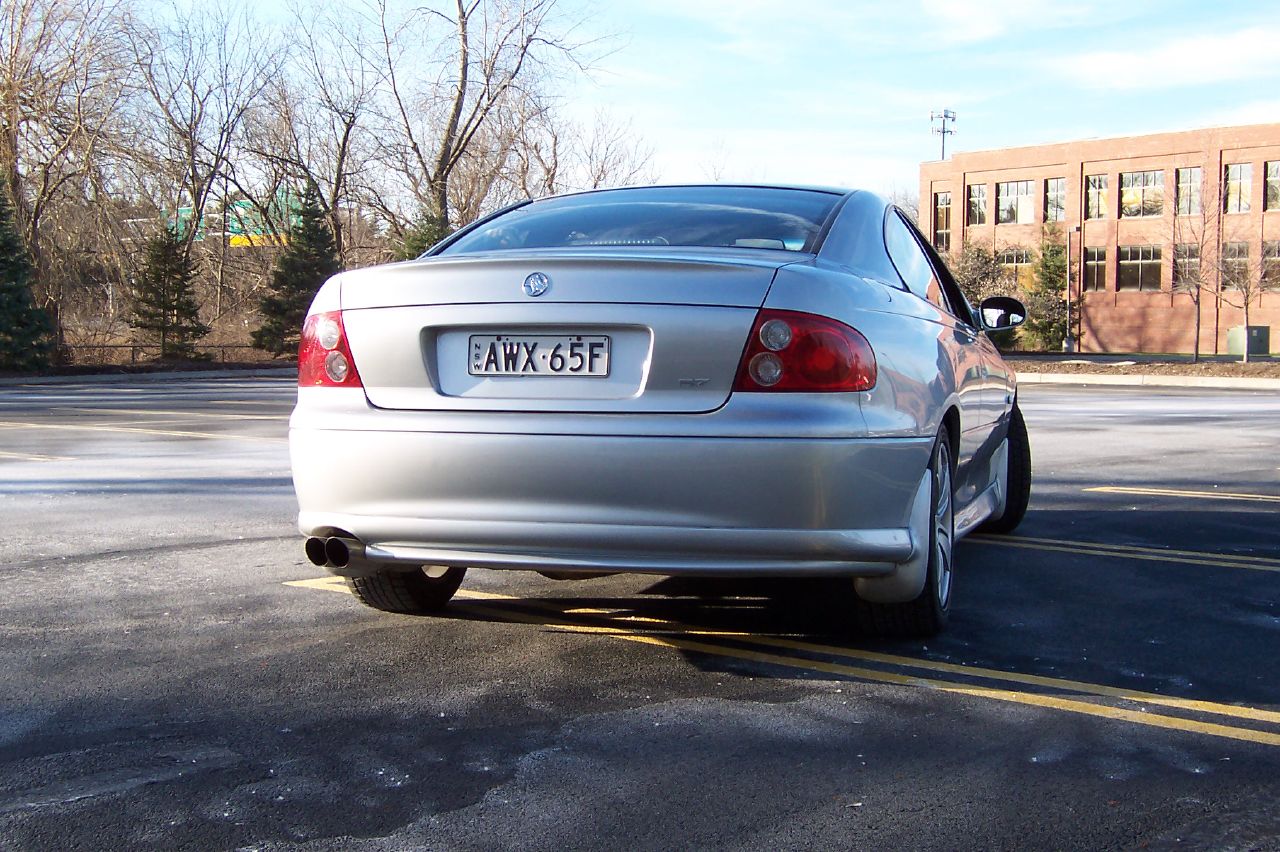
* 2005 Monaro VZ front bumper and side markers
* Gravana Tuning Type W ("Woodward") hood
* Monaro/Commodore SS molded splash guards (painted Silver)
* Deleted spoiler, filled/painted stock holes
* Replaced Pontiac badging with Holden emblems front, rear and dash
Interior/Electronics:
* Installed homemade dead pedal
* Hard-wired Valentine One radar detector w/ mount next to interior rear-view mirror
Pending install:
* Hotchkis front/rear swaybars (now in a box in my garage)
* 2005 OEM calipers (320mm vs 296 mm diameter rotors)
* ATE Super Blue Racing (brake fluid)
* port/polish LS1 heads (OEM 241 casting)
My car links are in my sig below (or should be).
My DD is my 2004 Pontiac GTO, now in the process of being converted to a Holden VY/VZ Monaro mutt.
As for my current mods, here's a list:
Engine:
* K&N AirCharger intake & baffle (IAT sensor placed in filter)
* Hand ported/polished throttle-body w/ coolant bypass
* NGK TR55IX Iridium Spark Plugs (gap to 0.055 inch)
* Taylor "409" 10.4mm wires
* EFILive street tune in progress
Transmission:
* B&M Ripper short-shifter kit
* Speed Inc's CAGS eliminator
* Royal Purple Synchromax (transmission fluid)
Exhaust:
* DynaTech long-tube headers w/ cats
* SLP Power-Flo stainless cat-back
Suspension/Brakes/Wheels:
* Pedders front "radius rod" bushings
* Delco Durastop front pads (Corvette C5 size)
* Front PowerSlot rotors w/ painted calipers
* (summer) Voxx MG 17x8 wheels / 245/45/R17 BFGoodrich g-Force T/A KDWS (needing replacement now)
* (winter) Stock 17x8 wheels / 225/50/17 Bridgestone Blizzak WS-50
Body:
* 2005 Monaro VZ front bumper and side markers
* Gravana Tuning Type W ("Woodward") hood
* Monaro/Commodore SS molded splash guards (painted Silver)
* Deleted spoiler, filled/painted stock holes
* Replaced Pontiac badging with Holden emblems front, rear and dash
Interior/Electronics:
* Installed homemade dead pedal
* Hard-wired Valentine One radar detector w/ mount next to interior rear-view mirror
Pending install:
* Hotchkis front/rear swaybars (now in a box in my garage)
* 2005 OEM calipers (320mm vs 296 mm diameter rotors)
* ATE Super Blue Racing (brake fluid)
* port/polish LS1 heads (OEM 241 casting)
Last edited by traumadog; 12-14-2006 at 12:02 AM.
 12-14-2006, 12:01 AM
#2
Teching In
Thread Starter
Join Date: May 2006
Location: North Coast, NY, USA
Posts: 10
Likes: 0
Received 0 Likes
on
0 Posts
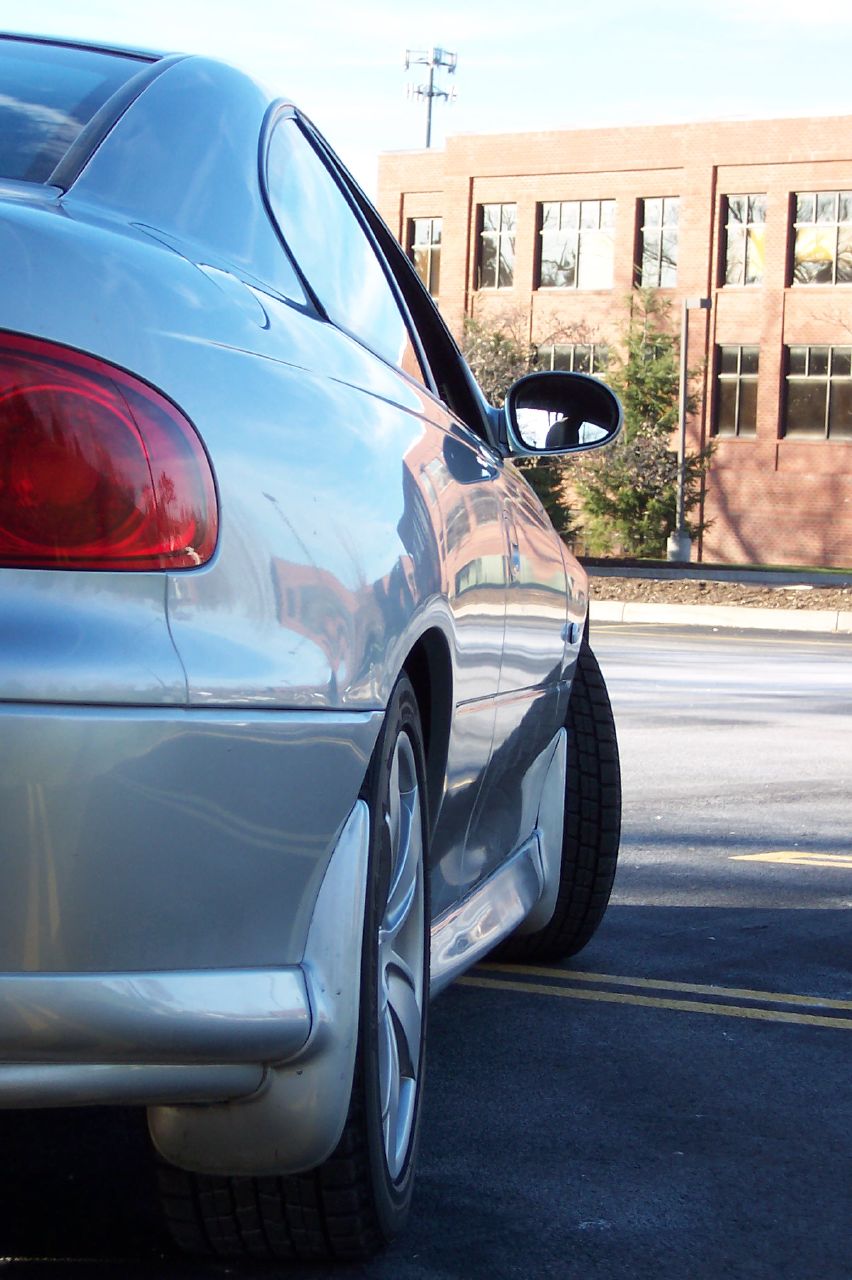
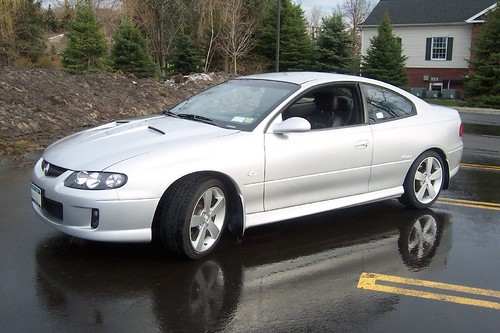
And if anyone cares, here are some pics...


As a sidebar, I also got picked as an AutoBlog Reader Ride of the Day...
As a sidebar, I also got picked as an AutoBlog Reader Ride of the Day...


Trending Topics
 05-26-2007, 10:49 PM
#10
Teching In
Thread Starter
Join Date: May 2006
Location: North Coast, NY, USA
Posts: 10
Likes: 0
Received 0 Likes
on
0 Posts
Some updates:
On the appearance front, I added some more exterior badging to complete the swap - and maybe to be less confusing to others - as well as swapped in a new set of 18's w/ OEM 235/40/18 Potenza's for summer rubber:


On the performance front, I also wanted to do some more to the GTO/Monaro for handling, as I hope to autocross some more.
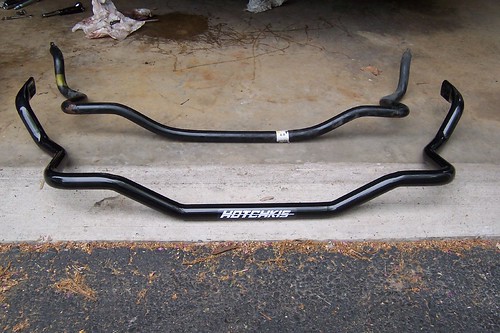
As the car wallowed some on the course, (and I'm already stuck in STU) I wanted to see how new swaybars changed things, so in went a new Hotchkis set.
First were the rear bars (they were easier).
Here's a shot vs. stock:

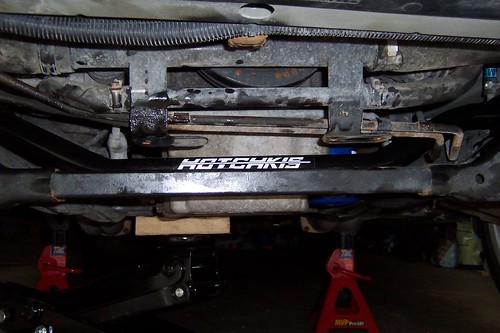
I had to drop the rear diff to get at the swaybar mounting bolts on the subframe. I wound up replacing the rear diff mounting bolts today (yay to torque-to-yield ), so now I don't have to be as paranoid and take it so easy on launches anymore.
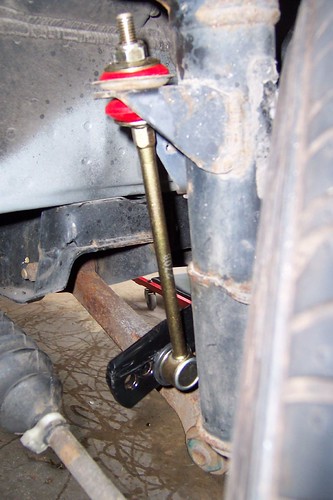
Here's the bar in place:

I'll have to play with the settings (there are four spots on the bar) to see where I like them best.
As for the fronts, I had to drop the front cradle to get it out - which was the bigger pain in the a$$.
Here's another "vs. stock" shot:
As well as my new Aussie end-links:


Here's the bar in place - I also had to undo the trans fluid cooler lines, so it was messy, too.
And finally, the new end-link in place:
I have it in the stiffest setting, and will see how things go from here.
All in all, I'm pretty happy so far; now I'll have to see where I like the bars to be set.
On the appearance front, I added some more exterior badging to complete the swap - and maybe to be less confusing to others - as well as swapped in a new set of 18's w/ OEM 235/40/18 Potenza's for summer rubber:
On the performance front, I also wanted to do some more to the GTO/Monaro for handling, as I hope to autocross some more.
As the car wallowed some on the course, (and I'm already stuck in STU) I wanted to see how new swaybars changed things, so in went a new Hotchkis set.
First were the rear bars (they were easier).
Here's a shot vs. stock:
I had to drop the rear diff to get at the swaybar mounting bolts on the subframe. I wound up replacing the rear diff mounting bolts today (yay to torque-to-yield
), so now I don't have to be as paranoid and take it so easy on launches anymore.Here's the bar in place:
I'll have to play with the settings (there are four spots on the bar) to see where I like them best.
As for the fronts, I had to drop the front cradle to get it out - which was the bigger pain in the a$$.
Here's another "vs. stock" shot:
As well as my new Aussie end-links:
Here's the bar in place - I also had to undo the trans fluid cooler lines, so it was messy, too.
And finally, the new end-link in place:
I have it in the stiffest setting, and will see how things go from here.
All in all, I'm pretty happy so far; now I'll have to see where I like the bars to be set.