


LS1/LS2/LS6 intake swap Sticky!!!
First things first...
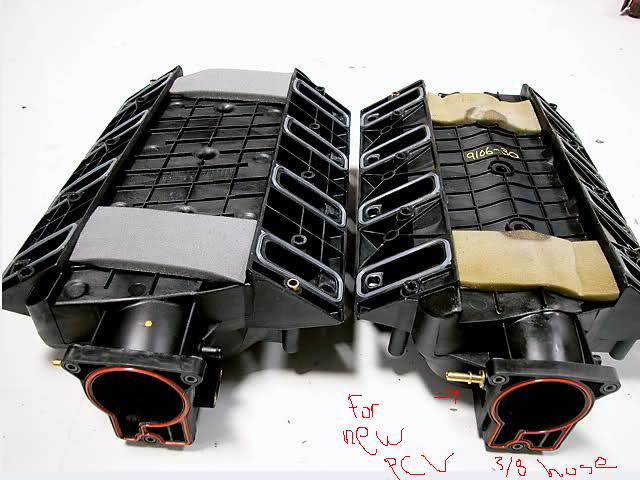
There has been a lot of questions about what intake manifold to use.. LS1 or LS6. F.A.S.T will not work due to the rear bulge. Sorry....
Here is a test performed by TPiS. READ AND DECIDE FOR YOURSELF! http://www.tpis.com/pages/2_17_06
LS1 intake vs. LS6 intake flow numbers.
.........................................200"..300 "..350"..400"..450"..500"..550"..600"
Stock LS6 head, LS1 intake....156...199...212...224...232...238...243. ..247
Stock LS6 head, LS6 intake....154...204...220...235...247...257...263. ..265
Stock cam with 1.8 rockers will provid about .510" non DOD and .520" DOD lobes lift. Valves will only reach peak lift numbers/flow once; and .050" lift twice. This is why the LS1 intake works after getting it's *** kicked above .450"
This is how I did my intake swap and the parts I used.
I will add links for the parts later
LS1/LS6 intake
LS6 injectors
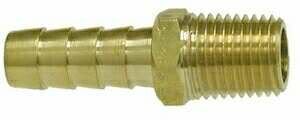
1/4 NPT to 3/8" hose fitting
1/4 NPT to 1/2" hose fitting
1 31/32" freeze plug
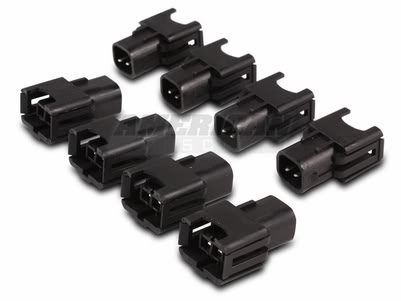
EV1-EV6 injector adapters
EGR plug (LS1 intake only)
LS1/LS6 fuel rail (non-returnless rail)
Intake gaskets, TB gasket
TB adapter
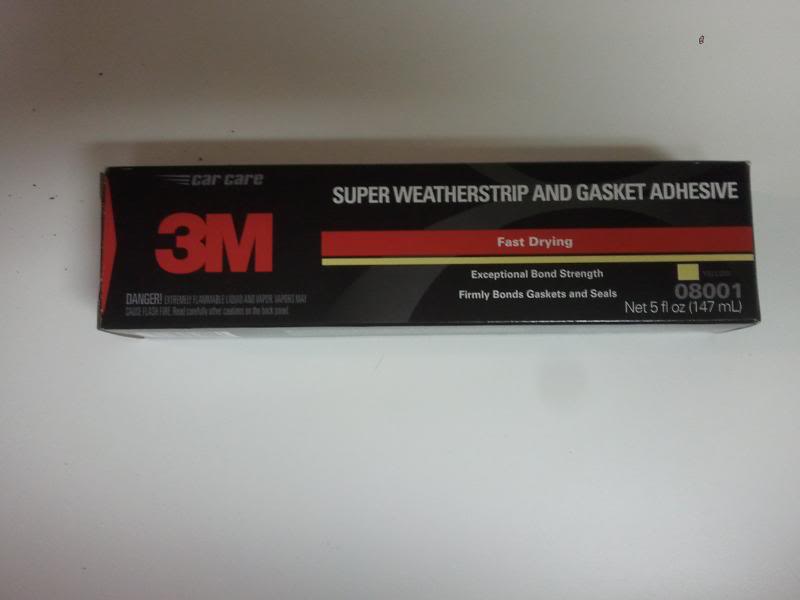
3M yellow weather stripping adhessive
You can get fittings here http://www.fastfittings.com/product/32006
Injector adapters http://www.bmotorsports.com/shop/pro...oducts_id/1765
Map extension harness http://www.bmotorsports.com/shop/pro...roducts_id/784
Start off by cleaning the intake with Gunk and hot water.
Remove the factory PCV fitting from the intake. You will need to gain as much opsu clearance as possible.
I used a dremel cutoff wheel. When the PCV nipple is ground down flush, plug the hole with some epoxy PUTTY.

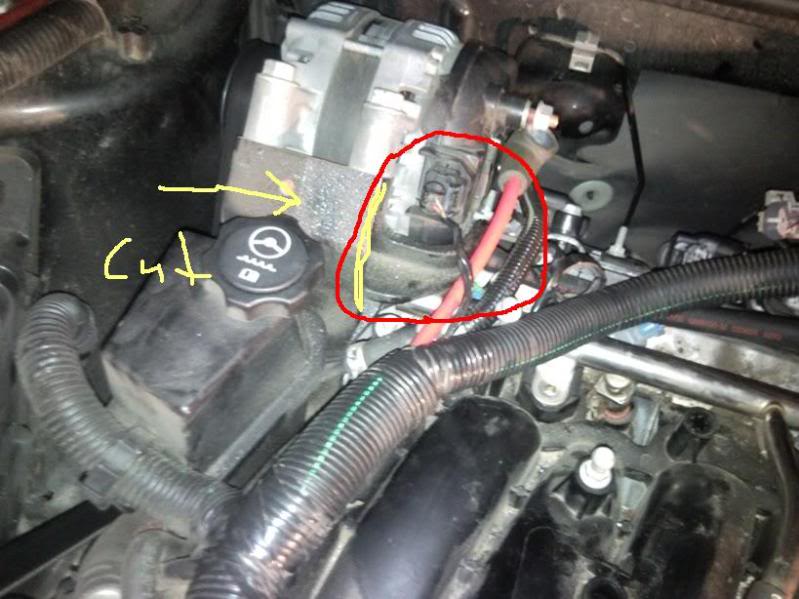
Next remove the rear vacuum fitting.
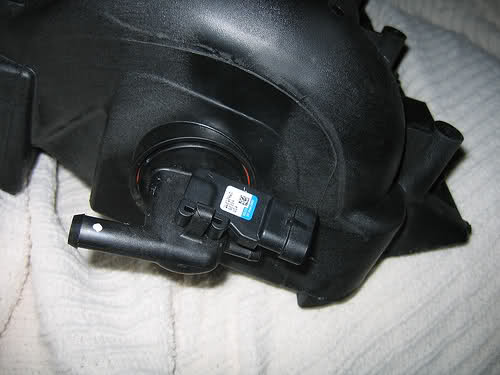
Take a hacksaw, and saw the fitting off. Pry the rest of the fitting out with a flat blade screwdriver.
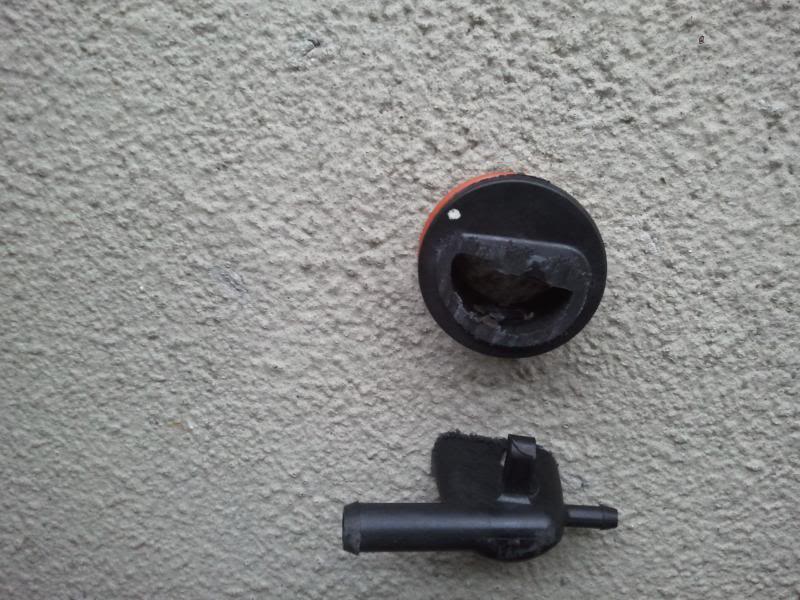
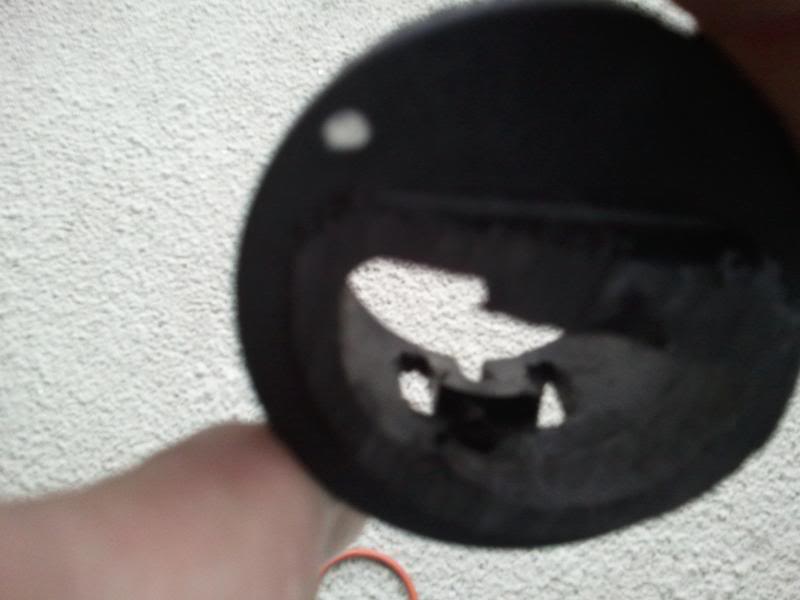
Here is what you'll end up with.
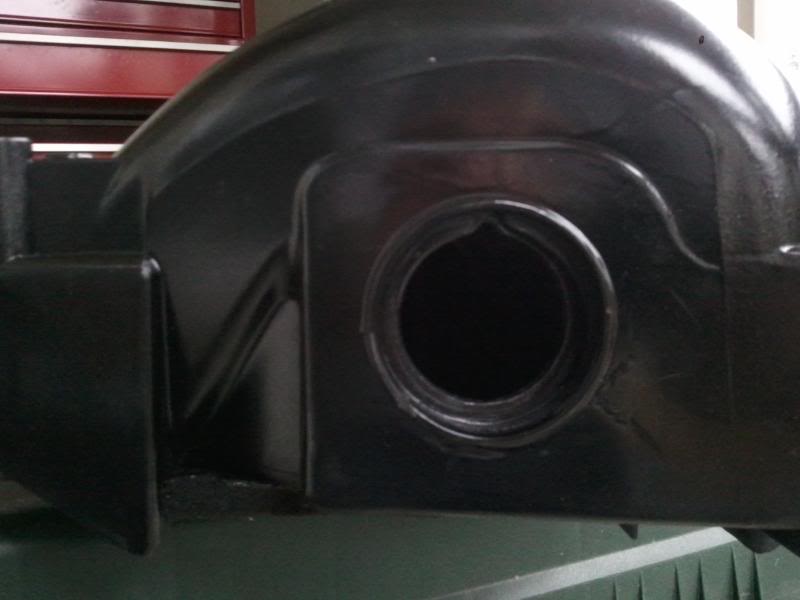
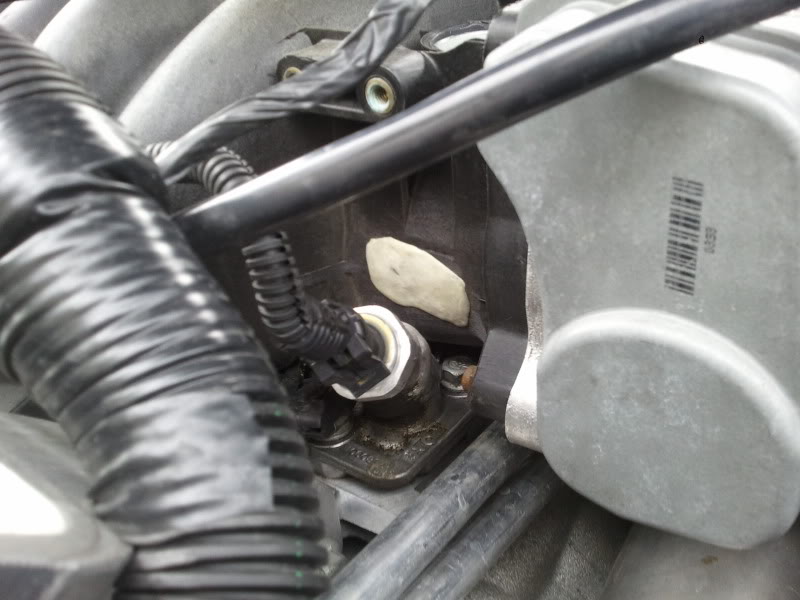
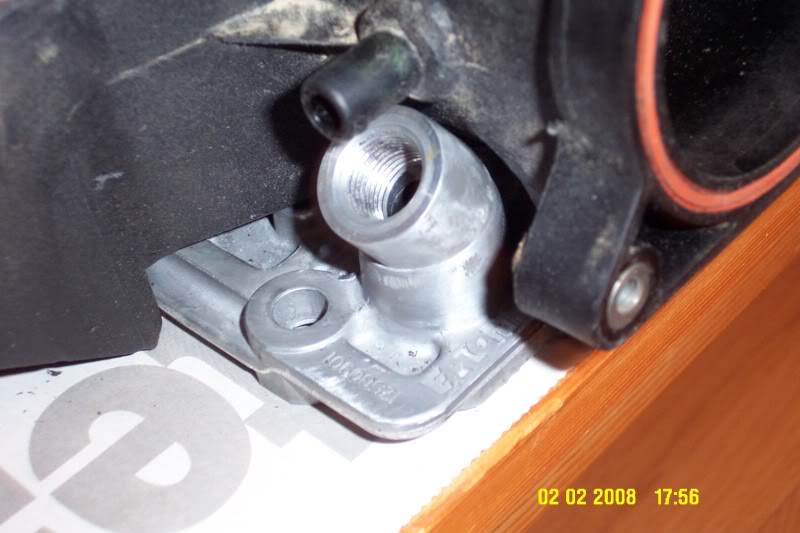
Next, plug the hole with a 1 31/32" freeze plug using 3M weatherstripping adhessive or epoxy. Then drill a 7/16" hole in the lower corner and mount the MAP sensor with a small screw. I used adhessive to seal the screw too.
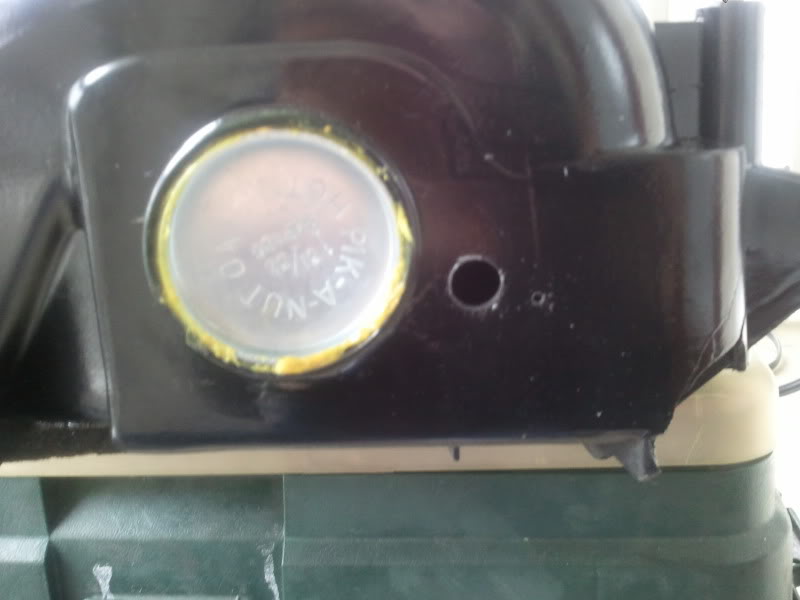
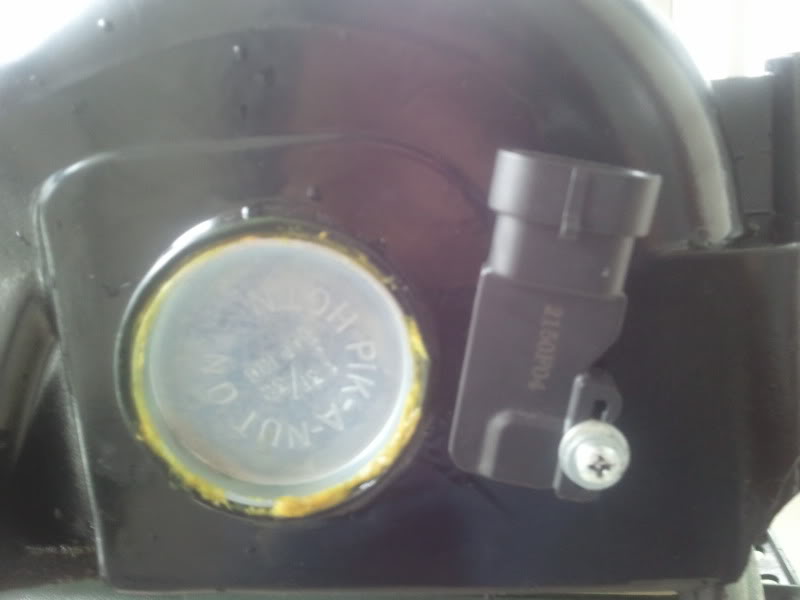
Very tight fit!
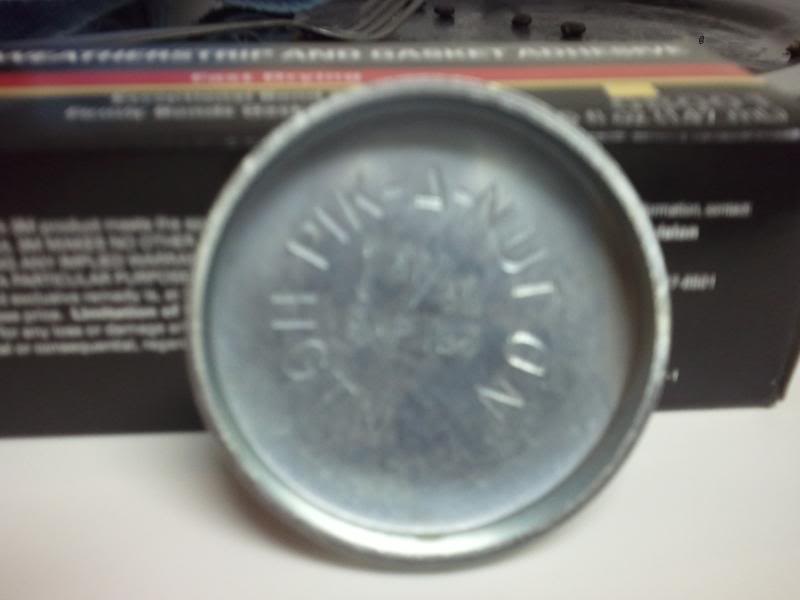
If using a LS1 intake and it has EGR you'll need to plug the EGR hole

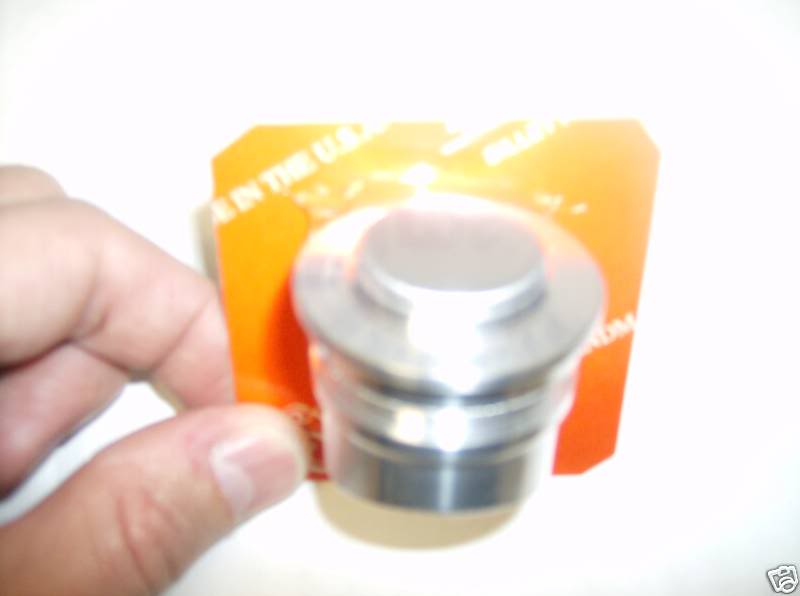
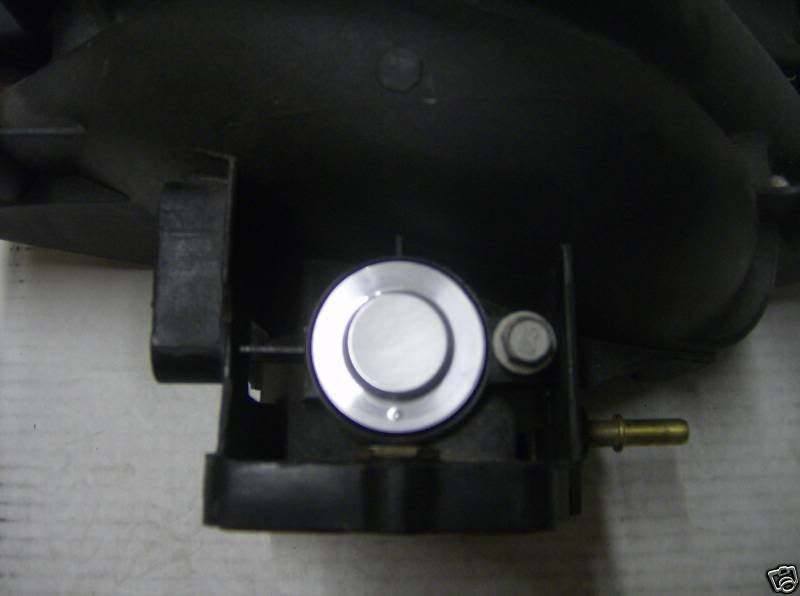
The plug pictured up above is found on E bay. You can also use Dorman 555-025 freeze plug for the EGR hole.
Now it is time to move onto the Vacuum fitting, and mod it for our power brake hose.
Drill the factory fitting out. Work your way up to a 7/16 drill bit.
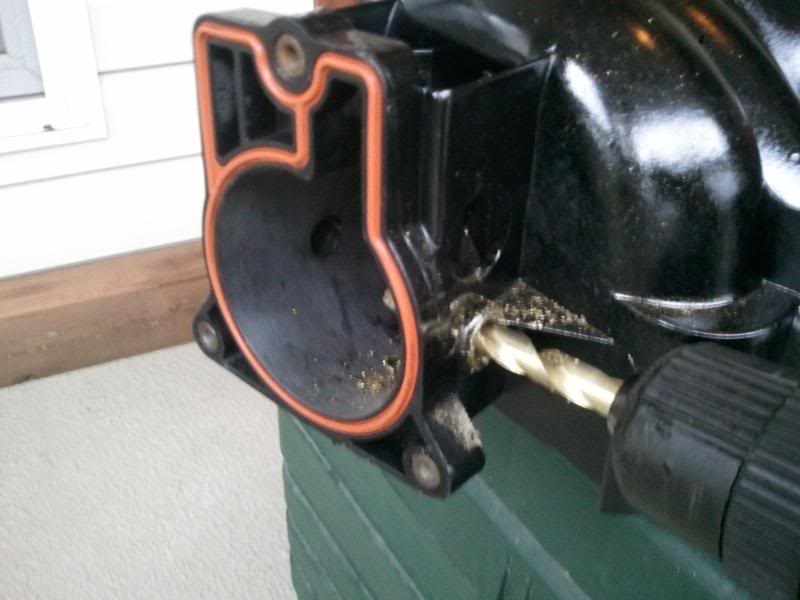

Next tap the hole with a 1/4-18 pipe tap
And install a 1/4 thread 1/2 hose fitting using 3M adhesive as sealer. This will allow the factocy brake hose to remain in the stock location. No clamps required.
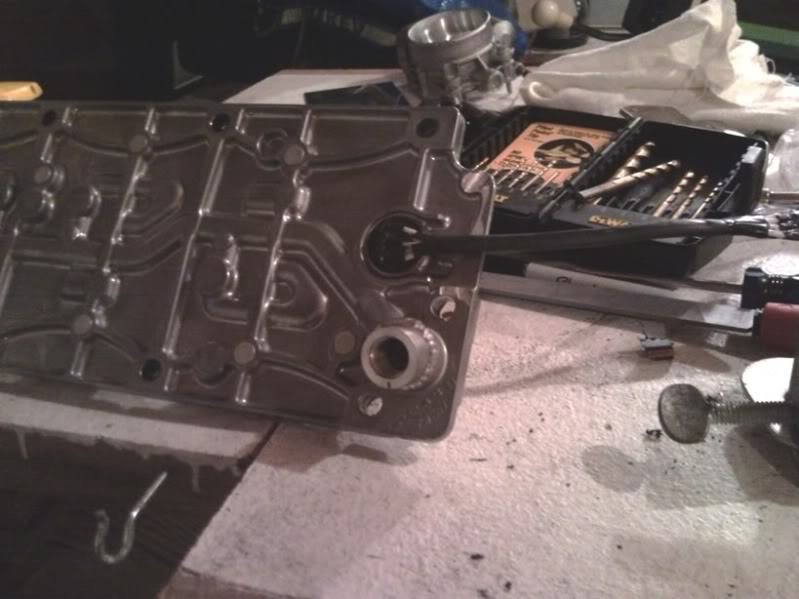
Move onto the bottom of the intake. The lower ribing will needs to be removed if using the DOD tray.
Here is what the bottom of the intake should look like after sanding or light grinding. Some intakes have curved bottoms and some are flat. Some DOD valley covers are thicker then others too! Remove a little at a time.
Brians TB adapter for use with headers
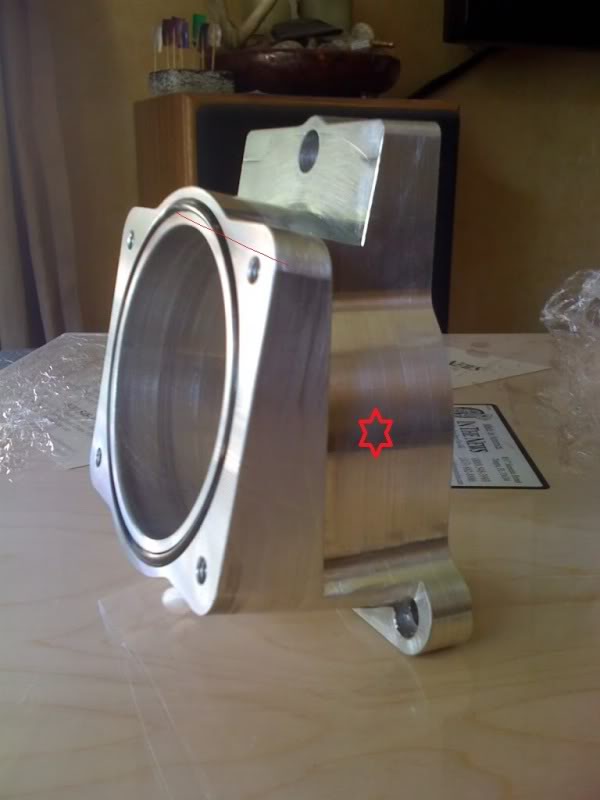
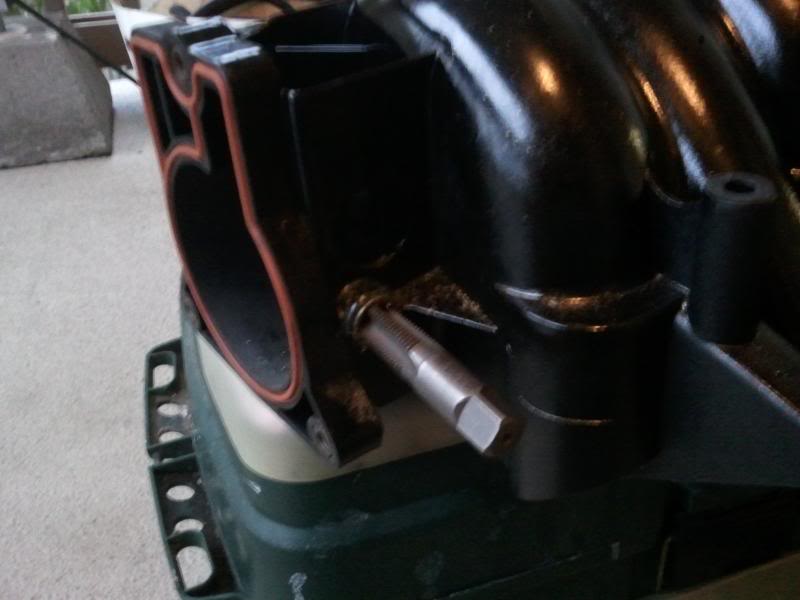
Drill and tap the star area with 7/16 drill, and tap with a 1/4-18 pipe tap and install a 1/4 pipe to 3/8 hose fitting for the dirty air PCV. The hose will go from fitting to the rear valve cover. Install with 3M adhessive.

I used LS6 injectors with LS6 fuel rail
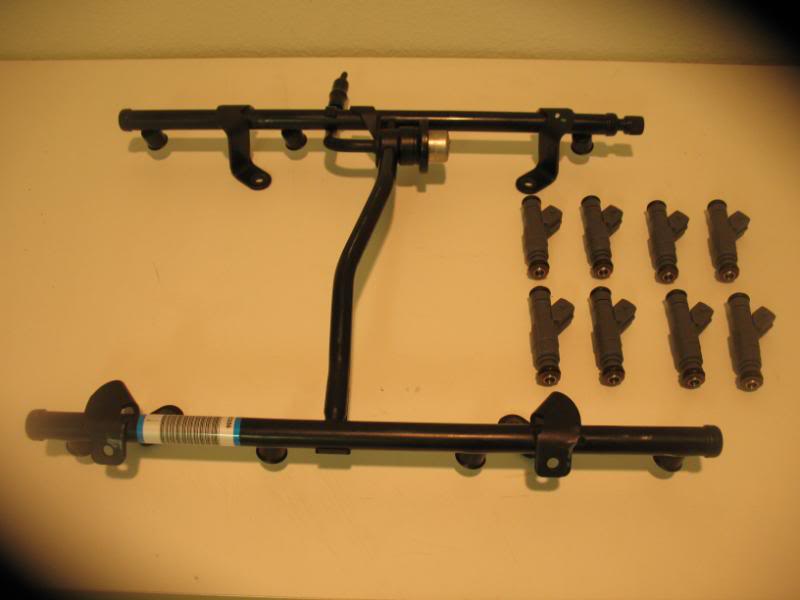
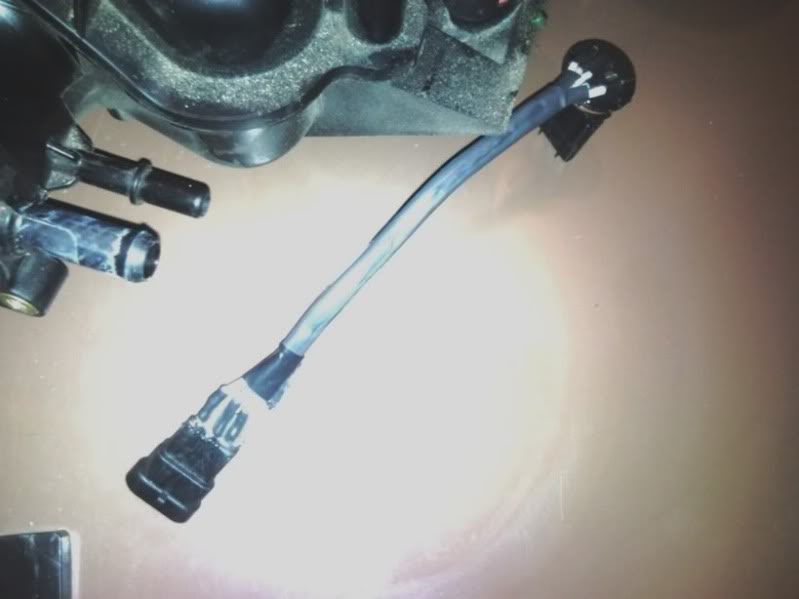
Which required pigtail adapters EV1 to EV6. This allows us to use our stock harness. I have also include a pic of the MAP extension harness.
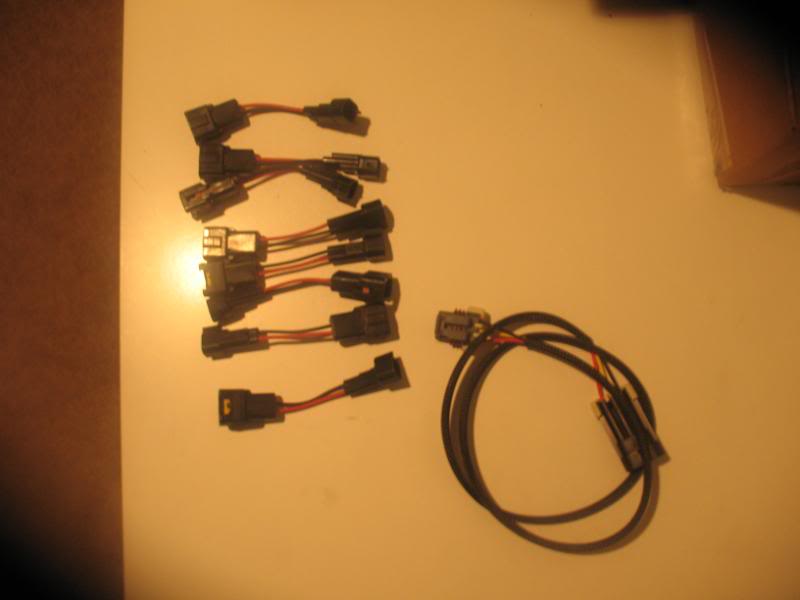
You can also use one piece adapters.
Now... In order to use the LS6 injectors/rail, you will need to remove your alt, and the alt bracket. The rear hump on the bracket has to be cut flush. It's pretty easy to figure out. Just use a vise and a hacksaw.
Here is a picture of the moddified bracket.
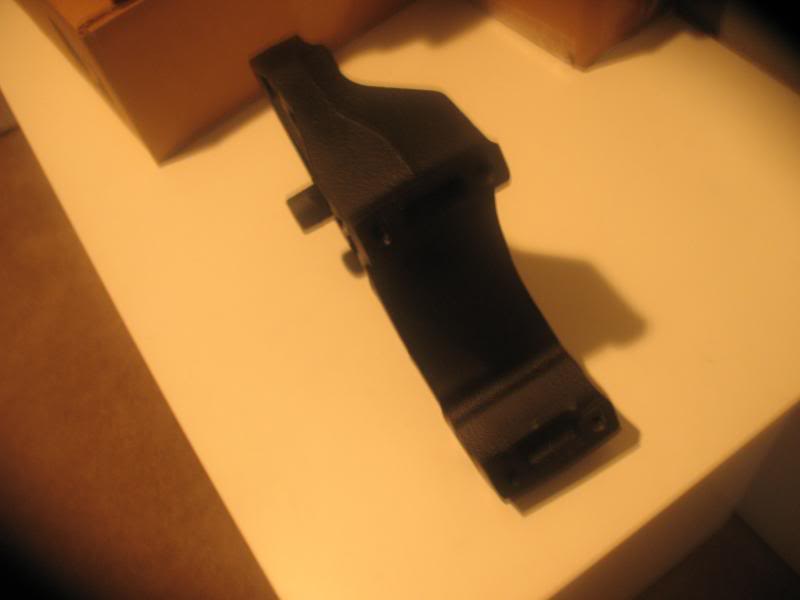
Tons of clearance now!

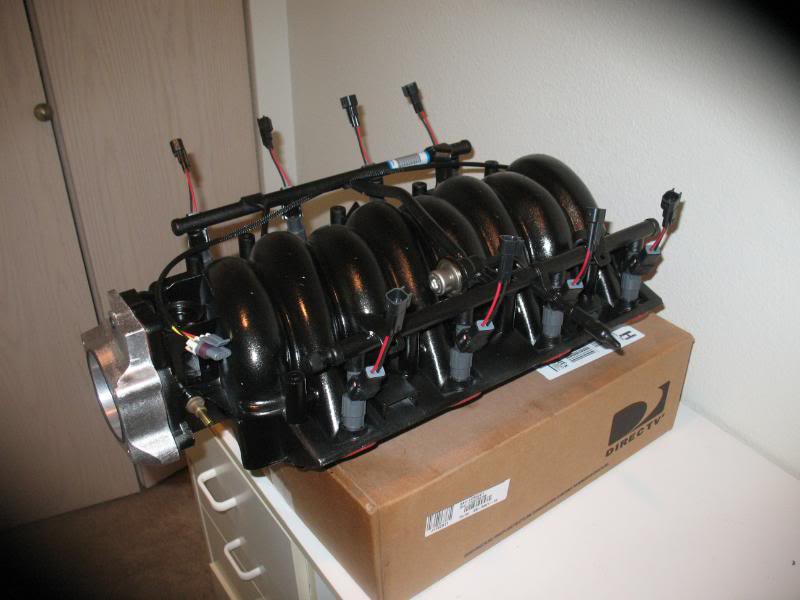
Everything assembled. MAKE SURE YOU BLOW THE INTAKE OUT WITH AIR TO REMOVE DEBRIS FROM DRILLING AND TAPING BEFORE INSTALL!!
Now it is time to move onto the DOD tray.
IF USING DOD LIFTERS, THEN YOU MUST USE THE DOD TRAY, even if the DOD is tuned out.
The OPSU will not clear the intake, so the OPSU port needs to be cut down to the DOD oil feed, and rewelded at an angle. 30* seems to work pretty good. Have a fab shop do the moddification. Try to retain the DOD filter if you can. If not, then be prepared for a clogged solenoid, or collapsed lifter if you decided to keep the DOD functional.
The DOD connector needs to be trimed down too, so pull the DOD connector out of the tray.
Next split into two
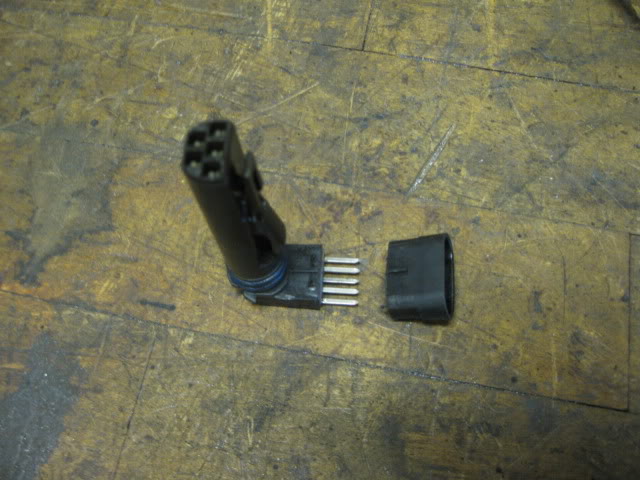
Trim the connector down as far as you can go. Then solder and heat shrink everything back together
IF YOU DO NOT PLAN ON USING DOD, THEN YOU CAN JUST PULL THE CONNECTOR FROM THE TRAY, AND WELD THE HOLE UP. JB WELD WILL WORK TOO! However.. The DOD Solenoids must remain intact. So bolt them back onto the tray after welding the OPSU at an angle
Tray isready to go. DOD still functionial!
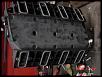
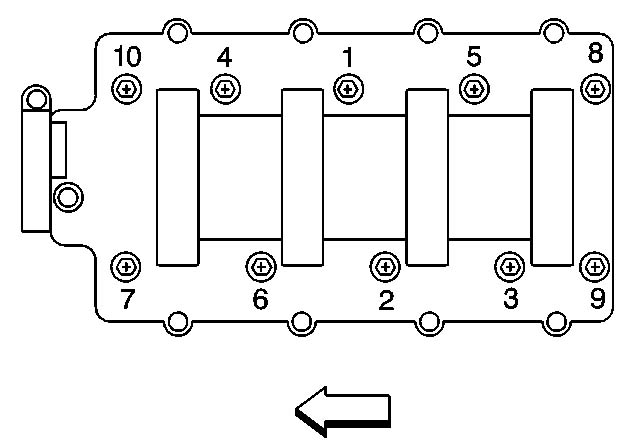
Intake manifold bolts Guide
Install and ensure that all 10 intake manifold bolts are hand threaded as far as they'll go, tighten them down with a wrench and then torque in the order shown in the picture on the left. You need to torque these down in a 2-pass fashion..the first pass, tighten to 44 INCH-lbs, then, on the 2nd pass torque them to 89 INCH-lbs. Again, note those specs are in INCH lbs. If you don't have an inch pounds torque wrench, just tigthen the bolts hand tight...its only about 7 ftlbs of torque on that final pass and the intake seals with rubber gaskets so its doesn't need much pressure at all to seal.
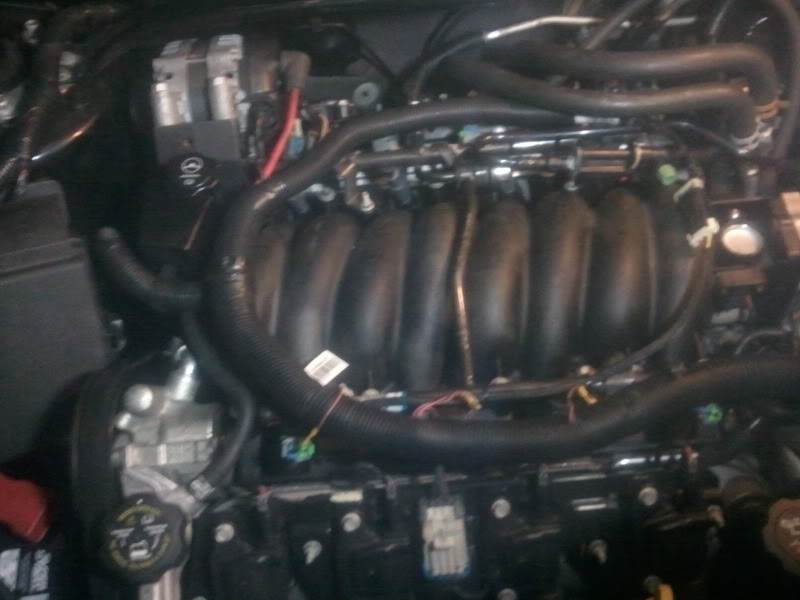
Intake installed pic

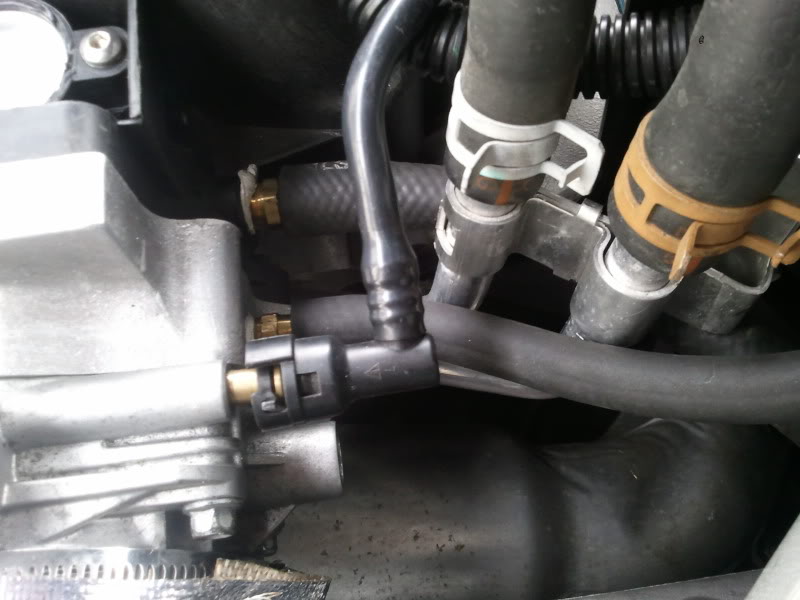
New fuel line location. Bendings and twisting is not required.
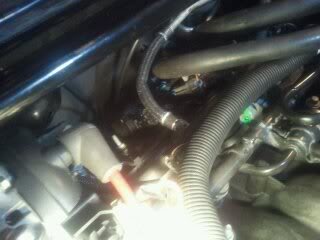
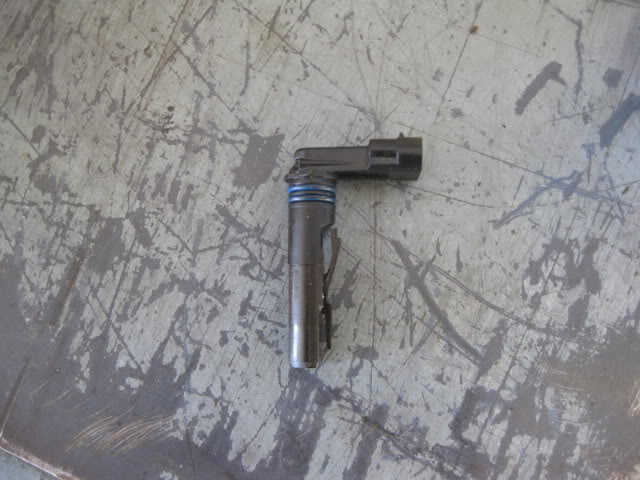
OPSU pic

Vacuum hose routing
Why the LS6 injectors and rail?
Well, for one... they are a bolt on item, and for two.. the LS6 injectors are pretty close to the LS4 injectors. LS6 are rated at 28.8lb and the LS4 injectors are a tad over 28lb. (58psi)
I'd rather cut up my alt bracket then the intake.
The engine will fire right up with the LS6 stuff, and will drive just fine till tuning. YOU WILL NEED TUNING.
SEE PAGE 4 FOR MORE PICS AND DETAILS!
There has been a lot of questions about what intake manifold to use.. LS1 or LS6. F.A.S.T will not work due to the rear bulge. Sorry....
Here is a test performed by TPiS. READ AND DECIDE FOR YOURSELF! http://www.tpis.com/pages/2_17_06
LS1 intake vs. LS6 intake flow numbers.
.........................................200"..300 "..350"..400"..450"..500"..550"..600"
Stock LS6 head, LS1 intake....156...199...212...224...232...238...243. ..247
Stock LS6 head, LS6 intake....154...204...220...235...247...257...263. ..265
Stock cam with 1.8 rockers will provid about .510" non DOD and .520" DOD lobes lift. Valves will only reach peak lift numbers/flow once; and .050" lift twice. This is why the LS1 intake works after getting it's *** kicked above .450"
This is how I did my intake swap and the parts I used.
I will add links for the parts later
LS1/LS6 intake
LS6 injectors
1/4 NPT to 3/8" hose fitting
1/4 NPT to 1/2" hose fitting
1 31/32" freeze plug
EV1-EV6 injector adapters
EGR plug (LS1 intake only)
LS1/LS6 fuel rail (non-returnless rail)
Intake gaskets, TB gasket
TB adapter
3M yellow weather stripping adhessive
You can get fittings here http://www.fastfittings.com/product/32006
Injector adapters http://www.bmotorsports.com/shop/pro...oducts_id/1765
Map extension harness http://www.bmotorsports.com/shop/pro...roducts_id/784
Start off by cleaning the intake with Gunk and hot water.
Remove the factory PCV fitting from the intake. You will need to gain as much opsu clearance as possible.
I used a dremel cutoff wheel. When the PCV nipple is ground down flush, plug the hole with some epoxy PUTTY.
Next remove the rear vacuum fitting.
Take a hacksaw, and saw the fitting off. Pry the rest of the fitting out with a flat blade screwdriver.
Here is what you'll end up with.
Next, plug the hole with a 1 31/32" freeze plug using 3M weatherstripping adhessive or epoxy. Then drill a 7/16" hole in the lower corner and mount the MAP sensor with a small screw. I used adhessive to seal the screw too.
Very tight fit!
If using a LS1 intake and it has EGR you'll need to plug the EGR hole
The plug pictured up above is found on E bay. You can also use Dorman 555-025 freeze plug for the EGR hole.
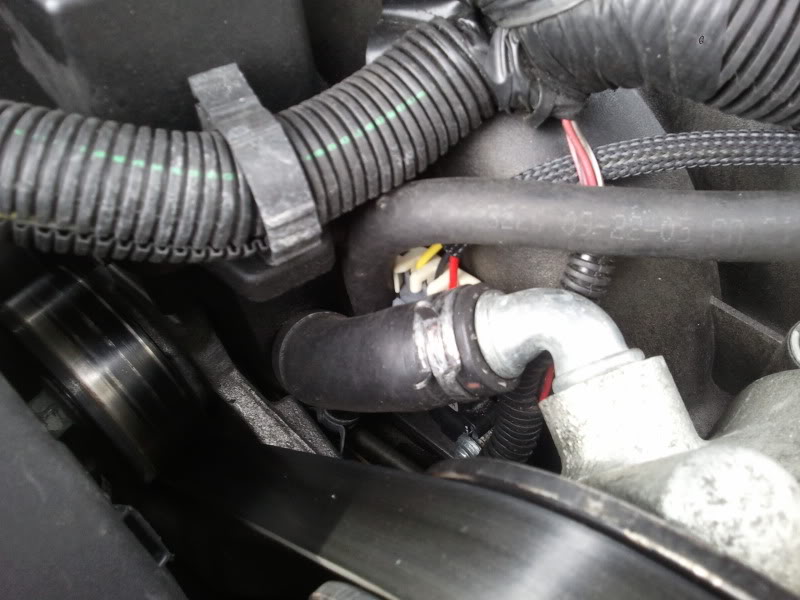
Now it is time to move onto the Vacuum fitting, and mod it for our power brake hose.
Drill the factory fitting out. Work your way up to a 7/16 drill bit.
Next tap the hole with a 1/4-18 pipe tap
And install a 1/4 thread 1/2 hose fitting using 3M adhesive as sealer. This will allow the factocy brake hose to remain in the stock location. No clamps required.
Move onto the bottom of the intake. The lower ribing will needs to be removed if using the DOD tray.
Here is what the bottom of the intake should look like after sanding or light grinding. Some intakes have curved bottoms and some are flat. Some DOD valley covers are thicker then others too! Remove a little at a time.
Brians TB adapter for use with headers
Drill and tap the star area with 7/16 drill, and tap with a 1/4-18 pipe tap and install a 1/4 pipe to 3/8 hose fitting for the dirty air PCV. The hose will go from fitting to the rear valve cover. Install with 3M adhessive.
I used LS6 injectors with LS6 fuel rail
Which required pigtail adapters EV1 to EV6. This allows us to use our stock harness. I have also include a pic of the MAP extension harness.
You can also use one piece adapters.
Now... In order to use the LS6 injectors/rail, you will need to remove your alt, and the alt bracket. The rear hump on the bracket has to be cut flush. It's pretty easy to figure out. Just use a vise and a hacksaw.
Here is a picture of the moddified bracket.
Tons of clearance now!
Everything assembled. MAKE SURE YOU BLOW THE INTAKE OUT WITH AIR TO REMOVE DEBRIS FROM DRILLING AND TAPING BEFORE INSTALL!!
Now it is time to move onto the DOD tray.
IF USING DOD LIFTERS, THEN YOU MUST USE THE DOD TRAY, even if the DOD is tuned out.
The OPSU will not clear the intake, so the OPSU port needs to be cut down to the DOD oil feed, and rewelded at an angle. 30* seems to work pretty good. Have a fab shop do the moddification. Try to retain the DOD filter if you can. If not, then be prepared for a clogged solenoid, or collapsed lifter if you decided to keep the DOD functional.
The DOD connector needs to be trimed down too, so pull the DOD connector out of the tray.
Next split into two
Trim the connector down as far as you can go. Then solder and heat shrink everything back together
IF YOU DO NOT PLAN ON USING DOD, THEN YOU CAN JUST PULL THE CONNECTOR FROM THE TRAY, AND WELD THE HOLE UP. JB WELD WILL WORK TOO! However.. The DOD Solenoids must remain intact. So bolt them back onto the tray after welding the OPSU at an angle
Tray isready to go. DOD still functionial!
Intake manifold bolts Guide
Install and ensure that all 10 intake manifold bolts are hand threaded as far as they'll go, tighten them down with a wrench and then torque in the order shown in the picture on the left. You need to torque these down in a 2-pass fashion..the first pass, tighten to 44 INCH-lbs, then, on the 2nd pass torque them to 89 INCH-lbs. Again, note those specs are in INCH lbs. If you don't have an inch pounds torque wrench, just tigthen the bolts hand tight...its only about 7 ftlbs of torque on that final pass and the intake seals with rubber gaskets so its doesn't need much pressure at all to seal.
Intake installed pic
New fuel line location. Bendings and twisting is not required.
OPSU pic
Vacuum hose routing
Why the LS6 injectors and rail?
Well, for one... they are a bolt on item, and for two.. the LS6 injectors are pretty close to the LS4 injectors. LS6 are rated at 28.8lb and the LS4 injectors are a tad over 28lb. (58psi)
I'd rather cut up my alt bracket then the intake.
The engine will fire right up with the LS6 stuff, and will drive just fine till tuning. YOU WILL NEED TUNING.
SEE PAGE 4 FOR MORE PICS AND DETAILS!
Last edited by DavidGXP; Sep 14, 2012 at 07:36 PM. Reason: Added flow numbers

TECH Regular
Joined: Nov 2009
Posts: 446
Likes: 0
From: Farmington Hills, MI
Nice work. I have some alternatives to throw out there.
1) You don't have to grind the bottom of the manifold if you use the newer VLOM. I wouldn't grind it smooth regardless; I'd take off as little material as possible.
2) I'm not convinced that taking that much material from the alternator bracket is wise. It's actualy a 2-2.5 HP generator (no OEM has used what is technically an alternator for years) that wants to torque out of alignment when heavily loaded. There are other fuel rail options, too. The LS3, L76, LS7, L99, etc. all have injectors of the same physical size as ours, and the mounting tabs on the fuel rail could be modified for the LS6 intake fairly easily.
I want to make it clear that flow rate is only half of the story when it comes to injectors. It only describes an injector that is 100% on. Make sure that you have access to tuning software that can change injector Offset vs. MAP vs. Volts and the Short Pulse Adder, which are used to compensate for the injector opening and closing. You can somewhat compensate for them by using fictitious MAF and VE data, but you will never get consistent fueling doing that, especially during transients.
Finally, in my opinion most people should just spring for the LS6 intake. If you already in for $500+, why not spend the extra $250 for more torque everywhere (albeit not much at lower and middle RPMs) and more RPM potential if you do decide to cam the engine? Guys have spent more for less horsepower (see all of the K&N kits people buy, and the headers give you less HP/$ than springing for the LS6 would). The gap only grows the with additional mods.
Finally, in my opinion most people should just spring for the LS6 intake. If you already in for $500+, why not spend the extra $250 for more torque everywhere (albeit not much at lower and middle RPMs) and more RPM potential if you do decide to cam the engine? Guys have spent more for less horsepower (see all of the K&N kits people buy, and the headers give you less HP/$ than springing for the LS6 would). The gap only grows the with additional mods.
Trending Topics
This has not been the case. I have had this bracket on for about almost a yr now. About 12k miles to be exact. When I swapped intakes last yr I installed the bracket. In fact.... the stock bracket is cast iron and weighs about 13lbs. With grinding and drilling small holes into it, I have got it down to 8lbs.
Again, not a single problem..
I want to make it clear that flow rate is only half of the story when it comes to injectors. It only describes an injector that is 100% on. Make sure that you have access to tuning software that can change injector Offset vs. MAP vs. Volts and the Short Pulse Adder, which are used to compensate for the injector opening and closing. You can somewhat compensate for them by using fictitious MAF and VE data, but you will never get consistent fueling doing that, especially during transients..
Finally, in my opinion most people should just spring for the LS6 intake. If you already in for $500+, why not spend the extra $250 for more torque everywhere (albeit not much at lower and middle RPMs) and more RPM potential if you do decide to cam the engine? Guys have spent more for less horsepower (see all of the K&N kits people buy, and the headers give you less HP/$ than springing for the LS6 would). The gap only grows the with additional mods.
Last edited by DavidGXP; Mar 2, 2011 at 02:22 PM.
LS1 Tech Stories
The Best V8 Stories One Small Block at Time

Topdon ONE vs. Artidiag 800 BT2: Which is the Diagnostic Tablet For You?
Pouria Savadkouei
Gas Monkey Built a 6-Wheel Ferrari Testarossa With a Corvette LT4 Engine
Verdad Gallardo
7 Most Reliable High-Performance Engines GM Has Ever Built
Verdad Gallardo
Amazing '71 Camaro Restomod Is Modern Muscle Car Under the Skin
Verdad Gallardo
6 Common C5 Corvette Failures and What's Involved In Repairing Them
Pouria Savadkouei
Retro Modern Bandit Pontiac Trans AM Comes With Burt Reynolds' Autograph
Verdad Gallardo
Top 10 Greatest Cadillac V Series Performance Models Ever, Ranked
Pouria Savadkouei
Top 10 Most Powerful Chevy Trucks Ever Made!

Hennessey's New Supercharged Silverado ZR2 Has 700 HP
Verdad GallardoYou will get gains by swapping to that larger maf, even with the stock TB.

TECH Regular
Joined: Nov 2009
Posts: 446
Likes: 0
From: Farmington Hills, MI
This has not been the case. I have had this bracket on for about almost a yr now. About 12k miles to be exact. When I swapped intakes last yr I installed the bracket. In fact.... the stock bracket is cast iron and weighs about 13lbs. With grinding and drilling small holes into it, I have got it down to 8lbs.
Again, not a single problem..
Again, not a single problem..
I have a ported LS6 comming in on Saturday (ported is probably a waste of $$) for my up comming cam swap. It just seems fitting too me. LS6 intake with LS6 heads. I have a 2001 LS6 MAF that I wanna install too.. But after looking at the stock LS4 tb opening. ( A little over 3 1/4) I am not going to bother. LS6 DBW tb has a 75mm throttle blade with a TB opening that is about 4".
I still wouldn't recommend it. I haven't failed a lifter yet with the high lift cam and I'm still using the stock style timing chain tensioner without issues, but that doesn't mean that I would recommend it to anyone as reliable long-term. Some speed shops are blowing out the stock tensioner with only a couple dyno pulls on a cam. I've also had the engine to 7000RPM several times without any issues, but I wouldn't recommend doing that either. I'm not being critical of your method, but I would say that there is risk involved and anyone attempting this should be aware of it. To put it another way, unless you did a DFMEA on the modified part and compared it to stock, you can't say it's perfectly OK. Clearly the part is not as strong as it was before, and without additional information it's impossible to say how much, if at all, you compromised the integrety of the belt system. So go ahead and do it, but take off as little material as possible and don't leave sharp angles to keep local stress/strain increases at a minimum.
AlabamaGuy, has the same set up on his engine and we both drive our cars very hard. So far... we have not encountered any problems. (Knock on wood)
The bracket is freaking heavy duty.. man.
Not trying to be a dick or anything..
 but I'd much rather cut up the bracket then modify the stock fuel rail and end up having something bust and spray fuel all over my hot engine. (My kind of luck)
 Guess there is a risk with everything we do..

I saw in increase in MAP at WOT (and yes, I looked at barometric pressure as well to make sure it wasn't weather) after swapping in an 85mm MAF. There's a little power there, and my MAF was only $25 + a couple connectors from the dealer. These MAFs also have more sensing elements (more consistent signal to the ECM) and read the same airflow at a lower output frequency (meaning my ECM can read more airflow before pegging the MAF, which may or may not come into play).
You should do a 85mm MAF write up.


Good start to a potential sticky thread.
My only suggestion is to break each step down and list the details of each proven options for each step, just to make it the most informative. This would give the end users the various options to solve the clearance/fit/interface issues at each step.
My only suggestion is to break each step down and list the details of each proven options for each step, just to make it the most informative. This would give the end users the various options to solve the clearance/fit/interface issues at each step.
When my LS6 gets here I'll take a bunch of pics
TECH Regular
Joined: Nov 2009
Posts: 446
Likes: 0
From: Farmington Hills, MI
Indeed sir. We are both committed, so I'm really talking to the next guy to come along. If I do catch fire, well, that's the risk you take when you dick around with anything that is working perfectly fine as it is.
I used a 4" to 3.5" bending reducer and tightened it down good. It needs to be a 3.75" to 3.25" reducer, and you can cobble it together with any number of combinations of two pieces. The 85mm MAF is 4" in and 3.75" out. I used a Spectre filter... they filter just as well as K&N, are cheaper, and most importantly they work with a 4" inlet out of the box. Again, tuning is a must. Maybe I'll do a write up sometime, but I didn't take a single picture.
My MAF is mounted to the airbox, so no more clocking issues for me!
EDIT: Also, if you are interested, I am willing to help with the text of the thread.
My MAF is mounted to the airbox, so no more clocking issues for me!
EDIT: Also, if you are interested, I am willing to help with the text of the thread.
My MAF is mounted to the airbox, so no more clocking issues for me!
I have a Specter cone filter in the garage. It's the one with the reducers, and is a very nice piece.
Can you snap a pic of the MAF in the box for me? Putting it in the box is a smart move, and I have thought about it.. I think I'd need a smaller cone filter though.. .
.
I have a Specter cone filter in the garage. It's the one with the reducers, and is a very nice piece.
Can you snap a pic of the MAF in the box for me? Putting it in the box is a smart move, and I have thought about it.. I think I'd need a smaller cone filter though..
Help would be nice. How should we go about it? Would you PM suggestions?

TECH Apprentice
Joined: Dec 2010
Posts: 383
Likes: 1
So we have LS6 Heads
When we do this mod wouldn't it make sense to do the LS6 MAF , Throttle body , And fueling(injectors and rails) all at the same time.
Otherwise the stock TB and MAF are still a major restriction and we wouldn't really see the true potential of this swap. Just my thoughts.
When we do this mod wouldn't it make sense to do the LS6 MAF , Throttle body , And fueling(injectors and rails) all at the same time.
Otherwise the stock TB and MAF are still a major restriction and we wouldn't really see the true potential of this swap. Just my thoughts.
Last edited by DavidGXP; Mar 3, 2011 at 12:46 AM.