
95 LT1 AI Cam-only Motor Build Pics
 12-30-2008, 02:20 AM
#1
TECH Fanatic
Thread Starter
iTrader: (4)

Join Date: Jul 2007
Location: Davenport, IA
Posts: 1,351
Likes: 0
Received 0 Likes
on
0 Posts

So i figured i'd make a new thread for the assembely of the motor so here is a little backround on the motor and the build.
It all started out cause somehow i blew out the head gasket by no. 7 so i decided to do it all while i was tearing it apart. THe car is a 95 Camaro with 38k miles on her. One day notice the coolant was low and keep drinking coolant so i decided to tear into her and found plenty of oil in no 7. So that is how this all started.
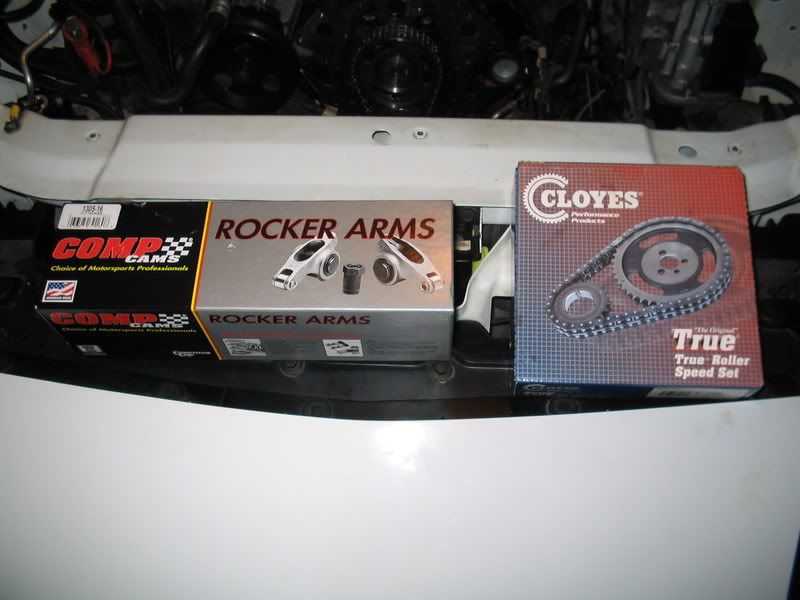
Now onto the build... I went with Advanced Inductions 226/234 .569/.570 110LSA cam kit with everything i needed along with a Cloyes double roller and will be getting an EWP when i get the extra cash.
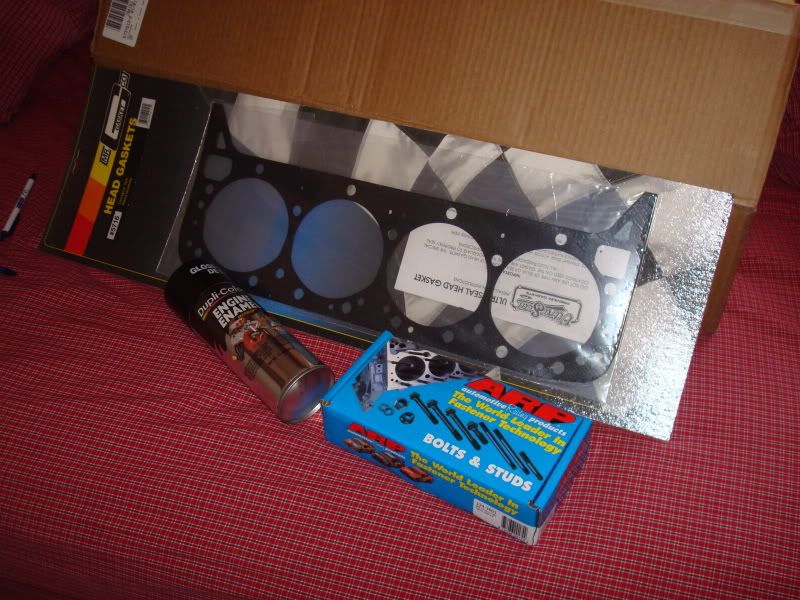
So everything from AI came in today and i got busy right away, i dropped the heads, valve springs, and rocker studs and guide plates at the local machine shop to get milled slightly cleaned, port job done, and the new springs installed. I choose the Mr. Gasket .026 gaskets to bump the compression up and the heads will also be milled slighty so it should be about 11.5:1 compression in the end.
Also installed the cam and timing chain tonight and will get pics of that stuff and everything else tomorrow.
I'm planning on ordering Pacesetter Coated LT's and y-pipe in a couple weeks along with my EWP and 30# SVO injectors and then seeing if i can get it to run on the stock tune just to get some easy break-in miles on her then she's goin on the trailer to Speed Inc. and getting tuned on the dyno by Ion.
Also planning on deleting the A/C and just plugging the box but remove all the lines and gettin the delete pulley.
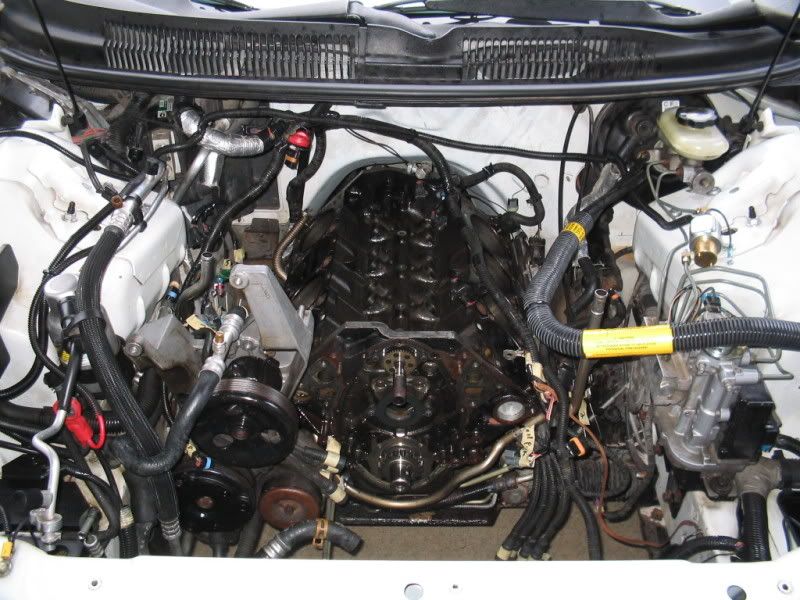
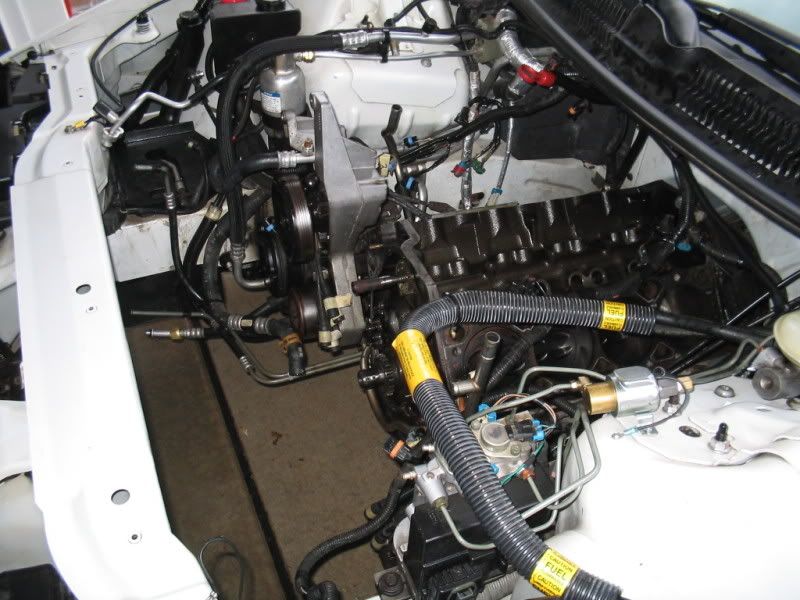
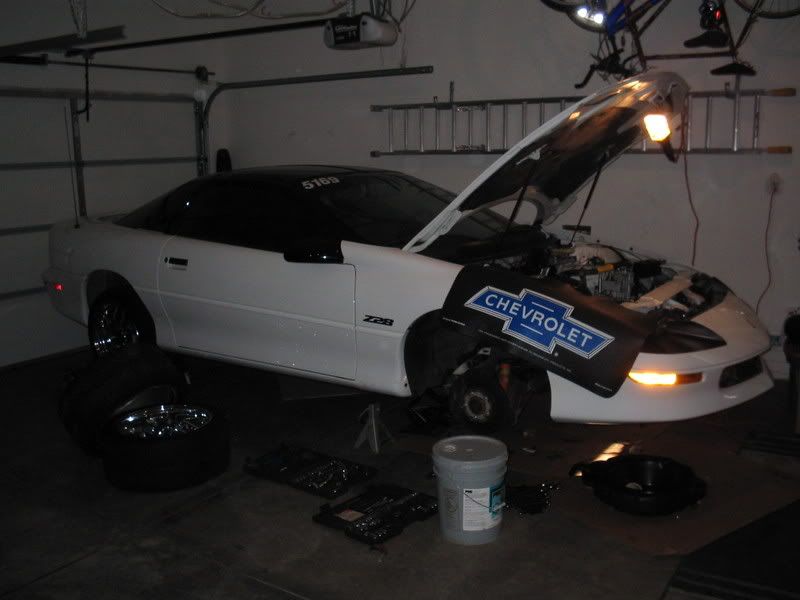
I will update this thread with pics as more things move along. Here are some pics how the motor sat as of this morning before the cam and timiing chain went in. Will get new pics tomorrow and more as things go back together.
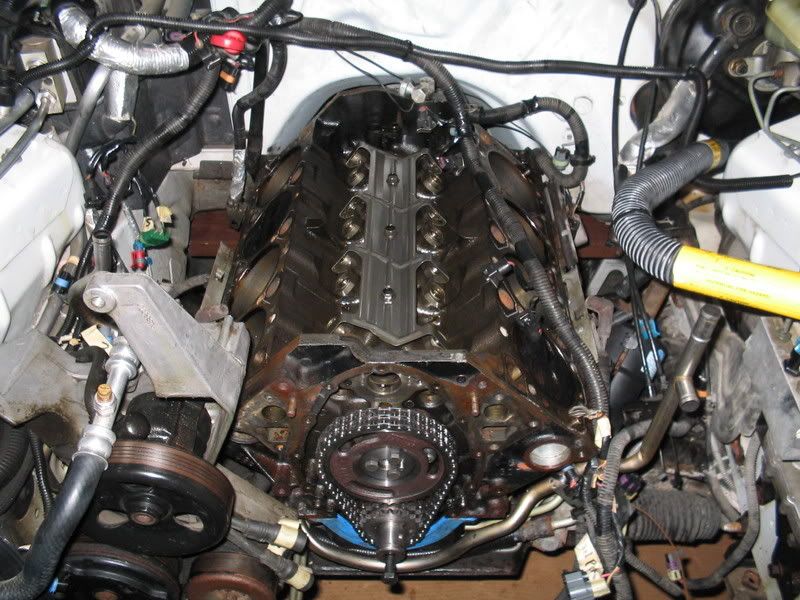
Not much in there-
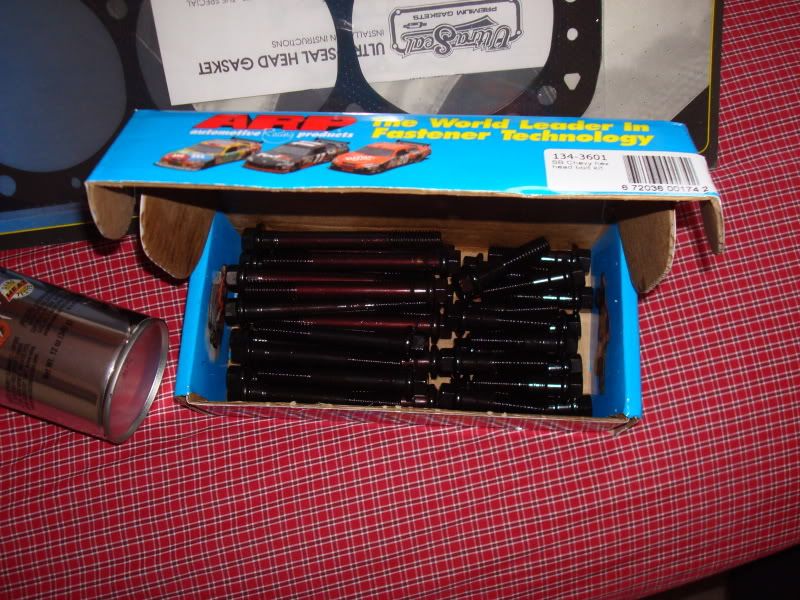
Here is a few pics of parts that came in a few weeks ago, got the head gaskets and .026 gaskets-
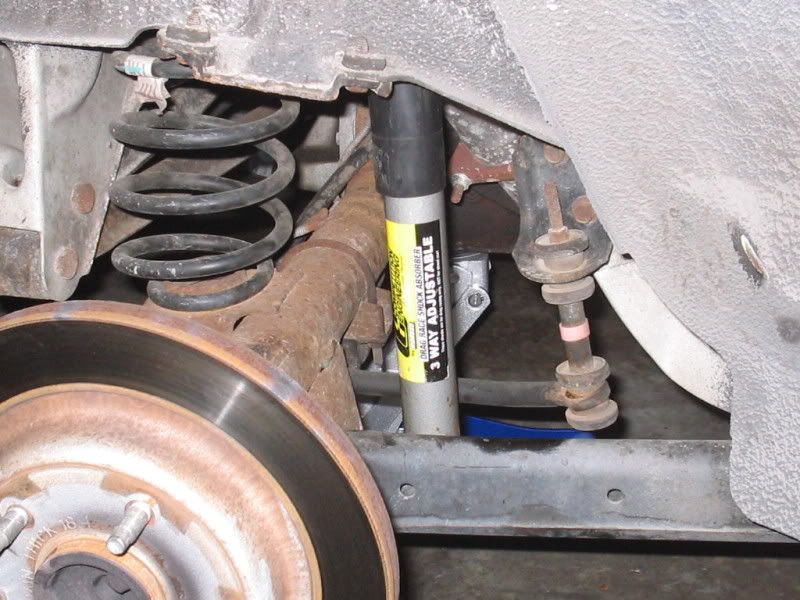
Also so far for suspension i got Comp Eng 3-way adj drag shocks, but planning on adj LCA's, Torque arm, and Subframe connectors
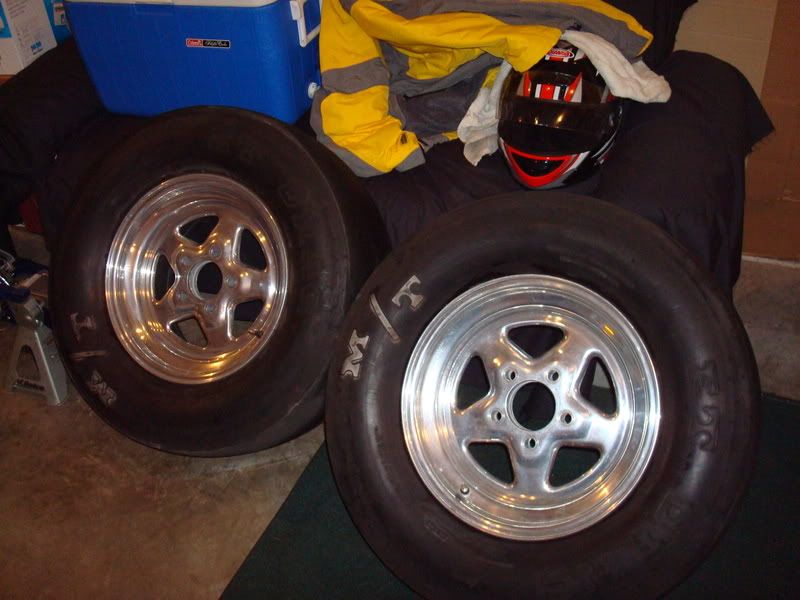
Wheels i got a set of 15x8 Pro-stars and going to pick up either greg weld or pro-star fronts eventually. Rims still need a little more polishing any ideas?
I'm hoping to run low low 12's maybe high 11's once everything is done and ready to go.
Thats all for now, i will keep updating as the motor comes together and more parts get ordered.
Enough of me rambling, Let's hear what you guys think!
It all started out cause somehow i blew out the head gasket by no. 7 so i decided to do it all while i was tearing it apart. THe car is a 95 Camaro with 38k miles on her. One day notice the coolant was low and keep drinking coolant so i decided to tear into her and found plenty of oil in no 7. So that is how this all started.
Now onto the build... I went with Advanced Inductions 226/234 .569/.570 110LSA cam kit with everything i needed along with a Cloyes double roller and will be getting an EWP when i get the extra cash.
So everything from AI came in today and i got busy right away, i dropped the heads, valve springs, and rocker studs and guide plates at the local machine shop to get milled slightly cleaned, port job done, and the new springs installed. I choose the Mr. Gasket .026 gaskets to bump the compression up and the heads will also be milled slighty so it should be about 11.5:1 compression in the end.
Also installed the cam and timing chain tonight and will get pics of that stuff and everything else tomorrow.
I'm planning on ordering Pacesetter Coated LT's and y-pipe in a couple weeks along with my EWP and 30# SVO injectors and then seeing if i can get it to run on the stock tune just to get some easy break-in miles on her then she's goin on the trailer to Speed Inc. and getting tuned on the dyno by Ion.
Also planning on deleting the A/C and just plugging the box but remove all the lines and gettin the delete pulley.
I will update this thread with pics as more things move along. Here are some pics how the motor sat as of this morning before the cam and timiing chain went in. Will get new pics tomorrow and more as things go back together.
Not much in there-
Here is a few pics of parts that came in a few weeks ago, got the head gaskets and .026 gaskets-
Also so far for suspension i got Comp Eng 3-way adj drag shocks, but planning on adj LCA's, Torque arm, and Subframe connectors
Wheels i got a set of 15x8 Pro-stars and going to pick up either greg weld or pro-star fronts eventually. Rims still need a little more polishing any ideas?
I'm hoping to run low low 12's maybe high 11's once everything is done and ready to go.
Thats all for now, i will keep updating as the motor comes together and more parts get ordered.
Enough of me rambling, Let's hear what you guys think!
 12-30-2008, 04:32 AM
#3
Looks like your on the right path! With the right suspension you should reach the 11's. As for the wheels, I can't think of the name but it comes in a chrome can about 4" in diameter and looks like cotton candy. I might be made by Eagle 1 but I'm not positive, anyway it works great and is availabel pretty much anywhere. Mothers polish works well too!
12-30-2008, 07:06 AM
#4
Banned
iTrader: (22)
Join Date: Jan 2004
Location: Schaumburg,IL
Posts: 4,957
Likes: 0
Received 0 Likes
on
0 Posts
not wasting anytime 
I would do the fuel line relocate while you got it tore down.
I used a Mothers PowerBall and Mothers Billet polish on my fathers wheels. They came out great and everyone always says those are the most shiny Welds I've ever seen
I would do the fuel line relocate while you got it tore down.
I used a Mothers PowerBall and Mothers Billet polish on my fathers wheels. They came out great and everyone always says those are the most shiny Welds I've ever seen


Trending Topics
12-30-2008, 10:11 AM
#10
TECH Fanatic
Thread Starter
iTrader: (4)
Join Date: Jul 2007
Location: Davenport, IA
Posts: 1,351
Likes: 0
Received 0 Likes
on
0 Posts
Looks like your on the right path! With the right suspension you should reach the 11's. As for the wheels, I can't think of the name but it comes in a chrome can about 4" in diameter and looks like cotton candy. I might be made by Eagle 1 but I'm not positive, anyway it works great and is availabel pretty much anywhere. Mothers polish works well too!
More pics coming here real soon, headed down to take them now.
12-30-2008, 10:44 AM
#11
Looks like your on the right path! With the right suspension you should reach the 11's. As for the wheels, I can't think of the name but it comes in a chrome can about 4" in diameter and looks like cotton candy. I might be made by Eagle 1 but I'm not positive, anyway it works great and is availabel pretty much anywhere. Mothers polish works well too!
Coming along Nice!!!!!!!
12-30-2008, 10:53 AM
#12
TECH Fanatic
Thread Starter
iTrader: (4)
Join Date: Jul 2007
Location: Davenport, IA
Posts: 1,351
Likes: 0
Received 0 Likes
on
0 Posts
Here is how she's been sitting for a few months already and is finnaly going back together...
Cloyes double roller installed along with the cam and rockers are in...
Here is a couple new parts that came in the AI kit, i forgot to take a pic of the cam before i put it in though and the rest is at the machine shop with the heads...
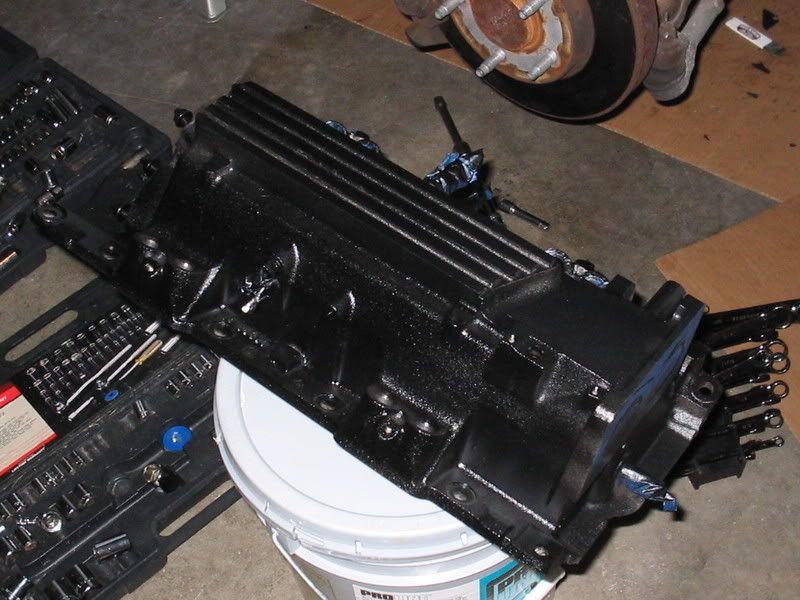
Painting the intake gloss black, it's all taped up it still needs another coat...
That's all i got today guys, will be workin more on it on thursday. Hoping to get the timing chain cover back on, crank hub, crank pulley, and opti on. Maybe start workin on tearin out the A/C lines also.
Cloyes double roller installed along with the cam and rockers are in...
Here is a couple new parts that came in the AI kit, i forgot to take a pic of the cam before i put it in though and the rest is at the machine shop with the heads...
Painting the intake gloss black, it's all taped up it still needs another coat...
That's all i got today guys, will be workin more on it on thursday. Hoping to get the timing chain cover back on, crank hub, crank pulley, and opti on. Maybe start workin on tearin out the A/C lines also.
12-30-2008, 11:10 AM
#14
Banned
iTrader: (22)
Join Date: Jan 2004
Location: Schaumburg,IL
Posts: 4,957
Likes: 0
Received 0 Likes
on
0 Posts
nice write up and cheaper route using the factory lines
https://ls1tech.com/forums/lt1-lt4-m...ock-lines.html
I used AN fittings and lines which will be about $150 in parts.
https://ls1tech.com/forums/lt1-lt4-m...ock-lines.html
I used AN fittings and lines which will be about $150 in parts.
12-30-2008, 11:49 AM
#15
TECH Fanatic
Thread Starter
iTrader: (4)
Join Date: Jul 2007
Location: Davenport, IA
Posts: 1,351
Likes: 0
Received 0 Likes
on
0 Posts
nice write up and cheaper route using the factory lines
https://ls1tech.com/forums/lt1-lt4-m...ock-lines.html
I used AN fittings and lines which will be about $150 in parts.
https://ls1tech.com/forums/lt1-lt4-m...ock-lines.html
I used AN fittings and lines which will be about $150 in parts.

