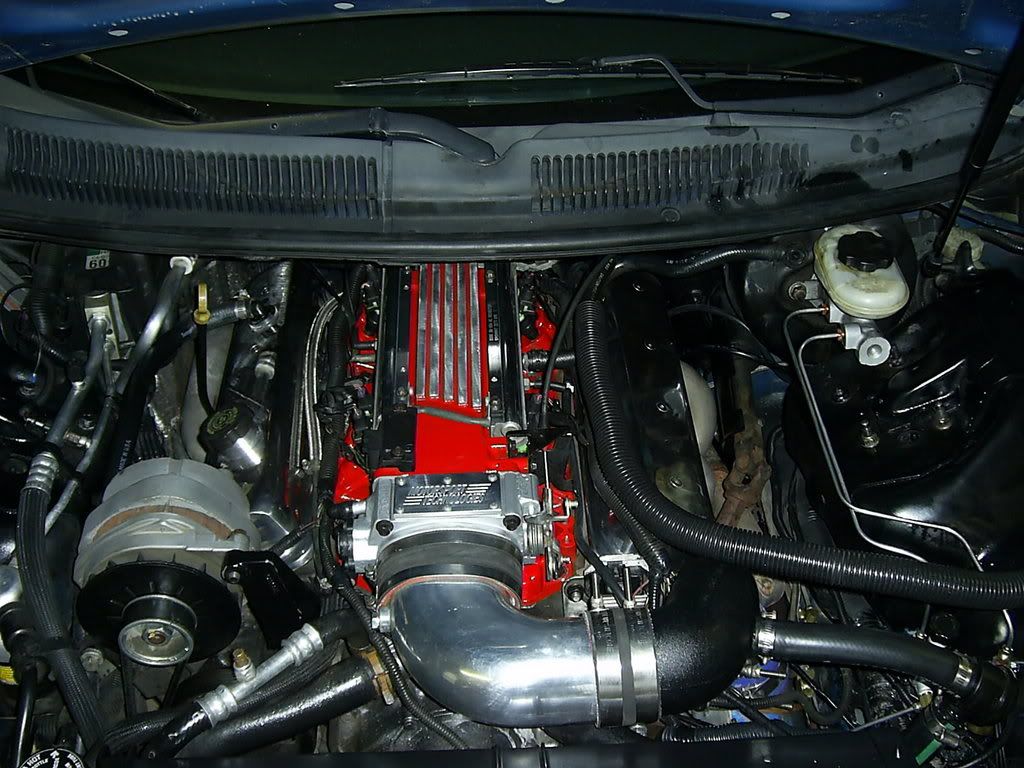
Fuel line mod write up (stock lines)
Factory Fuel Line Mod
1. The first thing is to relieve the pressure off the shrader valve on the fuel line, located beside the fuel pressure regulator on the rear of the intake.
2. Remove the fuel lines using the correct fuel line disconnect tool.
3. Then remove fuel lines from clip on inner fender.
4. Then Jack up drivers side front, place jack stand under car and remove drivers side front wheel.
5. Then remove inner fender
6. At the point where the fuel lines go thru the inner fender you can there push the Grommet for the fuel lines out of fender.
7. Carefully cut the grommet on the bottom side and remove it from the lines. ( Do this in a neat way as this grommet will be reused)
8. Gently pull the fuel lines thru the inner fender.
Looking to down on the brake master cylinder, to the right of it there is a small flat area (see picture) and in this place you will drill a 2� hole from the inside of wheel well.
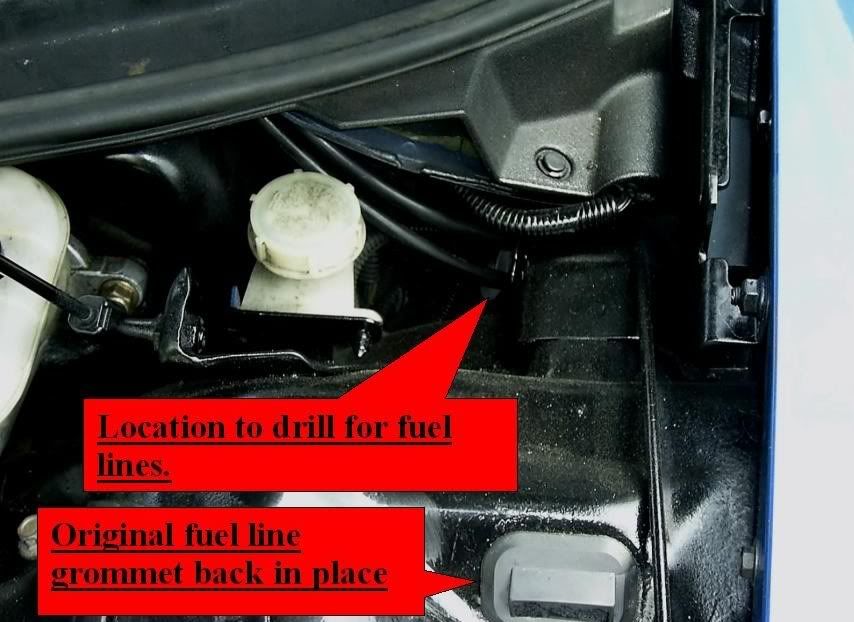
10. Then you will need a 2� grommet or rubber pipe coupler to place in the holes.
11. Then the part where you must be careful, the fuel lines can be kinked but if you take your time there is no issue. Gently push the fuel lines thru the grommet.
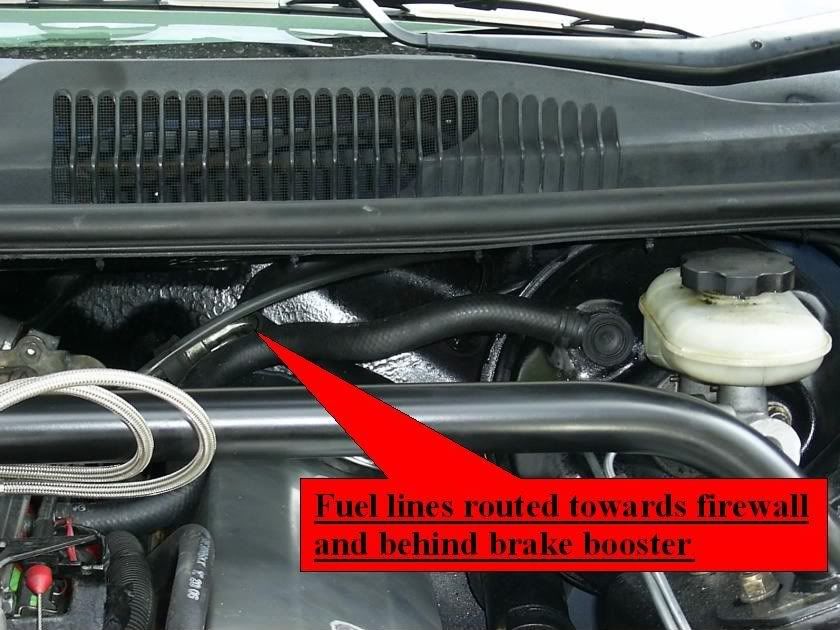
12. Then route them behind the power brake booster and come in from the back side of the intake.
13. Connect fuel lines up to the fuel rail.
14. Pull any slack back out from under hood, ensure lines are free and clear.
15. Carefully loop the fuel lines one time in a large loop. Then start where they come up from the subframe at thru the plastic holder and I used some zip ties about every 3��s around the loop keeping it uniform.
16. Then I mounted one bracket inside inner fender just to fasten the lines to in one spot and fastened them to it keeping it pulled tight against body.
17. Replace inner fender, replace tire, jack back up and remove stand, then lower car back on to ground.
18. Reinstall grommet in fender
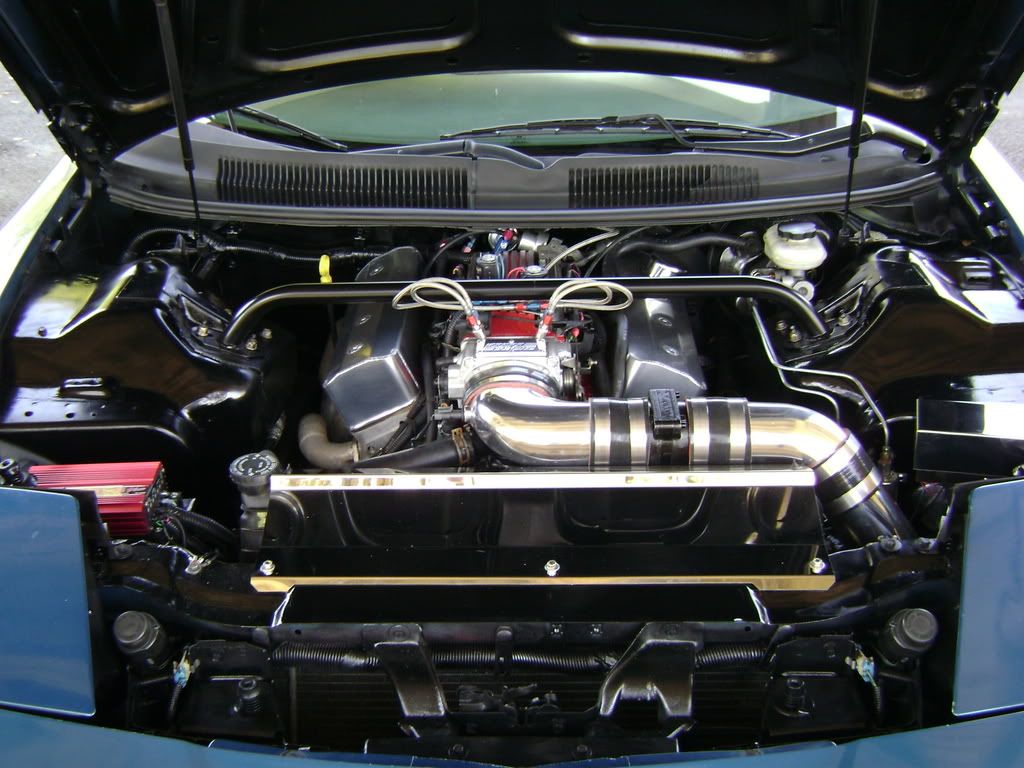
19. Smile as you have just completed the mod.
I know this is not the best write up, but many asked about my set up so here is some info, I hope it is helpful to those who asked.
1. The first thing is to relieve the pressure off the shrader valve on the fuel line, located beside the fuel pressure regulator on the rear of the intake.
2. Remove the fuel lines using the correct fuel line disconnect tool.
3. Then remove fuel lines from clip on inner fender.
4. Then Jack up drivers side front, place jack stand under car and remove drivers side front wheel.
5. Then remove inner fender
6. At the point where the fuel lines go thru the inner fender you can there push the Grommet for the fuel lines out of fender.
7. Carefully cut the grommet on the bottom side and remove it from the lines. ( Do this in a neat way as this grommet will be reused)
8. Gently pull the fuel lines thru the inner fender.
Looking to down on the brake master cylinder, to the right of it there is a small flat area (see picture) and in this place you will drill a 2� hole from the inside of wheel well.
10. Then you will need a 2� grommet or rubber pipe coupler to place in the holes.
11. Then the part where you must be careful, the fuel lines can be kinked but if you take your time there is no issue. Gently push the fuel lines thru the grommet.
12. Then route them behind the power brake booster and come in from the back side of the intake.
13. Connect fuel lines up to the fuel rail.
14. Pull any slack back out from under hood, ensure lines are free and clear.
15. Carefully loop the fuel lines one time in a large loop. Then start where they come up from the subframe at thru the plastic holder and I used some zip ties about every 3��s around the loop keeping it uniform.
16. Then I mounted one bracket inside inner fender just to fasten the lines to in one spot and fastened them to it keeping it pulled tight against body.
17. Replace inner fender, replace tire, jack back up and remove stand, then lower car back on to ground.
18. Reinstall grommet in fender
19. Smile as you have just completed the mod.
I know this is not the best write up, but many asked about my set up so here is some info, I hope it is helpful to those who asked.
pics of the loop would be badass...
im wondering if you can vut off the connectors off the end of the fuel lines cut them to the leingth ou want and press the metal fittings back into the plastic lines anybody know?
im wondering if you can vut off the connectors off the end of the fuel lines cut them to the leingth ou want and press the metal fittings back into the plastic lines anybody know?
cool thanks,i kinda started today. removed the evap line completely and capped it off underneath. need to start drilling next.
so you didn't cut the stock lines at all or use a fuel line repair kit?
i'm kinda worried but there being to much slack or kinking the lines..
so you didn't cut the stock lines at all or use a fuel line repair kit?
i'm kinda worried but there being to much slack or kinking the lines..
Thanks for the write up! That is a great appearance mod. Your engine bay looks so simple and clean, I love that. I'll practice the mod on my Z28, then decide if I want to cut the WS6
Trending Topics
LS1 Tech Stories
The Best V8 Stories One Small Block at Time

6 Common C5 Corvette Failures and What's Involved In Repairing Them
Pouria Savadkouei
Retro Modern Bandit Pontiac Trans AM Comes With Burt Reynolds' Autograph
Verdad Gallardo
Top 10 Greatest Cadillac V Series Performance Models Ever, Ranked
Pouria Savadkouei
Top 10 Most Powerful Chevy Trucks Ever Made!

Hennessey's New Supercharged Silverado ZR2 Has 700 HP
Verdad Gallardo
Coachbuilt N2A Anteros Is an LS2-Powered C6 Corvette In Italian Clothes
Verdad Gallardo
Awesome K5 Blazer Restomod Comes With C7 Corvette Power
Verdad Gallardo
10 Camaros You Should Never Buy

10 LS Engine Myths That Refuse to Die
Verdad Gallardo The way the first gm books read when these lines began to make their appearance was as follows. Carefully cut the plastic line length wise over the quick connect being careful not to gouge the connection. Then squarely cut off the bad end and dip the plastic line in boiling water for fifteen seconds then slide the metal quick connect on and then set it in ice water to cool the connection. We did a few of them before they started servicing the complete line assembly. It takes a few tries with the boiling water so you do not get it too soft and collapse the line when you push it in.
Okay, couldn't wait 'till tomorrow, did it just now.
I used a 1 3/4" holesaw and it works just as well. Took a piece of rubber hose and cut it down the middle and used it for the grommet. Everything is very easy and the instructions are good. I was gently pulling the fuel line through into the engine bay and it snagged. Looked in the wheel well and my plastic fuel line was wrapped around one of the lugs and I kinked the sucker. I just grabbed a short length of pretty stiff rubber hose and zip tied the fuel lines to it near where the kink was. The stiff hose won't allow the line to kink there again. The loop is just that and the entire loop will lay flat against the "roof" of the fender well between the plastic fender liner and inner fender.
My only concern is that you can obviously only wind your loop so tight, so its kinda big. When I put the fender liner back in, part of my 2 line loop was pokin' out right above the upper control arm. I recently replaced my upper ball joint and ends of the bolts stick straight up out the top of the upper arm. I can see my suspension compressing and those bolts hitting the fuel lines. Can't really rearrange the loop any, so I am going to fasten the 2 lines by way of insulated clamp, to the top of the inner fender to keep them out of the way. I may even cut the excess threads off those bolts.
BTW-anyone with stock upper balljoints does not have these bolts sticking through. When replacing the joint, you have to drill out the stock rivets and use bolts with nuts.
BTWII-I also rerouted my hood latch cable at the same time and ran it through the same hole for the fuel lines. Looks nice and clean under the hood!
Originally Posted by 94blownz281
ah sounds good to me, what about the couple inches of rubber hose thats on the plastic fuel lines? does that slide off or does it get cut off?
is it needed(rubber hose)
Thanks
is it needed(rubber hose)
Thanks
Originally Posted by great421
Forgive my Ignorance, but what purpose does this serve? Are you redirecting the fuel lines just for appearance or something else?
Could you post an "after the mod" photo?
Could you post an "after the mod" photo?