


Restoring my 1995 Bird..

Thread Starter
TECH Apprentice
iTrader: (1)
Joined: Jun 2008
Posts: 303
Likes: 0
From: Fort Worth, Texas
Hahahaha! Now all I need is a big ole John Deere sticker in my back window!
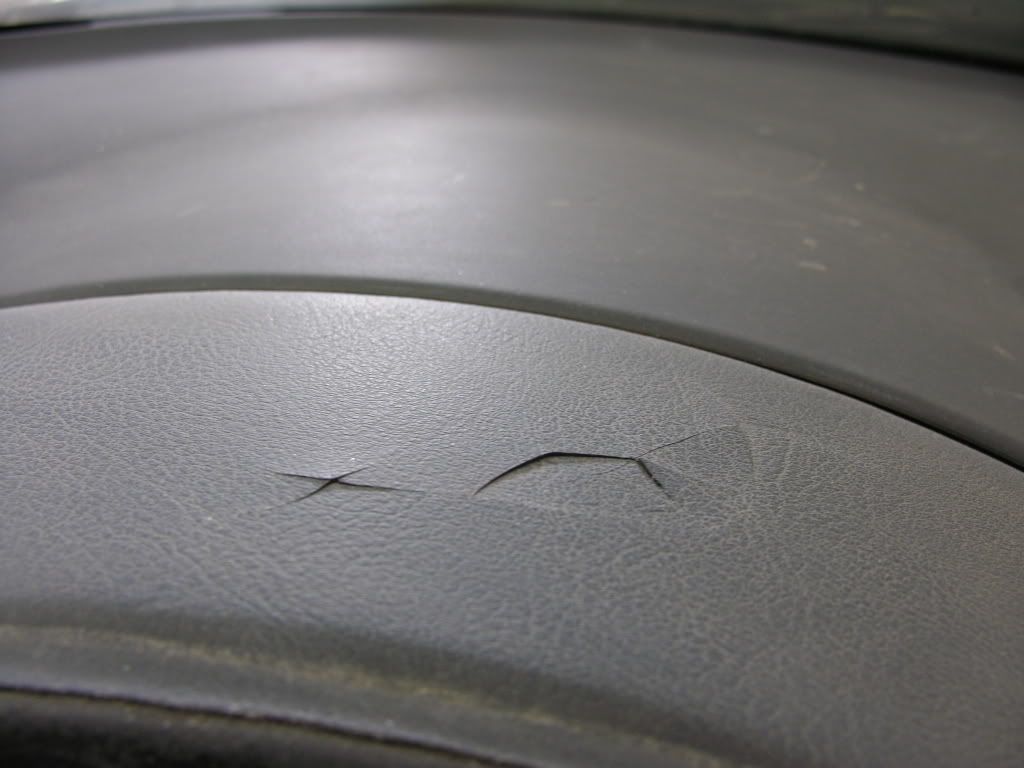
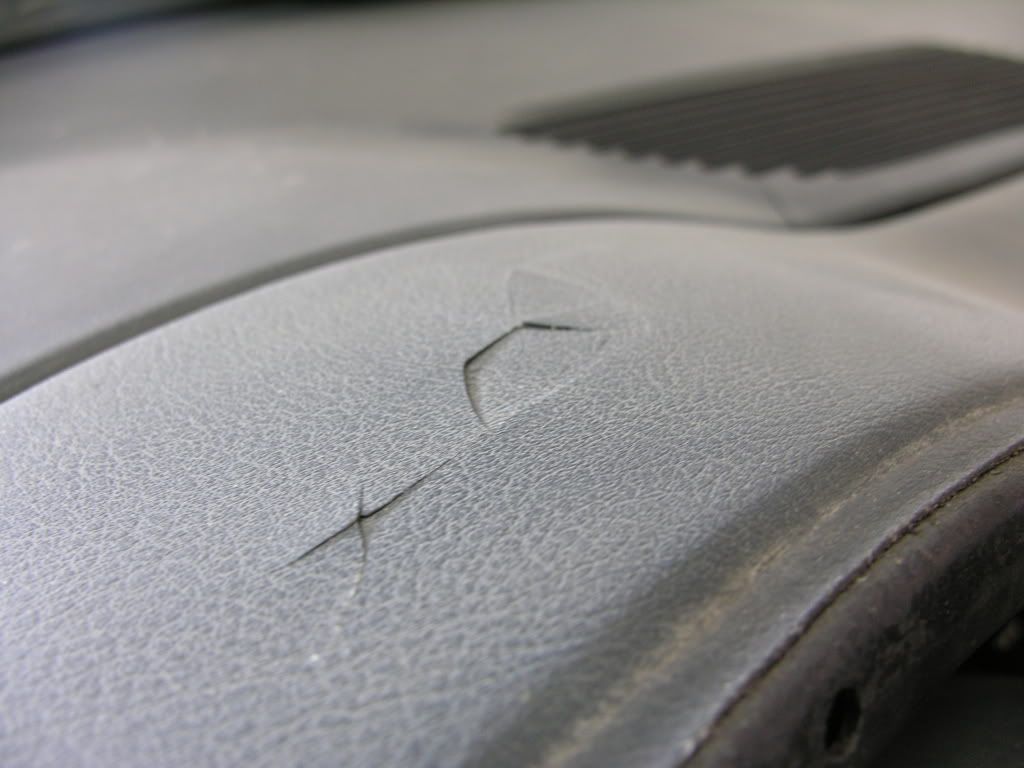
Oh, BTW, I have some damage on my dash that I still need to get fixed (thanks to those kids with cinder blocks)..
While I looking at my dash, I decided to purchase a double din radio opening from KEE AUDIO (here on LS1TECH). I will be purchasing my car stereo stuff in roughly 45-60 days.
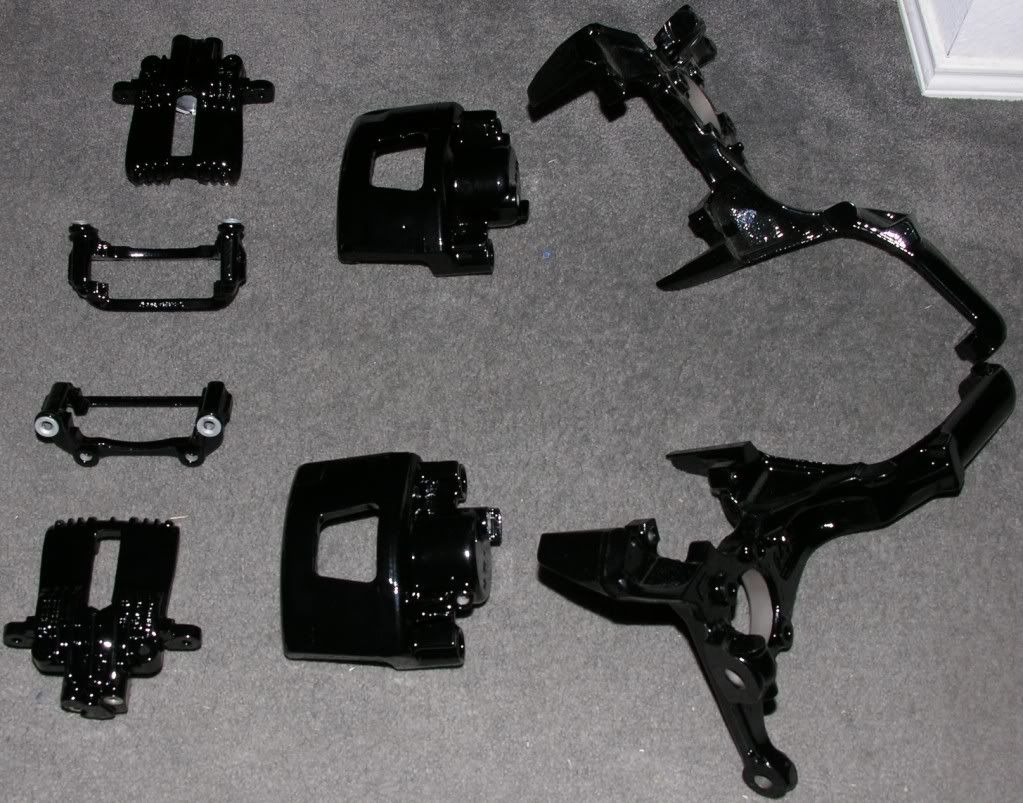
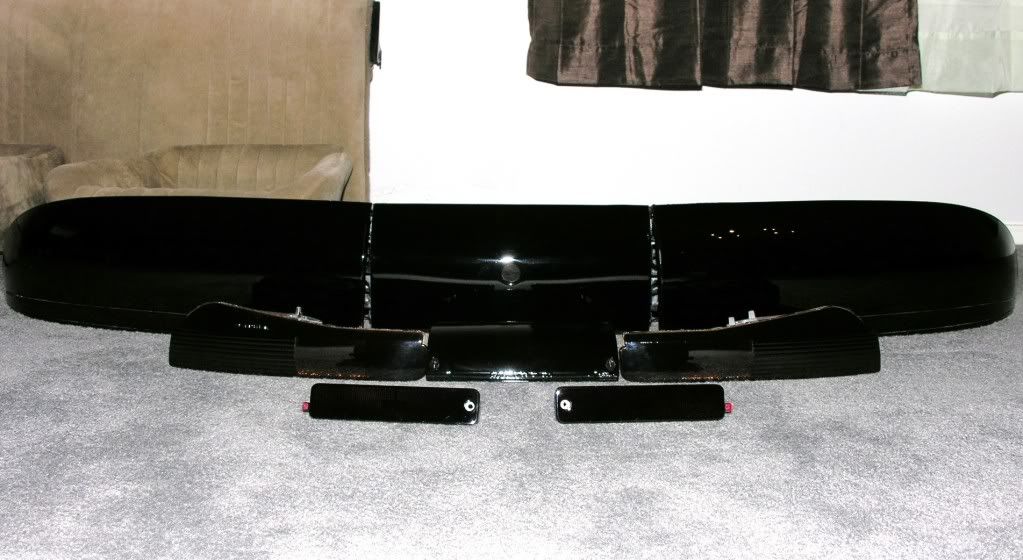
I also just purchased (4) brand new rotors and all of my new brake pads.. I drove down to Mansfield, Texas and picked up all (4) brake calipers for my car as well as the entire front spindle assembly.. I took them down to Kennedale, Texas to the powder coater.. I got them back and now they gloss black.. They look really good (pictures soon to follow, later on this evening). I also took my outside door handles and T-Top bar to the powder coater and had those done gloss black as well.. I have to pick those up tomorrow.
I picked up some GM approved factory type carpeting and some carpet backing from YearOne.com. The new carpet will go in as soon as I am satisfied with the Fatmat. I contacted Tyler at Pavlock Performance.. I sent all (4) of my side marker lights, my 3rd brake light and my entire rear tail light assembly to him to have all of the lights sprayed / tinted. I received the lights back and they look great.. However, one of the lights incurred some shipping damage so I had to go on to eBay to buy another tail light.. I ultimately sent that tail light to him (and I should get it back sometime this week):
Oh, BTW, I have some damage on my dash that I still need to get fixed (thanks to those kids with cinder blocks)..
While I looking at my dash, I decided to purchase a double din radio opening from KEE AUDIO (here on LS1TECH). I will be purchasing my car stereo stuff in roughly 45-60 days.
I also just purchased (4) brand new rotors and all of my new brake pads.. I drove down to Mansfield, Texas and picked up all (4) brake calipers for my car as well as the entire front spindle assembly.. I took them down to Kennedale, Texas to the powder coater.. I got them back and now they gloss black.. They look really good (pictures soon to follow, later on this evening). I also took my outside door handles and T-Top bar to the powder coater and had those done gloss black as well.. I have to pick those up tomorrow.
I picked up some GM approved factory type carpeting and some carpet backing from YearOne.com. The new carpet will go in as soon as I am satisfied with the Fatmat. I contacted Tyler at Pavlock Performance.. I sent all (4) of my side marker lights, my 3rd brake light and my entire rear tail light assembly to him to have all of the lights sprayed / tinted. I received the lights back and they look great.. However, one of the lights incurred some shipping damage so I had to go on to eBay to buy another tail light.. I ultimately sent that tail light to him (and I should get it back sometime this week):
Thread Starter
TECH Apprentice
iTrader: (1)
Joined: Jun 2008
Posts: 303
Likes: 0
From: Fort Worth, Texas
I began removing parts off of my car, to prep it for the upcoming body work and paint job..
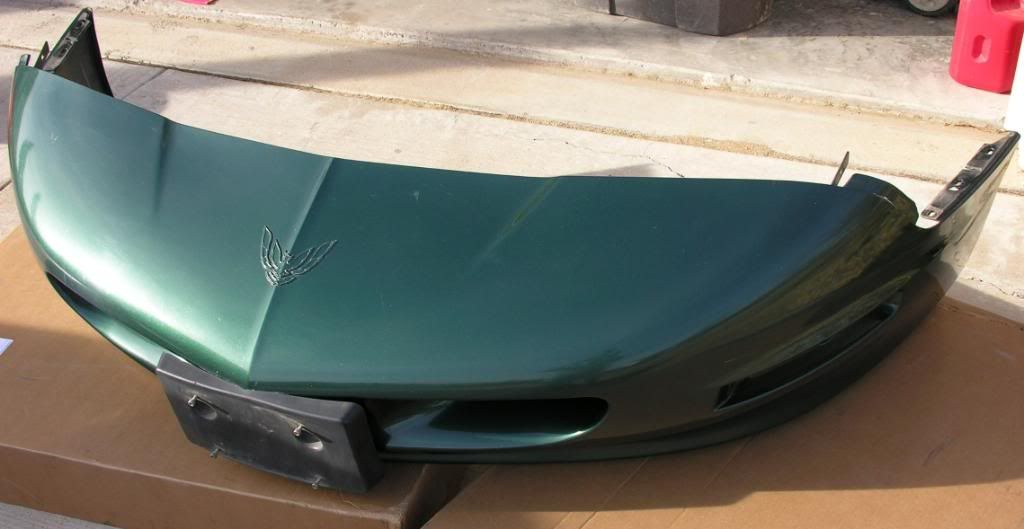
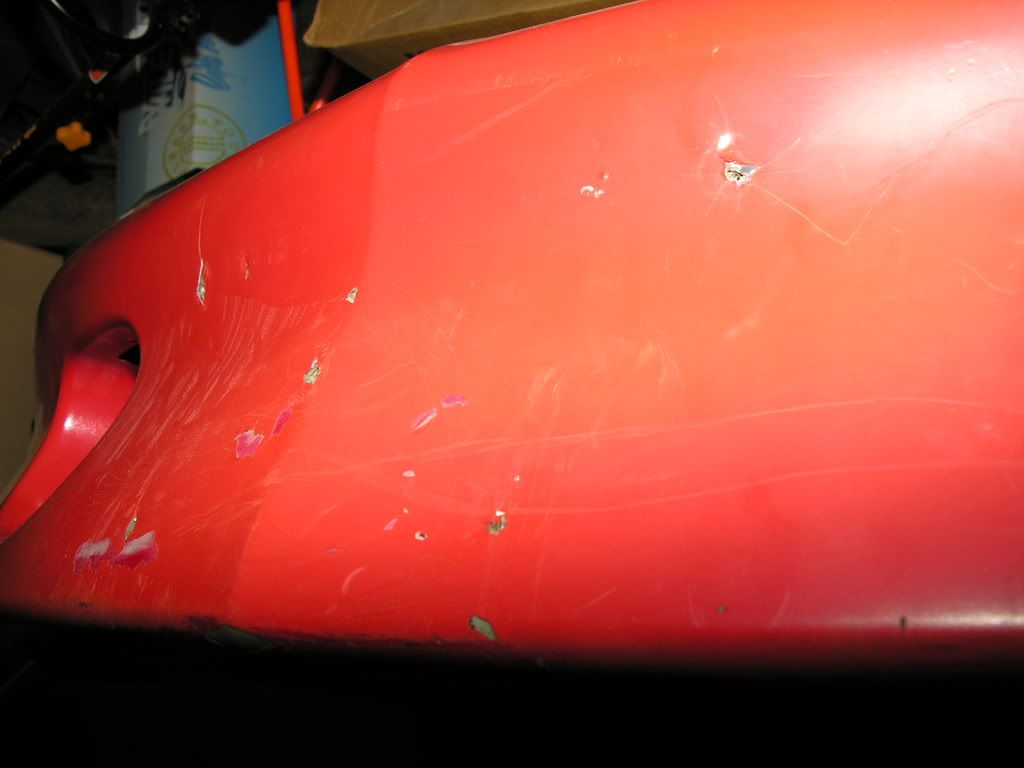
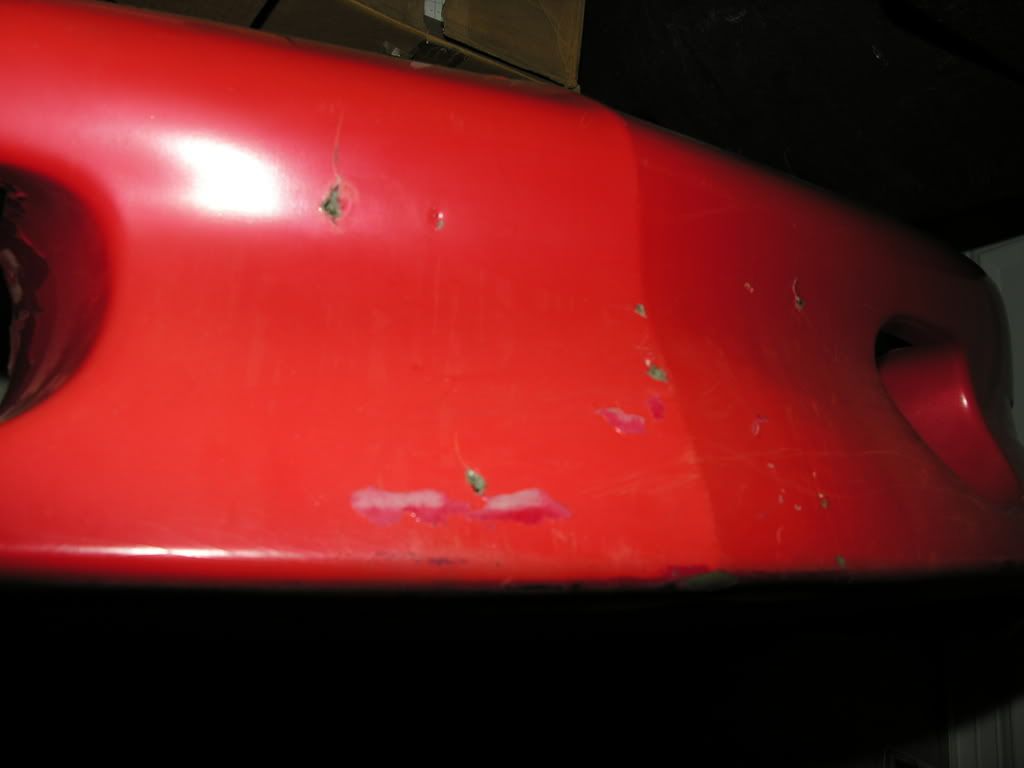
I also began searching high and low for LT1 Trans Am body parts.. (front bumper, rear bumper, side skirts, raised rear hatch / spoiler, new hatch shocks, etc). OMG, people are proud of their busted up parts.. LMAO! It took a lot of work (especially the front bumper cover) to bring everything up to par.. Also, the dents in the hood ended up being a major pain in the butt so I picked up another hood. Both of my mirrors were bad so I also picked up a set of the electronic controlled side mirrors as well.
One of my headlight motors is bad so I found one of those on eBay as well as TWO new window motors. Ughhhhhhh, when it rains, it pours.. I also took this opportunity to take off my hood and rear hatch hinges.. They were badly rusted. I took them over to the powder coater as well. A week later, viola.. new hinges!
Last edited by officermartinez; May 3, 2009 at 06:35 AM.
Thread Starter
TECH Apprentice
iTrader: (1)
Joined: Jun 2008
Posts: 303
Likes: 0
From: Fort Worth, Texas
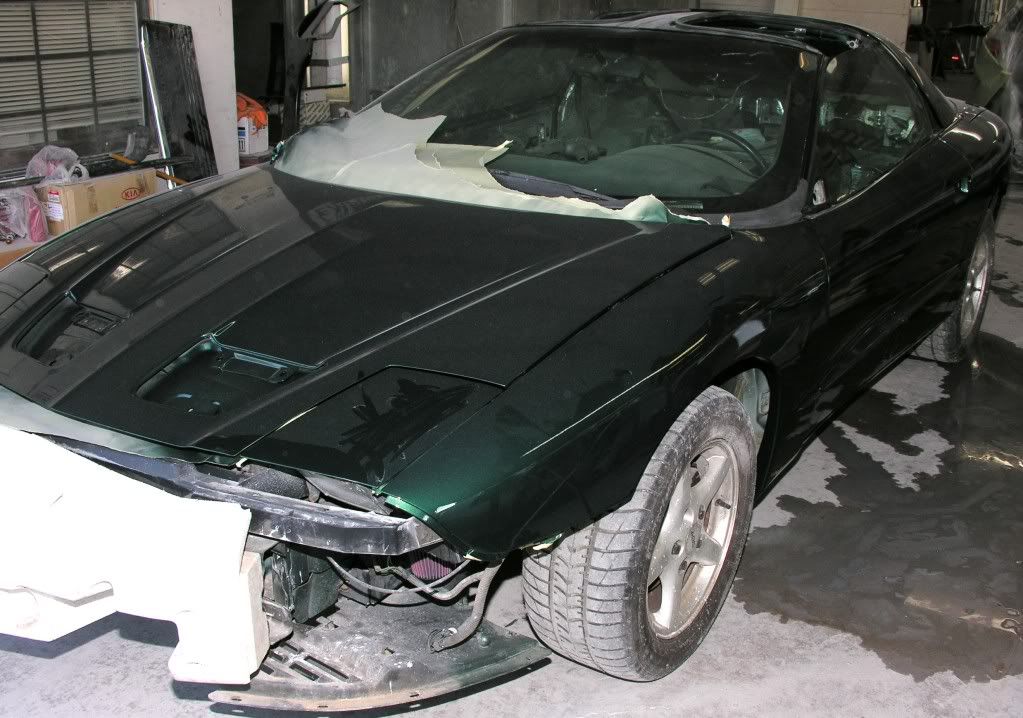
I picked up the parts and had a wrecker tow my car to the paint and body shop.. Here she is, at the paint and body shop.. I decided to stay with the factory dark green color (used PPG primer, paint and clear):
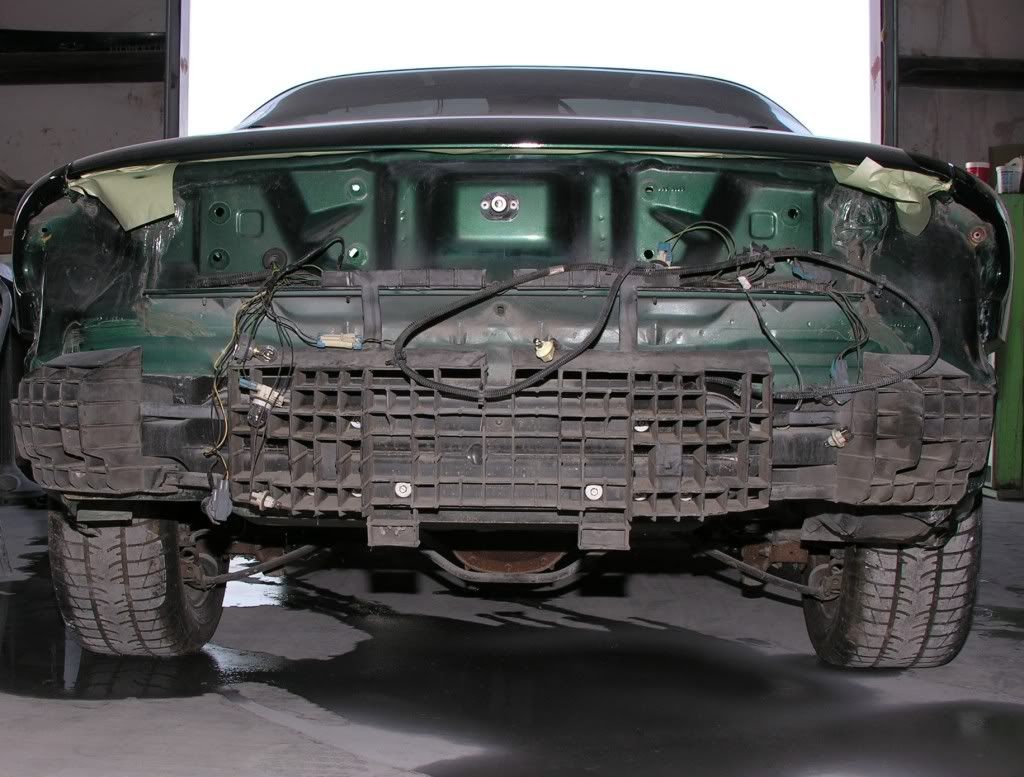
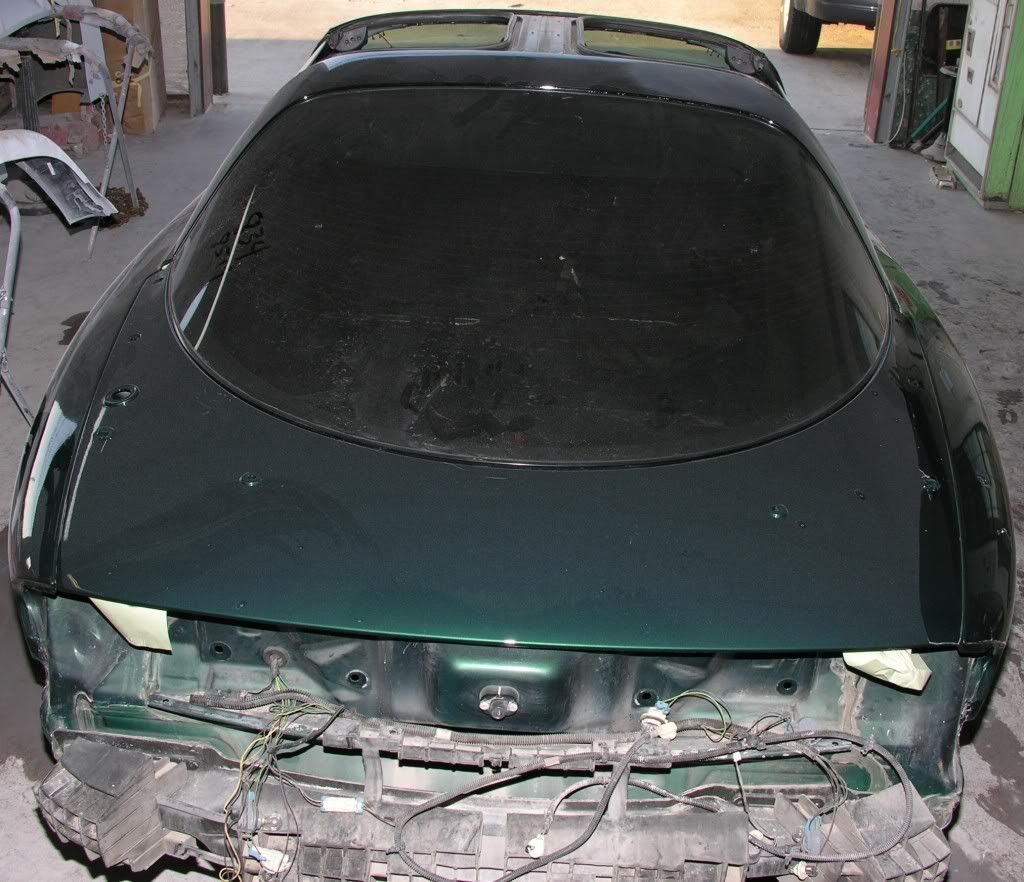
I began removing parts off of my car, to prep it for the upcoming body work and paint job..
I also began searching high and low for LT1 Trans Am body parts.. (front bumper, rear bumper, side skirts, raised rear hatch / spoiler, new hatch shocks, etc). OMG, people are proud of their busted up parts.. LMAO! It took a lot of work (especially the front bumper cover) to bring everything up to par.. Also, the dents in the hood ended up being a major pain in the butt so I picked up another hood. Both of my mirrors were bad so I also picked up a set of the electronic controlled side mirrors.
One of my headlight motors is bad so I found one of those on eBay as well as TWO new window motors. Ughhhhhhh, when it rains, it pours.. I also took this opportunity to take off my hood and rear hatch hinges.. They were badly rusted. I took them over to the powder coater as well. A week later, viola.. new hinges!
Thread Starter
TECH Apprentice
iTrader: (1)
Joined: Jun 2008
Posts: 303
Likes: 0
From: Fort Worth, Texas
Good job dude. That hard work is rewarding. On a side note, did you ever consider the factory ground effects for the firebirds and formulas? I always thought those looked cool and are VERY rare. You can always flip the T/A stuff, as you know people are proud their used parts. In any case, keep it up.
LS1 Tech Stories
The Best V8 Stories One Small Block at Time

Topdon ONE vs. Artidiag 800 BT2: Which is the Diagnostic Tablet For You?
Pouria Savadkouei
Gas Monkey Built a 6-Wheel Ferrari Testarossa With a Corvette LT4 Engine
Verdad Gallardo
7 Most Reliable High-Performance Engines GM Has Ever Built
Verdad Gallardo
Amazing '71 Camaro Restomod Is Modern Muscle Car Under the Skin
Verdad Gallardo
6 Common C5 Corvette Failures and What's Involved In Repairing Them
Pouria Savadkouei
Retro Modern Bandit Pontiac Trans AM Comes With Burt Reynolds' Autograph
Verdad Gallardo
Top 10 Greatest Cadillac V Series Performance Models Ever, Ranked
Pouria Savadkouei
Top 10 Most Powerful Chevy Trucks Ever Made!

Hennessey's New Supercharged Silverado ZR2 Has 700 HP
Verdad Gallardo Thread Starter
TECH Apprentice
iTrader: (1)
Joined: Jun 2008
Posts: 303
Likes: 0
From: Fort Worth, Texas
Good job dude. That hard work is rewarding. On a side note, did you ever consider the factory ground effects for the firebirds and formulas? I always thought those looked cool and are VERY rare. You can always flip the T/A stuff, as you know people are proud their used parts. In any case, keep it up.
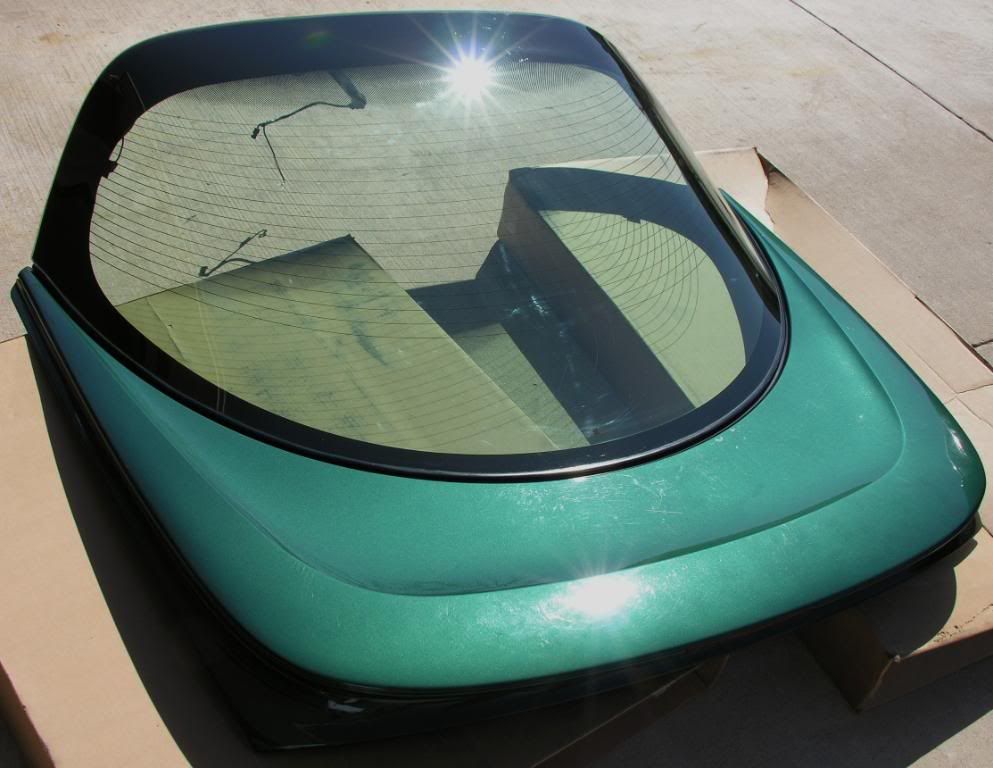
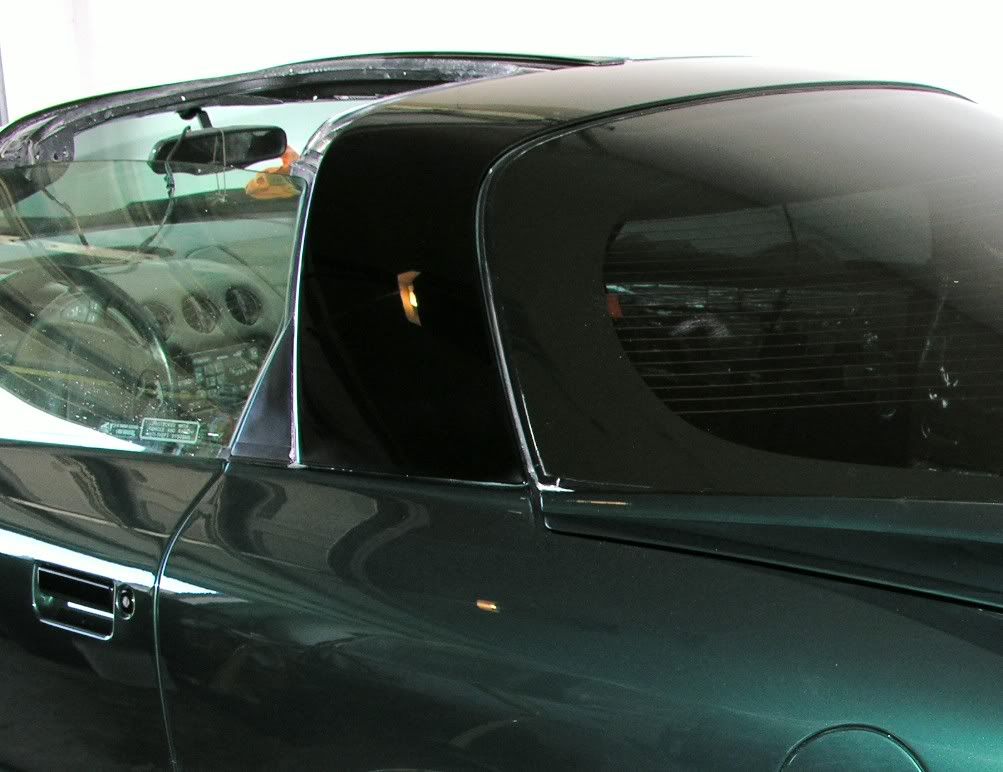
I'm supposed to run down to the powder coater in a couple of hours and pick up my door handles and T-Top bar.. BTW, the car was shot with the factory dark green. When I bought the car, the roof was dark green as well (painted from the factory). Back then (and still today), I saw the Camaro's offered a black roof (regardless of the rest of the paint). I have always liked the black roof look so I had mine painted gloss black..

Thread Starter
TECH Apprentice
iTrader: (1)
Joined: Jun 2008
Posts: 303
Likes: 0
From: Fort Worth, Texas

Thread Starter
TECH Apprentice
iTrader: (1)
Joined: Jun 2008
Posts: 303
Likes: 0
From: Fort Worth, Texas
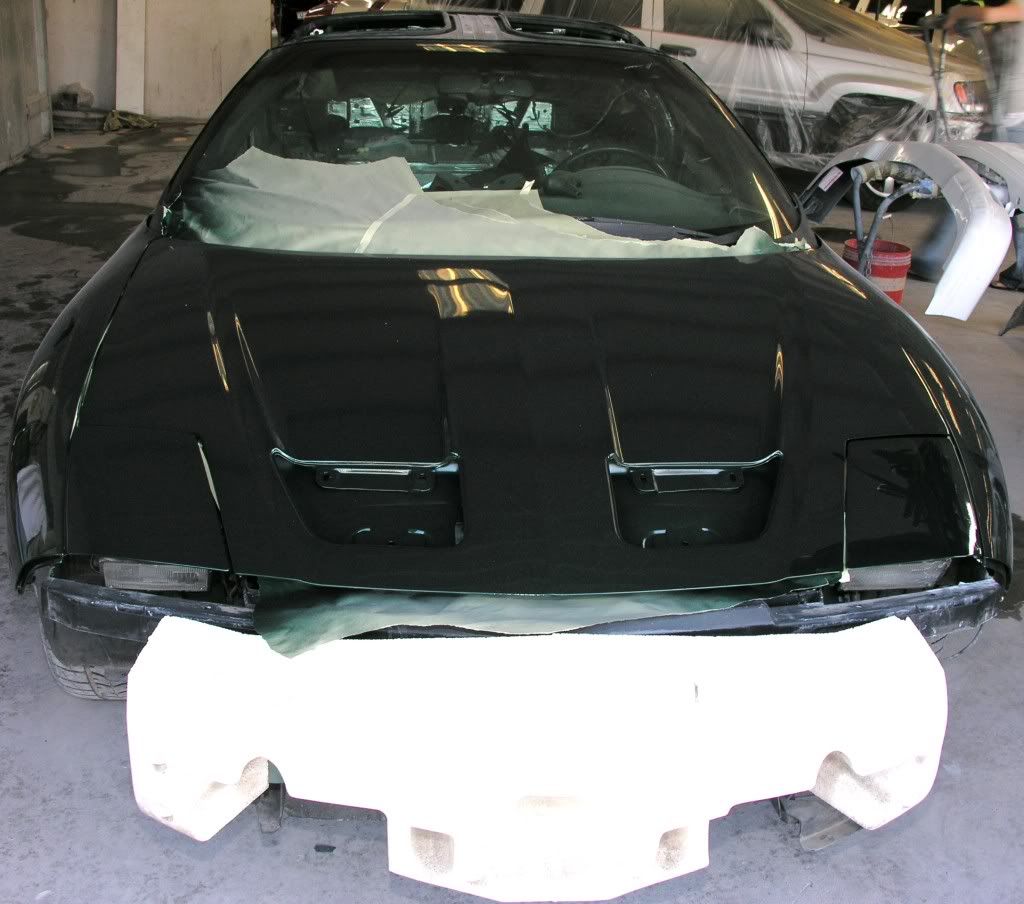
Here are a few more pics of the car at the paint and body shop:


Thread Starter
TECH Apprentice
iTrader: (1)
Joined: Jun 2008
Posts: 303
Likes: 0
From: Fort Worth, Texas
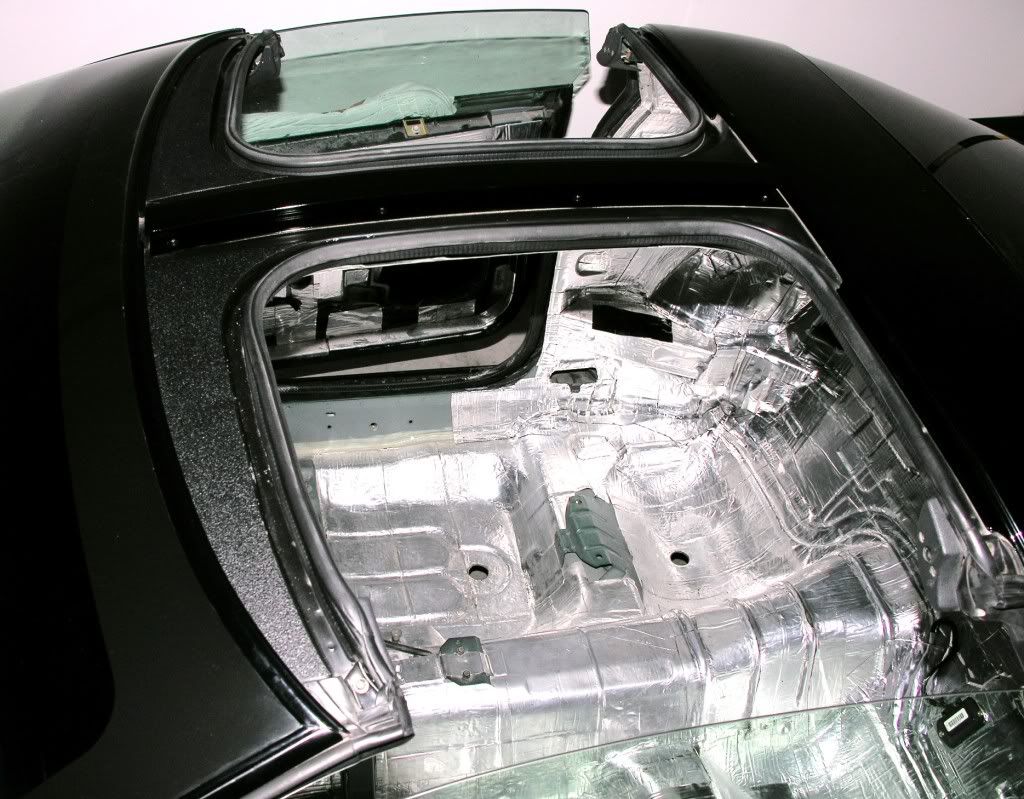
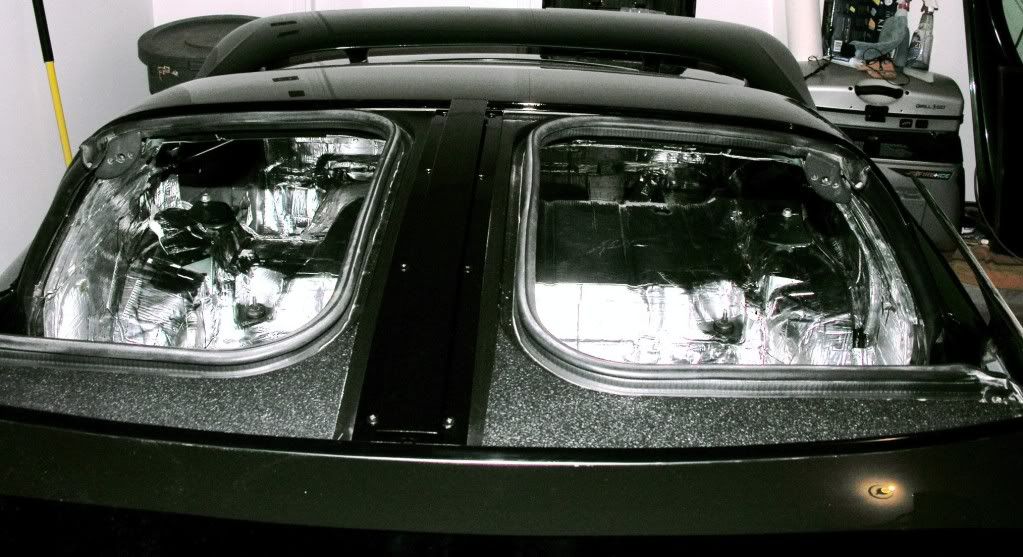
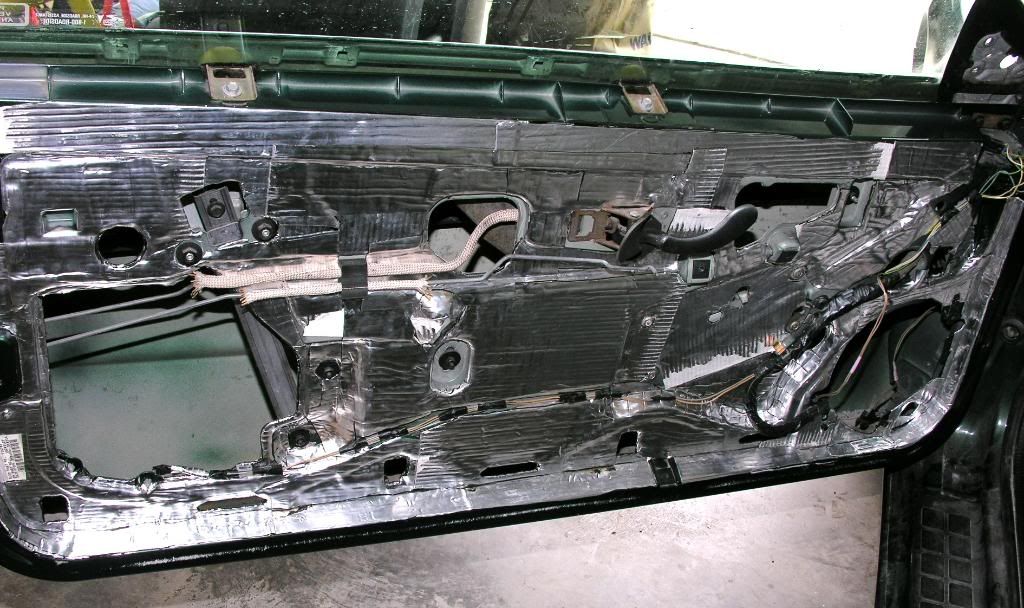
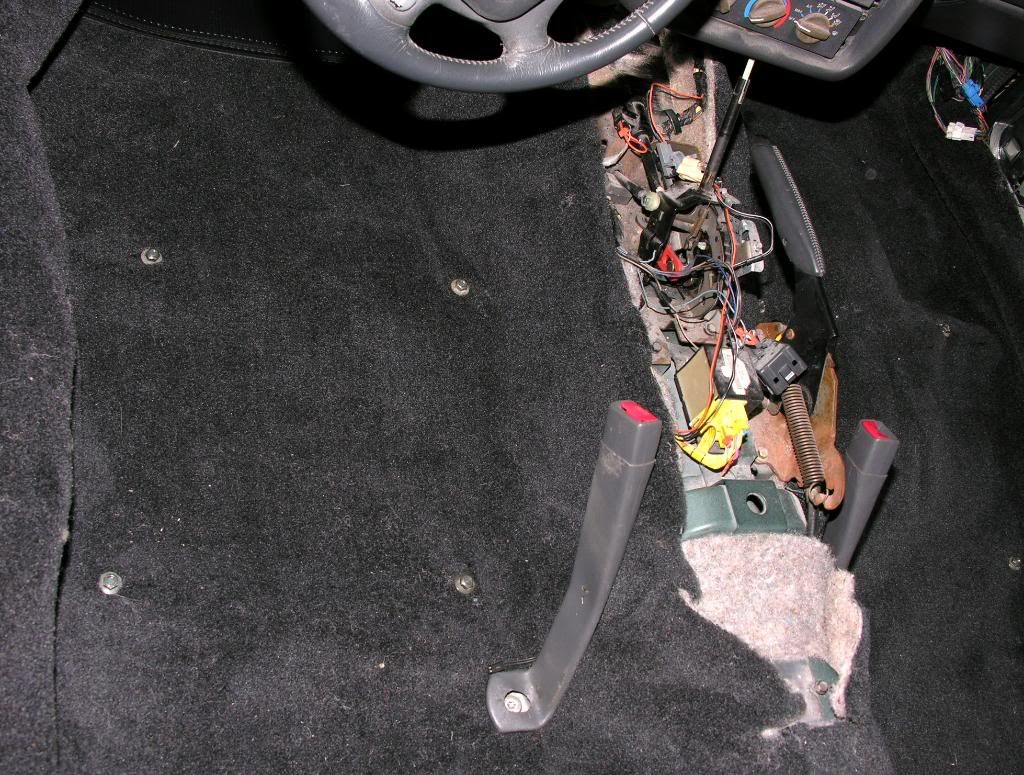
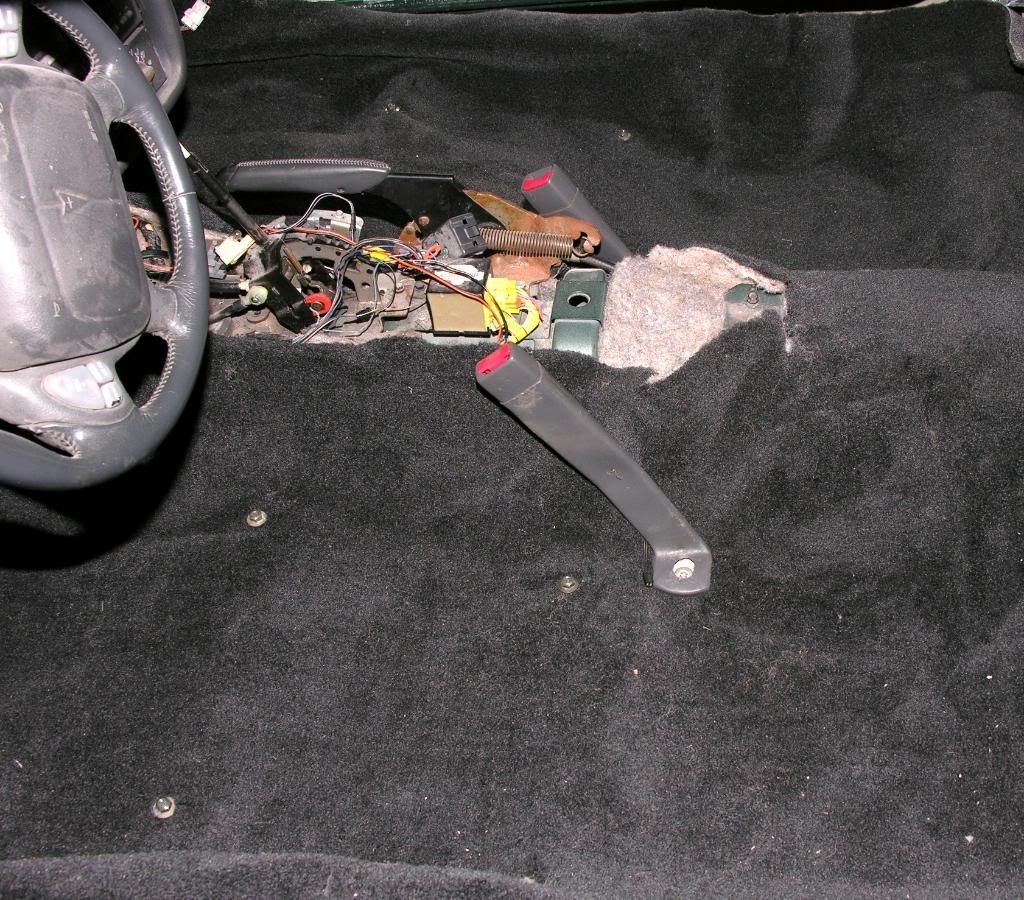
I worked on the door some (cleaning out the dirt dobbers nest and laying another layer of fatmat)..
Then, I finished out of the remaining bare spots of metal..
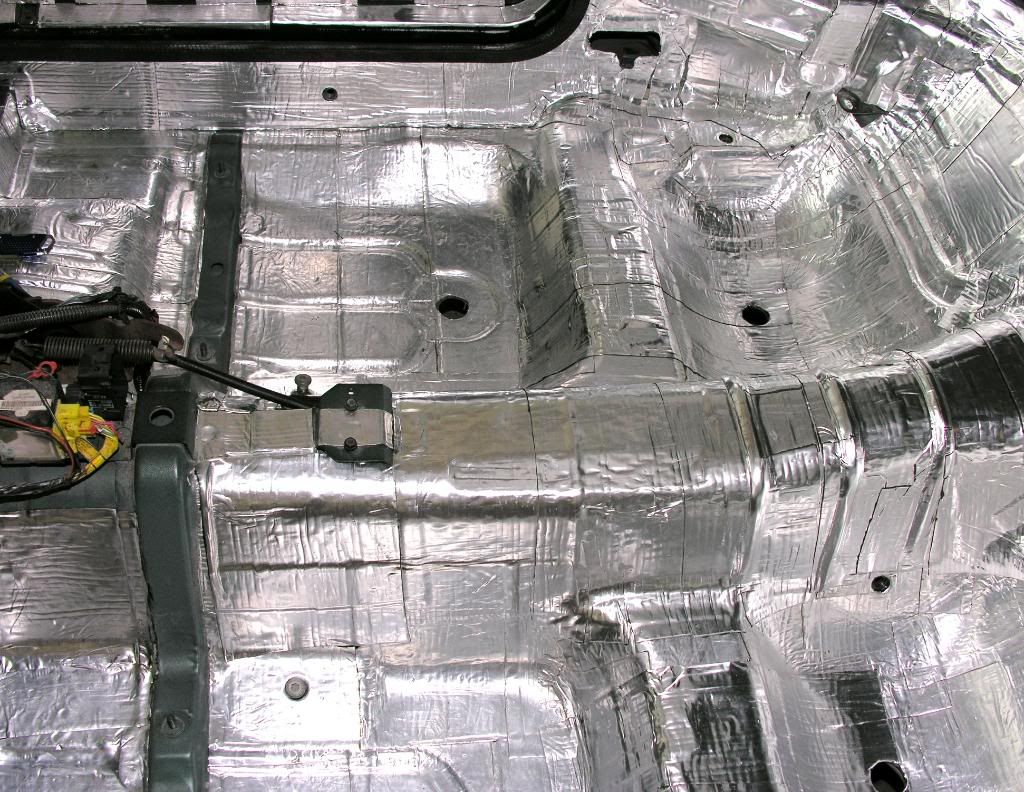
Next, I cut off my rear seat mounts and applied a few layers of sound dampening material..
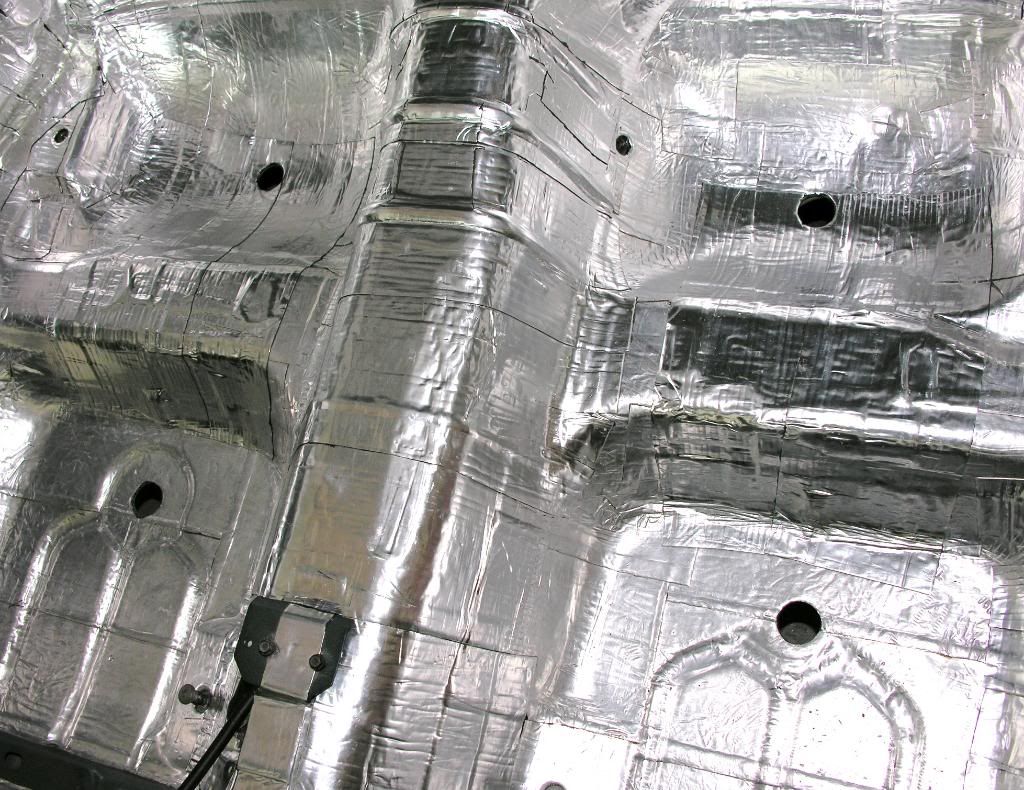
I purchased some VERY thick floorboard covering (also good for its additional sound dampening characteristics). I measured and cut the material, as needed..


Like I mentioned above, I am still in the middle of laying my carpet. As soon as that's done, I will mount my seatbelts and headliner. I also plan to purchase a single 4-AWG in and (4) 8-AWG out distribution block. Since I laid all of that Fatmat, grounding something against bare metal inside my car will be at a premium (ie.. my nitrous install which requires a few ground wires).
Thread Starter
TECH Apprentice
iTrader: (1)
Joined: Jun 2008
Posts: 303
Likes: 0
From: Fort Worth, Texas
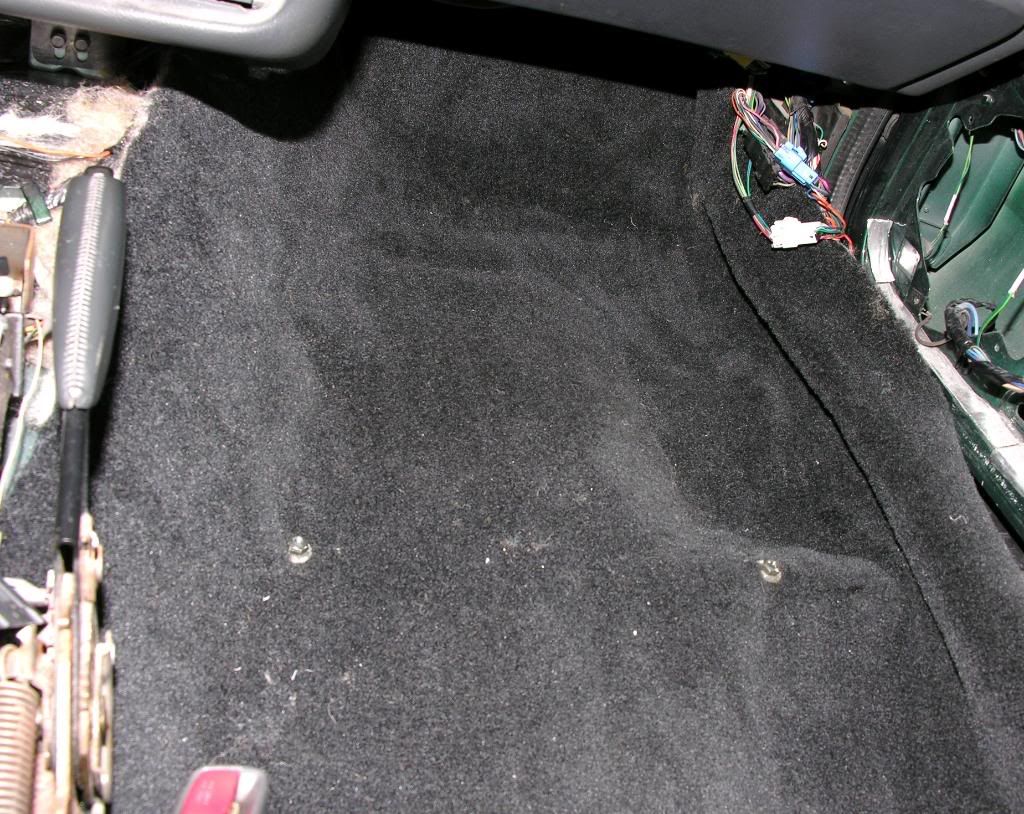
Ahhhhh.. I guess I'm gonna call it a day and start fresh tomorrow morning. Here are a few shots of the carpet being installed.. (By the way, the carpet came with some of that carpet padding glued in place.. talk about THICK. I had one hell of a time trying to get my seatbelt star bolts mounted up. I probably spent 45 minutes trying to mount two stupid seatbelt bolts up.. hahahaha).
Last edited by officermartinez; May 4, 2009 at 06:56 AM.


what did you use to paint down in the valleys around the t-top whether stripping? it looks a LOT better than the bare stock look
car is looking amazing man, can't wait to see it all come together. your definately going to have a beautiful car that will actually be VERY enjoyable to drive
car is looking amazing man, can't wait to see it all come together. your definately going to have a beautiful car that will actually be VERY enjoyable to drive