Restoring my 1995 Bird..
This is an awesome thread. I have a 94 firehawk that I bought new and started restoring a few years ago. It has been a much slower project then the pace you are going. Great work there is not very many of us that have held on to these cars this long.

Thread Starter
TECH Apprentice
iTrader: (1)
Joined: Jun 2008
Posts: 303
Likes: 0
From: Fort Worth, Texas
That's awesome! Yep, there are only a handful of us left.. However, I did run into a setback today.. I am going to have to sell my kick azz Toby speaker box.. I'm not a happy camper! ..LOL
Last edited by officermartinez; May 12, 2009 at 09:19 PM.
Thread Starter
TECH Apprentice
iTrader: (1)
Joined: Jun 2008
Posts: 303
Likes: 0
From: Fort Worth, Texas
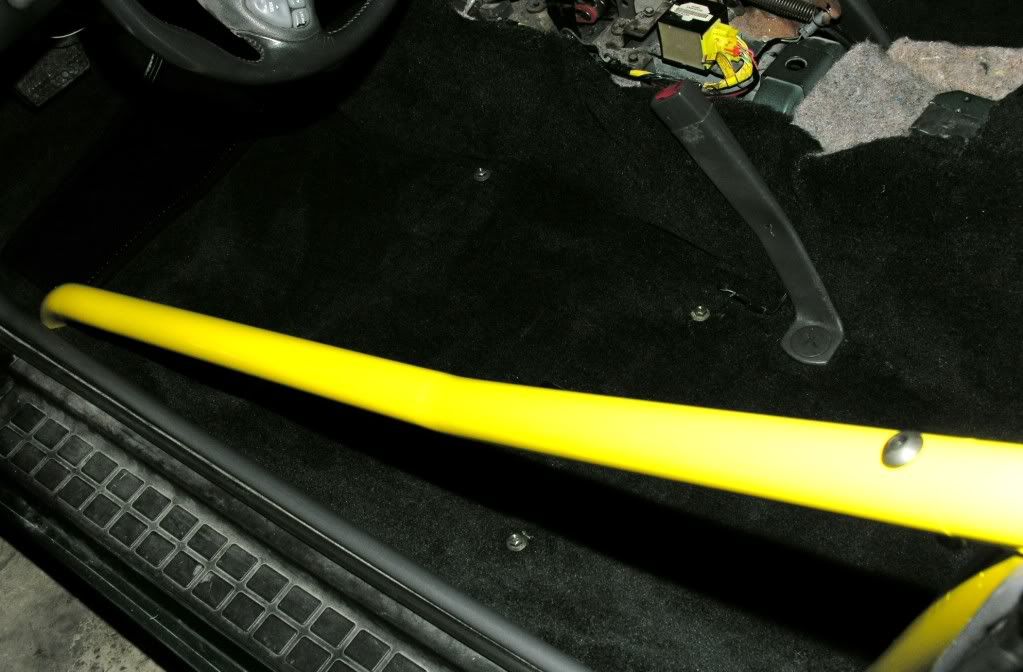
First day off.. Some good stuff and some bad stuff.. I pretty much have the roll ball mounted in. I still have to drill the mounting holes for the forward two bars, that mount near my feet when I am in a seated position. I trimmed the carpet on the two middle mounts and that's when it happened!
TWO freakin' teenagers saw my garage open and thought no one was inside. In fact, I was in the floor board of the car, trimming the carpet. One of them was on a cell phone and he said, "Oh hell ya dog.. jackpot"! I popped up from the floor board and told them that I was a police officer and that I know who they are and where they live. I picked up my handheld radio and told the dispatcher to start a marked unit to my house. The on duty officer arrived and he was able to find them around the block. He got them positively identified in case my stuff ends up stolen.
Oh what a day.. UGHHHHH!
Thread Starter
TECH Apprentice
iTrader: (1)
Joined: Jun 2008
Posts: 303
Likes: 0
From: Fort Worth, Texas
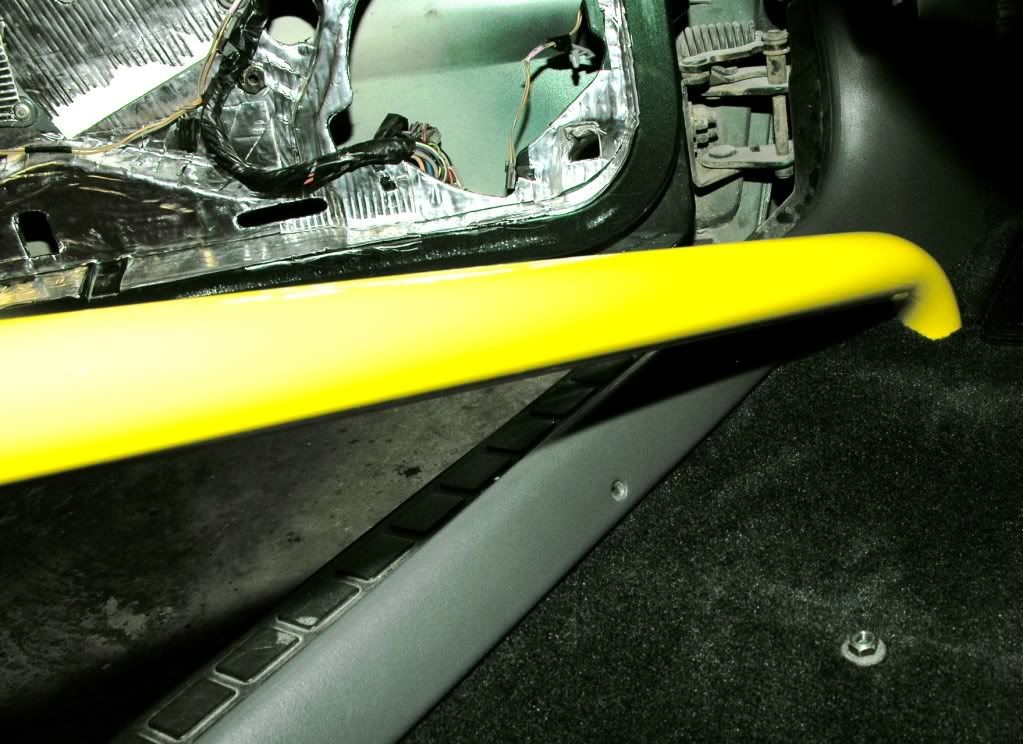
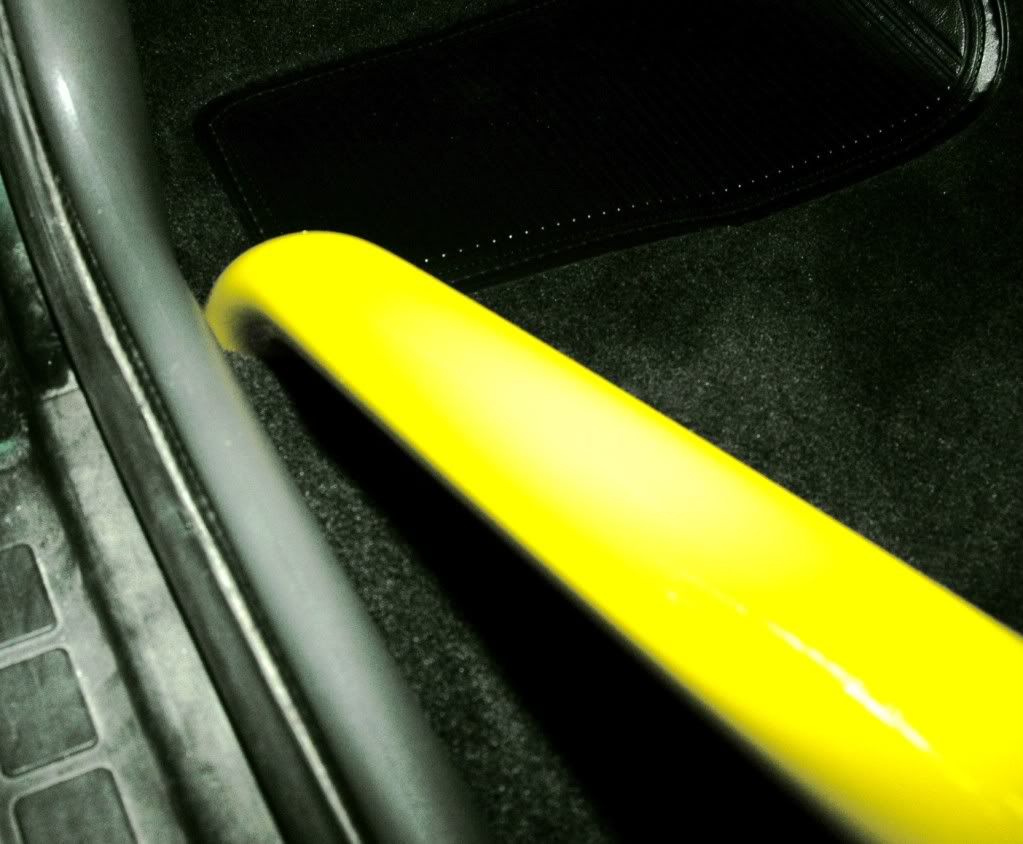
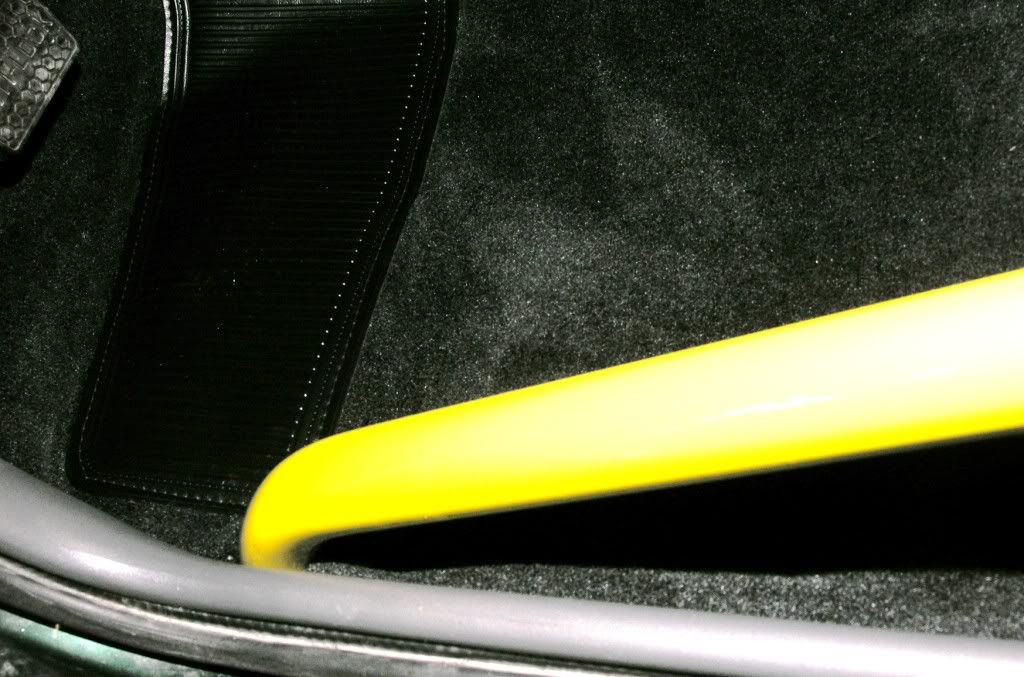
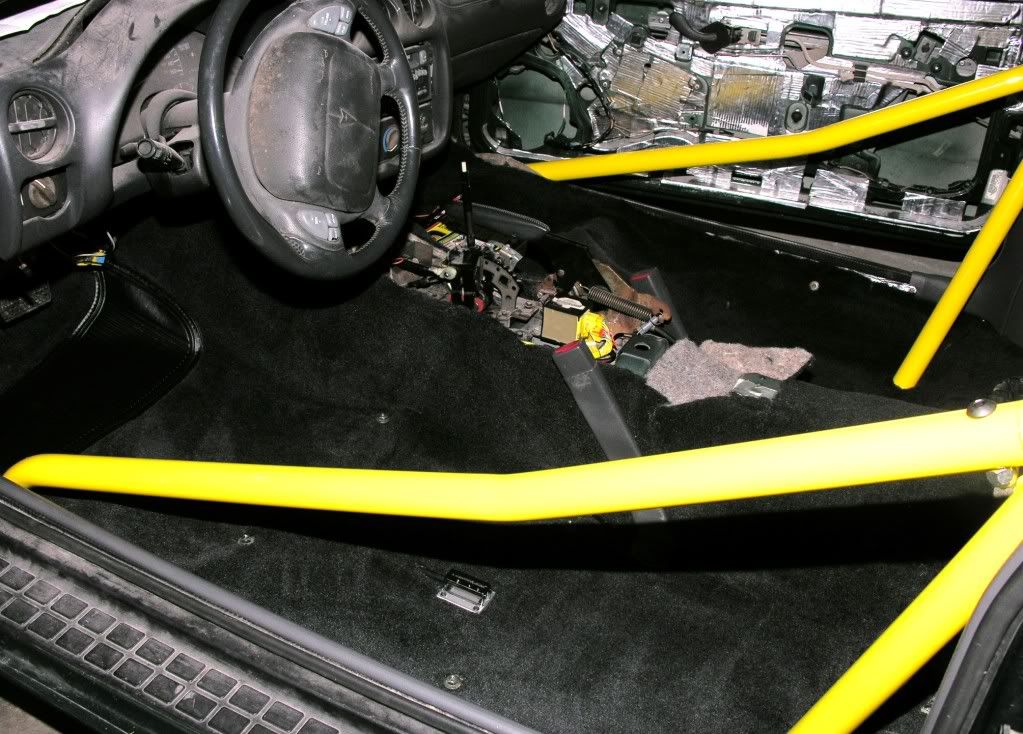
Got a few more update pictures.. Here is the roll bar "semi-mounted" in my car.. I still have to do the other side, but you get the idea.. I think it will look pretty good once everything is cleaned up and in place.. BTW, talk about being a little pain in the butt.. All I can say is it really sucked mounting this side of the bar on the drivers side floorboard. Whew! I tried to take several different angles.. (sorry for the lighting in the pics)
Looking good. There is nothing worse than thieves. What were they doing on your property...couldn't get them for trespassing or something? Especially when they have ill intent on their minds... Anyway, keep up the awesome work. If anything ends up missing...make sure those two delinquents end up the same way :-p
Thanks.. I was just admiring your build thread! Wow! I like how you are showing the damaged parts and the new "replacement" parts. Very cool! As for me, I didn't add too much to my setup but I did keep a "tally" of the parts that I have purchased:
Edge Racing 4L60E 3000RPM Converter (w/ anti-ballooning plate) - $565
New windows (minus the rear window) $438
Moroso Cold Air Intake System - $180
New GM MAF $228
BBK 52mm Throttle Body 1994-97 LT1 - $305
PowerForce+Plus harmonic race damper LT1- $175
MSD LT1 Pro Billet Optispark Distributor - $289
GM Performance Parts LT4 Hot Cam Hydraulic Roller Cam - $150
MAC Headers w/ Y Pipe (ceramic coated by Performance Coating Specialties) - $675
SLP Loudmouth I Exhaust - $490
Random Technology RACE High-Flow Catalytic Converter - $259
Comp Cams Magnum 1.6:1 Roller Rockers - $190
Comp Cams LT1 Hydraulic Roller Lifters - $190
SLP Line Lock kit - $140
Wolfe Racecraft Full 6-point roll bar - $625 + $200 custom powder coated
Cold Fusion 200HP Wet Nitrous Kit, 20 lbs bottle, warmer, progressive controller, misc parts - $1,485
Racetronix Fuel Pump Performance Bundle - $230
UMI Performance 3-Point Subframe Connectors - $300
UMI Performance Engine/Strut Bay Brace - $95
Corvette ZR1 Rims (2) 17x9.5" + (2) 17x11" custom powder coated - $1,400
Sumitomo Tires (2) 275 40ZR 17's + (2) 315 35ZR 17's - $675
TransGo 4L60E Shift Kit - $130
Beefed up rebuilt 4L60E - $1700
MSD 8.5mm Black Super Conductor Spark Plug Wires - $110
Vortech Aluminum Intake Elbow custom powder coated - $125
BMI Custom Powder Coated Aluminum Radiator Shroud - $200
LT1 Block .030 over, TRW forged pistons + powder coating - $ Ughhhhh
(4) new slotted / cross drilled rotors and brake pads - $509
(4) brake calipers and front spindles + powder coating - $270
(2) door handles + powder coating - $60
(2) new rear hatch shocks - $68
Misc fel-pro gaskets - $ Can't remember
New interior carpet - $200
Fatmat (200 sq ft) $200
6LE front air splitter - $284
Used (like new) center console - $150
Used (like new) misc interior panels - $200
Both front seats, headliner, sunvisors and door panels upholstered - $725
Roll bar mountable speaker dual speaker pods + powder coating - $225
Used T/A rear hatch, T/A front / rear bumper cover, side skirts, hood - $750
Paint and body work - $5500
Pavlock Perf. tinted rear tail lights, blinker lights and 3rd brake light - $275
KeeAudio double din bezel - $125 (give or take a few $$)
Cleaned / Dipped gas tank and radiator - $170
New window motors and new head light motors - $280
Used upper dash pad - $85
*** I'm sure there is more that I forgot to write down but you can get an idea about my general restoration costs so far.. Kind of depressing when I look at this list.. lmao!
 i got her back on the road and so far so good.
 holy ****! thats one helluva laundry list you have there! im loving your work alot man it makes me really want to do that tonight haha would you like to restore a 94 z in ny ?

Thread Starter
TECH Apprentice
iTrader: (1)
Joined: Jun 2008
Posts: 303
Likes: 0
From: Fort Worth, Texas
Thank you sir! Next, if I see them, I won't be sooo "nice".
They were criminally trespassed but the first time, it's only a warning. If they return, and the Police catch them on my property, it's an instant trip to jail.. No questions asked!
I know I still need many many things.. A new 9" or 12 bolt rear, new springs and shocks, new car radio, new speakers - subs - amplifiers - wiring, misc suspension related parts, heavier duty drive shaft, yada yada yada..
You can add a new (hopefully I can find one used) fuel line.. I CANNOT believe I was a dumb azz and drilled completely through my fuel lines. How noobish could I be.. Seriously, I feel like a complete idiot. No, I AM A COMPLETE IDIOT.. LOL. Now I need the fuel lines that go from the motor area all the way to the half way point, underneath the car.. My first real boo-boo on this project. Ughhhhhhhh!
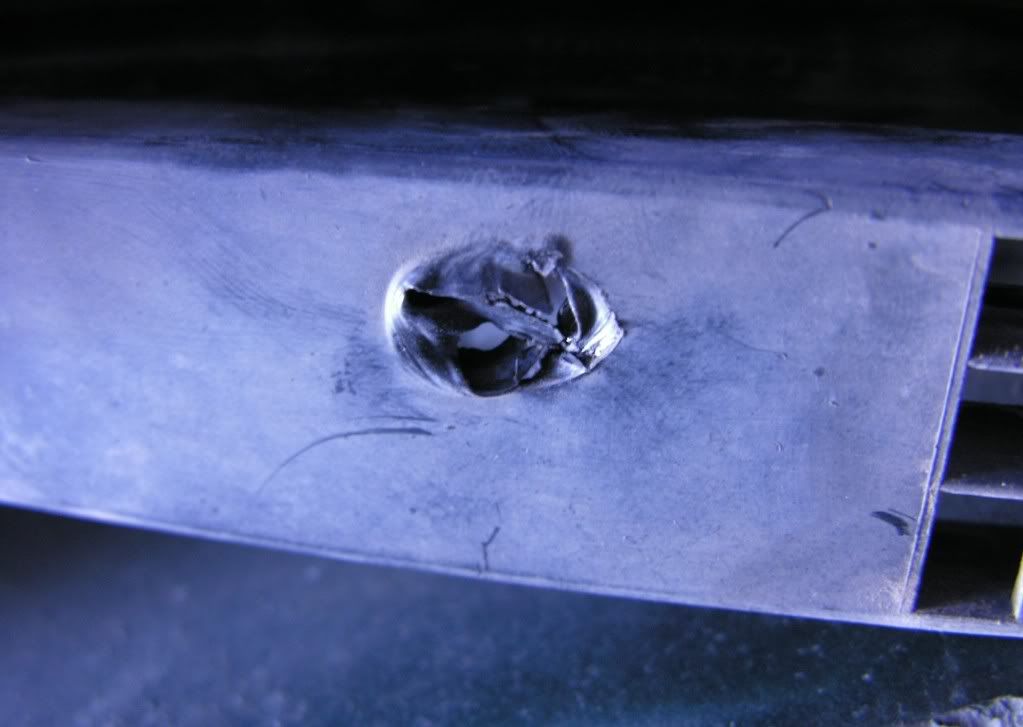
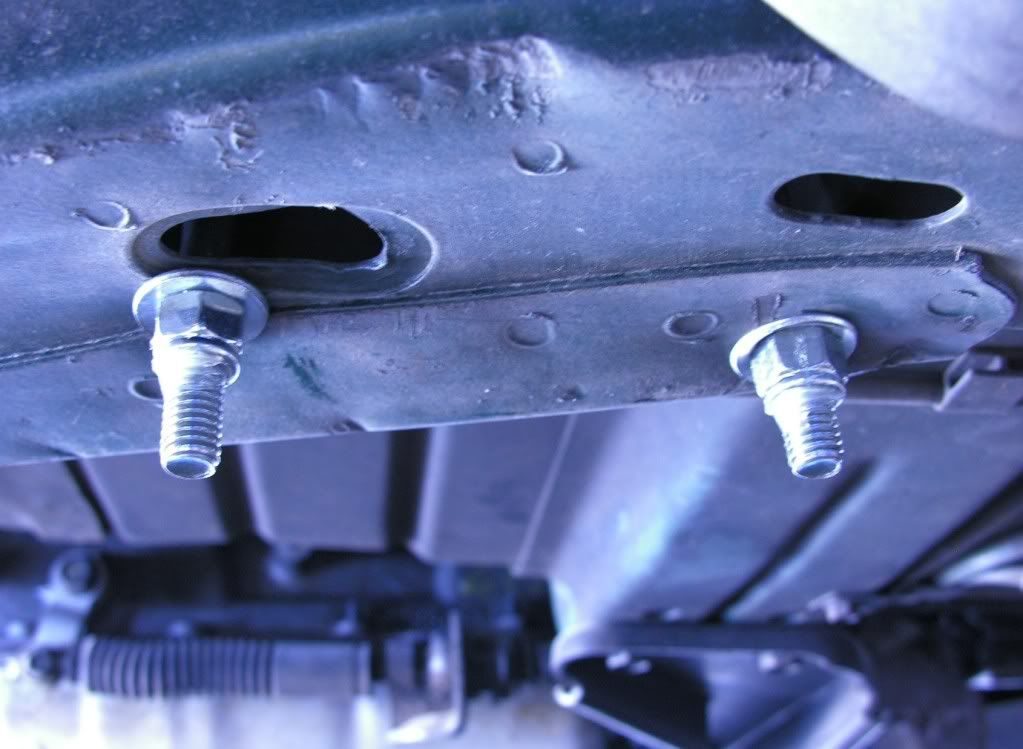
As for the roll bar, I never could get the supplied bracket to mount completely right without interfering with those fuel lines.. So, I had to torque those bolts down individually. Also, it required me to head over to the Lowes and pick up some longer bolts and washers. I think when I get the car up and going, I am just gonna have the plates / bolts welded anyways..
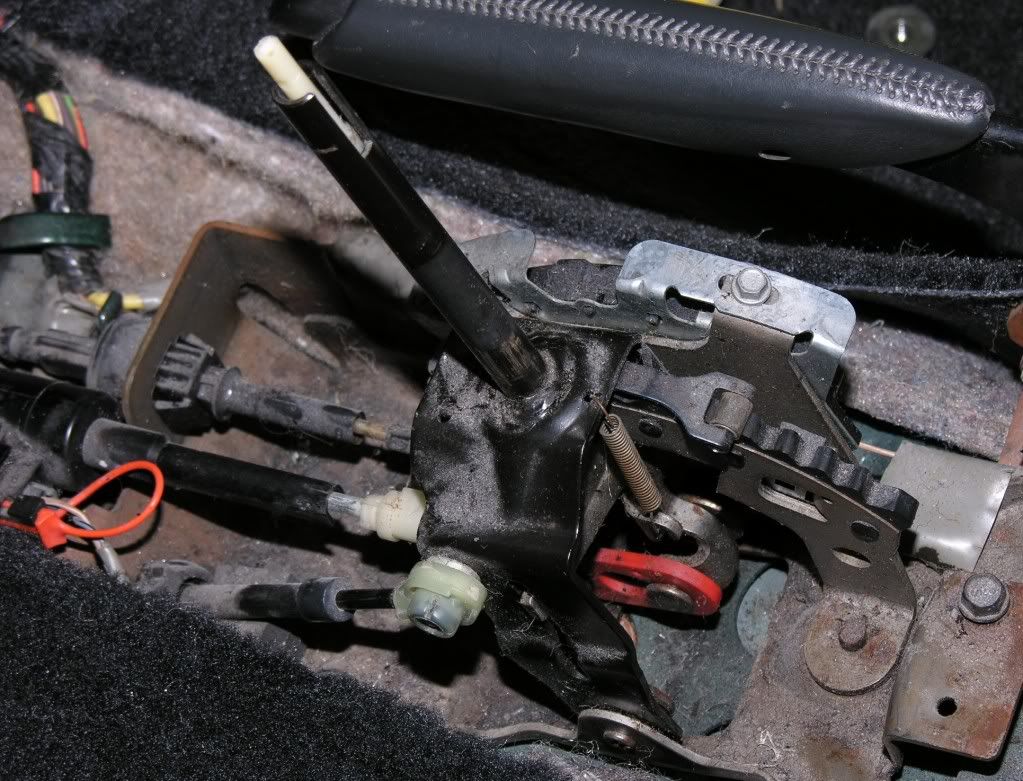
Now that the roll bar is pretty much in, it's on to other things.. I HATE the stock shifter.. I really really hate it. I know there is not really a solid aftermarket shifter made for my 4L60E.. So, it is what it is.. Pretty much an aesthetics thing.. I have my eye on a racket shifter and after reading some posts on here about installing them, I think I need to find someone on here who has experience installing them and for their troubles, a case of beer to quench their thirst! I got rid of the A4 console and purchased a M6 console.
Looking good. There is nothing worse than thieves. What were they doing on your property...couldn't get them for trespassing or something? Especially when they have ill intent on their minds... Anyway, keep up the awesome work. If anything ends up missing...make sure those two delinquents end up the same way :-p
thanks for the admiration of my build thread! i got her back on the road and so far so good.
holy ****! thats one helluva laundry list you have there! im loving your work alot man it makes me really want to do that tonight haha would you like to restore a 94 z in ny ?
i got her back on the road and so far so good. holy ****! thats one helluva laundry list you have there! im loving your work alot man it makes me really want to do that tonight haha would you like to restore a 94 z in ny ?
You can add a new (hopefully I can find one used) fuel line.. I CANNOT believe I was a dumb azz and drilled completely through my fuel lines. How noobish could I be.. Seriously, I feel like a complete idiot. No, I AM A COMPLETE IDIOT.. LOL. Now I need the fuel lines that go from the motor area all the way to the half way point, underneath the car.. My first real boo-boo on this project. Ughhhhhhhh!
As for the roll bar, I never could get the supplied bracket to mount completely right without interfering with those fuel lines.. So, I had to torque those bolts down individually. Also, it required me to head over to the Lowes and pick up some longer bolts and washers. I think when I get the car up and going, I am just gonna have the plates / bolts welded anyways..
Now that the roll bar is pretty much in, it's on to other things.. I HATE the stock shifter.. I really really hate it. I know there is not really a solid aftermarket shifter made for my 4L60E.. So, it is what it is.. Pretty much an aesthetics thing.. I have my eye on a racket shifter and after reading some posts on here about installing them, I think I need to find someone on here who has experience installing them and for their troubles, a case of beer to quench their thirst! I got rid of the A4 console and purchased a M6 console.
LS1 Tech Stories
The Best V8 Stories One Small Block at Time

Gas Monkey Built a 6-Wheel Ferrari Testarossa With a Corvette LT4 Engine
Verdad Gallardo
7 Most Reliable High-Performance Engines GM Has Ever Built
Verdad Gallardo
Amazing '71 Camaro Restomod Is Modern Muscle Car Under the Skin
Verdad Gallardo
6 Common C5 Corvette Failures and What's Involved In Repairing Them
Pouria Savadkouei
Retro Modern Bandit Pontiac Trans AM Comes With Burt Reynolds' Autograph
Verdad Gallardo
Top 10 Greatest Cadillac V Series Performance Models Ever, Ranked
Pouria Savadkouei
Top 10 Most Powerful Chevy Trucks Ever Made!

Hennessey's New Supercharged Silverado ZR2 Has 700 HP
Verdad Gallardo
Coachbuilt N2A Anteros Is an LS2-Powered C6 Corvette In Italian Clothes
Verdad Gallardo
Thread Starter
TECH Apprentice
iTrader: (1)
Joined: Jun 2008
Posts: 303
Likes: 0
From: Fort Worth, Texas
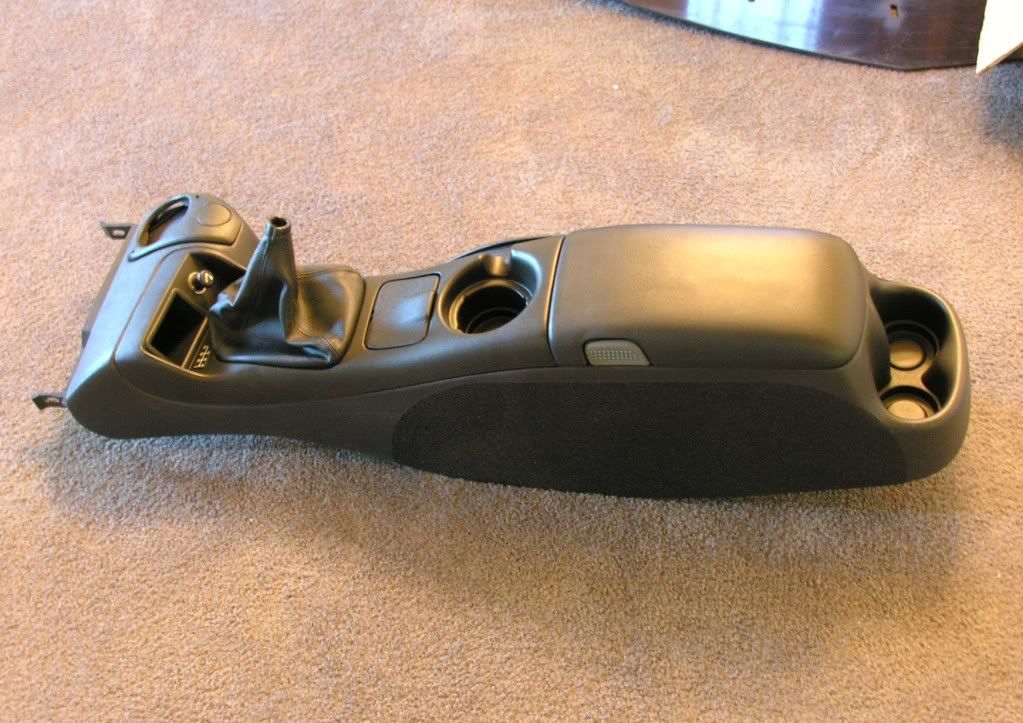
Thanks, I appreciate the compliment! I got an early start this morning. I just finished off the center console. The console had those rub marks from the seat belts. I simply added that same commercial type adhesive to the side of the console. Wow! It really turned out nicely!
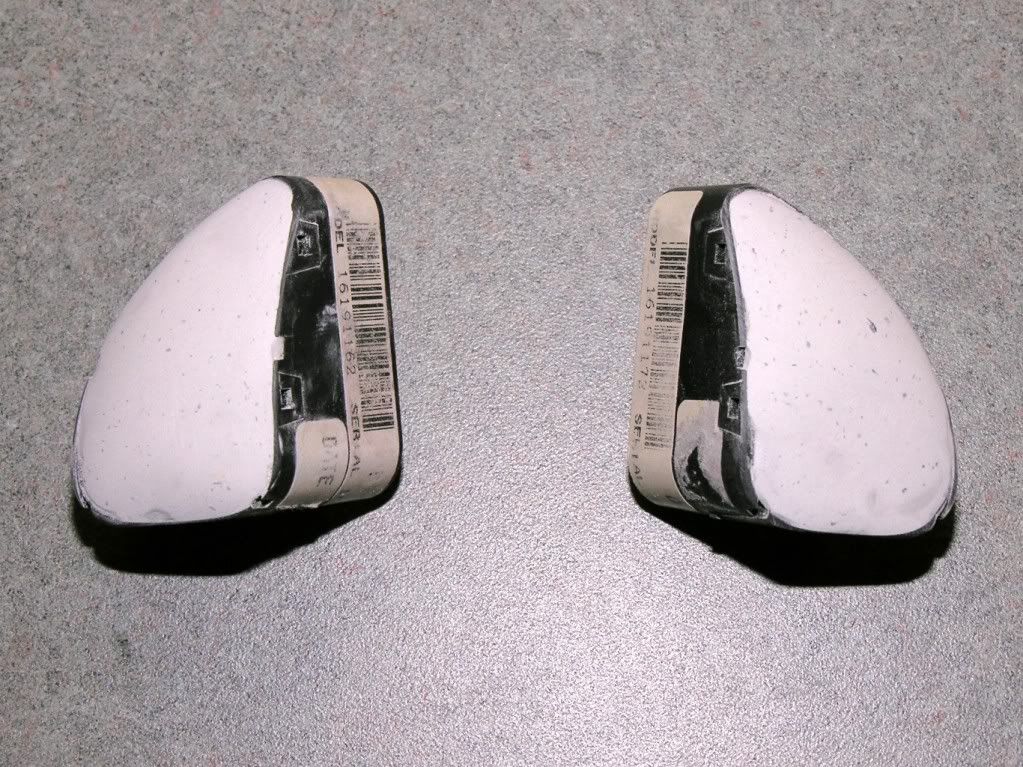
I was looking for my door speaker mounts. I found em.. There were some Older Kicker speakers still in them. I plan on removing the Kicker speakers but keeping the door mounts. Not sure if they are perfectly fine or if they are damaged. Anyone need a free pair of Kicker Speakers? They are about 8 years old..
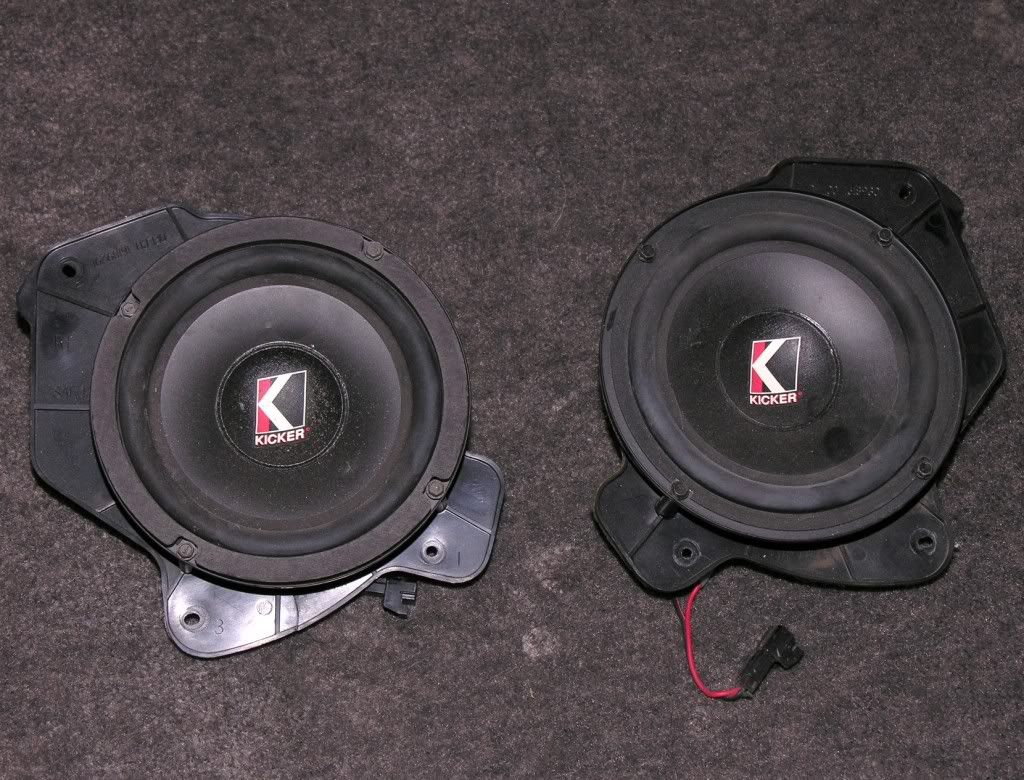
I was looking for my door speaker mounts. I found em.. There were some Older Kicker speakers still in them. I plan on removing the Kicker speakers but keeping the door mounts. Not sure if they are perfectly fine or if they are damaged. Anyone need a free pair of Kicker Speakers? They are about 8 years old..
Last edited by officermartinez; May 31, 2009 at 11:26 PM.
Thread Starter
TECH Apprentice
iTrader: (1)
Joined: Jun 2008
Posts: 303
Likes: 0
From: Fort Worth, Texas
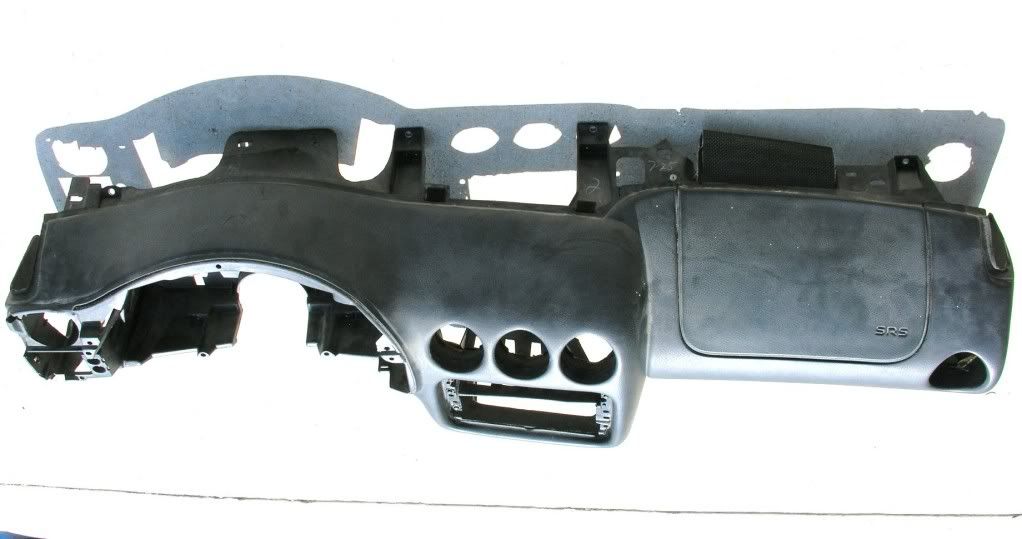
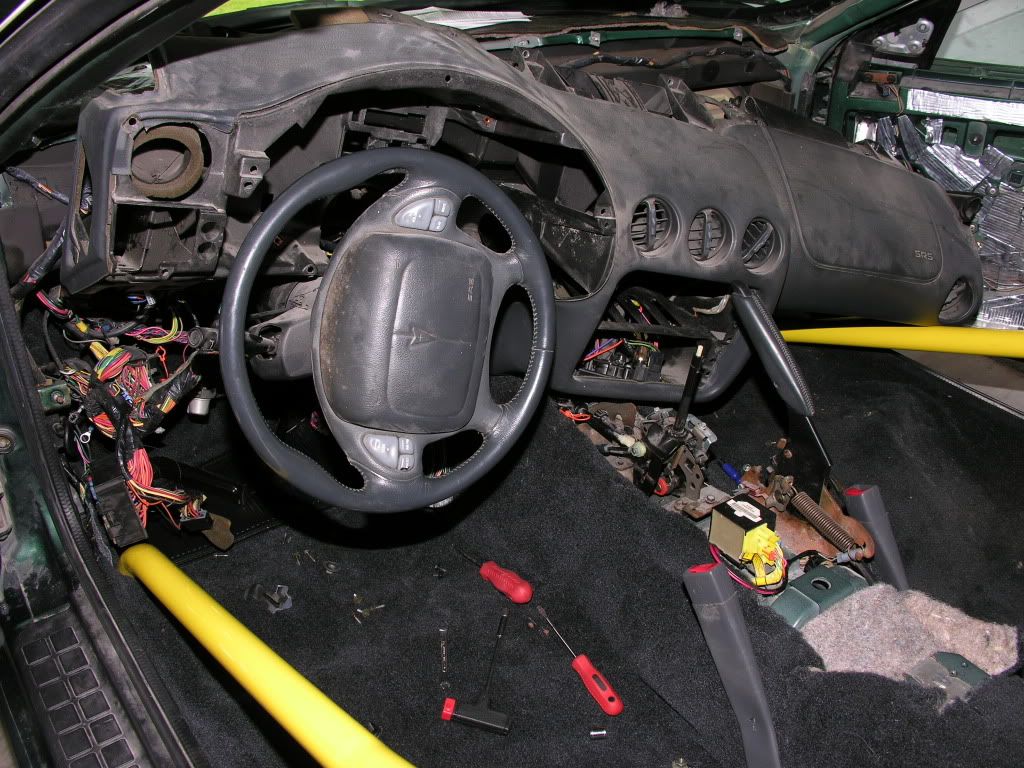
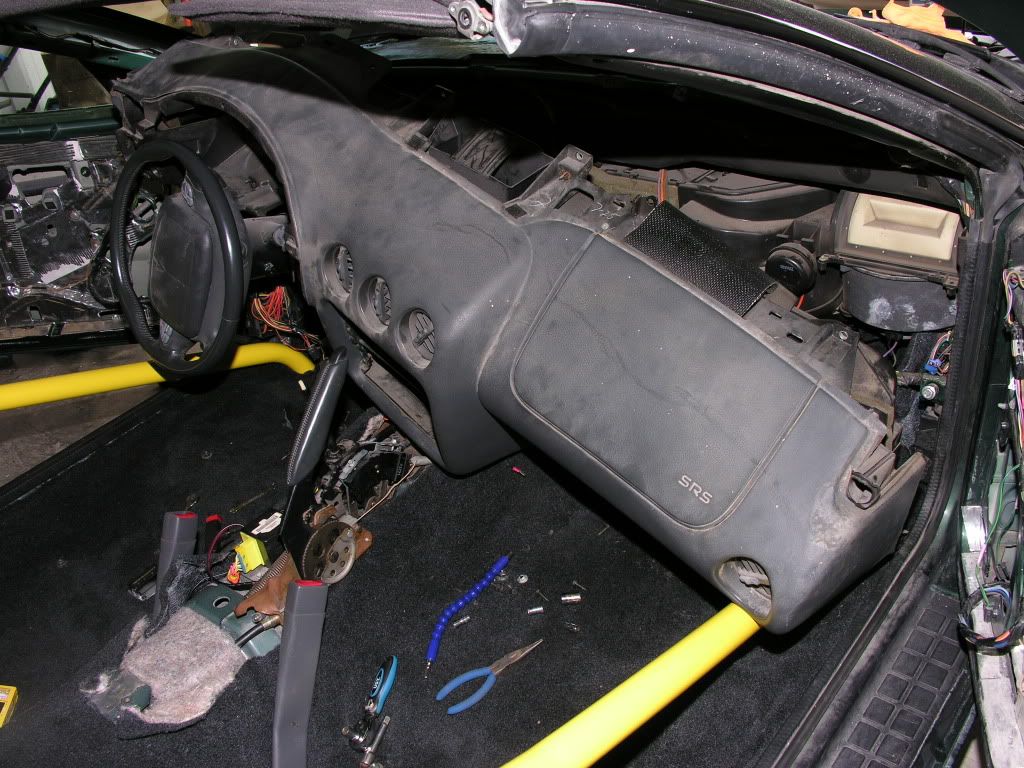
I've been working on the car all day.. I'm taking a breather at the moment. Did I happen to mention that it royally sucks to completely remove a dash from a 4th Gen Bird? (it sucks even more that I am by myself.. it's really a two person job for an amateur, like me).

Thread Starter
TECH Apprentice
iTrader: (1)
Joined: Jun 2008
Posts: 303
Likes: 0
From: Fort Worth, Texas
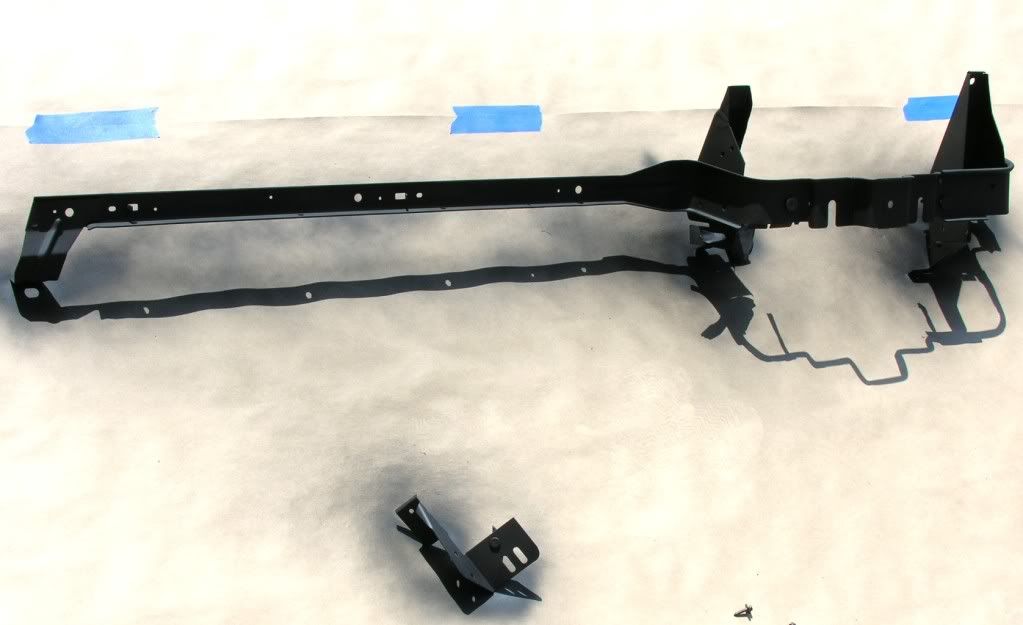
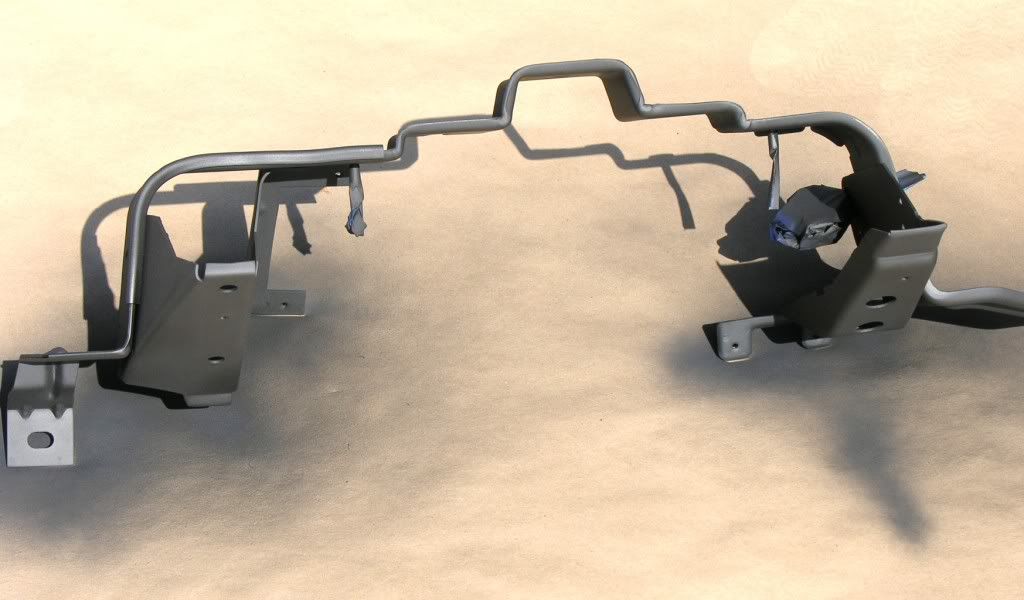
So far today, I pulled my dash support bar.. Since I used to live on the coast of South Carolina, I was very surprised to find that most of my car did well with only hints of rust, here and there... Well, after pulling the dash yesterday, I found the rust monster.. The bottom dash support bar was "infected" with rust everywhere! I've been sanding off the rust for about 3 hours and just finished up.. I was going to have it powder coated but honestly, NO ONE is really gonna see this bar.. So, I'm about to take a little trip down to Lowes and buy some rust inhibiting spray paint. While I am at it, I am going to buy some marine plastic epoxy. Here is what I plan to do..
Since I have my dash out, I pulled off my air bag. I had some glass "dust" in there from my front windowshield being shattered a while back.. Since I am trying to be pretty thorough, I thought, hmmmmmmm... I have an aftermarket double din radio lined up. I have NO intention of going back to a stock radio. So, what the heck.. I removed my factory steering wheel radio controls and then gutted them. Since I have experience working with plastic epoxies, I should be able to do this without any problem. I am gonna turn the "buttons" into a simple colored interior accent. Since 95% of my interior is dark grey, I think a smidgen of yellow on the steering wheel won't hurt. It can be done in any color in case you are wanting to do this little "mod"..
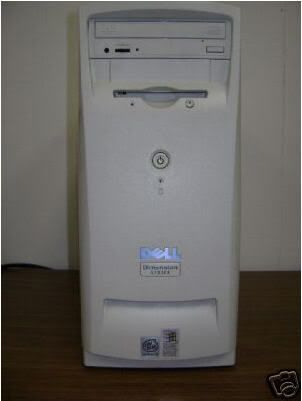
Here is a BEFORE and AFTER picture of the SAME COMPUTER (I build custom computers on the side). Here is a very old Dell L800R computer:
BEFORE (notice ALL of the factory lines on the front of this case) :
AFTER (notice how I added A LOT to the shape of the case) :
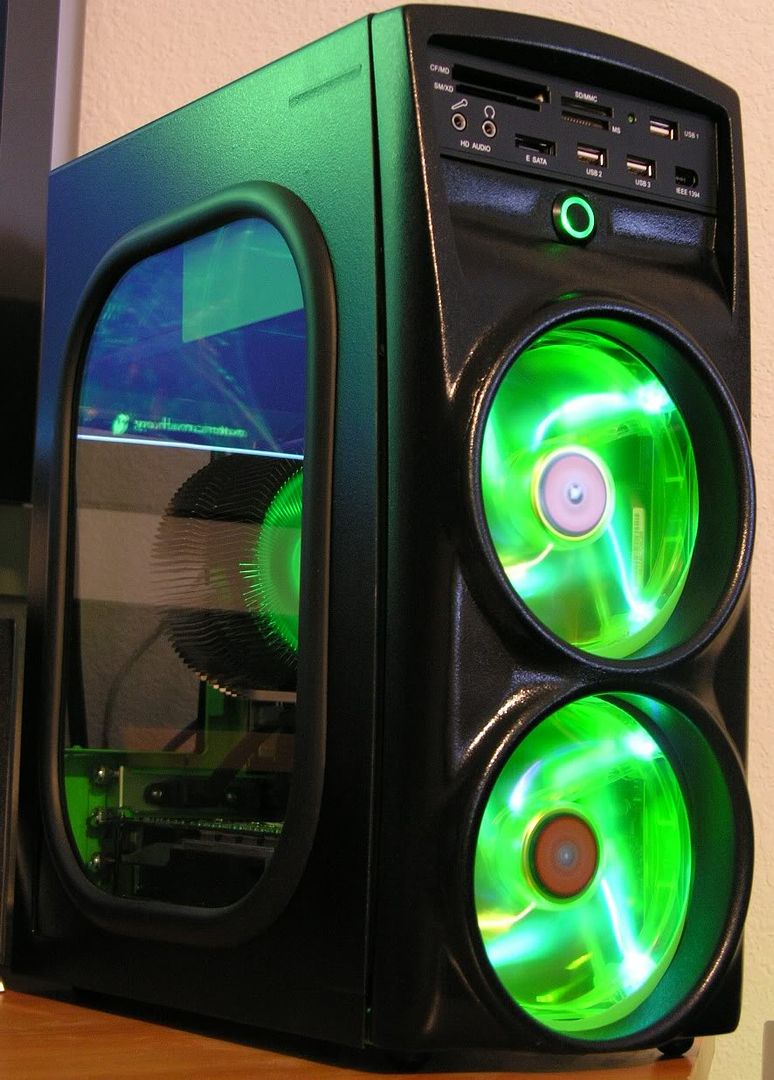
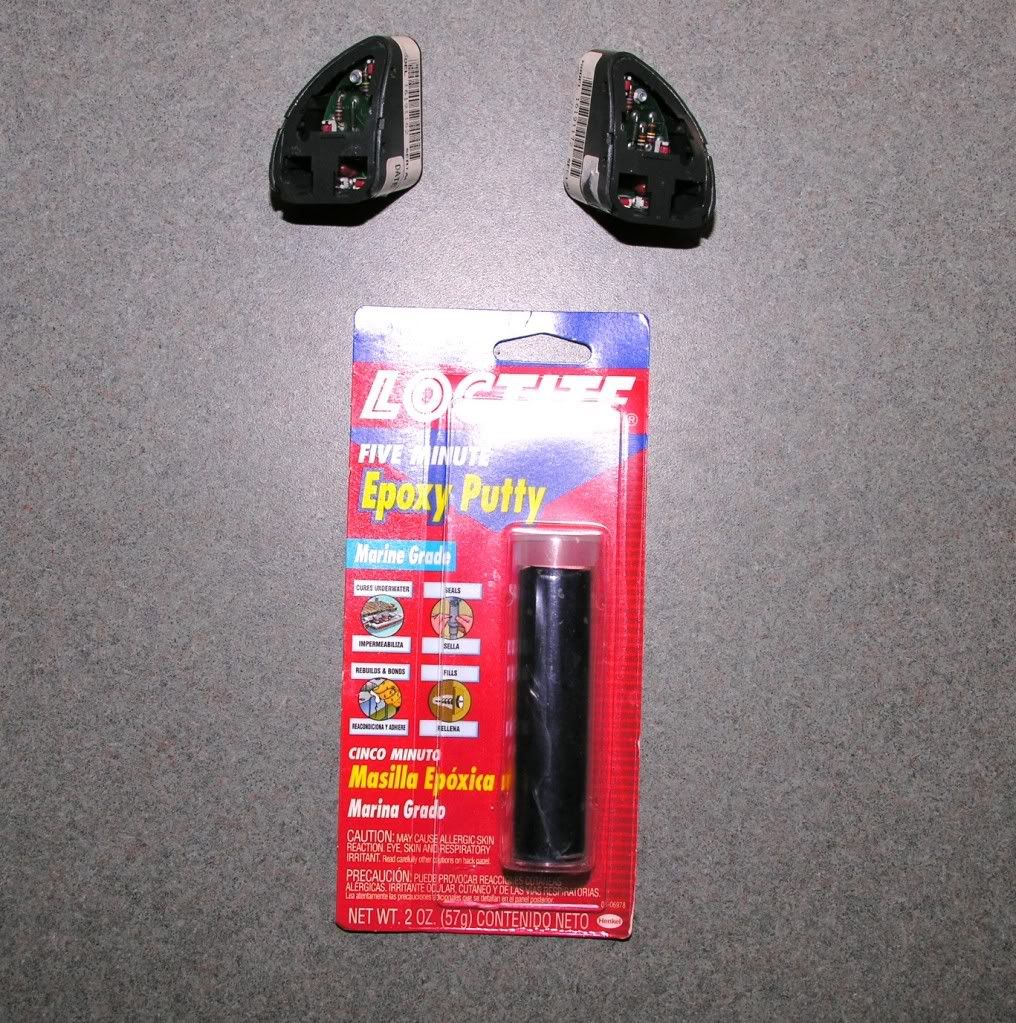
It turned out really well.. I did ALL of that "plastic work" and it was done with epoxy (and the help of a dremel). Same principle applies here. I am going to epoxy the buttons in and simply sand down to my desired shape. Once that's complete, I will simply cover the button area with the desired colored leather / marine grade vinyl. I should be able to just pop them back in and viola.. NO MORE ANNOYING STEERING WHEEL BUTTONS!

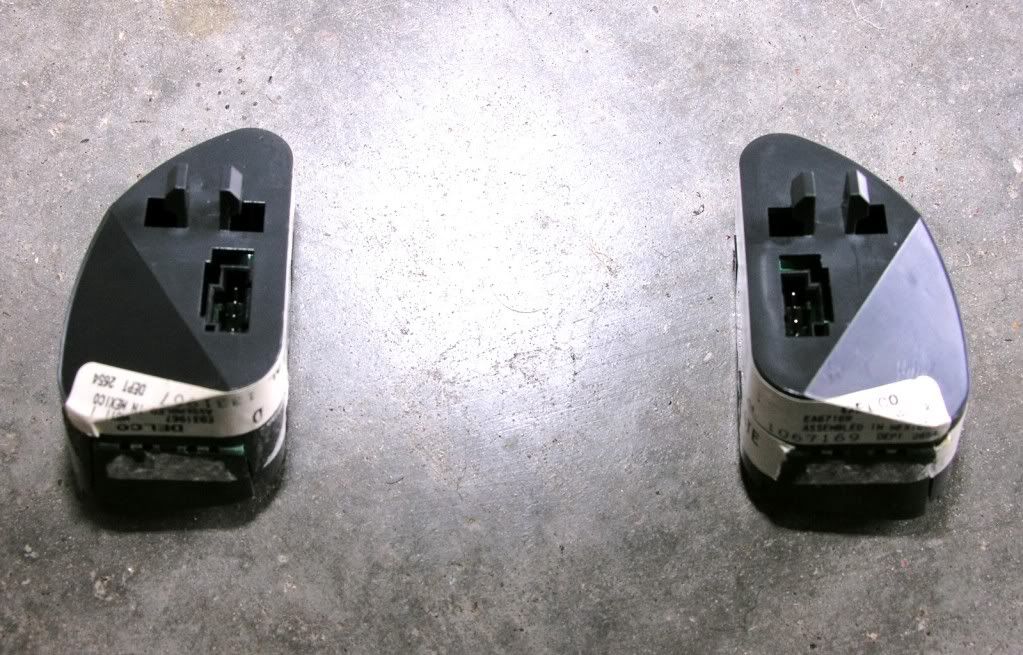
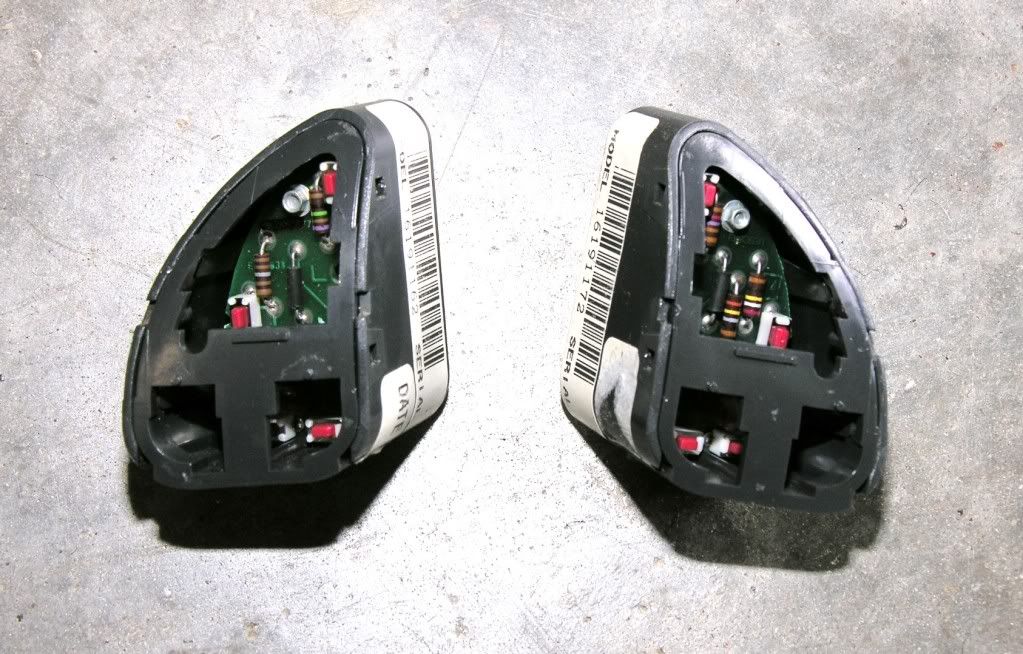
Since I have my dash out, I pulled off my air bag. I had some glass "dust" in there from my front windowshield being shattered a while back.. Since I am trying to be pretty thorough, I thought, hmmmmmmm... I have an aftermarket double din radio lined up. I have NO intention of going back to a stock radio. So, what the heck.. I removed my factory steering wheel radio controls and then gutted them. Since I have experience working with plastic epoxies, I should be able to do this without any problem. I am gonna turn the "buttons" into a simple colored interior accent. Since 95% of my interior is dark grey, I think a smidgen of yellow on the steering wheel won't hurt. It can be done in any color in case you are wanting to do this little "mod"..
Here is a BEFORE and AFTER picture of the SAME COMPUTER (I build custom computers on the side). Here is a very old Dell L800R computer:
BEFORE (notice ALL of the factory lines on the front of this case) :
AFTER (notice how I added A LOT to the shape of the case) :
It turned out really well.. I did ALL of that "plastic work" and it was done with epoxy (and the help of a dremel). Same principle applies here. I am going to epoxy the buttons in and simply sand down to my desired shape. Once that's complete, I will simply cover the button area with the desired colored leather / marine grade vinyl. I should be able to just pop them back in and viola.. NO MORE ANNOYING STEERING WHEEL BUTTONS!
Thread Starter
TECH Apprentice
iTrader: (1)
Joined: Jun 2008
Posts: 303
Likes: 0
From: Fort Worth, Texas
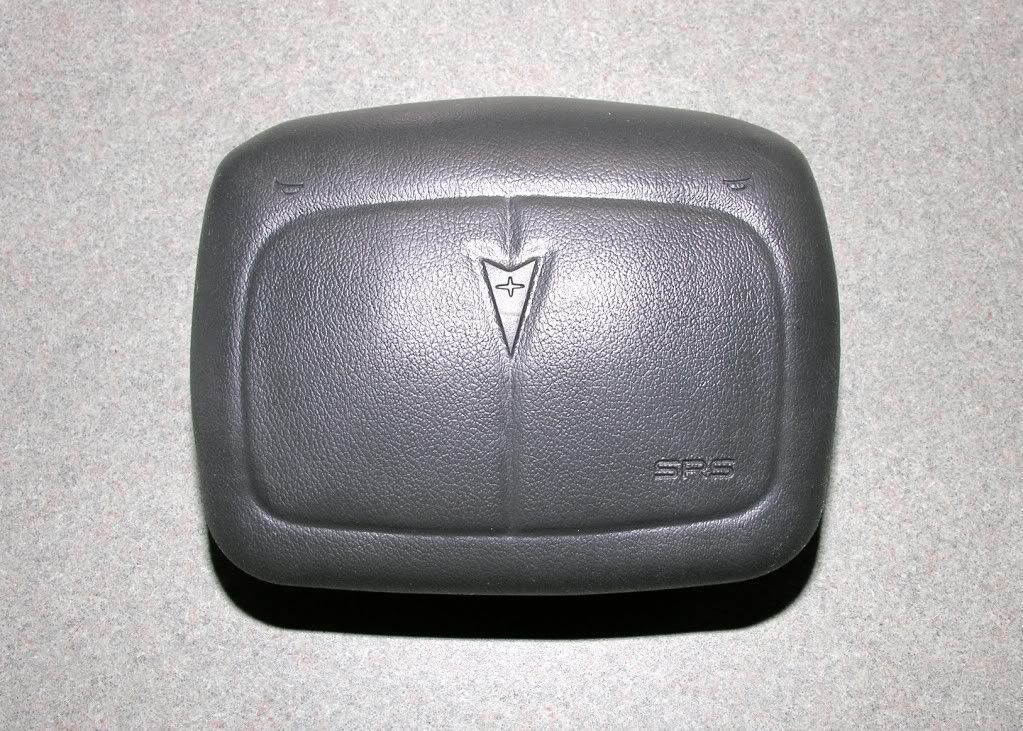
I made the trip over to Lowes.. I am about to start the epoxy process.. I don't have that yellow material on hand (but my upholsterer does). Hopefully, I can run down there in the morning and pick up a little of it. In the mean time, I've been working on my steering wheel. It is SEVERELY beaten up.. I plan on getting another steering wheel but my airbag is "hurtin' for certain!"
I have tried everything to get it clean.. It has been exposed to the weather too much I believe.. However, I "think" I can get it clean.. I have tried to use Windex, Leather/Vinyl cleaners, Tilex, Scrubby bubbles, Greased Lightning, Pine Sol, etc.. NOTHING has worked so far.. But all is not lost (yet). I forgot about acne cream. Acne cream? WTF? ..yes, acne cream! The same stuff for zits / pimples. Specifically, I need acne cream with Benzoyl peroxide. It's funny but it actually "lifts" out stains in leather and vinyl. Who knew? Here is a link to an interesting article about lifting stains out of vinyl: http://www.associatedcontent.com/art...e_skin_or.html
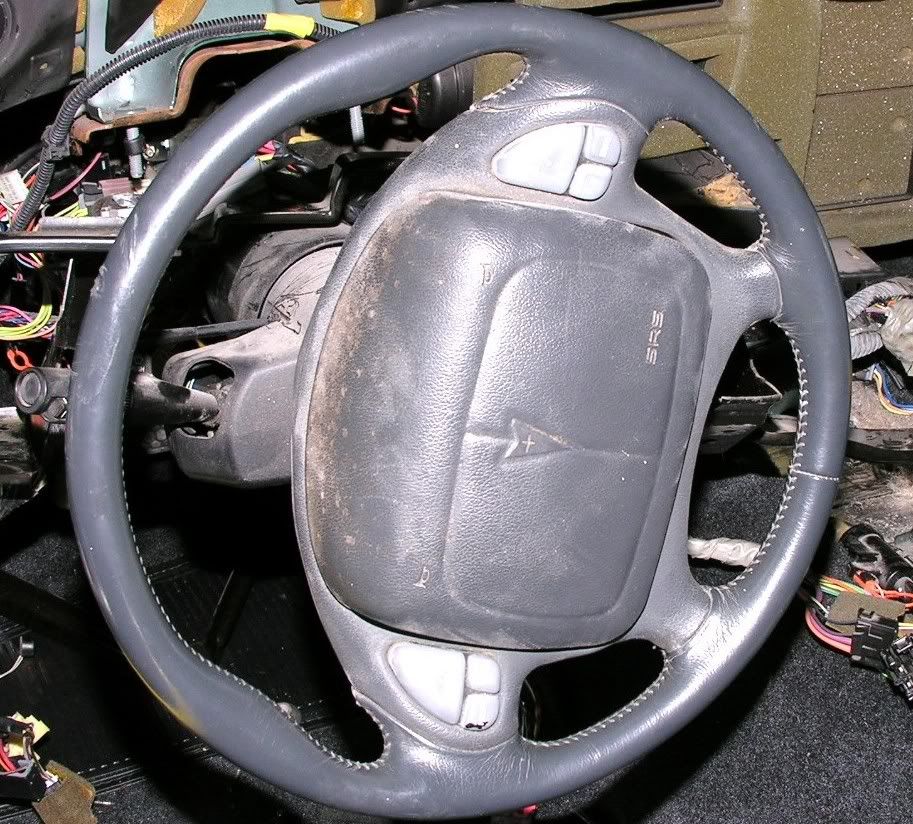
Here are MY stains.. The dust has come off but that's pretty much about it so far.. Here is the "before" picture:
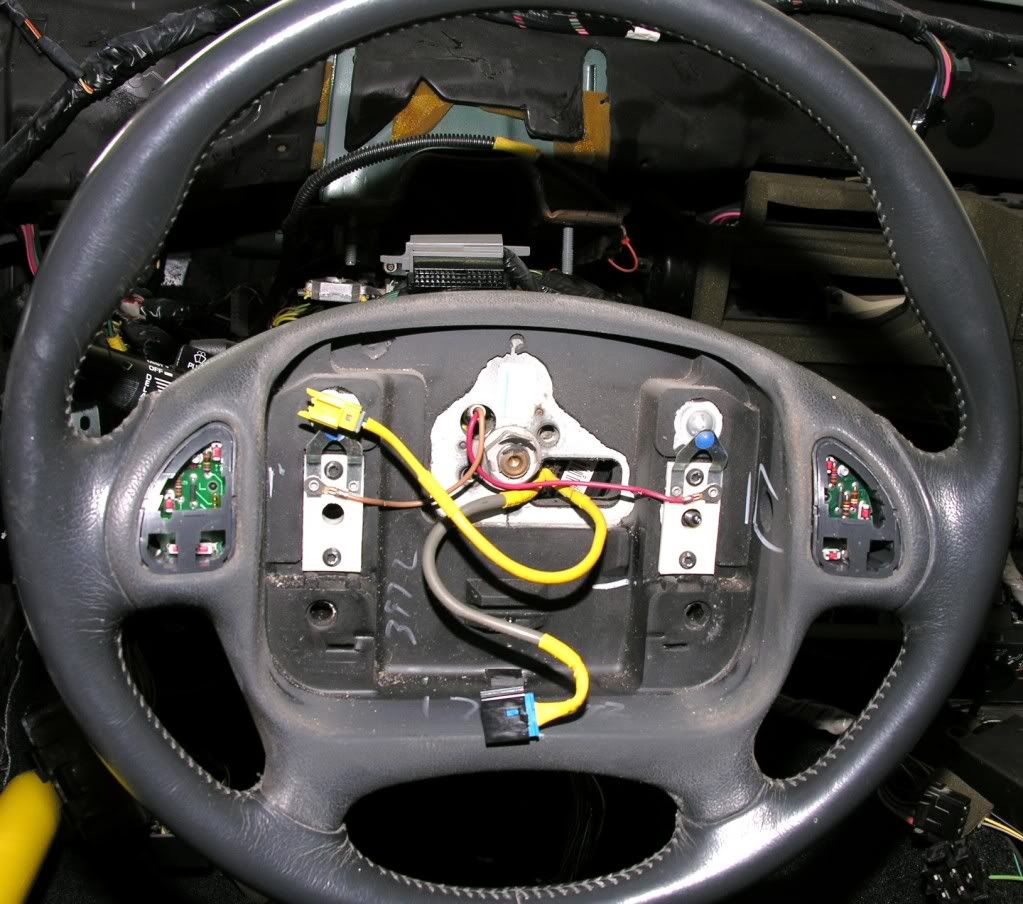
Here is the "after" picture (after using acne cream):
..And while I was at it, I epoxied the steering wheel controls. Took about an hour (mixed the epoxy, set it in place, let it dry and finally sanded it down):
I have tried everything to get it clean.. It has been exposed to the weather too much I believe.. However, I "think" I can get it clean.. I have tried to use Windex, Leather/Vinyl cleaners, Tilex, Scrubby bubbles, Greased Lightning, Pine Sol, etc.. NOTHING has worked so far.. But all is not lost (yet). I forgot about acne cream. Acne cream? WTF? ..yes, acne cream! The same stuff for zits / pimples. Specifically, I need acne cream with Benzoyl peroxide. It's funny but it actually "lifts" out stains in leather and vinyl. Who knew? Here is a link to an interesting article about lifting stains out of vinyl: http://www.associatedcontent.com/art...e_skin_or.html
Here are MY stains.. The dust has come off but that's pretty much about it so far.. Here is the "before" picture:
Here is the "after" picture (after using acne cream):
..And while I was at it, I epoxied the steering wheel controls. Took about an hour (mixed the epoxy, set it in place, let it dry and finally sanded it down):
Last edited by officermartinez; May 24, 2009 at 09:14 PM.

Thread Starter
TECH Apprentice
iTrader: (1)
Joined: Jun 2008
Posts: 303
Likes: 0
From: Fort Worth, Texas
Yeah, I was really amazed with the result. I bought some acne gel (it is 10% benzoyl peroxide). I only kept that stuff on the surface of the airbag for about an hour. I then took a warm damp cloth and wiped the acne cream off in a circular motion (think waxing a car).
My wife says you nailed it. She says I'm not normal when it comes to having patience. She goes as far as to say that my "O.C.D." (obsessive compulsive disorder) acts up from time to time (meaning I will spend tons of time trying to fix something until its right). LMAO!
It's about 10:30p here, so I am gonna stop for the night. It was raining so I didn't get a chance to paint my lower dash brace. I am going to tape off the exposed bolts and holes in the morning and give it a few coats. I've decided what I am going to do with my dash. I am going to take my dash (and upper dash pad) to my local upholstery shop to have it done up. It should look great after they are finished with it. So far, I am happy with the progress of the interior.
[QUOTE=officermartinez;11649650You can add a new (hopefully I can find one used) fuel line.. I CANNOT believe I was a dumb azz and drilled completely through my fuel lines. How noobish could I be.. Seriously, I feel like a complete idiot. No, I AM A COMPLETE IDIOT.. LOL. Now I need the fuel lines that go from the motor area all the way to the half way point, underneath the car.. My first real boo-boo on this project. Ughhhhhhhh![/QUOTE]
nahh its just time for you to hige the fuel lines behind the brake booster and clean up that engine bay some!
nahh its just time for you to hige the fuel lines behind the brake booster and clean up that engine bay some!
Thread Starter
TECH Apprentice
iTrader: (1)
Joined: Jun 2008
Posts: 303
Likes: 0
From: Fort Worth, Texas
Todays progress so far..
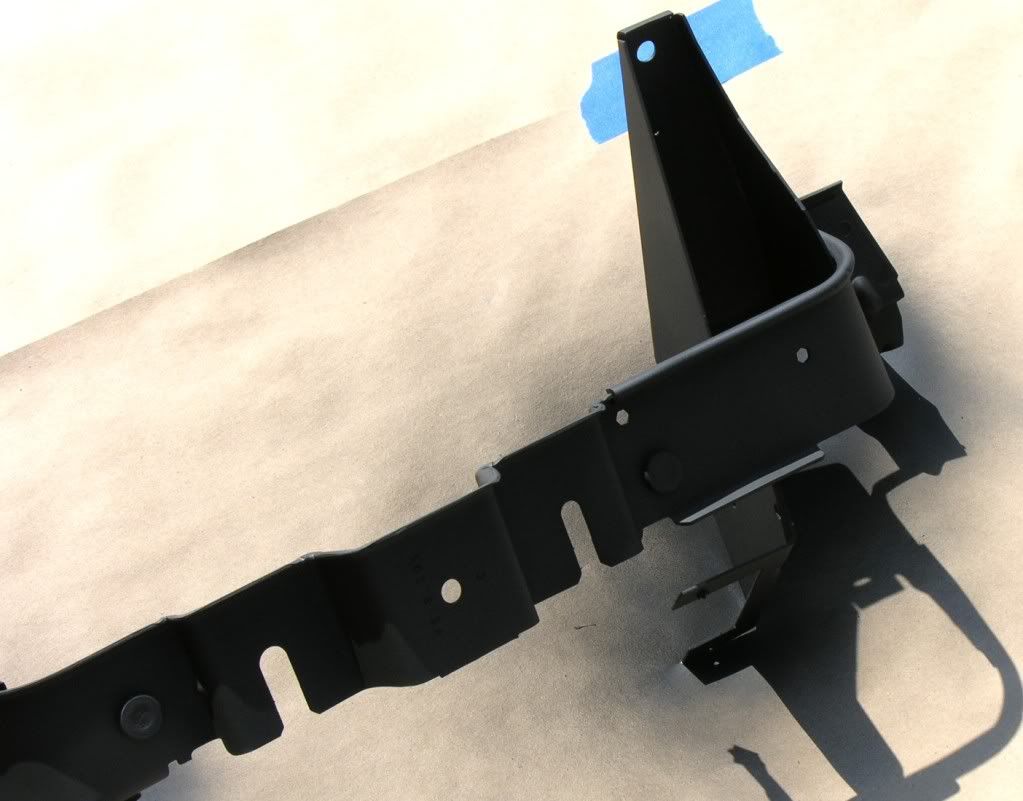
After it rained off and on all day yesterday, it is bright and sunny today. So, I masked off part of my driveway and laid some painters paper. I used Rustoleum rust proofer. Looks pretty darn decent if I do say so myself (especially for a piece of metal that no one will ever see)..
BEFORE:
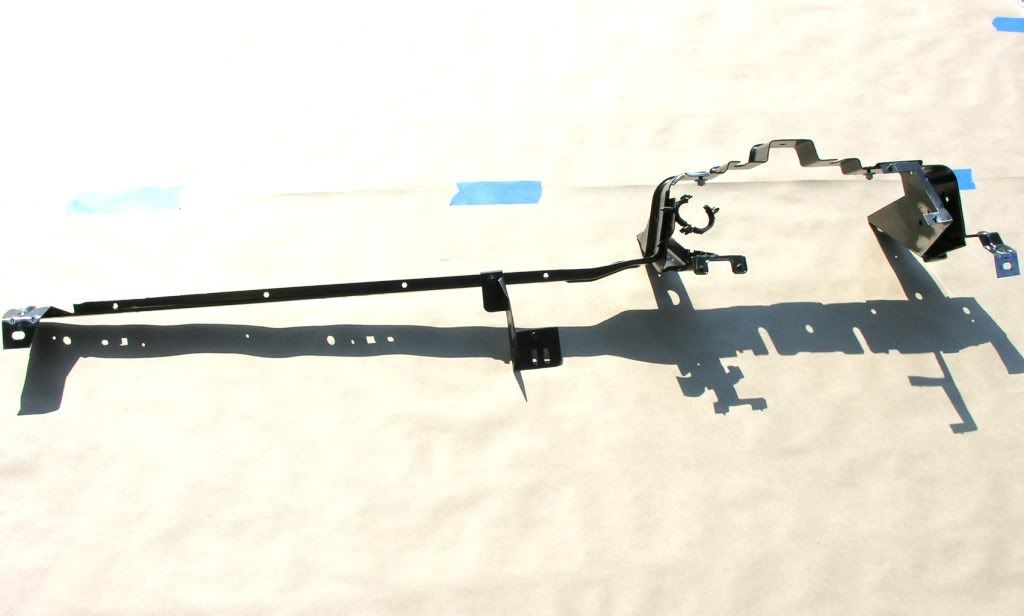
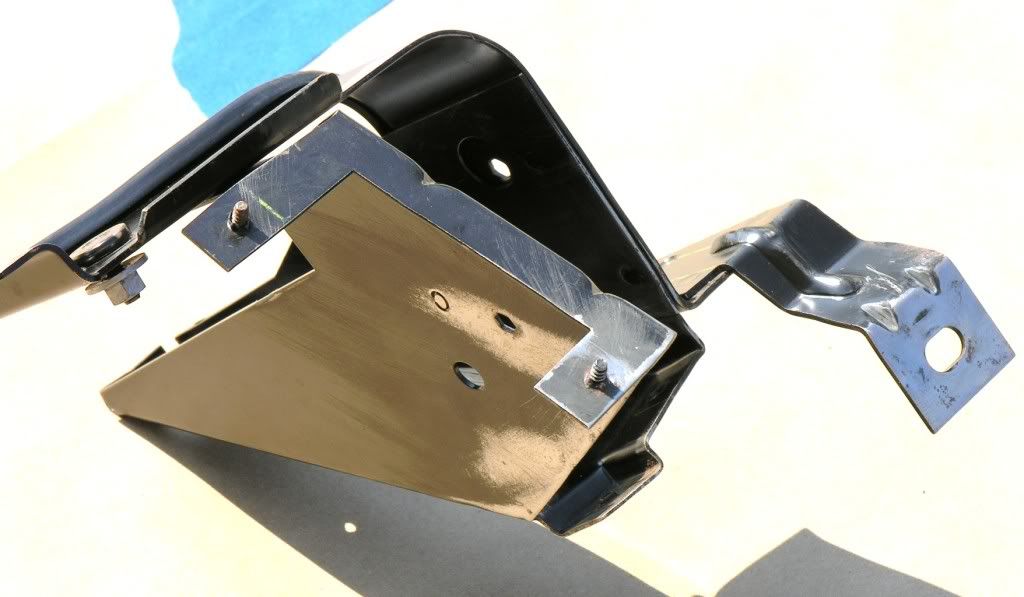
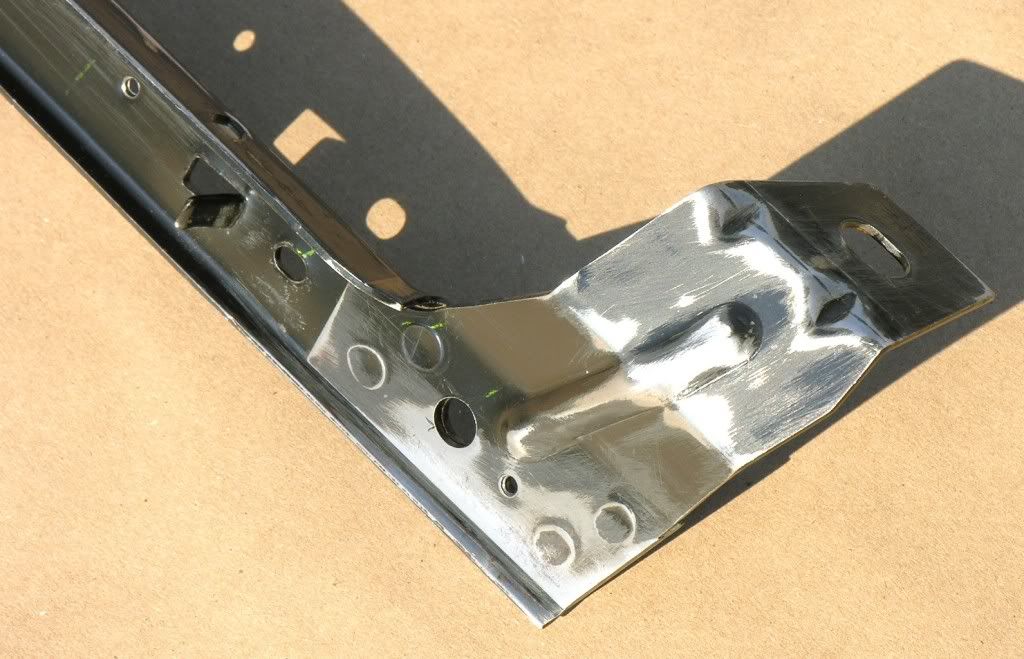
AFTER:

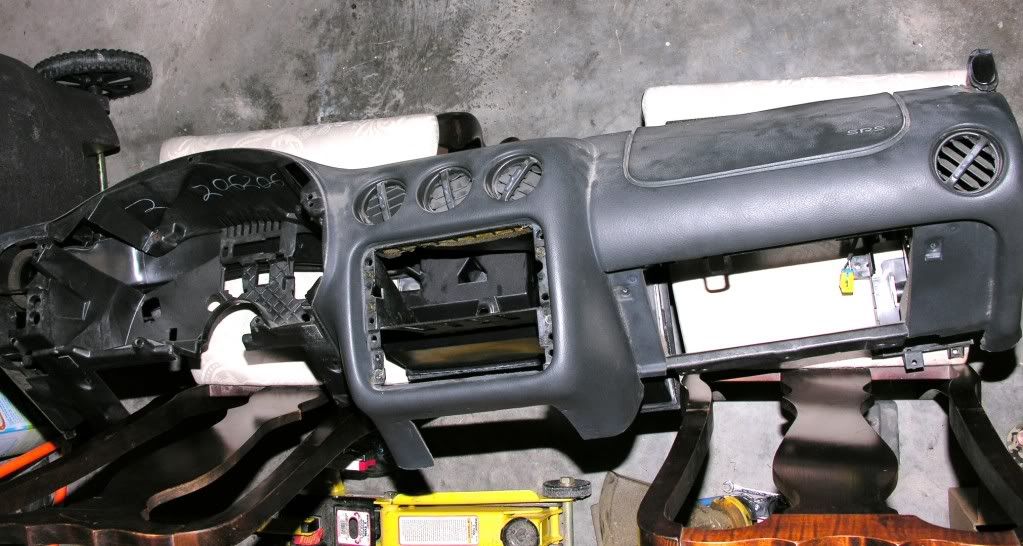
I also removed my passenger side airbag, the duct work and my dash vents this morning. I'm gonna take it to a mom and pops upholstery shop here in Fort Worth called TeoCals. They are the ones that did my seats, my door panels, my headliner and my sunvisors..