Stealth Purge Line Installation (pic intensive)
 07-23-2012 | 12:01 PM
#1


I just finished up my purge installation and thought the approach was novel enough to share. I know I am not the first to route to this exit, but I had not seen any DIYs or good pictures of a setup. Also, I didn’t "try" to hide the line I just wanted it to look "clean" and in process it has a more "stealth" appearance.
I am using the stock hood, and didn’t want to cut into it, so purging up over the cowl that way was not an option. And with my purge solenoid being up in front of the engine, the line was going to be long enough that it needed to be supported. I didn’t want to mount a hard line to the firewall from the engine, because of the motion the engine makes would eventually cause the line to break, and I don’t like the plastic hose that some use.
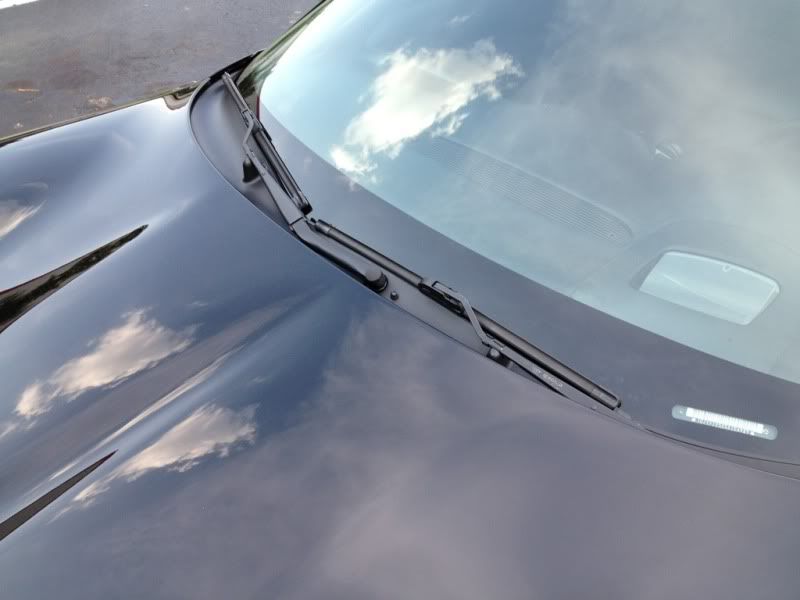
My approach was to use a -3 braided line up the firewall, then a bulkhead fitting to hard line to purge exit, which I used the washer nozzle exit that I have seen others use in the past.
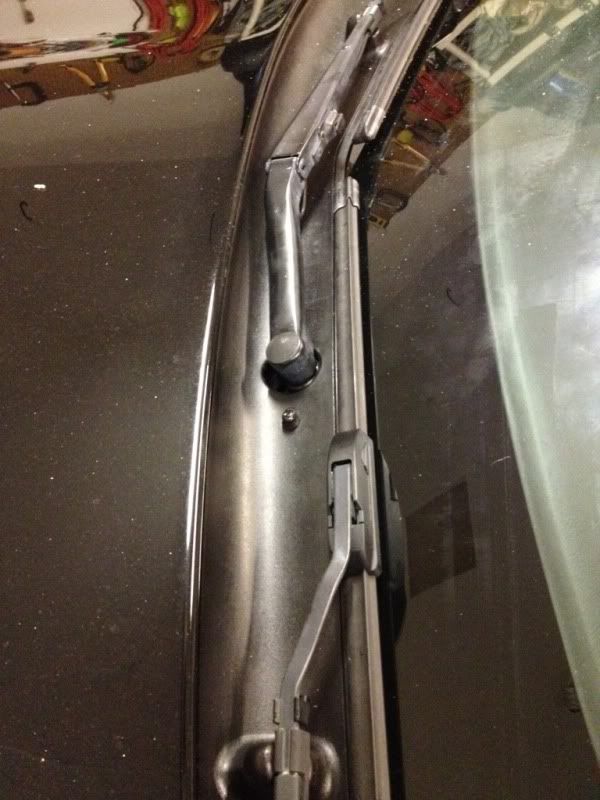
The first step was to remove the windshield wipers.
-In the key-on position, I turned the windshield wipers on to the delayed wipe position and once the wipers were in the 'up' rested position I turned the key off.
-Removed the 25A WSW fuse from #10 slot in the passenger footwell fusebox.
-Taped the location of the wipers to aid in re-installation. (my first thought was to mark across the threaded rod to the wiper arm to show the location, but couldn’t find an effective way to make the scribe line)
To remove the windshield wipers, take the caps off the nut cover and use a 13mm socket to remove the nut (I hit it with some PB blaster first and let it soak in a few minutes). With nuts off, lift the arm to release the spring pressure on the threaded rod and then wiggle back and forth and kind of push down actually and the arm will come right off.
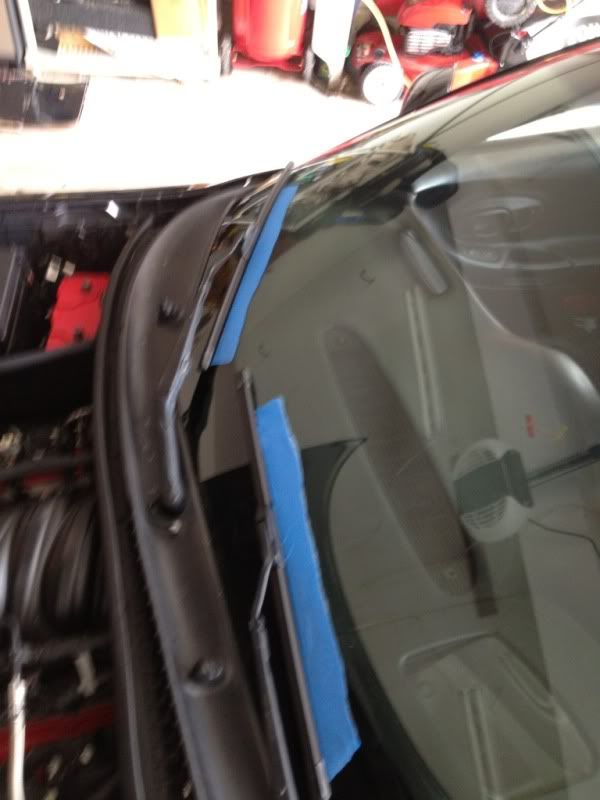
Next remove the cowl. Take the push-lock plugs out along the front of the cowl, and with those out, starting at the outer edges, push 'down' and away from the glass to allow the 'clips' to slide out that hold the cowl to the glass. You can push the rubber nozzles through the bottom and take the cowl all the way out.
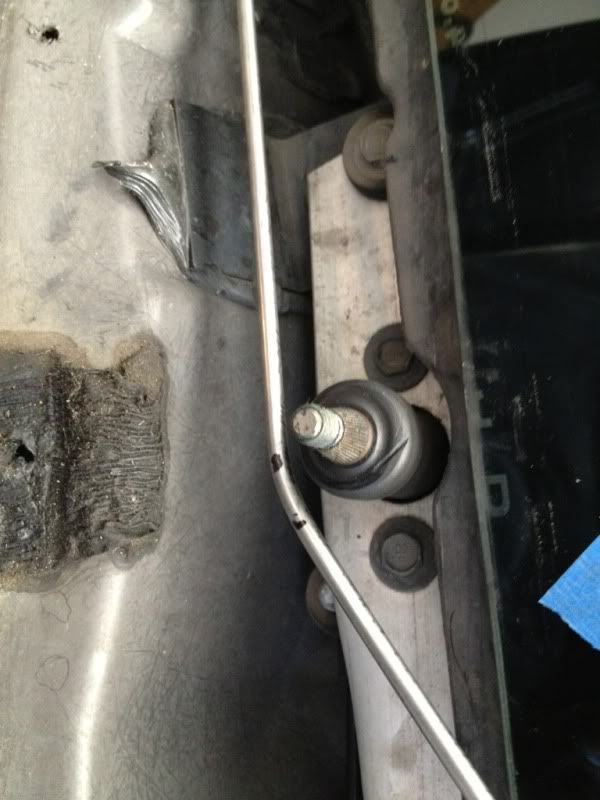
Now, with the cowl out of the car, I then drilled a 3/8 hole in the firewall where I wanted to put the line through (this will be your decision, just make sure you have clearance from other parts, and don’t forget about clearance from the engine as it rocks back and forth under load).
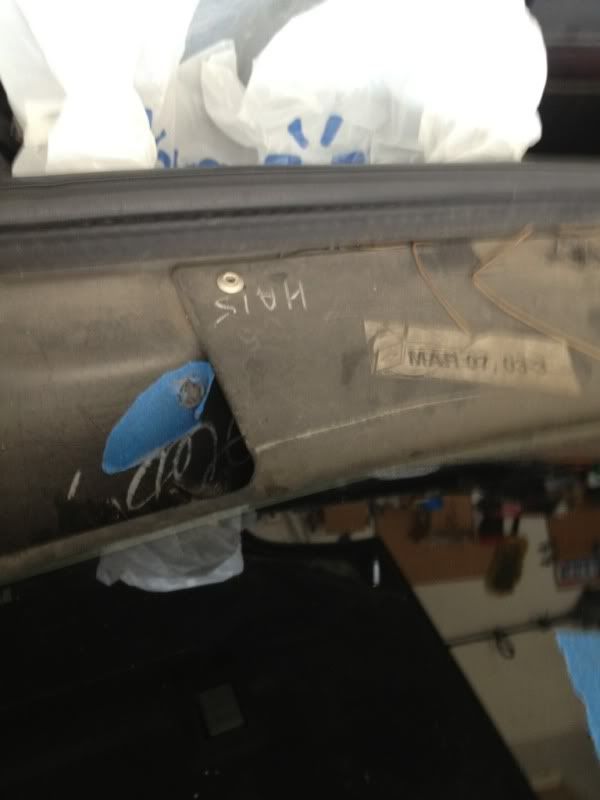
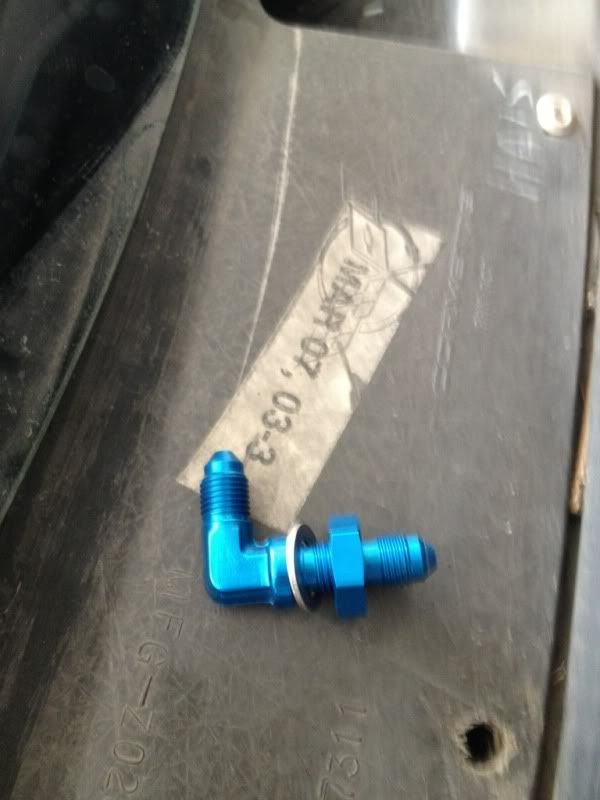
I then used my -3an 90deg bulkhead fitting and mounted it in the firewall
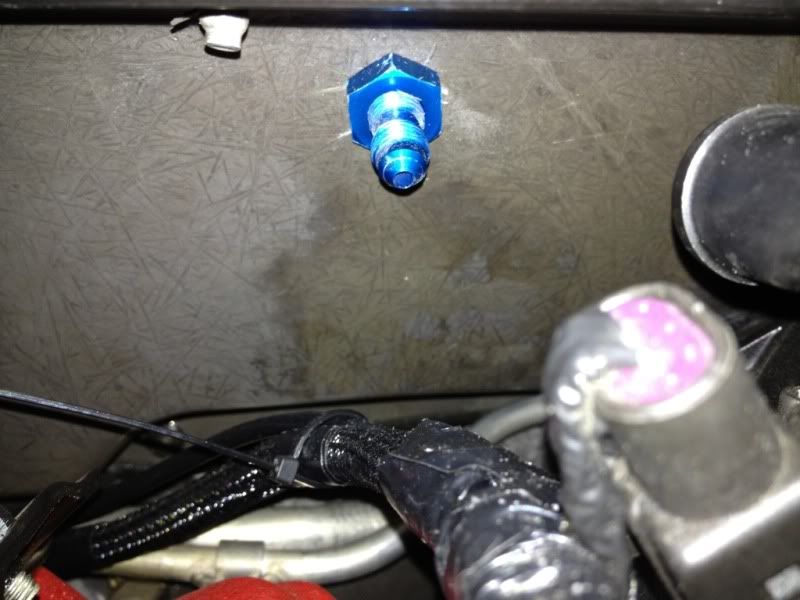
Next I took my 3/16 stainless tubing and flared one end and used a ferrule/cap to complete the connection.
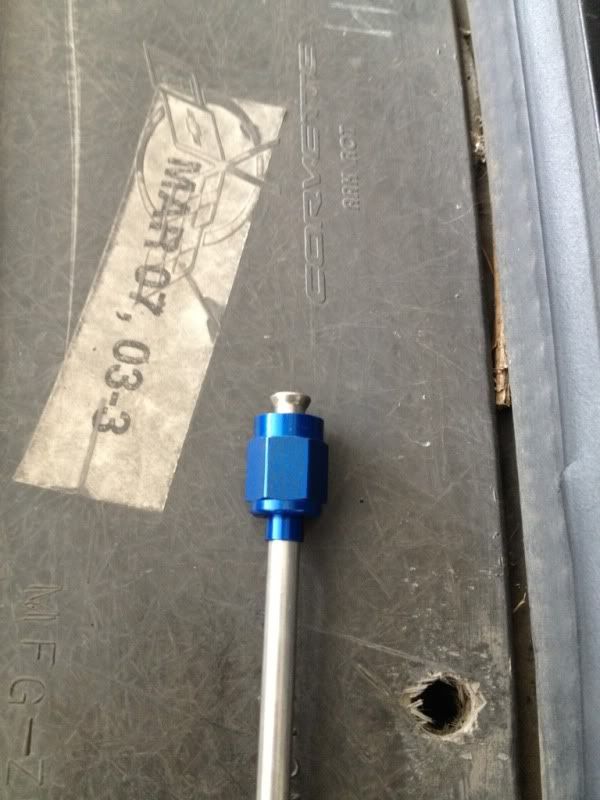
Then I attached the line to the bulkhead fitting to see where how I wanted to bend it.
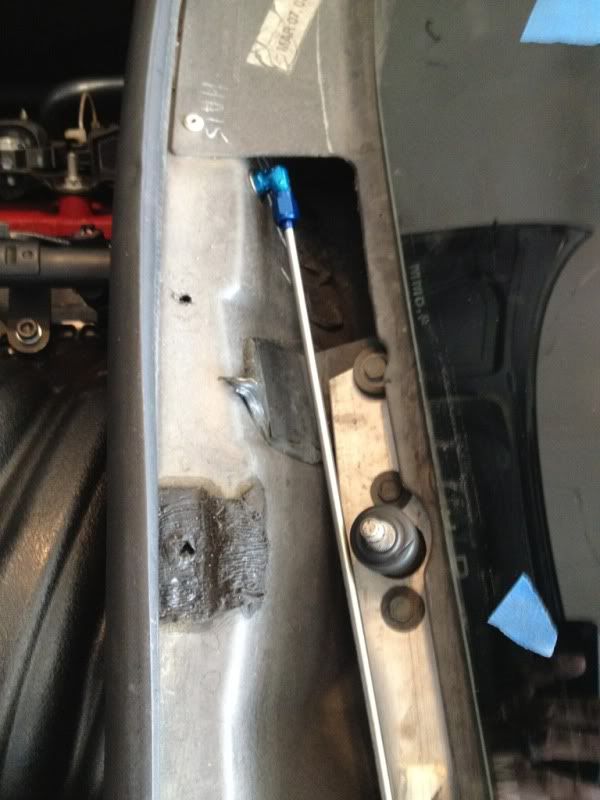
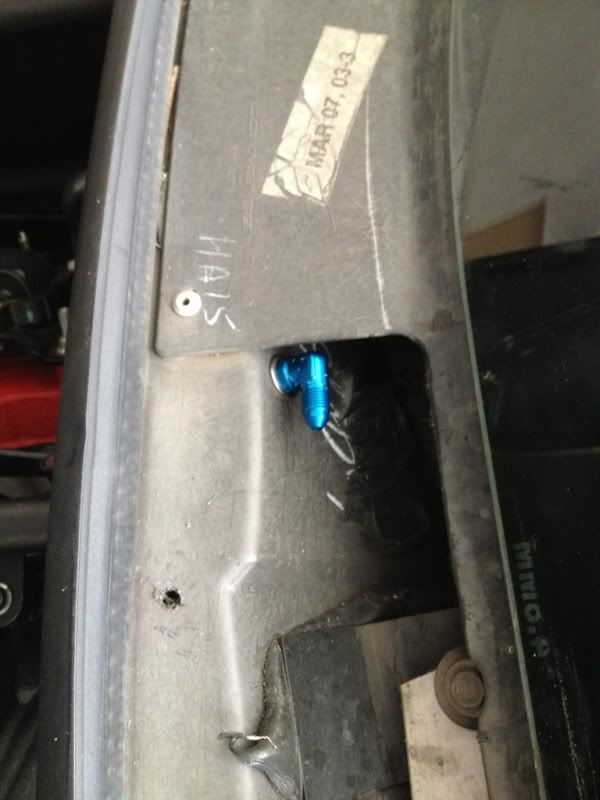
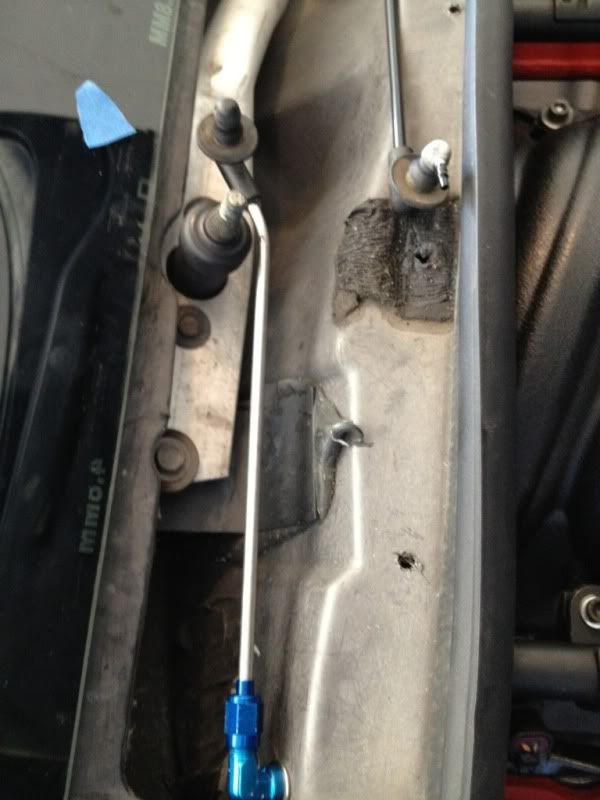
I decided to use a single bend and then cut the end off and use a stock rubber grommet for the washer nozzle (I procured another grommet off of a scrapyard vette). To ensure the grommet wouldn’t blow off I used 2part epoxy to secure it to the stainless line.

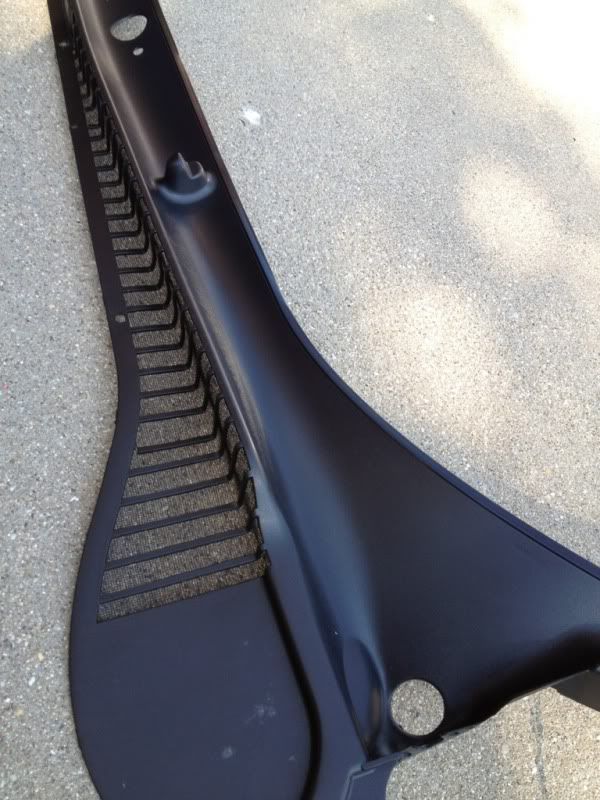
Since I already had the cowl off, I took the time to restore the finish with a good deep cleaning with a few products, then a couple coats of Mother's "Back to Black" compound.
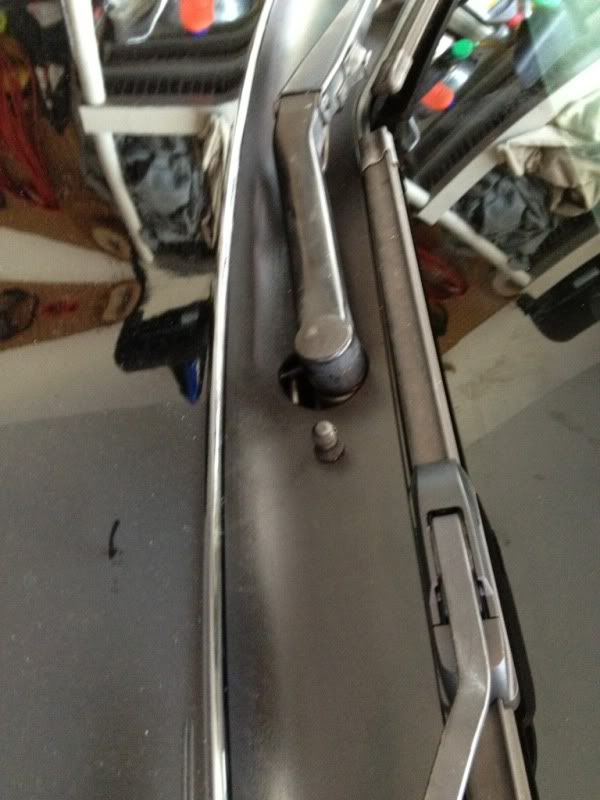
I repeated the procedure for installation. Notice I kept the top part of the washer nozzle, but broke off the tip and drilled it out to a slightly larger diameter. This will have the nitrous purge toward the windshield. I just thought it looked "cooler" as it went over the car, and also thought it might be easier to see if purged while driving. The added bonus is if I decide to just have it spray up, i can remove the upper part of the nozzle. It makes the purge exit easy to modify to my liking.
For the engine bay portion:
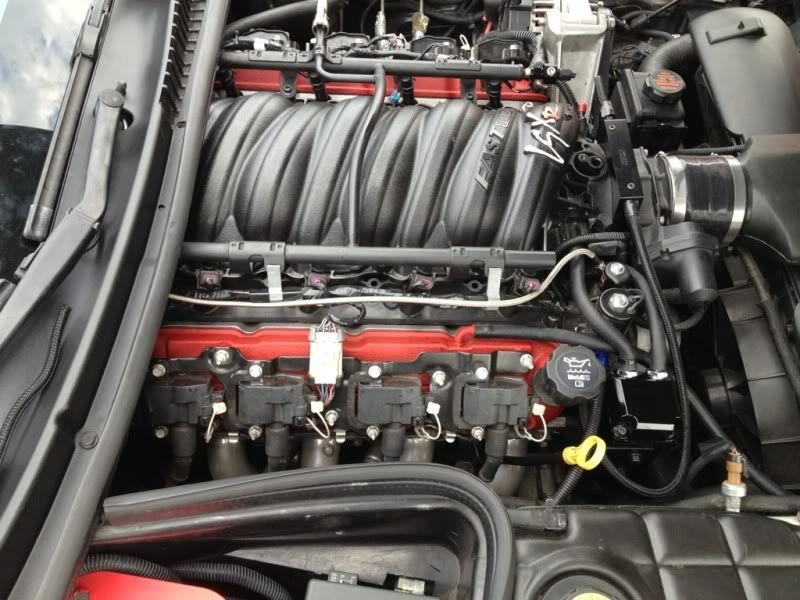
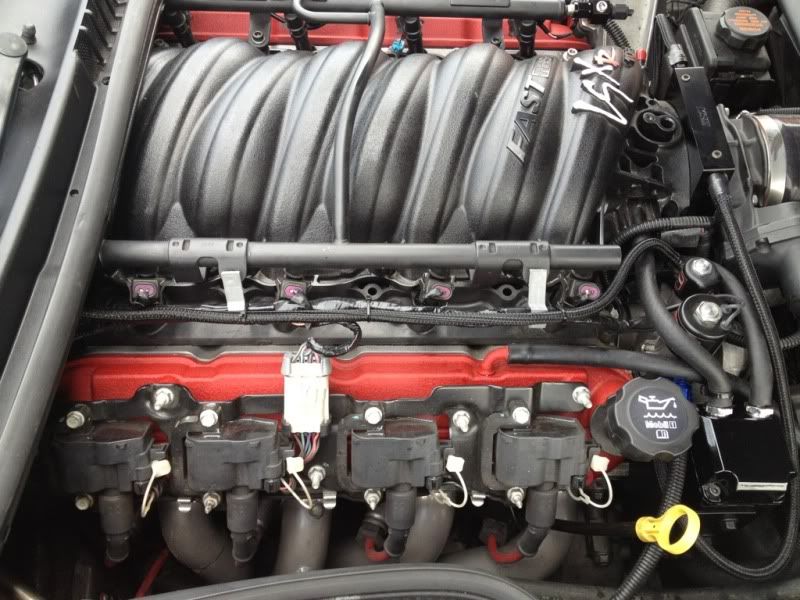
I used the standard -3 stainless braided line since it is much cheaper, and higher pressure rated, than the black fabric braided hose. After tightening both ends, I used premium woven wire loom to cover the line, and then zip-tied it to my harness to complete the look.
I will be back later with some video of the purge in action.
I am using the stock hood, and didn’t want to cut into it, so purging up over the cowl that way was not an option. And with my purge solenoid being up in front of the engine, the line was going to be long enough that it needed to be supported. I didn’t want to mount a hard line to the firewall from the engine, because of the motion the engine makes would eventually cause the line to break, and I don’t like the plastic hose that some use.
My approach was to use a -3 braided line up the firewall, then a bulkhead fitting to hard line to purge exit, which I used the washer nozzle exit that I have seen others use in the past.
The first step was to remove the windshield wipers.
-In the key-on position, I turned the windshield wipers on to the delayed wipe position and once the wipers were in the 'up' rested position I turned the key off.
-Removed the 25A WSW fuse from #10 slot in the passenger footwell fusebox.
-Taped the location of the wipers to aid in re-installation. (my first thought was to mark across the threaded rod to the wiper arm to show the location, but couldn’t find an effective way to make the scribe line)
To remove the windshield wipers, take the caps off the nut cover and use a 13mm socket to remove the nut (I hit it with some PB blaster first and let it soak in a few minutes). With nuts off, lift the arm to release the spring pressure on the threaded rod and then wiggle back and forth and kind of push down actually and the arm will come right off.
Next remove the cowl. Take the push-lock plugs out along the front of the cowl, and with those out, starting at the outer edges, push 'down' and away from the glass to allow the 'clips' to slide out that hold the cowl to the glass. You can push the rubber nozzles through the bottom and take the cowl all the way out.
Now, with the cowl out of the car, I then drilled a 3/8 hole in the firewall where I wanted to put the line through (this will be your decision, just make sure you have clearance from other parts, and don’t forget about clearance from the engine as it rocks back and forth under load).
I then used my -3an 90deg bulkhead fitting and mounted it in the firewall
Next I took my 3/16 stainless tubing and flared one end and used a ferrule/cap to complete the connection.
Then I attached the line to the bulkhead fitting to see where how I wanted to bend it.
I decided to use a single bend and then cut the end off and use a stock rubber grommet for the washer nozzle (I procured another grommet off of a scrapyard vette). To ensure the grommet wouldn’t blow off I used 2part epoxy to secure it to the stainless line.
Since I already had the cowl off, I took the time to restore the finish with a good deep cleaning with a few products, then a couple coats of Mother's "Back to Black" compound.
I repeated the procedure for installation. Notice I kept the top part of the washer nozzle, but broke off the tip and drilled it out to a slightly larger diameter. This will have the nitrous purge toward the windshield. I just thought it looked "cooler" as it went over the car, and also thought it might be easier to see if purged while driving. The added bonus is if I decide to just have it spray up, i can remove the upper part of the nozzle. It makes the purge exit easy to modify to my liking.
For the engine bay portion:
I used the standard -3 stainless braided line since it is much cheaper, and higher pressure rated, than the black fabric braided hose. After tightening both ends, I used premium woven wire loom to cover the line, and then zip-tied it to my harness to complete the look.
I will be back later with some video of the purge in action.


 07-23-2012 | 03:03 PM
#5
Thanks guys!
And Trey, I should have a video up 'soon'. I need an extra set of hands to either run the video or hit the purge button to demonstrate. Truth is, I havent even tried it yet! Just finished installing the flex line this morning.
And Trey, I should have a video up 'soon'. I need an extra set of hands to either run the video or hit the purge button to demonstrate. Truth is, I havent even tried it yet! Just finished installing the flex line this morning.
 07-23-2012 | 06:03 PM
#7
Well, my fear was realized; design fail. I guess I didn't respect the pressure enough, even with the 2 part epoxy the rubber grommet blew right off the tube. Rev2 coming soon.
Trending Topics
07-24-2012 | 12:16 AM
#8

I was right about to comment on that, I remember when i was playing around taking pictures of my purge holding the line by hand, I couldn't believe the force of 1000ish psi has leaving that small hole.. Definitely had to put a good grip on it.
07-24-2012 | 11:57 PM
#9
well, round two completed. I forgot to snap a picture of the modified line, but essentially it just has a bend where the grommet elbow was and I cut off the elbow and just pushed the remaining grommet piece over the line.
(yes, my car needs a bath!)
I will get a better video tomorrow and upload...
[youtube]aTT286xnnX4[/youtube]
(yes, my car needs a bath!)
I will get a better video tomorrow and upload...
[youtube]aTT286xnnX4[/youtube]