When you click on links to various merchants on this site and make a purchase, this can result in this site earning a commission. Affiliate programs and affiliations include, but are not limited to, the eBay Partner Network.
Newb looking for some advice. I bought a VFN 2" cowl hood from a member. Its factory red, but I want to paint it to match my maroon 95 Camaro. The hood and paint is in excellent condition. This will be my first attempt at body work and paint. Its not going to be my last. i'm wanting to learn, and have a few other projects in the mix that will need the same.
So, my first questions are,
How far should I sand thru the existing finish? just create tooth on the CC or go to the base?
What color and type of primer should I use at this point considering my existing color and the change?
Last edited by 95wannabe; Mar 1, 2017 at 04:51 PM.
If you want to paint it yourself and you have the time and supplies I say go for it. The thing about autobody work is anybody can do it! If you get something wrong you just sand it and repaint it, it's a world of difference between autobody work and powertrain work.
There are two schools of thought here:
1. The hood was already red so you can just sand the clear coat off, finish with the appropriate grit and spray the new shade of red followed by clear.
2. The new paint is a different vendor and may have different properties then the prior paint so you need to sand all of the original paint and primer off and start from scratch.
I am not a professional but every so often for the past decade I've found myself painting and have yet to find see any negative effects from painting over properly prepped old paint, provided it is only one layer of paint and not multiple layers.
However, if this is your first project I would say take it down to the base material. You're probably not in a time crunch that would inhibit it.
The brand of paint will be based on personal preference and/or your wallet. I've always stuck to the DuPont brand be it the Nason line (sometimes called a jobber line) or their Chroma line (expensinve, professional and arguably the best finish you can buy). I really have no idea what the difference in the primers and sealers is in Nason Vs Chroma so I always use the Nason line for those. The color coat's difference will be in the coverage, as in chroma will require fewer coats. That's precisely why on the tech sheets it always says spray till coverage. The clear coat of Chroma will have more UV stabilizers (anti-yellowing) and be a higher solids and better flowing. If you have a good gun and can spray well I would say the Chroma clear is the way to go. My gun is middle of the road and I can spray flat or semi'angled panels flawlessly but upright I can struggle with getting perfect Vs runs and sags. I painted one of my Camaros ten years ago and the clear coat shows no sign of failure or UV fading so I have decided to stick with the Nason line.
If DuPont isn't available in your area PPG is just as good and if they aren't available you can look into House of Kolor or Eastwood's new line which is rumored to be made by Kirker. Whatever brand you go with be sure to print out and follow their tech sheet to the letter. Don't dismiss it in favor of Joe's advice who "has been painting cars for X years" and "knows what hes talking about." The manufacturer knows what works for prep and what doesn't.
As a ballpark though, remove the existing finish and sand the base material to 220 grit. Most primers you will need 2-3 coats since most of it will end up sand off. Most primers will want a 400-600 grit finish. The higher end is where you want to finish to ensure you don't have any remaining sanding scratches from the lower grits. Any color coat with metal flake or pearl will also ask for finishing with a higher grit. Clear coat shouldn't be sanded with anything below 800 grit and if you have to use anything harsher than 800 just plan on respraying clear coat. Finish the clear coat with 2,000 grit but 3000 grit is wonderful to ensure you don't have to work the buffer excessively.
Thanks for your opinion.
I've been studying this for months and reading and watching every thing I can. I've read many times to keep with the same manufacturers products throughout a project, but since I don't know what was used by the PO, this is where I'm going in circles. I "think" I should do any body work needed, then sand it with 180-220 and then use an epoxy primer. From what I've read this should be the best way to not have any problems between this layer and the new products I'm going to use. Is that right?, If so, can I paint base right over the epoxy or do I need a different primer on top of that?
Last edited by 95wannabe; Mar 12, 2017 at 11:08 AM.
So, I've read on other forums that clear can be sanded with 600 and then the new base applied right over that. As long as you don't get in to the original base.
Any opinions on that method?
Technically you can scuff and shoot. As long as your original paint is solid and not lifting. Epoxy primer does add in a layer of protection from possible use of non catalyzed paint i.e. single stage. If you know for sure it is BC/CC, 220 sand, then final with 400 for solid paint and 600 for metallic.
Buy sandpaper by the box at a paint supply store, not auto parts store.
Hook and loop(Velcro) backed pads on a DA are the best for large areas. Also grab a box of gray scuff(scotch-brite) pads for the sharp edges and fine areas.
Since you're new at this, don't use the blue painters tape for your house. Get quality body shop tape. It sticks better and the lines are more crisp.
Aaron, thanks for the tips on sandpaper and tape.
The hood is near perfect condition. If my car was red, I'd put it on.
I'm pretty sure its bc/cc just because I hit a small area with 600 by hand and the dust is white. sounds like clear right?
As far as sanding goes, I don't think I should trust myself yet thinking I could sand clear only on the whole hood without breaking thru to the base. That said, sounds like I should hit the whole thing with 220, then 600 since new base is metallic. Now, next newbie question... I would spray the epoxy AFTER these sanding steps, correct? Does it not fill at all to worry about keeping the 600 scratches for the metallic?
Epoxy primer is just that, epoxy. Its glue right? it sticks to anything and things stick to it. Common sense tells me no sanding glue, or at least until its cured and hard.
If you're getting white dust, then yes it is clear. Burning through to the color doesn't really matter. The only reason shops don't go that deep is because of the extra time it takes. They are trying to do the most product in the shortest period. You, however have much more time. Also dipping into the base or primer layers makes low spots in the paint. These could be noticeable in the final paint.
Going from 220 to 600 is a little tricky. That's a big jump for 600 to sand down. 220, 300, 400 or 500 then 600. Some people even finish with 600 wet, but that doesn't make a mess. Either way, progressively move up in grit.
Epoxy primer is your final layer before base/clear. You want to have all your sanding complete. It needs to be ready like you were about to BC/CC. If you have imperfections, i.e., missing paint, scratch-you would use a high build primer(not rattle can garbage either) always stick with 2k products! 2k meaning it has a hardener/catalyst. EP should not be sanded. It tends to gum up the paper. It isn't really designed for correction. It is basically a sealer from other layers beneath, unknown paint product, primers. Since you are going with red, use a white EP. gray or black with darken your final color and require more paint to hide it.
Yes you are correct that EP is "glue" for lack of better words.
Getting into metallic for a new painter is quite the challenge. There lots of variables here. You may want to hire/find a pro to shoot that clear. Also color/metallic matching the fenders, doors, bumper will be big challenge at your skill level. Not to discourage you but, get some shop quotes first.
Aaron, first, thanks for the lengthy reply. I know everyone's busy and don't necessarily want to reply to a bunch of dumb questions.
Originally Posted by Aaron23
If you're getting white dust, then yes it is clear. Burning through to the color doesn't really matter. The only reason shops don't go that deep is because of the extra time it takes. They are trying to do the most product in the shortest period. You, however have much more time. Also dipping into the base or primer layers makes low spots in the paint. These could be noticeable in the final paint.
Going from 220 to 600 is a little tricky. That's a big jump for 600 to sand down. 220, 300, 400 or 500 then 600. Some people even finish with 600 wet, but that doesn't make a mess. Either way, progressively move up in grit.
ok, In this case, my hood and existing red paint is pretty much in excellent condition. Like I said earlier, if my car was red, I'd just put it on as is. So my question is... what is the purpose of starting at 220 grit? If I'm going to end with 600 can I save those sanding steps and just start with 600 since my hood and existing paint is in good shape?
Originally Posted by Aaron23
Epoxy primer is your final layer before base/clear. You want to have all your sanding complete. It needs to be ready like you were about to BC/CC. If you have imperfections, i.e., missing paint, scratch-you would use a high build primer(not rattle can garbage either) always stick with 2k products! 2k meaning it has a hardener/catalyst. EP should not be sanded. It tends to gum up the paper. It isn't really designed for correction. It is basically a sealer from other layers beneath, unknown paint product, primers. Since you are going with red, use a white EP. gray or black with darken your final color and require more paint to hide it.
Understood.
The hood is red, car is maroon. Still go with a white EP?
Originally Posted by Aaron23
Yes you are correct that EP is "glue" for lack of better words.
Getting into metallic for a new painter is quite the challenge. There lots of variables here. You may want to hire/find a pro to shoot that clear. Also color/metallic matching the fenders, doors, bumper will be big challenge at your skill level. Not to discourage you but, get some shop quotes first.
I agree, this whole process will be a challenge for me. But I always seem to have something that needs painted and I can't continue to pay the prices. I want to learn how to do it myself. I don't have all the body tools yet but believe I have most other tools already, air compressor to use for prep. I can rent a booth near me for $55/day and I have the means to transport a car.
I plan to practice first on a few panels I have from parts cars.
This car has the original paint on it still. I didn't buy it new, but bought it in '95. Been garage kept almost its whole life. Its been spotted here and there for the normal parking lot abuse but nothing major. The front-end needs a repaint so depending how this goes with the hood, I may continue on.
That said, I'd probably be really dumb to just paint the hood and then go back some time later and do the front-end and fenders huh?
This is a good thread with lots of good advice. I have experience painting with automotive basecoat/clearcoat with HVLP, as well as some other materials and rattle-can with some decent results. I still suck at clearcoat, but I can give you some good novice tips that the pros are so far past, they won't think to mention them.
Essentially, think of the last sanding pass (600) as the final surface you will be looking at when you see the car. If it has scratches, you will see them. If it has slightly different rates of absorption (basecoat, primer, clearcoat, filler) it will look slightly different. The basecoat is insanely thin, and the clearcoat is visible straight through, so it won't hide anything.
You can start sanding with 600 wet (or 400, or 320) if you want. It may actually be a good experience for you to learn what is the right grit to get down to a level surface. What you will find, is that there is orange peel in the clear, and the first spots you hit are the peaks, which will turn into white dots. Eventually, you will sand down to the valleys, which in your case, will be red dots. Be wary of "chasing a surface"--oversanding to remove an especially low valley. If it is much lower than the surrounding area, fill it with glaze or something, rather than ruining the surrounding surface. It's an additive/subtractive process.
A black car with orange peel partially sanded down:
Here is one I cannot stress enough: especially on the finer grits, throw sandpaper away before it wears out. If the edge gets nicked on something, toss it. Scratch on the underside: trashcan. It does not take much to ruin a clean surface and put new scratches into it. As such, flush sandpaper and area with water constantly, and buy lots so that you aren't stingy.
Watch the edges and positive panel creases--even tape them off to protect them. Your sandpaper will automatically hit these areas more often than the middle of large areas. As such, these will sand through first. You will be amazed how easy it is to sand right through the corner of a hood. When priming these areas, feel free to coat with a little extra sanding primer.
If you do sand through, you can always re-prime, as mentioned above. You should be just fine sanding the clearcoat though. I don't think you need to remove it. It does tend to clog the sandpaper a bit more than primer, but it should make a fine base.
Keep things super clean and dry before you paint. No greasy finger prints or oils, and no wet spots. Water will create fisheyes in the basecoat. Oil will cause adhesion problems. You can wash the hood with dish soap and hot water to prep. If drying allows dust to settle on it, wipe down with a tack cloth, or at least a lintless rag or dry Swiffer. Let the clear dry in a dust-free area, or build a box to cover it while it sets. Basecoat dries pretty fast, so just make sure it's dust-free when you are painting.
When you paint, paint past the edges of the hood, in overlapping passes. That is, as you go left-to-right, "draw outside the lines" by going past the outer edges of the hood before you release the trigger. If there are difficult to reach areas, such as the insides of the scoops, or pockets on the underside of the hood, coat those first. Then finish by sweeping the wide swaths of flat surface last. For these wide areas, it is much easier to keep a perfect 90 degree perpendicular spray angle from the surface. Spraying at an angle will create overspray spatter droplets, so keep this to a minimum.
eb110 has good tips too
Go watch Kevin Tetz videos on sanding. I used his cross hatch technique. It takes some practice but works well. Never sand in a straight line. It makes grooves. Also, never use your hands/fingers as it leave grooves. Buy a quality sanding block. Not that POS 3M thing from Wal-Mart either. Autozone actually carries a yellow foam board, about 8".
YouTube is your friend for tips. I like The Gunman or Refinish Network
Ok, onto your questions
600 will not always cut into the clear that well. It tends to just barely scuff the top layer or the orange peel. Perhaps starting at 320 will lend decent results.
Yes to white EP. Base paints are thin/don't hide well. A dark background=darker paint, light background=lighter paint
Renting the booth is totally worth it. You can't make a temporary booth for that cost. Be 100% sure you are ready to shoot paint. Make yourself a list of materials/tools/ etc. you need for the job.
Trying to match that metallic from fender to hood in different paint jobs is damn near impossible, especially at your skill level.
Final tip of the day-as your are applying clear, reduce the final coats more and more.
Let me explain. The first coat of clear after base is hand slick is considered a tack coat. You typically mix it according to tech sheet but spray it on at a faster pace with only 50% overlap.
Allow 10 min dry or until just tacky to dry to touch. (Also, touch the tape, not the actual job) Next cup of paint, reduce 10%, spray slower with 50 to 75% overlap, wait, . 3rd coat reduce again 5-10%. You can also slow down a bit here too as you want the paint to "flow out" meaning it should look wet like you dumped the can of paint on it. You don't want it to look orange peely because that will be your final outcome. If you see it running or turning white, STOP in that area. Walk away, let it tack. 3 coats should do you. Coat 2 and 3 should look wet. You don't want dry paint.
Be sure to tack really well after base dries. There will a lot of red "dust". You don't want to use Wax and grease here, it will destroy the paint.
Keep that gun 6-8 inches and perpendicular to the job. Patients and practice go a long way here.
I actually had great results with the HF professional gun. ~$70
Get an extra gallon can of urethane reducer for cleaning your gun. If some is left in the gun, it will not harm the paint. Lacquer or enamel reducer doesn't play well with urethane.
I also like to clean with a quality wax and grease remover-solvent based. I use blue paper towels followed with aerosol glass cleaner to remove finger prints, sweat, etc. Open up that tack rag, while using a blow gun and get all that dust off. All these steps lead to a quality paint job. It isn't just the paint quality.
Buy a throw away paint suit at Lowes/HD. Get the hooded version. Buy a box of nitrile gloves(auto parts store, Lowes, HD). Just before you paint, tape your sleeves to your wrist. Tape your suit to your waist, like a belt. I'm helping you keep that suit off that wet paint. Wear a real respirator, not a doctors mask. Isocyanates will kill you!
There's so much more. Just keep reading and watching videos.
Sounds like all excellent advice from above.
I'm glad you mentioned the you tube videos, I've watched Kevin Tetz hands on cars several times. I've picked up so much from him. It does create a few other questions, but that's from an overall paint job perspective.
I watched the Gunman and diyautoschool. Its cool to hear the different opinions....I just have to weed thru it.
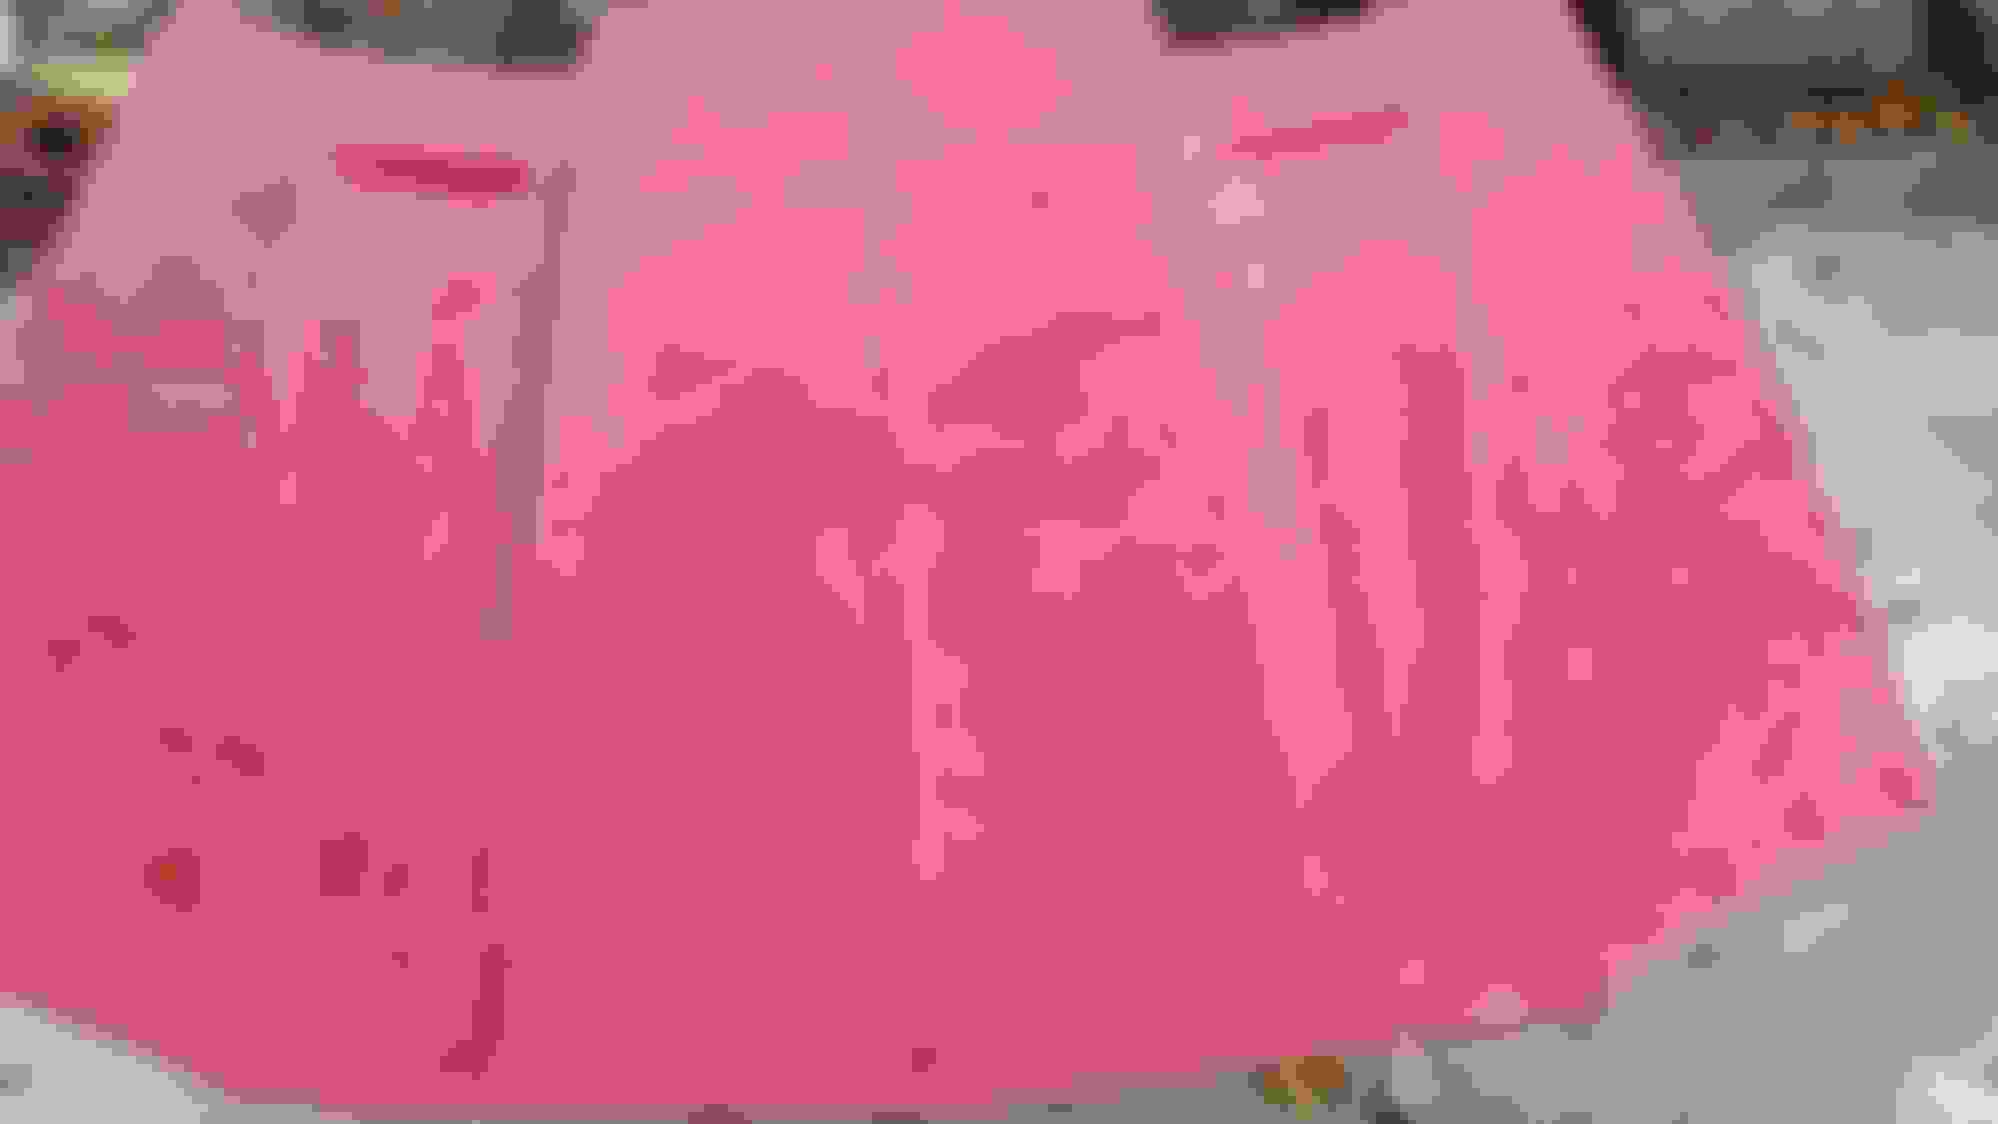
Back to this project, I want to post a picture of the under side of this hood and see what you guys think is the best thing for me to do here.
Thanks again everyone for contributing so far
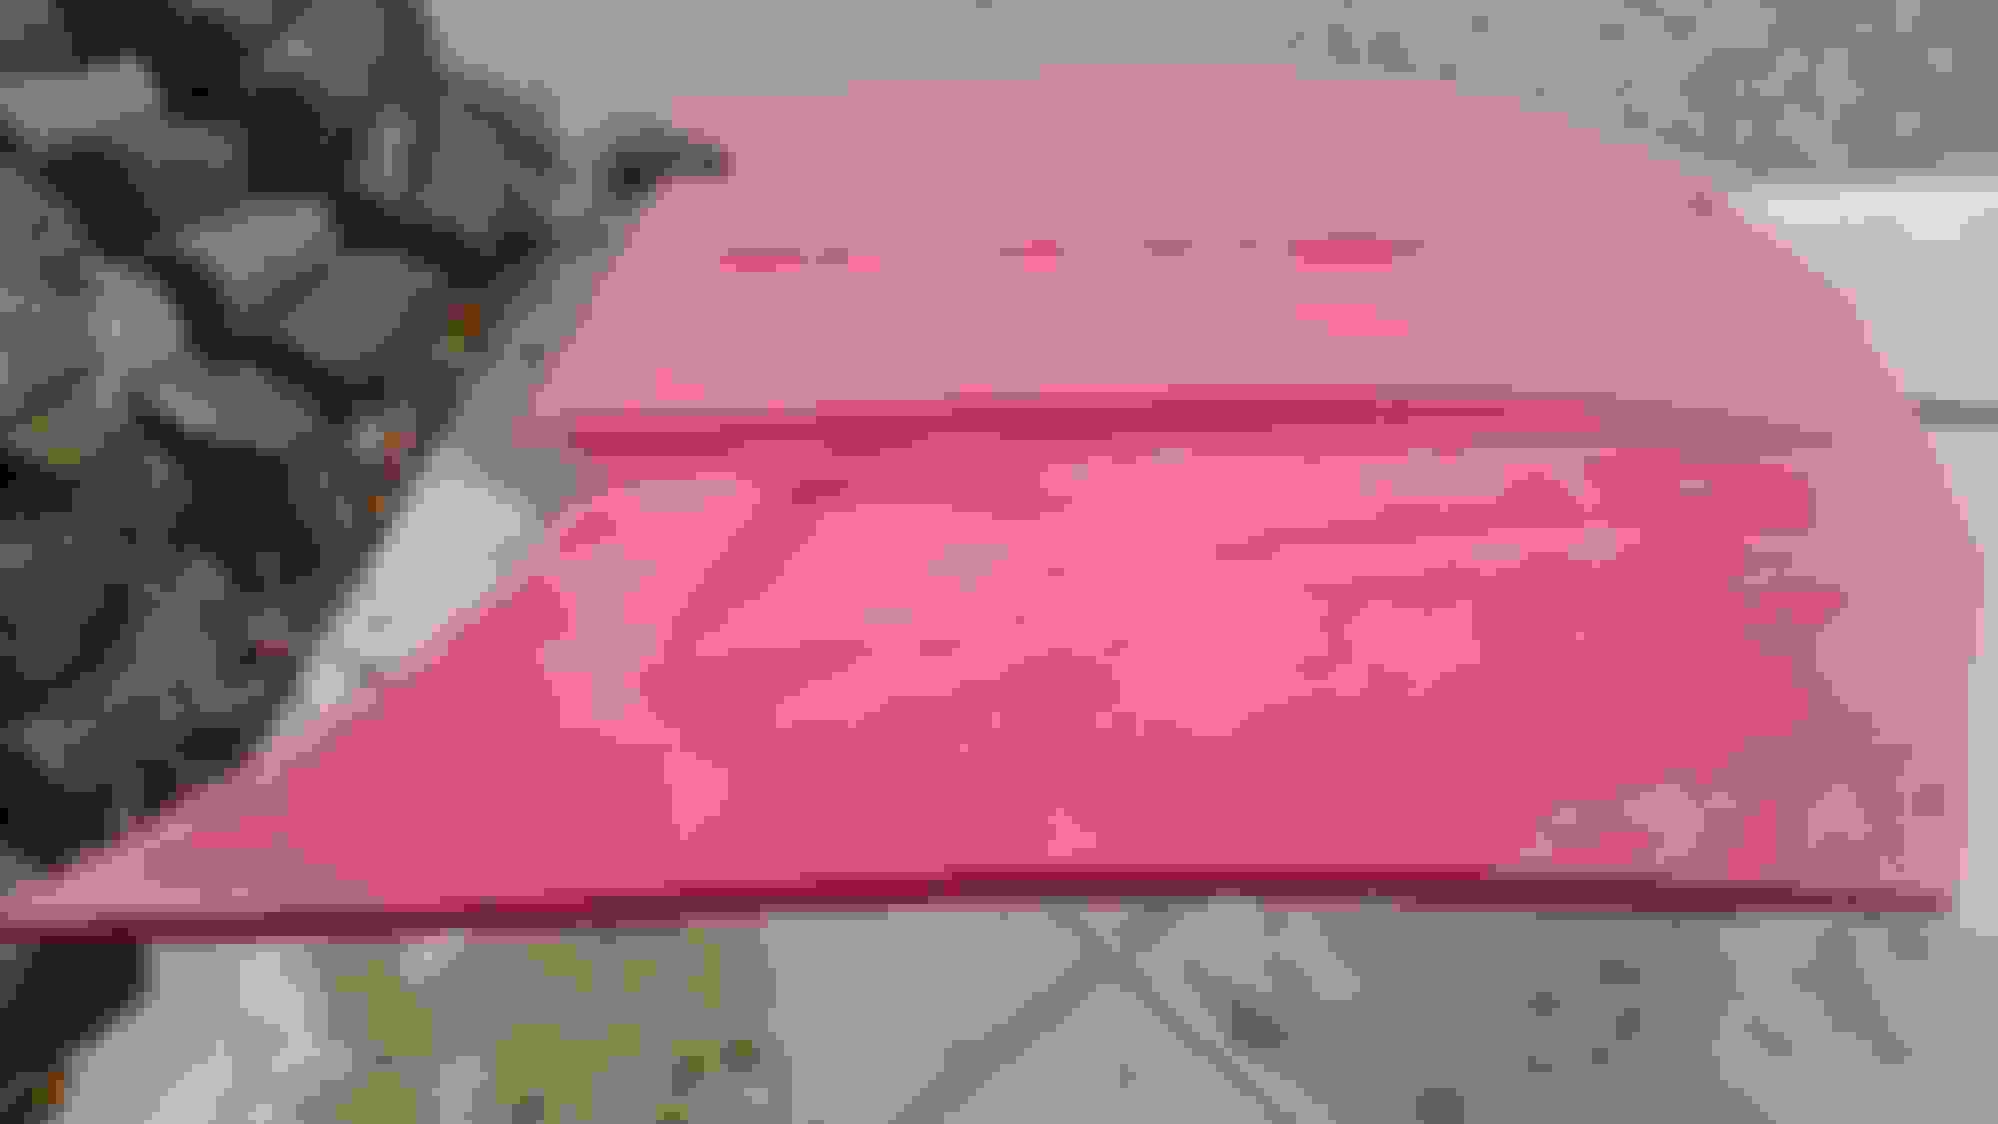
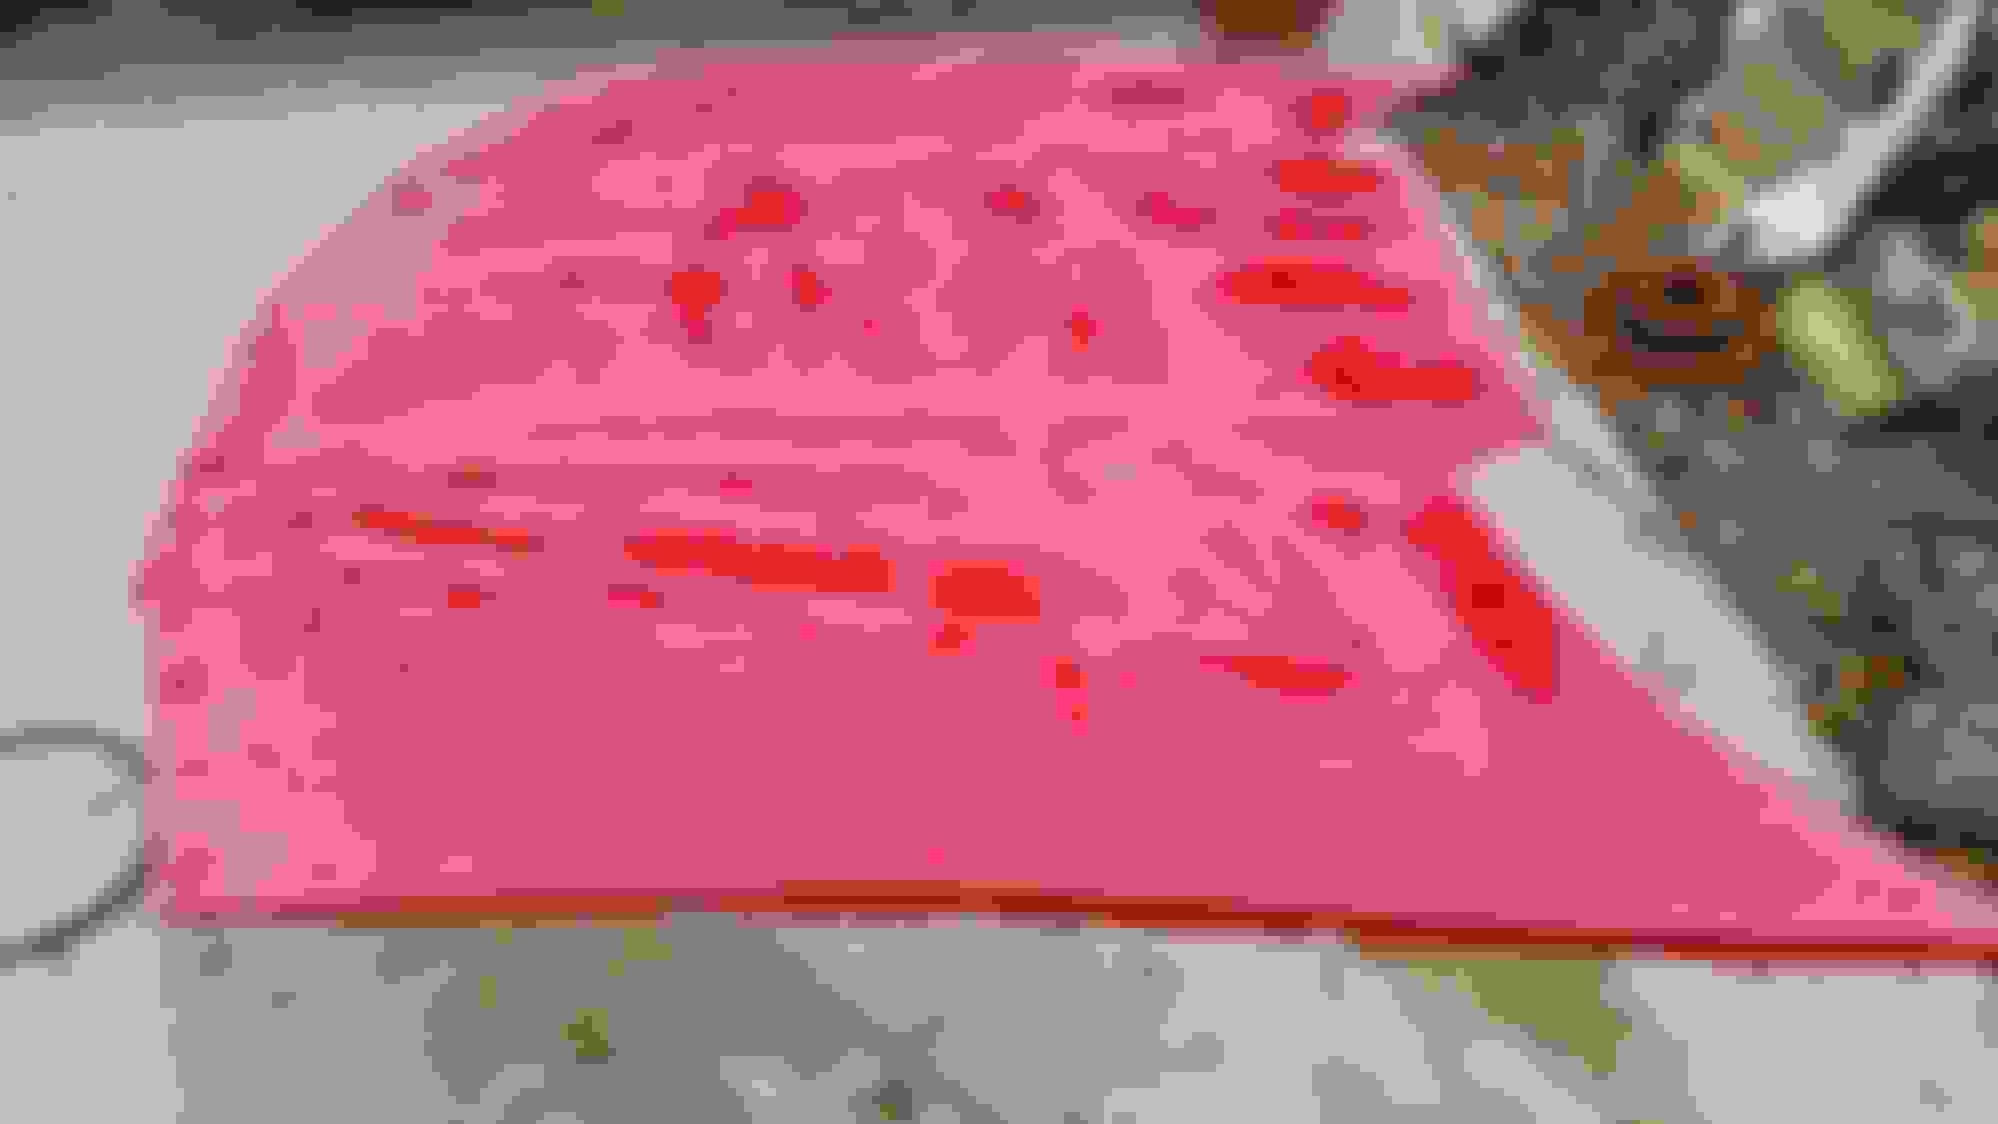
What should I do with the under side? Its a pretty rough surface. It looks like somebody just blew some red paint across it.
Degrease it and do the same?
Yes, degrease and shoot. Same procedure as top. I highly recommend removing the hood, to include all brackets. You can't paint the windshield side while still mounted to car.
It's hard to tell, but looks like you need to wash it with something like Purple Power first.
Yeah, will definitely remove the hood. I think I'm going to order one of the work stands from Eastwood. Actually thought I might just bolt it on to my parts car sitting outside and do all the sanding out there.
I'm going to start with 320. I'll post some pics and we'll go from there.
Its taken 10 months for me to get this far....why rush it now
This is honestly the first time I've ever sanded a body panel. Absolutely don't know what I'm doing, but with your guys help I'm going for it.
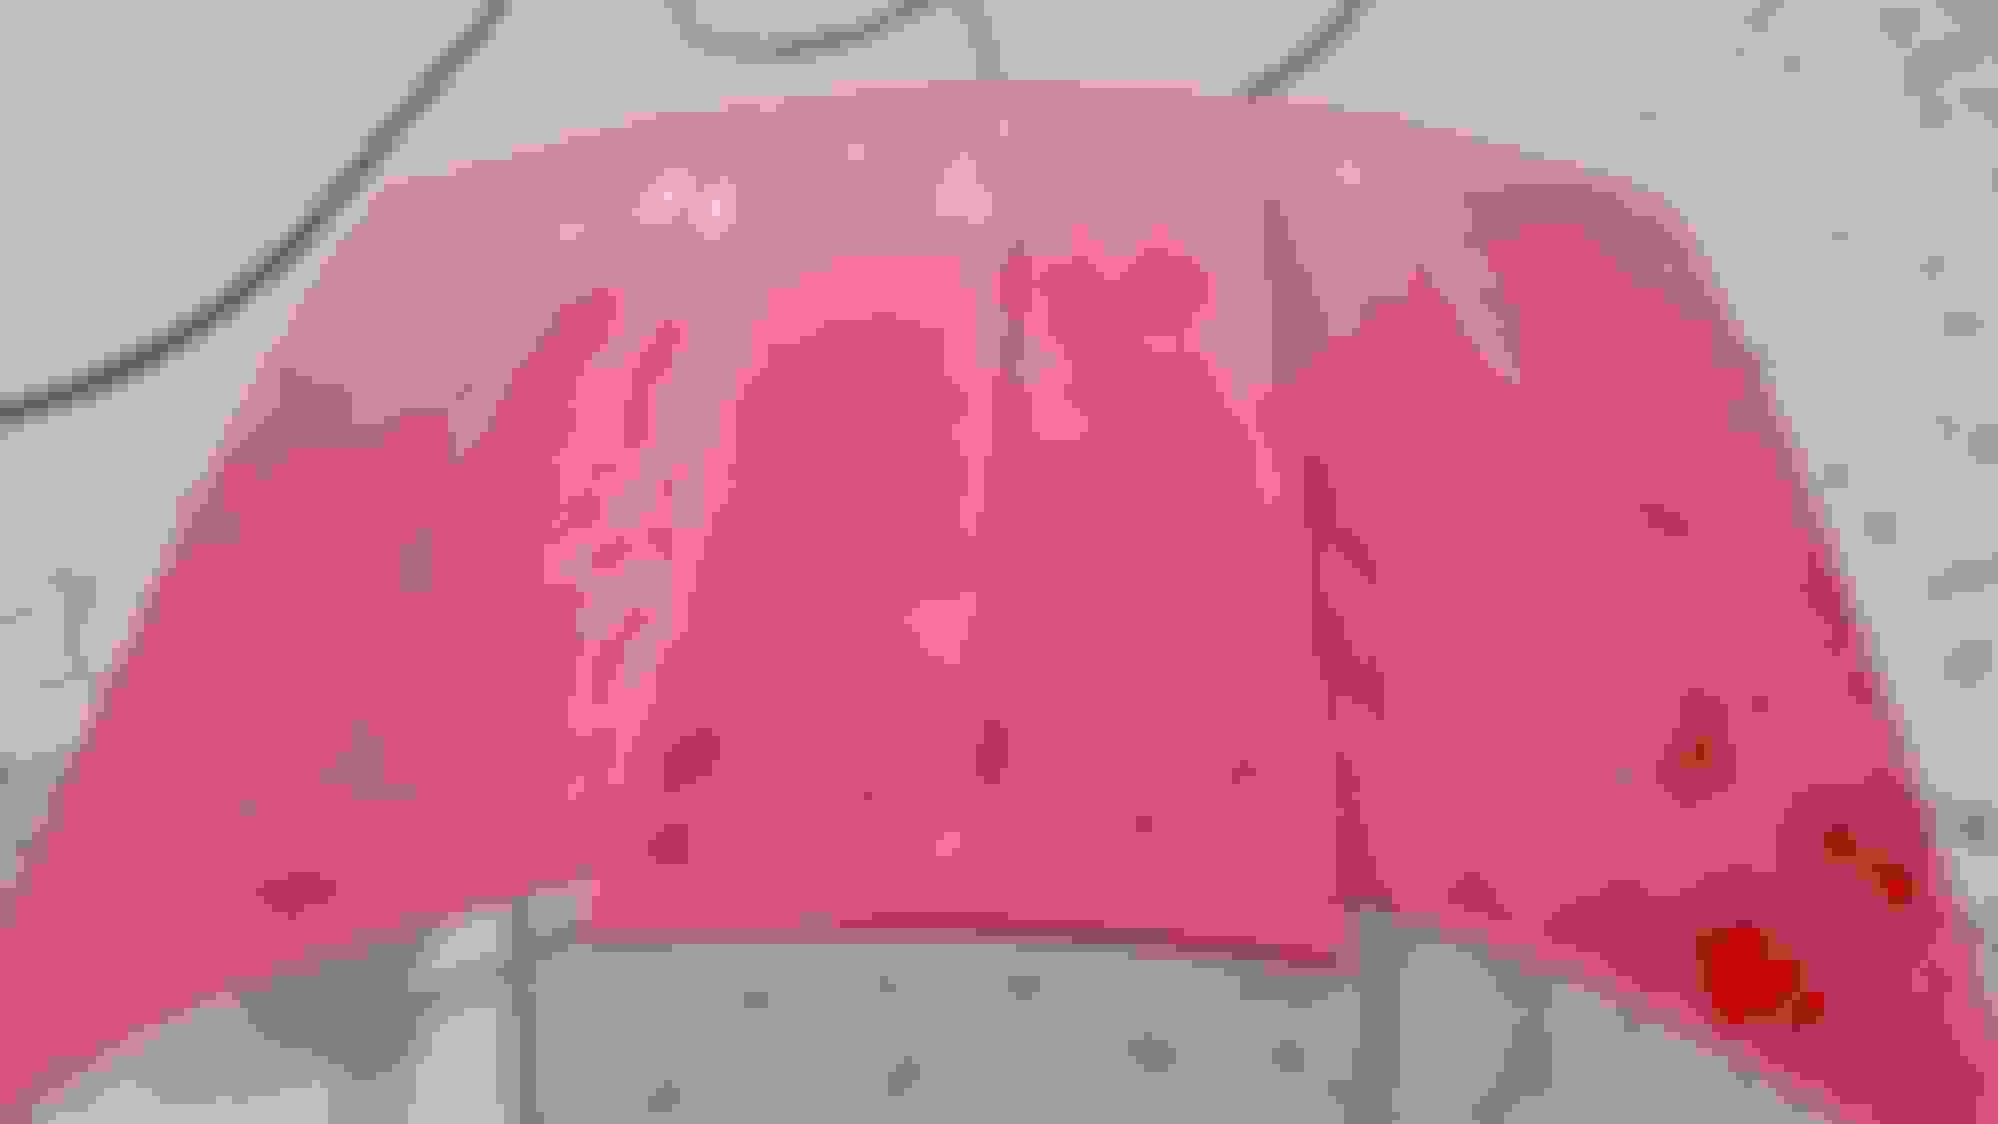
Bought a set of Durablocks. Started with a 8". Didn't seem to hit much with it. Next 4" in areas I obviously missed. Also used a 1" dia round block up the sides of the scoop.
I probably picked the most difficult panel I could to start sanding on, but its a start. What do I need to do to get the entire hood sanded evenly? This is 320.
Already some really good advice in this thread, let me add a bit. First kudos for attempting to do this!
You see those shiny areas? Paint won't stick to that properly and will peel up later, nothing should be shiny on the substrate. Since you are laying paint on top of this the whole panel should look hazey, that's when you know your primers will stick. Sanding your substrate is creating a mechanical adheasion point if the surface isn't scuffed up the next layer won't stick. When you paint several layers on top of each other your using a chemical bond which is why you have to spray your next coat within it's recommended window. Once you shoot your epoxy you should throw down a few high build primer layers and get yourself guide coat. The spray can stuff usually clogs up sandpaper so I prefer the powder/dust version. You use the guide coat to tell you when the substrate is perfectly smooth prior to painting your base. If you sand too much off you can always shoot more high build, as someone mentioned you may need a little bit of glazing putty to fill in low areas. Once you have properly blocked the hood with the guide coat, wash it, dry it, tack it down and shoot your base + clears from there and you should have a very smooth painted surface (after you cut and buff).
Thanks cap. I appreciate your reply.
From that, I think I just realized what your saying is, at this point, make sure I have it all sanded and not necessarily worry about it being flat.
Get it flat after the epoxy is down. Sound right?
Gas Monkey Built a 6-Wheel Ferrari Testarossa With a Corvette LT4 Engine
Slideshow: The controversial Ferrari F6 swaps its original flat-12 for a Corvette Z06-derived LT4 V8 and sends power to four rear wheels through a custom-built drivetrain.
7 Most Reliable High-Performance Engines GM Has Ever Built
Slideshow:These GM engines didn't just make huge power, they survived abuse, boost, track days, and six-digit mileage with a reputation for refusing to quit.
6 Common C5 Corvette Failures and What's Involved In Repairing Them
Slideshow: From wobbling harmonic balancers to failed EBCMs, these are the issues that define long-term C5 ownership and what repairs typically involve.
Retro Modern Bandit Pontiac Trans AM Comes With Burt Reynolds' Autograph
Slideshow: A modern Camaro transformed into a retro icon, this limited-run "Bandit" build blends nostalgia with brute force in a way few revivals manage.
Top 10 Greatest Cadillac V Series Performance Models Ever, Ranked
Slideshow: Cadillac didn't just crash the high-performance luxury vehicle party, it showed up loud, supercharged, and occasionally a little unhinged...
Coachbuilt N2A Anteros Is an LS2-Powered C6 Corvette In Italian Clothes
Slideshow: A one-off sports car that looks like a vintage Italian exotic-but hides a C6 Corvette underneath-just sold for the price of a new mid-engine Corvette.




 changing color on hood