


Rear quarter replacement

Thread Starter
TECH Apprentice
iTrader: (2)
Joined: Sep 2005
Posts: 324
Likes: 0
From: College Station
Im looking at picking up a cheap LT1 Z28 here in the next few days that has a bad pass side quarter. The car is red and there are two red Camaros at a local pick-n-pull with perfect red quarters.
My question is, has any one on the board ever removed a rear quarter? This is going to be a project car so im thinking of going to the wrecking yard with a die grinder and a drill set and goin at it till it comes off. The hatch, sail pannle and rear bumper are already off the car as well as the door.
Based on how hard it is to remove the doner panel im going to try to install it on the project car myself and with out having to do any exterior paint work. Is this possible? I have a small Hobart MIG with gas hook ups so I should be able to tack it in place and just have to repaint the jams.
I would cut a large chunk out of the donor car with a battery powered Sawzall and some of those Torch sawblades.  Then you can drill out the gazillion spot welds at your house during your leisure time.
And I seriously do not think you can do it without repainting the panel.
Then you can drill out the gazillion spot welds at your house during your leisure time.And I seriously do not think you can do it without repainting the panel.
It is a serious bitch, definitely the hardest body work by far. I tried to remove one with a drill and an angle grinder and it took freakin forever, gave up eventually. After attempting and failing miserably at this, I would honesty recommend letting a professional body man handle this job.
You're definitely going to need to repaint it though, even if you get it off.
You're definitely going to need to repaint it though, even if you get it off.
Last edited by infinitebird; Sep 11, 2007 at 05:09 PM.
if you have never done body work before your probably goin to have some trouble with this... i mean its not impossible to do it in a garage but if u dont have experience in this its going to give you all sorts of problems... youlll need a spotweld cutter and spot weld chisle.... drill out the welds... problem will be down by the rocker becuase you will have to section that because i belive its one peice... cant be done without paint.... you can just sawzall around the 1/4 at the pick and pull through all the structure that it welds too just dont damage the 1/4... i strongly strongly dont reccommend you doing this at all... but if you try good luck... make sure your welds are strong or thell start to pop at the first launch of the car...
I did one on a third gen ('84)with t tops. First major panel repair. Got the car for $350 so if I failed it was no big loss. The local junkyard cut me 1/4 of a car out for $100 so I had plenty of material to work with, plus I practiced on some spot welds before doing anything to the car.
The worst part was the roof sagging when I got it out. Had to support it at the right height to mock up the replacement.
The worst cut was behind the door window, I just cut from the jamb to the hatch and butt welded it there so there was that paint spot, the other was at the rocker crease on the bottom.
I also replaced the spare tire section and into the trunk floor.
My work was tested a few months later when my girlfriend hit a jeep cherokee head on around 30 mph, more to the drivers side. Much to my suprise nothing was cracked at the rear.
It was totalled AGAIN but I bought it back, got lucky again and found a Z28 front that looked new, even the radiator. Fixed that up and had a shop check to see if the frame was straight, it was, never even had an alignment and it drove great.
I'd say do it.
Thread Starter
TECH Apprentice
iTrader: (2)
Joined: Sep 2005
Posts: 324
Likes: 0
From: College Station
Its going to cost over 1200 I know at a body shop. It was around 1300 to have the quater on the T/A replaced. I just cannot afford that. I may try to section the quarter. Ill just cut out what is damaged and cut a peice that fits and use body filler for the edges. I work in a tractor trailor repair show so im accustomed to fabricating peices and working with metal. Ive also had lots of time doing bodywork.
Like mentioned above, go and cut out a lot more then you need. Bring it home and take a look at how your going to remove the new one. Remove it and see how hard or easy it is, then work on the one on your car.
I had my quarter replaced on my old 00 formula. Had a friend at a body shop do it and only charged my 600. But if you don't have connections it can get pricey really quick.
I had my quarter replaced on my old 00 formula. Had a friend at a body shop do it and only charged my 600. But if you don't have connections it can get pricey really quick.
Trending Topics
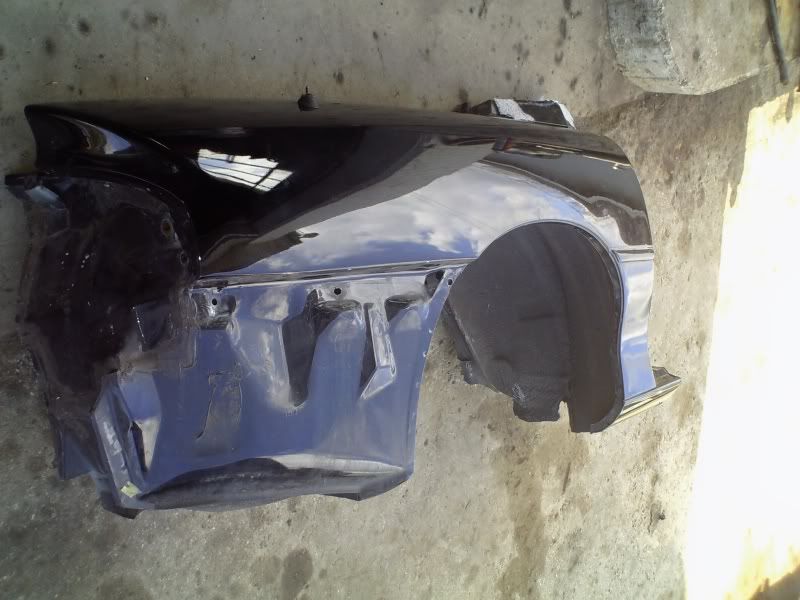
its really not that bad man i replaced the passenger quarter on my ss by myself when i was 16 it only took me 22 hours nonstop and thats only because i had to stop and drink some beers with my buddies, and go buy more wire for my welder half way through lol. but i bought my new quarter off a buddy with a wrecked camaro for 100 bucks i cut the whole side chunk off the car with a sawzaw
then after that i simply drilled all the spot welds to remove the new quarter from the inner fender.after that i drilled the spot welds on my car and removed my dented quarter.
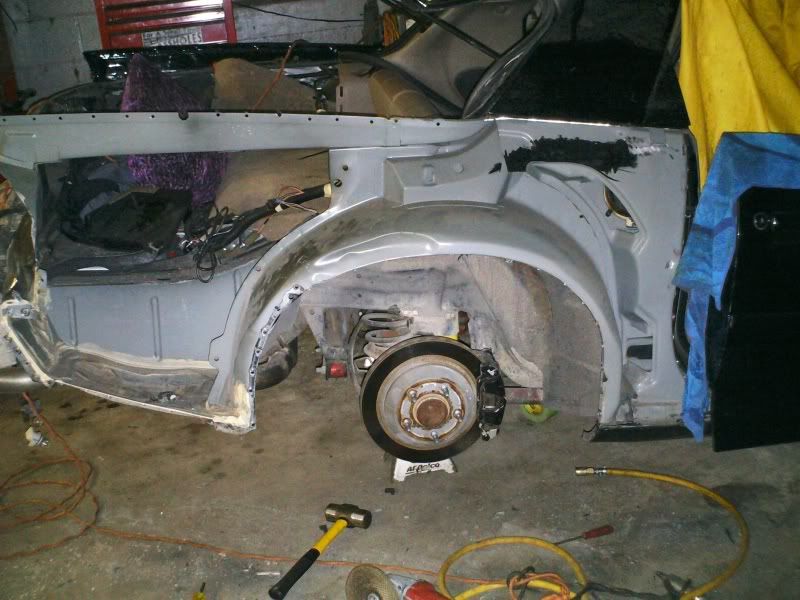
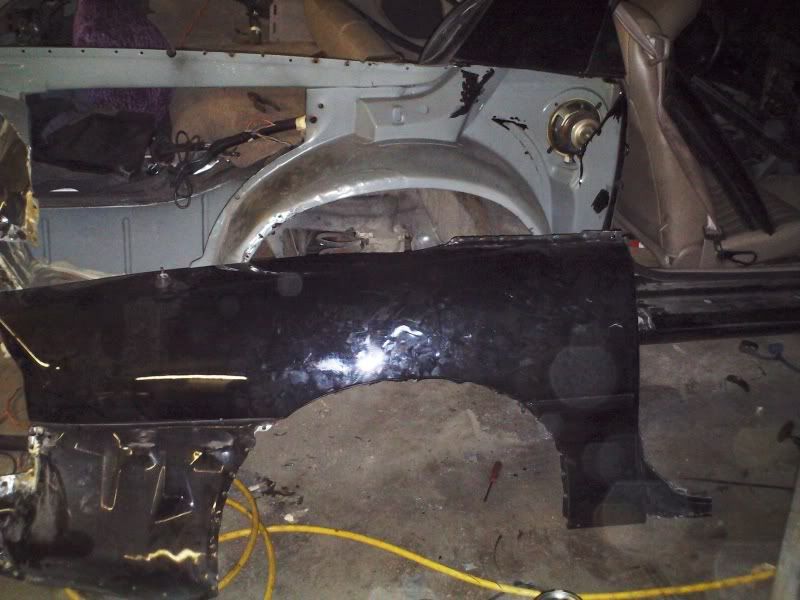
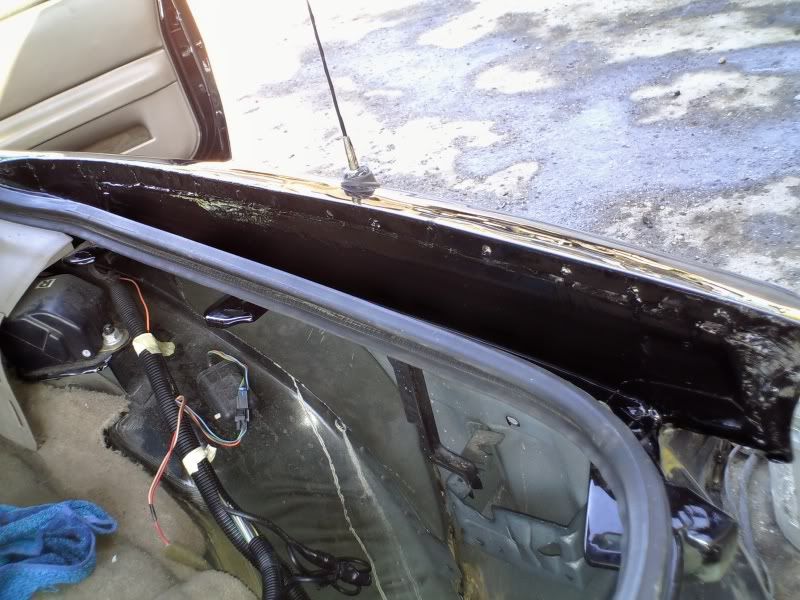
then i carefully placed the new quarter on my car with a spot weld in like 4 places, pretty much just tack it on then line things up one body line at a time then once you think it is good weld it all up. also to get to the spot under that plastic piece that goes across the top of the car just get some guitar string or piano wire like you would with a windshield and saw it back and forth underneath to cut the glue and carefully bend the plastic piece up so you can get to those spot welds, be extra careful though that piece likes to break i almost broke mine so be sure to cut it really far up. then after i had it all welded on i just took some caulk and sealed the seams then painted over with some black tractor paint from tractor supply ( i know what your thinking but it works)
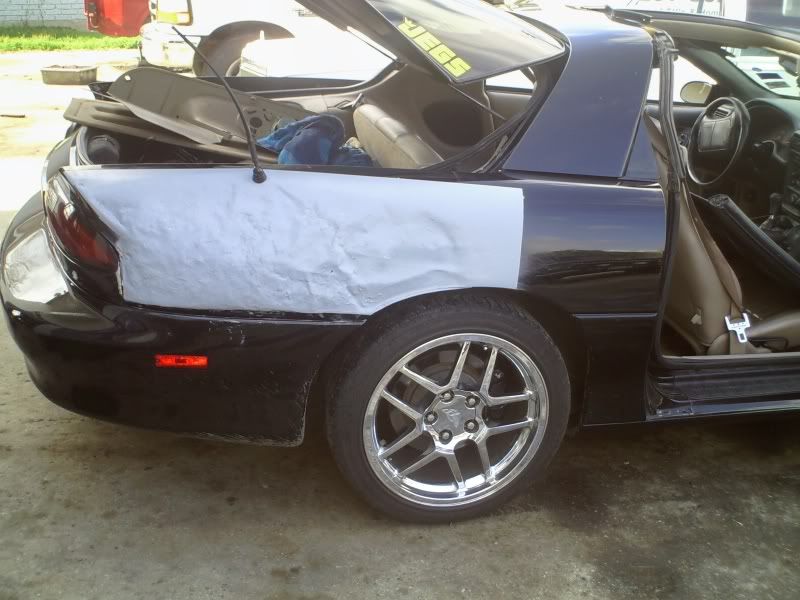
this is what i started with
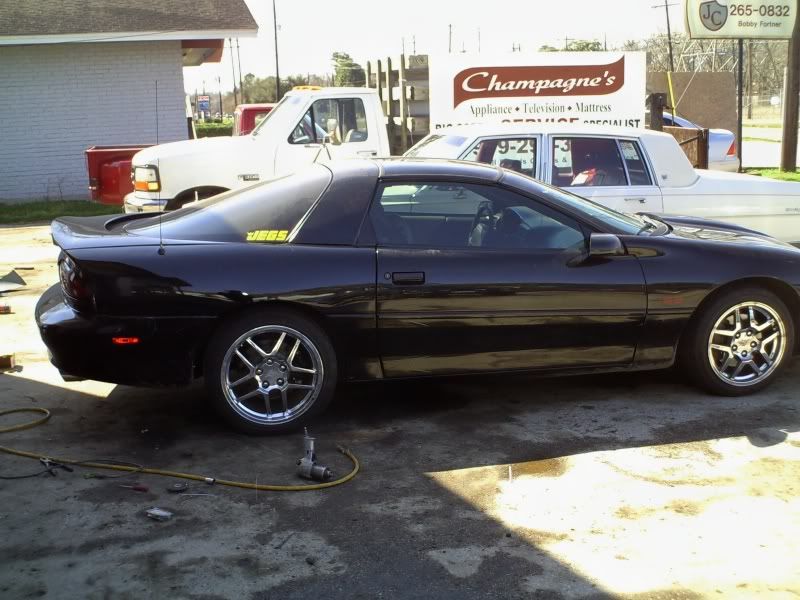
here is the finished product
and now unfortunately thanks to my father in law backing into me i have to do it again to the driver side along with patching a softball sized hole in the door. once again i just wanted to say i was 16 when i did it and did it on a friday night after school i cost me 150 bucks total 100 for the quarter then 50 for welding wire, paint, and caulk. so i can do it you definately can. this was also my first big body work project
then after that i simply drilled all the spot welds to remove the new quarter from the inner fender.after that i drilled the spot welds on my car and removed my dented quarter.
then i carefully placed the new quarter on my car with a spot weld in like 4 places, pretty much just tack it on then line things up one body line at a time then once you think it is good weld it all up. also to get to the spot under that plastic piece that goes across the top of the car just get some guitar string or piano wire like you would with a windshield and saw it back and forth underneath to cut the glue and carefully bend the plastic piece up so you can get to those spot welds, be extra careful though that piece likes to break i almost broke mine so be sure to cut it really far up. then after i had it all welded on i just took some caulk and sealed the seams then painted over with some black tractor paint from tractor supply ( i know what your thinking but it works)
this is what i started with
here is the finished product
and now unfortunately thanks to my father in law backing into me i have to do it again to the driver side along with patching a softball sized hole in the door. once again i just wanted to say i was 16 when i did it and did it on a friday night after school i cost me 150 bucks total 100 for the quarter then 50 for welding wire, paint, and caulk. so i can do it you definately can. this was also my first big body work project
LS1 Tech Stories
The Best V8 Stories One Small Block at Time

6 Common C5 Corvette Failures and What's Involved In Repairing Them
Pouria Savadkouei
Retro Modern Bandit Pontiac Trans AM Comes With Burt Reynolds' Autograph
Verdad Gallardo
Top 10 Greatest Cadillac V Series Performance Models Ever, Ranked
Pouria Savadkouei
Top 10 Most Powerful Chevy Trucks Ever Made!

Hennessey's New Supercharged Silverado ZR2 Has 700 HP
Verdad Gallardo
Coachbuilt N2A Anteros Is an LS2-Powered C6 Corvette In Italian Clothes
Verdad Gallardo
Awesome K5 Blazer Restomod Comes With C7 Corvette Power
Verdad Gallardo
10 Camaros You Should Never Buy

10 LS Engine Myths That Refuse to Die
Verdad Gallardo
Instead of cutting all those spot welds wouldn't it be easier to replace everything? I need a new quarter on my bird just trying to figure out what I need to cut. I might even try to cut out the damaged section and not the whole quarter.
TECH Enthusiast
Joined: Apr 2008
Posts: 701
Likes: 0
From: chicago
ok if its that bad always do a pre pull on a frame rack, cmon guy where are the residant techs in here??
the fastest way i do after i prepull, i cut a big *** section out with my air hammer, then i use my cut off wheel with the cutting disc on it, and grind all the welds down , and you will see if you go past the 1/4 to the exsiting panle
when all welds are ground off, i use a torch to break kthe PANLE BOND, AND PANLE VIBRATION MATERIL LOOSE!!!, then i use a panle seperator, and it comes off like butter, WITH THE USE OF HEAT!!!!!
junk 1/4 are and alway will have to be repaired after its off, going to happen, once you get the section of the car, start drilling!!! start with 1/8 inch bit then go to 1/4inch or once size above it, or use a step drill bit, i like doing it with those cuts the weld down in now time, and i use oil on my bits to reduce heat and save my bits and cuts the metal faster
same approach, use HEAT!!!, move the torch fast over where you know there is panle bond, like around the wheel house, lower part of the 1/4, 1/4 extension or tail light pocket, and you will hear the panle start to pop, then use the panle seperator, i hammer and dolly the 1/4, hammer out dents hammer out the metal if it got fucked up from removing the new 1/4
then use a grinding disc, to clean up inside and out side of the panle, on the car do the same, clean up mating surfaces, i panle bond around the trunk floor, wheel house and tail light pocket and weld the rest shut
but before, hang the 1/4, put everything back on the car get gaps at the door and hatch, sheet metal screw it down and clamp the crap out of it, then remove the panle, panle bond where i stated, and just put a tack here and there, so the panle doesnt move on ya
the replace the panle vibration material, etch prime inside and out, 3m makes a strip caulk, so you can make the other side the same, oh ya duhhhhhh grind and grind and more grinding
thats how i do a 1/4
TECH Enthusiast
Joined: Apr 2008
Posts: 701
Likes: 0
From: chicago
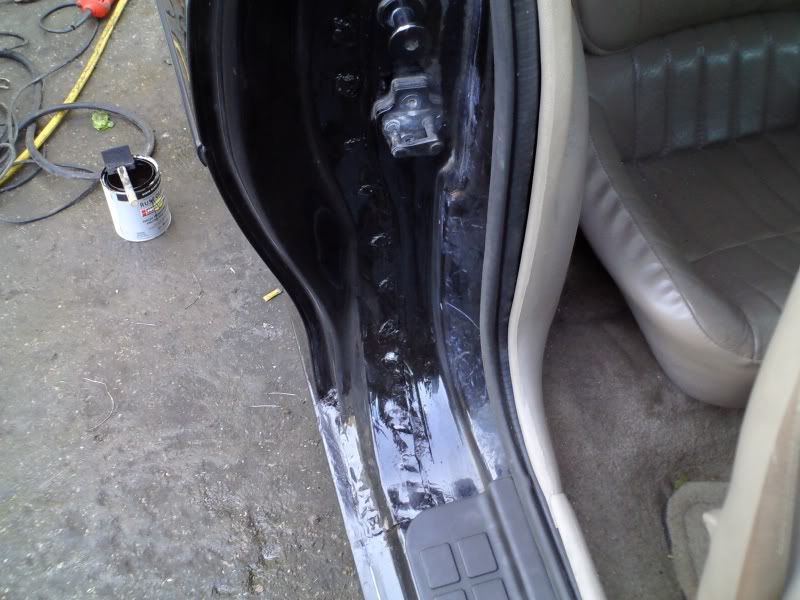
i almost forgot no offense to you who did the 1/4 but if i left something looking like that i would be fired, why didnt you grind the welds down?? did you panle bond where needed?? did you use corrossion resistant material?? no offense at all iam trying to help ya out here dude
and dont hang a 1/4 this is for everyone else and us tech knows this, ya dont hang a 1/4 or any structual part of a car ON A JACK OR LEFT JACKED UP IN THE AIR!!!
you panle bond and weld it shut with out fitting everything, you let the car back down..........your fucked!!!!! the car will move the car will twist back on the ground and all your nice gaps that ya got in the air are gone!!!!!!
thats why we use a stand that we bolt to the studs, so the car is on the suspension its like being on the ground all the weight of the car is on the ground and the body isnt moving around and not flexed
little tips for you "novice" or apprentice body men

Banned
Joined: Jun 2009
Posts: 42
Likes: 0
From: San Antonio, TX
TECH Enthusiast
Joined: Apr 2008
Posts: 701
Likes: 0
From: chicago
you can if you have a resistant spot welder, just like factory does it, but allot of shops dont, but you only panle bodn where it was from factory, like by the outer wheel house, body panle, rocker panle some cars do, in the 1/4 extension, tail light pocket
like on your f-bodies, i do them with panle bond first, at the lower part of the 1/4, wheel house, body panle, and tail light pocket, and weld the rest
boom done
and grind the welds down, make it look nice not sloppy but thats me
like on your f-bodies, i do them with panle bond first, at the lower part of the 1/4, wheel house, body panle, and tail light pocket, and weld the rest
boom done
and grind the welds down, make it look nice not sloppy but thats me

I would chime in but bdyman has it covered i see. It's really a lot of work to someone that has not done it before. Not to be mean here but if you say you work for a tractor trailor repair place than i would really be scared of you doing this. Their usual style is using brute force to accomplish things to do something like this is like a work of art.
So you put the panel bond on say a lap joint, you sandwich it between the joint then weld it? Then grind the welds, blah blah and then seal it over the joint? If you do it this way wouldn't the panel bond burn off when you weld it.
TECH Enthusiast
Joined: Apr 2008
Posts: 701
Likes: 0
From: chicago
only if you use a resistant spot welder, yes if you mig weld it yes the panle bond will fail, but with a resistant spot welder it does not, they do not get as hot as a mig welder, if you ever seen the factory build cars and those big *** robots come with what looks like 2 big lobster claws, thats it thats the resistant spot welder
most panle bond has glass beads in it so when you clamp to joint together, you will hear a small crushing sound thats the glass beads breaking and telling us hey dumb *** you went to far, but ya when the welds are ground down i use my cut off wheel with a welding disc on it, then my angle grinder with a 40 grit disc, then i use a grinding wheel thats made for finishing welds
then ill glaze the where i have to, etch prime or sealer, then i`ll caulk where it belongs, then finish it, you do allot of them for years on end you will get the hang of it, know what and where things belong, and you can have a 1/4 done by the end of the week, start monday finish friday ready for paint