PROJECT "UNLEASHED" (My 99' Trans Am)
 11-07-2011, 05:39 PM
#101
Staging Lane
Join Date: Oct 2011
Location: Creighton saskatchewan Canada.
Posts: 73
Likes: 0
Received 0 Likes
on
0 Posts
Ya Matt your right, nothing like knowing someone who has the experiance with something your building, I think it can be a bit much sometimes, but it is cool seeing others build stuff and you were involved, kind of like it was almost your own car. I am just sitting back and listening, ready to collect the right parts to get building on mine. Cool stuff this LS land.
 11-07-2011, 07:53 PM
#103
10 Second Club
Thread Starter
iTrader: (66)
Join Date: Mar 2007
Location: Indianapolis, IN
Posts: 1,378
Likes: 0
Received 0 Likes
on
0 Posts

Well I got off work around 4:00 today, I Hit up the junkyard, and I had everything I needed by 6:00 to finish my A4 swap. 
Overall, It was a magnificent Monday.
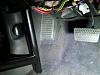
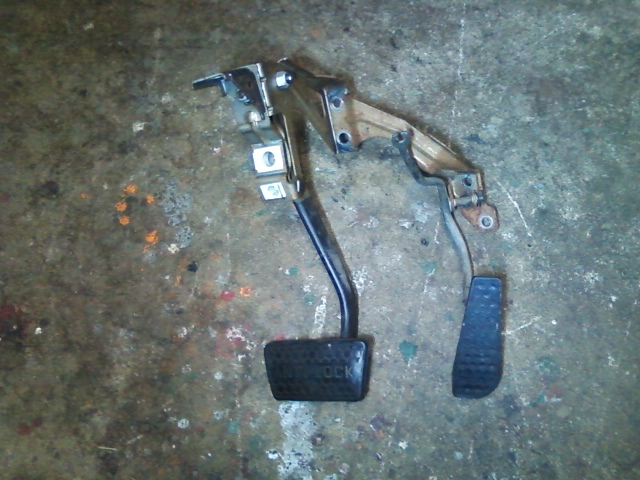
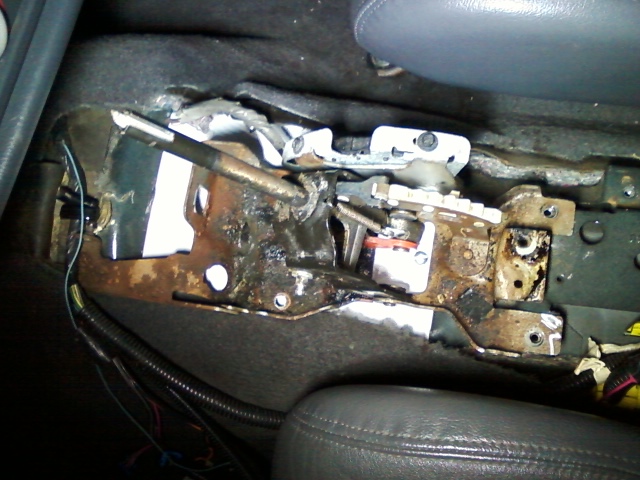
Not to mention, I couldn't resist putting the pedals in and mocking up the shifter assembly. (Note: This is a spare shifter, not the 1 thats gonna be used in my car. I just bought this 1 to have on hand, so it's very dirty and needs to be cleaned and lubed as well.) But for $20, I couldn't pass it up. Only thing wrong with this is the white plastic rod that goes down inside the shifter arm, is broken at the top. Just gotta grab 1 of those from another junkyard now.
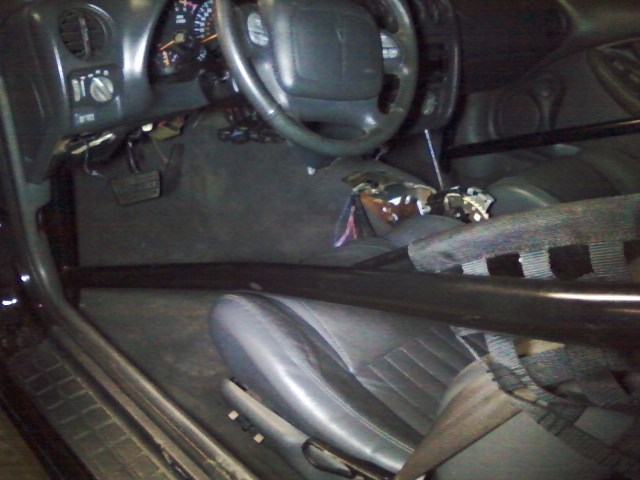
Anyways, Heres some pictures of the "Automatic Transmission" Style Pedals in my car now!
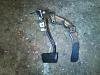

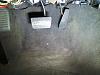
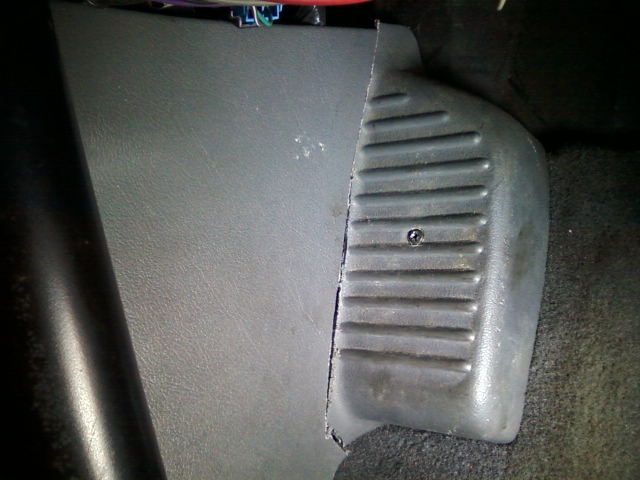
I also never showed in detail how the Plastic goes in between the cage and the body. It wouldn't fit... So I cut it along the foot rest and put it in there in 2 pieces. Doesn't look too bad I guess. But it's the only way I could see to make it work.

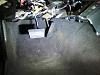
Last picture is of the hole in my firewall for the slave cylinder.
I didn't wanna hack the car up or drill any more holes. So I utilized the pre-existing holes for the slave, Made a piece to cover the hole, drilled holes in the piece of metal, and then used sealer and some sticky black tar like weather-stripping stuff to seal it from the engine bay.
Then instead of having bolts hold it together, I used push-pin style plastic pieces to hold the piece in place so that it would be Very easy to remove if I ever needed to take it out for some reason.
Well here's the pic of the Patch Job I did.
Overall, It was a magnificent Monday.
Not to mention, I couldn't resist putting the pedals in and mocking up the shifter assembly. (Note: This is a spare shifter, not the 1 thats gonna be used in my car. I just bought this 1 to have on hand, so it's very dirty and needs to be cleaned and lubed as well.) But for $20, I couldn't pass it up. Only thing wrong with this is the white plastic rod that goes down inside the shifter arm, is broken at the top. Just gotta grab 1 of those from another junkyard now.
Anyways, Heres some pictures of the "Automatic Transmission" Style Pedals in my car now!


I also never showed in detail how the Plastic goes in between the cage and the body. It wouldn't fit... So I cut it along the foot rest and put it in there in 2 pieces. Doesn't look too bad I guess. But it's the only way I could see to make it work.

Last picture is of the hole in my firewall for the slave cylinder.
I didn't wanna hack the car up or drill any more holes. So I utilized the pre-existing holes for the slave, Made a piece to cover the hole, drilled holes in the piece of metal, and then used sealer and some sticky black tar like weather-stripping stuff to seal it from the engine bay.
Then instead of having bolts hold it together, I used push-pin style plastic pieces to hold the piece in place so that it would be Very easy to remove if I ever needed to take it out for some reason.
Well here's the pic of the Patch Job I did.
 11-07-2011, 09:40 PM
#104
Staging Lane
iTrader: (1)

Join Date: Feb 2008
Location: zionsville, indiana
Posts: 76
Likes: 0
Received 0 Likes
on
0 Posts
Lol yea I kno I need another one bad. I still got the gmc it's a super heavy and slow LSX I think I'm gonna finish my Chevelle first tho for my dad. I'm leaning towards a 6 speed formula ws6 that's a solid roof. Pewter of course ;p
I think I'm gonna finish my Chevelle first tho for my dad. I'm leaning towards a 6 speed formula ws6 that's a solid roof. Pewter of course ;p
11-08-2011, 09:03 PM
#106
10 Second Club
Thread Starter
iTrader: (66)
Join Date: Mar 2007
Location: Indianapolis, IN
Posts: 1,378
Likes: 0
Received 0 Likes
on
0 Posts
Sounds like a plan brotha. On both cars. The Gf's and your Chevelle.
And oh don't even get me started on the hard top formula's. I LOVE THEM!
Gotta be Black tho. I love Black Formula's. And Trans Am's Can You Tell!
BTW, I got some more work done on the TA today.
I mounted the shifter in the car for good, ran the shifter cable through the floor, and even put the 6 speed console back in the car. It took alot of playing with to get the automatic shifter to work with a 6 speed console, but I managed to make it work. But the shifter is Very close to the HVAC controls. I have JUST ENOUGH room to fit my hand all the way around the shifter without hitting the HVAC Controls.
Gonna finish the brake lines up on it tomorrow. I haven't ran any new brake lines in the rear yet. My last car was a 3 channel setup, and this car is a 4 channel setup, so I need to run new lines to the rear brakes.
**I hate messing with brake lines.
It's hard to bend them up to where they actually look good...
The Gf's and your Chevelle.And oh don't even get me started on the hard top formula's.
I LOVE THEM! Gotta be Black tho.
I love Black Formula's. And Trans Am's BTW, I got some more work done on the TA today.
I mounted the shifter in the car for good, ran the shifter cable through the floor, and even put the 6 speed console back in the car. It took alot of playing with to get the automatic shifter to work with a 6 speed console, but I managed to make it work. But the shifter is Very close to the HVAC controls. I have JUST ENOUGH room to fit my hand all the way around the shifter without hitting the HVAC Controls.
Gonna finish the brake lines up on it tomorrow. I haven't ran any new brake lines in the rear yet. My last car was a 3 channel setup, and this car is a 4 channel setup, so I need to run new lines to the rear brakes.
**I hate messing with brake lines.
It's hard to bend them up to where they actually look good...
11-09-2011, 07:45 PM
#107
10 Second Club
Thread Starter
iTrader: (66)
Join Date: Mar 2007
Location: Indianapolis, IN
Posts: 1,378
Likes: 0
Received 0 Likes
on
0 Posts
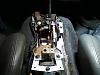
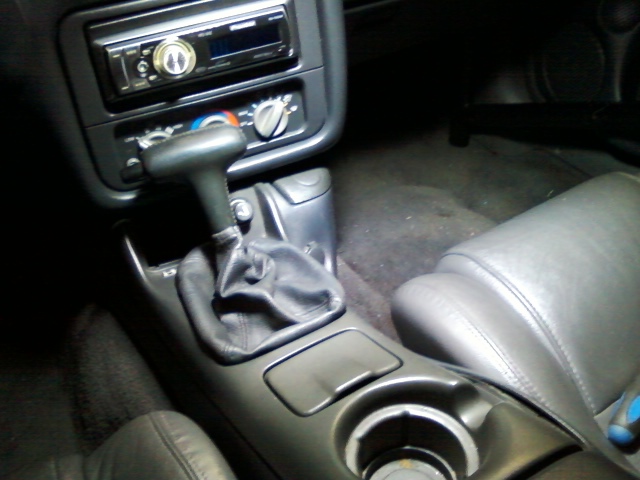
Heres the progress of the Shifter install into the car. All while reataining the factory 6 speed console and shift boot.
*The shifter T Handle is getting replaced considering it is not in the greatest shape! It'll get a Very nice one in it's place.
Heres the pics from last night!
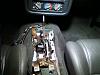
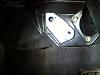
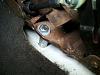
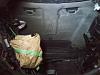
In the 1st picture, Theres actually 4 L Brackets there. "They are stacked on top of each other", and theres 1 bolt holding the 4 pieces to the chassis. I was concerned with how sturdy it was gonna be, But that's all I could find in the garage. But after putting it together, I was satisfied with it's durability. If you notice, the brackets actually Lay on the chassis, It actually creates a Very sturdy Support for the Shifter and the brackets. Along with the 2 Long bolts holding the front section of the shifter to the floor, The shifter does NOT wanna budge. I Literally "Yanked" the shi+ out of it - side to side and front to back, and it didn't even try to budge.
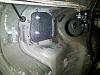
Here is a hole I cut into the floor for the shift cable, And I put a grommet in there to keep the cable from getting cut into by the cut metal.
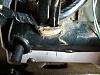
Theres no Binding whatsoever...
Here are some pics of the front being bolted to the floor. I used those pieces to create some support there, and ran a bolt through them with washers on each side of the shifter and the floor.
And the shifter cable going through the floor pan.
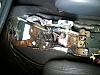
Here is a pic of how close it is when it's in Park. This was the only way I could make the Auto shifter work with the 6 speed console. Otherwise, The shifter wouldn't pull down past 3rd gear. I moved the shifter as far forward as possible and it finally will go all the way down into 1st gear and still go up into Park. My only other option, If this didn't work was to install a B&M Shifter in the car, and then it would've been fine. But I wanted the "STOCK" look.
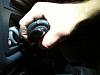
Here is the shifter all the way down in 1st gear...
And back in Park...
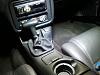
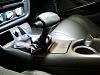
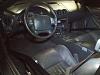
And an overview of the whole Auto Swap Completed! Everything from the Console, to the Shifter, and down to the Gas and Brake Pedals.
I'll update again as soon as I get more done on the car. It was pretty cold out tonight when I got home, so I chose to just relax and not work on the car. But I'll get the brake lines finished soon, and post pics of some other stuff!
-James
*The shifter T Handle is getting replaced considering it is not in the greatest shape!
It'll get a Very nice one in it's place. Heres the pics from last night!
In the 1st picture, Theres actually 4 L Brackets there. "They are stacked on top of each other", and theres 1 bolt holding the 4 pieces to the chassis. I was concerned with how sturdy it was gonna be, But that's all I could find in the garage. But after putting it together, I was satisfied with it's durability. If you notice, the brackets actually Lay on the chassis, It actually creates a Very sturdy Support for the Shifter and the brackets. Along with the 2 Long bolts holding the front section of the shifter to the floor, The shifter does NOT wanna budge. I Literally "Yanked" the shi+ out of it - side to side and front to back, and it didn't even try to budge.

Here is a hole I cut into the floor for the shift cable, And I put a grommet in there to keep the cable from getting cut into by the cut metal.

Theres no Binding whatsoever...
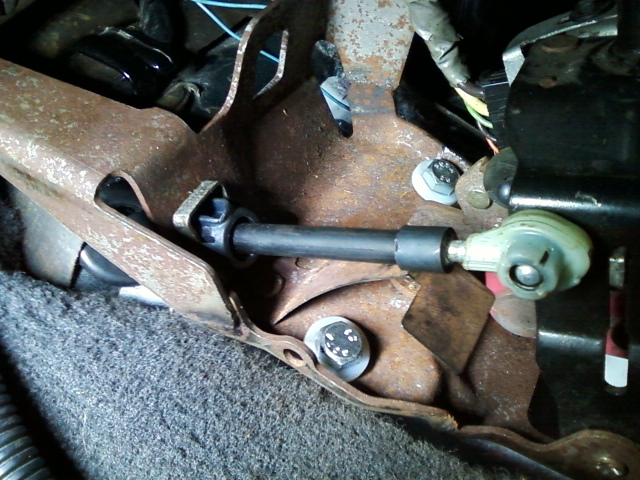
Here are some pics of the front being bolted to the floor. I used those pieces to create some support there, and ran a bolt through them with washers on each side of the shifter and the floor.


And the shifter cable going through the floor pan.
Here is a pic of how close it is when it's in Park. This was the only way I could make the Auto shifter work with the 6 speed console. Otherwise, The shifter wouldn't pull down past 3rd gear. I moved the shifter as far forward as possible and it finally will go all the way down into 1st gear and still go up into Park. My only other option, If this didn't work was to install a B&M Shifter in the car, and then it would've been fine. But I wanted the "STOCK" look.

Here is the shifter all the way down in 1st gear...

And back in Park...
And an overview of the whole Auto Swap Completed! Everything from the Console, to the Shifter, and down to the Gas and Brake Pedals.

I'll update again as soon as I get more done on the car. It was pretty cold out tonight when I got home, so I chose to just relax and not work on the car. But I'll get the brake lines finished soon, and post pics of some other stuff!
-James
11-12-2011, 09:23 PM
#108
10 Second Club
Thread Starter
iTrader: (66)
Join Date: Mar 2007
Location: Indianapolis, IN
Posts: 1,378
Likes: 0
Received 0 Likes
on
0 Posts
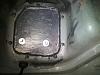
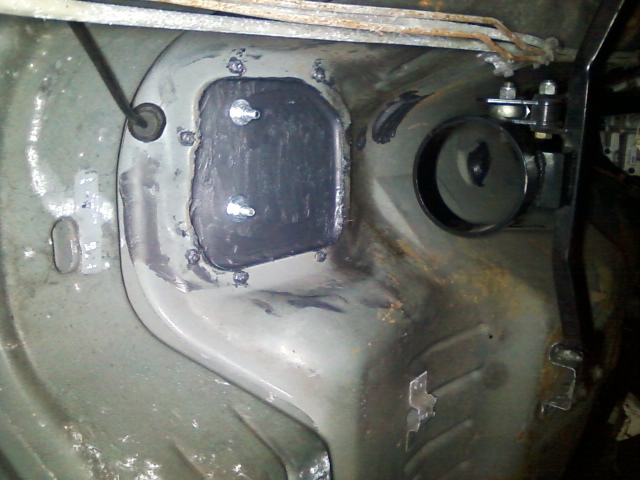
Got a few more pics of the Under-side of the Shifter Plate I installed in place of the Hole for the 6 Speed. (I reused the mounting holes for the Rubber 6 Speed Boot) Just used a little bit bigger Bolts instead of the Small factory screws!
I also used RTV "ALL OVER" the plate and the hole to keep it sealed from any moisture that could possibly get into the car. And, This will all be covered with POR 15 or Undercoating anyways.
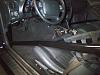
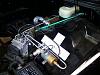
Under hood shot, with the hood closed! IDK Why I took a picture.
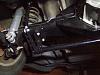
Trans Tunnel Shot, Before the Undercoating goes on...
Heres some pictures of the Brake Line Install I did in the rear of the car. What A PITA too BTW! I ran around town all day looking for the fittings and etc. that I needed to install everything without cutting lines and flaring the ends.
*I hate doing that stuff!
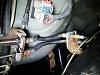
** I got too long of a Line on this side, I'm gonna grab 1 thats just a little shorter next time I get around to it, and change it out so it doesn't look like crap everytime I look under there. ** It's just me being picky!
Just used a little bit bigger Bolts instead of the Small factory screws!I also used RTV "ALL OVER" the plate and the hole to keep it sealed from any moisture that could possibly get into the car. And, This will all be covered with POR 15 or Undercoating anyways.

Under hood shot, with the hood closed! IDK Why I took a picture.

Trans Tunnel Shot, Before the Undercoating goes on...

Heres some pictures of the Brake Line Install I did in the rear of the car. What A PITA too BTW! I ran around town all day looking for the fittings and etc. that I needed to install everything without cutting lines and flaring the ends.
*I hate doing that stuff!


** I got too long of a Line on this side, I'm gonna grab 1 thats just a little shorter next time I get around to it, and change it out so it doesn't look like crap everytime I look under there. ** It's just me being picky!
 11-12-2011, 09:37 PM
#109
10 Second Club
Thread Starter
iTrader: (66)
Join Date: Mar 2007
Location: Indianapolis, IN
Posts: 1,378
Likes: 0
Received 0 Likes
on
0 Posts
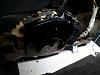
Drivers side Brake line was just a bit too small, but It fit just close enough to still fit in the bracket on the reaend. Although it's not bent how i wanted it to be.
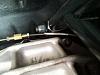
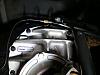
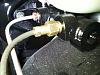
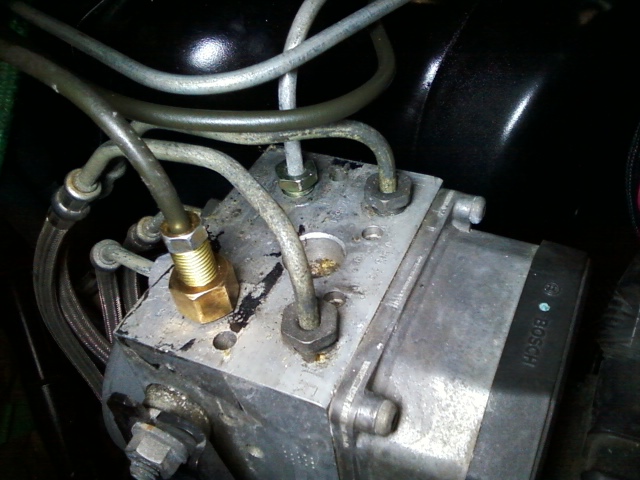
Found an Adapter for the ABS Block, This Prevented me from cutting the line and changing the fittings and then flaring the line back together...
I didn't like the look of the fitting, so for now, It's getting covered until I can figure something else out..
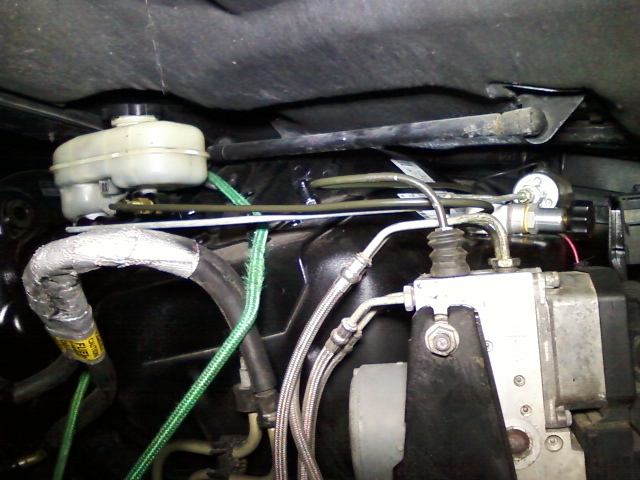
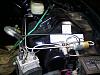
Found another fitting for the Master Cylinder, Ran a smaller diameter line from the M/C to the Proportioning Valve, and from the Proportioning Valve to the ABS Block with the other fitting...
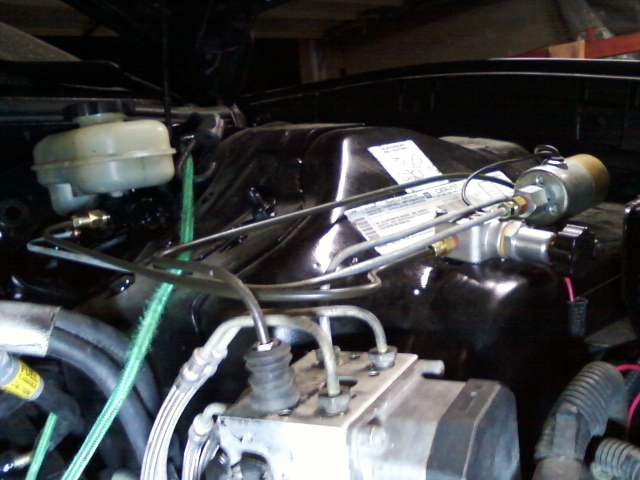
Took a few pics with the hood closed to check for clearance... I had plenty!


AND, The finished product. Not the prettiest IMHO, But It sure beats the hell out of Cutting a ton of Brake lines, and then having to flare everything all over again. I will be the first person to admit, I hate it... And I suck at it. But i can do it, and keep them from leaking. So I guess that's still a Good thing. lol


Found an Adapter for the ABS Block, This Prevented me from cutting the line and changing the fittings and then flaring the line back together...
I didn't like the look of the fitting, so for now, It's getting covered until I can figure something else out..

Found another fitting for the Master Cylinder, Ran a smaller diameter line from the M/C to the Proportioning Valve, and from the Proportioning Valve to the ABS Block with the other fitting...

Took a few pics with the hood closed to check for clearance... I had plenty!
AND, The finished product. Not the prettiest IMHO, But It sure beats the hell out of Cutting a ton of Brake lines, and then having to flare everything all over again. I will be the first person to admit, I hate it... And I suck at it. But i can do it, and keep them from leaking. So I guess that's still a Good thing. lol


 11-12-2011, 09:47 PM
#110
10 Second Club
Thread Starter
iTrader: (66)
Join Date: Mar 2007
Location: Indianapolis, IN
Posts: 1,378
Likes: 0
Received 0 Likes
on
0 Posts
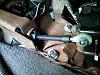
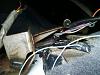
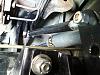
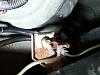
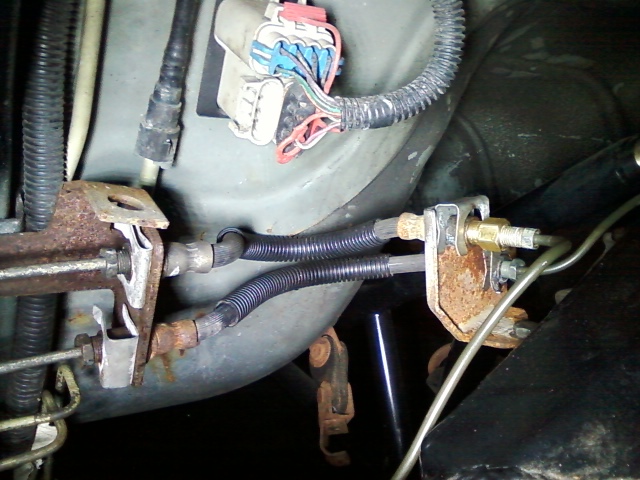
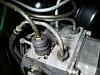
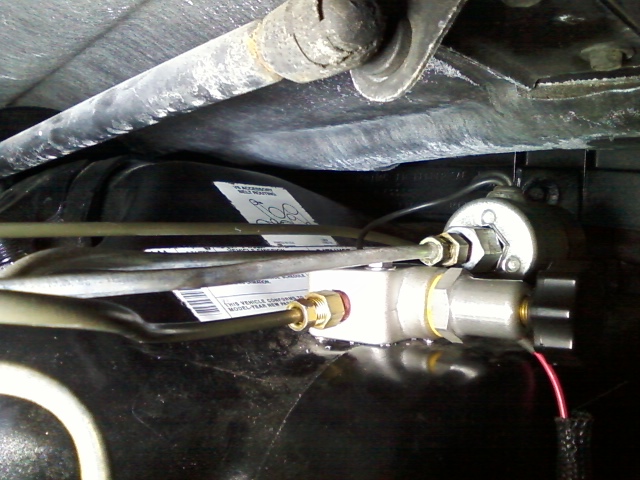
And heres the last pic of the Brake Lines, Proportioning Valve, And Line Lock Kit that I installed today.
**The Line Lock was a friends of mine, who lost his life due to a car falling on top of him while installing his transmission. (RIP PurdueRanger)
So I def. wanted to install this kit over a different 1.
**It's the least I can do to make him a part of my car build.
I also decided to place the Proportioning Valve right next to it, b/c I figured it was easy to get to if I needed to replace it for any reason. And also, I kinda liked how all the lines went over there on the drivers side. It added some Extra Attention to the engine bay I think.
I'll add some more pics of my progress with the car soon.
I'm just not quite sure what I wanna tackle on it next...
~ Stay Tuned!!!!
**The Line Lock was a friends of mine, who lost his life due to a car falling on top of him while installing his transmission. (RIP PurdueRanger)
So I def. wanted to install this kit over a different 1.
**It's the least I can do to make him a part of my car build.
I also decided to place the Proportioning Valve right next to it, b/c I figured it was easy to get to if I needed to replace it for any reason. And also, I kinda liked how all the lines went over there on the drivers side. It added some Extra Attention to the engine bay I think.

I'll add some more pics of my progress with the car soon.
I'm just not quite sure what I wanna tackle on it next...
~ Stay Tuned!!!!
12-22-2011, 07:50 PM
#112
10 Second Club
Thread Starter
iTrader: (66)
Join Date: Mar 2007
Location: Indianapolis, IN
Posts: 1,378
Likes: 0
Received 0 Likes
on
0 Posts
3/16" and 1/4" are the factory sizes.
But they use some wierd fittings. You can always cut the lines if you have to, and just reuse the fittings you need though, and then double flare everything and put it all back together!
But they use some wierd fittings. You can always cut the lines if you have to, and just reuse the fittings you need though, and then double flare everything and put it all back together!
01-06-2012, 02:37 PM
#113
10 Second Club
Thread Starter
iTrader: (66)
Join Date: Mar 2007
Location: Indianapolis, IN
Posts: 1,378
Likes: 0
Received 0 Likes
on
0 Posts
Few more pics...
I won't be doing much else to this car for a while. I'm to the point now, that an engine and trans install is my next step!
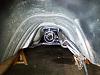
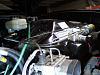
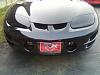
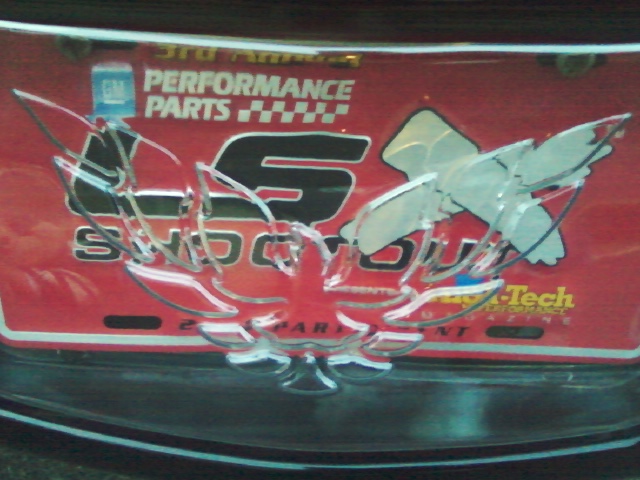
Here's a few pictures of the Clear bird. before I paint it with clear coat/Black mixed. Trying to SMOKE it out and I plan to use an LED strip at the top to illuminate my new front plate this year. It'll say LSX on the front and that's it. But it won't be seen until night time hopefully! Or if you look close during the day!

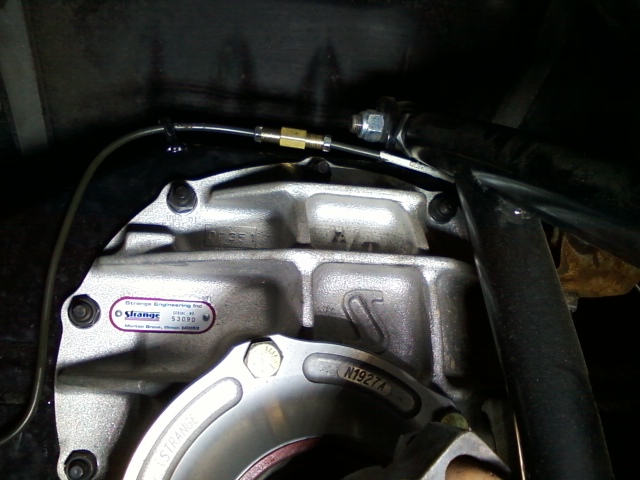
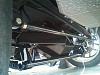
Another pic of the rearend setup!
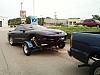
Bringing the car back from MWC. All I could get was a dolly. lol But hey it worked great!
And I just thought this was cool, so I posted it. lol
I won't be doing much else to this car for a while. I'm to the point now, that an engine and trans install is my next step!
Here's a few pictures of the Clear bird. before I paint it with clear coat/Black mixed. Trying to SMOKE it out and I plan to use an LED strip at the top to illuminate my new front plate this year. It'll say LSX on the front and that's it. But it won't be seen until night time hopefully! Or if you look close during the day!

Another pic of the rearend setup!

Bringing the car back from MWC.
All I could get was a dolly. lol But hey it worked great! 
And I just thought this was cool, so I posted it. lol
 01-08-2012, 09:54 PM
#115
10 Second Club
Thread Starter
iTrader: (66)
Join Date: Mar 2007
Location: Indianapolis, IN
Posts: 1,378
Likes: 0
Received 0 Likes
on
0 Posts
Thanks Man!
I ended up finishing everything I could while it was warm.
And now it's just sitting in the garage. lol
I am actually in the process of grabbing another 99 TA roller for the GF. So I will have another build going on very soon! Can't Wait.
This car will be done this summer for sure, and so will the GF's.
*** Just Hoping everything falls in place like it has been so far!
-James
I ended up finishing everything I could while it was warm.
And now it's just sitting in the garage. lol
I am actually in the process of grabbing another 99 TA roller for the GF. So I will have another build going on very soon!
Can't Wait.This car will be done this summer for sure, and so will the GF's.
*** Just Hoping everything falls in place like it has been so far!
-James
01-11-2012, 01:50 PM
#118
Launching!
iTrader: (29)

Join Date: Nov 2007
Location: Richmond, VA
Posts: 250
Likes: 0
Received 0 Likes
on
0 Posts
Do you have any pictures of how you mounted the sensors back on the pedals, especially from going from a manual. A good explanantion of that and the wiring would be really, really helpful, as I am doing this now, lol.
01-11-2012, 03:50 PM
#119
10 Second Club
Thread Starter
iTrader: (66)
Join Date: Mar 2007
Location: Indianapolis, IN
Posts: 1,378
Likes: 0
Received 0 Likes
on
0 Posts
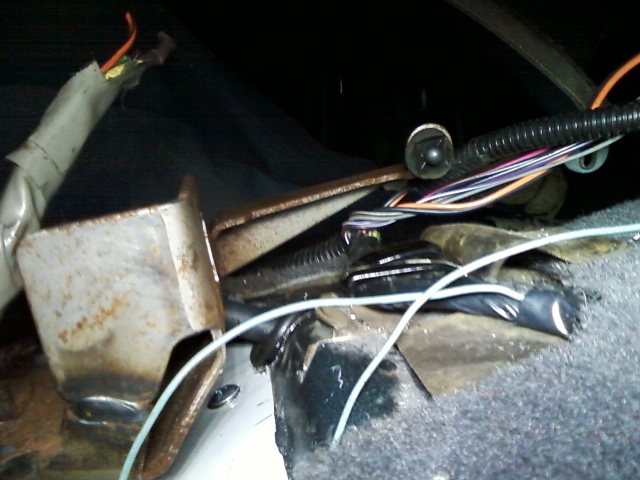
The wiring I have not done yet, BUT.
I do know there are a few ways of doing it.
I'm planning on running all of the wires back up to the shifter, and wire them into the factory neutral saftey switch on the side of the shifter.
I know the Brake light switch and Cruise Control Interupt switch will fit the factory A4 pedal assembly. But the Nuetral Safety Switch for an M6, does not. It's wired into the NSS on the right side of the Auto Shifter Assembly.
As far as the neutral saftey switch goes, on the M6 Pedals, you can do 1 of 2 things. Extend the wires and run them to the neutral safety switch, Wire them together so it will start at all times, put it on a toggle, or just mount it somewhere so you can press the button down when starting the car (Kinda like a override switch on an alarm system) Theres other wires you'll need to hook up for the reverse lights to work as well. Again, wire them into the NSS or on a toggle. Or just leave them, and they won't work. Theres also wires for the hatch release to work as well. Again, wire them on a toggle, or together and they'll allow the hatch to work at anytime.
I'll see if I can find the info I was using to do mine, and I'll get back with you.
-James