'95 Formula M6


 03-21-2014, 07:20 PM
#22

My vacation didn't pan out the way I'd hoped in terms of time for car projects. I also am so g-darn sick of the gray, cold weather that I was just not itching to spend much time in the barn doing anything. I have a torpedo out there, but it still isn't going to be in my comfort zone of 70 degrees.
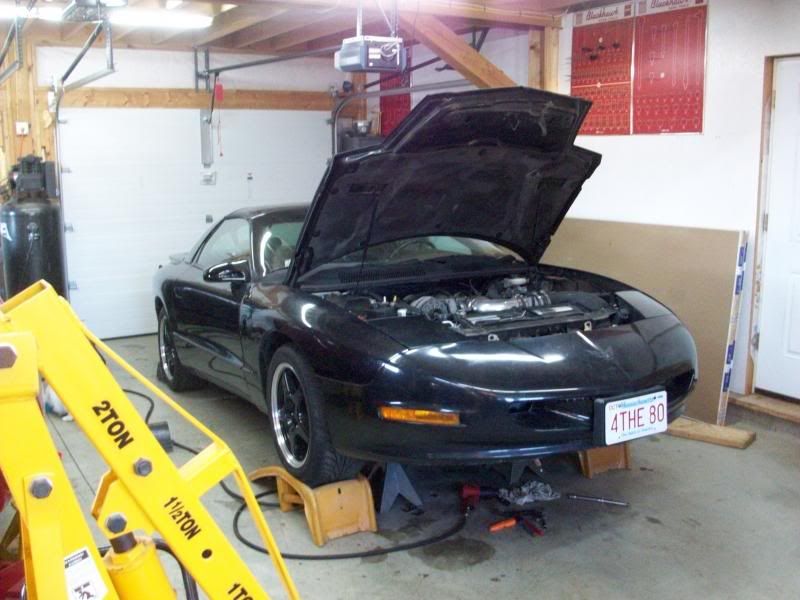
Anyway, the front of the car is up on ramps, with stands positioned as backups in case of catastrophe.
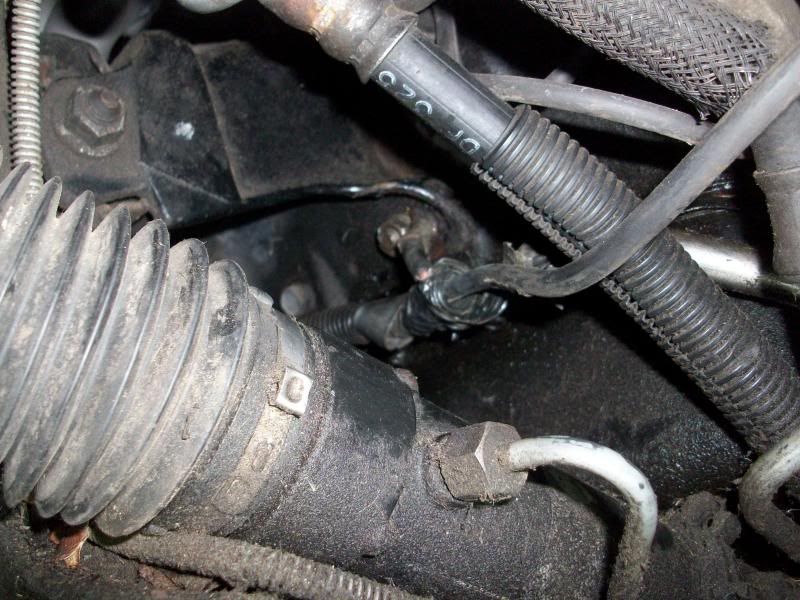
I am often reminded of how jobs that should literally take five minutes become hassles. I just want to throw on a new negative battery cable. I got a nice, thick new one from Delco. It might even be old enough to have been made somewhere in North America; I don't know and can't find a COO stamp anywhere. Anyway, the stud for the accessory lead mounted on the PS fender well fought me. It had fused to the terminal of the accessory lead, so turning it turned the cable. Got that off and went under the car and located the other end of the negative cable where it grounds to the PS of the engine block down low. Same darn thing there. The bolt or stud or whatever it is that secures the end of the cable and also secures a metal bracket to route the positive cable seems fused to the terminal end. This makes the negative cable, positive cable and bracket all want to twist and prevents me from just backing the bolt out. In the few minutes I had to dink around I did not find a way to hold things in place (it's cramped under there) to keep everything but the bolt from moving. What a lame obstacle!
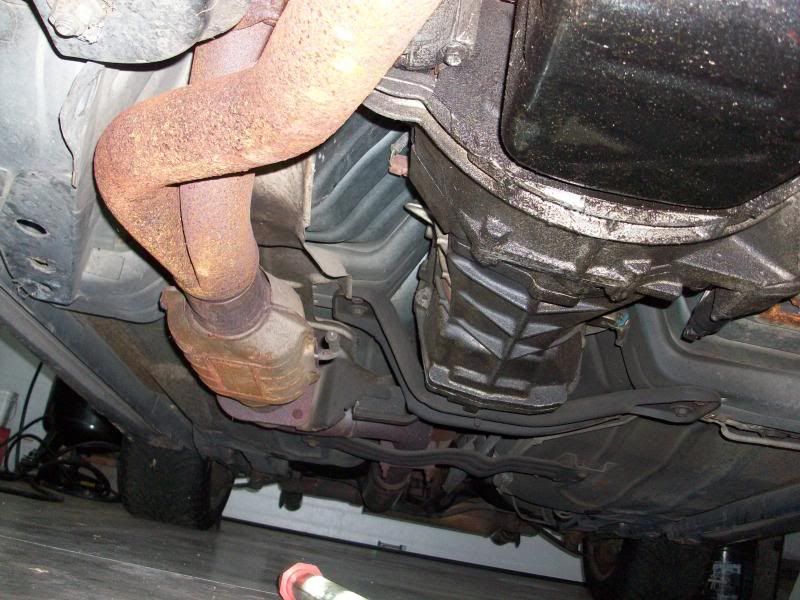
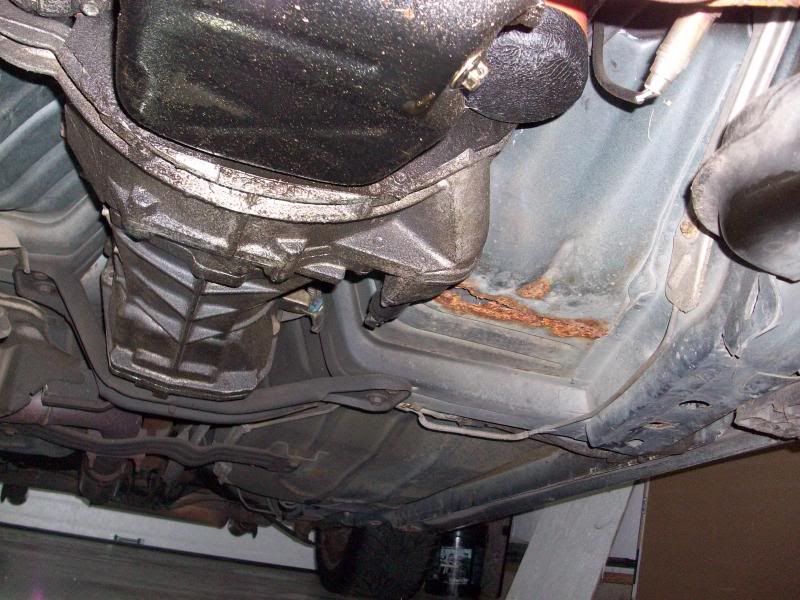
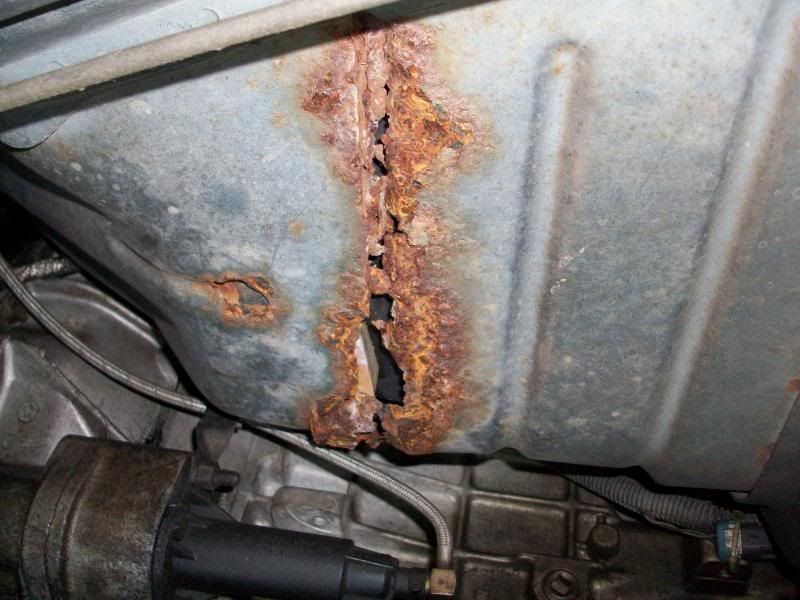
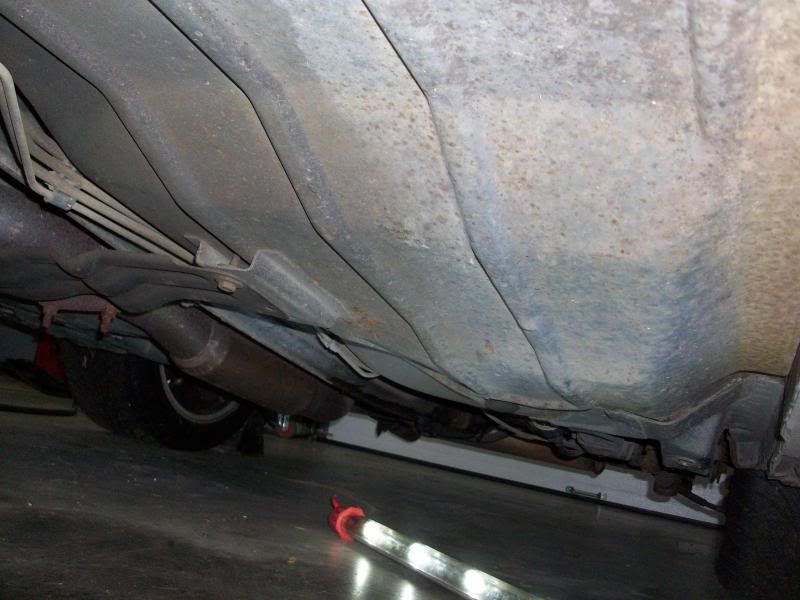
The good news is that the underside of the car really is in good condition for a car in this part of the country. My last Formula had all kinds of crust on the floors, control arms, axle, suspension, you name it. This car has very little of that. The ONLY rot I can see, and it is a large-ish area and does suck, is at a seam on the DS, up towards the front of the car. I'll have to pull the carpet and see what the deal is from that side, but the metal feels weak around the obviously rotten section. I have a welder, but can't weld. My brother might be getting good enough himself to teach me, though.

It also appears that the reason why one of the lines to the Opti is plugged with a bolt is because the PO installed an Opti with just one vacuum port, which I assume means an earlier non-vented version?
Anyway, the front of the car is up on ramps, with stands positioned as backups in case of catastrophe.
I am often reminded of how jobs that should literally take five minutes become hassles. I just want to throw on a new negative battery cable. I got a nice, thick new one from Delco. It might even be old enough to have been made somewhere in North America; I don't know and can't find a COO stamp anywhere. Anyway, the stud for the accessory lead mounted on the PS fender well fought me. It had fused to the terminal of the accessory lead, so turning it turned the cable. Got that off and went under the car and located the other end of the negative cable where it grounds to the PS of the engine block down low. Same darn thing there. The bolt or stud or whatever it is that secures the end of the cable and also secures a metal bracket to route the positive cable seems fused to the terminal end. This makes the negative cable, positive cable and bracket all want to twist and prevents me from just backing the bolt out. In the few minutes I had to dink around I did not find a way to hold things in place (it's cramped under there) to keep everything but the bolt from moving. What a lame obstacle!
The good news is that the underside of the car really is in good condition for a car in this part of the country. My last Formula had all kinds of crust on the floors, control arms, axle, suspension, you name it. This car has very little of that. The ONLY rot I can see, and it is a large-ish area and does suck, is at a seam on the DS, up towards the front of the car. I'll have to pull the carpet and see what the deal is from that side, but the metal feels weak around the obviously rotten section. I have a welder, but can't weld. My brother might be getting good enough himself to teach me, though.


It also appears that the reason why one of the lines to the Opti is plugged with a bolt is because the PO installed an Opti with just one vacuum port, which I assume means an earlier non-vented version?
 03-23-2014, 08:25 PM
#23
So, after some reading, thought, and talking to a fellow I know, I believe that the previous owner installed a non-vented cap on the vented Opti base. This is not good. The vacuum line from the air intake is bringing fresh air in to the unit. That air will certainly have moisture in it. The sparks inside the cap are creating ozone. Neither the moisture nor the ozone are going to have a way to get out since the eliminated vacuum line is the one that would pull that crap out of the unit. An unvented Opti base would actually have holes drilled in it to allow the unit to breathe a bit, but the vented base I have does not have these holes so by eliminating the "exhaust" line you are guaranteeing that the internals are going to be contaminated.
Whether this is responsible for the current codes and poor performance, it is certainly a bad setup. I believe the prudent thing to do is to pull the assembly to evaluate it.
Quality units are quite costly, but if I find this thing is junk I am going to consider going with the best replacement. I also might have access to some used but good parts; I will investigate that.
03-29-2014, 08:52 PM
#24
I finally had a little bit of time to work on this after lunch today. I have the water pump out. If I can get another chunk of time, I'll pull the balancer and the Opti. I'm also going to be removing the AIR pump and associated components.
I'm quite eager to see what the Opti looks like inside.
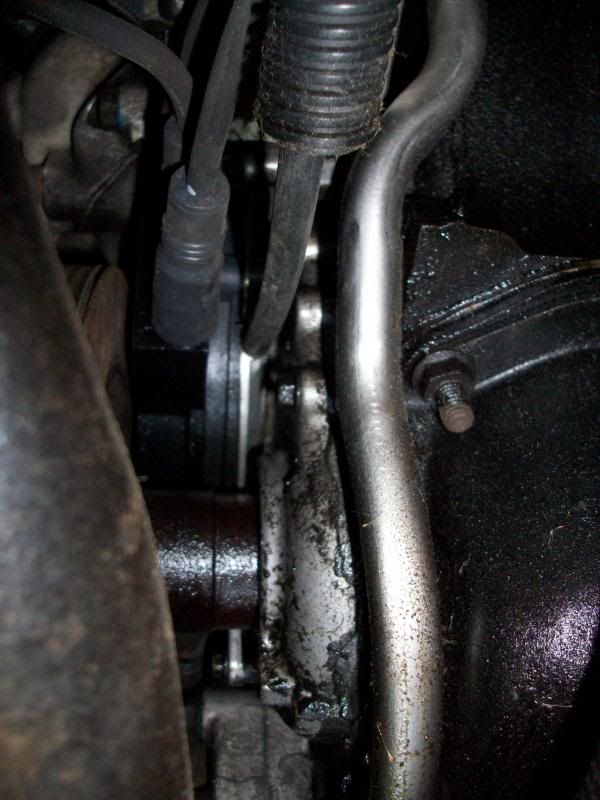
This part is exclusively for the AIR pump, correct?
The area around the bottom of the timing cover looks very messy and gloopy. I want to wipe away the crap and see what is going on while I'm doing this.
I'm quite eager to see what the Opti looks like inside.


This part is exclusively for the AIR pump, correct?

The area around the bottom of the timing cover looks very messy and gloopy. I want to wipe away the crap and see what is going on while I'm doing this.
 04-02-2014, 06:57 PM
#25
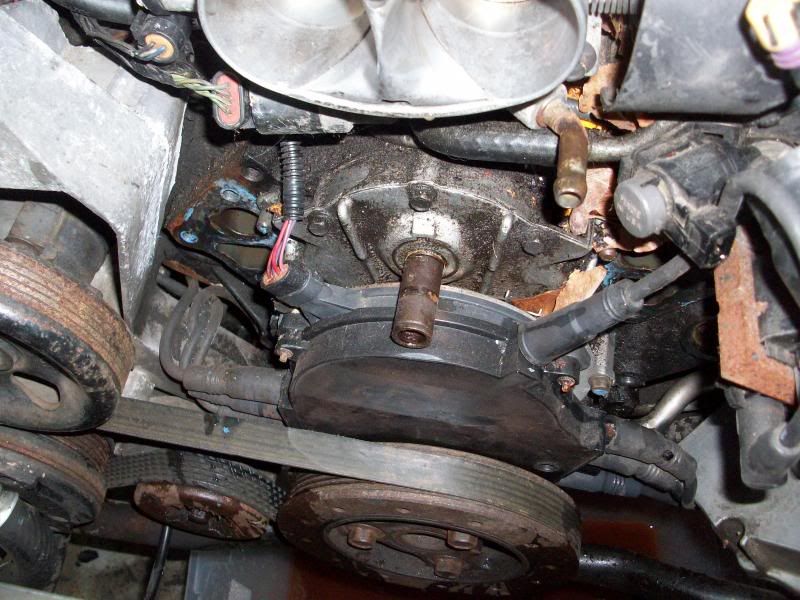
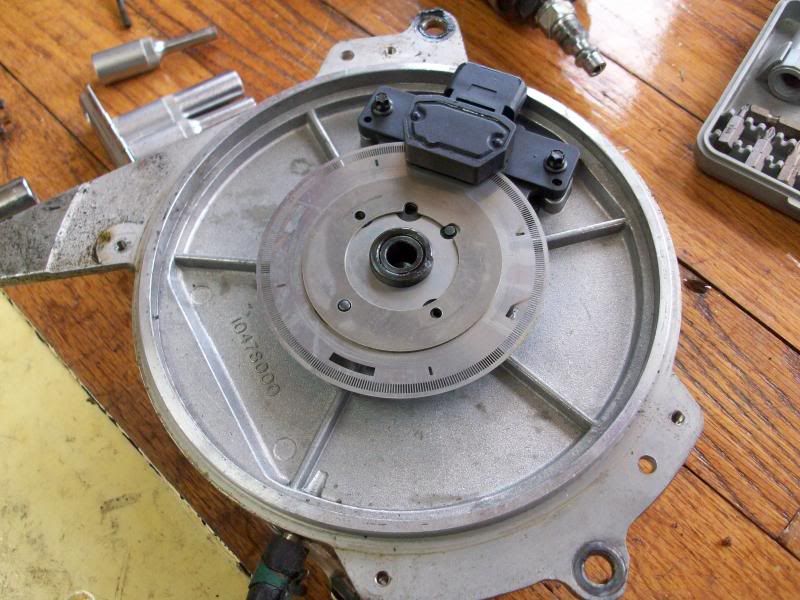
I had one hour to work on the car after I got home today. I got the Opti off, thanks in part to the balancer pulling off by hand; otherwise I was going to have to wait to get the right bolts to use with my puller.
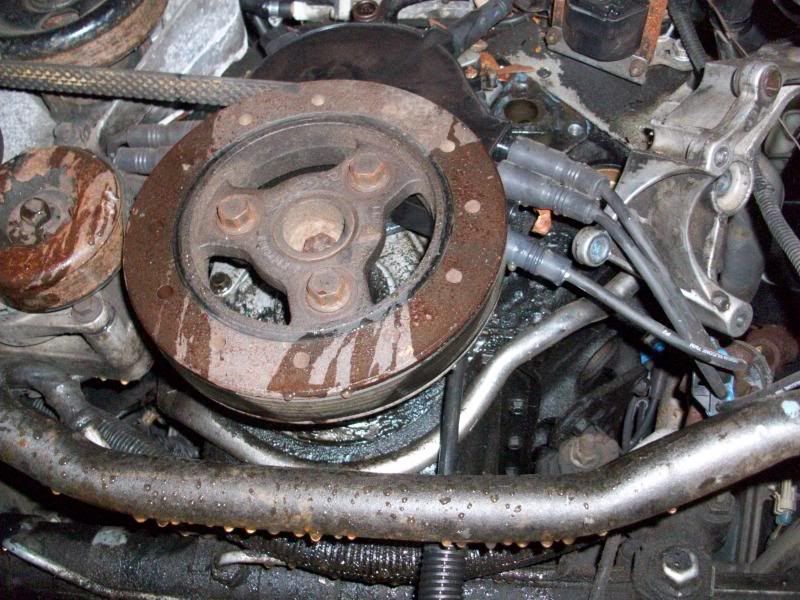
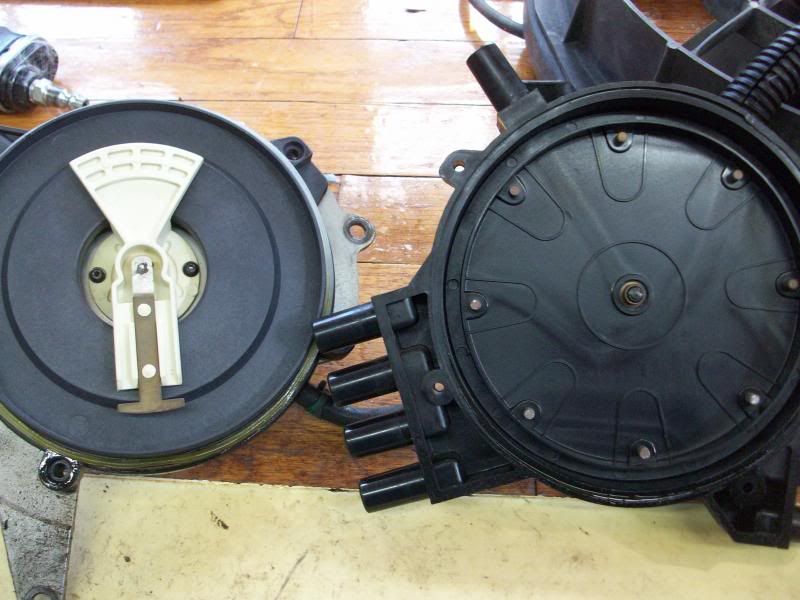
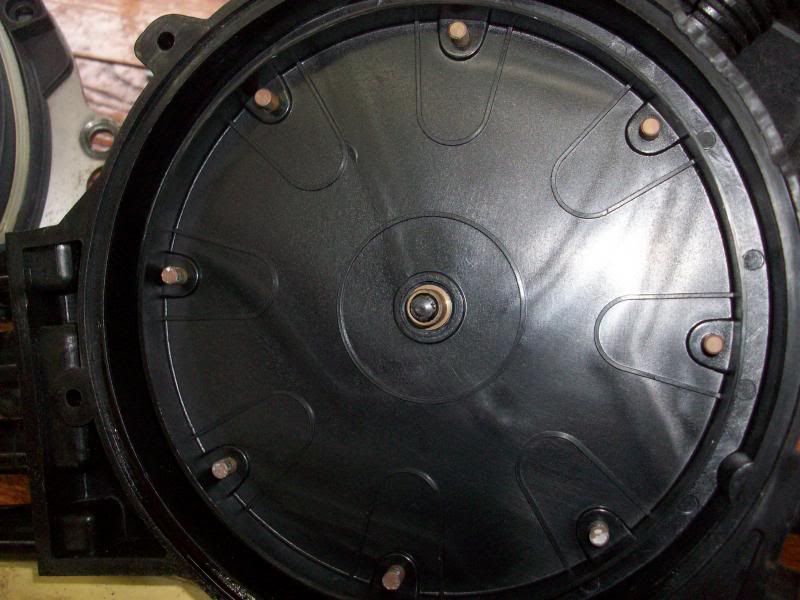
The Opti looks like it hasn't been on the car that long. If you guys have comments about how it looks in there, I'd love to hear them. The terminal in the center, that the coil supplies, had some black shmutz on it, and the tang on the rotor also had this greasy shmutz. I can't imagine that wasn't having some negative effect. The rotor tang also has a crater in it; I assume this is not normal?
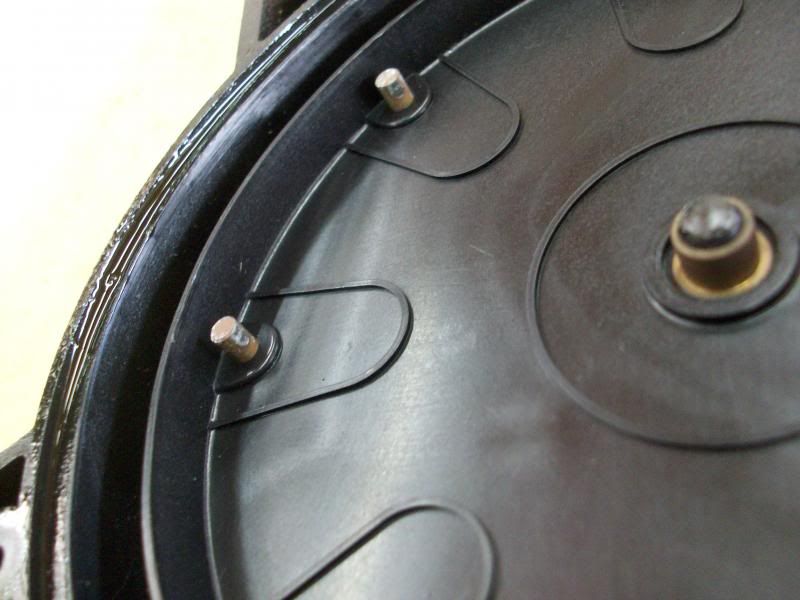
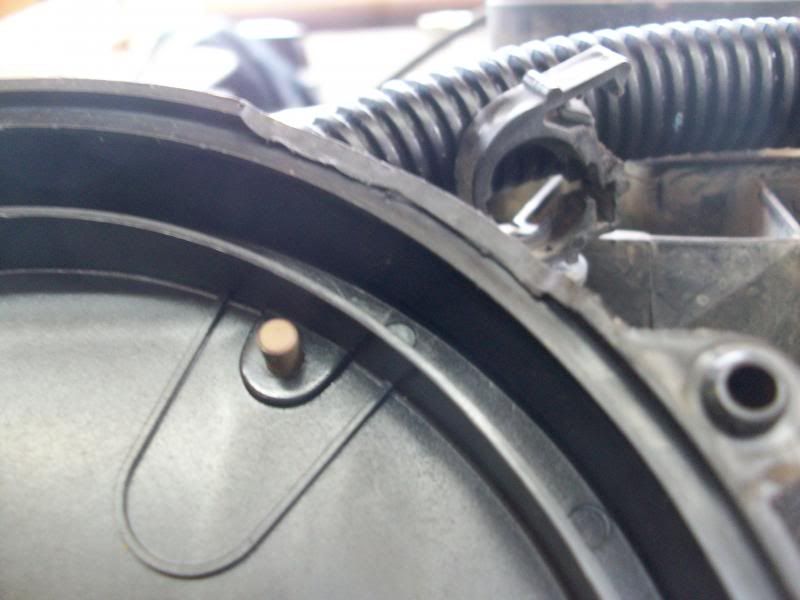
Some kind of "custom" clearancing here


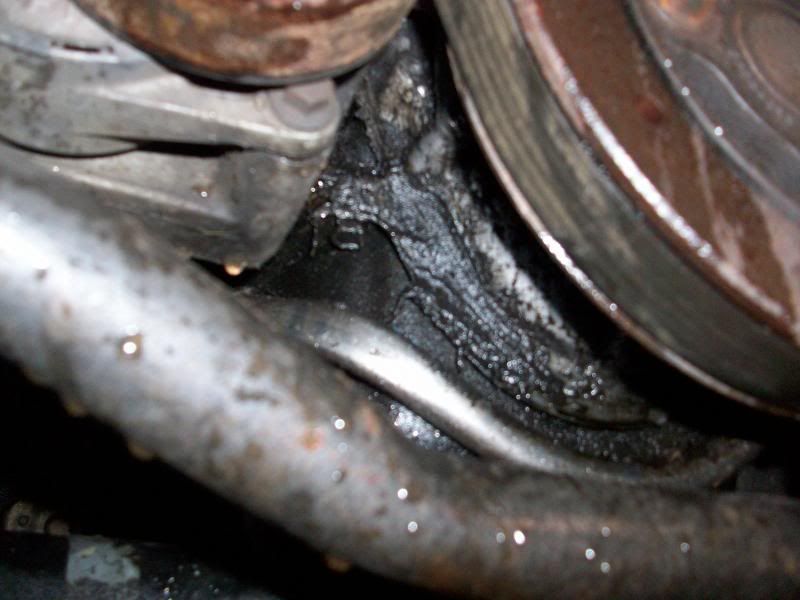
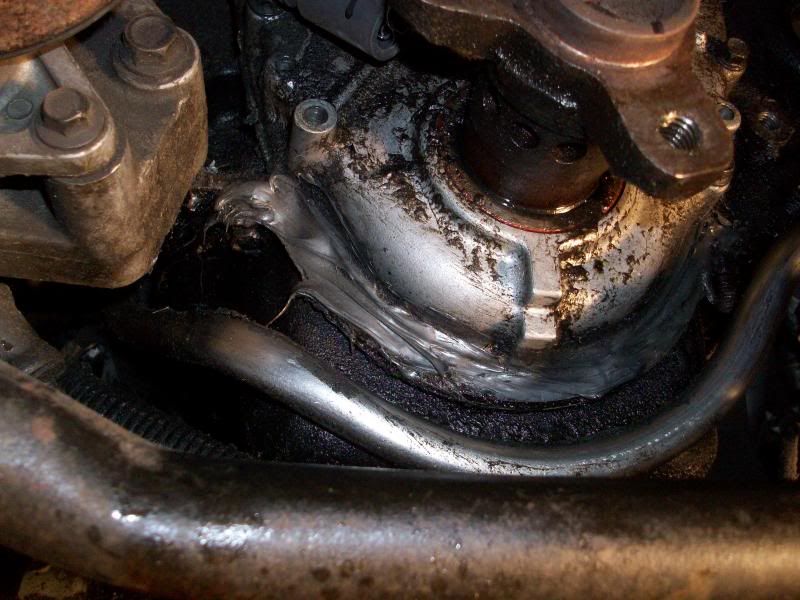
Sweet anti-leak measures. So, how much of a hassle is it to pull this cover, replace the seals, and button back up?
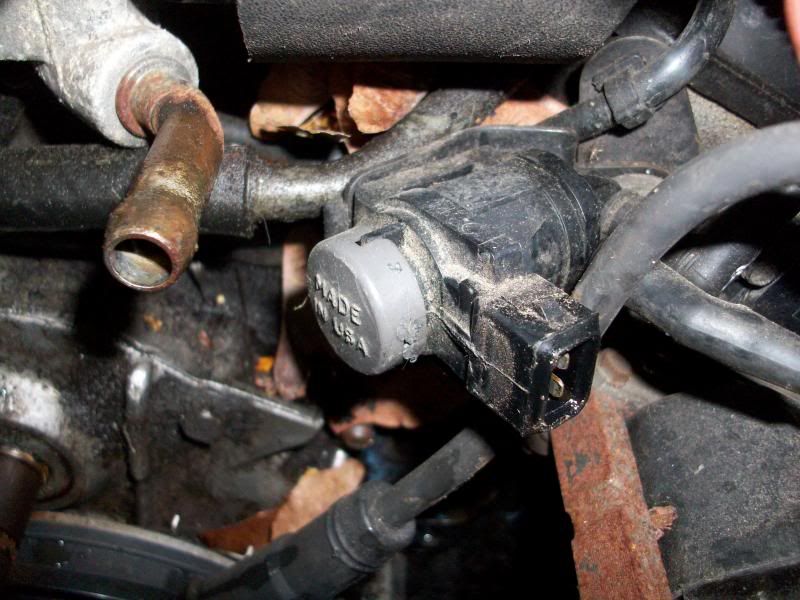
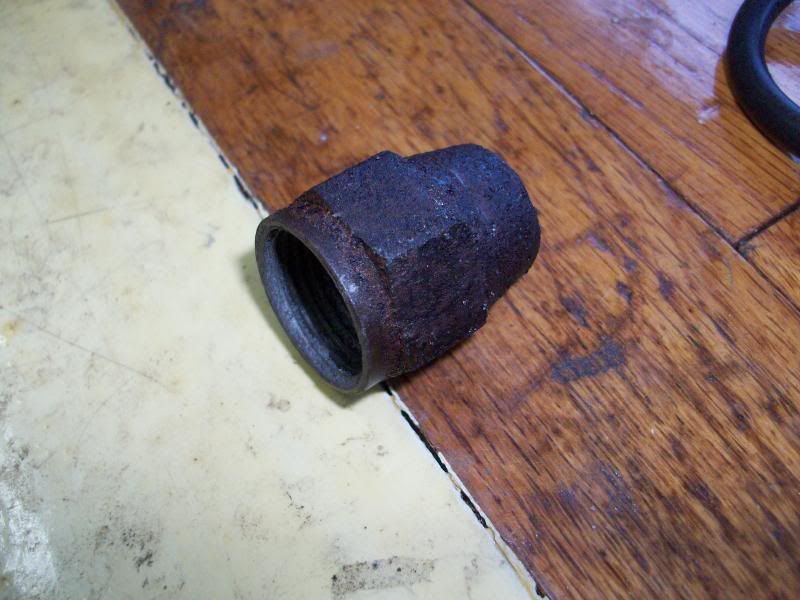
I started removing the AIR stuff. I screwed up by not holding the larger nut underneath the hex on this plug that I want to remove. The torque I applied ended up causing the hole tube that comes off the headers to move a bit, so I've probably broken the weld and caused a leak there. We'll find out.
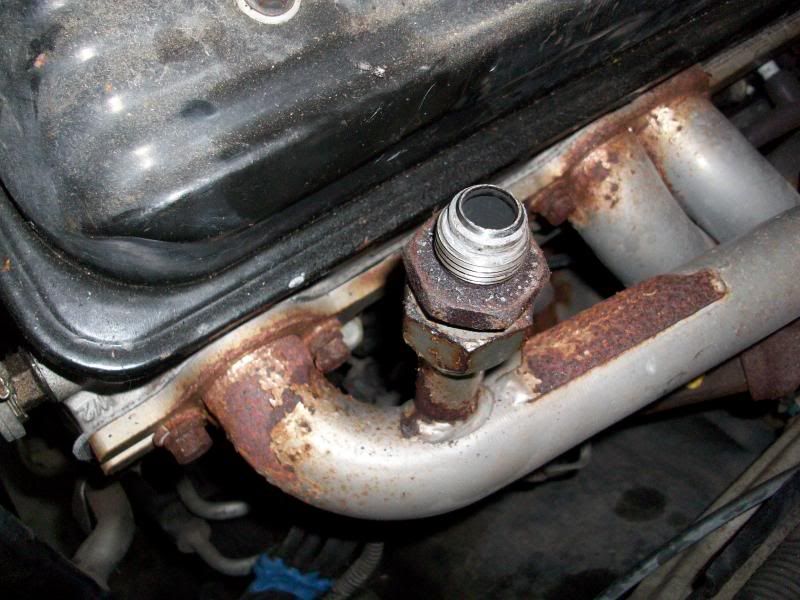
It will be uglier, but I'll find a cap that has the same threads as this one and just put it on top of the tube assembly.
The Opti looks like it hasn't been on the car that long. If you guys have comments about how it looks in there, I'd love to hear them. The terminal in the center, that the coil supplies, had some black shmutz on it, and the tang on the rotor also had this greasy shmutz. I can't imagine that wasn't having some negative effect. The rotor tang also has a crater in it; I assume this is not normal?


Some kind of "custom" clearancing here


Sweet anti-leak measures. So, how much of a hassle is it to pull this cover, replace the seals, and button back up?

I started removing the AIR stuff. I screwed up by not holding the larger nut underneath the hex on this plug that I want to remove. The torque I applied ended up causing the hole tube that comes off the headers to move a bit, so I've probably broken the weld and caused a leak there. We'll find out.

It will be uglier, but I'll find a cap that has the same threads as this one and just put it on top of the tube assembly.

 04-07-2014, 10:35 PM
#28
Well, after playing around with throwing on a cheap Opti unit to "get me by" for a while, or sourcing a new cap and rotor and a used GM base from a friend of mine, I decided to just suck it up and pay the $260 for a Delphi unit from Amazon. It should be here by mid-week along with some new gaskets for my water pump.
I am considering installing a new or used ICM since folks told me it might be a cause of the trouble I was having. But, if they are easy enough to access and swap then I will see what the Opti replacement does before throwing more money at the car. I also picked up a NOS factory harness for the Opti.
This week is busy, so maybe on the weekend I can make some progress with this.
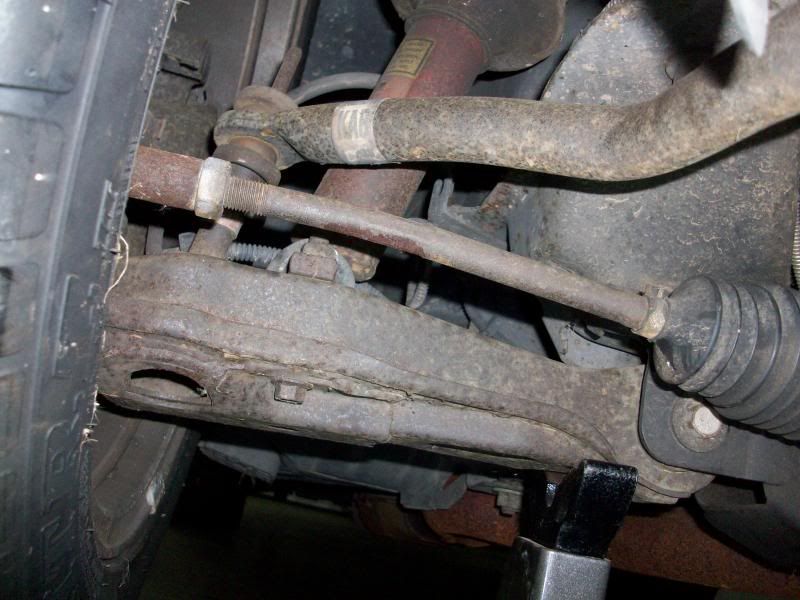
Oh and yes, my tie rod is somehow bent. I looked at it and there is no doubt.
I am considering installing a new or used ICM since folks told me it might be a cause of the trouble I was having. But, if they are easy enough to access and swap then I will see what the Opti replacement does before throwing more money at the car. I also picked up a NOS factory harness for the Opti.
This week is busy, so maybe on the weekend I can make some progress with this.
Oh and yes, my tie rod is somehow bent. I looked at it and there is no doubt.
04-09-2014, 11:12 PM
#29
TECH Regular
iTrader: (5)
Join Date: Dec 2010
Location: Too close to the cities, MN
Posts: 497
Likes: 0
Received 0 Likes
on
0 Posts
You should check out shbox.com in his how-tos I'm pretty certain that he has write ups on how to check the opti and the ICM with a multimeter. Even so, it's still a great place for lt1 know-how and stuff like that, check it out.
04-28-2014, 09:32 PM
#30
I finally had enough time here and there to install a new Delphi opti and put the car engine back together. Along the way I installed a new negative battery cable, replaced the stud for that cable that threads into the block, replaced a few vacuum lines, installed a new opti harness and deleted the AIR pump.
I am feeling as though my timing might be off, and therefore that I inconceivably installed the opti incorrectly despite there only being "one way" it should be able to go on. The engine will crank over, but not well and acts as though the battery is struggling. The battery is new and shows 12.6 volts at rest. The engine will crank a bit, give a slight backfire, and then it won't move anymore for a moment.
When I installed the opti I was struggling to get the dowel on the cam to fit into the oddly-shaped hole on the cloverleaf. It did finally slip on and felt as if it had seated. I do not recall 100% for certain, but I did not think there was a gap between the opti mounting ears and the engine. It seemed to be mounted flush. But since the car cranked fine before, and now has this issue, I am guessing I screwed something up. So, time to pull the intake elbow, fans, hoses and water pump and opti and try again. Woohoo. At least I didn't fill it up with coolant yet.
05-04-2014, 01:16 PM
#32
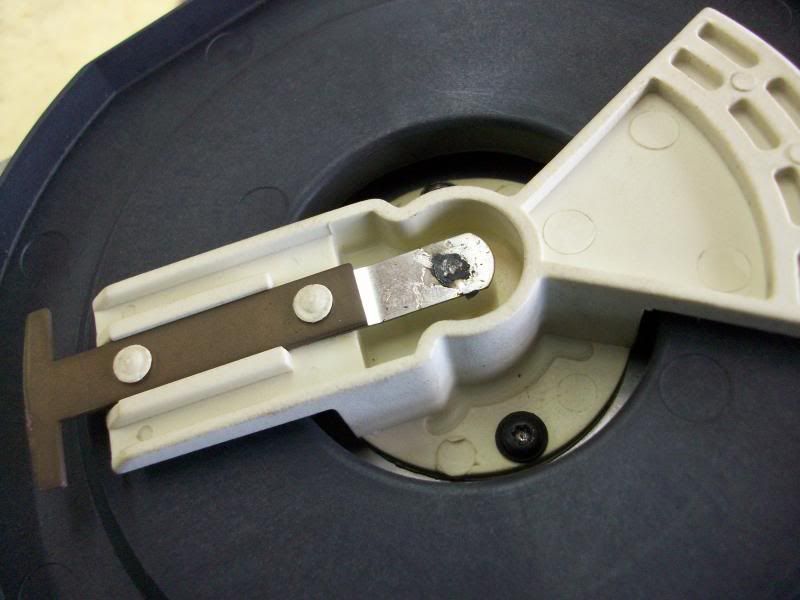
I'm going to need some help here. I do not feel confident that I had previously installed the Opti correctly. I took the front of the engine apart today to get to the Opti again, and I still cannot feel confident. I just am not convinced that I am getting that little "nub" on the camshaft to go into that one hole on the back of the Opti.
I am doing this with the cover of the Opti off so I can move the rotor easily.
I noticed that there is a hole on the Opti's shaft that corresponds to the rectangular hole on the back of the clover leaf. So, when I am under the car and fitting the Opti, I am observing this hole while I insert the shaft into the cam snout. I know that the shaft is being inserted such that the rectangular hole should end up meeting the dowel on the cam. I do need to finesse the rotor to get the Opti shaft to slide into the cam; it requires a little force, it's not like throwing a hot dog down a hallway or anything like that.

Once I perform the above operation, the Opti is as seated as well as I can get it. Two things bother me. First, the mounting ears for the Opti do not perfectly touch the block. I have read over and over that an Opti is not seated correctly if there is ANY space between the block and Opti mounts. Also, if I grab the rotor, I can still move it back and forth a bit. Should this be possible? It would seem that if that dowel on the cam really was seated in the rectangular hole on the clover leaf, then there would be no back and forth movement. Am I wrong about this?
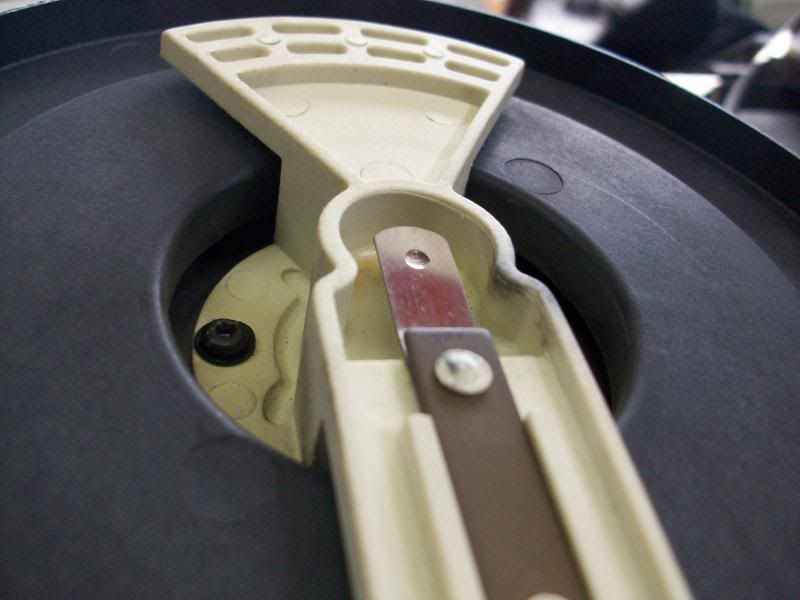
Here is my cam dowel, pointing down towards the DS of the car.

Pics to show all three mounting points below, and a short video clip (please excuse quality) showing the rotor movement.


If I don't have the video posted correctly, please let me know. I have not posted a video on a forum before.
https://www.youtube.com/watch?v=wVT2...ature=youtu.be
Last edited by Bull; 05-04-2014 at 01:30 PM.
05-07-2014, 05:40 PM
#33
Bull you are correct - if the three tabs on the Opti do not seal against the timing cover perfectly, then the center hub on the Opti must be rotated until the pin goes into the square hole.
There is an easy way to accomplish this task:
First rotate your Opti until you think the pin on the cam will mesh with the square hole on the Opti, then, with a sharpie, put a black line at the 12 O'clock position on the outside of the 3" metal Opti disk.
This is done so that when the Opti is half-way installed you can verify that it has not rotated by looking for the sharpie witness mark from the top of the engine. If the Opti and cam pin do not mesh perfectly, then this black line will help you to correctly rotate the center portion of your Opti until the Opti and the cam pin does line up.
When the cam pin and the metal hub on the Opti is lined up so that the pin and square hole meshes, the Opti will slide all the way in and it will be flush with the cover.
I developed this method after struggling with an Opti or two; I can now perform the entire task (start to finish - without swearing) in about an hour!

Good Luck!
There is an easy way to accomplish this task:
First rotate your Opti until you think the pin on the cam will mesh with the square hole on the Opti, then, with a sharpie, put a black line at the 12 O'clock position on the outside of the 3" metal Opti disk.
This is done so that when the Opti is half-way installed you can verify that it has not rotated by looking for the sharpie witness mark from the top of the engine. If the Opti and cam pin do not mesh perfectly, then this black line will help you to correctly rotate the center portion of your Opti until the Opti and the cam pin does line up.
When the cam pin and the metal hub on the Opti is lined up so that the pin and square hole meshes, the Opti will slide all the way in and it will be flush with the cover.
I developed this method after struggling with an Opti or two; I can now perform the entire task (start to finish - without swearing) in about an hour!
Good Luck!
Last edited by great421; 05-08-2014 at 11:24 AM.