My New Project: 2001 WS6
#62
Staging Lane
Thread Starter
Thanks.
I just ordered the skip-shift eliminator for $12. That should arrive this week. Man, that skip-shift is THE most annoying thing. All it does is make you want to step on the gas to get out of skip range. I can't see how they thought that was a fuel saving idea?
I just ordered the skip-shift eliminator for $12. That should arrive this week. Man, that skip-shift is THE most annoying thing. All it does is make you want to step on the gas to get out of skip range. I can't see how they thought that was a fuel saving idea?
#64
TECH Senior Member
When the EPA drives the car to rate the gas mileage they are forced to use the skip shift feature, which does save gas. That is part of the reason these cars dont get the gas guzzler tax.
#65
Staging Lane
Thread Starter
Just picked this up today off of a 1997 Firebird in a local salvage yard. If the paint was a little bit better I could have used it as is, but the clear coat is crackling from sitting out so long. Now comes the fun part of carefully removing it from the steel frame.
BTW, what is the small triangular trim piece by the lower edge, held on with?
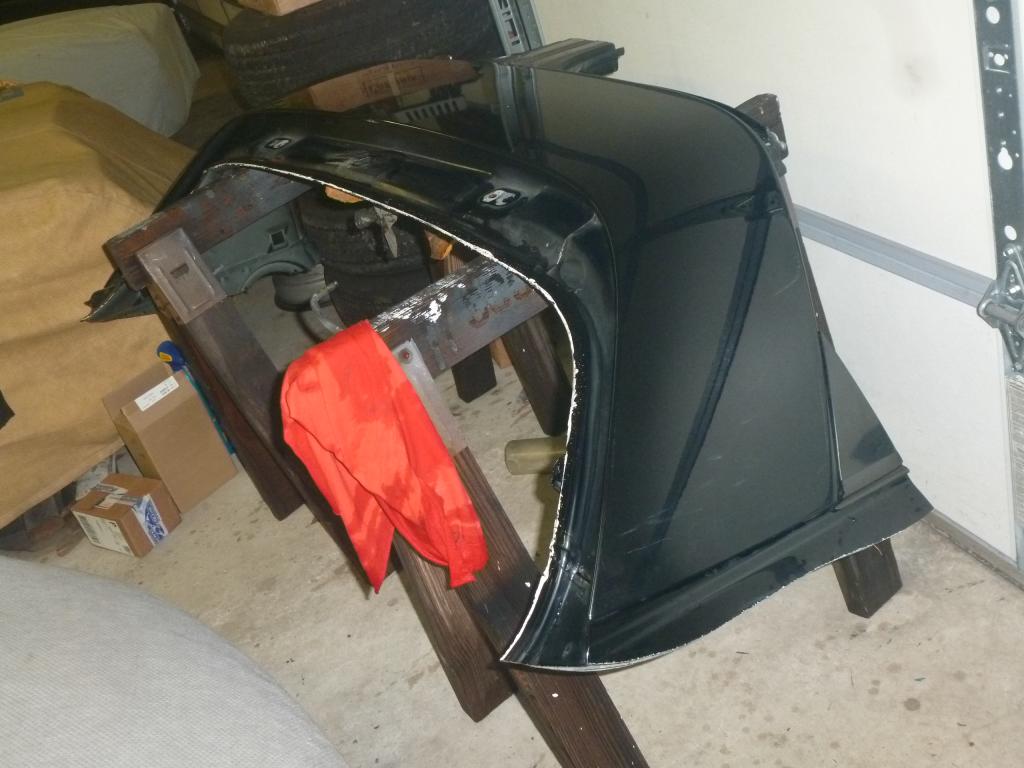
BTW, what is the small triangular trim piece by the lower edge, held on with?

#66
#68
Staging Lane
Thread Starter
Well it took two days but we got the panel detached from the steel frame. First we had to use a sawzall and disc grinder to cut away the edges of the steel to allow a straight shot under the plastic panel. Then came the heat gun heating the steel to the point where it allowed an old butchers knife to slide in between the panel and the steel frame. On the middle areas where the plastic panel curves over the edge of the steel we used the windshield removal tool: a wire with two handles, to slide-cut the adhesive once the steel was hot enough to release it. The heat makes all the difference. Without it you could be there for a week with that windshield tool sawing away..
Here is the final result:

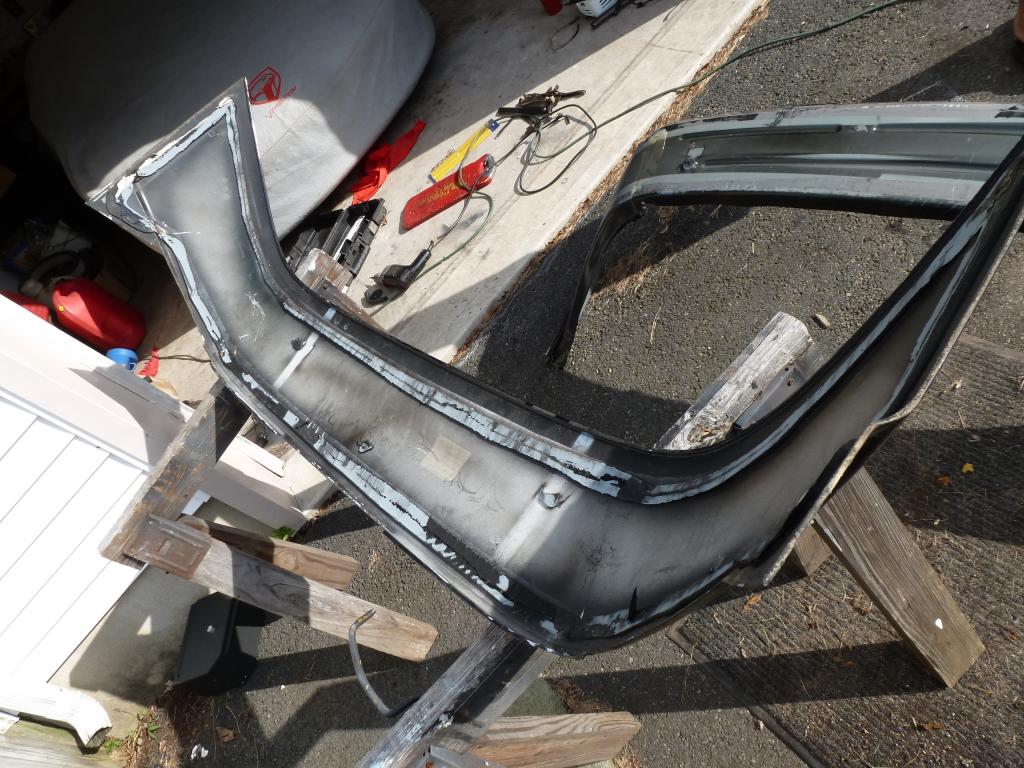
Here is the final result:


#69
man what a score, awesome to find one with such great records, and taken care of with love. harder to find these days, my transam and now my camaros have all come from similar owners to the one u bought from. worth the wait and searching for sure. and awesome ti have the kids ezlxzited about em,, my 10 year old is the same. nice ride.
#70
Staging Lane
Thread Starter
Went to my buddy's garage this morning and installed the skip-shift eliminator harness. It is a $10 plug-in that goes between the solenoid on the transmission and the harness that leads to the solenoid. Got rid of that annoying 1st to 4th gear, mandatory shifting. While we were under there, we checked to diff and trans oil levels. The boy is getting better with his wrenching, though he still thinks that everything has to be mega-tightened. Not with a drain plug, my boy!
Took some underbody photos after we wiped down the rear diff oil spray residue from prior to the diff being rebuilt last year by the dealer. Here it is.

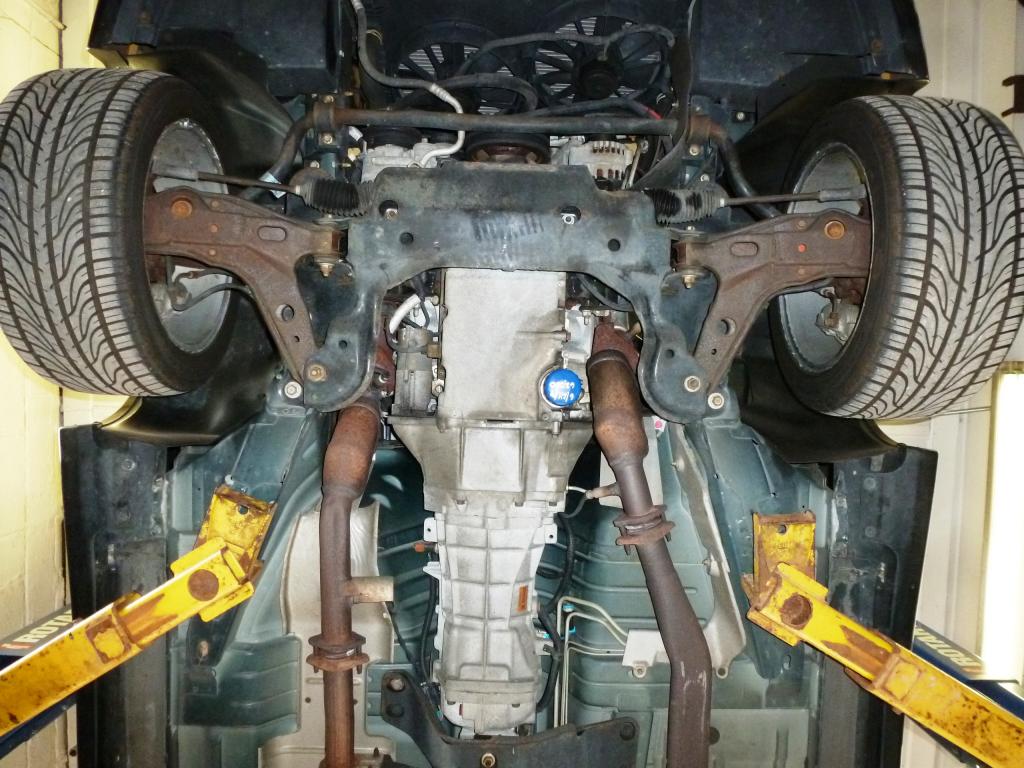

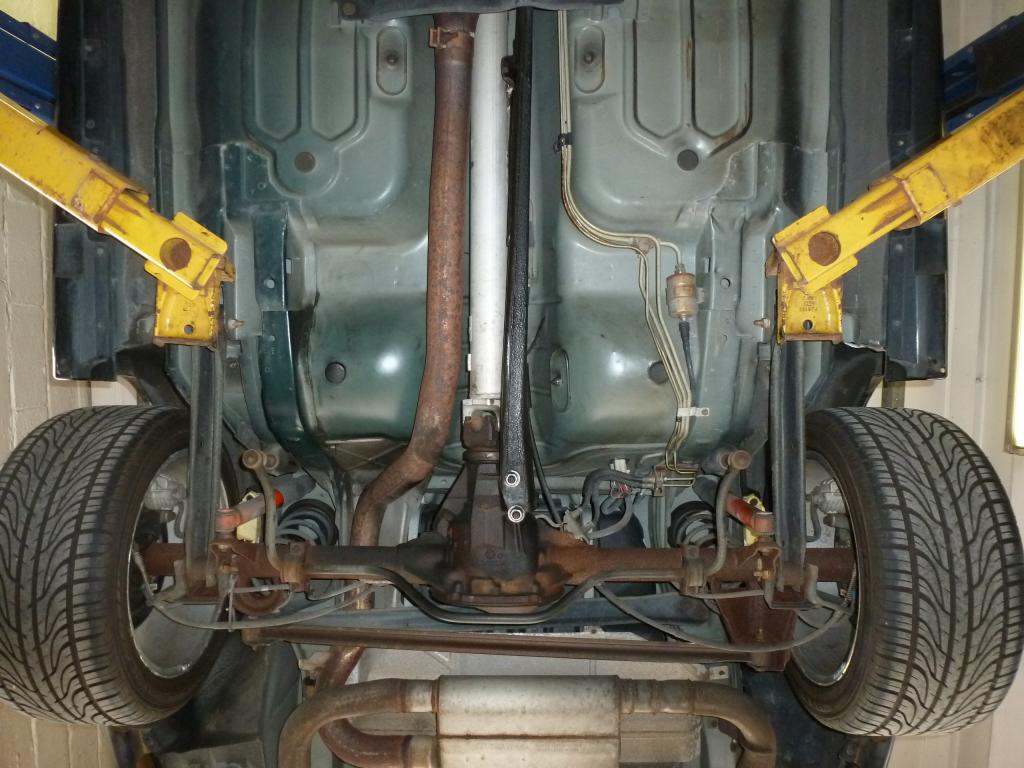

Took some underbody photos after we wiped down the rear diff oil spray residue from prior to the diff being rebuilt last year by the dealer. Here it is.


#71
TECH Fanatic
iTrader: (5)
My buddy and I can get one off of a car at the junk yard in about an hour with a wiresaw and some basic hand tools / hammer. I have a small stack in the garage because they are so easy to get off. It does help that we live in Texas and the panels and glue get nice and hot and stay that way for the most of the year, haha!
#72
Staging Lane
Thread Starter
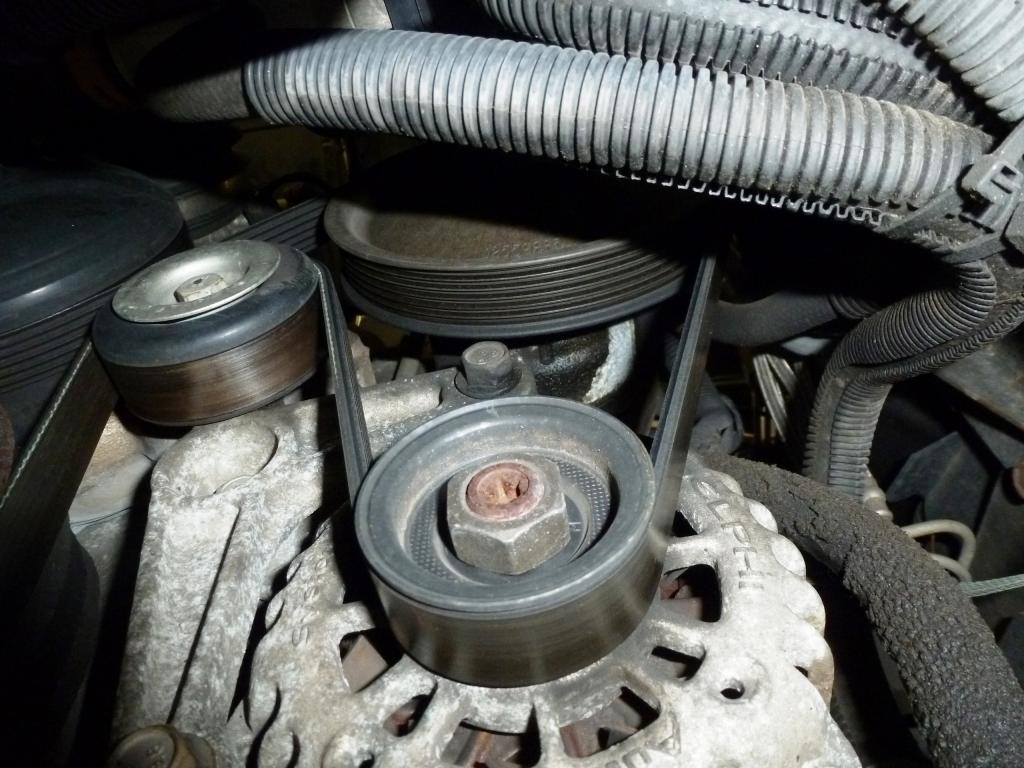
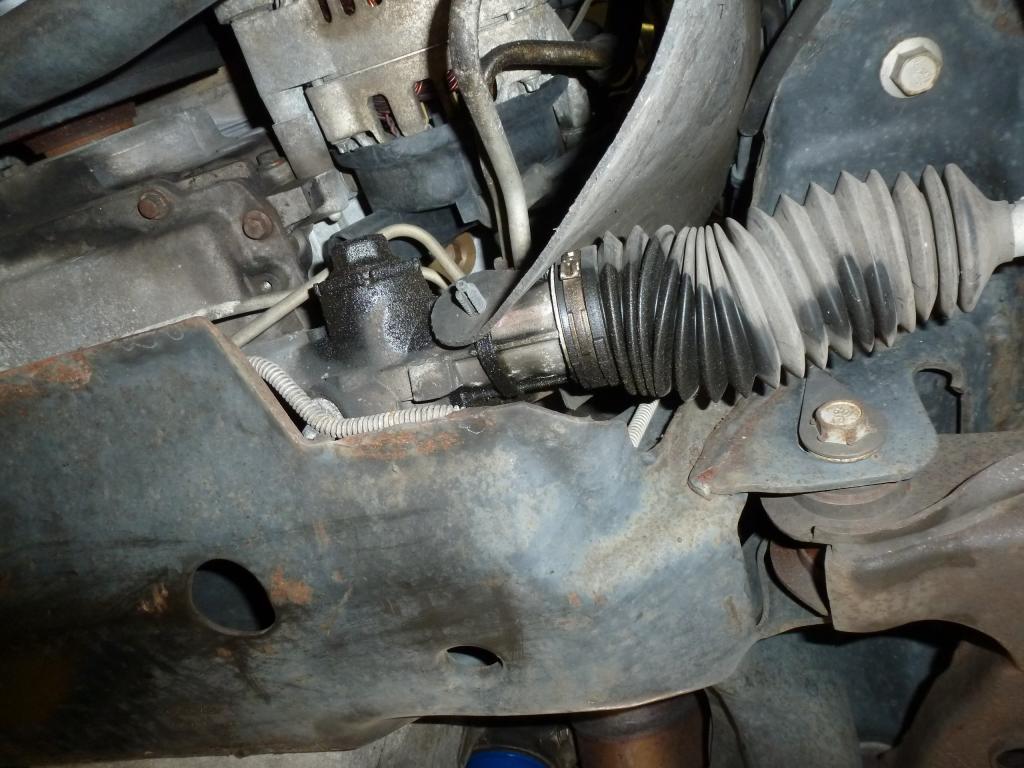
And noticed that the steering rack and the power steering pump were leaking. Gotta love that extended warranty! I'm going to call the dealer on Monday to get them replaced. ($50 warranty co-pay).


#73
Staging Lane
Thread Starter
My buddy and I can get one off of a car at the junk yard in about an hour with a wiresaw and some basic hand tools / hammer. I have a small stack in the garage because they are so easy to get off. It does help that we live in Texas and the panels and glue get nice and hot and stay that way for the most of the year, haha!
#74
Staging Lane
Thread Starter
Update on the steering rack: I brought it to the local GM dealer. The extended warranty covered most of it. Those warranty companies sure do nickle and dime the dealership to death. The service manager is very familiar with these warranty companies: he told me that they put you on hold for 20-30 minutes any time you call and don't pay the full repair rate and try to get you to put used parts on. They do this just to get you to give up on a claim. He was right. I was there when he was simply trying to get an update on authorizing a part and I could overhear the aggravation he was going through.
Since it is a GM dealer they wouldn't guarantee the work (only the labor) unless they installed Delco parts. The warranty company finally agreed to using Delco parts. The rack was a Delco unit ordered by the dealer. The power steering pump was a Delco unit provided by the warranty company after they balked at the high dealer price. The warranty didn't cover the pressure hose, so I got a new Delco hose from rockauto for $25. The warranty company didn't pay for the alignment and their labor rate was $10 less an hour than the dealer so I owed that difference. And there was a $50 deductible on the warranty policy. So in the end, for a $1,100 repair bill, I paid $225.
Since it is a GM dealer they wouldn't guarantee the work (only the labor) unless they installed Delco parts. The warranty company finally agreed to using Delco parts. The rack was a Delco unit ordered by the dealer. The power steering pump was a Delco unit provided by the warranty company after they balked at the high dealer price. The warranty didn't cover the pressure hose, so I got a new Delco hose from rockauto for $25. The warranty company didn't pay for the alignment and their labor rate was $10 less an hour than the dealer so I owed that difference. And there was a $50 deductible on the warranty policy. So in the end, for a $1,100 repair bill, I paid $225.
#75
Staging Lane
Thread Starter
A little Spring time update. The seat bolster panel I plastic welded held up for about 6 months until a real cold day a month ago when I sat in the seat and heard the panel crack at the repair joint.
But the good news is that after a year of hunting I was finally able to find a drive's side plastic seat bolster panel. It turns out that the panel for the optional seats with the lumbar support is a very rare piece. I found one on ebay last week that was from a 99 Trans Am. And it was only $19. The only down side was that it was grey, not black. I was able to dye it black using the SEM Landau Black vinyl dye. Great stuff and matched perfectly! Got it installed and now that is one less part to hunt for.
I spent today with the boy, outside working on the T/A. We put the car on jackstands and flushed the brake system. The old brake fluid was green - very weird. I mean green like the old Kendell Motor Oil green! We used an entire gallon of fresh DOT3 brake fluid to flush the system until it came out clear. Afterwards I went back and reviewed the inch-thick, volume of original dealer work orders on the car from the original owner. It looks like she had the Pontiac dealer do that BG Brake Flush at least three times in 61,000 miles, the last one at 55,000 miles. I don't know what was in that flush stuff but I have never seen green brake fluid before. By the amount of fluid discoloration, it looks like they never actually flushed the existing fluid out - just added some snake oil to it.
The dealer sold her a bill of goods every two months for 13 years. It's unbelievable how much she was over-charged for over-maintenance - over $10,000 in maintenance invoices during that time - in addition to the three extended warranties she had purchased for the car - good til 2016! Every 1,500 miles or 60 days she had the $39 oil and filter change, the $189 fuel injection system flush done, the $69 power steering flush done, the $169 6,000 mile service done (which is just an overpriced inspection with no replacement of parts), the $39 tire balance and rotation, (after she paid for free lifetime balancing and rotation in 2001), and the $99 brake flush plus $39 for the BG snake oil liquid.
Whenever she had a legitimate warranty complaint - like the driver's door speaker not working, they would note that they could not "duplicate the problem"...and then would go and do the maintenance-palooza on the car and she would get hit with a $300 bill on what should have been a zero deductible warranty visit. I found seven invoices over 13 years requesting the speaker to be replaced under warranty, before the speaker was actually replaced.
It just gets me so angry that the dealer did this to her (even though the car was the beneficiary of the over attention).
OK, I am done venting for the moment.
I did order a new set of ACDelco spark plugs and original equipment 748CC Delco plug wires for the car. So that will be our next project. (You'd have thought that the dealer would have done a tune up on the car with all those visits but I guess since changing spark plugs on an LS1 equipped F-body actually takes a bunch of time, labor, and busted knuckles, that they took the low road and just did fluids). Stay tuned!
#76
TECH Junkie
You aren't venting. It needs to be posted, and then posted again. What you cite is simple outright theft. These places just prey on the inexperienced car owners. Why does the car industry have to be so vicious?? This mentality of ripping off people apparently started back in the old horse trader days, yet draws the same type sales people today. What a way to live and make a buck.
#77
10 Second Club
Just read your story here. Good read and a great find dude!
#78
Staging Lane
Thread Starter
Another update. I brought the T/A to my buddies garage last night and put it up on the lift to find a noise that I thought was an serpentine belt idler bearing, going. We think it is just the belt squeeling when it hits a rusty spot on the water pump pulley and slips at 2500 rpm. A result of the car sitting in the pine barons of New Jersey for too long without getting driven.
While it was up on the lift I decided to change the fuel filter since I had an NOS GM filter laying around. We swapped out the filter and applied a little air to the old filter's outlet to see what if anything was inside. A whole bunch of blackish dirt and residue came out with the fuel. Upon closer examination it looked like it was the original, assembly line fuel filter which, you guessed it...the dealer had "replaced" on four separate occasions in the 13 years she had the car.
Too bad the dealer is out of business, otherwise "60 Minutes" would have had a field day with them.
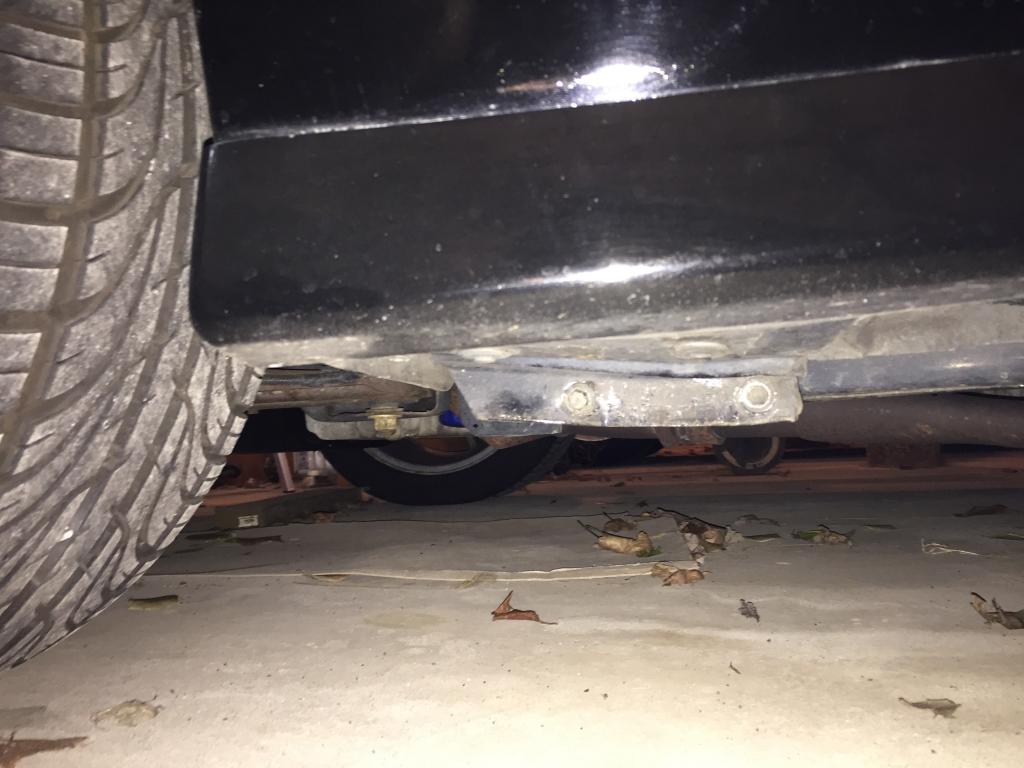
We also used some wide mouth vise grips to unbend the lower front fender mounting tabs where the bottom of the plastic front fenders are bolted to the rocker panel flange. The dealer had used that spot to place the jack lift pads, instead of the frame rails, four inches further in. It had bent both mounting tabs 90 degrees over, and flush with the bottom of the rockers. Luckily the mounting areas on the plastic fenders bent and didn't crack. Here is the after photo once we got it back in to position. We used a heat gun to warm up the plastic fender's flange so it wouldn't shatter when it was bent back to its original position.
I must say that I am liking these 4th Gen cars more and more. (Other than the plastic interiors). They ride and handle wonderfully. They have some great lines with the WS6 Ram Air hood. And the LS1 is no slouch on the road. (Could use some more horsepower...but then don't we all say that about every car?)

While it was up on the lift I decided to change the fuel filter since I had an NOS GM filter laying around. We swapped out the filter and applied a little air to the old filter's outlet to see what if anything was inside. A whole bunch of blackish dirt and residue came out with the fuel. Upon closer examination it looked like it was the original, assembly line fuel filter which, you guessed it...the dealer had "replaced" on four separate occasions in the 13 years she had the car.
Too bad the dealer is out of business, otherwise "60 Minutes" would have had a field day with them.
We also used some wide mouth vise grips to unbend the lower front fender mounting tabs where the bottom of the plastic front fenders are bolted to the rocker panel flange. The dealer had used that spot to place the jack lift pads, instead of the frame rails, four inches further in. It had bent both mounting tabs 90 degrees over, and flush with the bottom of the rockers. Luckily the mounting areas on the plastic fenders bent and didn't crack. Here is the after photo once we got it back in to position. We used a heat gun to warm up the plastic fender's flange so it wouldn't shatter when it was bent back to its original position.

I must say that I am liking these 4th Gen cars more and more. (Other than the plastic interiors). They ride and handle wonderfully. They have some great lines with the WS6 Ram Air hood. And the LS1 is no slouch on the road. (Could use some more horsepower...but then don't we all say that about every car?)

Last edited by njsteve; 04-07-2015 at 12:41 PM.
#79
Staging Lane
Thread Starter
The boy and I decided to tackle the cracked driver's side door panel that has been annoying me since we got the car. Last year we removed the panel, glued the cracks, removed and reinstalled the window felt, and reinstalled the panel but it was still an eyesore, especially since I had to look at the damn thing every time I was driving the car. (The passenger side panel was perfect - but I did remove it and reinforce the crack-prone areas with flexible body repair material and removed and reinstalled the window felts in a "looser" position).
So we decided to replace the panel. We all know how hard an uncracked 2001-2002 ebony panel goes for, so I went for the alternative. The early cars - up to early 1997 used a different plastic material for the panel which doesn't crack when exposed to heat/cold cycles like the later panels do. The only problem is that they are grey and not ebony. So we found a really nice 1996 grey panel with a cloth insert and started the experiment.
Since the panels used multiple parts that were plastic welded in place at the factory we used a heat gun to soften the melt points. The cardboard backed cloth panel then pulled right off the tabs. I actually trusted my son to wield the heat gun...lets just say he needs work on his aim...and I need to wear asbestos gloves.
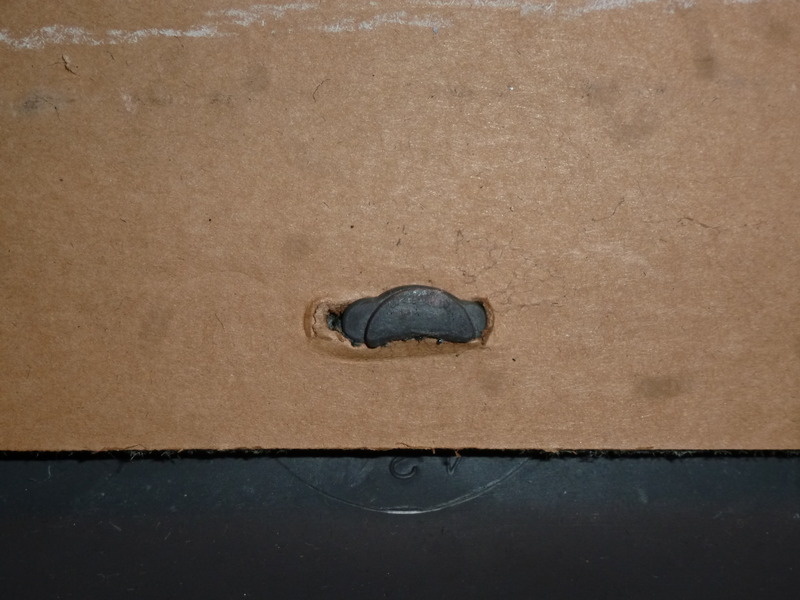
And here is the plastic panel after the cardboard-backed upholstery panel was removed. I will tell you that the arm rest mounting points are much harder to heat as they seem to be of a harder white plastic material and not polypropylene. (this photo is actually a couple steps ahead and shows the ebony arm rest and map pocket set in place. Note the color difference).
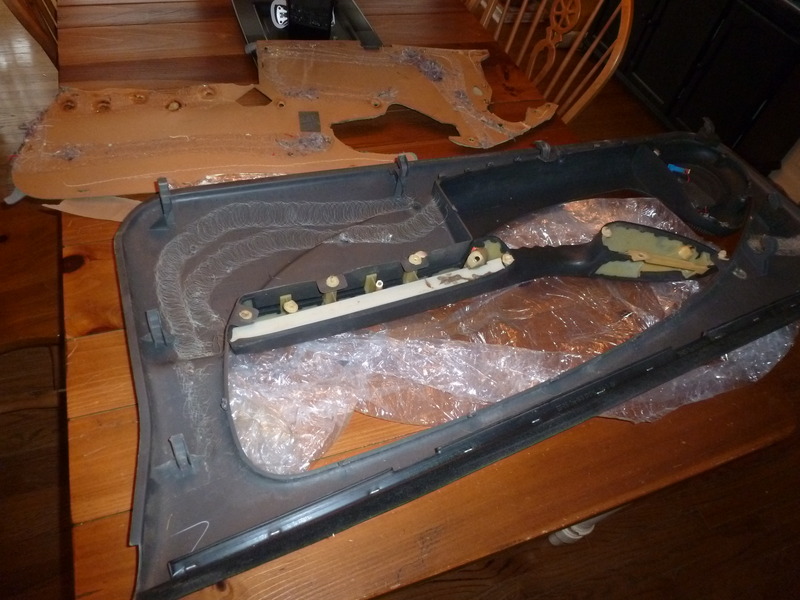
I went ahead and removed the arm rest and the map pocket as I wanted to install as much of the original stuff from my 2001 ebony panels as possible. Most people could stop at this point and then dye the panel as is to get ready to install the ebony leather interior upholstery panels.
So we decided to replace the panel. We all know how hard an uncracked 2001-2002 ebony panel goes for, so I went for the alternative. The early cars - up to early 1997 used a different plastic material for the panel which doesn't crack when exposed to heat/cold cycles like the later panels do. The only problem is that they are grey and not ebony. So we found a really nice 1996 grey panel with a cloth insert and started the experiment.
Since the panels used multiple parts that were plastic welded in place at the factory we used a heat gun to soften the melt points. The cardboard backed cloth panel then pulled right off the tabs. I actually trusted my son to wield the heat gun...lets just say he needs work on his aim...and I need to wear asbestos gloves.

And here is the plastic panel after the cardboard-backed upholstery panel was removed. I will tell you that the arm rest mounting points are much harder to heat as they seem to be of a harder white plastic material and not polypropylene. (this photo is actually a couple steps ahead and shows the ebony arm rest and map pocket set in place. Note the color difference).

I went ahead and removed the arm rest and the map pocket as I wanted to install as much of the original stuff from my 2001 ebony panels as possible. Most people could stop at this point and then dye the panel as is to get ready to install the ebony leather interior upholstery panels.
Last edited by njsteve; 04-12-2015 at 10:57 AM.
#80
Staging Lane
Thread Starter
Here is the grey donor panel after everything has been removed.

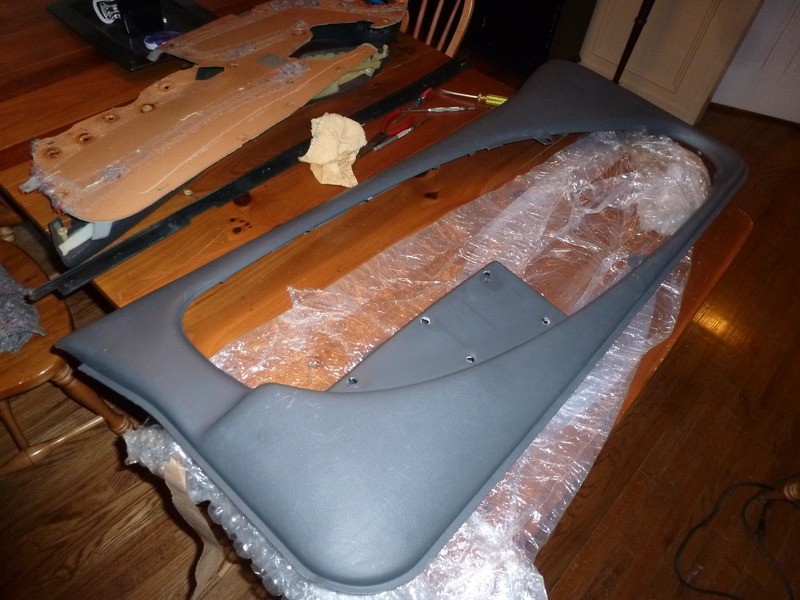
And after I scrubbed, cleaned and redyed the panel with SEM Laundau Black interior dye. This stuff is wonderful and I have used it for all sorts of black interiors over the years. Its a great match for the ebony panel color.
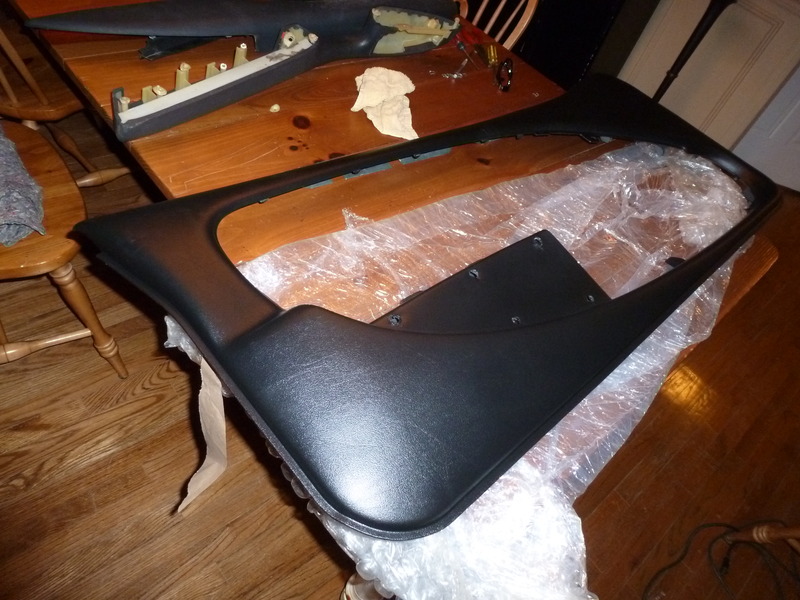


And after I scrubbed, cleaned and redyed the panel with SEM Laundau Black interior dye. This stuff is wonderful and I have used it for all sorts of black interiors over the years. Its a great match for the ebony panel color.

Last edited by njsteve; 04-12-2015 at 10:52 AM.


