How do you take out the carpet without removing the dash?
 06-07-2014, 11:48 PM
#1

I really want to take out the carpet to replace it with this new one i got that's been sitting here for ages.
I see its fairly simple to take off from the back and the mid section of the car, but i can't see how it would come off from under the dash. I removed the stereo to see whats back there. There is the drain pipe and this black steel bar/brace thing that goes thru a hole in the carpet and bolt on the the frame...check out the pic....
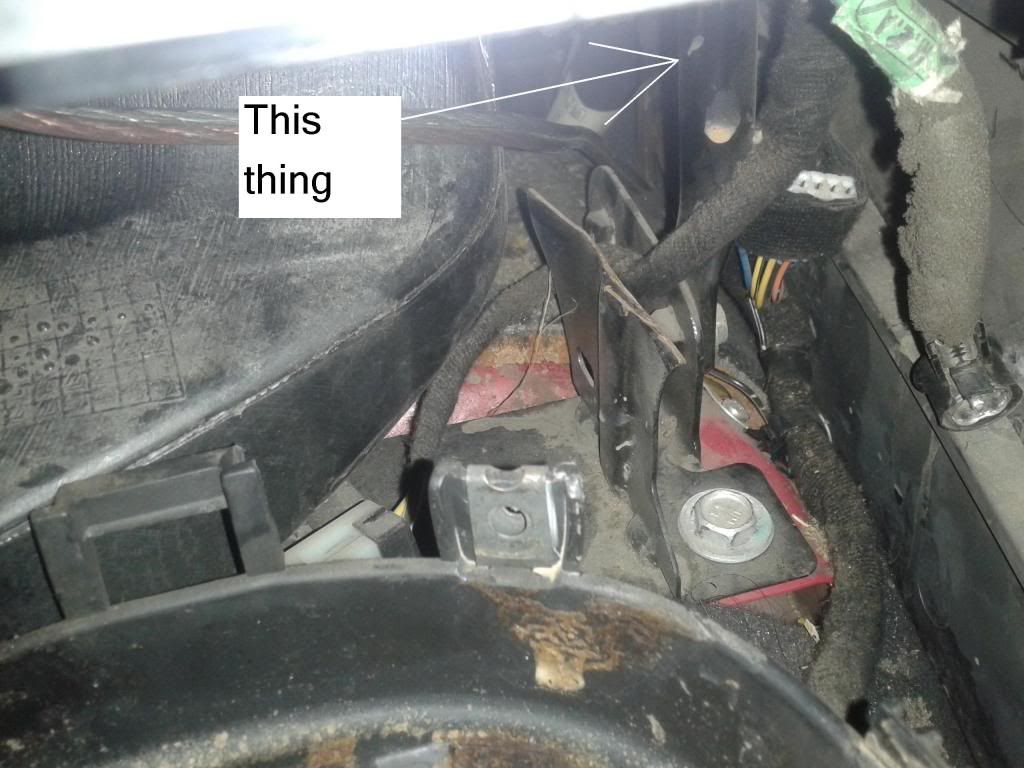
Any tricks/procedures to get this done?? Much appreciate any help!
I see its fairly simple to take off from the back and the mid section of the car, but i can't see how it would come off from under the dash. I removed the stereo to see whats back there. There is the drain pipe and this black steel bar/brace thing that goes thru a hole in the carpet and bolt on the the frame...check out the pic....
Any tricks/procedures to get this done?? Much appreciate any help!

 06-10-2014, 10:15 AM
#3
06-11-2014, 12:18 PM
#5
Managed to take it off. Wasn't that difficult just lots of screws and bolts to remove.
That metal brace thing I was talking about turned out to be removable. There are 5 (or 6) bolts that hold it. 2 at the bottom to the frame and 3 (or 4) on the sides.
Oh yeah, I also managed to slide it off without cutting it in any way. And of course the dash didn't have to be removed.
What needs to be removed (in no particular order):
1) The drain pipe, which takes a sec to remove as it is just a rubber piece that attaches to the HAVAC box that you could just twist and pull down to take off.
2) The center console.
3) The radio bezel.
4) The shifter trim/bezel(?). Disconnect the connectors to the traction control and power button. And twist the light bulb connector out from the trim.
5) The hand brake cover(?). Pry out, using a flat blade screw driver, the hard, glossy plastic part at the top. Once you get that part off, slide off the rubber part that covers the hand brake through the top.
6) The brace that I mentioned earlier.
7) 3 pieces of square things that hold the radio. Don't know what they are called. Basically when you remove the radio, you take off what the radio was held in, and then you take off what that thing was held in, and what that thing was held in. Kinda like a box in a box. The last one, you will have to unscrew the 4 screws that hold the AC controls and I think 4 more screws on the sides of it to take it off.
8) The loom that runs under the center console which is held by 3 pita clips (2 at the shifter and 1 at the frame of the car under where the radio is supposed to be) and has 3 connectors at the end which you can easily disconnect. Getting these clips off without damaging them was the hardest part in this entire mission.
9) The tiny silver screw that is screwed in to the frame right under where the radio is supposed to be which holds a tiny ground wire. Don't forget this little crider as it will block the carpet from coming off.
10) The front seats and the rear seats. Disconnect the seat motor connectors and the side air bag connector. This will cause the air bag warning light to come on at the display and you might need a tech2 or similar device to clear it.
11) The side trims.
12) The seat belt 16mm bolt at either side.
13) The plastic panels under the dash. One at the passenger side which I guess cradles the BCM and the other at a similar location on the driver side which doesn't really hold anything but just obstructs your view to the brake light switch.
14) The kick panels at either side.
That's it.
Last edited by Freefallin; 06-11-2014 at 12:28 PM.