When you click on links to various merchants on this site and make a purchase, this can result in this site earning a commission. Affiliate programs and affiliations include, but are not limited to, the eBay Partner Network.
great thread, those back seats would fool me that anything is done . im not well versed on the gto but it looks stock which is what you wanted nice work . I cant believe you went ls9 thats a baller engine swap for the car. Do you plan to have kong port the supercharger?
I'm not well versed on the gto but it looks stock which is what you wanted nice work . I cant believe you went ls9 thats a baller engine swap for the car. Do you plan to have kong port the supercharger?
I kinda already did that myself. It's not ported, but I smooth the inner casing by hand. This is the second engine in this car. I sold the first after I cracked a head. The ECM was pre AND post detonating cylinder #4, causing the crack. By the time I figured out what was wrong, there was all kinds of internal damage. I had another motor (long story), but I sold the original 135K mile engine / trans and swapped in the spares (which esssentially was a new crate motor and an RPM Trans. level 6). The newer motor, which WAS a 6.0 litre, was sleeved and stroked and professionally rebuilt. It's not an LS9 motor. It's a LS2 that I dumped a TON of $$$ into. It was designed to handle 1500 boosted crank hp. It has a custom grind Erson cam, 823 heads, JBA longies and high flow mids and the LS9 is independantly driven...also the intercooler bricks were reinforced.
This is my vid for when I cleaned / smoothed outthe inner casing.
Nice work. Can the seat foam be shaved to help keep the seat shape? I really want to get this done someday. I just want the most oem look and feel possible.
Nice work. Can the seat foam be shaved to help keep the seat shape? I really want to get this done someday. I just want the most oem look and feel possible.
Oem look and feel has Kangaroo and Emu scratches on the seats, lol.
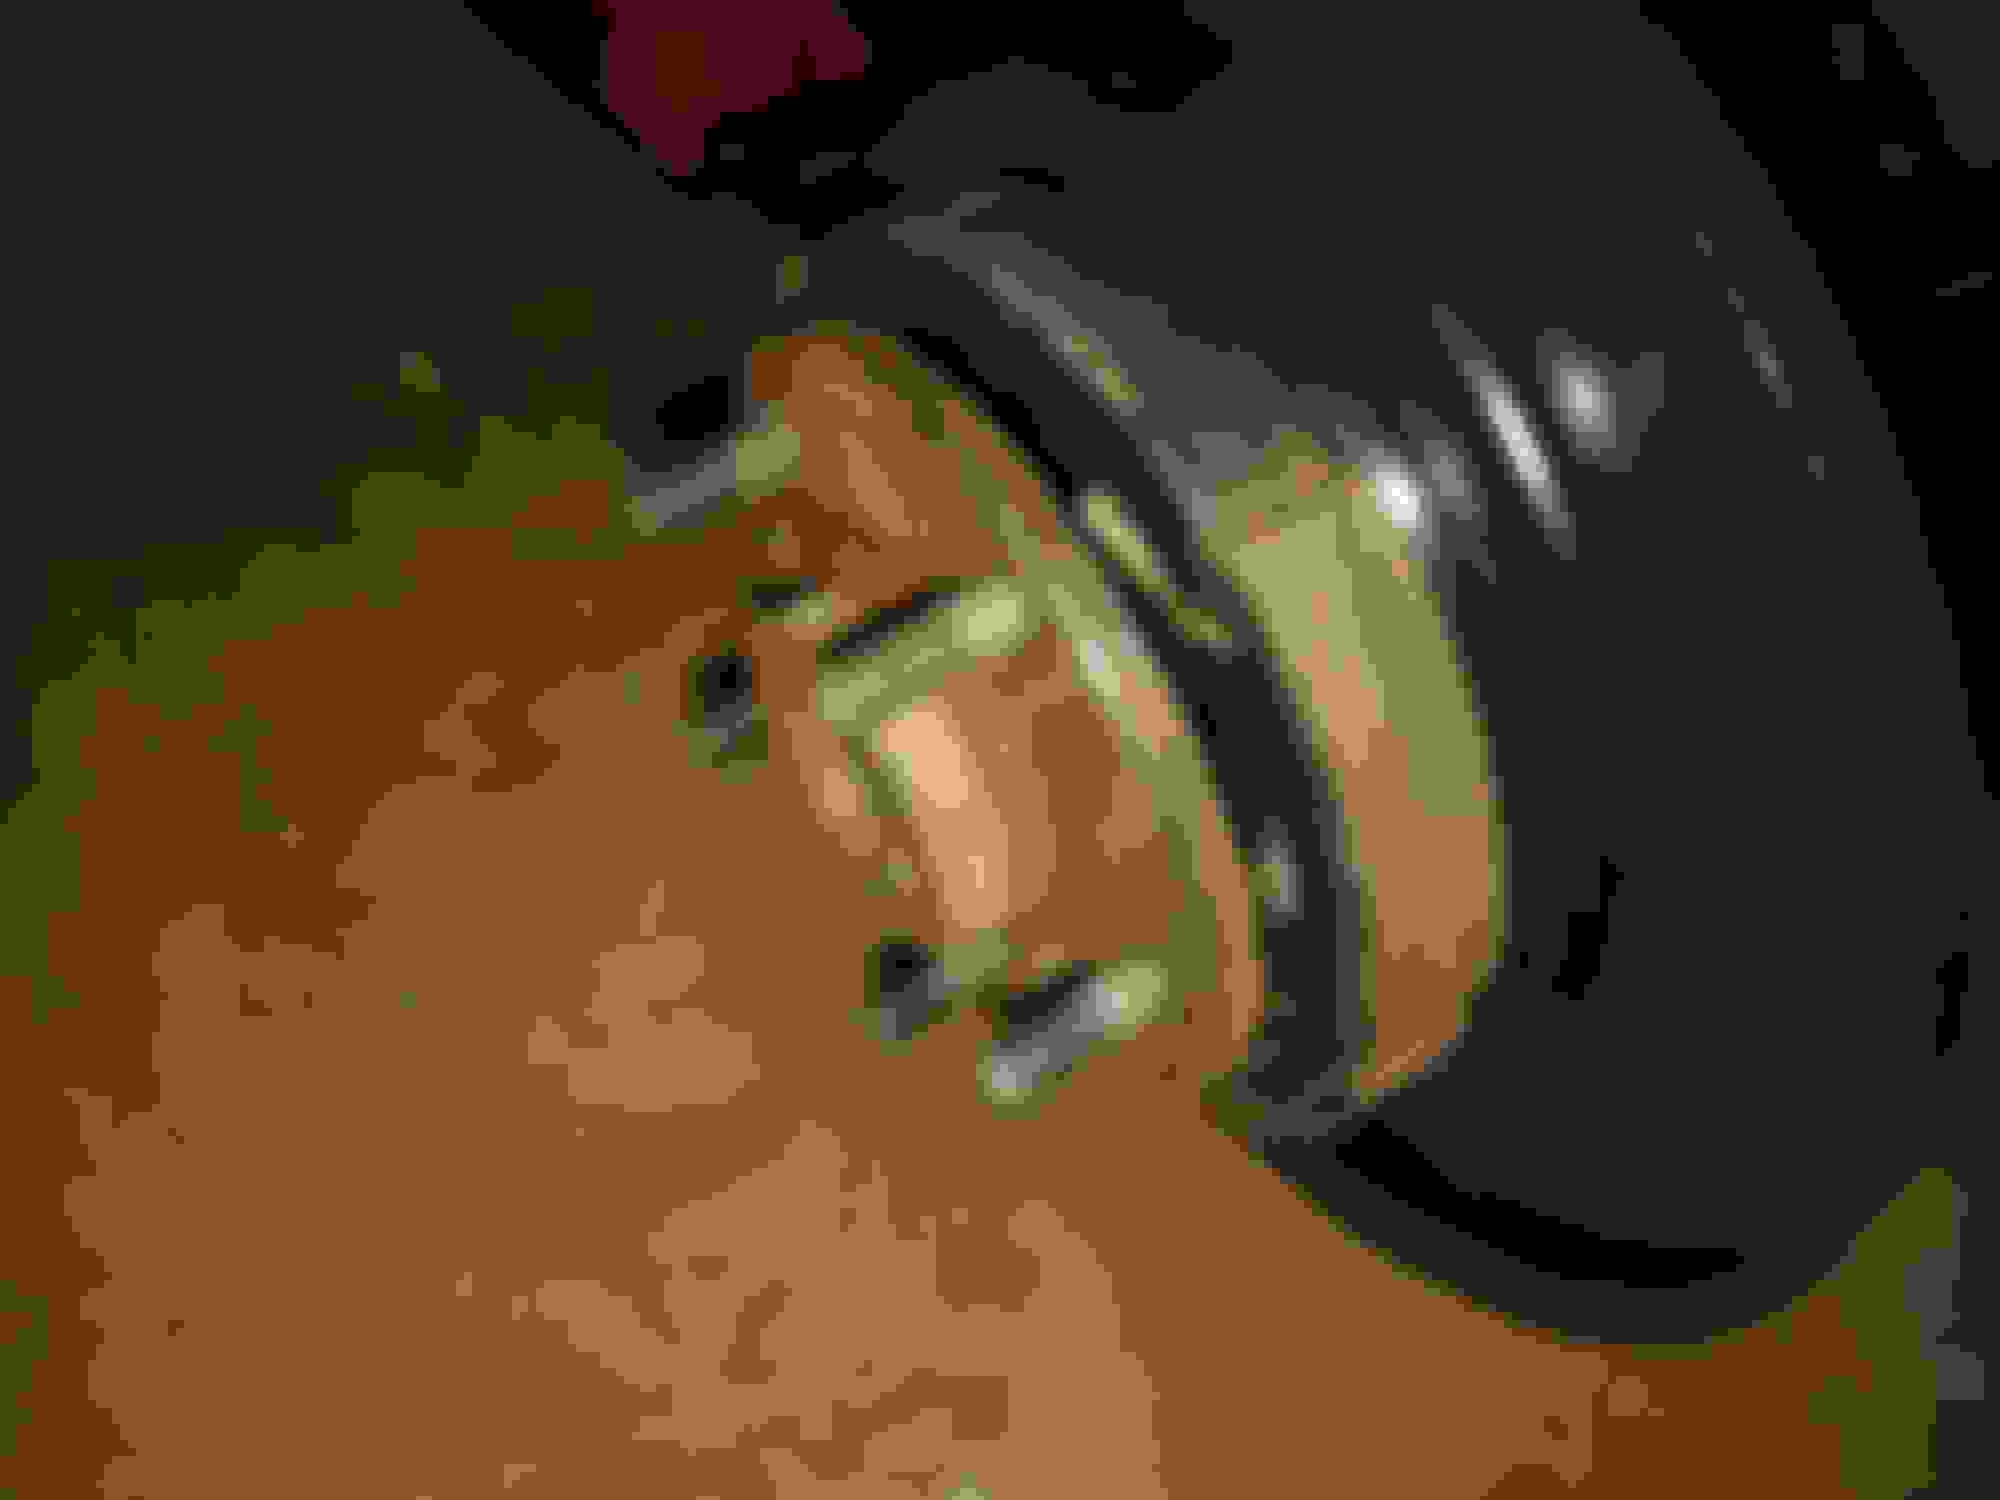
JFYI...I did a big brake upgrade on the car (Bohnman Customs) and the rear brakes require a spacer BEHIND the dust plate. This wouldn't be such a big deal, but part of the mini-tub deal are new ARP rear lug studs. Initially, I was like, "COOL!" I've done this before and could probably install these in my sleep! YEAH!!! Except, when the lug studs are quite a bit longer and would NORMALLY fit. i.e. if you didn't have the Brembo brake upgrade kit.
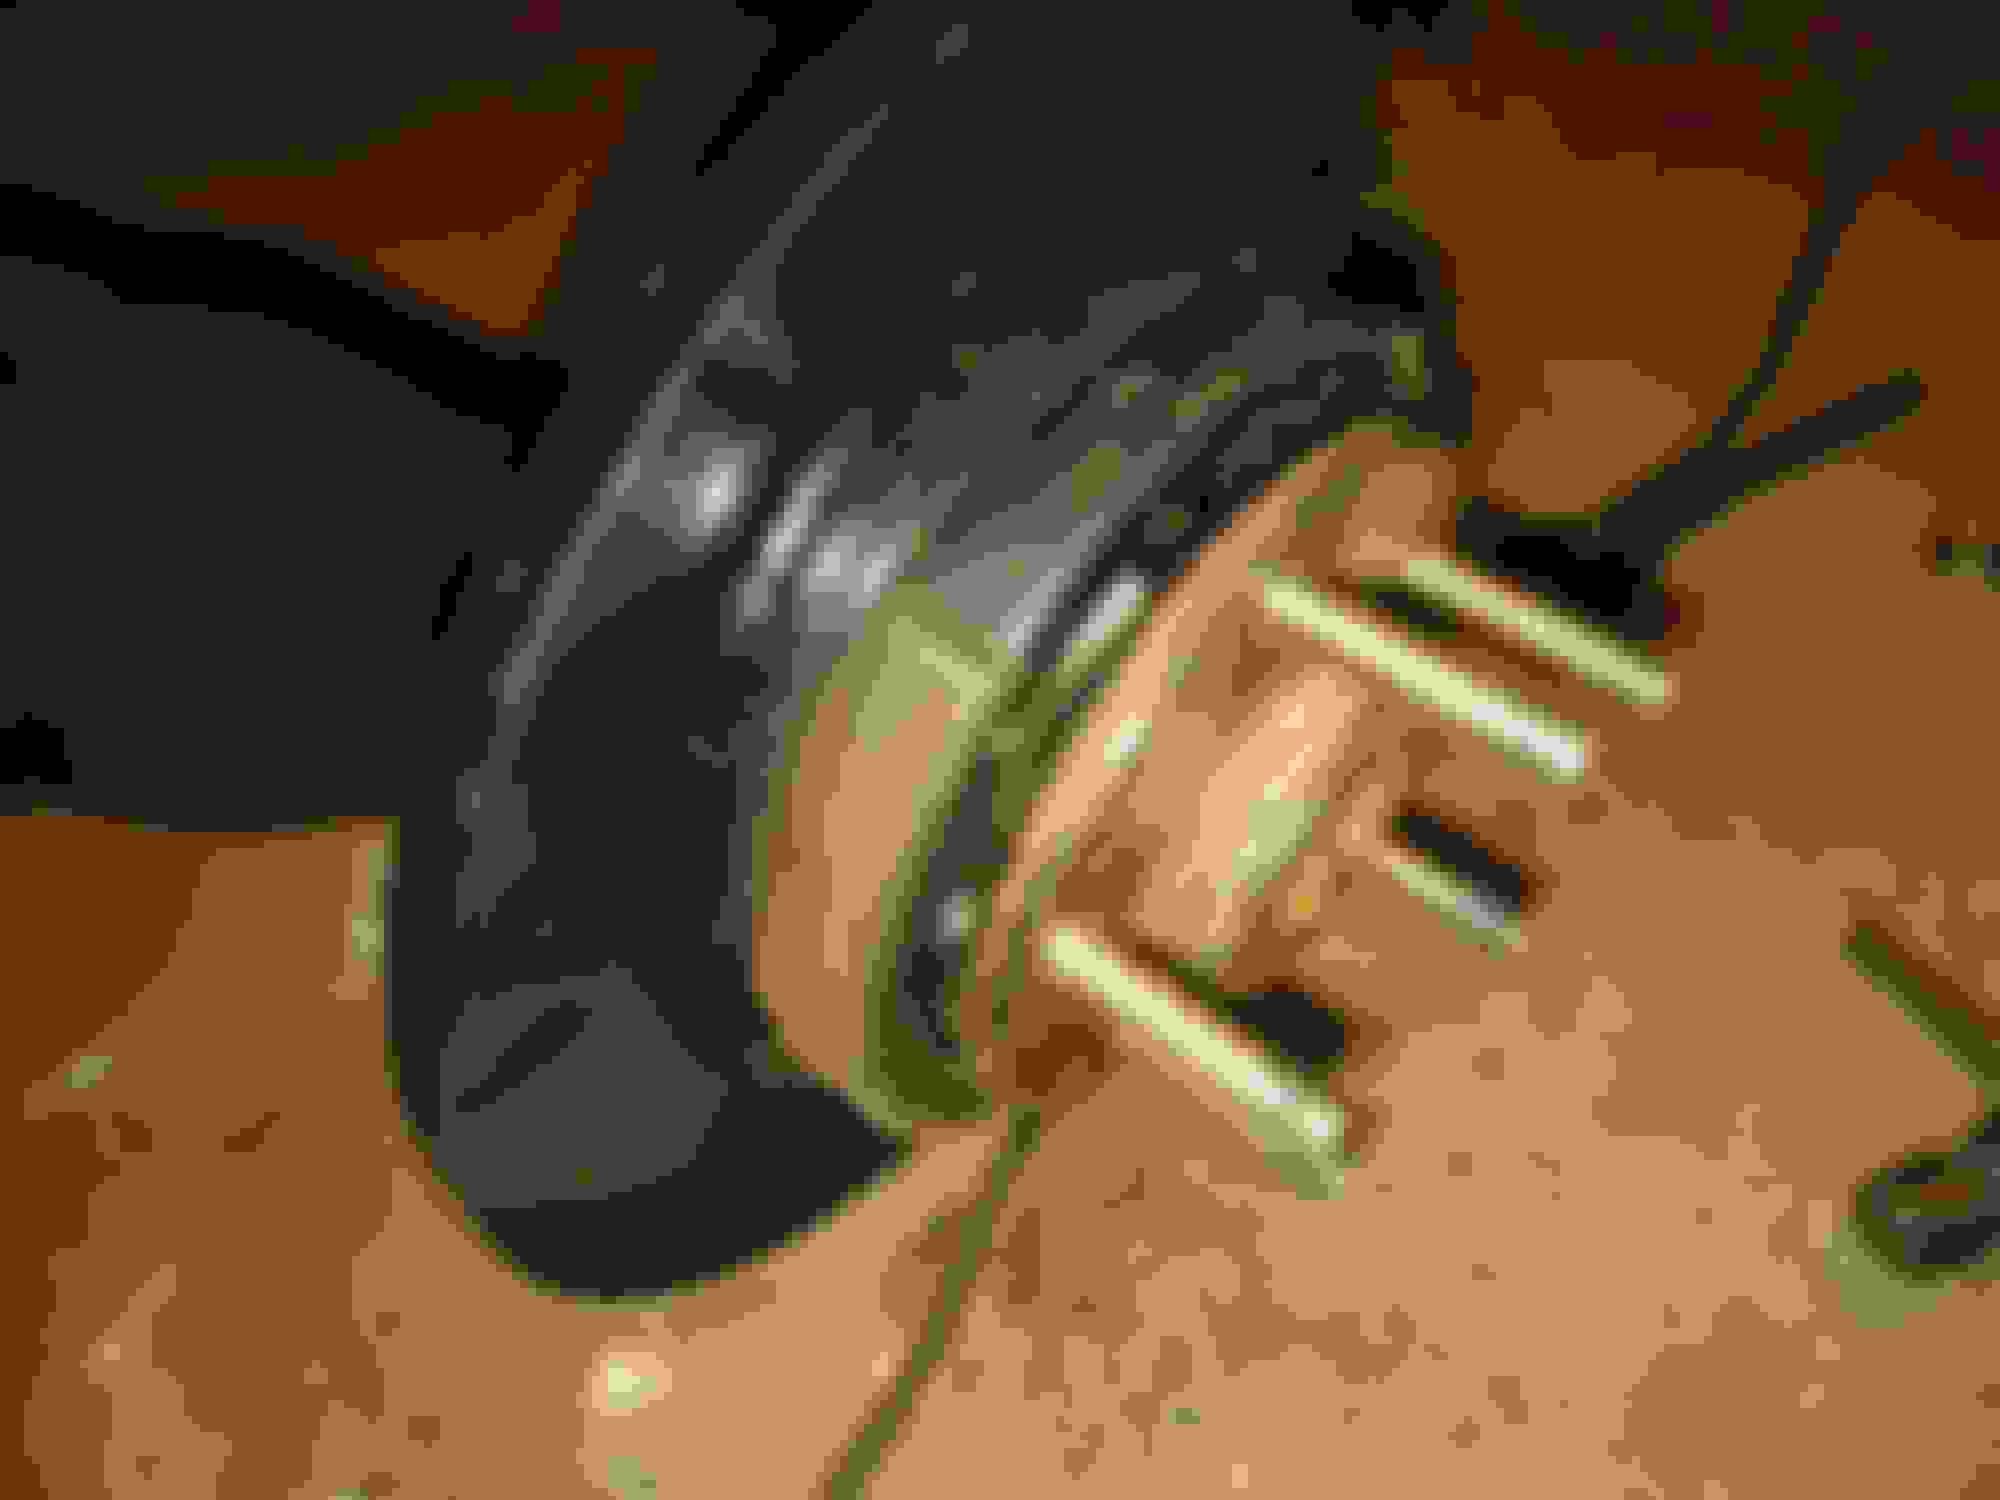
For those of you who don't know, to do this the "easy way" <-- notiice the quotes you should take everything off. This includes the 4 bolts holding the backing plate, which also hold the e-brake cylinder and the e-brake shoe. To get this shoe off...pretty much requires a miracle from GOD, a horse shoe up your (_!_) and for your name to be MERLIN! I swear, I ( -explicative- )'ed with this thing for close to an hour and 40 minutes, trying to remove the shoe. It's supposed to go on and off fairly simple. It's NOT! The inner diameter of the e-brake shoe is roughly the same as the wheel hub. I was just about to go get a hammer and "motivate" the shoe off, when I let go of it and it literally slid off. I sat there in amazement and stared at it...
It was almost a moment, when you're sitting there wondering to yourself and contemplating life. For a split second, I thought to myself, "Should I cry right now...???". Seriously, I have no explanation of how this happened or the precise angle of atack that caused the shoe to come off from around the hub. However, I did - VERY CAREFULLY - grab the shoe and slid it back on and off about 30 times in a row with no problems at all. I then set it in place, got a sharpie and marked a bunch of places, so I could remember how to get it back on easily. I went about putting on the wheel studs (before):
and after:
It would stand to reason, if you could remove it from one side, the other side would be easier...you would be WRONG!
The second side was a literaal "Mind F__" because you know it's possible to get the shoe off. You just don't know how or why it came off...but you witnessed it. I spent another hour + on the second side, when I had to use a pry bar to get the shoe to lift up, and away from the e-brake cylinder. It got stuck. When I lifted it up slightly, the bottom must have rotated and I was able to remove it. Again, I have NO idea how to get this off easy. There is definitely a trick to it. My theory is, there is an inherent time component, magically ingrained in the iron. if you're not spending at least an hour screwing with it, it will not release.
Another thing I needed to do, was modify the spacers for the G-Force coilover bracket. The bracket has an ever so slight bend to it, because the spacers are a little too big. Using a circular sanding disc with a sticky back, I secured it to my work bench. Then I sanded down the end to reveal....
There are some scratches in the steel, but there is also a ring on the inner acpect of the spacer. This is from the coilover being ightnened down and pushing / compressing the metal around the inner aspect of the spacer. This distortion also impinges on the bolt...making the bolt difficult to install and remove. Using a flat file, I took some of the material off the spacer.
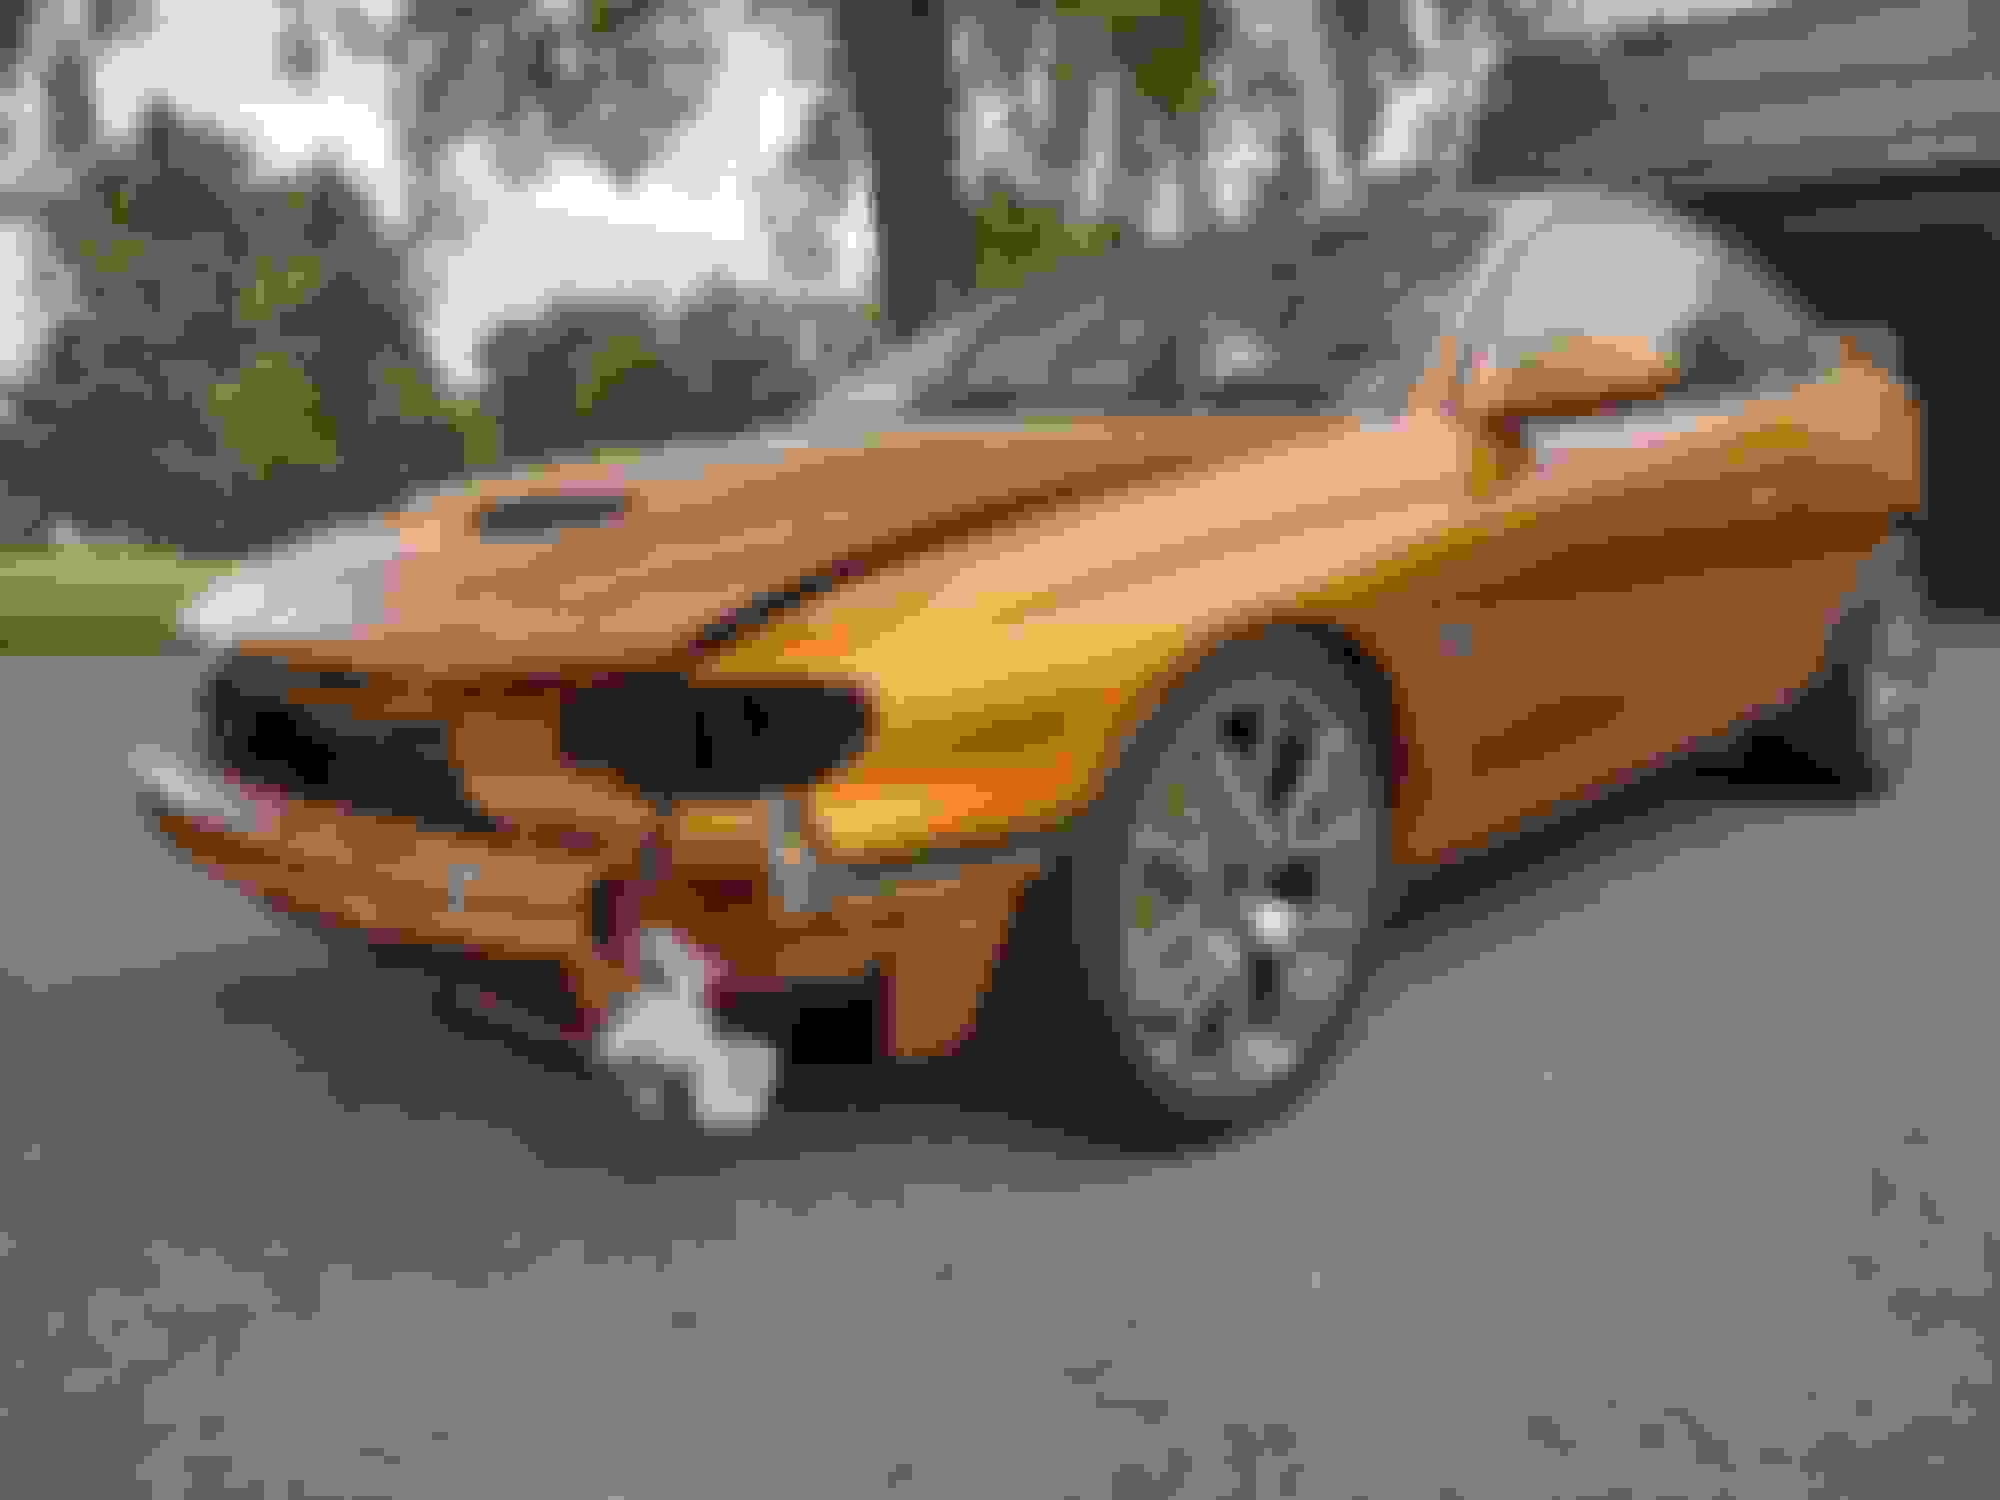
I didn 't want to take too much material off, which is why I used a file and did this by hand. Once I had almost obliterated the inner ring recess, I figured I was done. I repeated this for the spacer for the other side. Once I repainted the spacers, they installed MUCH easier and the bolt went in without an issue. Here's a pic of the Strange / G-Force coilovers, Brembo brakes and the brake lines installed. I'm loving how the Brazen Orange contrasts with the Satin Gold, aluminum and the black.
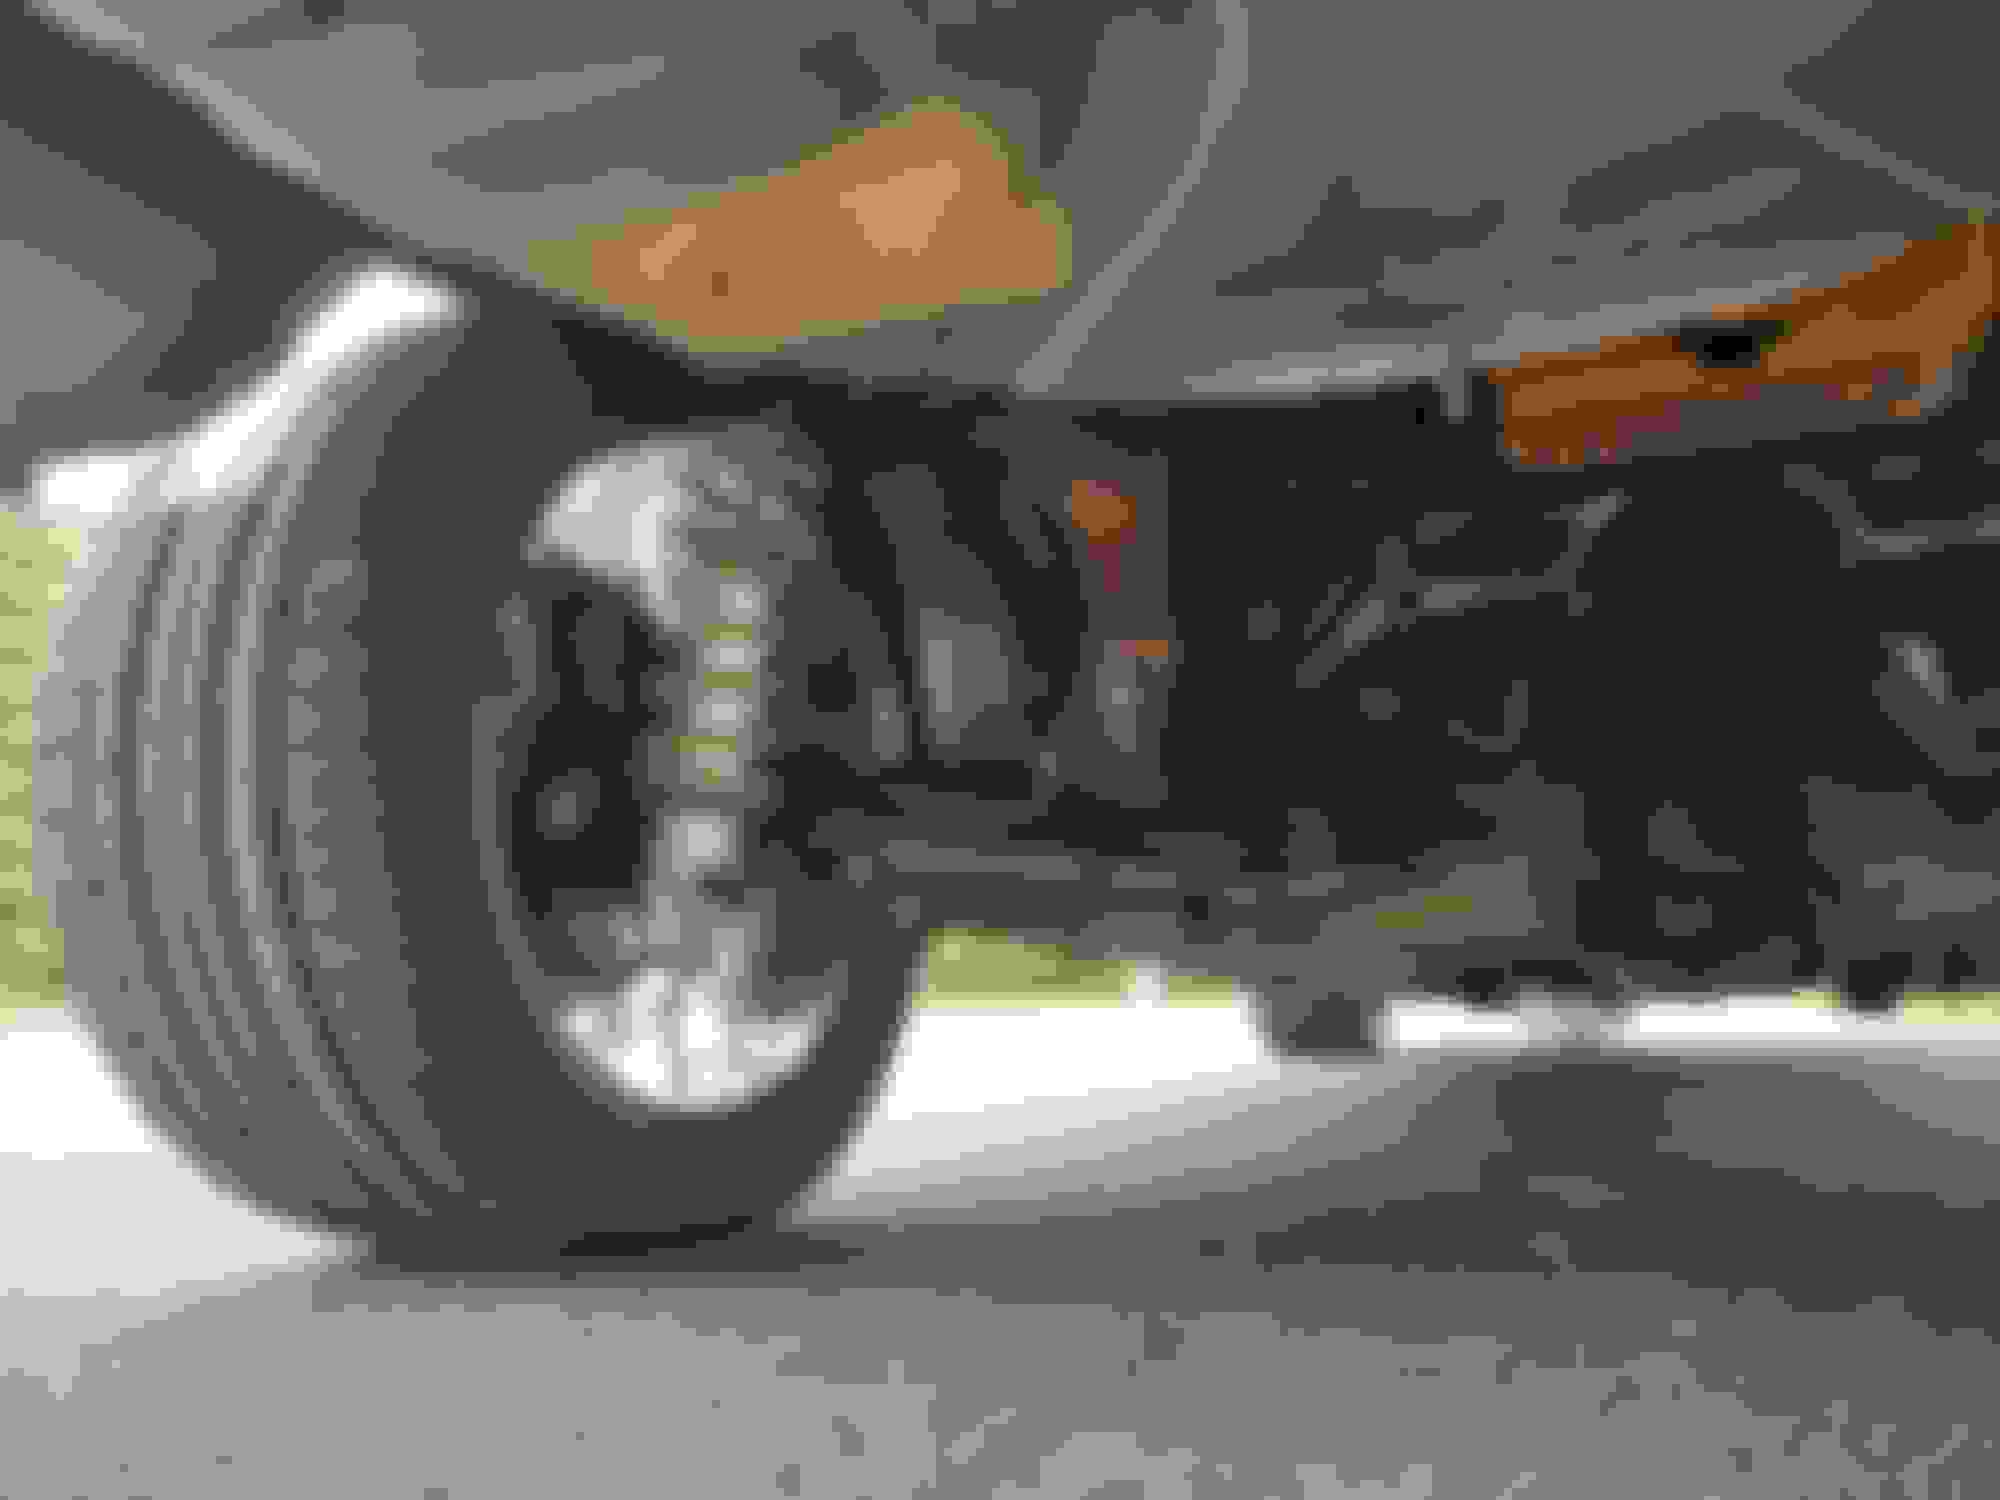
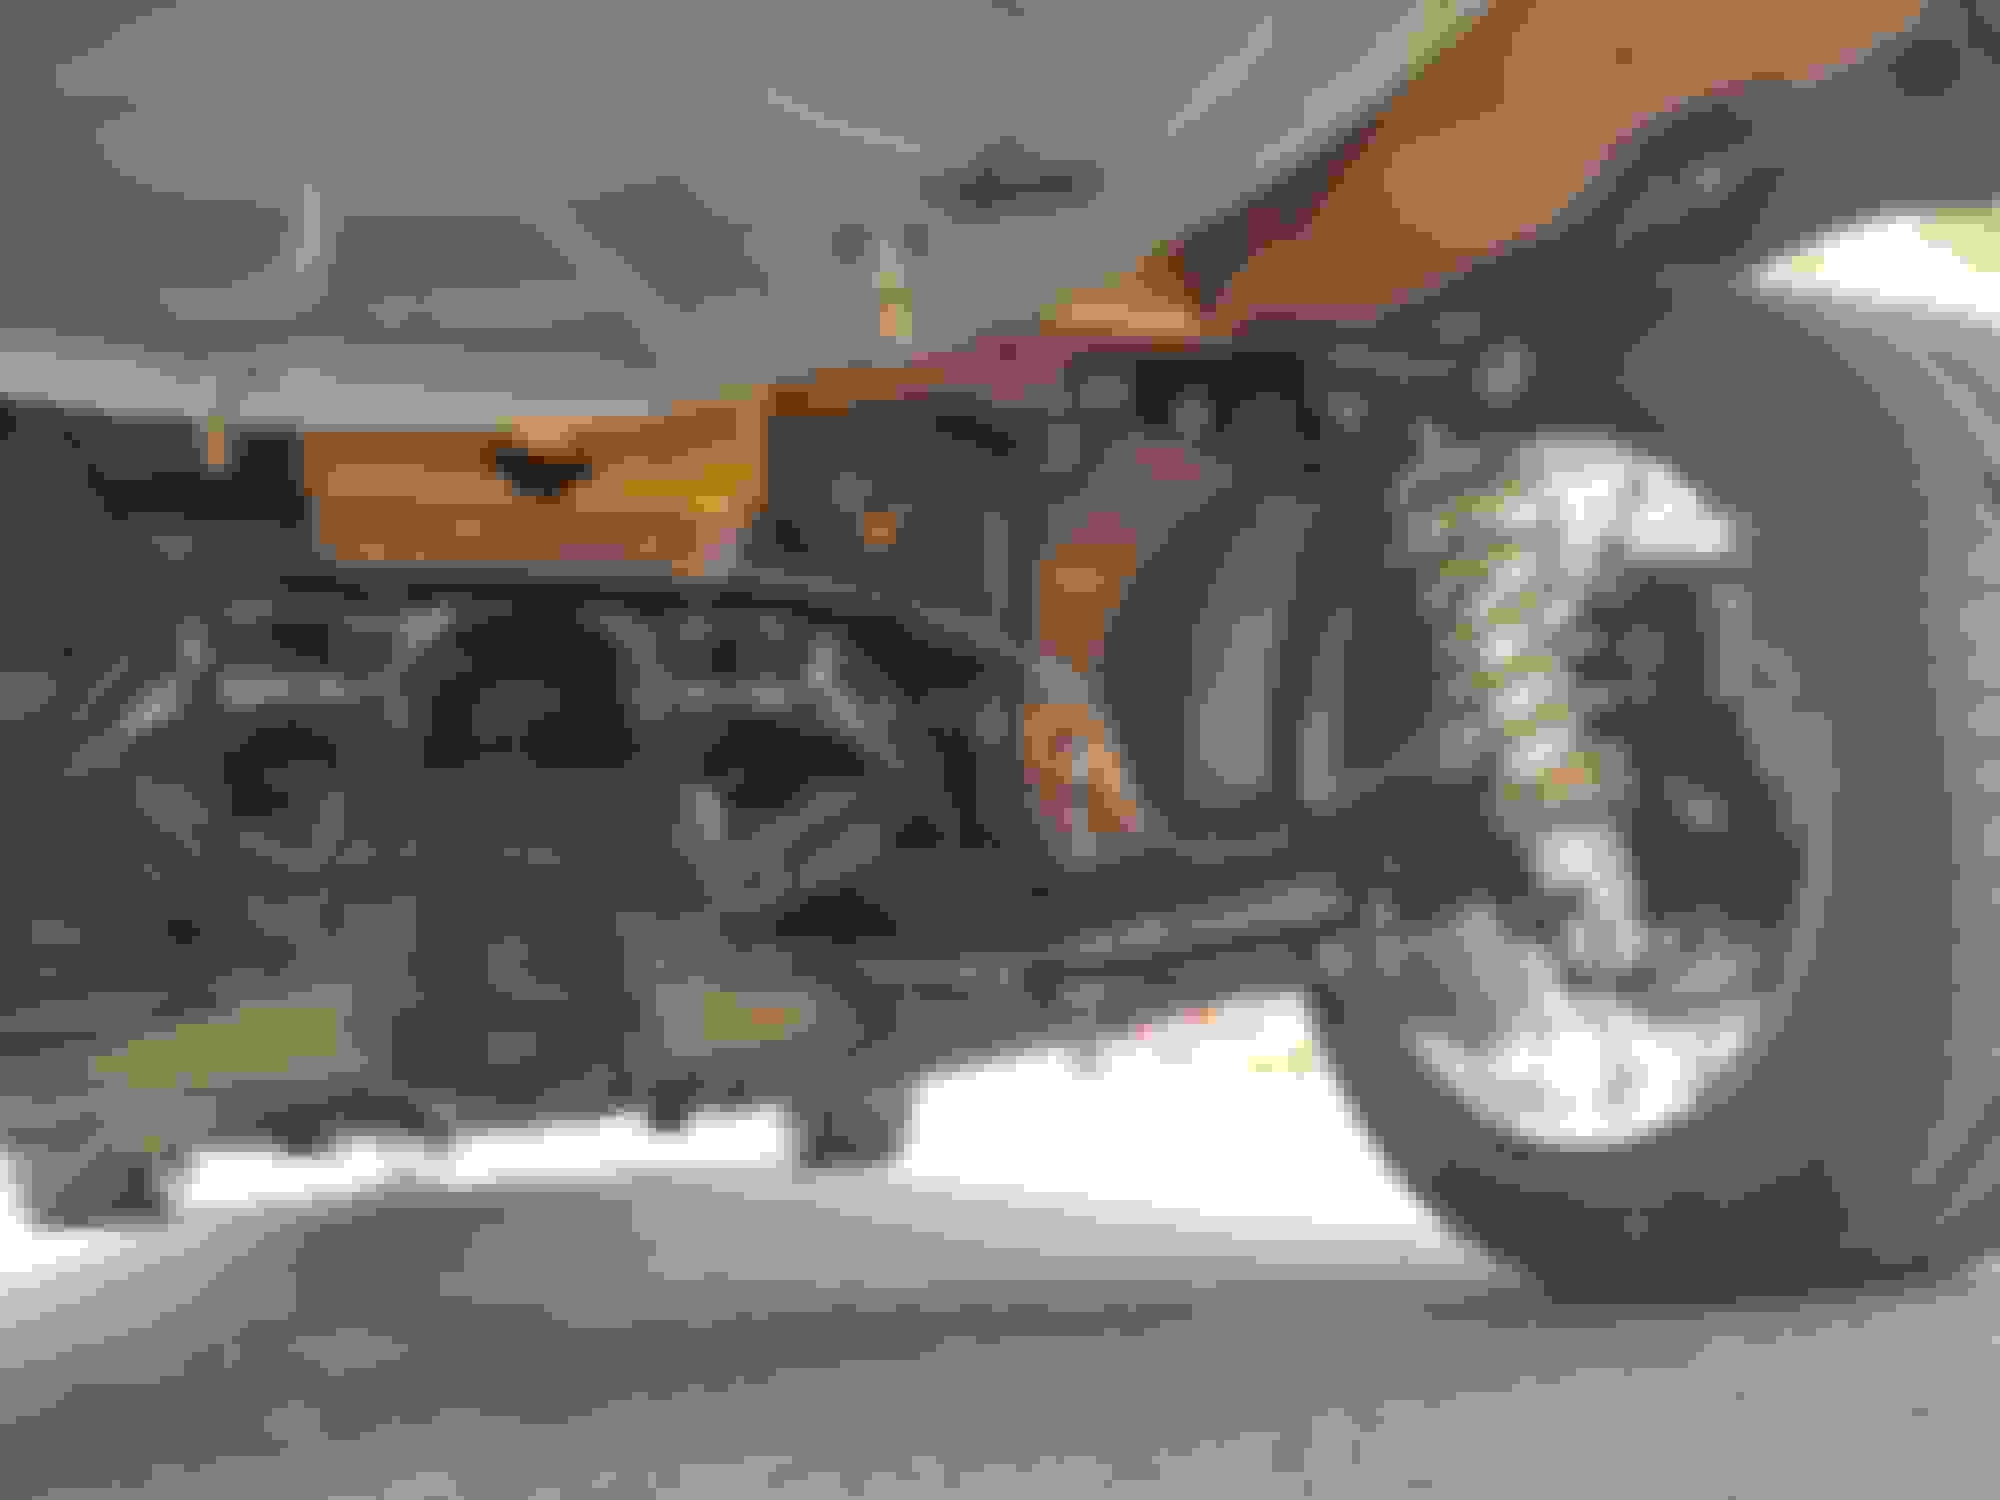
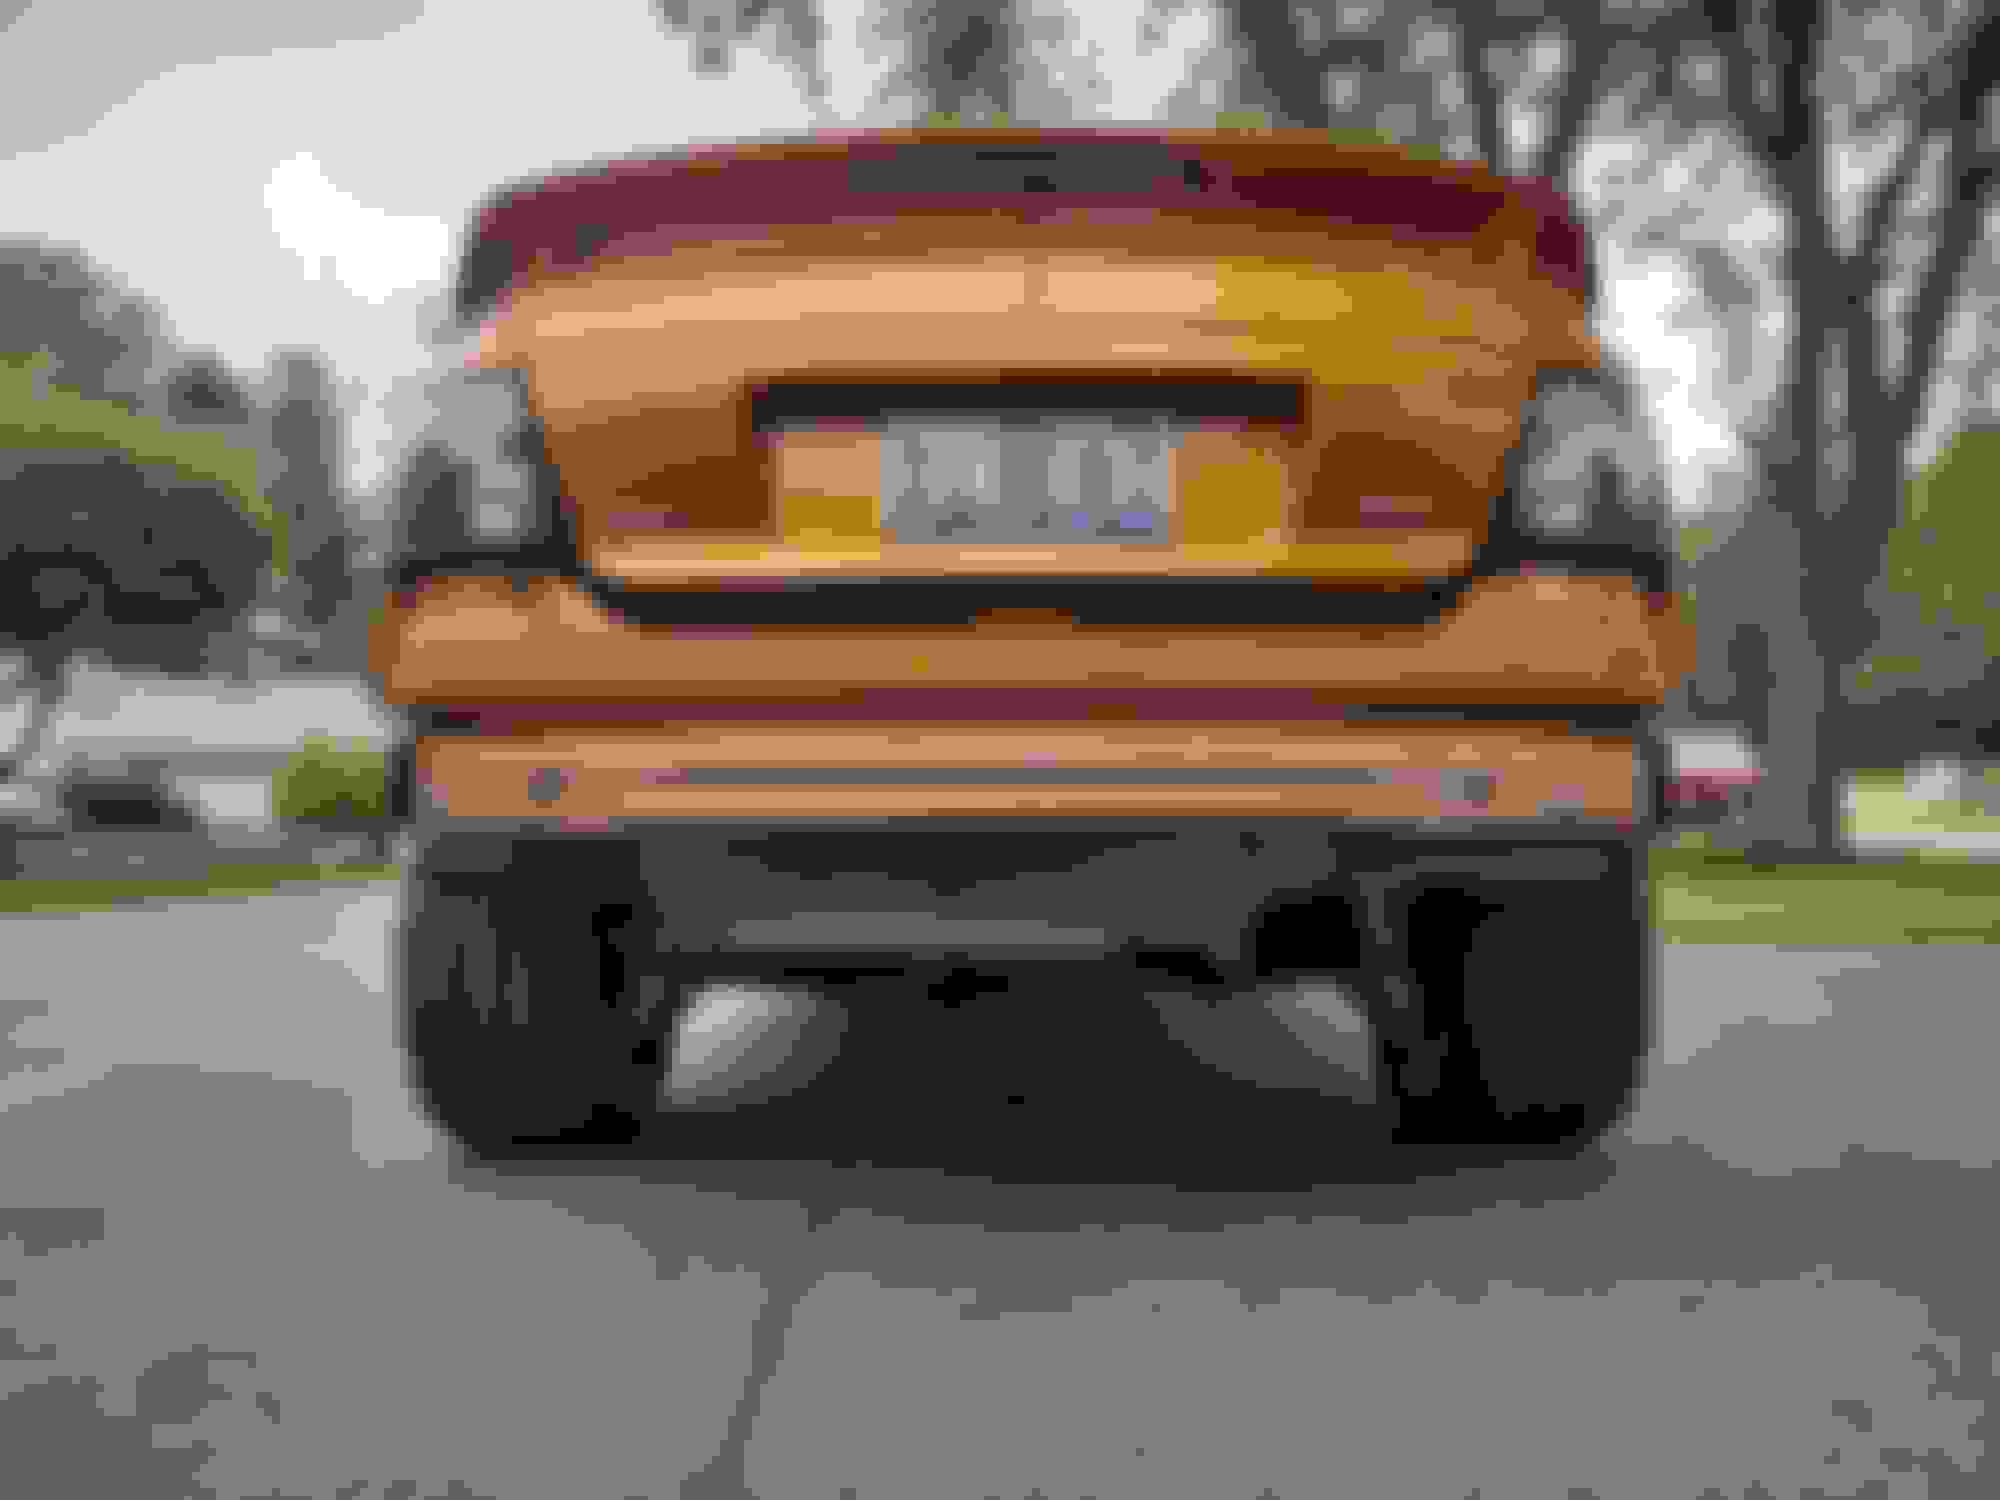
On Friday night / Saturday, morning, I wanted to see how much space was between the tire and lower control arm. To the best of my ability, I snapped a billion pictures, trying to get a reading. This is the ONE that turned out. At the closest area, I believe I have around 7/8ths to 15/16ths of an inch clearance. The wheels are from a 2012 Cadillac CTS-V Sedan, with Continental Extreme Contact Sport 295/35 19" tires mounted on them.
A few hours later (after going to bed), pushed the car outside for the first soapy wash in almost 4 years!!!
Even the interior got cleaned. My ex's little ...umm... "kids" used to spill their in the back ALL of the time. When I was with her, I shampoo'd the carpet several times (like once a month). She would buy them Starbuck's constantly, but they would only manage to get 1/2 in their mouth. The rest...well...here's what I had to clean up YEARS later! The other side was worse, I just forgot to take pics. The OEM floor mats were cleaned a long time ago, but I wound up getting some nicer Lloyd's mats for the car.
/\
Before
After (amazing what "Top Job" floor cleaner will do!!!) \/
Then I put some of the interior back in. The front seats are not fastened in all the way, because I still need to get the center console back in place. I can easily lean them backwards to install / tighten the screws taht go along the bottom edge of the console. - BUT - the seats are back in!
For those who may ask, the covers were made by "Wet Okole". They are made from Neoprene and have copper piping. The copper color faded to a real nice, feminine PINK . The "GTO" logo was custom embroidered on, using silver stitching on the border and copper stitching in the center. Oddly enough, that did NOT fade! I think when I have the seats redone, I'm going to have the embroidered GTO done like this again. I kind of wish I didn't do the piping because of the fade and it doesn't match the back seats. The "GTO" logo looks SO AWESOME!!!
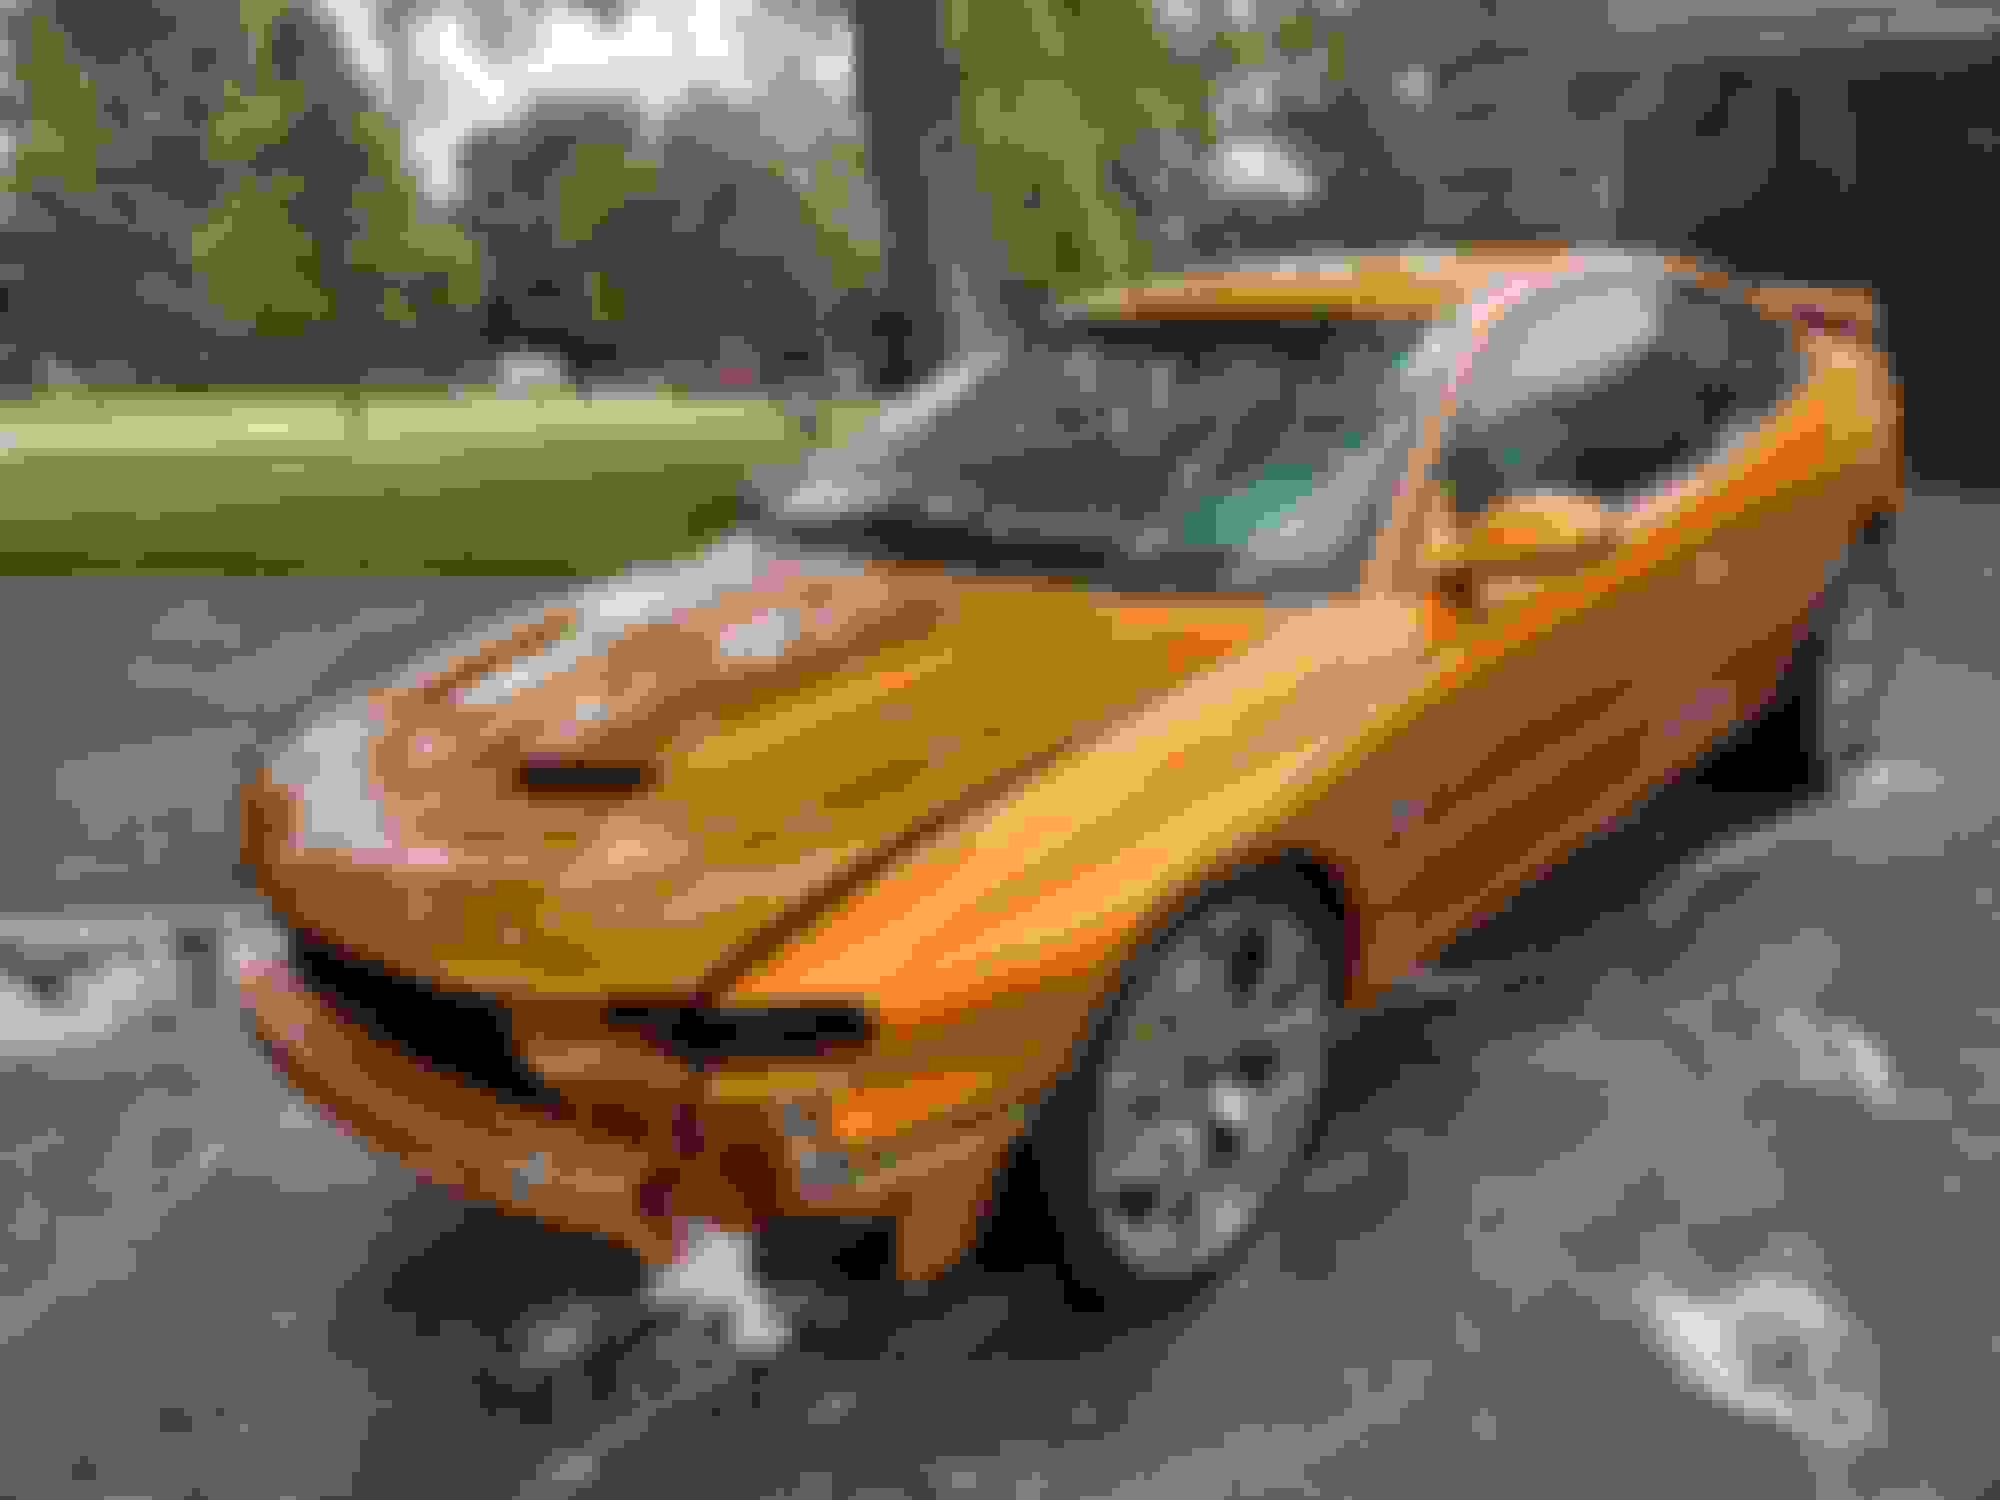
Here's a pic of the car (cleaned) showing the size of the tires. Again, these are 9.5" CTS-v Sedan wheels, with Continental Extreme Contact Sport 295/35 19 tires mounted on them.
There is still a TON of work to do on the car. I have to run new PTFE fuel lines (outgoing and return), install the electric cutouts, hang the 3" exhaust, get the diff back, install the shifter and drive shaft, reconnect the e-brake cables, finish the brackets for the coil packs and P/S reservoir, finish the DuSPEED, figure out and install the intercooler pump and lines...UGH! there's a LOT to do!
Nice work. Can the seat foam be shaved to help keep the seat shape? I really want to get this done someday. I just want the most oem look and feel possible.
As with anything else, I would practice on a piece of plastic to get an idea of what sort of stresses the plastic can take while getting it to bend, flex and do what you want it to do. There is a small learning curve, it's not difficult, but it's best to learn on a piece of scrap, than your GTO's interior panel.
1). Putting the lower seat in (where your but goes), was really easy and I had no issues with this piece.
2). The upper piece (where your back goes) needed some massaging. I took the seat belt hooks off (these fasten to the seat frame and are a type of clip to stop the seatbelts from flopping all over). The cord fishes through a double sided leather hole and has a hard plastic end, tied onto it. To pull back the leather is pretty simple. There are some plastic hook-type things stitched into the leather and hold onto the seat frame. A simple compress of the foam cushiion and twist of the hook and the hook will pop off. This allows you to pull back the leather (this is super easy). Once you've released all the leather on one side, you can pull the foam (bolster) back to expose the metal framework underneath. With the entire seat on the ground or on a flat surface, I simply pushed the upper bolster framework inward about an inch to inch and a half. I suggested placing this on a flat surface, so when you push that bolster frame inward, you DON'T BEND the rest of the seat frame into a "C" shape. If you have it standing on the side and push down, you'll definitely cause the whole seat back to bend. Trying to get the four (4) hooks along the top edge of the seat to align with the recepticles on the rear panel (which seperates the interior from trunk) will be a fight. You might have to give the upper seat a litle motivation, but it should pop back in prett easy. Repeat this to the other side.
3). The plastic interior side panels are a different story. I eyeballed how much I needed to cut off the plastic interior panel with a magic marker. Using a dremel and a small cutting wheel, I took off LESS plastic of that panel than I thought I needed to remove...figuring, if I screw up, the damage will be less. The part that is going over the tub is going to have to be heated and bent. Be careful to move the heat gun along the area you wish to bend. Try to keep the heat even, so you don't melt the plastic. If the plastic starts to look wet, it's melting! Move the heat away from this area and allow the plastic to dissipate the heat.. ALSO!!! Be certain you heat the plastic on the BACK SIDE of the panel or on the side facing AWAY from the interior. This way, if you begin to melt the plastic, you will not damage the outward facing surface. You want to keep the part looking as stock as possible. The plastic panel will have to be bent towards the inside (middle) of the car to help cover the tub.
Along the bottom edge of the rear interior panel, which is closest to the REAR of the car' there is a reinforcement, "L". You will need to cut along the bottom edge of this a couple of inches in order for this to bend away from the mini tub. I would suggest cutting the the bottom and NOT the corner or any of the outward facing surfaces:
-- A), you don't want to screw up and damage the panel,
-- B). this area will be covered by the lower rear seat...BUT, it's always best to err on the side of caution.
-- C). I actually left a slight lip or ridge on this inner edge. When I went to bend the panel, this gave the area a little more meat. I noticed, if I ddin't leave taht ridge, some areas of the plastic would have a more harsh bend, a;lmost a kink in the plastic. Again, it is covered by the lower part of the seat, but if someone goes back there, you probably don't want them knowing all the work you did. Plus, it will end up having a more factory feel.
You're best bet is to cut a little at a time and test fit the panel. The plastic will be hot, so make sure you have some sort of gloves on...BUT you're also going to want to make sure you DON'T heat it up so much, you make an unwanted impression in the face of the plastic (the part you can see). :Lastly, I used some brake parts cleaner on the back side of the panel to help cool it down. Don't use this on the face, as it might distort the color or pattern that is molded in the plastic.
I didn't do much to the car this weekend. The landscaper tried to scam my 80 year old mother. He was charging her $70 / week to mow her lawn (when fuel was $515 / gal), but decided he wanted her to pay for the entire month instead of only weekly. When he told her it was going to be $525 for the month (and gas is $546 / gal), she told him no. So, even if the price went from $70 to $85 / week, that's still $425 for a 5 week month. He had also started some work, (3 small projects) which he was being paid extra for, but never finished any of them.
So, I helped her by edging around everything and showed her how to use the mower. I took down some branches and moved some dirt around to finish what this guy started in May.
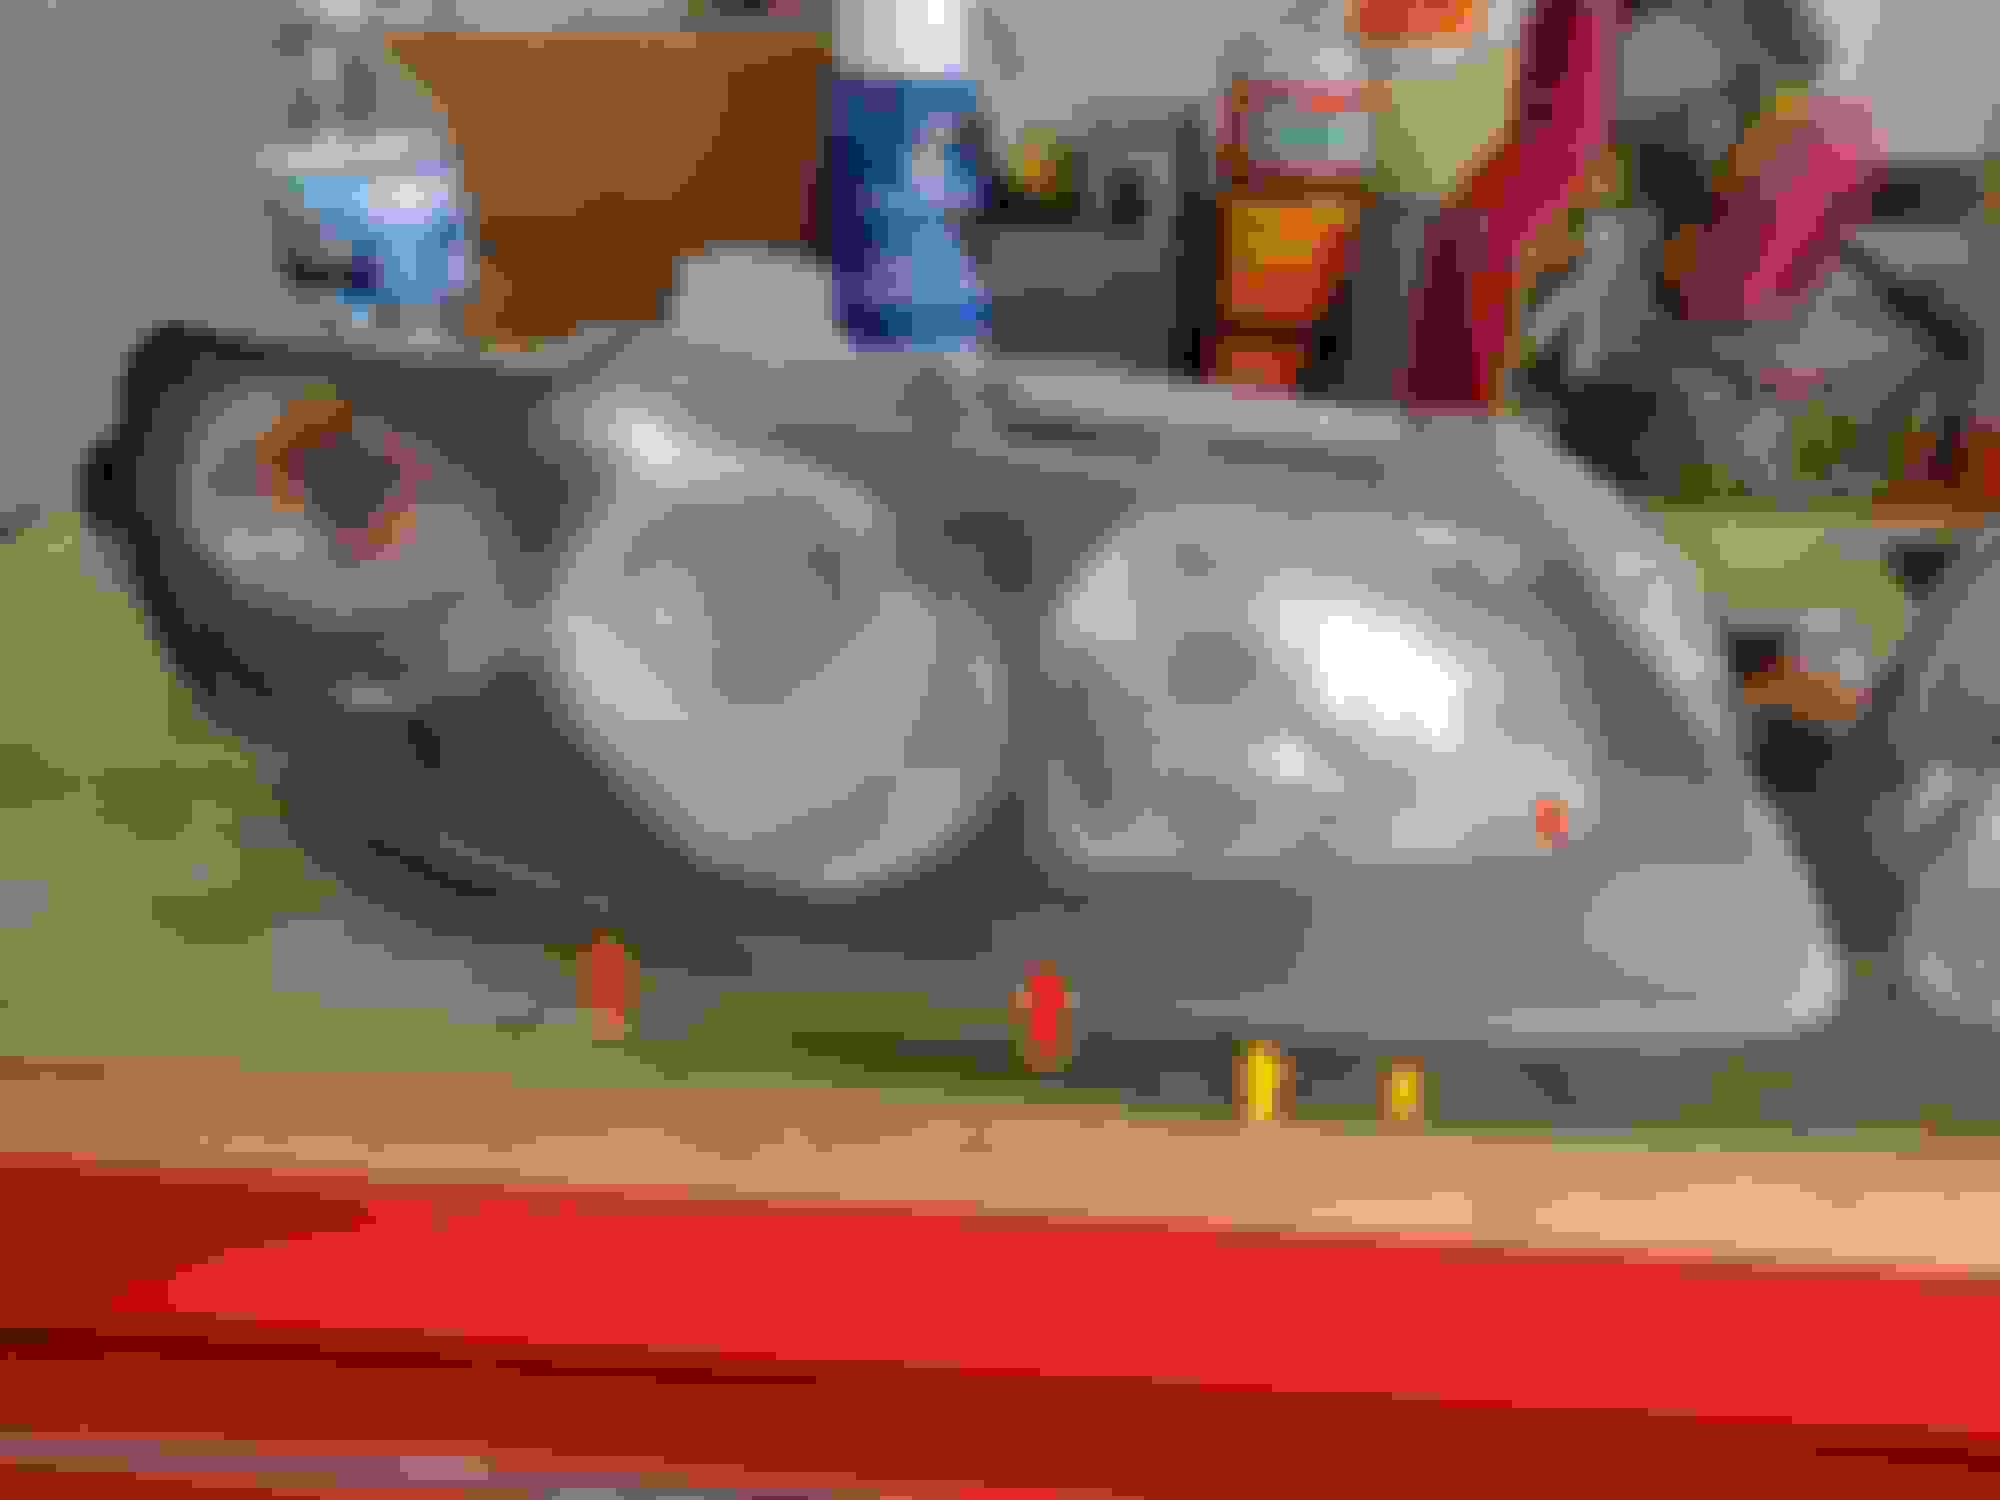
All I managed to do was polish my headlights. They were sanded down and finished with 2000 grit paper, then put on the side. When I pulled them out of the container, they weren't wrapped up, one of the top tabs was cracked and the other one had a piece missing out of it. To add insult to injury, some sort of white stuff DRIPPED and dried on the lenses. I tried to sand through the drips, but it penetrated into the polycarbonate and left a ghost-like shadow. I got most of it out, but I'm super P!$$ED. These were really nice and now they look like . What used to be a set of headlights that looked really good up close, are NOW a set of 10 footers. The red arrows with yellow borders show some spots and drips. Below, the yellow arrow with red borders show a fairly large area where...whatever was dripped onto these, pooled. This is after some substantial wet sanding, ending with 2000 grit paper
These were only wet sanded down using up to 200o grit paper
Below, you can see in the headlight on the left, where that stuff pooled better. I did sand this area and the other marred spots with 400, 500, 800, 1000, 1200, 1500 and 2000 grit paper 2 times. I did try polishing it out with rubbing compound and saw there were still marks in the lens...so I sanded it again. It turned out O.K., but I'm NOT very happy.
After 3 stages of polishing, this is where I left them. There is still a shadow on the lower aspect of the headlight on the left, but I can live with this. This shows around 4 hours of constant sanding and polishing of these headlights. They look better, but now I have to fix the tabs! .
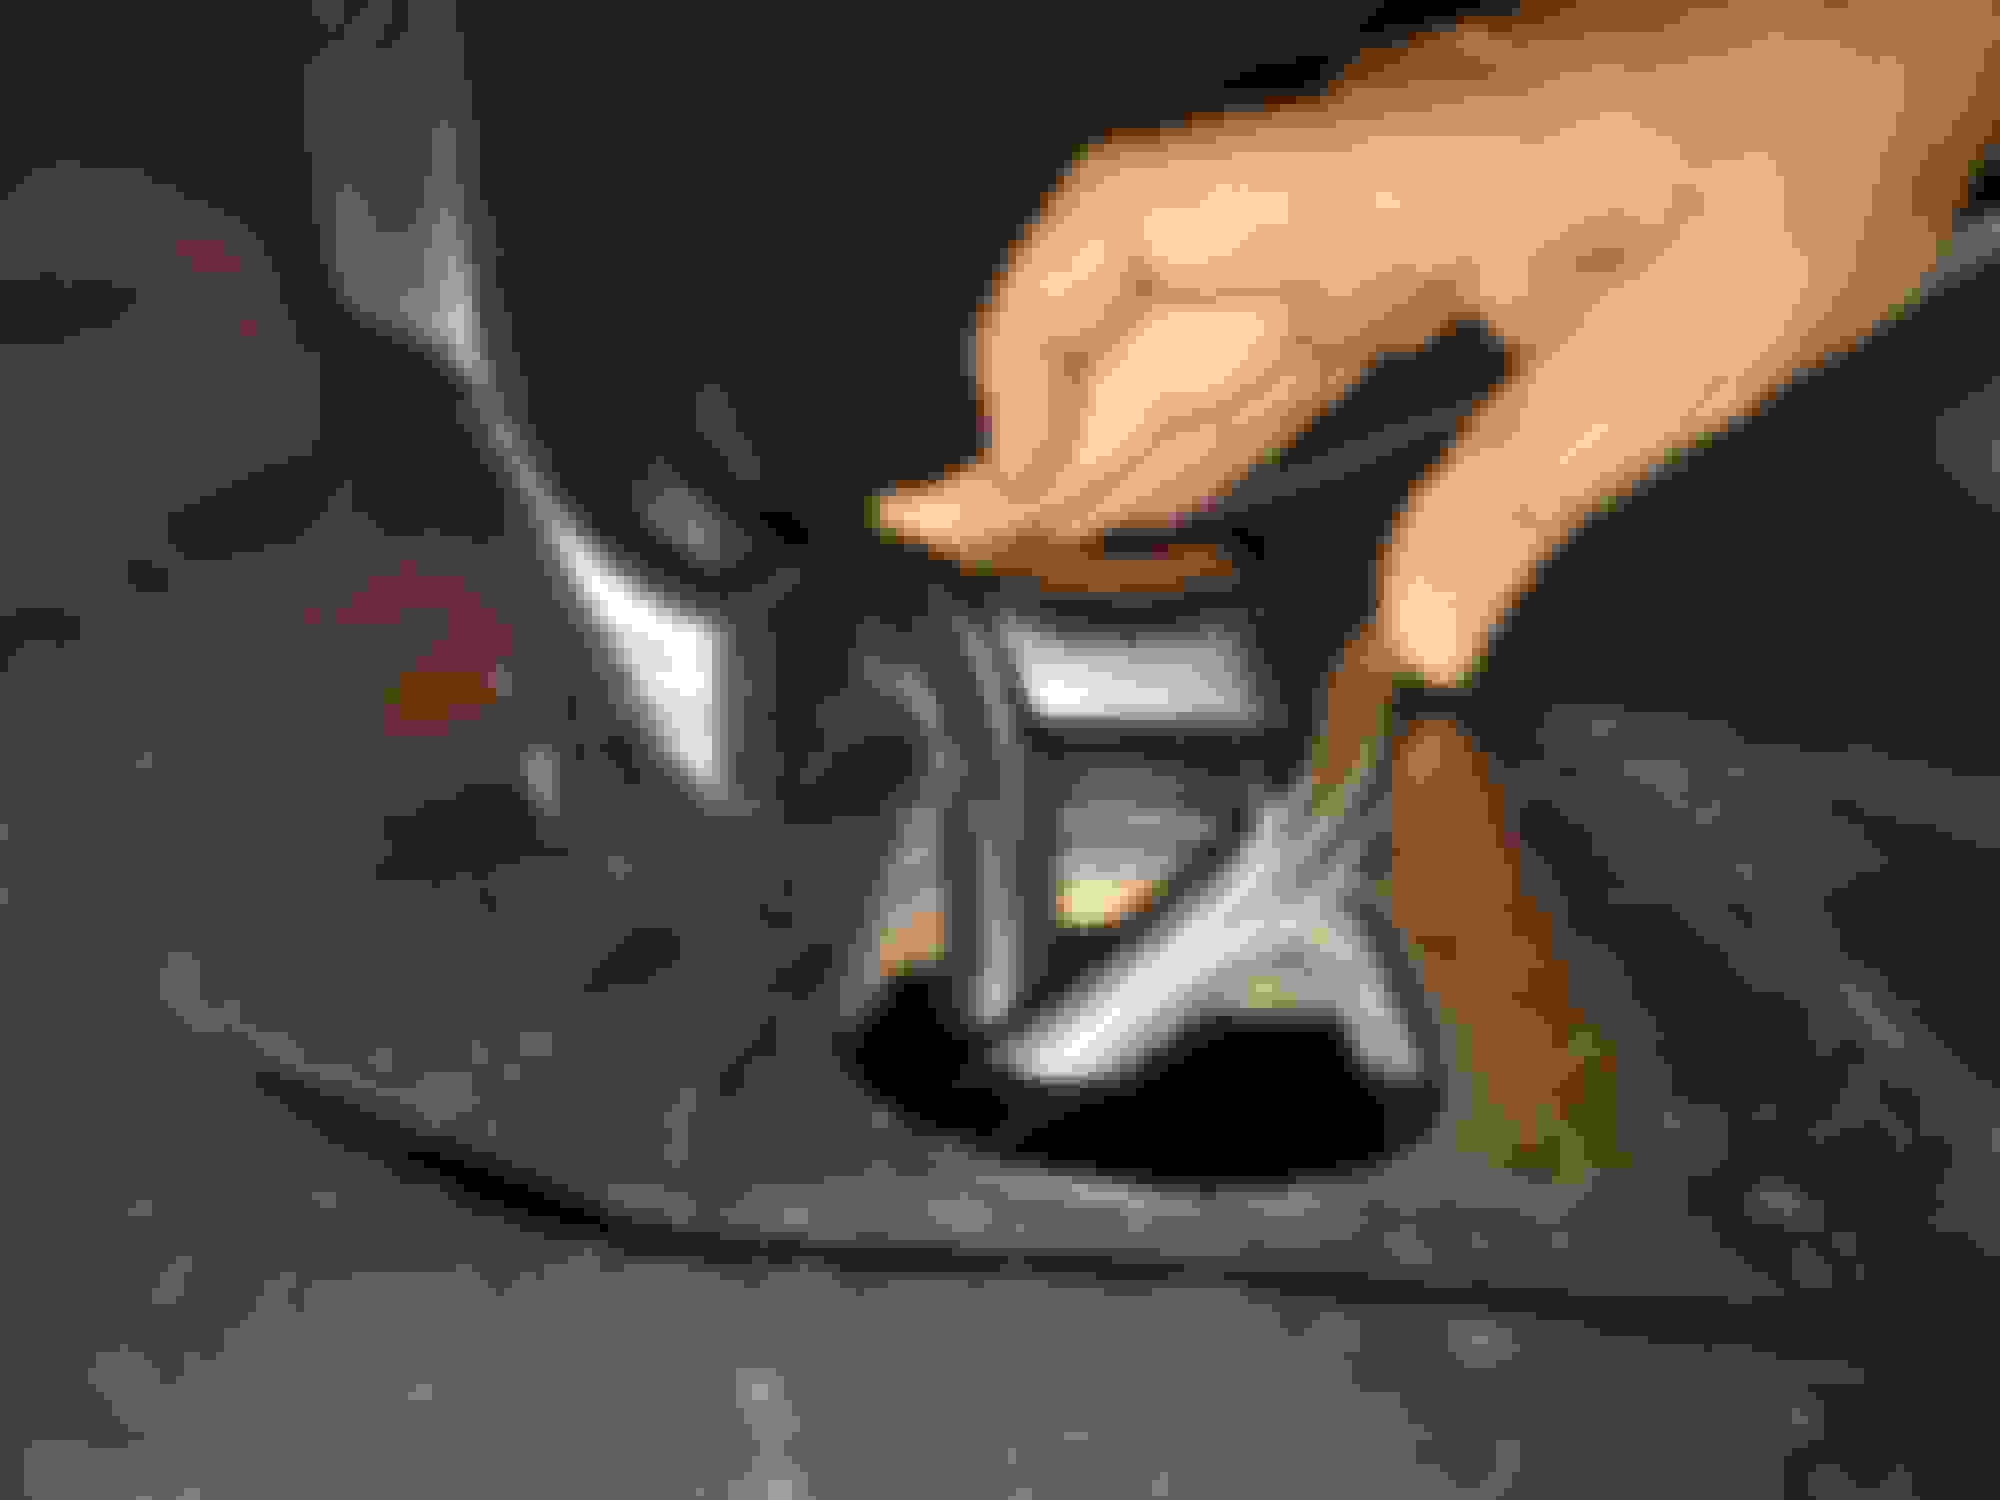
Then I started cleaning off some of my shelves and found an unlabeled box. When I opened it, I rediscovered one of the brackets I was working on. This is for the brake / clutch reservoirs. Originally, there were 2 arms that connected the top and side parts. I removed the lower arm and made some extra bracing, to weld onto the bracket to give it better rigidity. I had to do this because the coil pack bracket I made would have interfered with the lower arm. I should have taken better pictures to illustrate what I did...which I'll have to do for the book of modifications I'm putting together for this car. The piece of metal at the top was going to be the mount for the coil pack bracket, but it was getting really heavy. I wound up redesigning it, so it was lighter.
@DOC-Z good to see her outside and on the ground, project is looking good!
man I wish I had checked here earlier, I sold my driver side but still have my passenger headlight from my 06. I pulled them off not long after I got the car with 54k on it back in 2014. its about the only part I have left let me know if you are interested.
Hmm...I am interested, but I just spent some $$$ buying more parts (1400 hp axles, an connectors and such). I have to get some billing sent in, but I'll message you in 2 weeks to see if it's still available. I just don't have the free cash at the moment.
Originally Posted by 02*C5
Any updates?
Sorr, but I went on my first vacation in about 5 years last weekend. I didn't work on the car at all, but I should be getting the diff. back soonly. Once I have that and the new fuel lines installed, I'll be taking more pictures (of the diff, fuel lines, D/S and brand new (but 3 year old) Magnaflow 3" exhaust ) all installed. Trust me, I'll be posting more within the month!
Hmm...I am interested, but I just spent some $$$ buying more parts (1400 hp axles, an connectors and such). I have to get some billing sent in, but I'll message you in 2 weeks to see if it's still available. I just don't have the free cash at the moment.
Sorr, but I went on my first vacation in about 5 years last weekend. I didn't work on the car at all, but I should be getting the diff. back soonly. Once I have that and the new fuel lines installed, I'll be taking more pictures (of the diff, fuel lines, D/S and brand new (but 3 year old) Magnaflow 3" exhaust ) all installed. Trust me, I'll be posting more within the month!
No worries hope you enjoyed your vacation and just really interested in this build. Looks really great, class A build. 👍🏻
Hate to be the bearer of bad news, but I have polished some lenses back to perfection before, and they cloud up much faster than they originally did. The UV damage apparently runs deeper than you can see upon initial inspection. If you are ok with a greatly shortened service interval, this is not a problem, but they will cloud up again exponentially faster as you go.
Hate to be the bearer of bad news, but I have polished some lenses back to perfection before, and they cloud up much faster than they originally did. The UV damage apparently runs deeper than you can see upon initial inspection. If you are ok with a greatly shortened service interval, this is not a problem, but they will cloud up again exponentially faster as you go.
I knew they do cloud up, but there was something (physically) on my passenger side lens. Whatever it was, it etched into the plastic and discolored (whitened) the area where the stuff dripped onto it. Years ago, I found a really nice set of headlights and polished them. They almost looked new, but then I got into an accident. I did have headlight Armor on them and they held up really well the two years I was daily driving it with those headlights.
Is there anything you can't modify or fabricate? Wow.
For the headlights, if you put something like headlight Armor (I prefer Lamin-X) on them right after polishing them it will help preserve the clearness. I had to polish the headlights on a VW we had once and I covered them with Lamin-X right after and they lasted another 7-8 years.
It's been a few weeks since my last post. Since then, I sold:
- the OEM 18" GTO wheels,
- the G-Force anti-hop axles,
- the lower block and flywheel for an Ecotec 2.4 litre
...and I had a TON or people asking me about the LSA I have for sale...
I also managed to get the new fuel lines sorta installed, did some glassing on my modded DuSPEED cold air intake, pulled the fuel tank (it was only set in place) and changed up a few -8 and -6 an connectors. Since I completely changed my fuel system (went with twin 450's from Chris Johnson), I had to take the OEM fuel pump out. So, now I have a set of pumps I need to sell (i.e. a "used" DW300c and never installed DW350il).
Originally, I had a -6an fuel rail connector, w/a 45* angle coming off the rail. I opted to swap that out for a newer / better -8an connector and a 45* bend for the braided PTFE hose. I also mocked up the return line from the fuel pressure regulator. ordered some -8 an and -6 an connectors. They arrived yesterday, so I took them home and put them in right away.
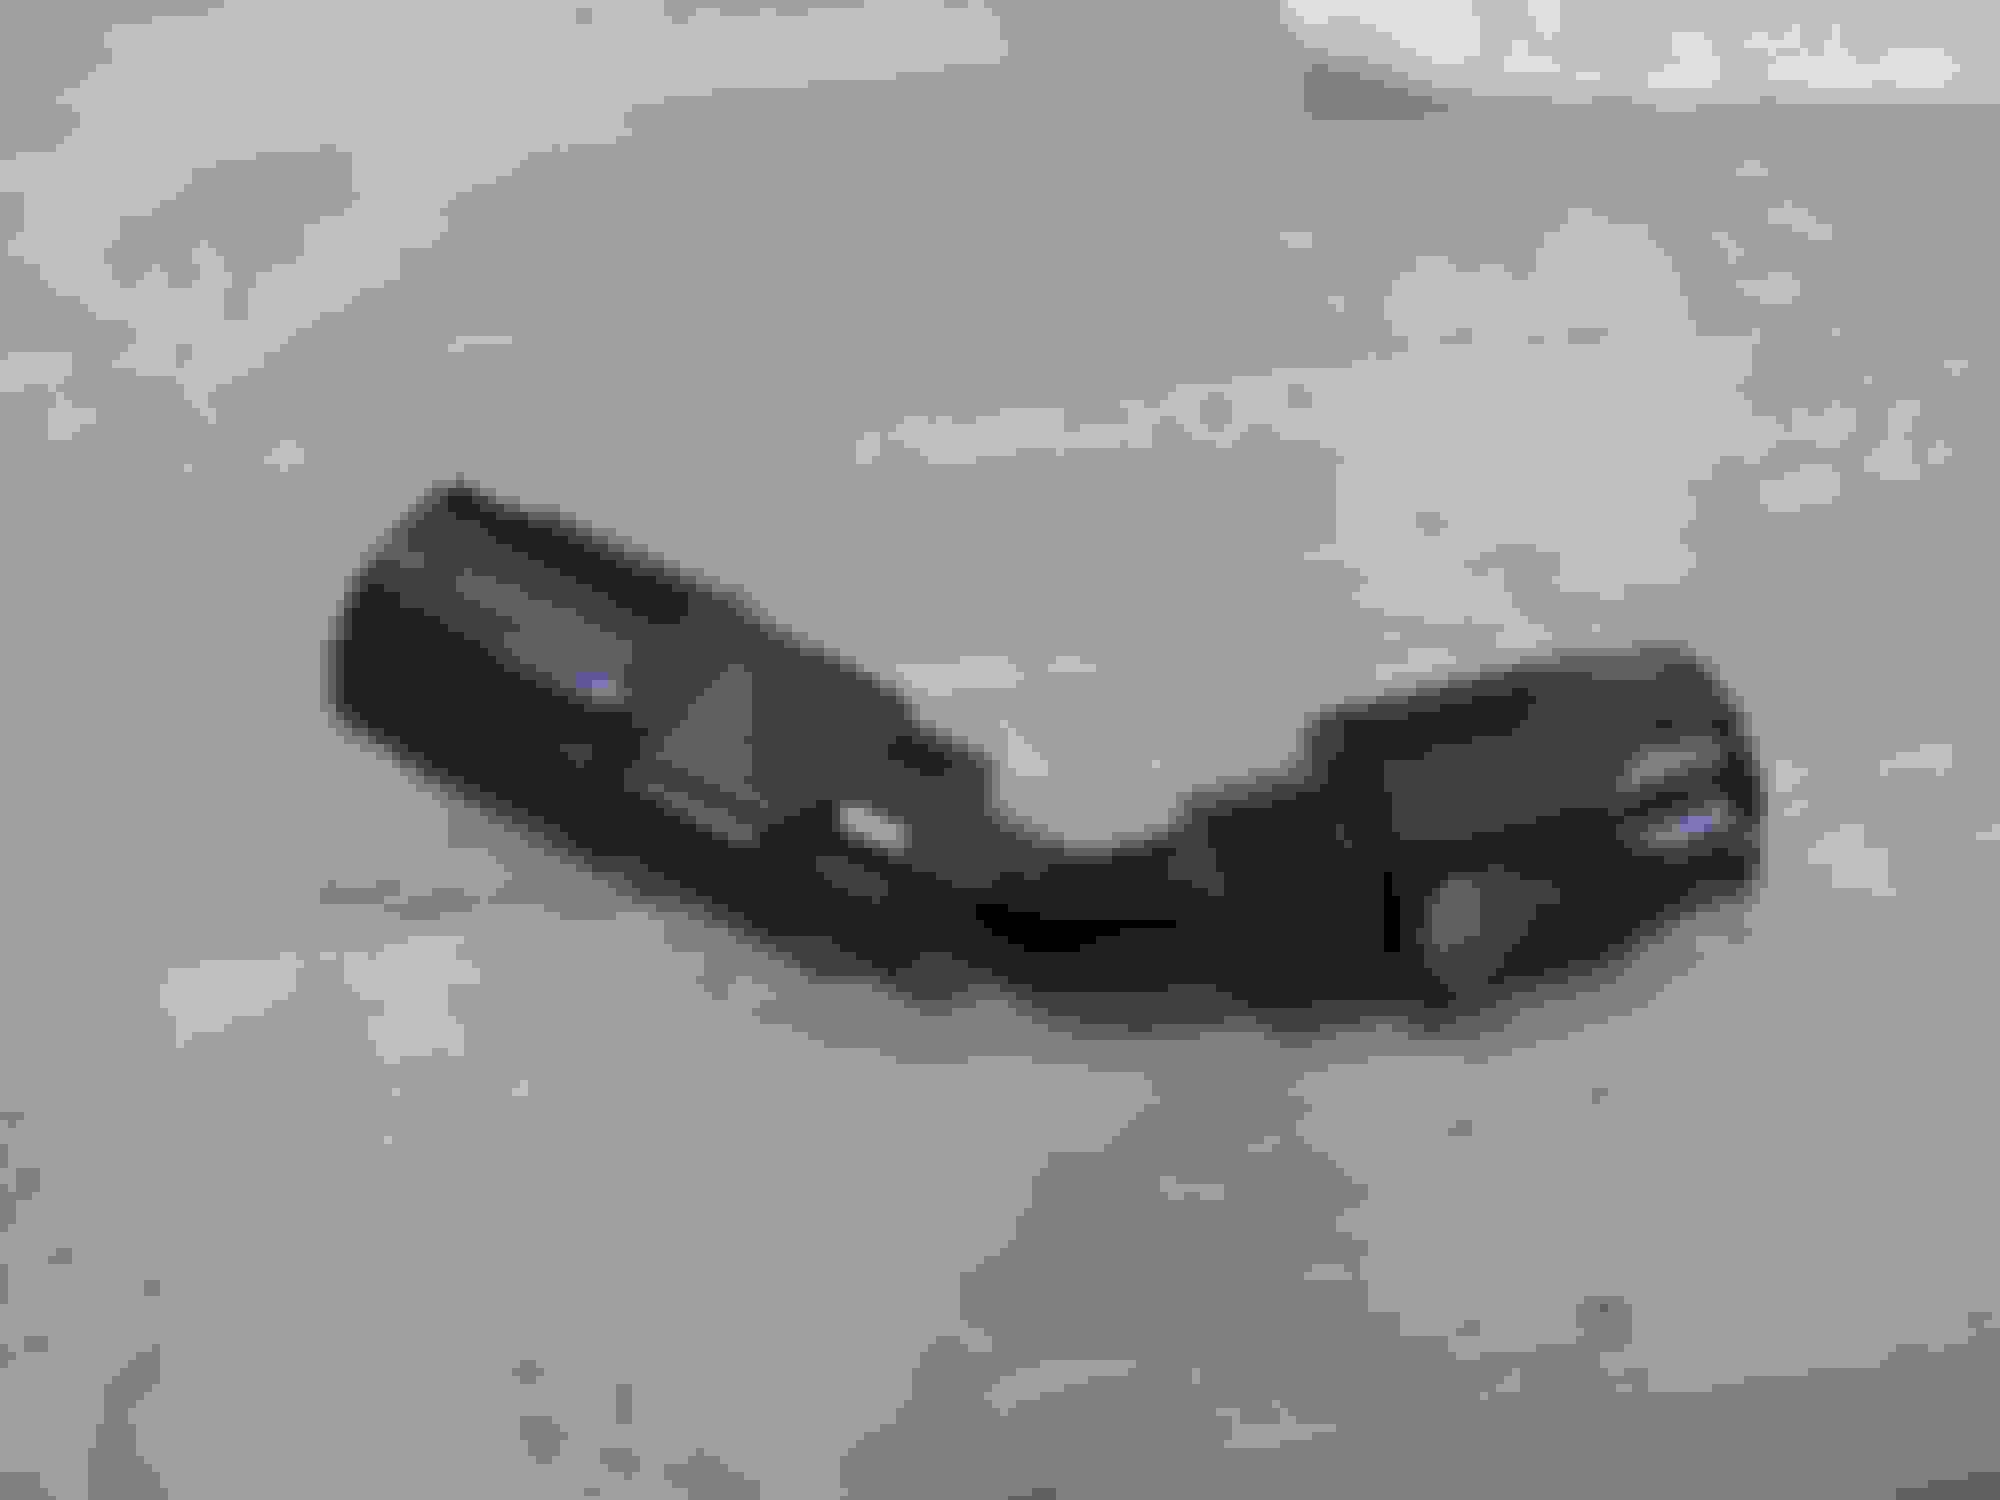
Old - 6 PTFE connector (never attached to a hose) that I removed
New - 8 an fuel rail connector, with a 45* angle and the black braided steel -8 an PTFE hose
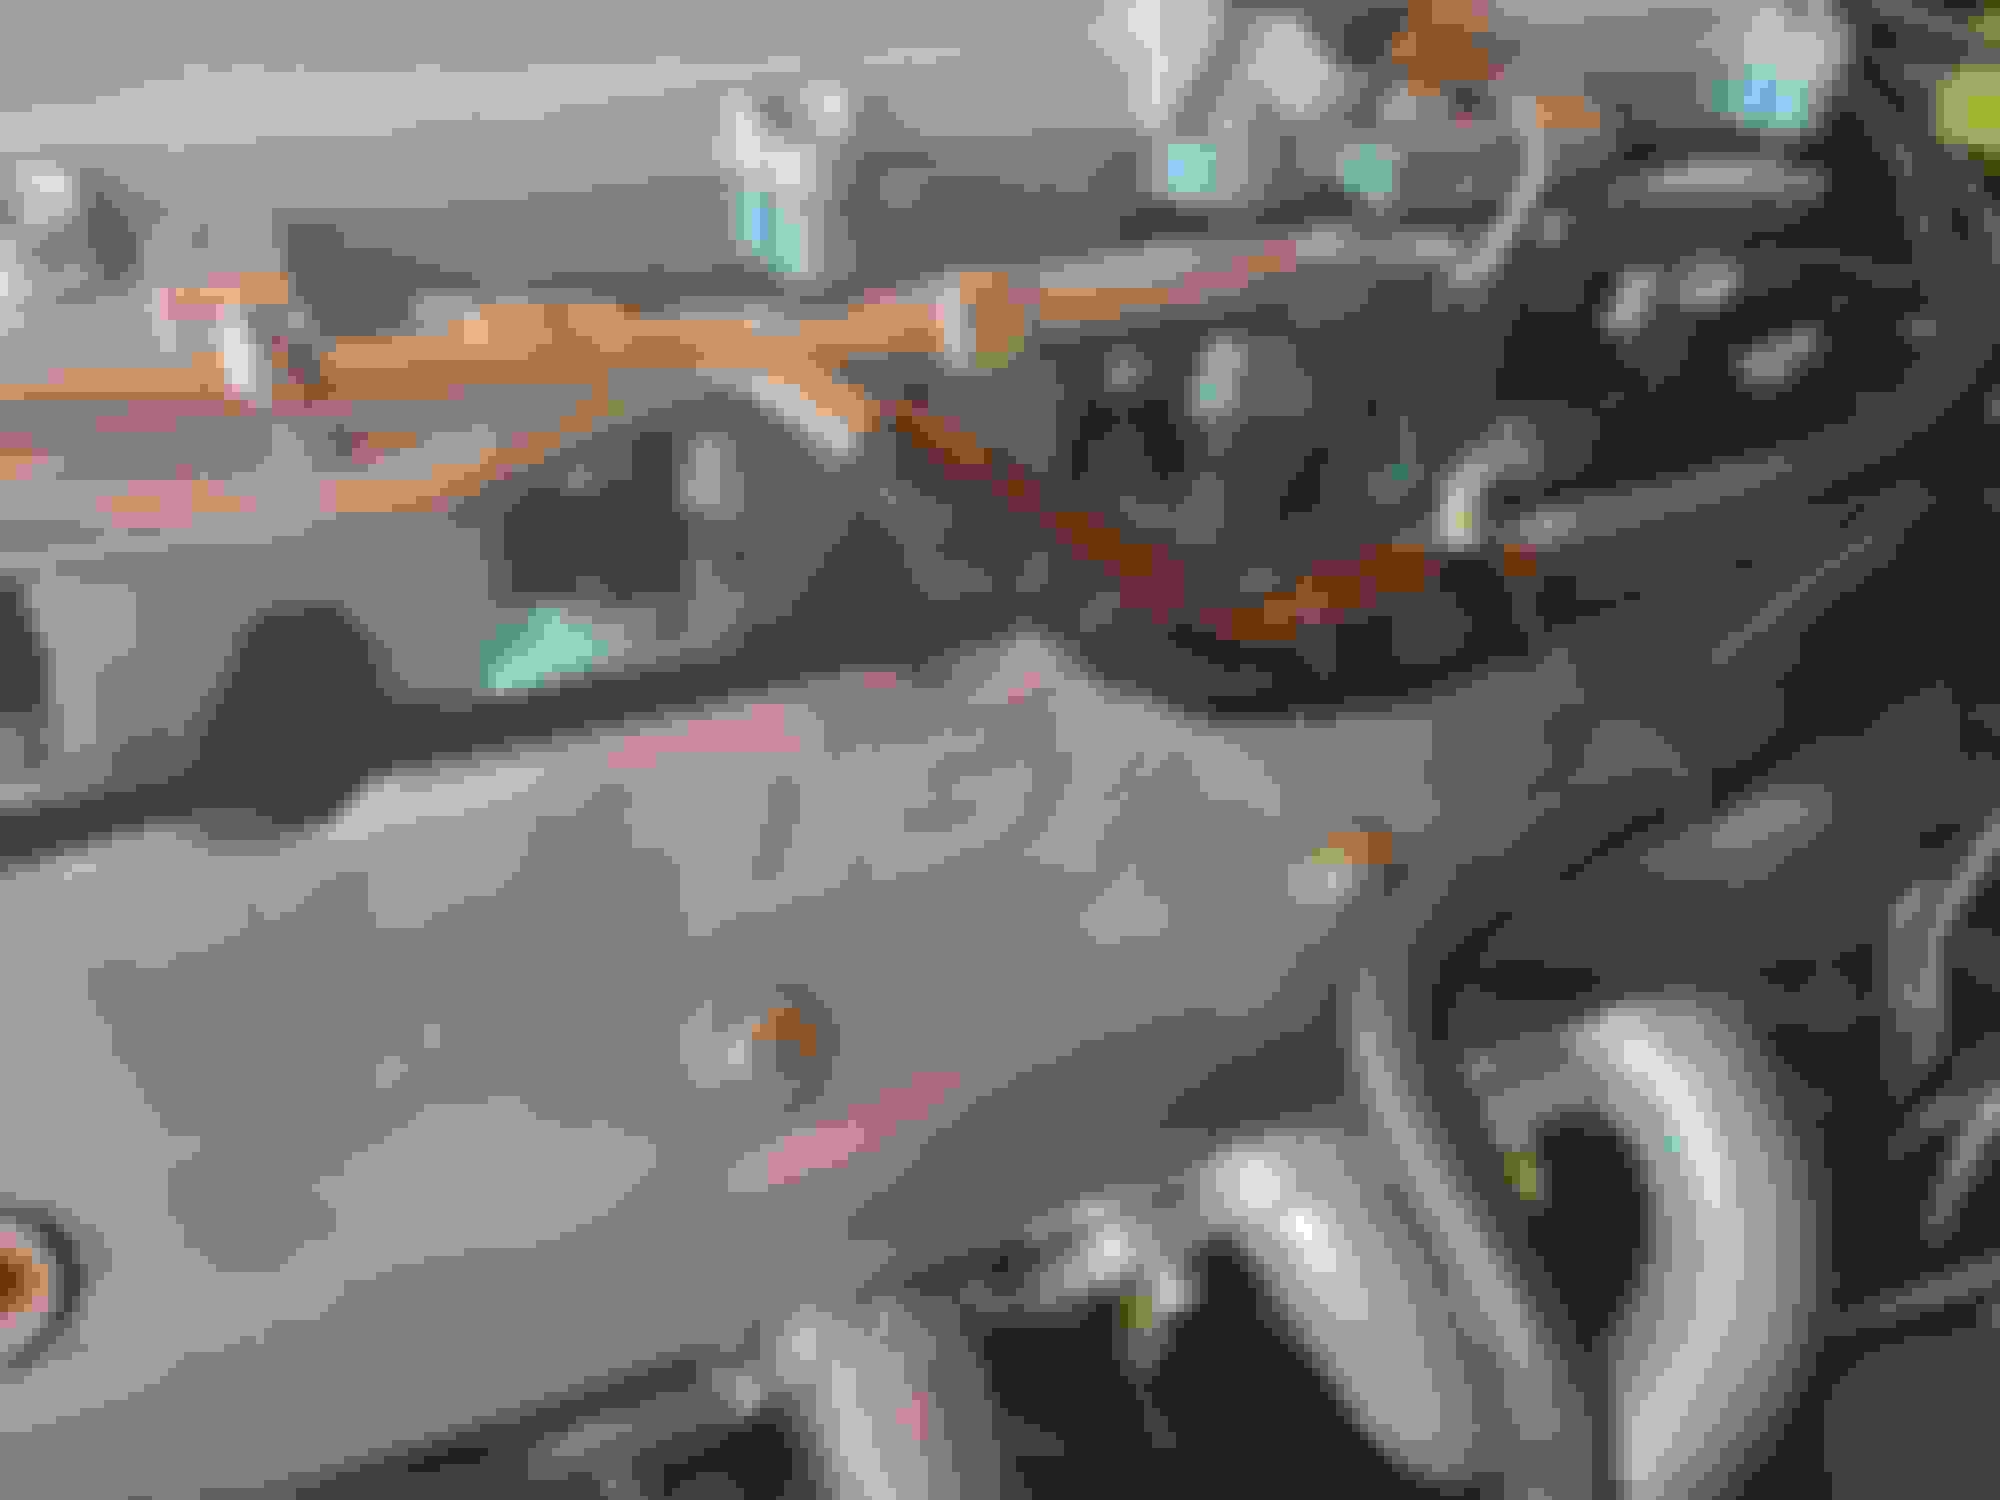
Then the Fuel pressure regulator (installed after the fuel rails) with the -6 an braided stainless PTFE return line. This is my first mock up, and I'll have to do something to get the fuel lines to stay along the firewall and off of the motor. For now, they are in place.
I was kind of concerned that I would have to do something with the tank, to prop it up, so the fuel lines wont get kinked or compressed. Luckily, the engineers at Holden already did this for us. The hard plastic cover has a bump, which holds the tank up and out of the way. So, I was able to run the lines through the stock hole in the trunk floor and into the covering for the fuel tank. I'm going to wrap the lines with something, so they don't rub the tank and remove the galvanization off the tank. So, I feel I should be able to finish up the fuel system this weekend.
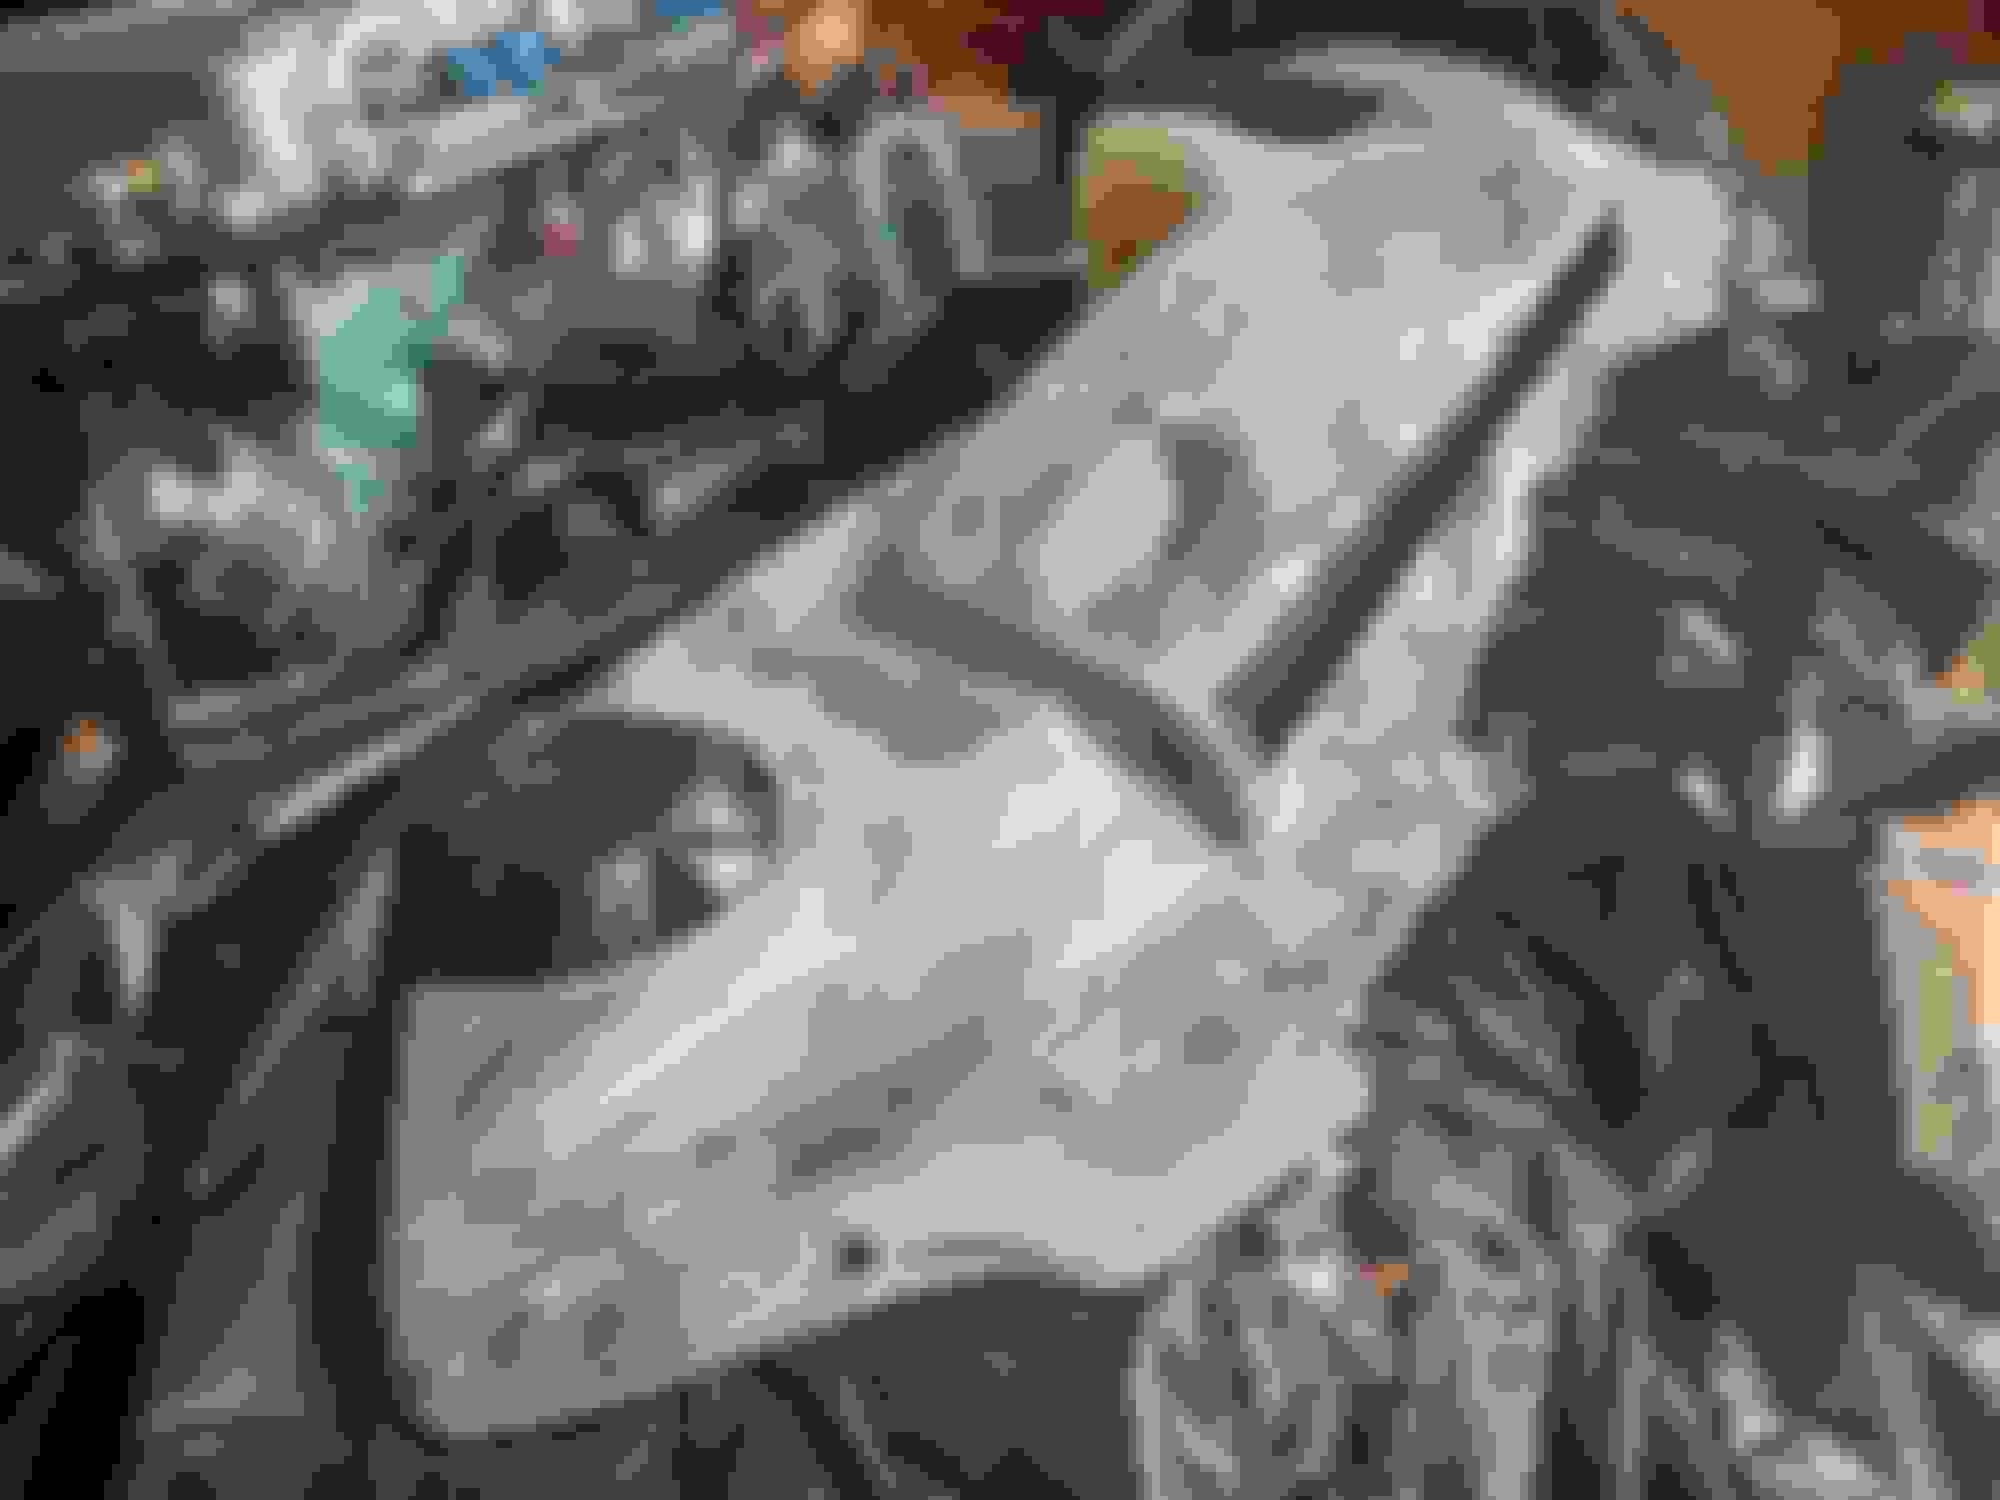
While I was waiting for those ( above ) parts to show, last weekend I was doing some glassing of the modified DuSPEED ( below ). I bought this on one of these forums, years ago. Someone cut off the outlet (-???-) and I managed to get it for cheap. It was the perfect candidate for someone to hack up and use for an LS9 top swap. I mean, there are SO many custom parts, why wouldn't I have a DuSPEED air cleaner?
To help clarify what I did, in the picture below, I had to move the outlet of the part over to the right about 6 to 7 inches (on center) and then made a round outlet out of fiberglass. I also added a section onto the right aspect of the part. I did this because I felt, this is one of the best looking parts made to go under the hoods of a GTO / Monaro. These are really nice and a complete work of art (IMO). Unfortunately, the piece just sorta...well...it just ends on both sides. The top sides and ends of the radiator is exposed, as is the coolant reservoir, reservoir cap (yellow) and A/C tubing.
What I decided to do, was glass over the right side to help hide some of the mess underneath. My power steering reservoir is going to mount onto the header panel, next to the radiator coolant cap....somewhere. I haven't made the bracket yet, so I am not 100% sure how this is going to look. I also extended that side, along the drivers side side fender (a.k.a. passenger side wing). This will help to hide the reservoirs, as well as (VERY POORLY) hide the intercooler pump (which I'm mounting where the old air box was located). There is a huge gap there, so why not?
The main problem I had with this part, is I cut off the bottom of the air cleaner (for some reason). In order to make it functional, I had to glass it over and encapsulate it. This was after the fist glassing. I was only able to get a few hours of work done on the car, but the weather REALLY helped me out. The fiberglass set up real quick and O got to sand this down and apply another layer. Even though it was really humid, I got 2 layers onto the bottom of this and a layer on the bottom part of a spoiler I'm doing for my daily driver (Fusion Orange G5). I think, a good sanding and a finishing layer of glass and this will be ready for primer.
I figure, I'll have this running soon (fingers crossed). I'm still waiting on the diff rebuild to get completed and shipped back and the DSS 1400 hp axles to arrive (middle of August). When those are in, I can put the drive shaft back in and hang the new Maganflow 3" exhaust I bought 5 years ago!!!
I also have to:
- mount the P/S cooler.
- figure out the I/C piping and heat exchanger mounting
- finishing up the brackets for the fuel lines, coil packs, P/S reservoir and brake / clutch reservoirs.
- make new fender well liners from ASB plastic sheeting.
- have the headliner refinished
- finish my gauge pods
- install the 4 color matched Mavman gauges
- prime the motor and have the car tuned...
Looking good!!!! You gonna paint the DuSpeed setup to match the car afterwards?
That poweplant in pontiac blue just makes me happy
I love Pontiac Blue Metallic!!!!
...to answer your first question, YES! I'm going to paint the DuSPEED Brazen Orange...however, I may...
1). Paint the air cleaner black / tint it darker (for some contrast).
2). Skin it with Carbon Fiber
If I do the CF skinning, I'm going to use Composite EnvisionsCopper Reflections because it has an interesting copper / orange color to it and when the light hits is, it POPS! I stole these of the interwebs to show y'all.

 06-07-2022, 07:38 AM


 in the back ALL of the time. When I was with her, I shampoo'd the carpet several times (like once a month). She would buy them Starbuck's constantly, but they would only manage to get 1/2 in their mouth. The rest...well...here's what I had to clean up YEARS later! The other side was worse, I just forgot to take pics. The OEM floor mats were cleaned a long time ago, but I wound up getting some nicer Lloyd's mats for the car.


 . The "GTO" logo was custom embroidered on, using silver stitching on the border and copper stitching in the center. Oddly enough, that did NOT fade! I think when I have the seats redone, I'm going to have the embroidered GTO done like this again. I kind of wish I didn't do the piping because of the fade and it doesn't match the back seats. The "GTO" logo looks SO AWESOME!!!
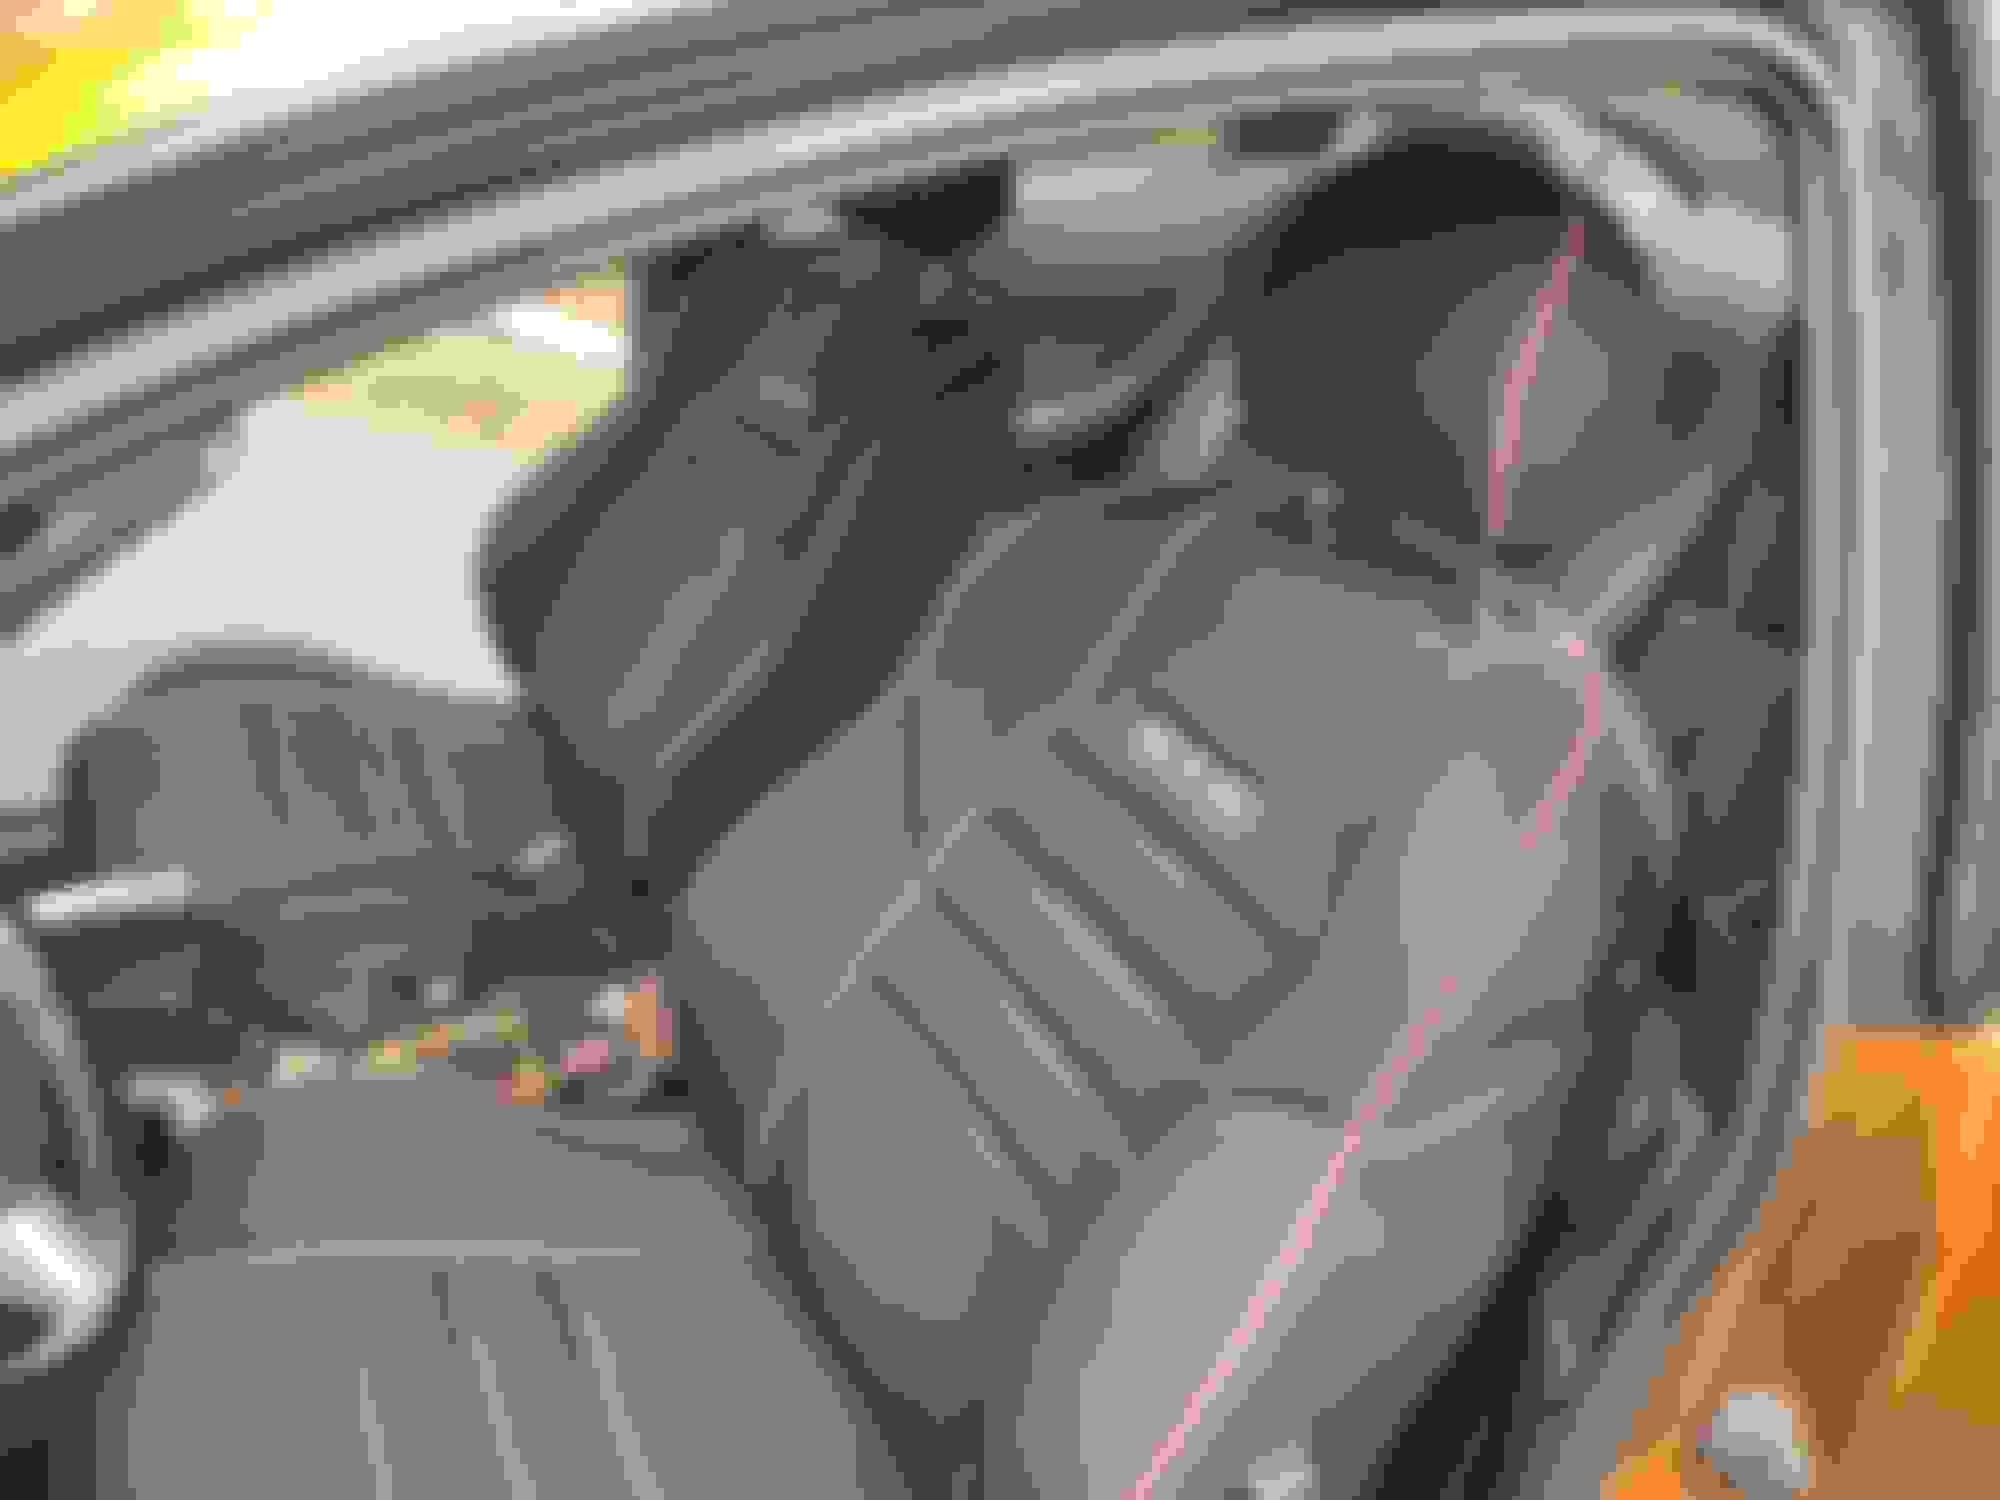


 .
.