


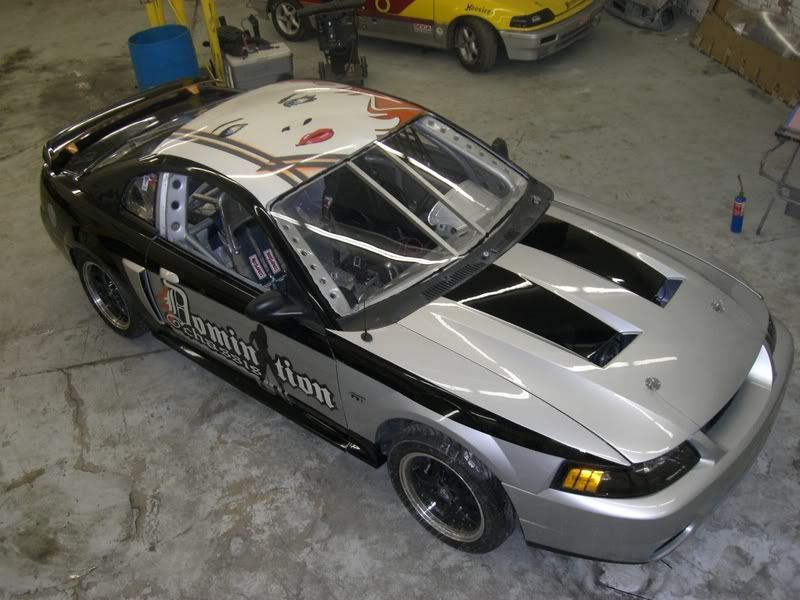
01 SS full race conversion
Almost ready for paint. Once the window net installation is done.
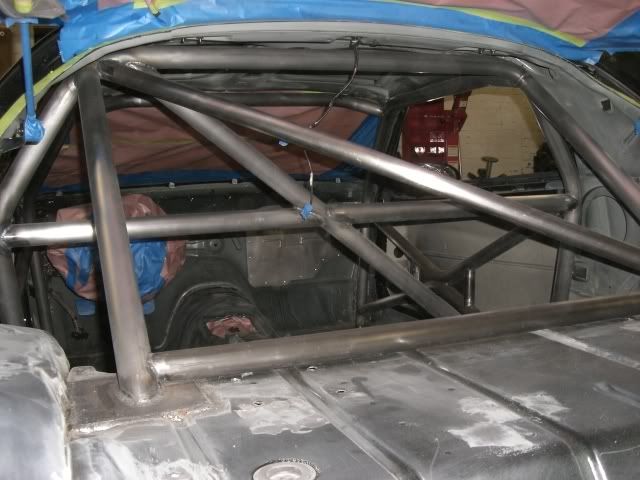
This one shows how much the drivers X comes into the door.
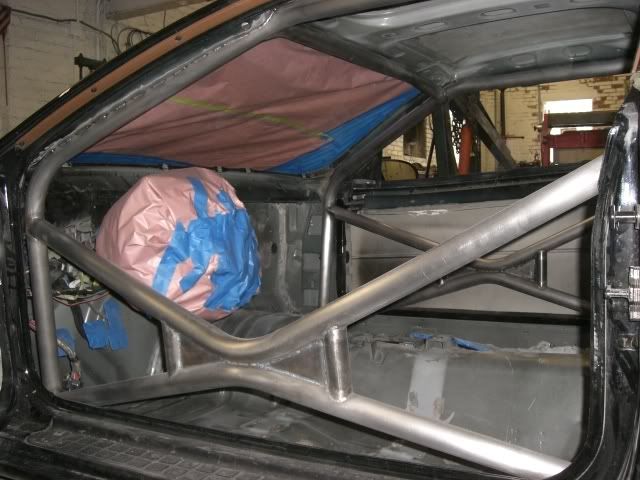
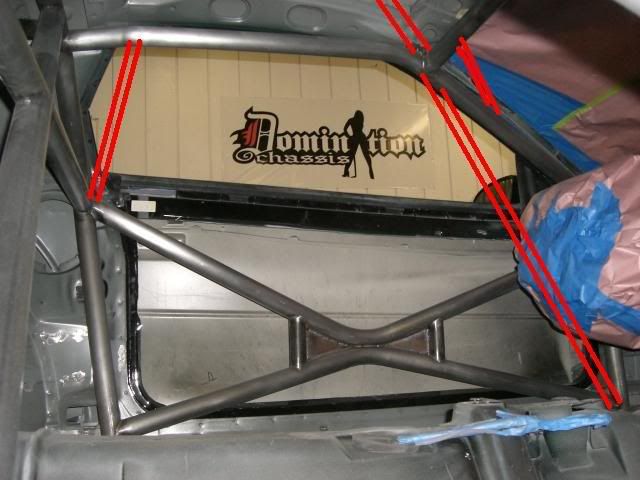
Drivers A pillar cut and A bar sectioned in plus final stitch weld.

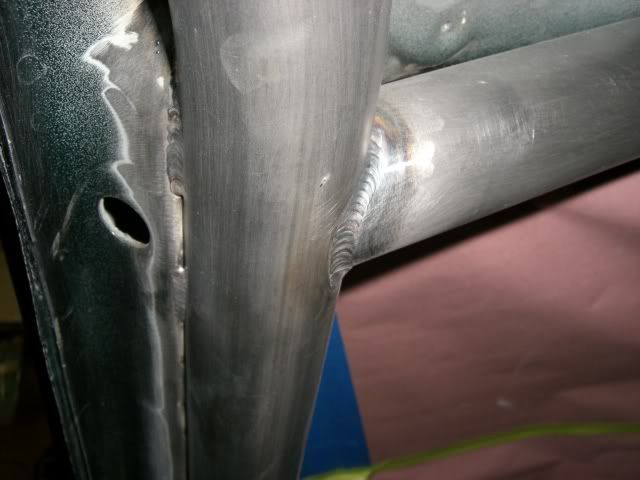
Weld.
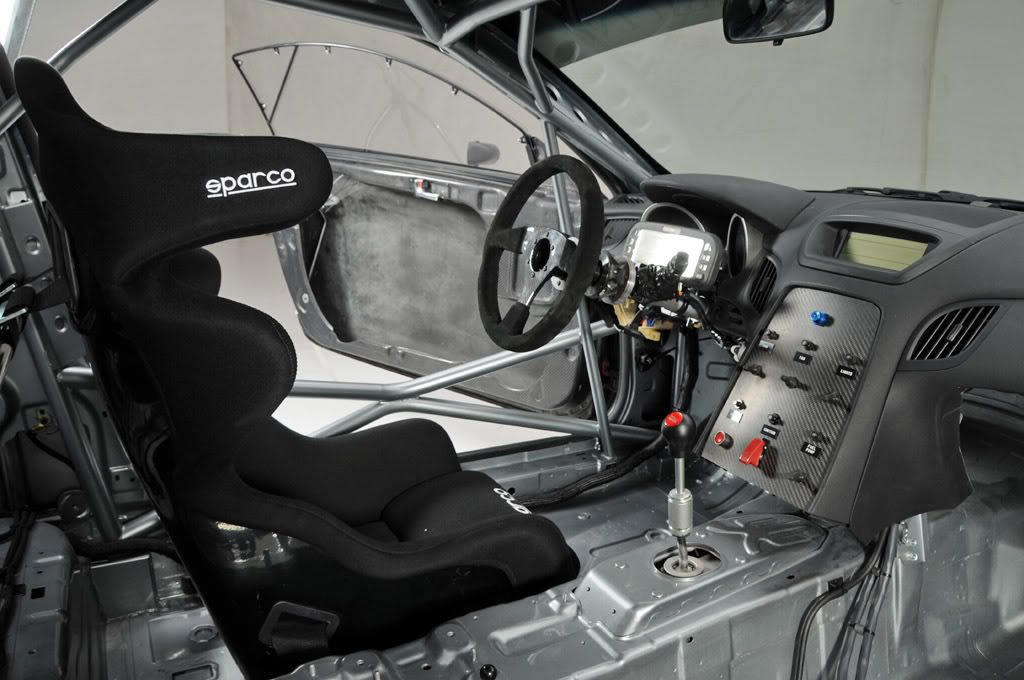
Cockpit area..........
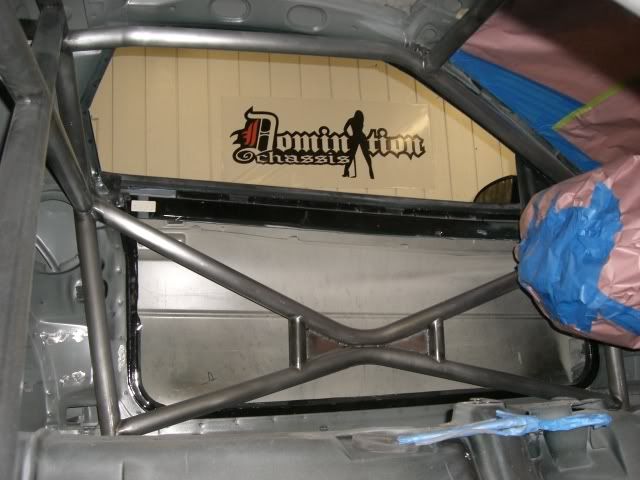
This one shows how much the drivers X comes into the door.
Drivers A pillar cut and A bar sectioned in plus final stitch weld.
Weld.
Cockpit area..........

Teching In
Joined: Jan 2009
Posts: 8
Likes: 0
From: Huntington Beach Ca.
you stole my door bar design, cracker! The vertical support in them is not a bad touch but i would add the extra a and b-pillar support like we did here. Little details make a good cage into a great cage.
I told you I was gonna steal the right to that design!
I do dig the double A, and B reingnforcments, but he is only doing time attack. If he does decide to go wheel to wheel I would like to see him get at least this done.
I do dig the double A, and B reingnforcments, but he is only doing time attack. If he does decide to go wheel to wheel I would like to see him get at least this done.
LS1 Tech Stories
The Best V8 Stories One Small Block at Time

Gas Monkey Built a 6-Wheel Ferrari Testarossa With a Corvette LT4 Engine
Verdad Gallardo
7 Most Reliable High-Performance Engines GM Has Ever Built
Verdad Gallardo
Amazing '71 Camaro Restomod Is Modern Muscle Car Under the Skin
Verdad Gallardo
6 Common C5 Corvette Failures and What's Involved In Repairing Them
Pouria Savadkouei
Retro Modern Bandit Pontiac Trans AM Comes With Burt Reynolds' Autograph
Verdad Gallardo
Top 10 Greatest Cadillac V Series Performance Models Ever, Ranked
Pouria Savadkouei
Top 10 Most Powerful Chevy Trucks Ever Made!

Hennessey's New Supercharged Silverado ZR2 Has 700 HP
Verdad Gallardo
Coachbuilt N2A Anteros Is an LS2-Powered C6 Corvette In Italian Clothes
Verdad Gallardo Teching In
Joined: Jan 2009
Posts: 8
Likes: 0
From: Huntington Beach Ca.
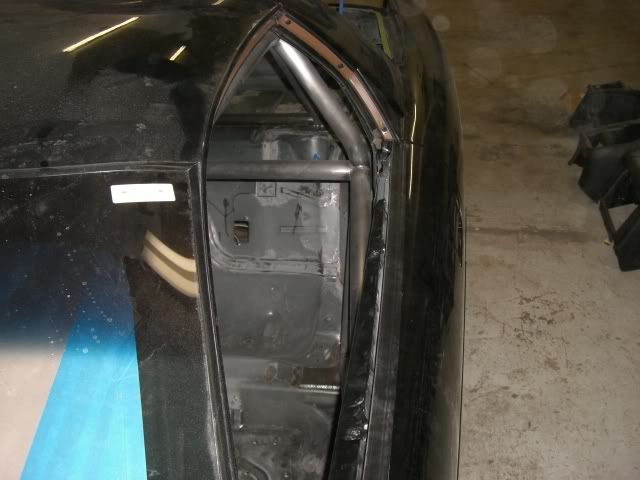
How deep does a A-pillar bar sink into the chassis. That is a new one to me, but it look like you guys pulled it off very nicely from the underside. Post a pick of the upper view of the A-pillar.
Also, Thanks everyone else for the compliments. It should be in paint some time early next week!

Just trying to figure out your thought process.
Why bury the A-Pillar as opposed to butting the tube against it? The work done looks great, I'm not seeing the benefit for the cost/time involved.
I don't see a knee bar in any of the pics. Is this something that has been added after the pics were taken? Or to be added later? The NASA CCR requires a knee bar.
I always learn something new looking at other's work. Thanks for putting it out there.
Not significantly, no. It was a LOT of work to cut through the factory A-Pillar and then form the tube to fit as nicely as it turned out.
Don't get me wrong ... it looks fantastic and is very functional.
I might've just butted the tube, stitched the tube to the untouched A=Pillar and built filler panels for any extra strength with nice rolled edge holes cut in it.
Like I said, there was obviously a plan and I'm just trying to learn it. Never too old to learn.
Edit:
Also, I'd like to get your thoughts on where you connected the main hoop diagonal up by the driver's head. The rules allow that diagonal brace to be up to 12" from the bend's start and we take full advantage of that. The thought is if the car rolls and lands dead on it's roof, there are now bars on either side of the driver's head, creating a cocoon kind of like we are seeing in a lot of drag cars. Also, the diagonal bars are a few inches shorter and more vertical, giving added strength.
Like we did in this car ...
http://www.lawmotorsports.net/Pics/9...TealForm34.JPG
Contact point is on the right side of the driver's head and 3 bars come into contact on the left. And the diagonal brace is shorter and more vertical.
Not trying to get into a pissing match. If anything, I'd like to know the flaws in what we do ...
Last edited by mitchntx; Jan 6, 2009 at 10:03 PM.
Done one like that.
I have never seen one like this so we went for it. It uses less material and I believe it to be even more rigin than plates. It blew me away how quickly it went though. I just held a roughed in A bar and traced it onto the A pillar. Then I cut the inside of the lines with a wheel, and presto. It only took another half hour per side to trim in better welding gaps.
Acording to NASA CCR, Page 62,
15.6.8 Forward Hoops (Option 1)
The forward hoops shall extend from the main hoop (in a forward direction) to the floor
by following the roof and the �A� pillar of the car. There shall be a bar connecting the
two (2) forward hoops at the top of the windshield mounted as close to the roof as
possible without violating CCR Section #15.6.20 Inspection. The forward hoops shall
incorporate no more than four bends each. Optionally a �15.6.9 Halo Hoop (Option 2)�
or �15.6.10 Front Hoop (Option 3)� construction may also be acceptable.
and the diagram on page 65 shows the dash/knee bar as an option. I believe very much so in that bar providing a great deal of protection in the event of a heavy T bone. There is really nothing keeping the lower A bar from just laying over. But in this particular case, he is not going wheel to wheel and still wants to use the factory guage cluster. So rather than go threw the headache to make it fit, we'll just wait and see if he ever decides to go wheel to wheel.
Also, I'd like to get your thoughts on where you connected the main hoop diagonal up by the driver's head. The rules allow that diagonal brace to be up to 12" from the bend's start and we take full advantage of that. The thought is if the car rolls and lands dead on it's roof, there are now bars on either side of the driver's head, creating a cocoon kind of like we are seeing in a lot of drag cars. Also, the diagonal bars are a few inches shorter and more vertical, giving added strength.
Like we did in this car ...
http://www.lawmotorsports.net/Pics/9...TealForm34.JPG
Contact point is on the right side of the driver's head and 3 bars come into contact on the left. And the diagonal brace is shorter and more vertical.
Not trying to get into a pissing match. If anything, I'd like to know the flaws in what we do ...
Good thought. I think the kind of wreck would determine which design is better. Like you said, your design anticipated direct flat roof top loading. I kinda feel like the benefit you gain there isn't worth minimizing the amount of structure in the roof edge area. The funny car style cockpit is for a wreck that is for sure to obliterate the cars body leaving the drive to get smashed by what ever. If your concerned about the roof caving I would start with a roof diagonal. Then double A, and B bars. Then possibly an X in the main hoop. I'll have to dig up some old pictures of a dirt car we built that did a couple tumbles. The roof edged get pounded in.
