When you click on links to various merchants on this site and make a purchase, this can result in this site earning a commission. Affiliate programs and affiliations include, but are not limited to, the eBay Partner Network.
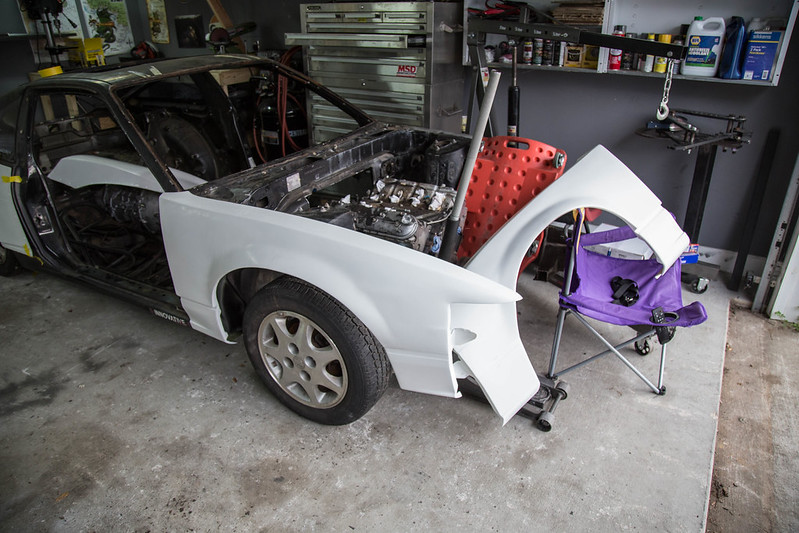
Small parts update. Part 1 of 2 of the wide body is here. They are Koguchi power replica over fenders and wide front fenders. Reason for the replicas is they will be cut up and heavily modified. No sense in purchasing the expensive ones when they are getting severely modified anyway. Normally not a fan of knockoff stuff, but in cases like this it just makes logical sense.
Company i got them from is Fineline Tuning. They fit pretty ****** bad. Maybe I'm just spoiled by how my Varis kit fit on my wrx, but there are multiple things on these that are just off. The bodline on the qtr is off across from the fuel door, the upper edge is quite wavy and frayed, the flat lower flanges where the meet the body are angled wrong, the same on the front, the mating surfaces angkes are off, small chips and wavy lines etc. Not what i was expecting quality wise. As mentioned, good thing I'm getting down and dirty with them. Also did a brake job on my daily. Boring.
OK so, over the last day or so i have been trying to piece together in my head how i want to do my cage. For the most part everything is figured out. However there is one area ive been on the fence about, however i think i have come up with a decent idea.
Alright. The problem is when i cut the floor to gain clearance for the corvette transaxle i had to cut through a crossmember just aft of the center of the car. Would be a big no no to not reinforce this as if i were to get t-boned the floor would just crumple without the support.
Biggest issue with adding support back in was how the transaxle sits. It sits above and below the crossmember. So just welding in a much thicker steel single layer plate isnt an option as it would have to bend to go around it.
Second issue is exhaust clearance. I could run a DOM tubing piece from frame rail to frame rail underneath the transaxle, while still having sufficient ground clearance, but then i have zero room to run the exhaust.
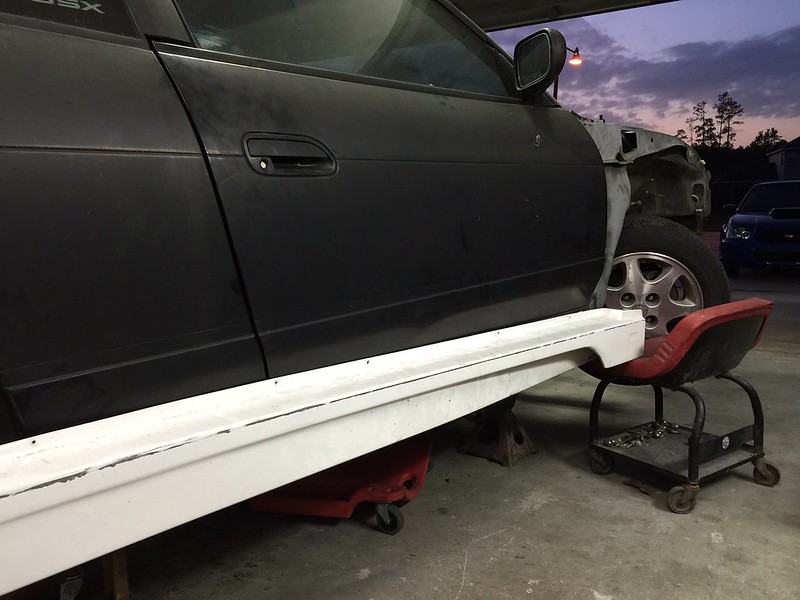
So here is my theroized solution, provided there is enough room. When i first bought the car i mocked up my Varis side skirt of my 2012 wrx that i was parting out, just for ***** and giggles. turns out, i should be able to integrate it nicely with my widebody plans and helo give the car that gt300 style look im after even more so.
The sideskirt, along with the front bumper i plan to run hang a little bit lower than the pinch weld. So what im thinking, is run the piece of dom tubing laterally from frame rail to frame rail like mentioned before, and run a side exit exhaust, through the side skirt. The added depth of the side skirt will allow me to not just have a exhaust pipe hanging down, and i dont have to worry about snaking an exhuast around the crossmember reinforcement. Running the welded in DOM tube connecting the frame rails also allows me to tie it into the cage, for more added rigity.
And side exhaust are badass. Will def exit out the passenger side and passenger side only. I enjoy my hearing, my passengers can get over it. Now lets just hope the wife doesnt divorce me over it.
SO. In the midst on working on multiple customer cars, I've managed to get a small amount of work done on my own.
First up. Had a few parts come in. Roll cage tubing showed up. (not all of it, obvisouly. Will need to make a separate order as i need it) Tire for mock up came in as well. 335/30.18 toyo r888. And Lastly, the part dos of my wide body setup. Rocket bunny flares. Get over it. Been there done that, played out yada yada. Not like this they haven't been done. Promise.
So actually on to getting some work done to the car. Found some spare time one afternoon and finished breaking down the wheel faces so that i could get them shipped out to get machined and the lips and barrels made to make a set of rear wheels for now. Once those are back ill mount the tire and we can get down to business to see how much hell I'm going to have to go through to make these suckers ft with the camber i want to run (minimal, purely for function here) while still making it sit with that perfect meaty, but still have clearance, stance
Speaking of fitting wheels, have full gktech adjustable links, drop knuckles etc. basically there full 240 suspension system on order. Some parts are on back order so hopefully it doesn't take too terribly long for it all to come in. Still need to order some 5 lug hubs for when the suspension gets here so i will have some thing to actually bolt the wheels to.
Lastly, tonight after getting home, i got to mock up one side of the rb flares. OH BOY am i excited. Its exactly the look I'm going for. To say I'm excited is an understatement. Def going to need some trimming, splicing, and widending (front def, was expecting this regardless) but man will the work be worth it. You can see now why i am confident the sti varis flares will tie in well. Adds to the gt3 style car look. Also again gives the great place for the passenger leg hair remover, i mean exhaust.
Also figured y'all would appreciate this. My wife grandfather gave us this awesome early 50s/late 40s stroller for me to restore for our current baby on the way thats is due soon. Pretty awesome little stroller. Our little boy is going to be pulling all the ladies at the track and meets/shows.
That stroller looks like a tetanus shot on wheels. Cool little project, though, for sure.
Good luck with getting those fenders lined up, it looks like you have your work cut out for you. I am very interested to see how this turns out... both the car and the stroller.
That stroller looks like a tetanus shot on wheels. Cool little project, though, for sure.
Good luck with getting those fenders lined up, it looks like you have your work cut out for you. I am very interested to see how this turns out... both the car and the stroller.
Thank you. yes in its current state its quite deadly to an infant I'm sure lol But i will be going through it and making it good as new, if not better.
As for the fenders, yes, going to take quite a bit of work to make it look good. But thats what u really enjoy is making things first and work that shouldn't.
Was able to get a bit more work done while also working on the caddy. I took some weights of stock components. Fully assembled doors, hatch, hinges etc. Will be a good base/reference once i get the lighter componets in, to see just how much I'm saving.
Also picked up used set of 5 lug rotors to use as mock up. Now all i need is front and rear 5 lug hubs ordered for when the new knuckles and linkage comes in.
Not sure if you're keeping a/c and heat, and not sure if the s13 dash is narrower than the s14 dash, but the 55" cavalier dash from Jerry Bickel fits perfect in a s1
4
I will be doing ac yes, (a must down here in southeast louisiana) but wuill be a universal system, not the stock system as my firewall is so highly modified. Im actually more than likely going to remove the entire firewall and fabricate my own.
As for a dashboard, ive got something lined up already, thanks tho!
Def interested to see what you come up with for the AC System. One of the biggest gripes for my last LS-Zenki was no AC in the TX heat. Good way to lose weight though lol.
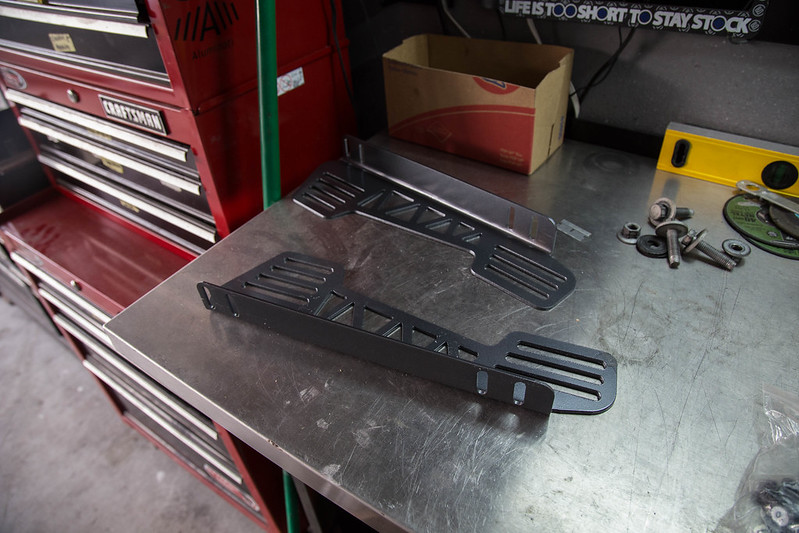
So this weekend has been productive thus far. Got my Street Faction seat brackets in today. Very impressed with the quality and fitment so far. Decided to sell the planted ones i had as they didn't fit very well.
Also was able to get the caddy I've been doing some work on out of the garage and could move the 240 back center stage. untitled (1 of 14) by lawrx, on Flickr
Went a head and cut up the other side of overs so i could fit the flares over them to see the overall width of the car. Also moved the rear flare up more, so now the top is in line with the hip line of the overs. Cant finalize positioning until suspenions and wheels are here, but its fun to mock up and check clearances and such thus far.
And finished the day off with taking the front fenders off and getting the car up on jack stands so i can pull the drivetrain to make the jigs to locate the strut towers and front caster arm mount so i can chop off the rest of the front end. untitled (13 of 14) by lawrx, on Flickr
Def interested to see what you come up with for the AC System. One of the biggest gripes for my last LS-Zenki was no AC in the TX heat. Good way to lose weight though lol.
I will more than likely be going with a vintage air universal setup.
Ah, was such a perty day today i couldn't not go outside and get some work done.
Well let start where we left off form working yesterday. After getting the car on jack stands, i pulled the motor and front subframe so i could start making the locating jig for the front LCA mount and strut towers untitled (1 of 16) by lawrx, on Flickr
Started off with making the jig by cutting the stock caster arms off to use as the locaters. since ill be using after market arms, it made the most logical sense instead of spending time making my own end to fit to the stock mount. untitled (2 of 16) by lawrx, on Flickr
I used the shitty ebay top hats as the locaters for the strut towers, as again, ill be going aftermarket and have no use for them. Welded some square tubing to them and then bolted that to the locater plate right above it. That way i can unbolt the mounts and allow removal of the jig overall. Once the jig was finalized i could cut off the stock strut towers. Well there is def no turning back now... untitled (8 of 16) by lawrx, on Flickr
I also cut off the frame rails right after the subframe mounts, since i incorporated the caster rod mounts into the jig as well. Having the freedom to move the front mounting point of the front LCA will allow me to mess with caster, camber, and anti-dive properties for even more in depth chassis tuning.
Over the last week I've been extremely busy, and just haven't gotten as much done as i had wanted to. Between being busy at work and other projects that are timeline sensitive i need to do work on, which you will see below, have taken up my time.
Really can't do a whole lot at the moment, as I'm still currently waiting on my seat to arrive, dont exactly have time right now anyway as the RS I'm working on needs to be finished and wrapped up by Saturday for the local Subaru crawfish boil were debuting it at.
So in short, no real update other then me groaning about being too busy and still waiting on parts. Carry on
Also heres a before shot of the RS. Every panel scratehed to hell and back, multiple dents on every panel, rust hole in driver floor, rusted out taillights housings, terrible gap fitment. She was a damn pain in my ***.
Small mere pointless update. Ordered more parts, still waiting on others to arrive. Pulled the rear suspension and rear subframe to finish welding it up. I **** WAITING ON PARTS AND HAVING NO TIME TO WORK ON HER. that is all. Also be in awe of my awesome new 50mm f1.4 lens. This lens is ******* awesome.

 03-16-2016, 11:00 PM

 IMG_1687 by lawrx, on Flickr
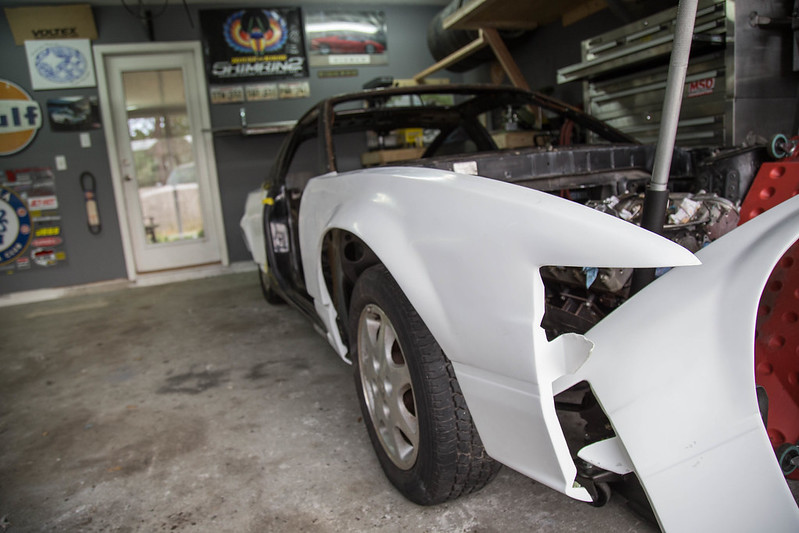 IMG_1688 by lawrx, on Flickr
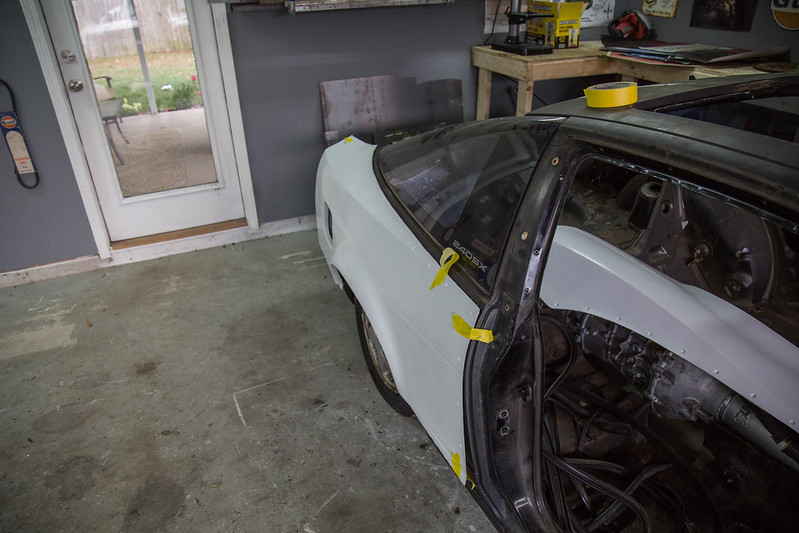 IMG_1689 by lawrx, on Flickr
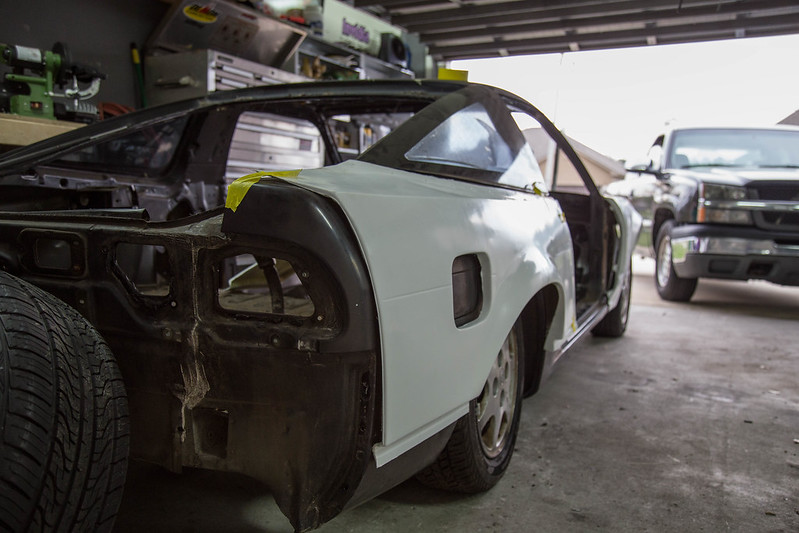 IMG_1691 by lawrx, on Flickr
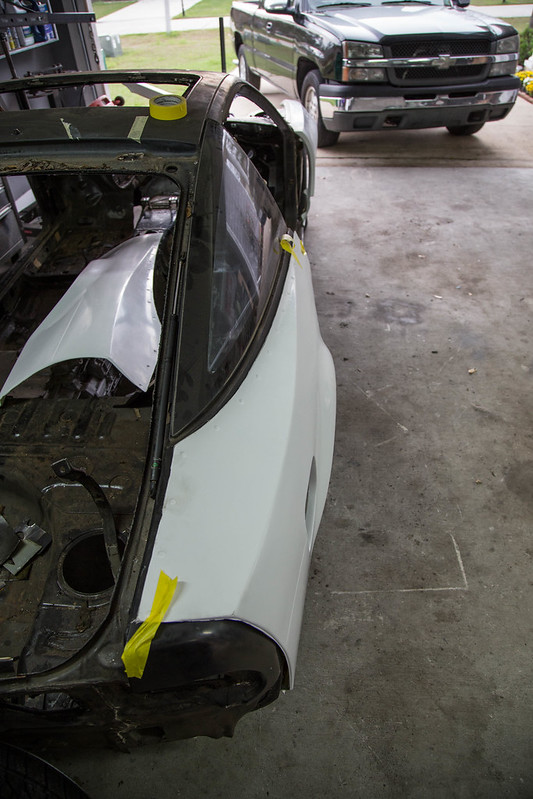 IMG_1692 by lawrx, on Flickr
 IMG_2546 by lawrx, on Flickr
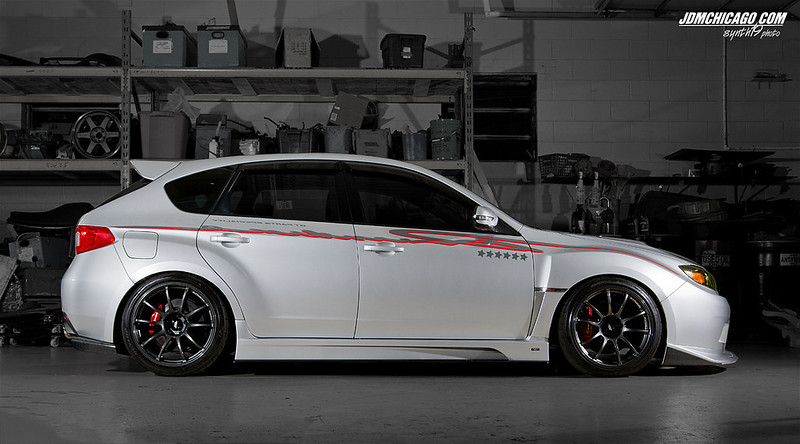 sti side skirts by lawrx, on Flickr
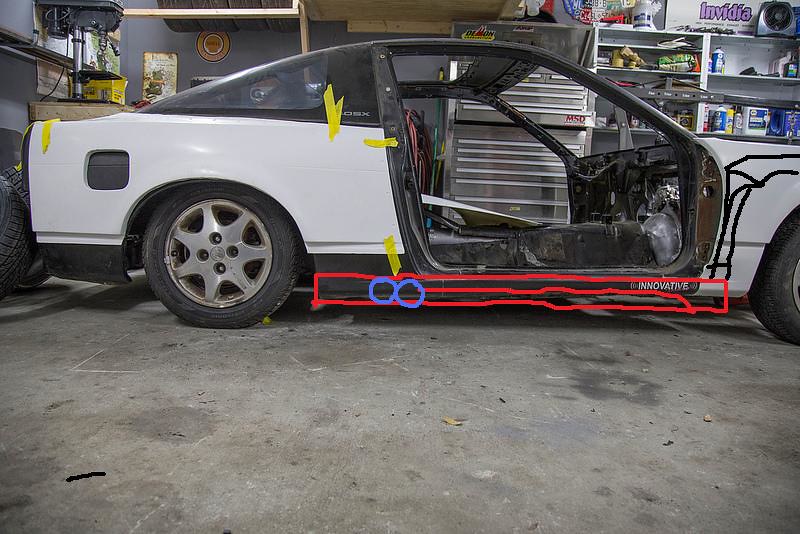 side exhaust diagram by lawrx, on Flickr
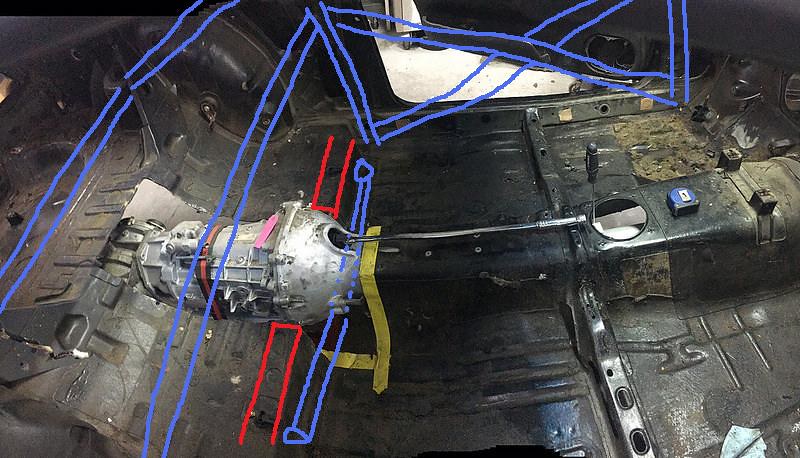 s13 roll cage by lawrx, on Flickr
  IMG_1932 by lawrx, on Flickr
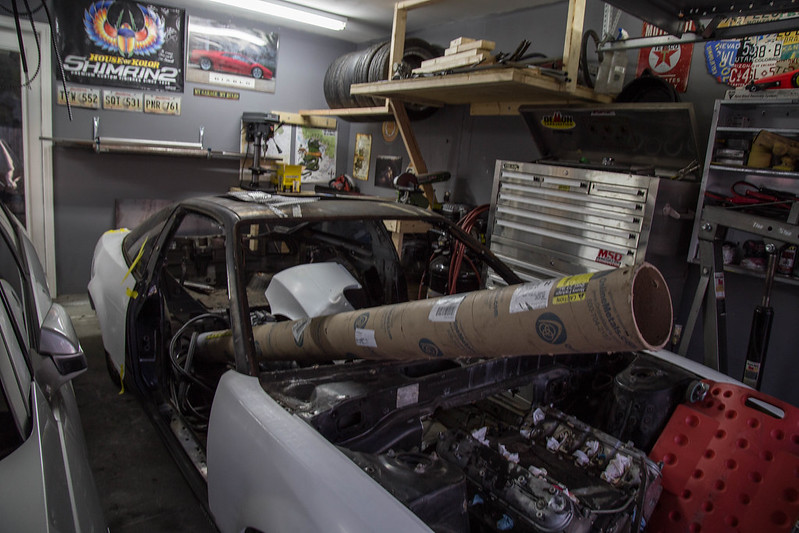 IMG_1937 by lawrx, on Flickr
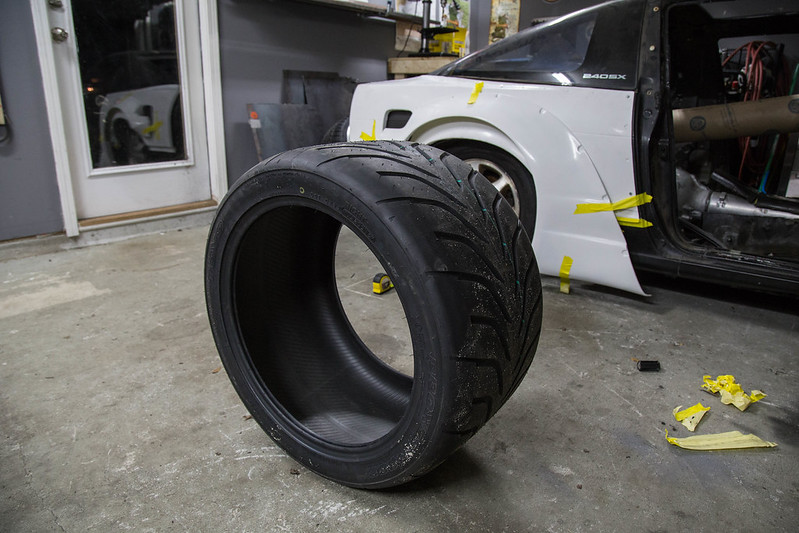 IMG_1967 by lawrx, on Flickr
 IMG_1968 by lawrx, on Flickr
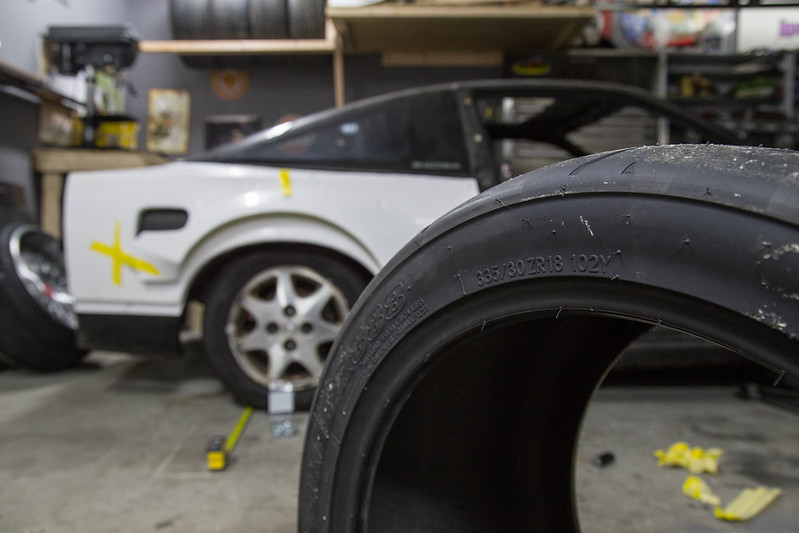 IMG_1969 by lawrx, on Flickr
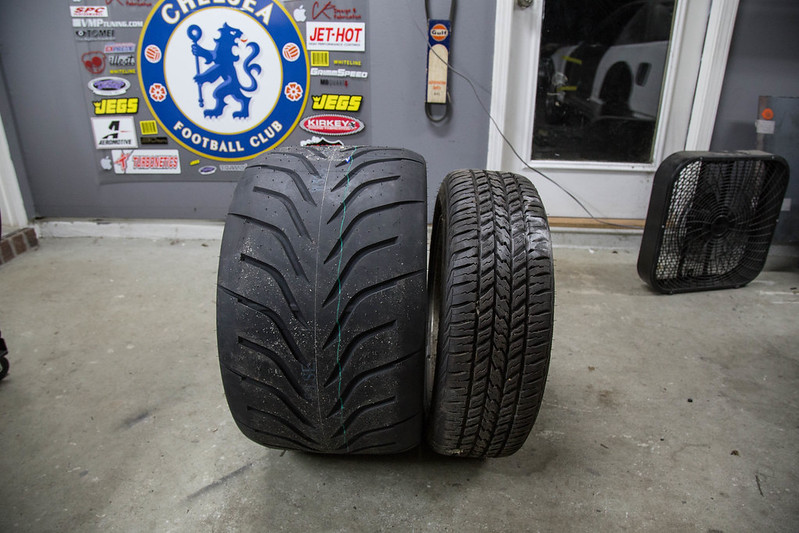 IMG_1972 by lawrx, on Flickr
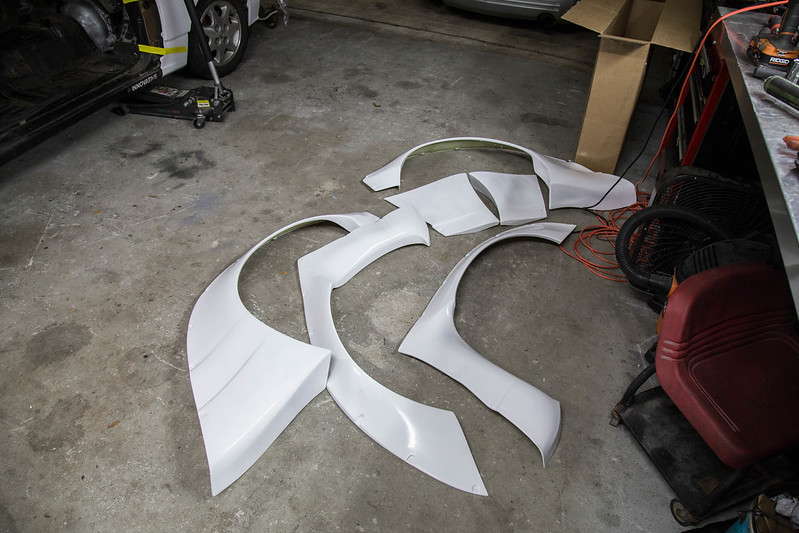 IMG_1965 by lawrx, on Flickr
 IMG_1927 by lawrx, on Flickr
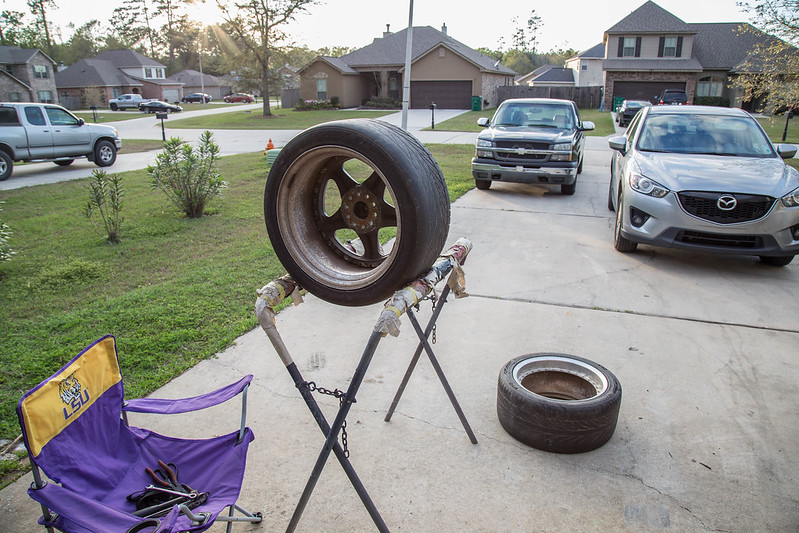 IMG_1933 by lawrx, on Flickr
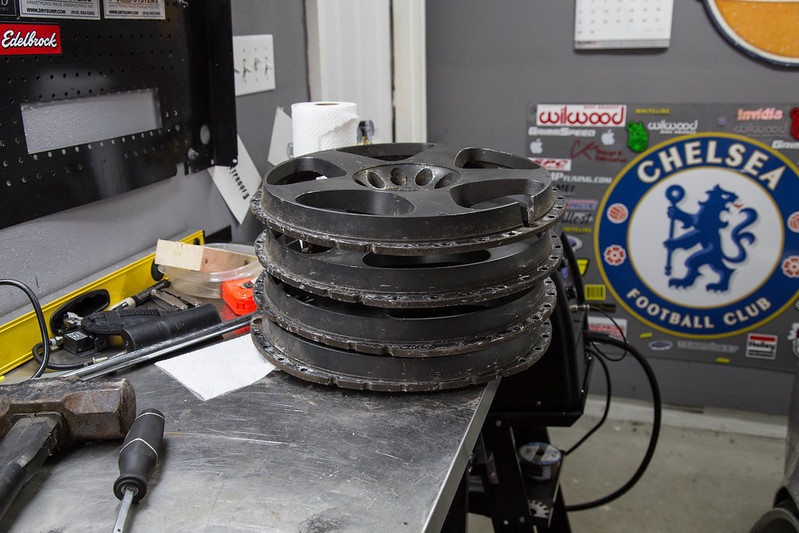 IMG_1936 by lawrx, on Flickr
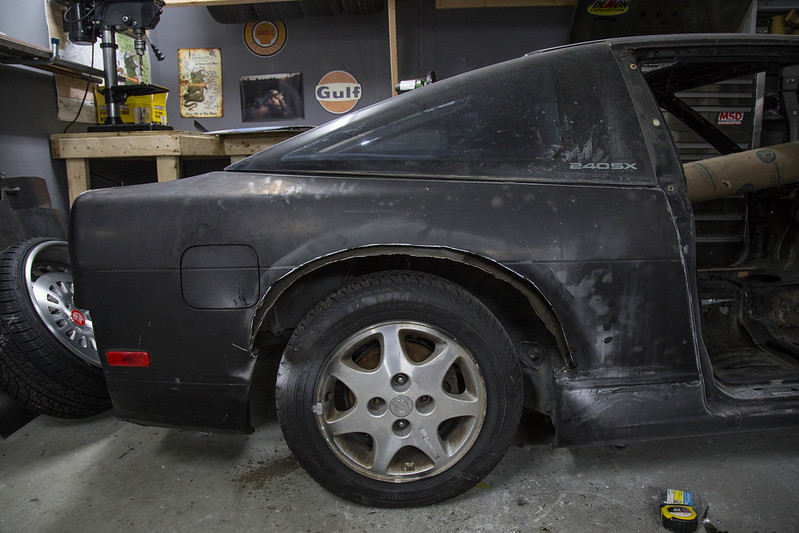 IMG_1971 by lawrx, on Flickr
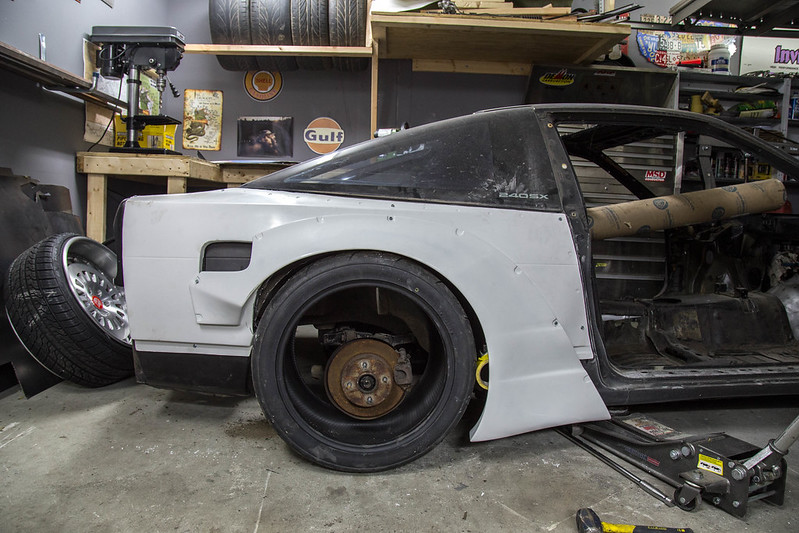 IMG_1974 by lawrx, on Flickr
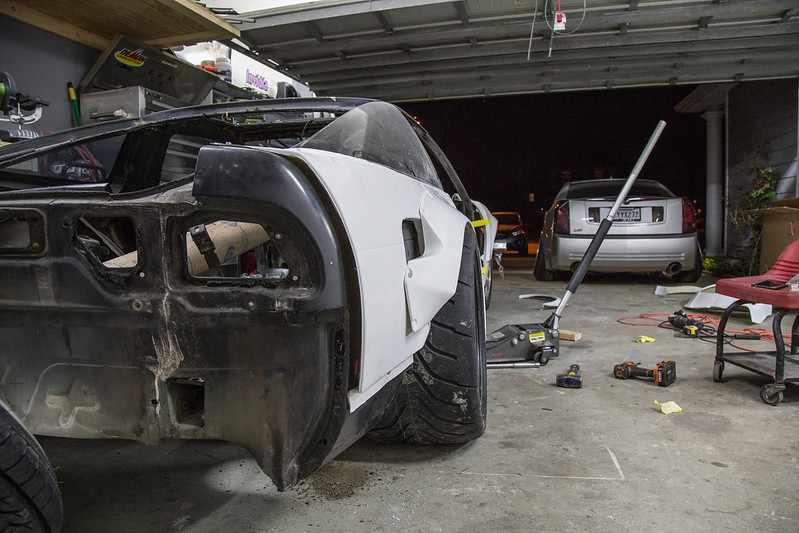 IMG_1975 by lawrx, on Flickr
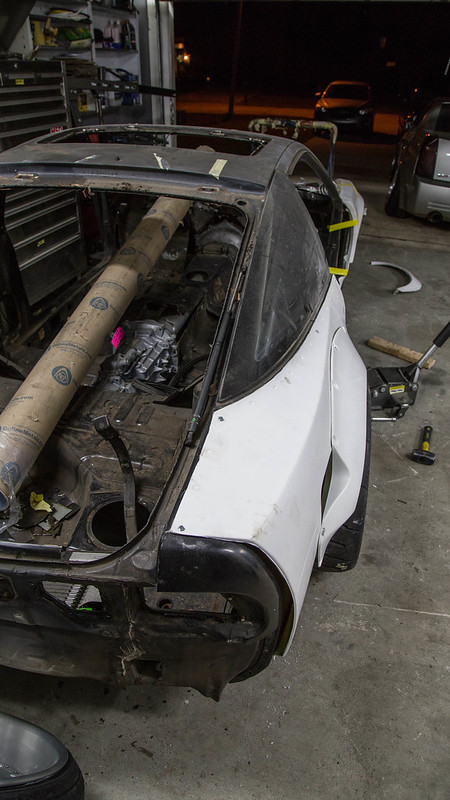 IMG_1977 by lawrx, on Flickr
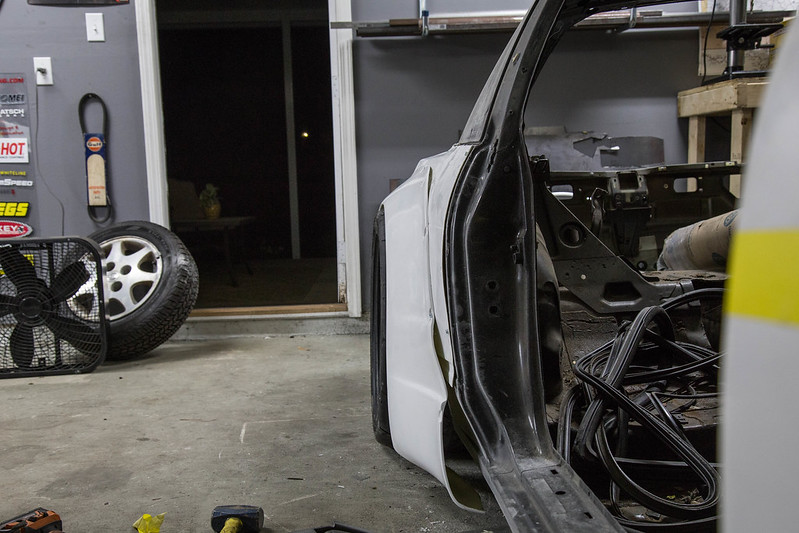 IMG_1978 by lawrx, on Flickr
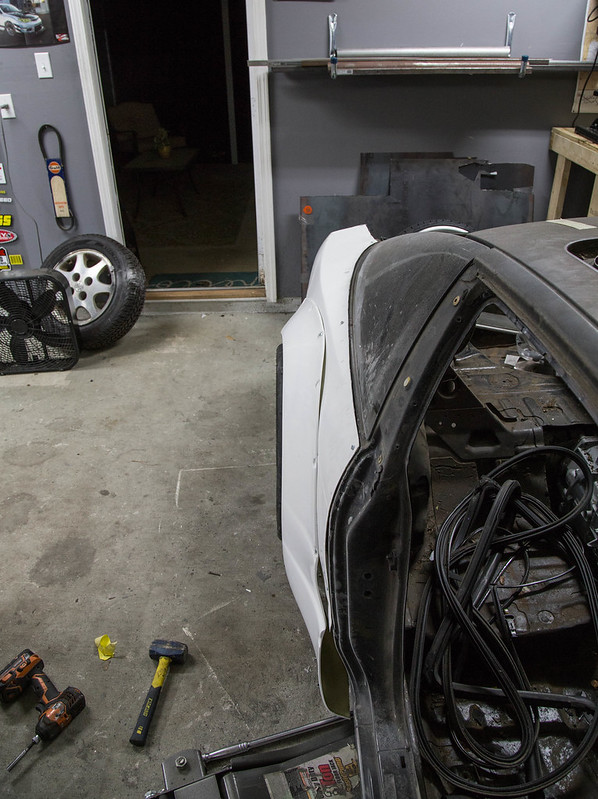 IMG_1979 by lawrx, on Flickr
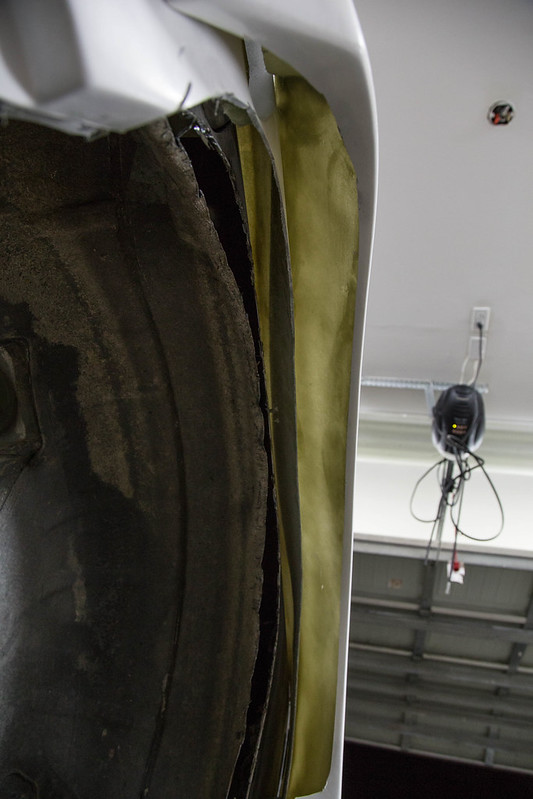 IMG_1980 by lawrx, on Flickr
 IMG_1981 by lawrx, on Flickr
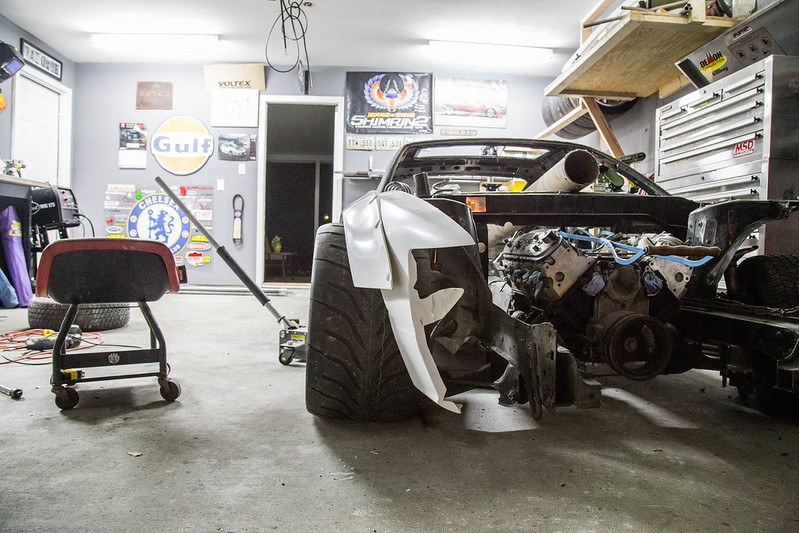 IMG_1982 by lawrx, on Flickr
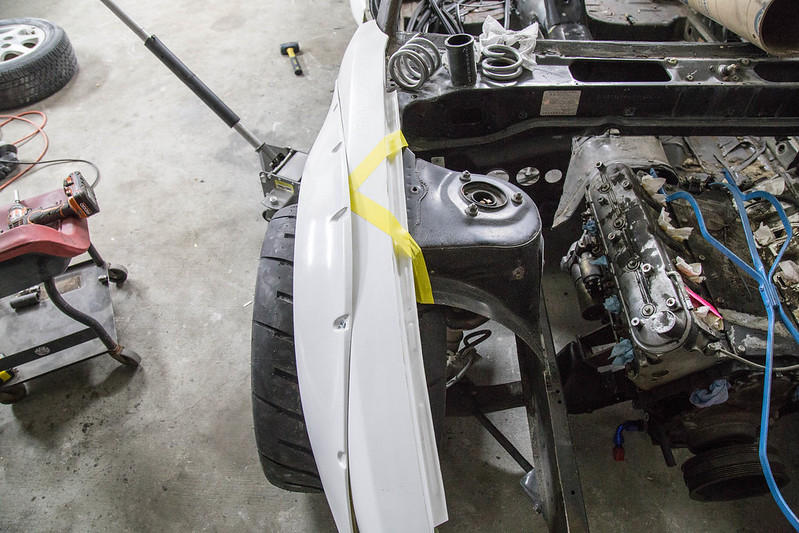 IMG_1983 by lawrx, on Flickr
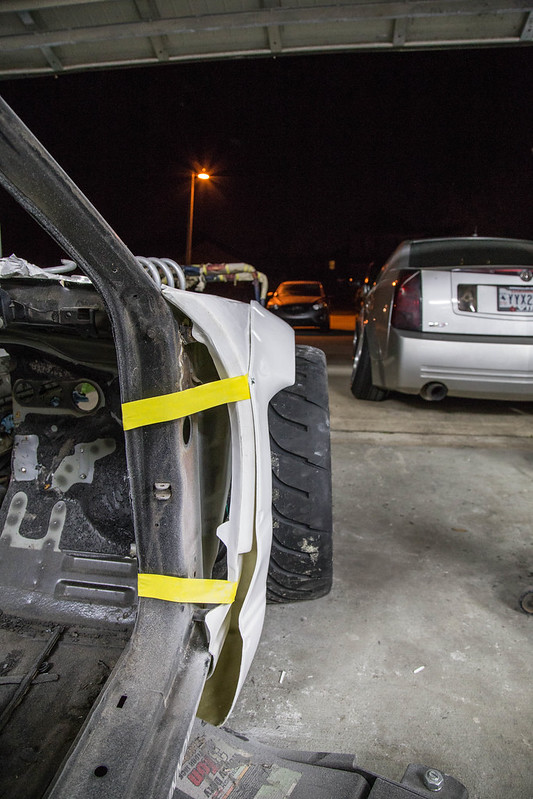 IMG_1984 by lawrx, on Flickr
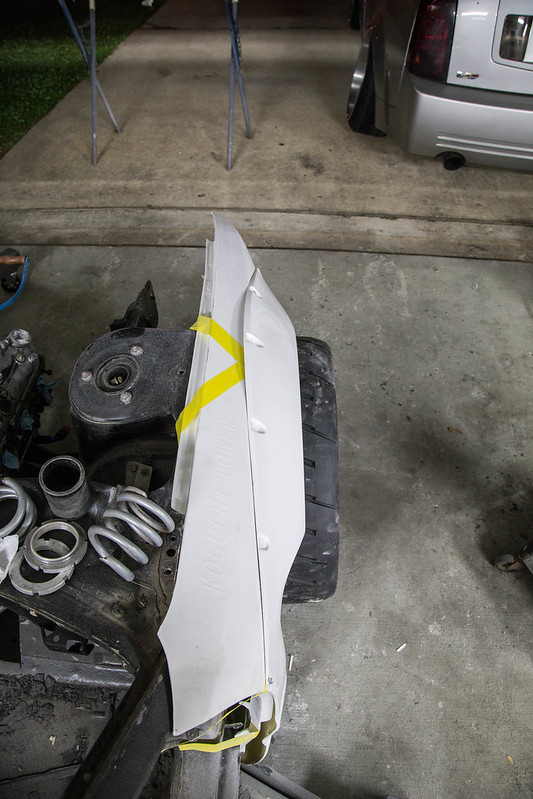 IMG_1985 by lawrx, on Flickr
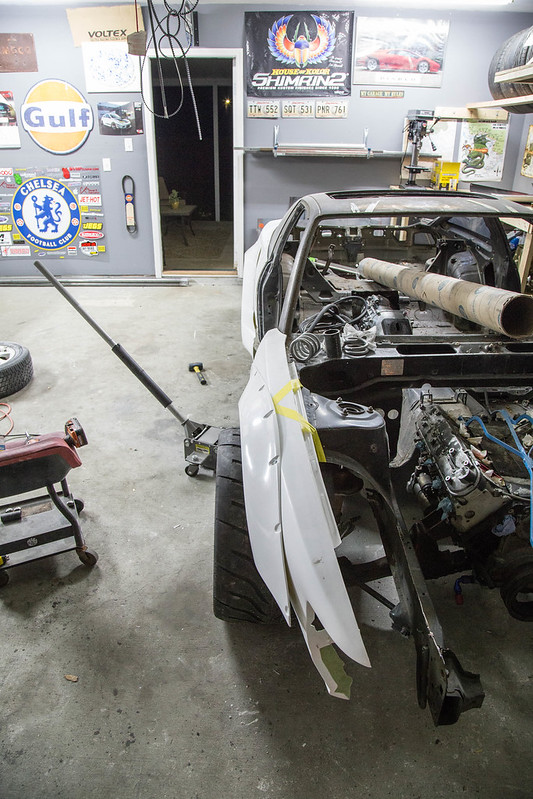 IMG_1986 by lawrx, on Flickr
 IMG_1935 by lawrx, on Flickr
 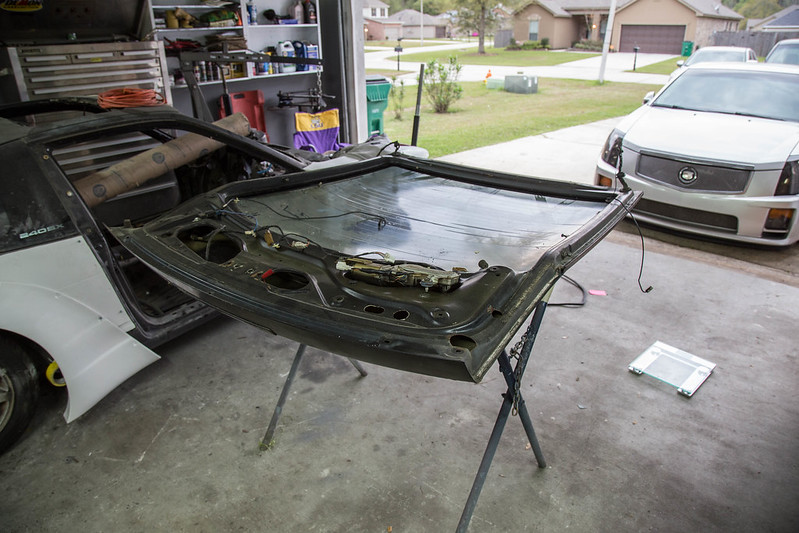 IMG_1995 by lawrx, on Flickr
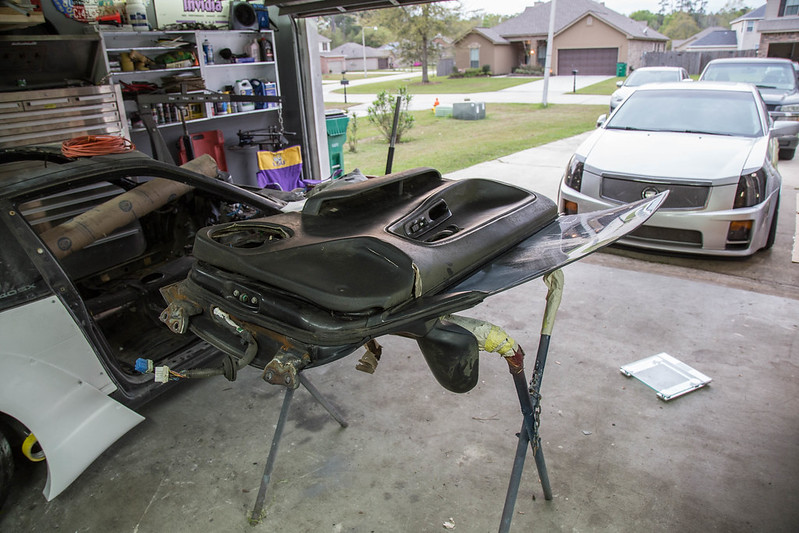 IMG_1996 by lawrx, on Flickr
 IMG_2001 by lawrx, on Flickr
 IMG_2000 by lawrx, on Flickr
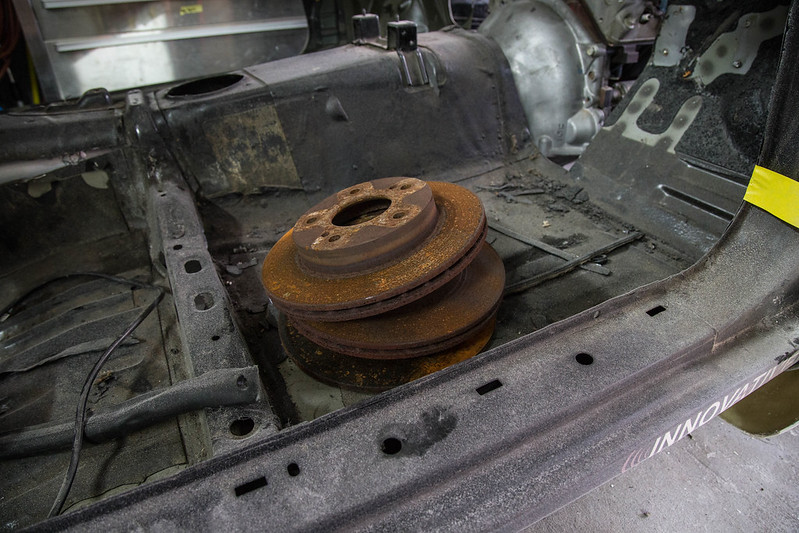 IMG_1999 by lawrx, on Flickr
 IMG_2002 by lawrx, on Flickr
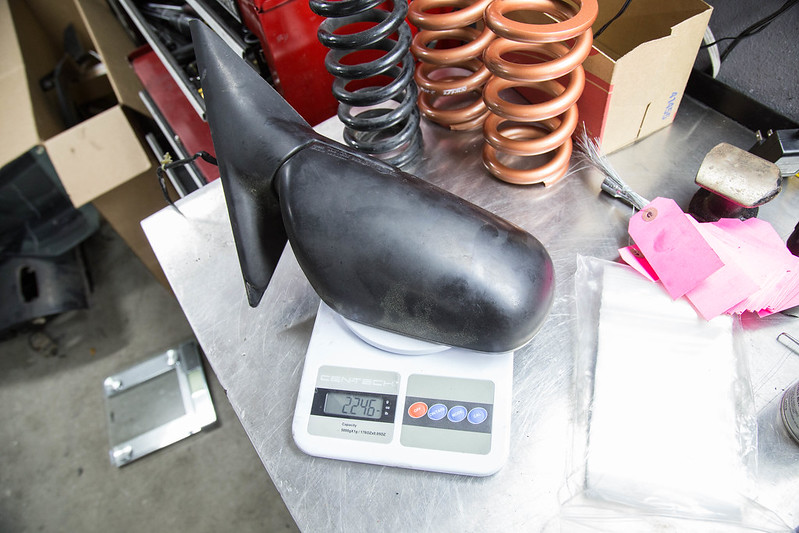 IMG_2003 by lawrx, on Flickr
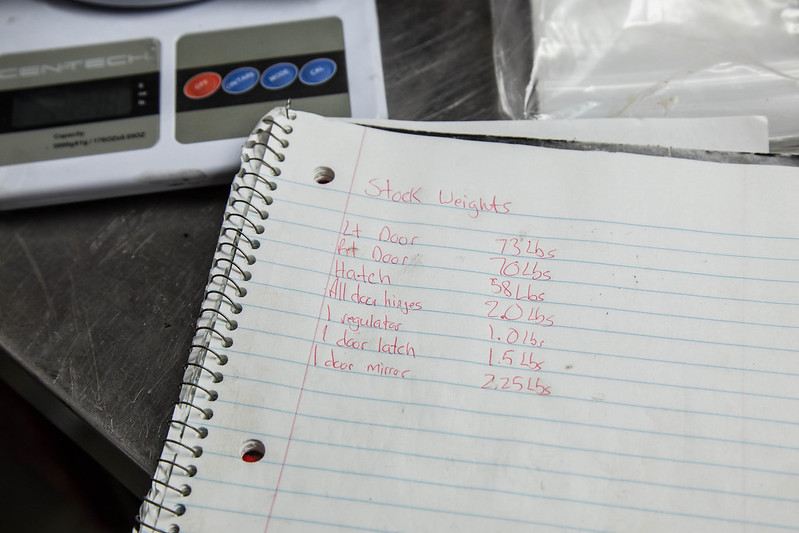 IMG_2005 by lawrx, on Flickr

 untitled (10 of 15) by lawrx, on Flickr
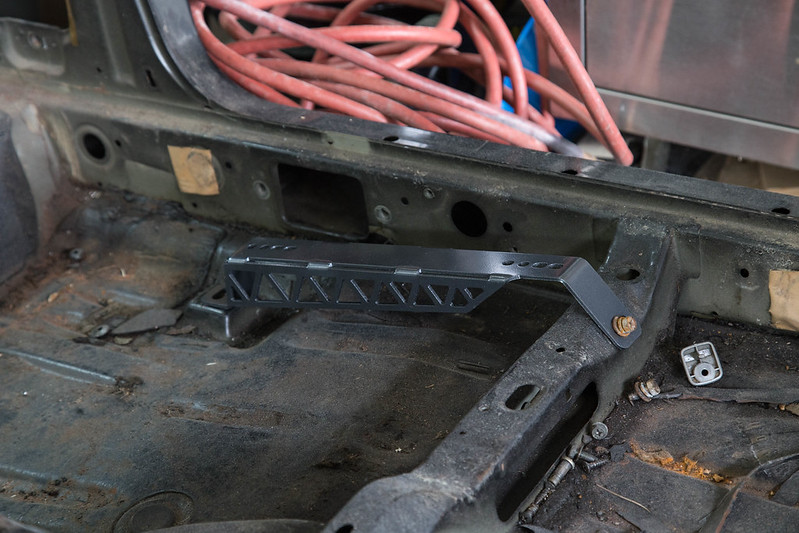 untitled (11 of 15) by lawrx, on Flickr
 untitled (14 of 15) by lawrx, on Flickr
 untitled (15 of 15) by lawrx, on Flickr
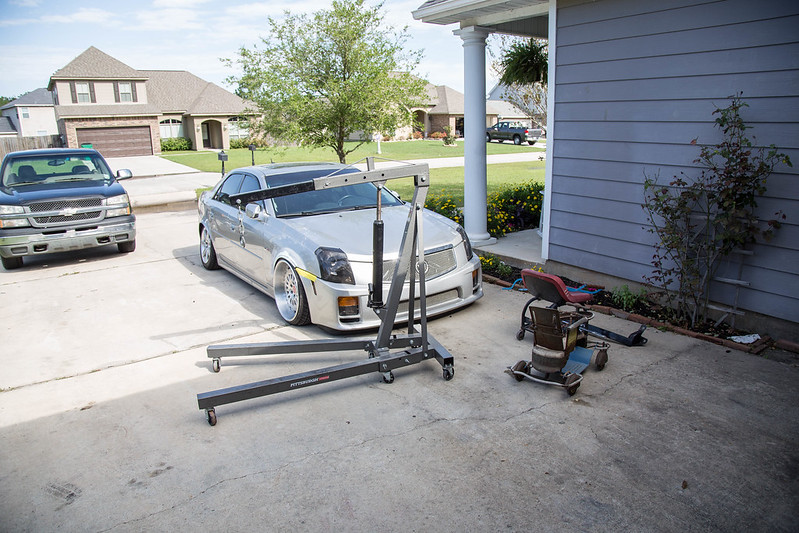 untitled (1 of 14) by lawrx, on Flickr
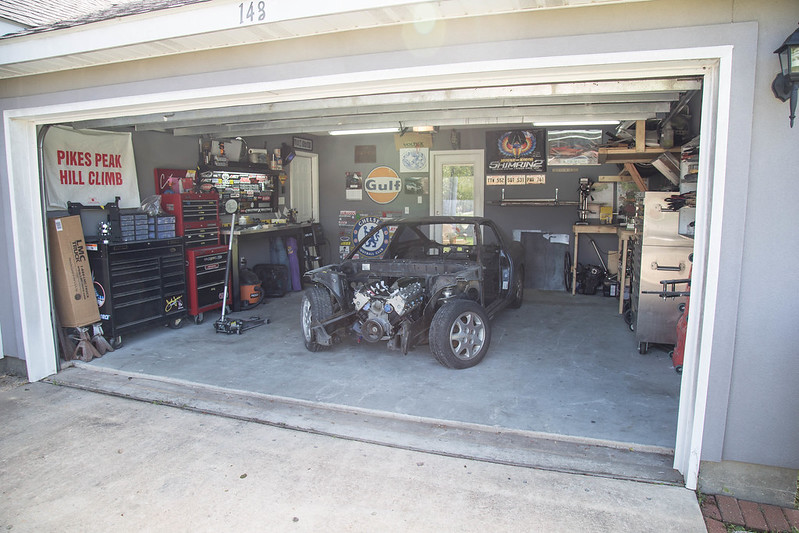 untitled (2 of 14) by lawrx, on Flickr
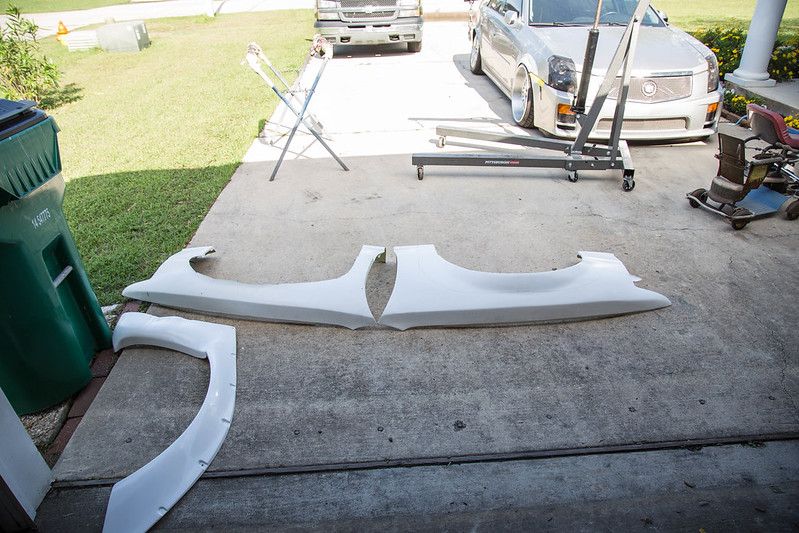 untitled (3 of 14) by lawrx, on Flickr
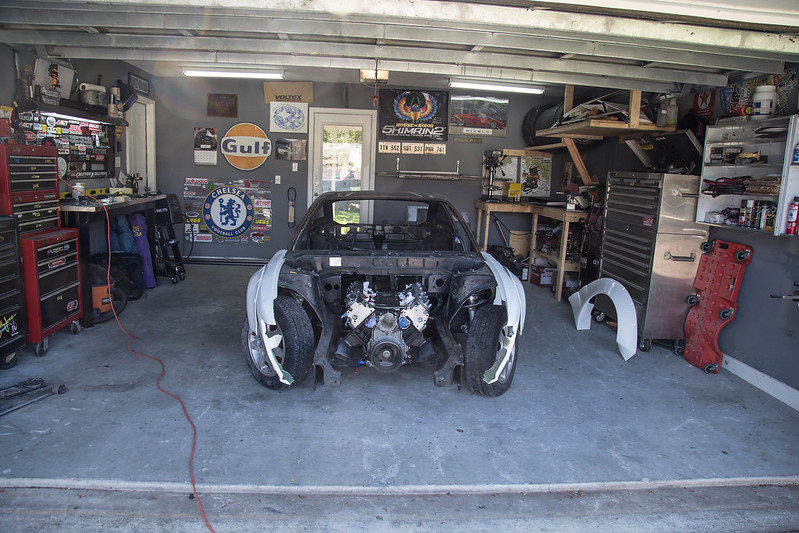 untitled (4 of 14) by lawrx, on Flickr
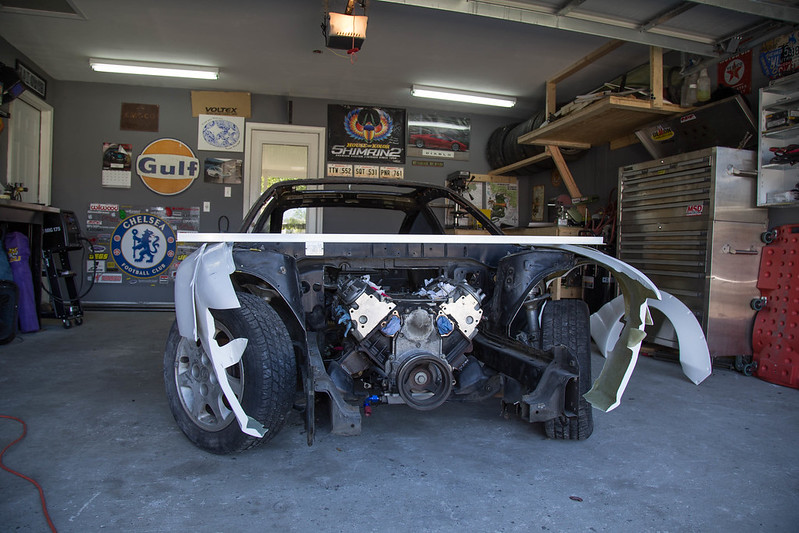 untitled (5 of 14) by lawrx, on Flickr
 untitled (6 of 14) by lawrx, on Flickr
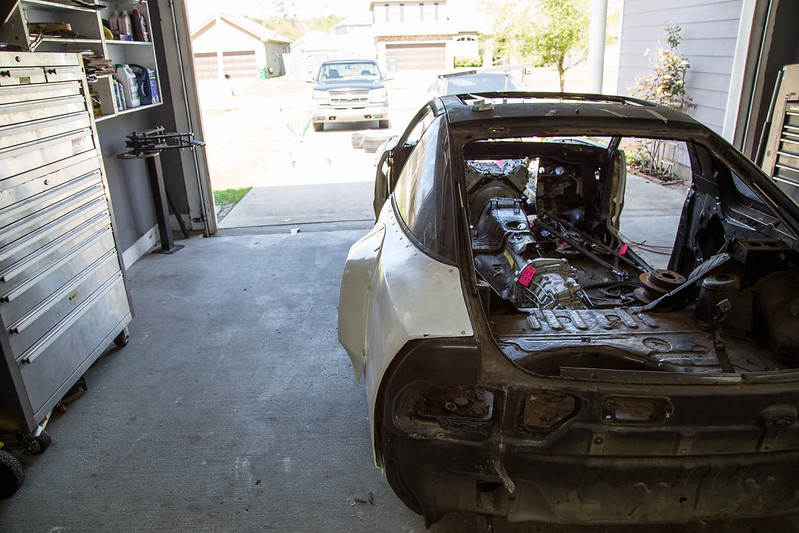 untitled (7 of 14) by lawrx, on Flickr
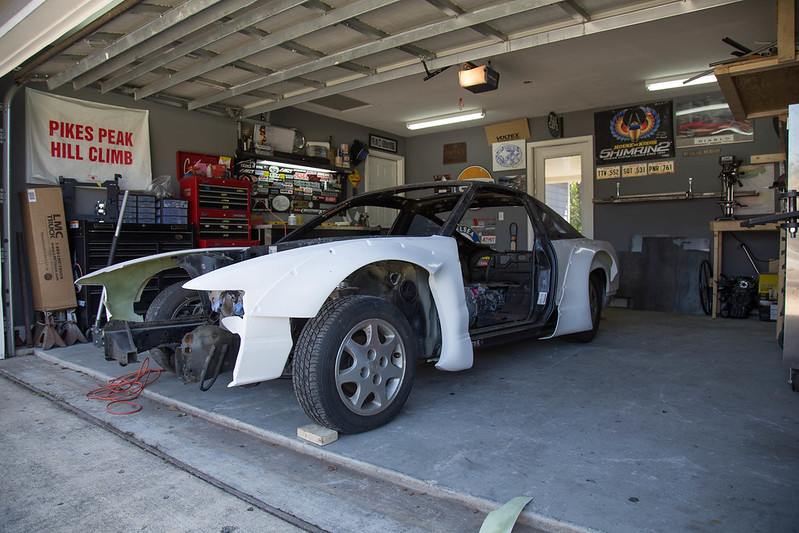 untitled (8 of 14) by lawrx, on Flickr
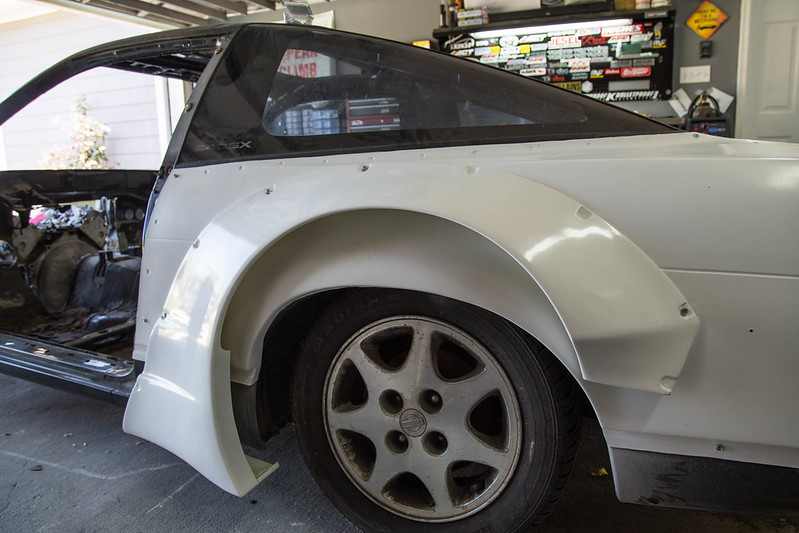 untitled (9 of 14) by lawrx, on Flickr
 untitled (10 of 14) by lawrx, on Flickr
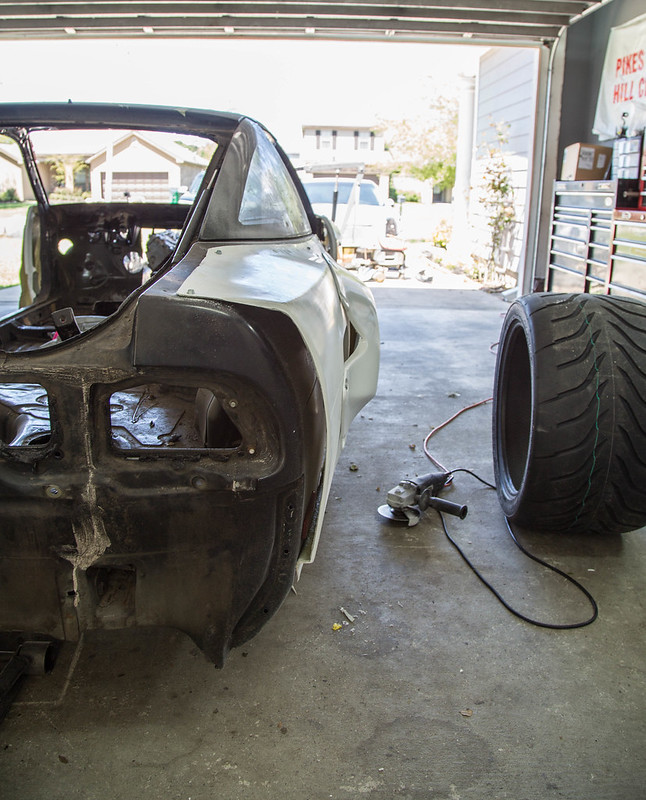 untitled (11 of 14) by lawrx, on Flickr
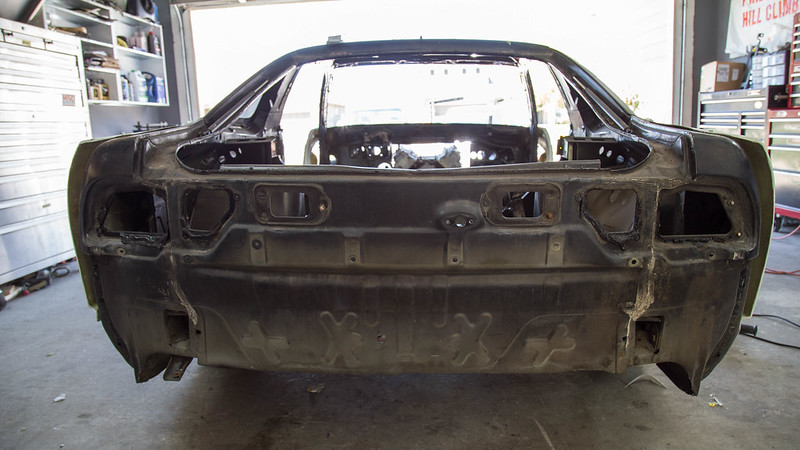 untitled (12 of 14) by lawrx, on Flickr
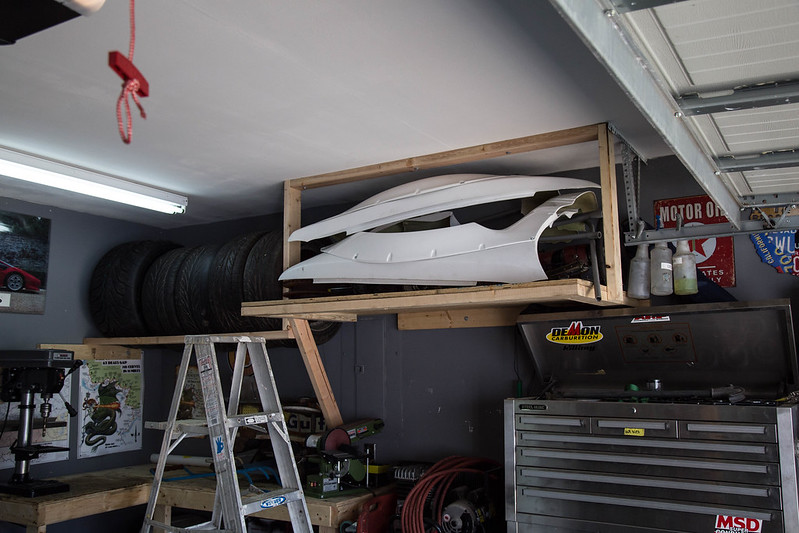 untitled (13 of 14) by lawrx, on Flickr
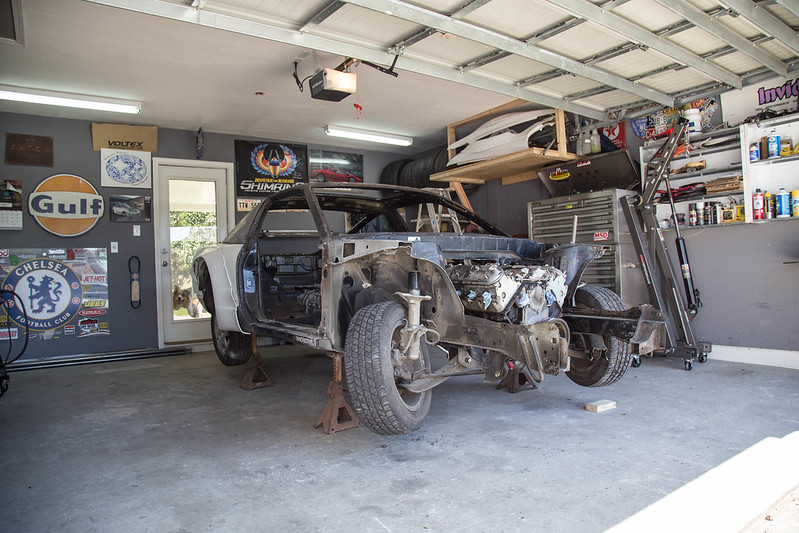 untitled (14 of 14) by lawrx, on Flickr
 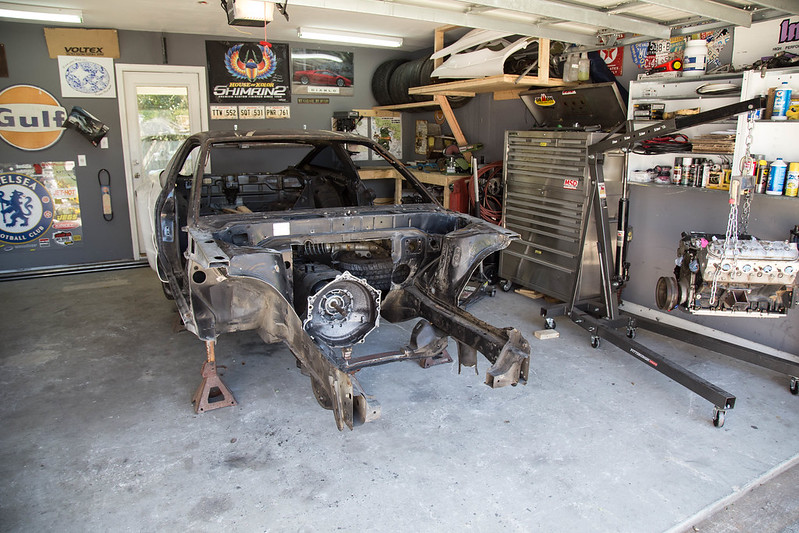 untitled (1 of 16) by lawrx, on Flickr
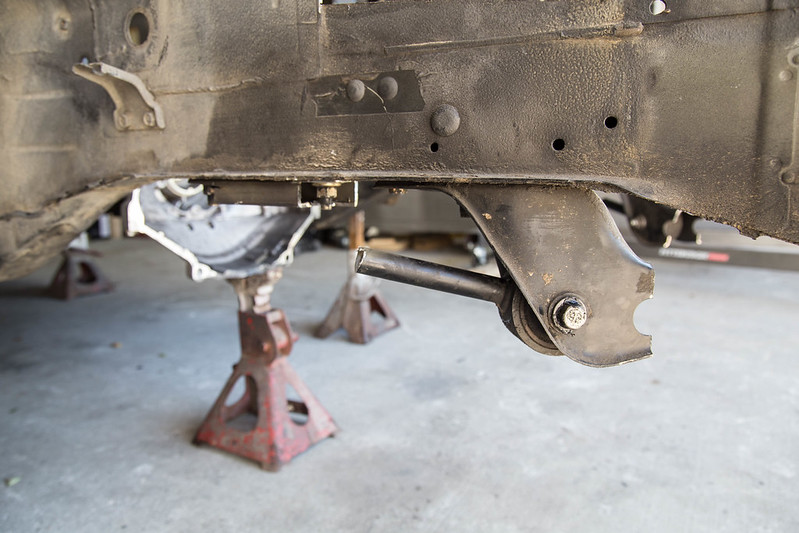 untitled (2 of 16) by lawrx, on Flickr
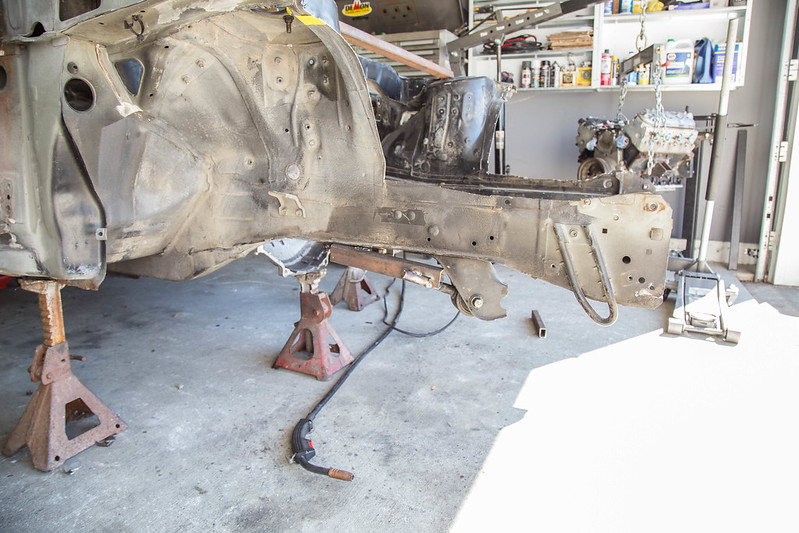 untitled (3 of 16) by lawrx, on Flickr
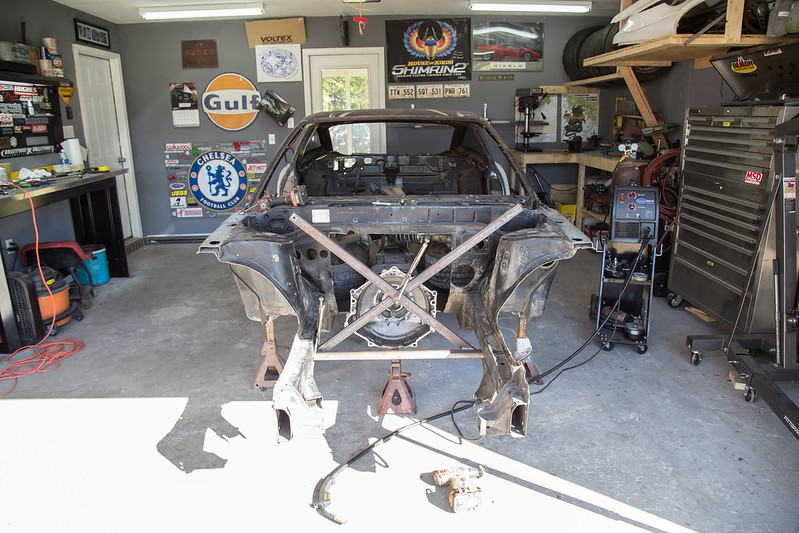 untitled (4 of 16) by lawrx, on Flickr
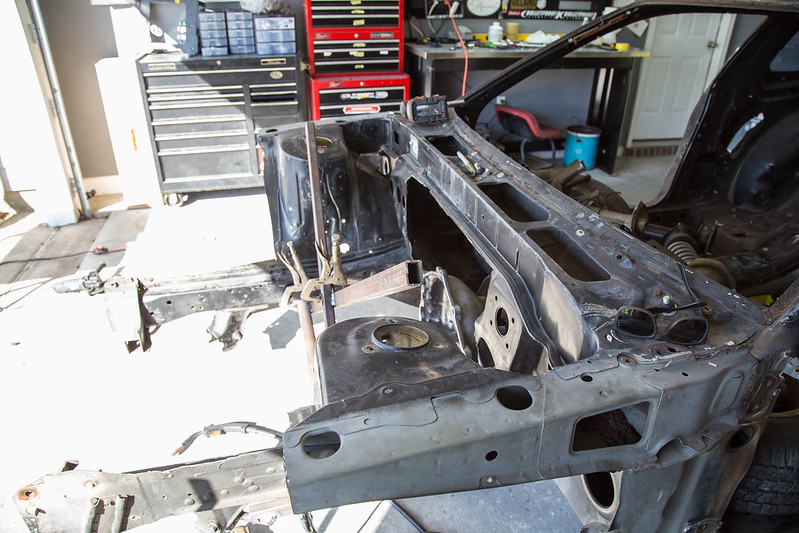 untitled (5 of 16) by lawrx, on Flickr
 untitled (6 of 16) by lawrx, on Flickr
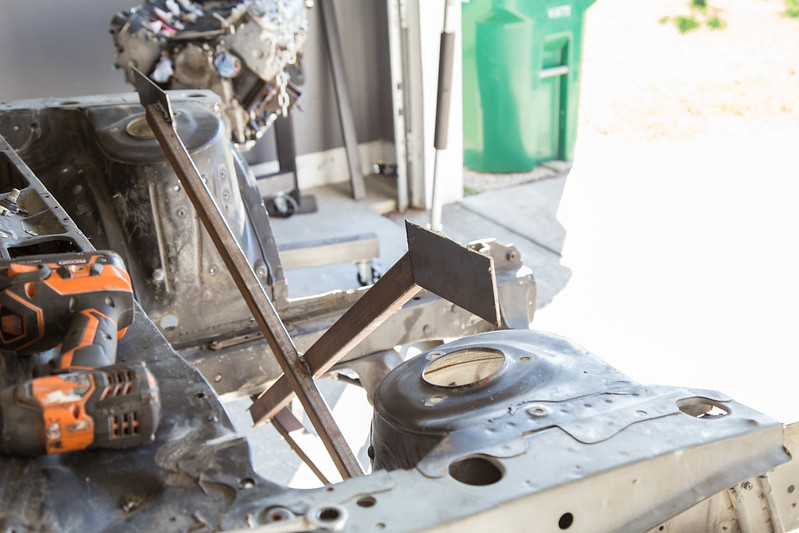 untitled (7 of 16) by lawrx, on Flickr
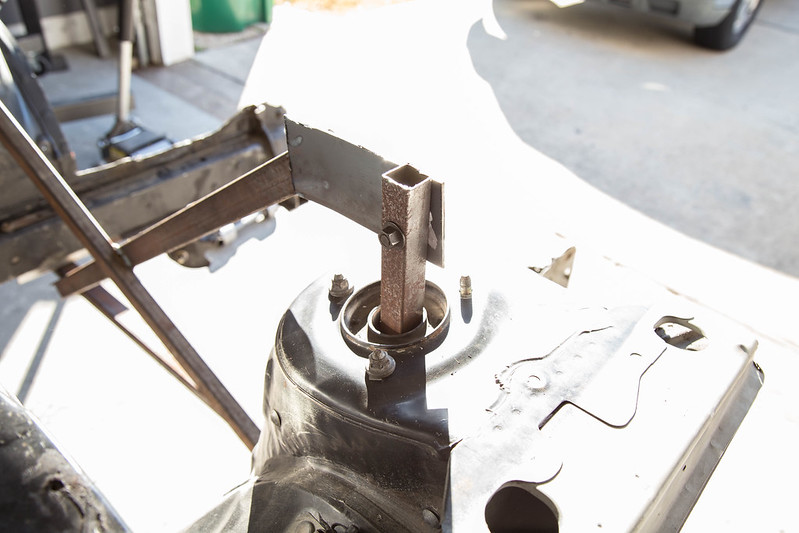 untitled (8 of 16) by lawrx, on Flickr
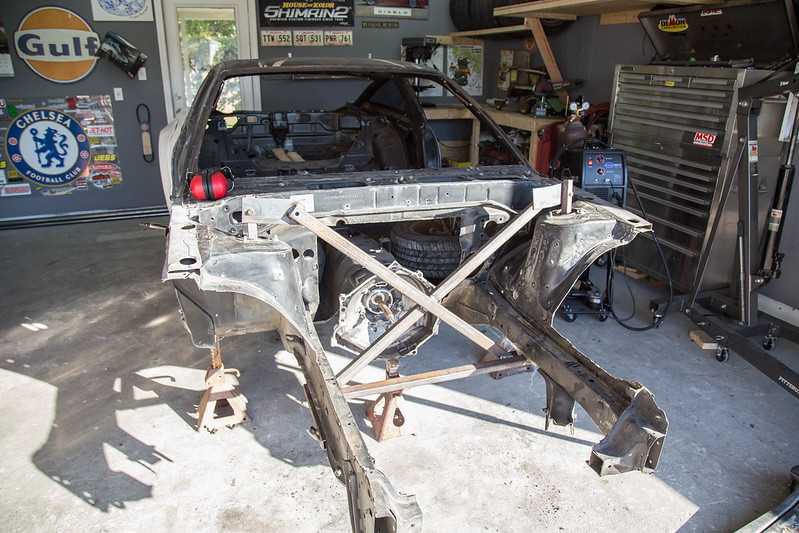 untitled (9 of 16) by lawrx, on Flickr
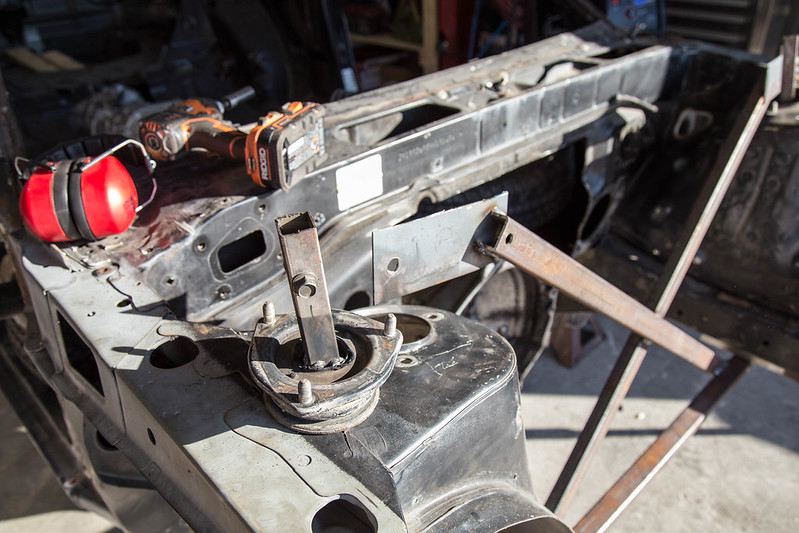 untitled (10 of 16) by lawrx, on Flickr
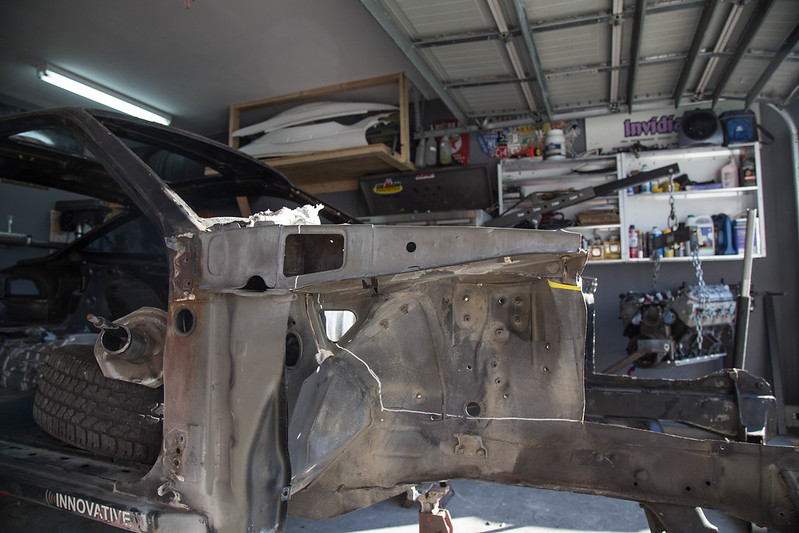 untitled (11 of 16) by lawrx, on Flickr
 untitled (12 of 16) by lawrx, on Flickr
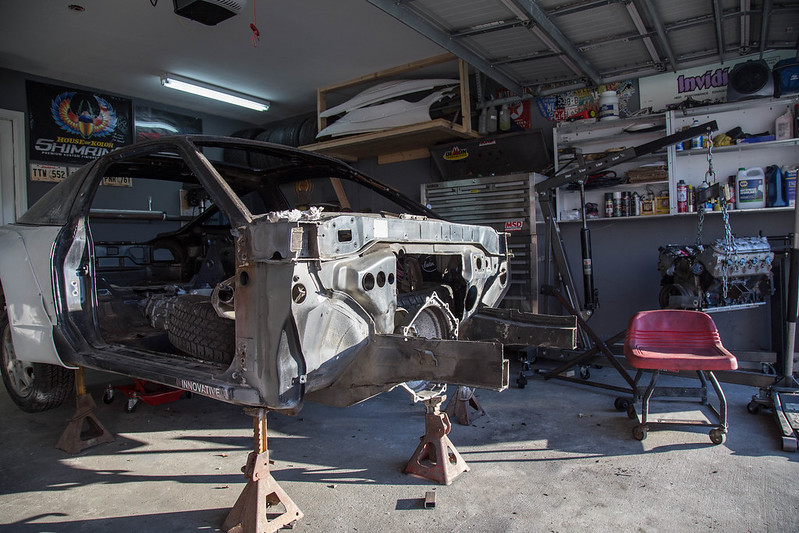 untitled (13 of 16) by lawrx, on Flickr
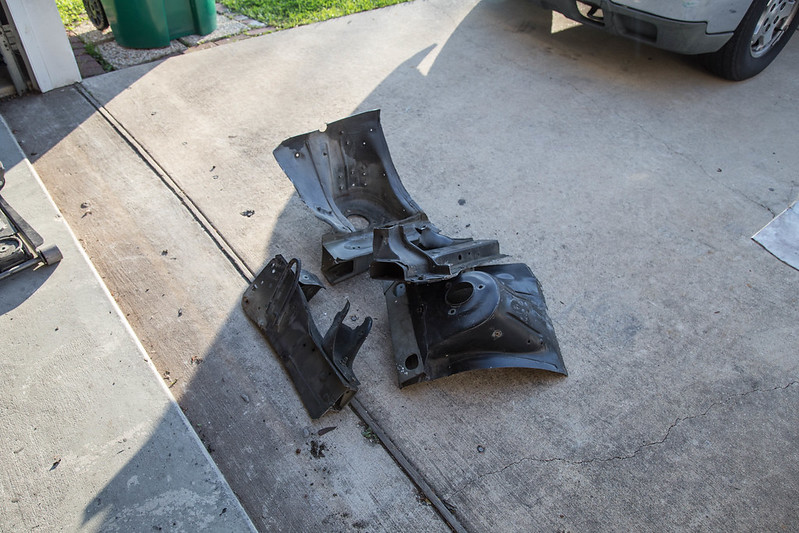 untitled (14 of 16) by lawrx, on Flickr
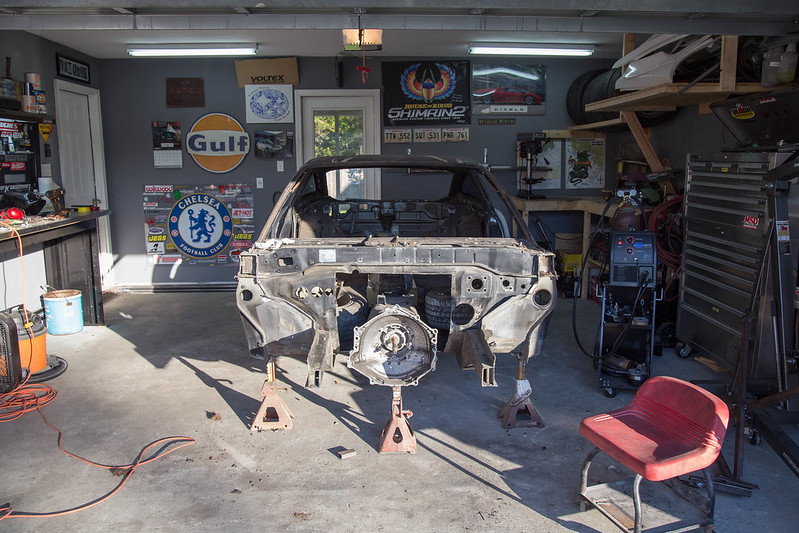 untitled (15 of 16) by lawrx, on Flickr
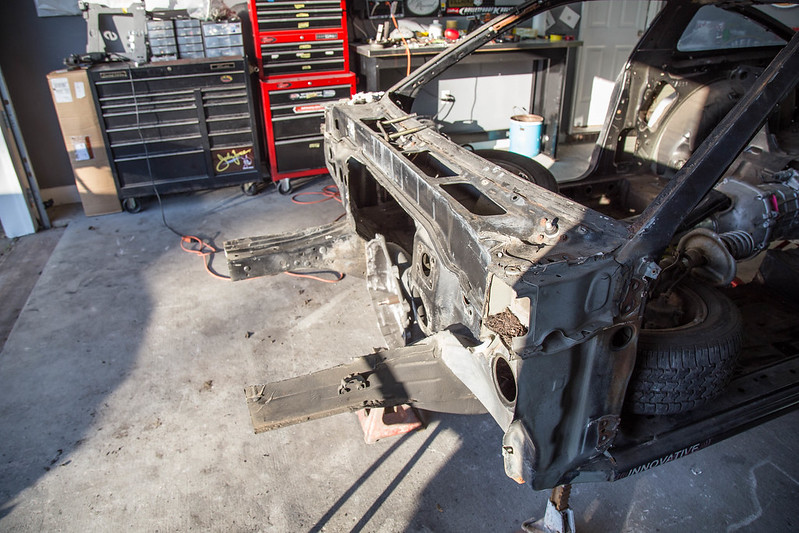 untitled (16 of 16) by lawrx, on Flickr
 untitled (1 of 9) by lawrx, on Flickr
 untitled (3 of 9) by lawrx, on Flickr
 untitled (7 of 9) by lawrx, on Flickr
 10418356_10152935127527469_6095829385190003456_n by lawrx, on Flickr

 IMG_2295 by lawrx, on Flickr
 IMG_2296 by lawrx, on Flickr
 IMG_2391 by lawrx, on Flickr