On the Road to Removing the Shock Towers

 03-28-2011, 02:44 PM
#22
But it's not contradictory. When the stock suspension is lowered all the way, the K-member is about 2" from the ground. Thats just wasted space. I want to use that space. Plus a little more if possible.
Stock travel is 6". About 3" compression and 3" extension.
So when you lower the front of the car 1.5", your left with 1.5" of compression travel and 4.5" extension travel. Stiffer springs and good shocks can make that acceptable. I ran my car like that everyday. It rode well with the Koni SA's and 550lb springs.
My all new suspension combined with the shock towers gone, allow me to lower the front of the car 2.5" below stock height and still have 2.5" of compression travel. So that's a lot lower and still be better riding than now.
Then if I can raise the engine/trans 1.5", I'll have 4" of compression travel. That's more than stock! And the car will still looked slammed up front.
Make sense?
The down side is that I won't be able to raise the cars nose up very high for driveways and such because I'm limited with that 6" of shock travel. Now if I swap over to some longer stroke shocks, I'd be able to lift the nose higher and make it quite practical to drive everyday.
Last edited by JasonWW; 03-28-2011 at 03:26 PM.
03-28-2011, 03:56 PM
#23
Launching!

Join Date: Sep 2009
Location: Toronto, Ontario, Canada
Posts: 266
Likes: 0
Received 0 Likes
on
0 Posts

Im still confused, but as long as you know what your doing that is all that matters lol. I still dont understand how the k member wont hit the ground or the rest of the car for that matter. good luck on the project interested to see how it turns out.
03-28-2011, 04:34 PM
#24
Okay Joe, with my car as it sits right now, I can drop the pressure in the front bags and the car will drop down fully, compressing the bumpstops. The K-member is still 2" off the ground.
So let's say I modify the suspension to go 1 7/8" lower so that the K-member sits 1/8" off the ground at full drop.
I gain 1 7/8" of usable suspension travel. That means I'm not hitting the bumpstops as much and the ride is smoother. Make sense?
So let's say I modify the suspension to go 1 7/8" lower so that the K-member sits 1/8" off the ground at full drop.
I gain 1 7/8" of usable suspension travel. That means I'm not hitting the bumpstops as much and the ride is smoother. Make sense?
03-28-2011, 04:48 PM
#25
I've seen guys replace the sheetmetal shocktowers with tubing, but I've never seen anyone actually remove them, so I'm in uncharted territory here.
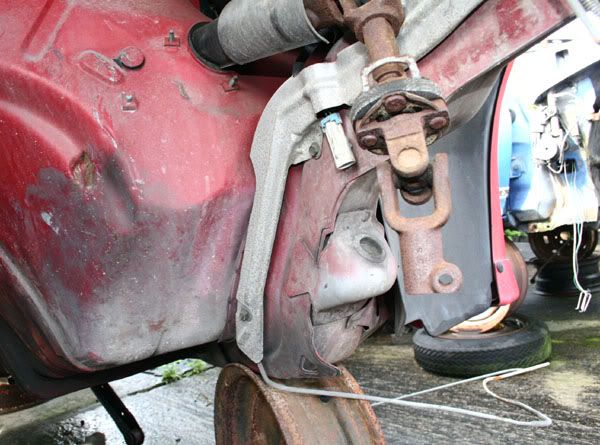
As it stands right now, I'm can get this low.
I want to go all the way! I need to drop it 3 more inches.
As it stands right now, I'm can get this low.
I want to go all the way! I need to drop it 3 more inches.
Last edited by JasonWW; 03-28-2011 at 05:02 PM.
03-28-2011, 05:20 PM
#26

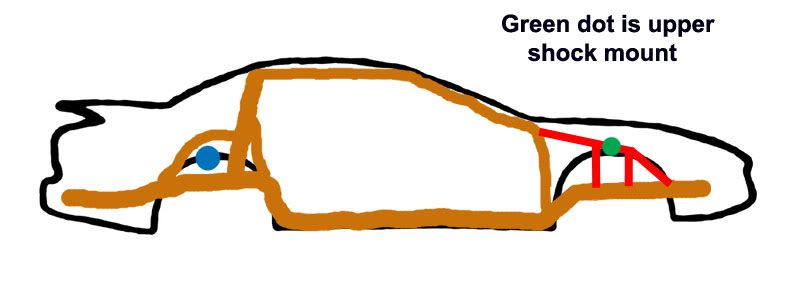
Here is the most efficient way to brace the front and is what you were saying Leadfoot. Adding the red bar.
The downside is needing to strip the dash out. I think I can get almost the same strength by keeping the welding points lower, thereby not having to remove the dash.
The downside is needing to strip the dash out. I think I can get almost the same strength by keeping the welding points lower, thereby not having to remove the dash.
Yes, that is where I was going. If you really wanted to do something "out of the box", you could purchase a "front clip", similar to the one I linked you to, and mate it to your car. That particular chassis is built by Troyer Race Cars, in Rochester, NY. Since oval track cars see a little "action" now and again, with the front ends usually being first at the scens, those cars get "clipped" a lot. Therefore, they keep front clips on hand.
I originally intended to link you to Troyer's, when I posted that info, but when I went there, I couldn't get a good picture of the chassis. It appeared that their site was down for maintenance over the weekend....

 03-29-2011, 01:49 PM
#32
Years ago I did research to determine how low a street car could be. One of the vehicles I researched was the C6 vette. They were designed to ride low and you'll notice that there are no mechanical bits lower than the body line. Most areas are 6" off the ground, but the area right behind the front tire is 5".
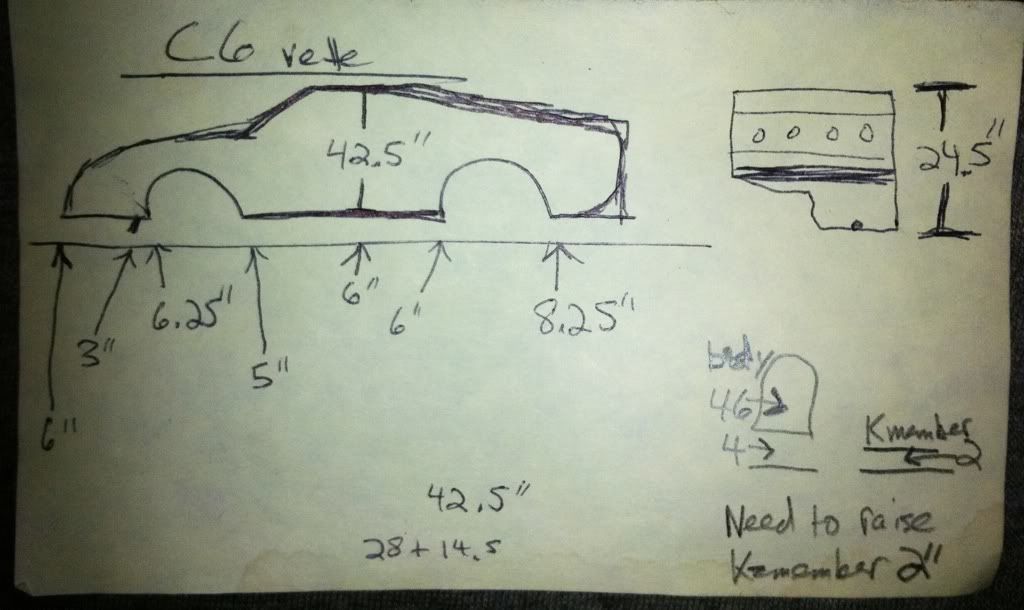
Seeing as how these are stock vehicles and there are thousands of them running around all over, including people who lower them, I decided on 4" clearance as a minimum. So no part of the vehicle would be below 4" at ride height.
And consider this, I drove daily for over 5 years with my car lowered and all that time the K-member was 3.5" to 4" off the ground and I never had any problems whatsoever.
I'd really like to move the K-member up 2" so that it's even with the side skirts giving me more ground clearance.
Getting back on target, regardless of my reasons for wanting to do this, how can I best make the main framerails nice and strong?
Lete post up all my frame rail dissections so everyone can see whats going on there.
03-29-2011, 02:10 PM
#33
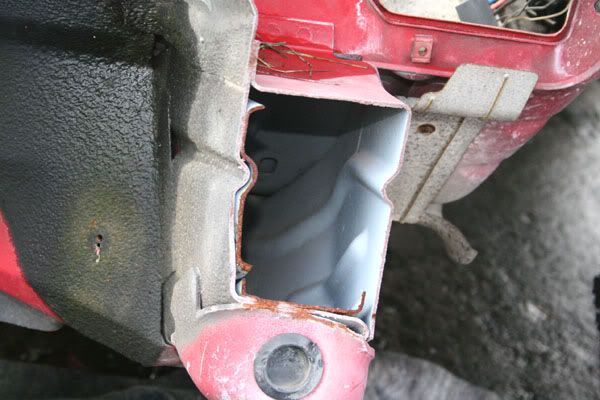
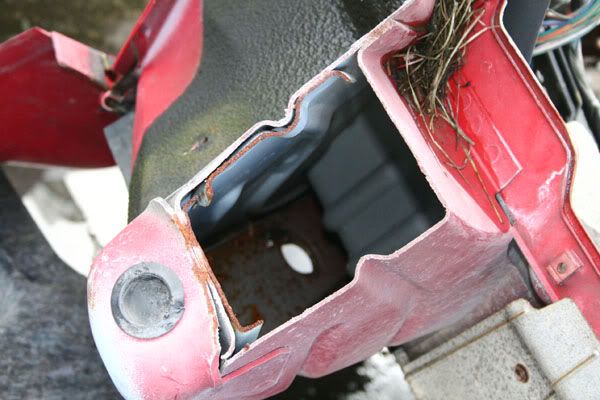
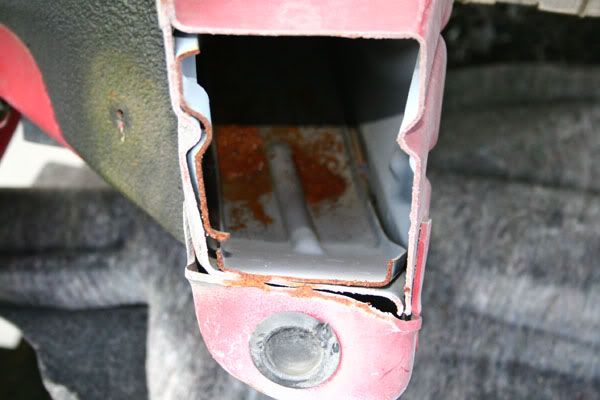
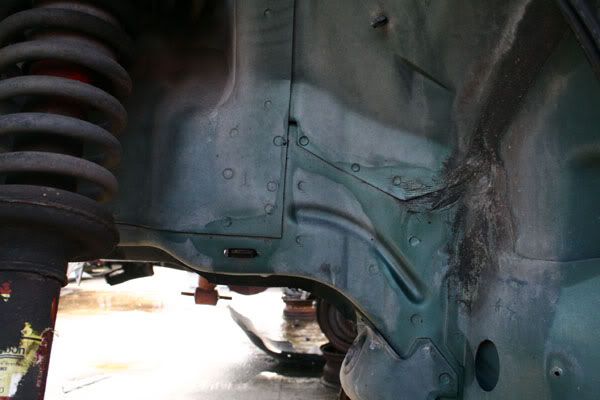
I have a white 98 donor car that I've been using for testing plus a lot of junkyard pics. As you can see the factory spot welded addition reinforcement plates to the inside of the frame rails between the K-member and the firewall.
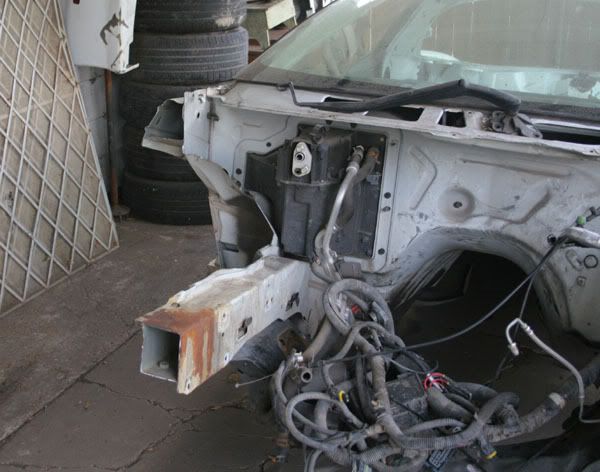

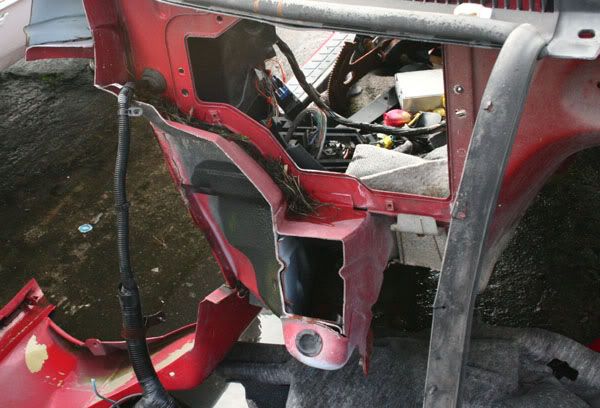


Last edited by JasonWW; 03-29-2011 at 03:04 PM.
03-29-2011, 02:39 PM
#34
(I can take more pics if anyone needs them)
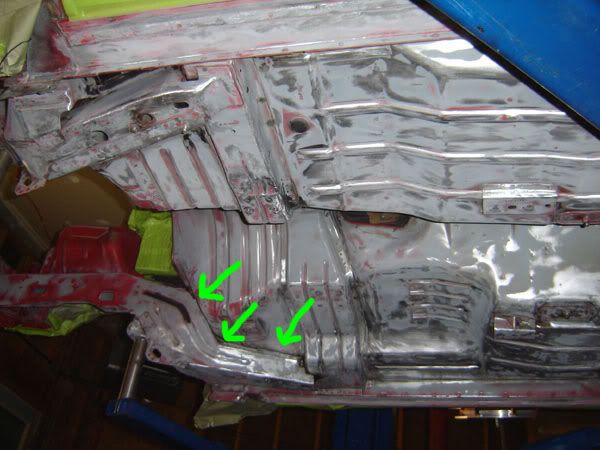
I really think my idea of reinforcing the K-member to firewall area should be more than sufficient for having the main frame rails carry all the weight.
I really think my idea of reinforcing the K-member to firewall area should be more than sufficient for having the main frame rails carry all the weight.
Another option and what I was considering is to add a side plate to the frame rail. Holes can be added to reduce weight and to add contact area. Plate can be added to the inner frame rails also if need be.
Last edited by JasonWW; 03-29-2011 at 03:02 PM.
03-29-2011, 03:20 PM
#35

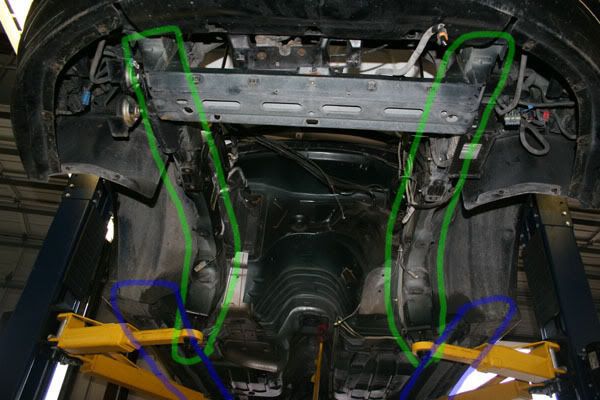
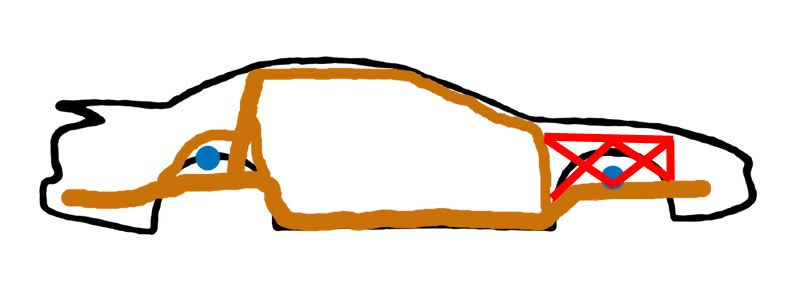
Why not draw in the crayon picture posted before...
A rectangle...then 2 X's filling in the rectangle above each frame rail.....all made of rectangular tubing in real life.
Then tie the rears of both rectangulars together with another rect tubing rail.
Also couldn't you rivet a steel plate to the current firewall? perhaps welding to that plate before riveting to the firewall?
03-29-2011, 03:31 PM
#36
I'm not really following you on the rectangles. Maybe you could draw it and post a pic of the drawing?
I like the rivet idea. I didn't think of that. I'm going to explore that more. Thanks.
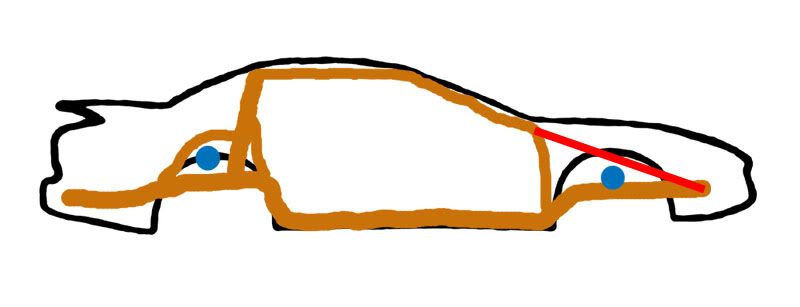
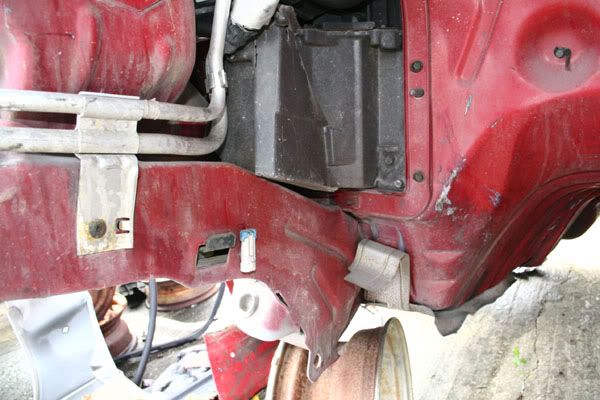
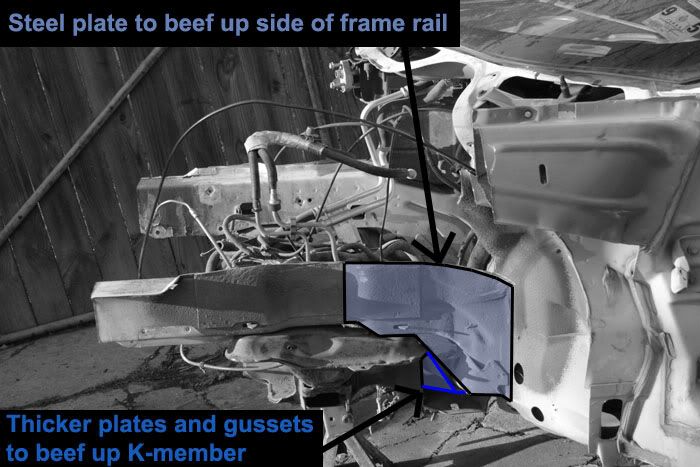
Here's an older idea I had:
I like the rivet idea. I didn't think of that. I'm going to explore that more. Thanks.
Here's an older idea I had:
Last edited by JasonWW; 03-29-2011 at 03:59 PM.
03-29-2011, 03:53 PM
#37
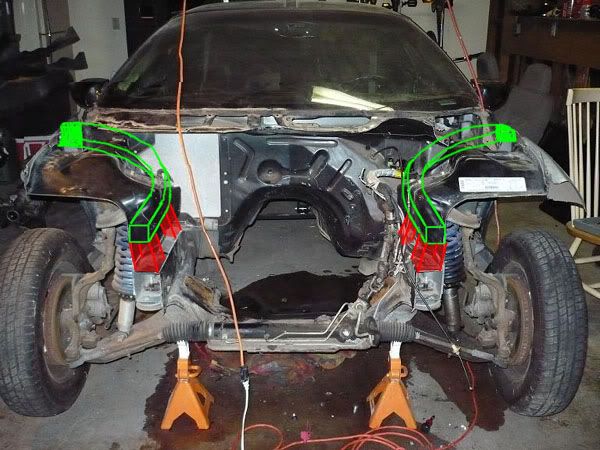
Jason in this pic.....draw the red into a rectangle....then 2 X's inside it.
Then another red bar across the back of the firewall at the top of both rectangles that sit on the main rails.
Maybe weld the rear bar to the steel plate riveted to the original firewall.
You would have to go through plenty of rivets tho.
I think you could also on top of that throw in a few spot welds along all the edges of the mock firewall.
03-29-2011, 03:59 PM
#38
On The Tree
iTrader: (20)
Join Date: Mar 2007
Location: TX
Posts: 126
Likes: 0
Received 0 Likes
on
0 Posts
4" clearance on the k-member should be fine. The previous posts throughout the thread lead one to believe it would be lower hence the miscommunication. Good luck with it!
03-29-2011, 04:11 PM
#39
Jason in this pic.....draw the red into a rectangle....then 2 X's inside it.
Then another red bar across the back of the firewall at the top of both rectangles that sit on the main rails.
Maybe weld the rear bar to the steel plate riveted to the original firewall.
You would have to go through plenty of rivets tho.
I think you could also on top of that throw in a few spot welds along all the edges of the mock firewall.
Then another red bar across the back of the firewall at the top of both rectangles that sit on the main rails.
Maybe weld the rear bar to the steel plate riveted to the original firewall.
You would have to go through plenty of rivets tho.
I think you could also on top of that throw in a few spot welds along all the edges of the mock firewall.
I think it's over kill.