
Building fiberglass stealth box for 10" sub
 06-29-2014, 09:58 PM
#1
After realizing my stock 6.5" subs were blown to oblivion, I was faced with 2 decisions. Replace them with 2 more 6.5s, that most likely would suck just as bad, and if they had any increase in performance, would probably still be bad compared to even the weakest singe 8" in a box, while costing way more...So my other option (which I obviously choose or this thread wouldn't exist) was to build a stealth box, with an 8" or 10" so after some research I decided on the soundqubed HDS210 (link here>http://www.soundqubed.com/HDS210_p_219.html)
mostly because it is cheaper than the 8" and just as good if not better, most likely the latter. But the main problem I faced was getting enough air for it in a wood stealth box, so I decided fiberglass would give the best fit, and most amount of interior volume to get a great sound out of a 10". I will update this as I go, and will post the final cost of everything and any other info AFTER I am finished, so you can know exactly how much material I used, and what it will cost.
mostly because it is cheaper than the 8" and just as good if not better, most likely the latter. But the main problem I faced was getting enough air for it in a wood stealth box, so I decided fiberglass would give the best fit, and most amount of interior volume to get a great sound out of a 10". I will update this as I go, and will post the final cost of everything and any other info AFTER I am finished, so you can know exactly how much material I used, and what it will cost.
 06-29-2014, 10:18 PM
#2
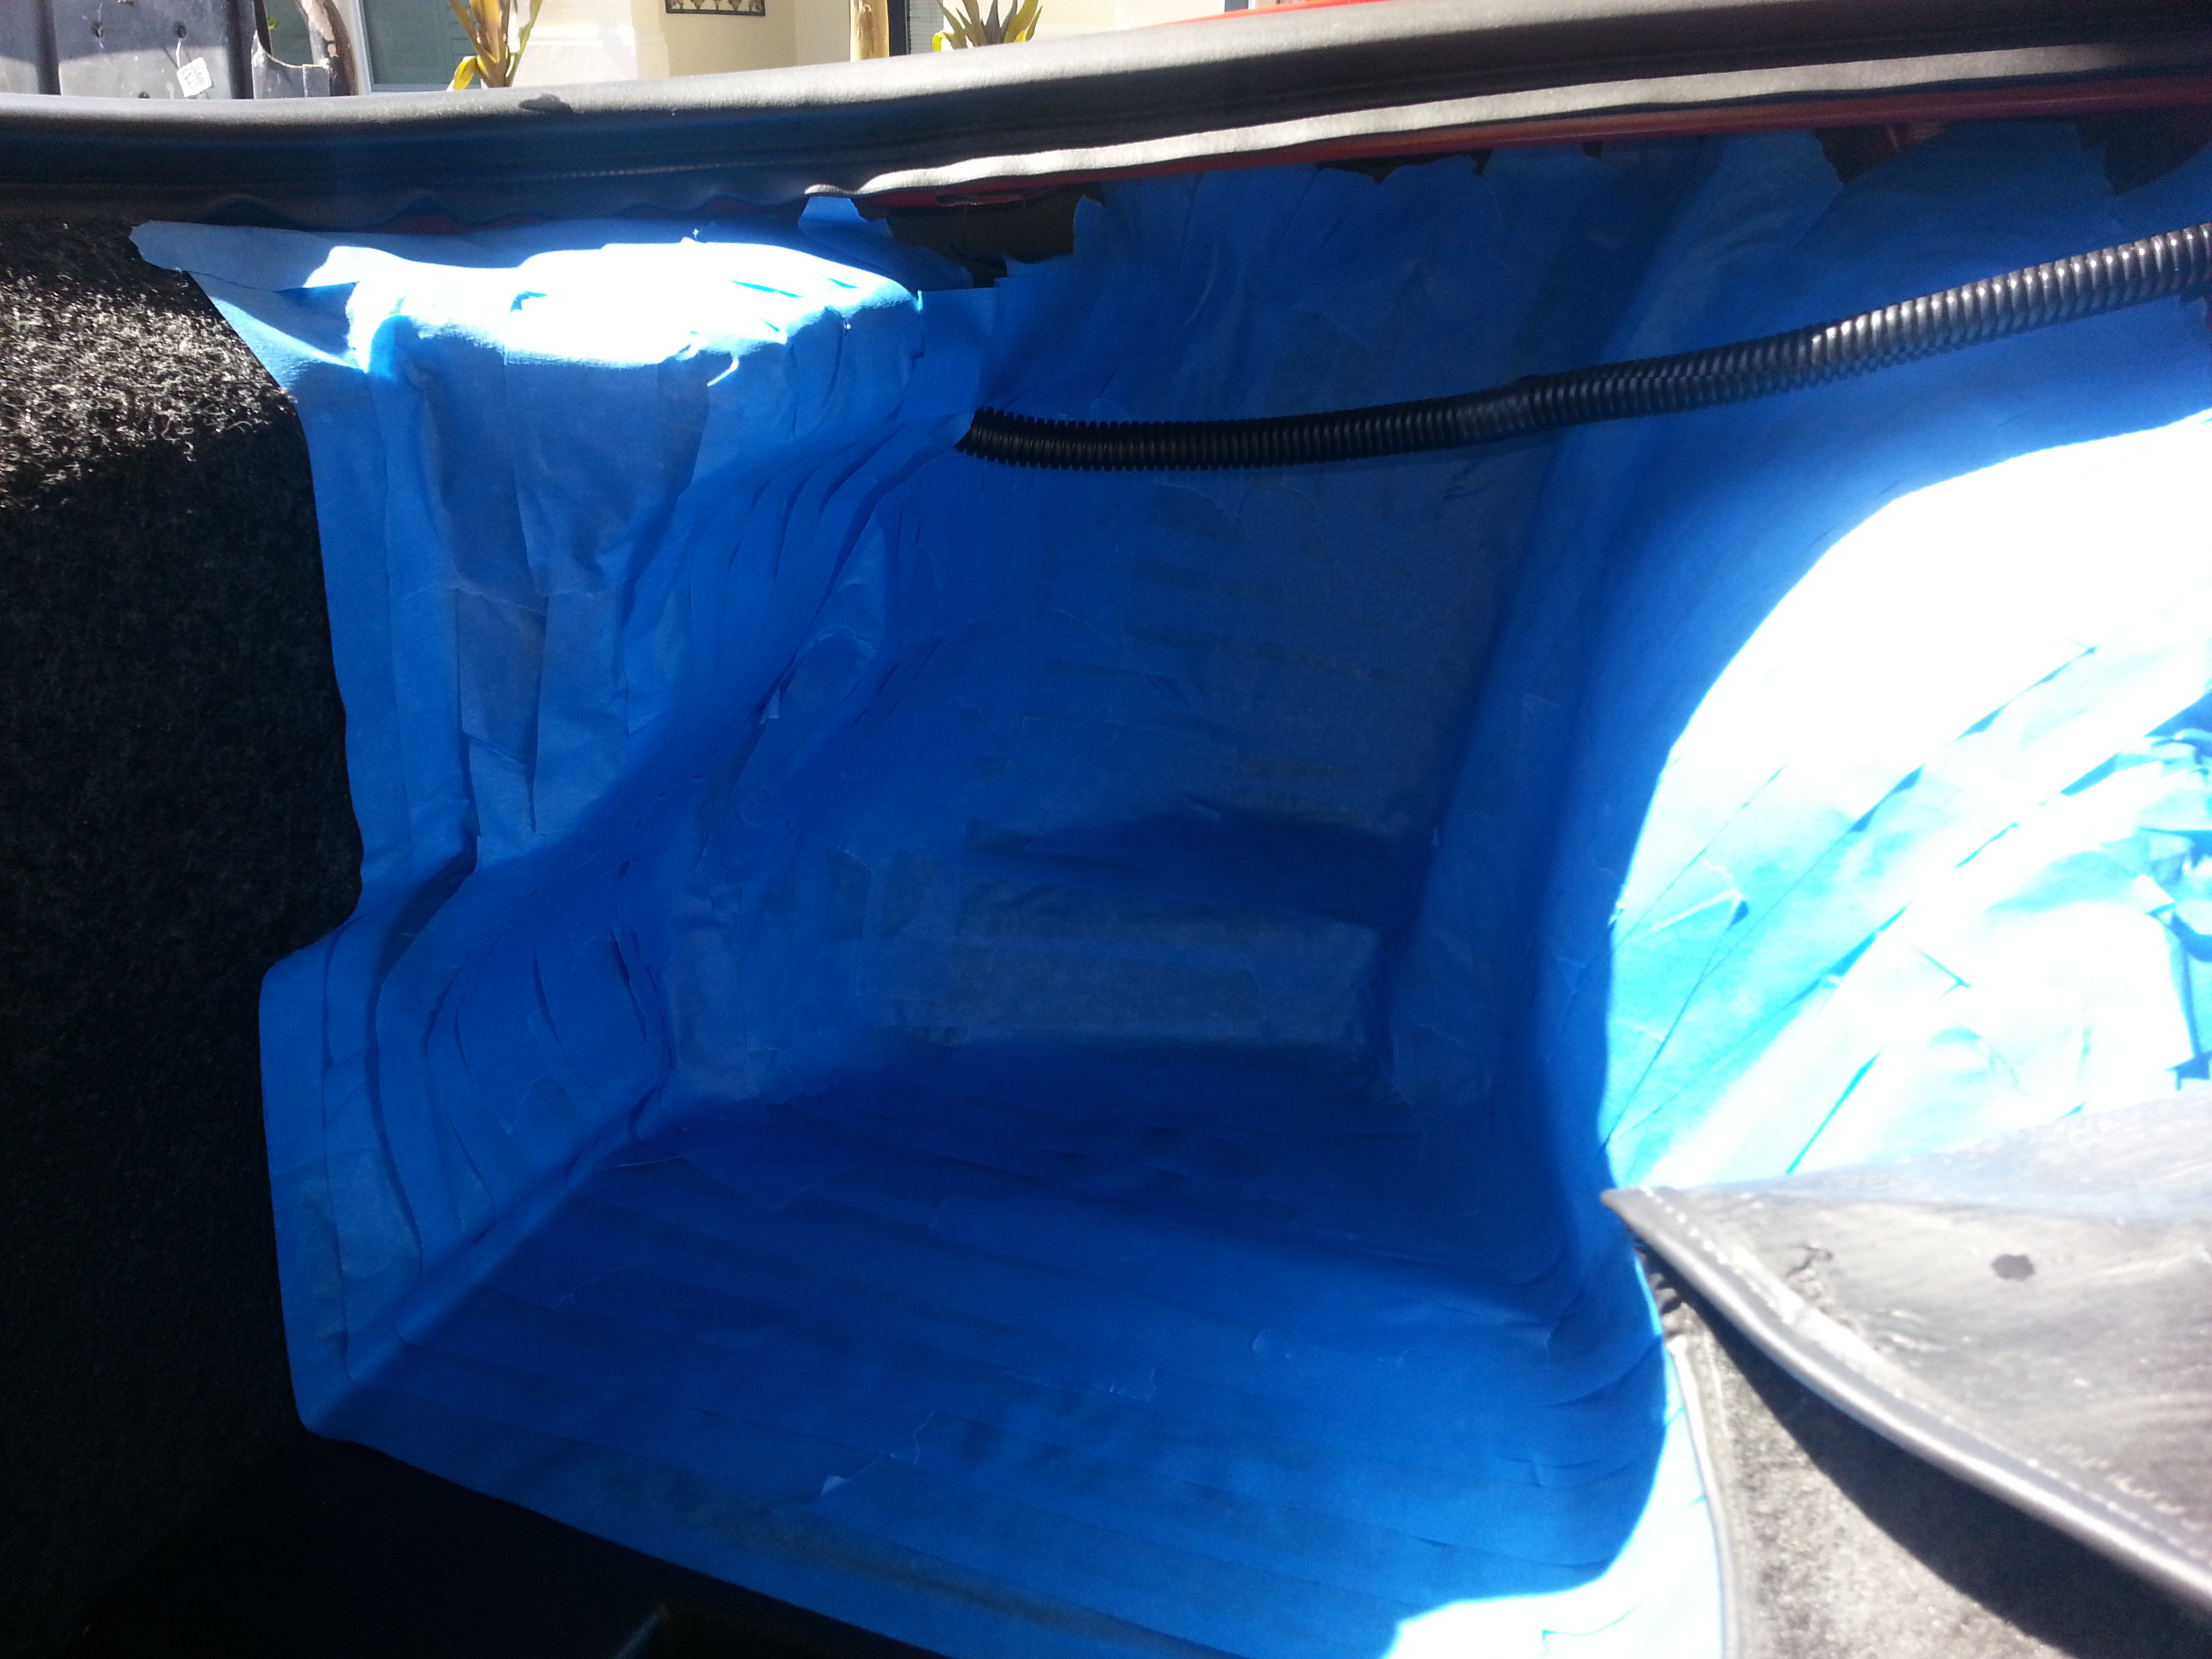
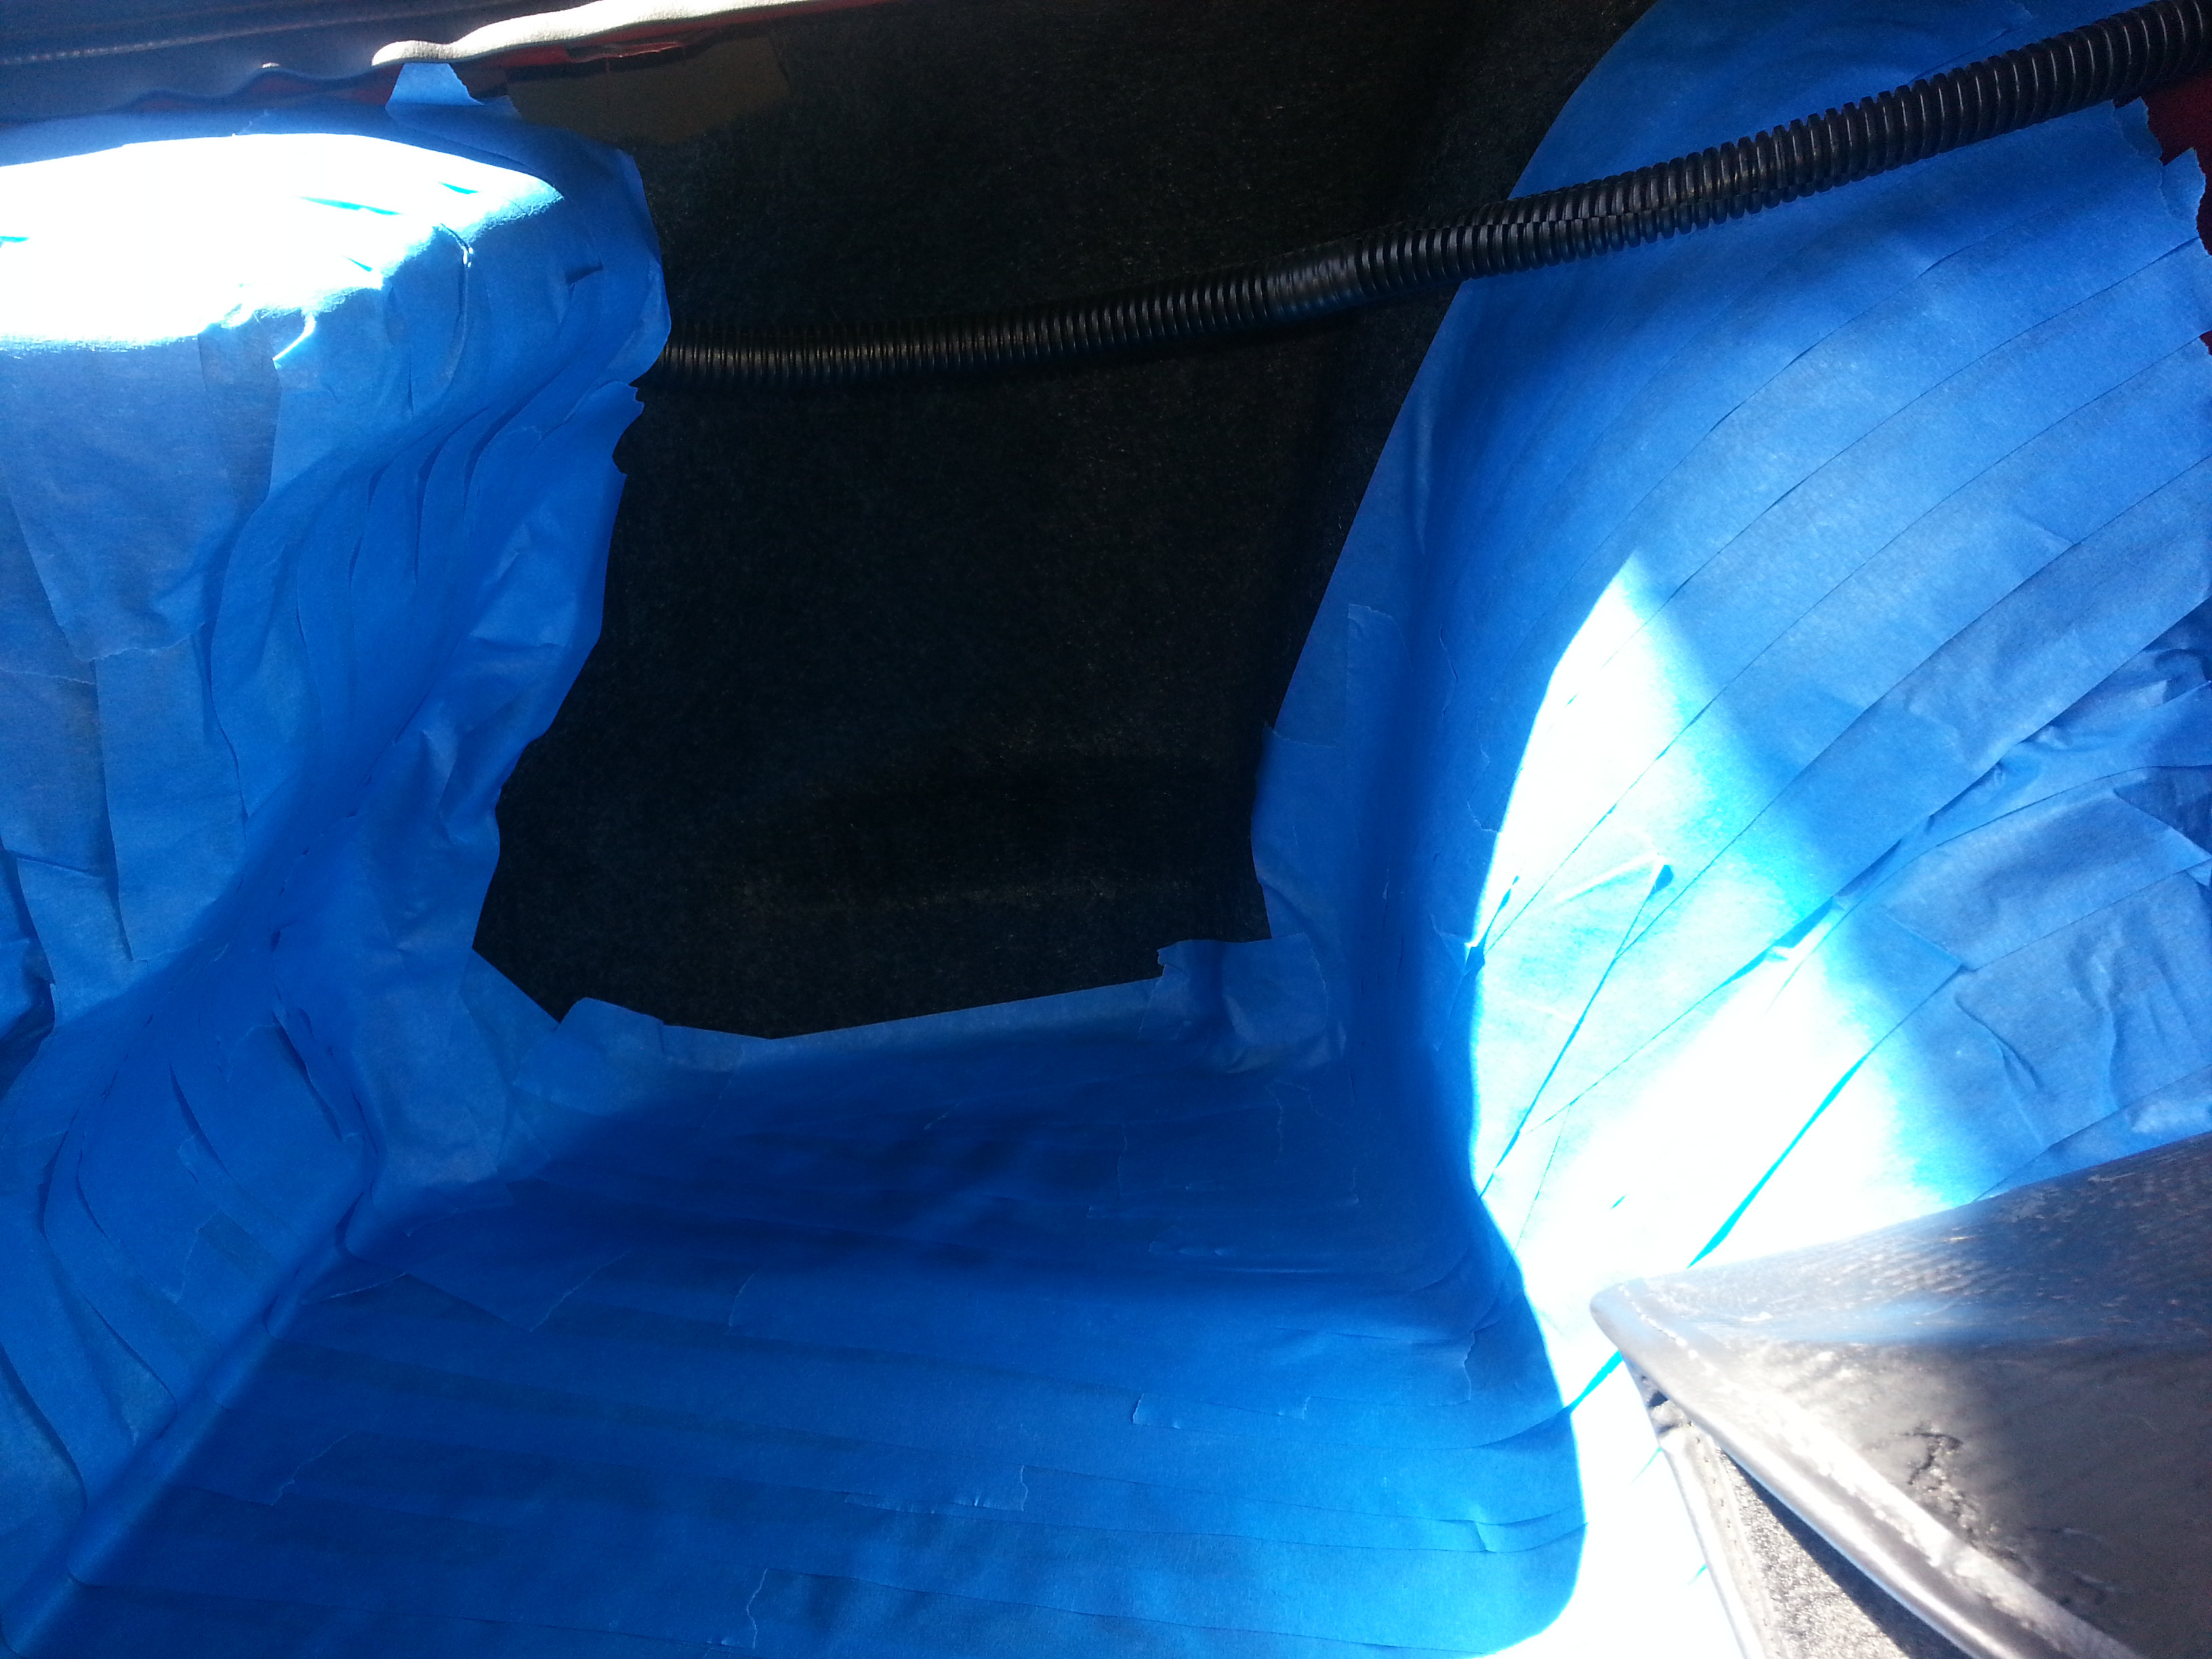
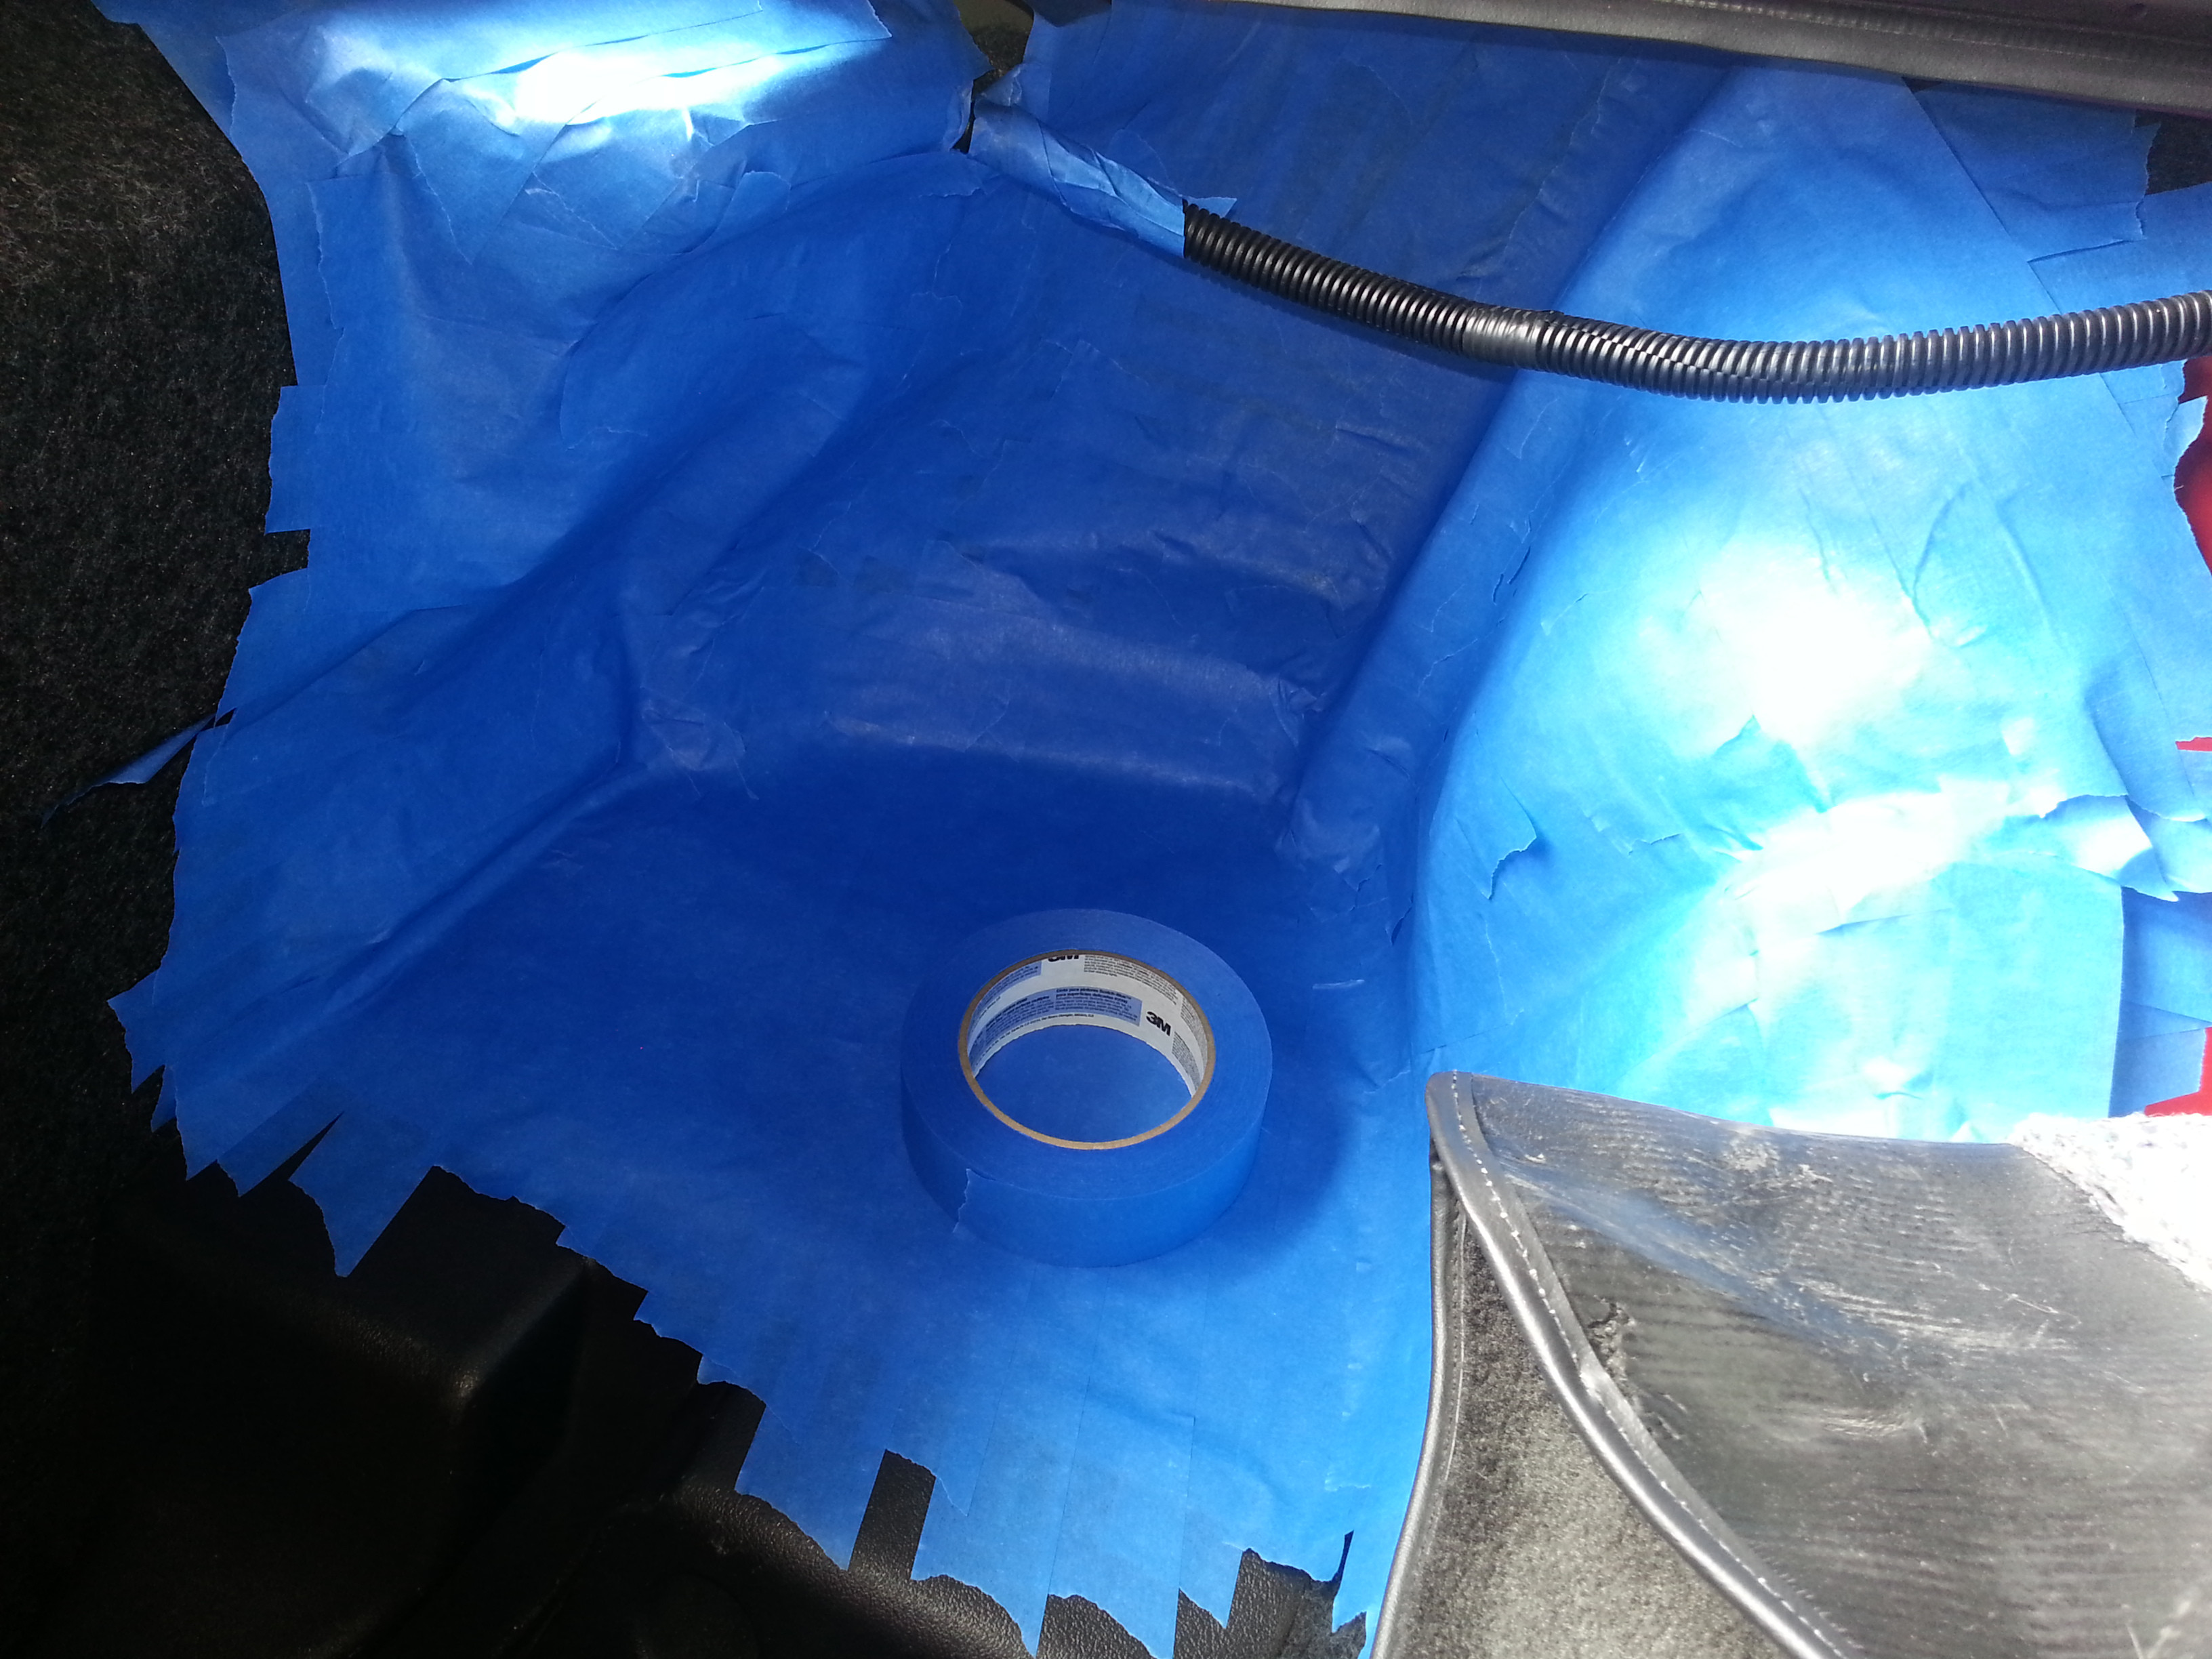
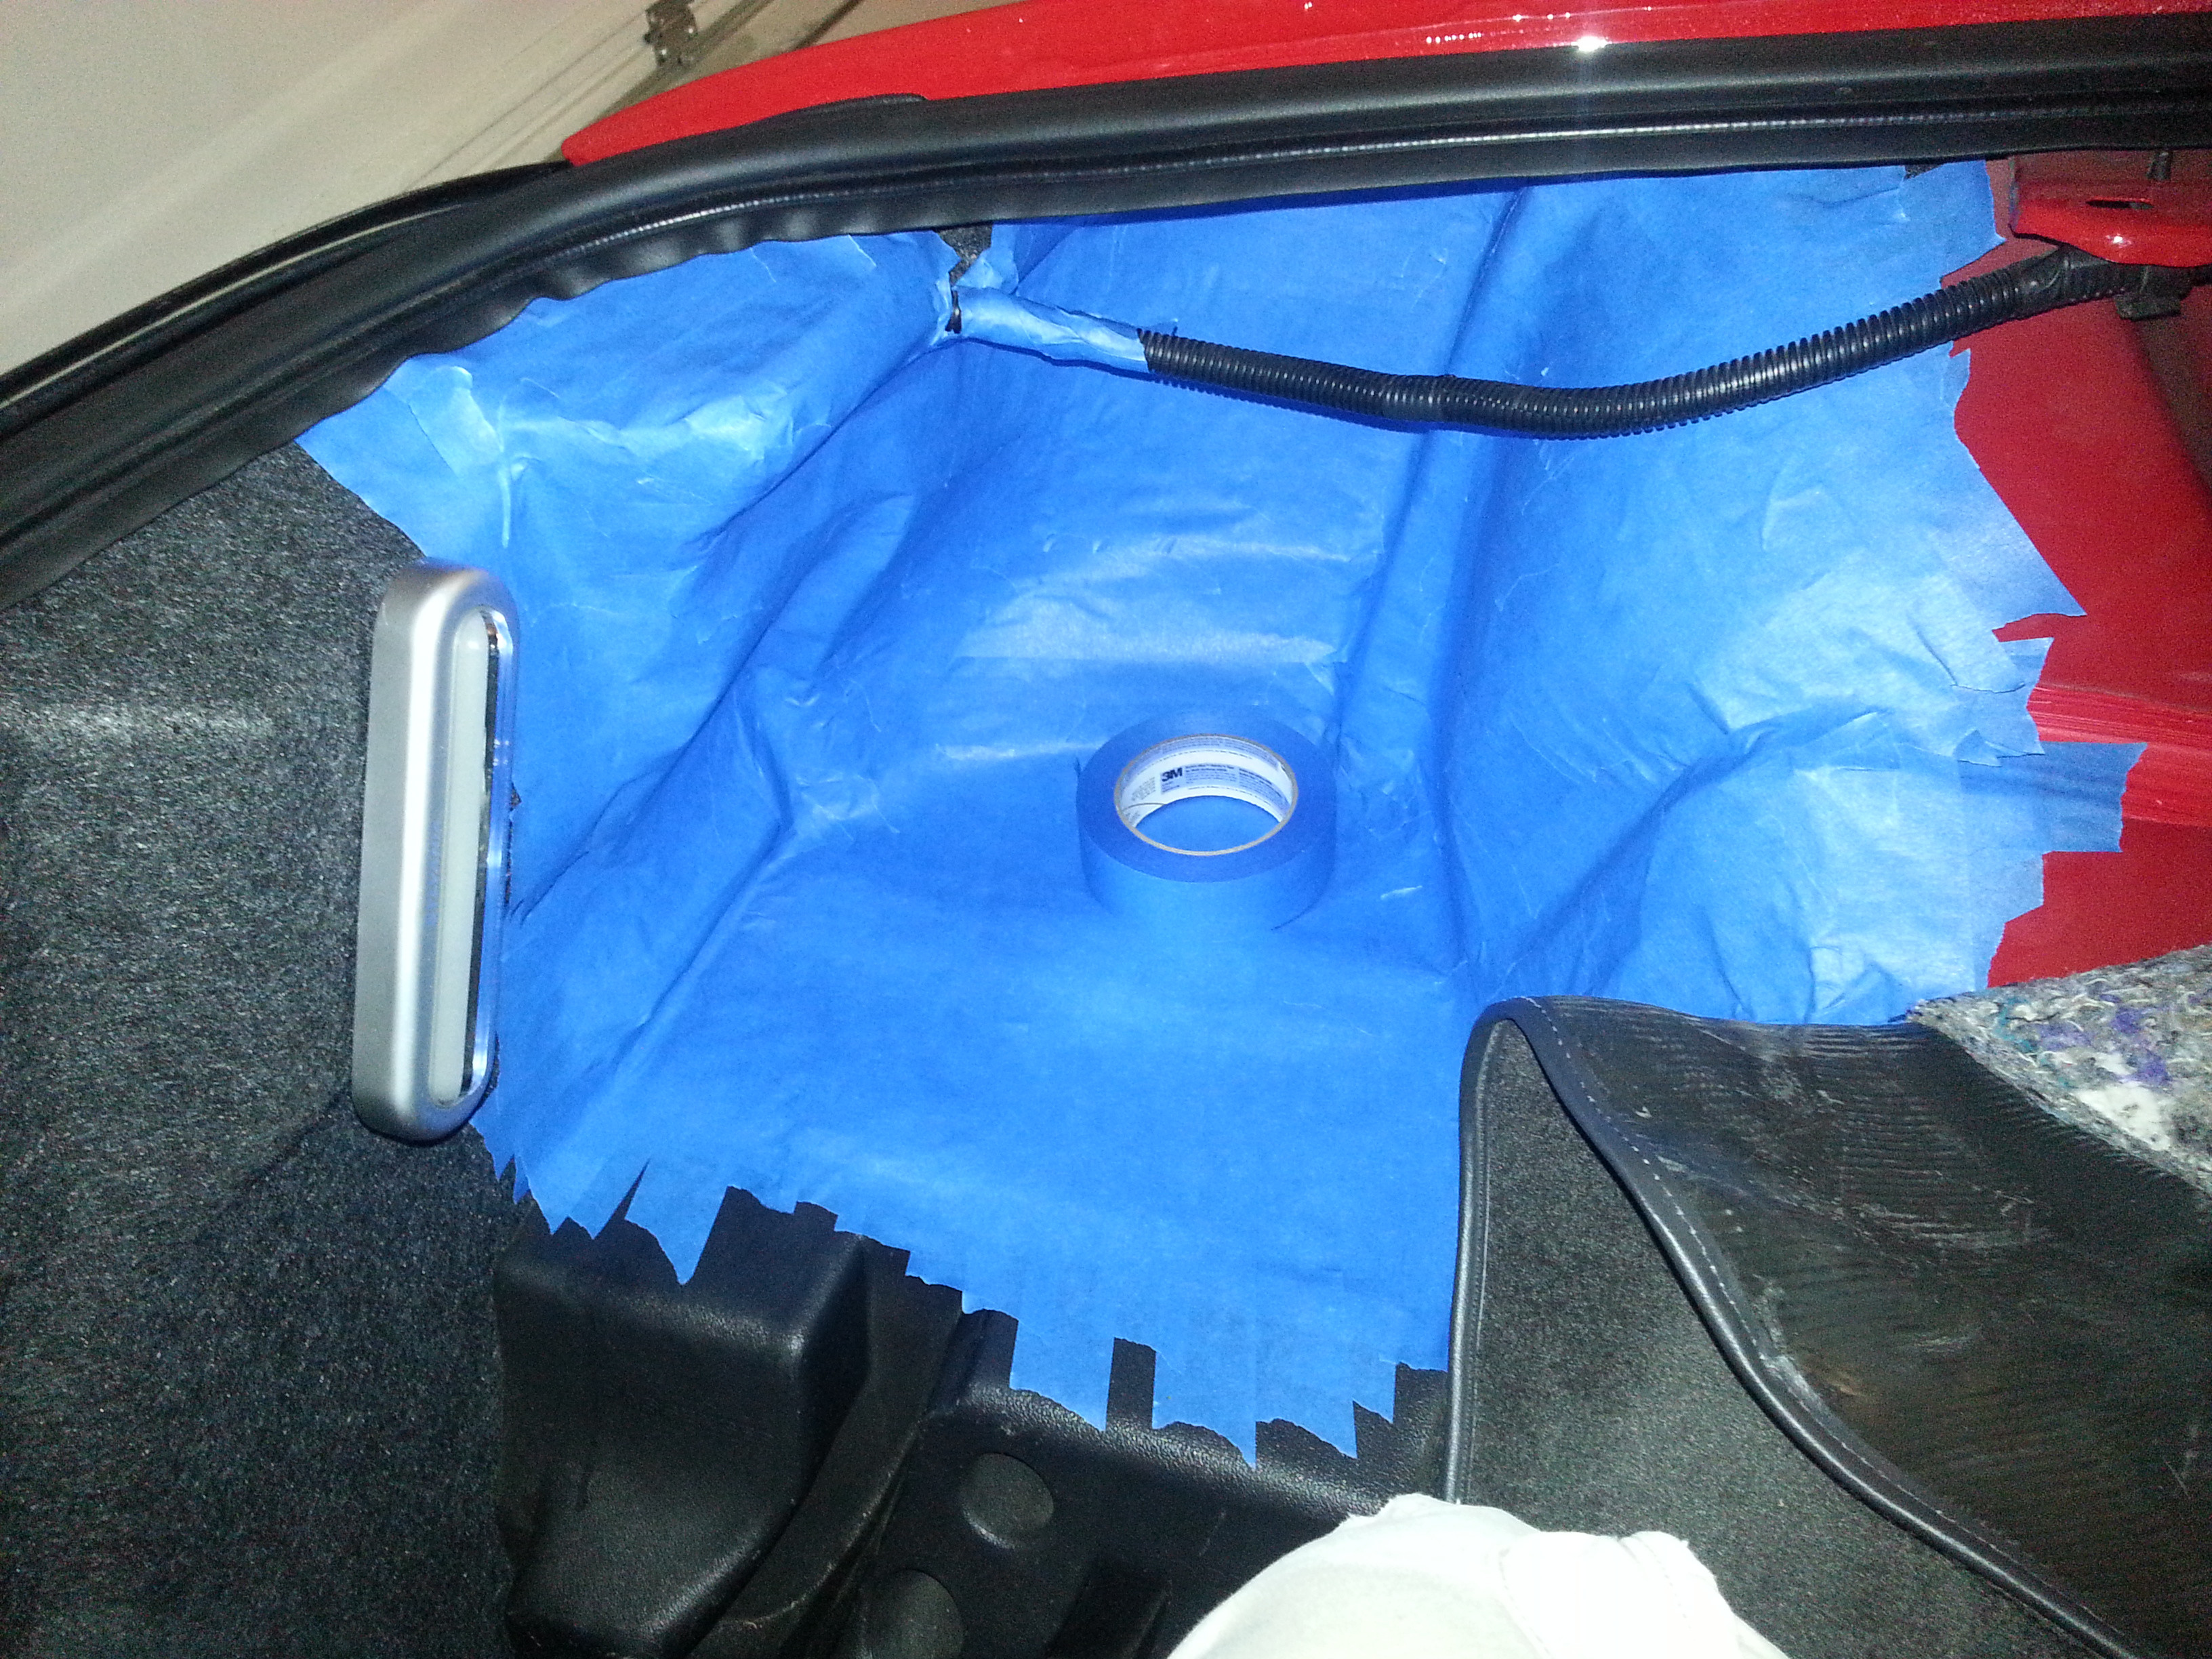
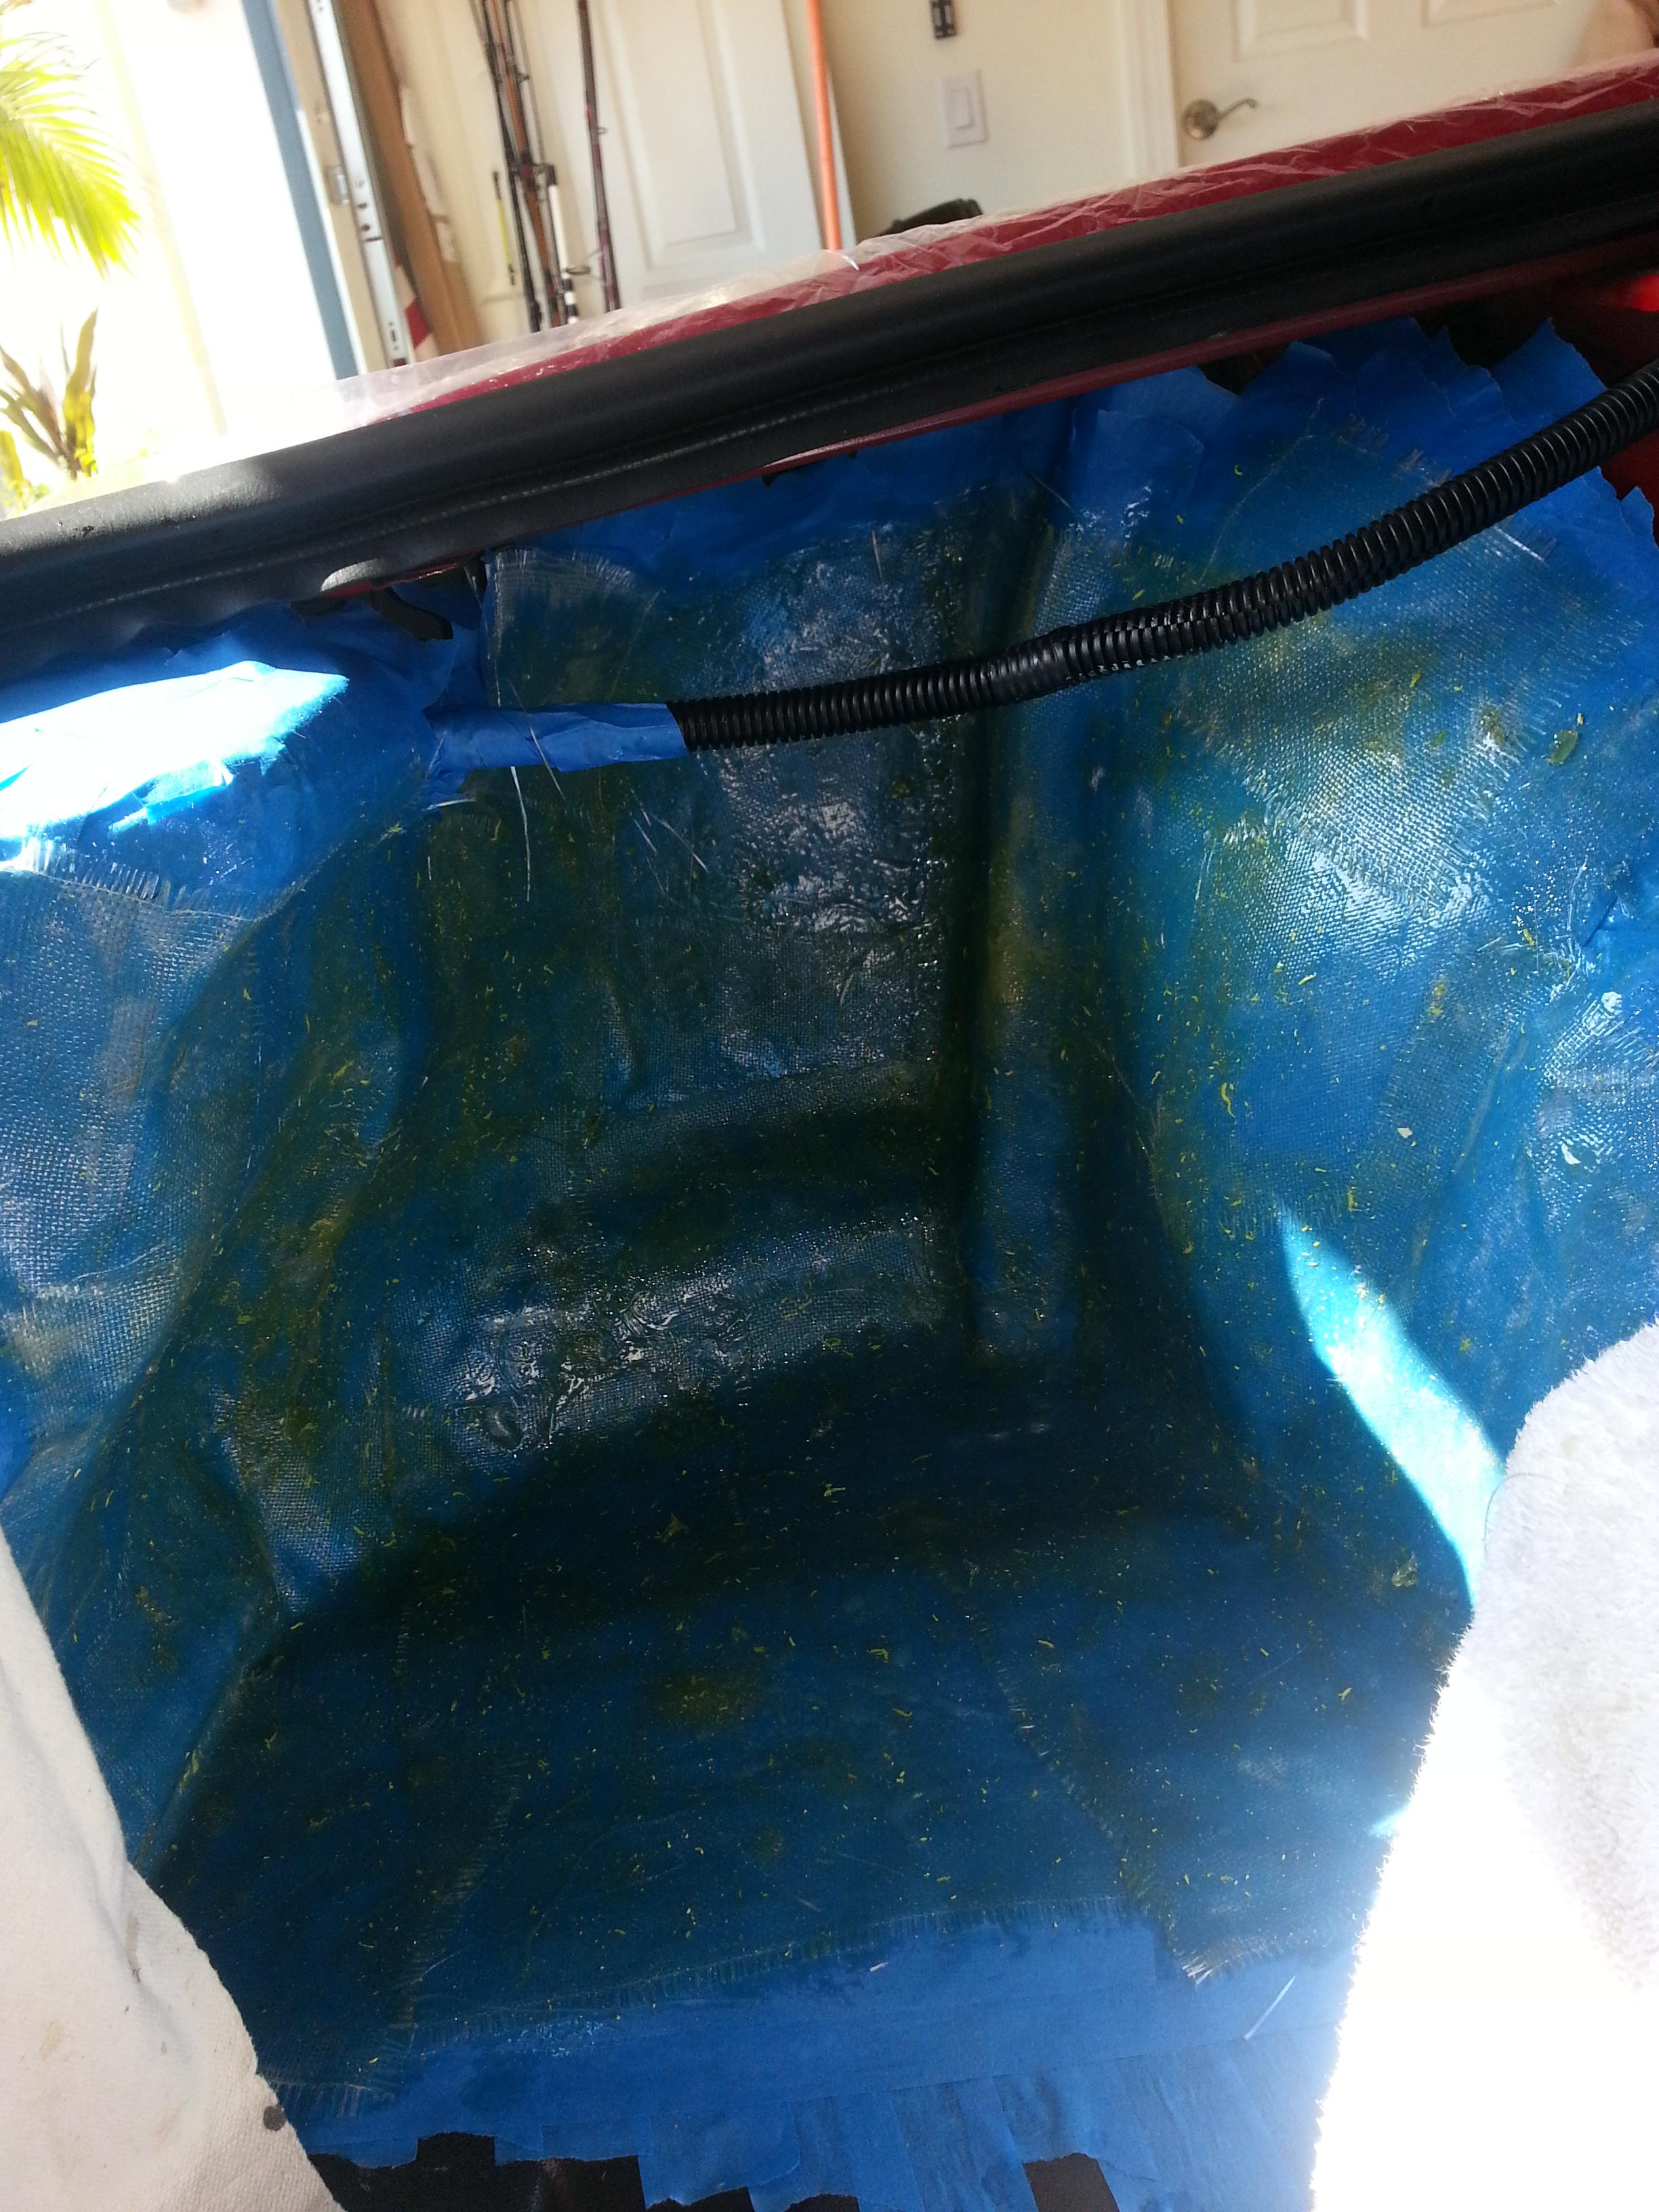
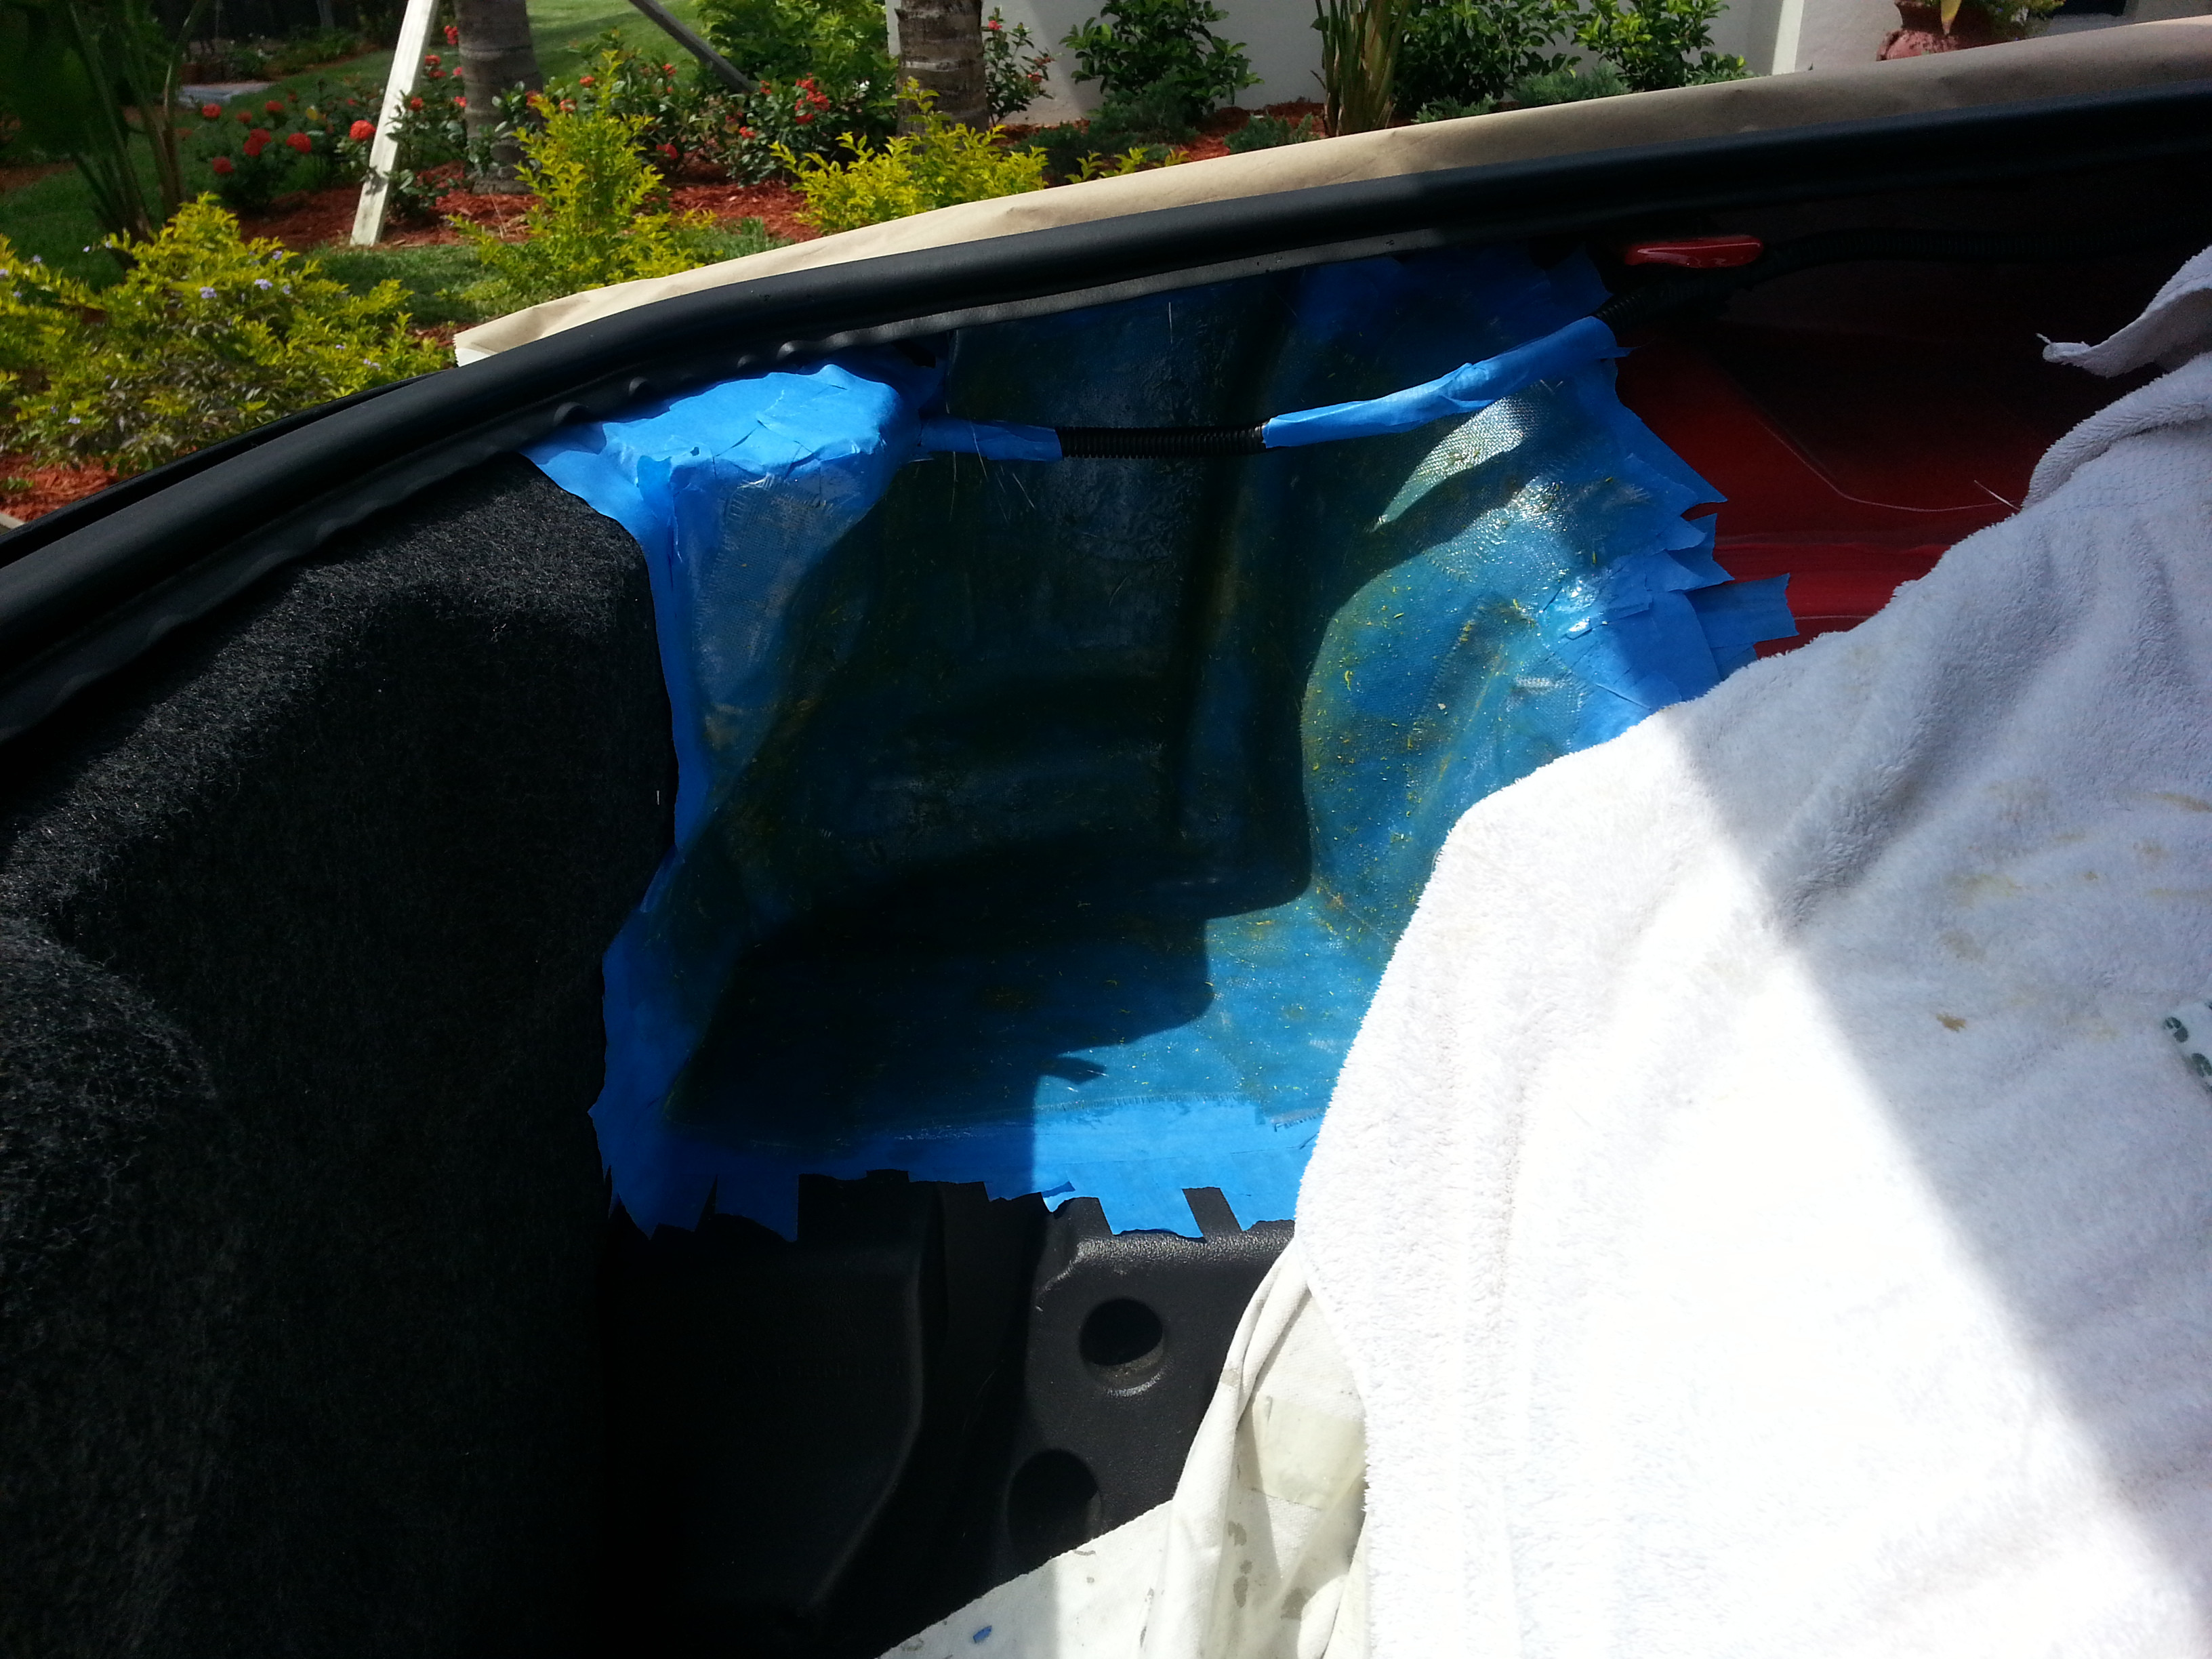
Being a painter, I had plenty of tape. I would recommend 3M scotch blue, or good masking tape. Don't use frog tape, it sucks. Blue tape is the best out of the 2 recommended though.
first layer

first layer
 06-29-2014, 10:37 PM
#3
 06-29-2014, 11:40 PM
#4
12 Second Club
iTrader: (23)

Join Date: May 2007
Location: San Antonio, TX
Posts: 652
Likes: 0
Received 0 Likes
on
0 Posts

Never heard of that brand of audio equipment but the Sub looks like its well built. I like the paper cone, those sound great. I look forward to seeing some progress pics
06-30-2014, 01:29 AM
#5
Trending Topics
07-01-2014, 01:49 AM
#8
TECH Addict
Looking good. How many layers you planning? What's the enclosure specs for that sub you listed? Looks like a nice sub.
I built one for the spare tire area. Mine houses a Kicker CompVR10 DVC. Specs out to 1.6 cu ft. It's a sealed enclosure. I built my walls to over 1/4" thick. I spent about $200 on supplies; Resin, Fiberglass, bondo, fleece, sand paper, primer, paint, wood, wires, terminal housing, etc.
You may want to adjust your garage door to stop with it cracked a couple inches for a few days after you're done. LOL.

Here's my boy showing me a thing or two.

I built one for the spare tire area. Mine houses a Kicker CompVR10 DVC. Specs out to 1.6 cu ft. It's a sealed enclosure. I built my walls to over 1/4" thick. I spent about $200 on supplies; Resin, Fiberglass, bondo, fleece, sand paper, primer, paint, wood, wires, terminal housing, etc.
You may want to adjust your garage door to stop with it cracked a couple inches for a few days after you're done. LOL.
Here's my boy showing me a thing or two.
07-01-2014, 08:23 PM
#9
Looking good. How many layers you planning? What's the enclosure specs for that sub you listed? Looks like a nice sub.
I built one for the spare tire area. Mine houses a Kicker CompVR10 DVC. Specs out to 1.6 cu ft. It's a sealed enclosure. I built my walls to over 1/4" thick. I spent about $200 on supplies; Resin, Fiberglass, bondo, fleece, sand paper, primer, paint, wood, wires, terminal housing, etc.
You may want to adjust your garage door to stop with it cracked a couple inches for a few days after you're done. LOL.
Here's my boy showing me a thing or two.
 How does your sub sound in that enclosure? (better than stock no doubt...)
 Last edited by Mildphil; 07-01-2014 at 08:26 PM. Reason: wanted to add more info
07-01-2014, 08:25 PM
#10
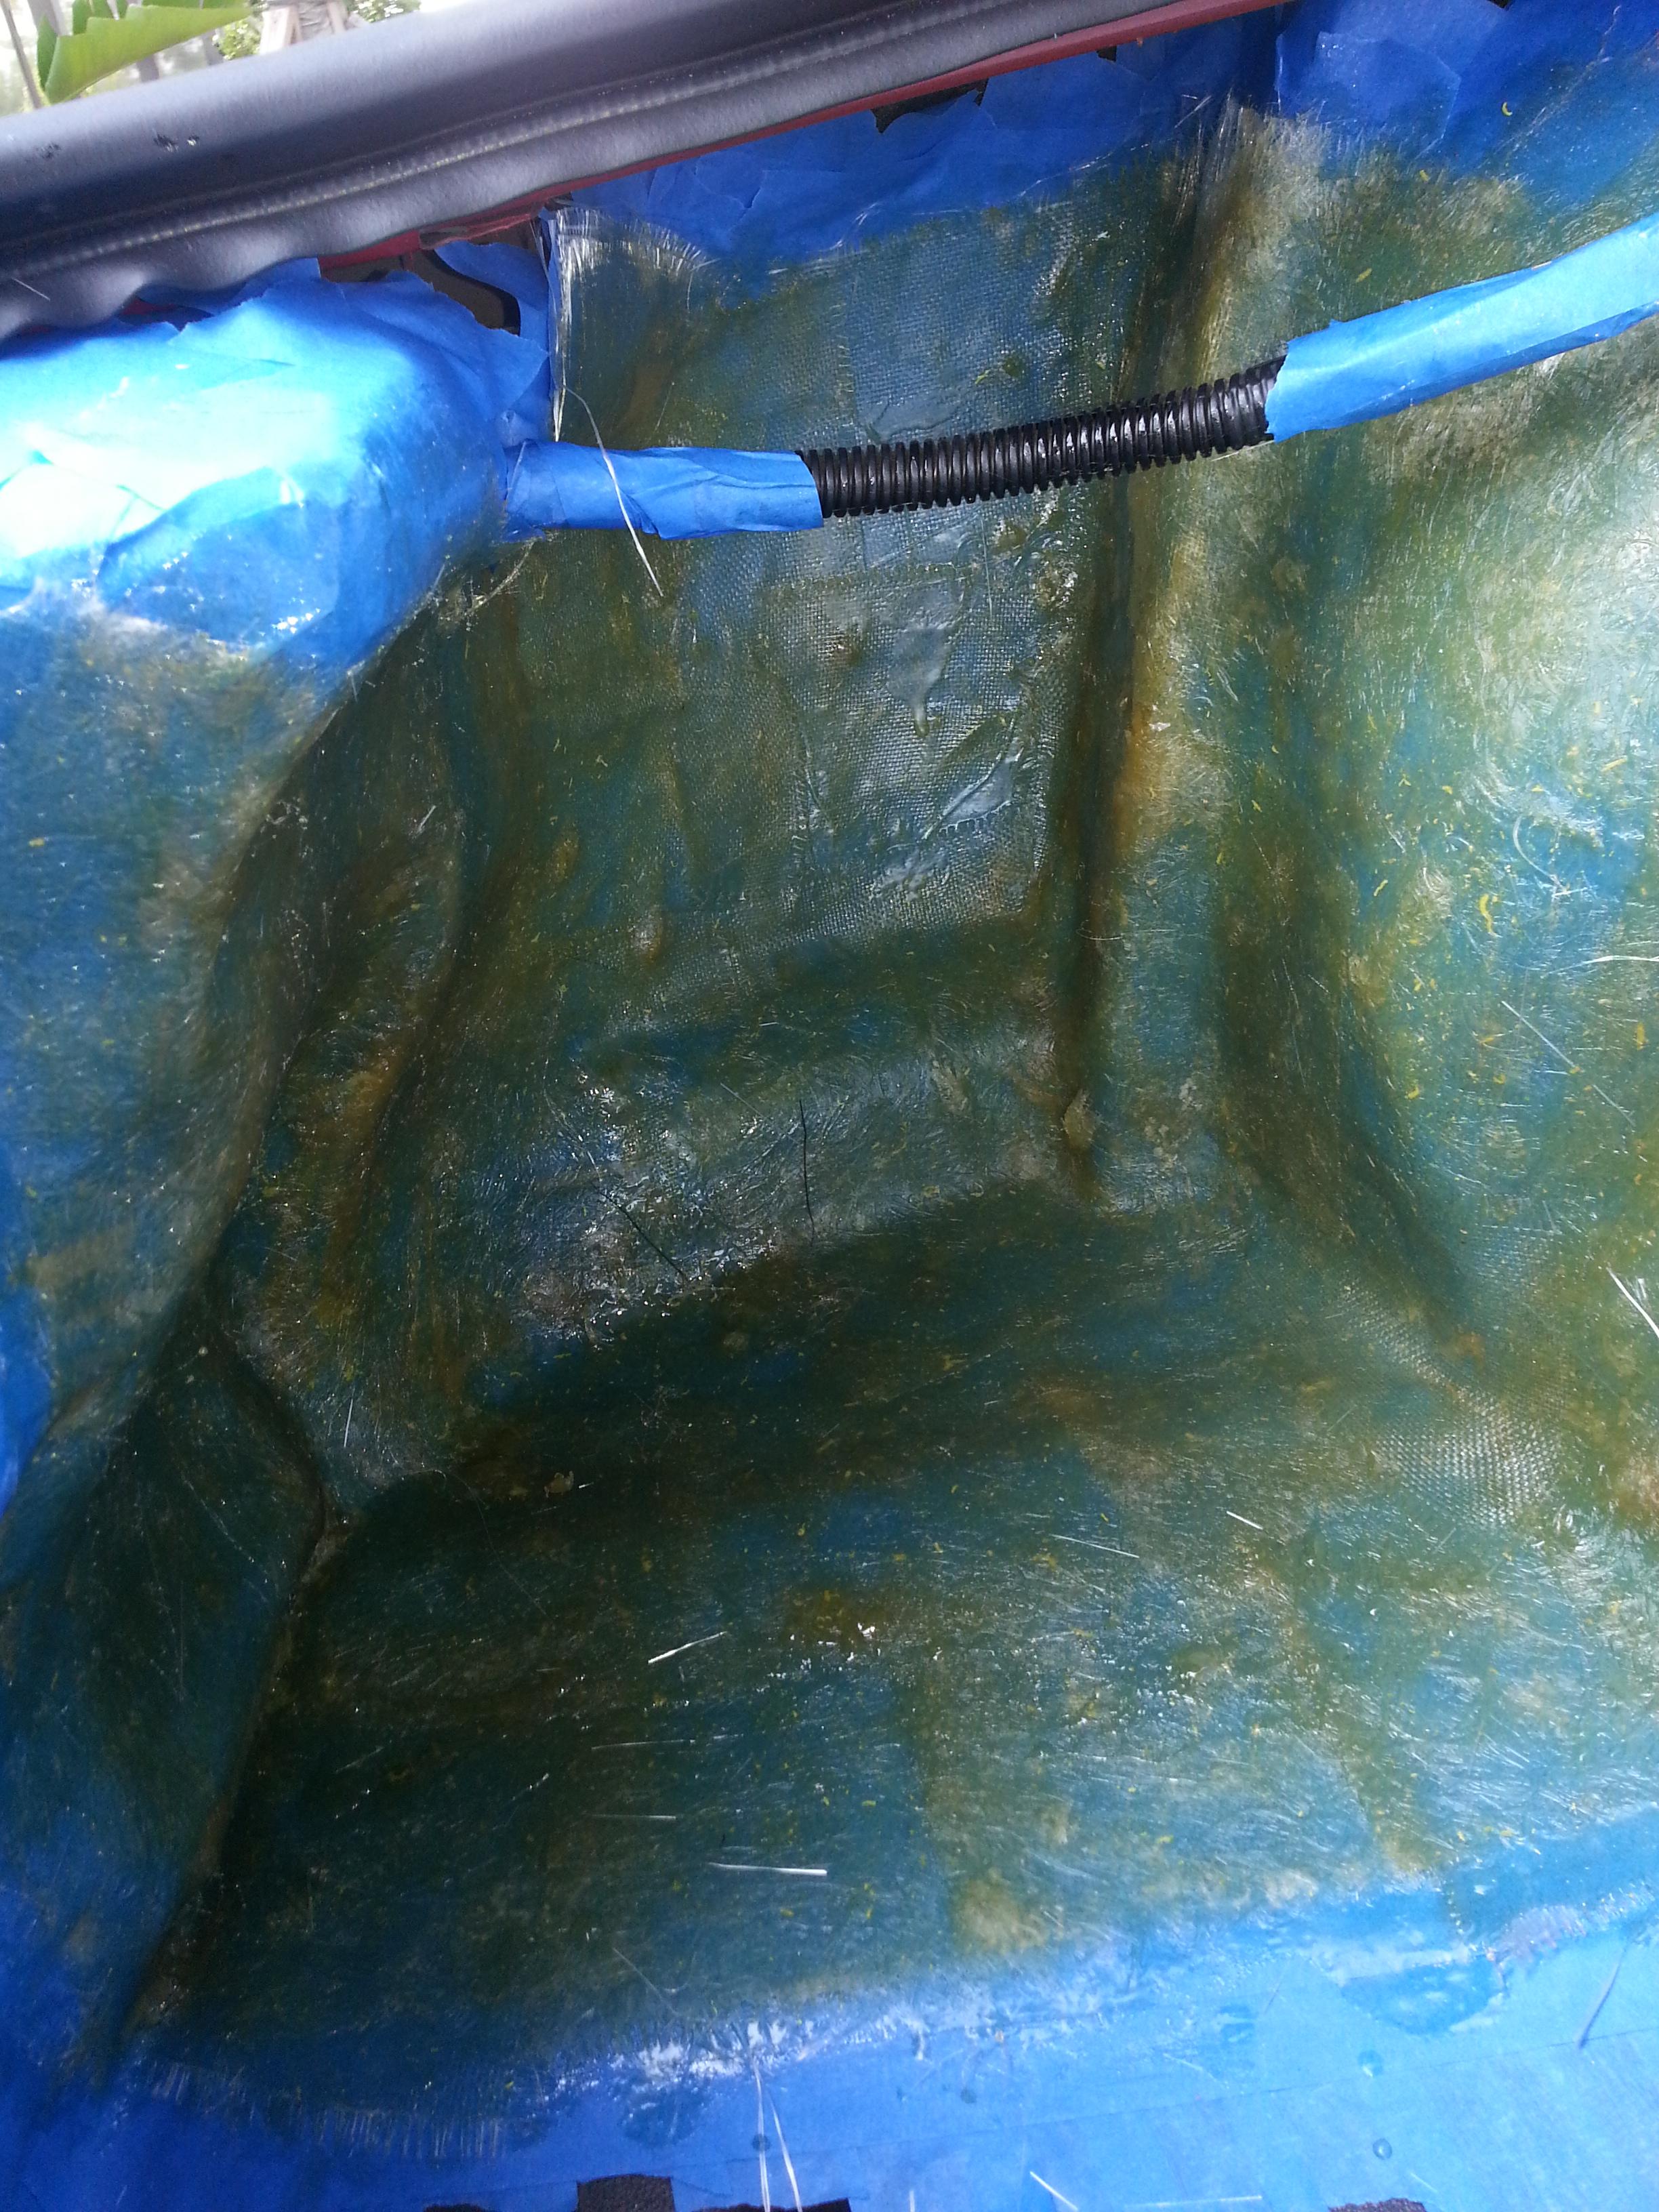
Finished 2 more layers today but no pics because my car was outside (garage needed to be used) and it is pouring raining, but hopefully tomorrow I can put another layer or 2 on and post pics then. Im planning on taking it out after about 4 layers, maybe 3 idk, seems really sturdy at 3 but some spots are weak so I may just throw on another layer.
07-02-2014, 04:32 PM
#11
TECH Addict
I am probably going to do 7 layers. have 2.5 done, didn't get to finish because it was pouring again but it isn't a big deal. Don't know the enclosure specs, will have to find them out. Yeah it is a pretty nice sub, my cousin has either 2 of these or 2 higher model 10"s, and they are ridiculous; ear shattering! How does your sub sound in that enclosure? (better than stock no doubt...)
How does your sub sound in that enclosure? (better than stock no doubt...)Reason I'm asking for the enclosure specs is because it's hard to find a 10" sub that works in a 1.6 cu ft sealed enclosure; it's big enough to be ported. Most want ported at that volume. But I like the sound of a sealed box better.
7 layers should be pretty good. You gonna use felt for any of those layers? I used 2 layers of fiber for the base shape, then built the speaker housing from MDF, then wrapped it in fleece, resin, fleece, resin, then bondo, smooth then paint.
Came out stronger than I thought it would.
Finished 2 more layers today but no pics because my car was outside (garage needed to be used) and it is pouring raining, but hopefully tomorrow I can put another layer or 2 on and post pics then. Im planning on taking it out after about 4 layers, maybe 3 idk, seems really sturdy at 3 but some spots are weak so I may just throw on another layer.
07-02-2014, 04:58 PM
#12
Sounds real good, way better than stock. My Suburban had a $6K stereo in it at the time (since been stolen, ugh!). So I was really hoping for more, LOL. That stereo I had in the Suburban would shake your hair from 10 ft away and be absolutely crystal clear, you could hear the Highs, Mids, and Bass in perfect clarity from 300 yards away. Loved that stereo. Oh well, life goes on I guess.
Reason I'm asking for the enclosure specs is because it's hard to find a 10" sub that works in a 1.6 cu ft sealed enclosure; it's big enough to be ported. Most want ported at that volume. But I like the sound of a sealed box better.
7 layers should be pretty good. You gonna use felt for any of those layers? I used 2 layers of fiber for the base shape, then built the speaker housing from MDF, then wrapped it in fleece, resin, fleece, resin, then bondo, smooth then paint.
Came out stronger than I thought it would.
Better to be safe than sorry. You tweak that shape a little with it out of the car through finish and it wont sit right. I'd go so far to say mock up the speaker face before you pull it out.

 07-02-2014, 06:33 PM
#14
TECH Addict
I think it will run fine in 1.6 cu ft, found a list from the manufacture for recommended box sizes for each sub (http://www.soundqubed.com/Box-Sizes-...ng-_ep_68.html) And I don't plan on using fleece, just the 7 layers and a mdf face plate. Im pretty sure It will hold up fine. At 3 layers it is pretty strong, so im sure 4 more layers will do the trick. Now all I need is more mat and resin.

 07-14-2014, 05:22 PM
#16
07-18-2014, 08:13 PM
#19
Yeah that is the best way. I will be working on it again soon, I have just been real busy with work because the rain has slowed me down so now I am playing catch up. But all my layers are done, and now I just need to make the top part.
07-18-2014, 09:51 PM
#20
Teching In

Join Date: Jan 2012
Posts: 5
Likes: 0
Received 0 Likes
on
0 Posts
looks good so far. I've always had the best luck making the top part out of cardboard, tape, hot glue, and fiberglassing over that, then removing the cardboard, etc... when done. Then just attach an mdf wood face to the front with some strips of fiberglass and resin.
.. couple pointers for anyone else reading this and thinking of building one...
1. remove the carpet form the cubby whole first, lets you build the enclosure just a little bit bigger.
2. try to do as many layers at once as possible, as opposed to doing a few, letting it dry, doing more, etc ... reason is the bond will be much stronger since the resin is not trying to adhere to an already hard surface, which can introduce small air pockets and bubbles depending on how smooth the prior layers came out.
3. Use a stitched biaxial (chop mat and woven fabric stitched together), you get the quick buildup and conformability of chop mat, with the superior strength or cloth. I use this, cut it into 2" wide strips, overlaying strips 50% on top of each other. Using this method, I can build a sub box for these cars in 4 or 5 layers that is strong enough to be used as a jack-stand under the car (I actually proved this with a picture years ago on this site.)