

 04-29-2016, 05:39 PM
Last edit by: IB Advertising
See related guides and technical advice from our community experts:
- Camaro and Firebird How to Add AUX Input MP3 Player without Adapter<br>Step by step instructions for do-it-yourself repairs.

How you can add an aux input/mp3 player without an adapter

 06-22-2012, 06:54 AM
#482
There are several models available... GM9-AUX is the most popular. A search for other threads will get you lots of information. Search for "aux input" or "ipod".
Last edited by WhiteBird00; 06-22-2012 at 07:22 AM.
06-26-2012, 07:05 PM
#483
Teching In

Join Date: May 2011
Posts: 4
Likes: 0
Received 0 Likes
on
0 Posts
Now, the clock lights up and passes time, but none of the button light up or work (including the clock buttons and the steering wheel controls). I have checked the two radio fuses with a multimeter, but they are both fine. The plan tonight is to check continuity across my Aux In receptacle and then return the internal wiring to stock. Will report back.
This is on a 2000 T/A. Will take pictures and make a wiring diagram tonight.
06-26-2012, 10:54 PM
#484
Teching In
Join Date: May 2011
Posts: 4
Likes: 0
Received 0 Likes
on
0 Posts
Attempted this last weekend using the above instruction, put everything back together, heard CD player whir a little then stop, then nothing.
Now, the clock lights up and passes time, but none of the button light up or work (including the clock buttons and the steering wheel controls). I have checked the two radio fuses with a multimeter, but they are both fine. The plan tonight is to check continuity across my Aux In receptacle and then return the internal wiring to stock. Will report back.
This is on a 2000 T/A. Will take pictures and make a wiring diagram tonight.
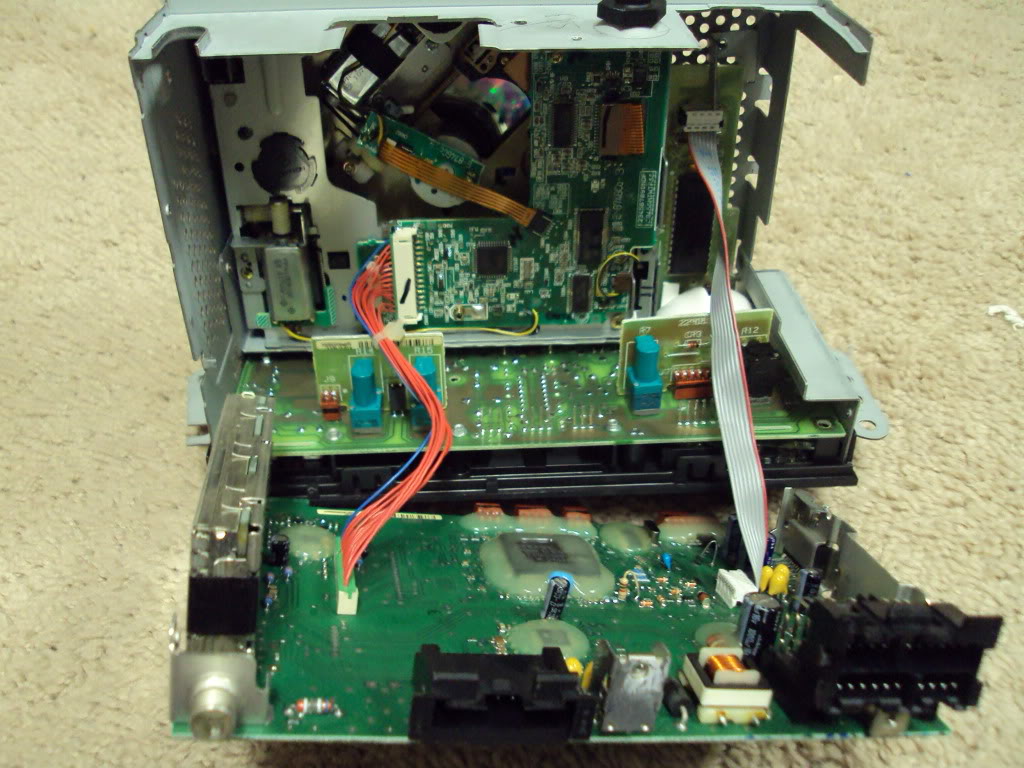
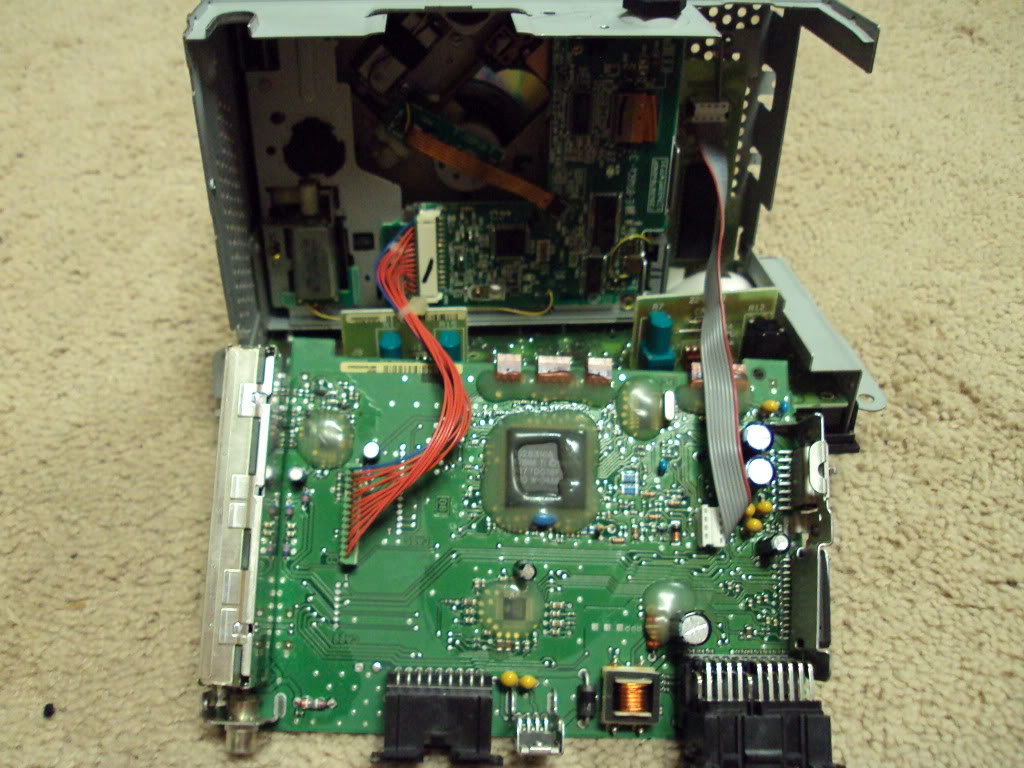
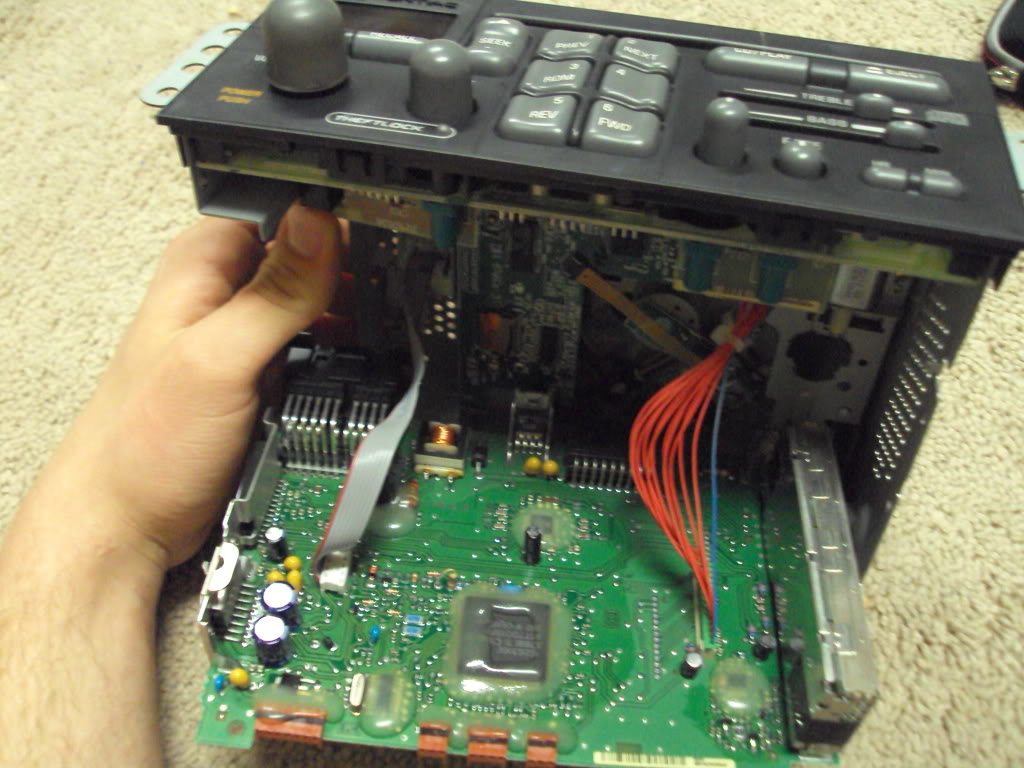
Checked continuity across jack - L and R good
Plugged in cable - Continuity across jack open (as it should be)
Confirmed wiring is as described
Removed cable, tested continuity across cable - good
Switched back to OEM wiring, checked continuity - good
Plugged in deck, no response.
Picture link (also attached): http://imgur.com/a/KhED5
Last edited by notford; 06-26-2012 at 11:06 PM.
06-27-2012, 04:52 PM
#485
Launching!
Thread Starter

Assuming you have the right wires for audio, the wiring looks ok. You said you went back to the original wiring - so you took out the jack and it still didn't work?
06-27-2012, 07:52 PM
#486
Teching In
Join Date: May 2011
Posts: 4
Likes: 0
Received 0 Likes
on
0 Posts
Taking the bottom board off required more force than I would have liked, but who knows what is really wrong.
06-27-2012, 09:02 PM
#487
Launching!
Thread Starter
Sorry, never seen this issue before ... seems likely it was physically damaged. May want to do some searches, this thread is has the issue and indicates a power problem:
https://ls1tech.com/forums/stereo-el...-not-turn.html
2nd post
https://ls1tech.com/forums/stereo-el...-not-turn.html
2nd post
06-27-2012, 11:07 PM
#488
Teching In
Join Date: May 2011
Posts: 4
Likes: 0
Received 0 Likes
on
0 Posts
I did a fair amount of searching, but did not find that one. Thanks! The linked post implies that when ignition power is missing you can still eject CDs, but I cannot even do that.
I also did not know about the Monsoon wiring diagram; I will poke around more with a meter.
https://ls1tech.com/forums/5923441-post3.html
I also just found a monsoon head unit missing a volume **** on craigslist for $20 so I may make another run at this mod. The stock stereo is definitely good enough for now if I can get my phone going through it.
06-28-2012, 11:26 AM
#489
Launching!
Thread Starter
Ya, worth checking the ignition wire on the harness, otherwise sounds like you found a cheap replacement. Will also be an obvious power issue if the new one has the issue stock
07-01-2012, 11:22 AM
#490
Registered User

Join Date: Jul 2012
Posts: 1
Likes: 0
Received 0 Likes
on
0 Posts
i am new to the gm scene, i just bought a Buick Park Avenue, i am looking to do this mod i opened my stereo(AM/FM/CD-no tape deck or cd changer) and the cd player harness is 13 wires 12 black 1 white
07-01-2012, 12:35 PM
#492
I just want to say this mod is awsome & exactly what I needed. Every time I crank up the music it sounds perfectly clear. I look foward to upgrading the front speakers & throwing in an amp. Thanks again Jason & the Crew.
Another advantage I found is :
I was hanging out @ a cruise night, with a long cord I was able to sit in a chair outside my car & operate my stereo from the ipod.
Another advantage I found is :
I was hanging out @ a cruise night, with a long cord I was able to sit in a chair outside my car & operate my stereo from the ipod.
Last edited by Carguy8888; 07-07-2012 at 08:42 AM.
07-17-2012, 03:39 PM
#493
Registered User

Join Date: Jul 2012
Posts: 1
Likes: 0
Received 0 Likes
on
0 Posts
Because this thread was so helpful, I thought I would add to the noise. I installed this on a 2002 Impala, with HU Delco 12216421. Post 324 by bheston was accurate: left and right channels are on the 6-pin connector (see his photo), left on pin 1 (black), right on 3. I could not get the leads disconnected, so I had to cut them. bheston's picture is with the HU upside down, if you flip it over you can get better access to the wires. Remove the aluminum heat sink and the small IC board on the side of the chassis, and the 6 wires are wrapped around the 14 leading to the other connector.
07-26-2012, 10:42 PM
#494
Staging Lane
iTrader: (9)
Join Date: Jun 2010
Location: Garland Tx
Posts: 53
Likes: 0
Received 0 Likes
on
0 Posts

Sorry using someone else's pics. I finished this mod today works great. when plugging the ribbon harness back in for the bulb circuit board I plugged it in backwards and caused something to burnout. It's not the bulb I replaced it and checked it with a 9volt battery. I did see smoke coming from the inside of radio. I took it back apart but couldn't find anything burnt.
Last edited by WhiteBird00; 07-27-2012 at 06:54 AM.
08-10-2012, 08:56 PM
#495
Teching In

Join Date: Aug 2012
Location: Lexington, ky
Posts: 3
Likes: 0
Received 0 Likes
on
0 Posts
lot of good info on this site. the aux input is awesome i did this to my 1995 Tahoe. has a cassette built in to HU and a slave cd player. so i tapped mine into the slave and used the same jack as the original poster. works great i can still use my cd player. the nice thing about that jack is one of the sides is clear so i took a marker cap and epoxied it to the clear side and installed a blue led. that way at night it lights the hole up so you can see to plug in to it. will post a night pic of it tomorrow when i put it back in.

08-15-2012, 10:15 PM
#497
Staging Lane
iTrader: (2)

Join Date: Oct 2002
Location: Greenville Texas
Posts: 67
Likes: 0
Received 0 Likes
on
0 Posts

On another note, Pin 2 is a ground that you can use so you don't have to do the screw thing. Just make sure you tap into it as I believe that is the main ground for the CD player itself. I used an old audio cable form a set of speakers, ran the wire inside the unit and tied a knot in the wire so it won't pull out. The cable is long enough to run to my center console and I plan on using my old smartphone as my player. I'm trying to find a way to mount it under the ashtray lid.
So to recap:
Pin 1 - Left Audio
Pin 2 - Ground
Pin 3 - Right Audio
So to recap:
Pin 1 - Left Audio
Pin 2 - Ground
Pin 3 - Right Audio
