
Front Bumper Removal


 05-23-2007, 05:30 AM
#6
TECH Resident
iTrader: (2)
Join Date: Jan 2003
Location: MD
Posts: 994
Likes: 0
Received 0 Likes
on
0 Posts

slp has instructions for mounting their grille at their website. the instructions include removing the front bumper. diagrams are included check their website, go to the grille, and click install instructions. may help you.
05-23-2007, 05:52 AM
#7
TECH Enthusiast
iTrader: (9)
Join Date: Feb 2007
Location: Stank Cloud, FL
Posts: 744
Likes: 0
Received 0 Likes
on
0 Posts

very easy to do. the most time consuming part is getting the bottom filler panels off and the air dam. Other than that, there are 3 nuts and one screw type bolt where the bumper meets the fender on both sides, and the 5 push fasteners on the top and 3 underneath. Once those are out, lift the top of the nose over the lip and carefully work it off. Make sure you disconnect the turn signal bulbs. Heres an idea.
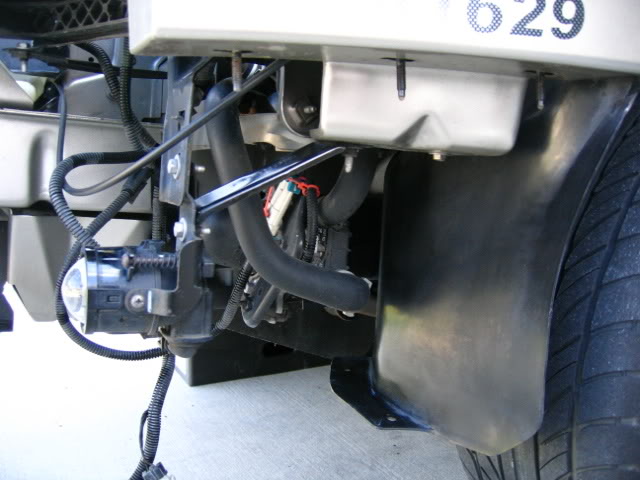
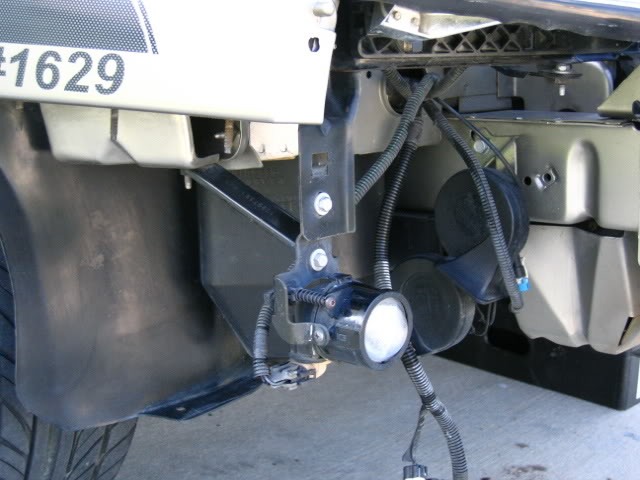
The hole below the dowl on the front edge of the fender in the above pic is where the screw bolt is. Kinduva pain but not that bad. Just a tight area.
Almost everything is a 10mm socket except the 5 that attach the air dam to the radiator support. I cant remember off hand what they are. Hope this helps.
Last edited by Ntimid8r7; 05-23-2007 at 05:57 AM.
Trending Topics
05-24-2007, 05:16 PM
#8
***note: my bumper cover is already off the car
this is what i did:
1. get the car up in the air (ramps, jackstands, etc)
2. open the hood
3. locate the 5 fasteners on top of the bumper cover

i used a small flathead screwdriver to lift up the center piece.

then remove them.
4. there are 3 more fasteners on the bottom on the bumper cover. repeat step 3.
5. where the 5 fasteners were, place your fingers under there and lift up and towards the front of the car, just enough to get it over the lump.
6. there is a 10 mm bolt holding each headlight in.

remove that bolt then slide the headlight towards the middle of the car then out. in other words, slide the pass side headlight to the right then out. for the drivers side slide it to the left then out. be careful when removing the headlights. you don't want to scratch the paint.
7. now you can remove the corner lights/parking lights. they are held on with 3 7mm screws (2 on the side, 1 on the bottom). i found it easier to remove them from the bumper cover after the bumper cover was off the car. so for now, just disconnect the bulbs from their connectors.
8. on the side of each fender, another 10 mm bolt will be exposed. remove both (1 on each side).

9. get back under the bumper cover and remove the 8 10mm bolts. they hold the plastic shields to the bumper cover. there are 4 bolts on each side.


10. now you can fold the access panels down to expose the last 6 10mm bolts to remove {3 on each side). * a 10mm deep socket was needed here

11. now you want to grab the bottom of each side of bumper cover from the wheel well and pull down and towards the front of car. just angle it in different ways to remove it. once again, be careful to not scratch any paint.

this is what i did:
1. get the car up in the air (ramps, jackstands, etc)
2. open the hood
3. locate the 5 fasteners on top of the bumper cover
i used a small flathead screwdriver to lift up the center piece.
then remove them.
4. there are 3 more fasteners on the bottom on the bumper cover. repeat step 3.
5. where the 5 fasteners were, place your fingers under there and lift up and towards the front of the car, just enough to get it over the lump.
6. there is a 10 mm bolt holding each headlight in.
remove that bolt then slide the headlight towards the middle of the car then out. in other words, slide the pass side headlight to the right then out. for the drivers side slide it to the left then out. be careful when removing the headlights. you don't want to scratch the paint.
7. now you can remove the corner lights/parking lights. they are held on with 3 7mm screws (2 on the side, 1 on the bottom). i found it easier to remove them from the bumper cover after the bumper cover was off the car. so for now, just disconnect the bulbs from their connectors.
8. on the side of each fender, another 10 mm bolt will be exposed. remove both (1 on each side).
9. get back under the bumper cover and remove the 8 10mm bolts. they hold the plastic shields to the bumper cover. there are 4 bolts on each side.
10. now you can fold the access panels down to expose the last 6 10mm bolts to remove {3 on each side). * a 10mm deep socket was needed here
11. now you want to grab the bottom of each side of bumper cover from the wheel well and pull down and towards the front of car. just angle it in different ways to remove it. once again, be careful to not scratch any paint.
05-24-2007, 07:43 PM
#10
On The Tree
Thread Starter

Join Date: Mar 2003
Location: Napervile, IL
Posts: 142
Likes: 0
Received 0 Likes
on
0 Posts
Originally Posted by Loochy88
I'd be more concerned with getting it back on and lining it up. How much effort needs to be put into making it fit right when you get it back on?
it can pretty much only go on straight with the way it overlaps the front pieces and the nubs sticking out of the fender for alignment. Not to mention all the holes keeping it in alignment
05-24-2007, 11:38 PM
#13
On The Tree
Thread Starter
Join Date: Mar 2003
Location: Napervile, IL
Posts: 142
Likes: 0
Received 0 Likes
on
0 Posts
Originally Posted by Yahelou
so do the headlights have to come out??