
LQ4 in a 1971 Nova
 11-12-2013, 04:32 PM
#381

Not sure if anyone answered your question on the line-lock/reverse lock out switch. I took a pigtail from a donor 1994 Camaros antilock brake assembly(same connector as the lockout). One wire in the pigtail will go to ground and the other to switched hot of the line-lock. Without the reverse lock out wired in be prepared for some shoulder surgery, lol! No effort now to shift to reverse.
 12-10-2013, 09:28 AM
#382

And so it begins... I began pulling things out yesterday. Here's the rundown of what I've got:
-Tick stage 2 T56
-Spec 3+ clutch with a spare clutch disk
-Tick adjustable Master cylinder
-Pro 5.0 shifter
I also bought a master cylinder bracket from DSE.
I ran into a problem after I received all the hardware... My 2000 LQ4 features a .400" flange on the back of the crank that was removed in later engines. This pushes the flywheel/clutch/pressure plate back that amount and not allow the starter to engage the flywheel. Enter McLeod - they manufacture a conversion flywheel to make it work (PN 460537), as well as a .500" bellhousing spacer to locate the trans relative to the clutch assembly.
Here's the OE flywheel:
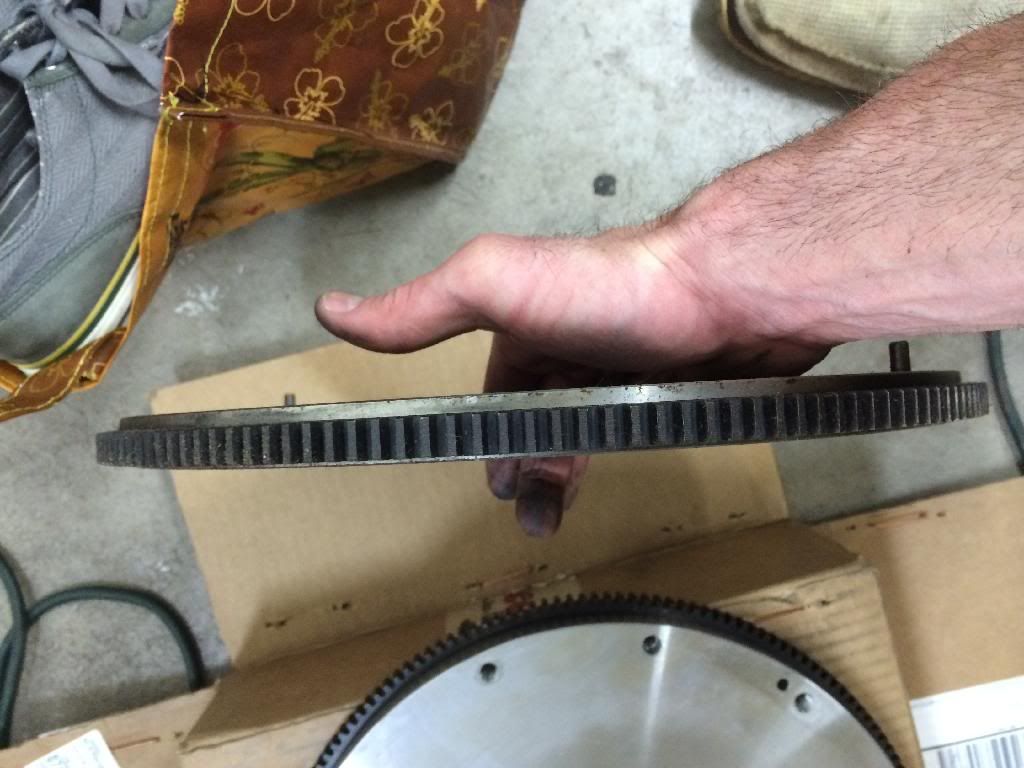
And the McLeod adapter. The added thickness is forward of the crank-mounting flange to allow the starter to engage the teeth.
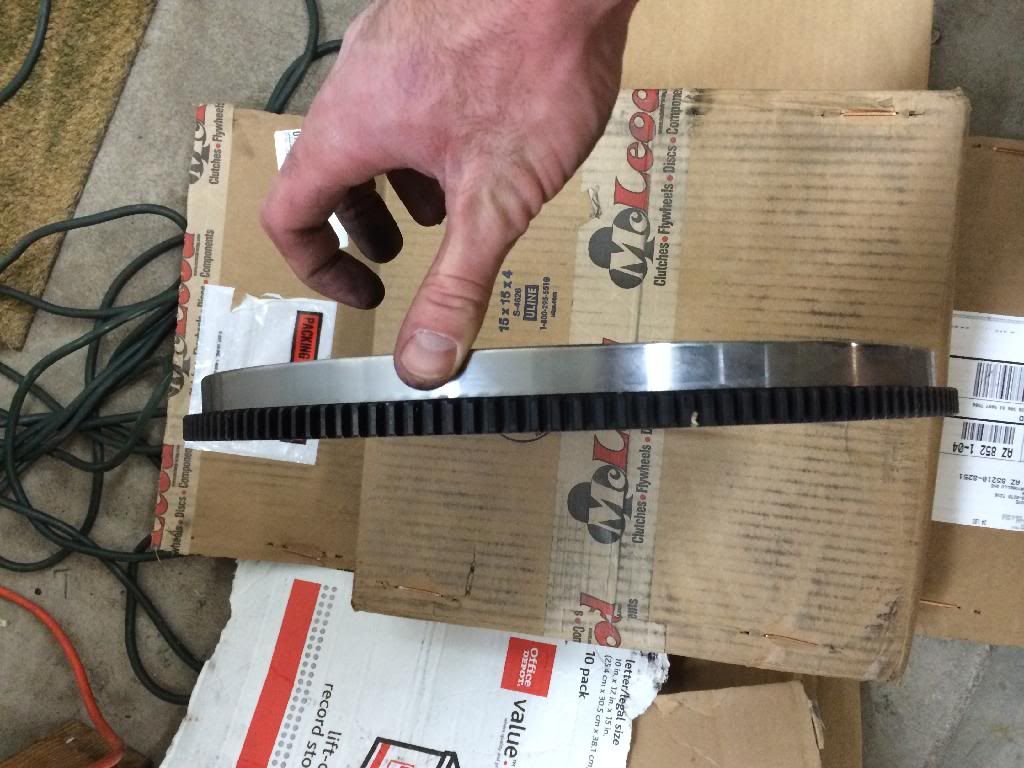
And the DSE bracket, which will be welded to the firewall.
So I think I'm going the wrong way... It's now a 1-pedal, not a 3-pedal...
-Tick stage 2 T56
-Spec 3+ clutch with a spare clutch disk
-Tick adjustable Master cylinder
-Pro 5.0 shifter
I also bought a master cylinder bracket from DSE.
I ran into a problem after I received all the hardware... My 2000 LQ4 features a .400" flange on the back of the crank that was removed in later engines. This pushes the flywheel/clutch/pressure plate back that amount and not allow the starter to engage the flywheel. Enter McLeod - they manufacture a conversion flywheel to make it work (PN 460537), as well as a .500" bellhousing spacer to locate the trans relative to the clutch assembly.
Here's the OE flywheel:
And the McLeod adapter. The added thickness is forward of the crank-mounting flange to allow the starter to engage the teeth.
And the DSE bracket, which will be welded to the firewall.
So I think I'm going the wrong way... It's now a 1-pedal, not a 3-pedal...
12-10-2013, 09:29 AM
#383
The T56
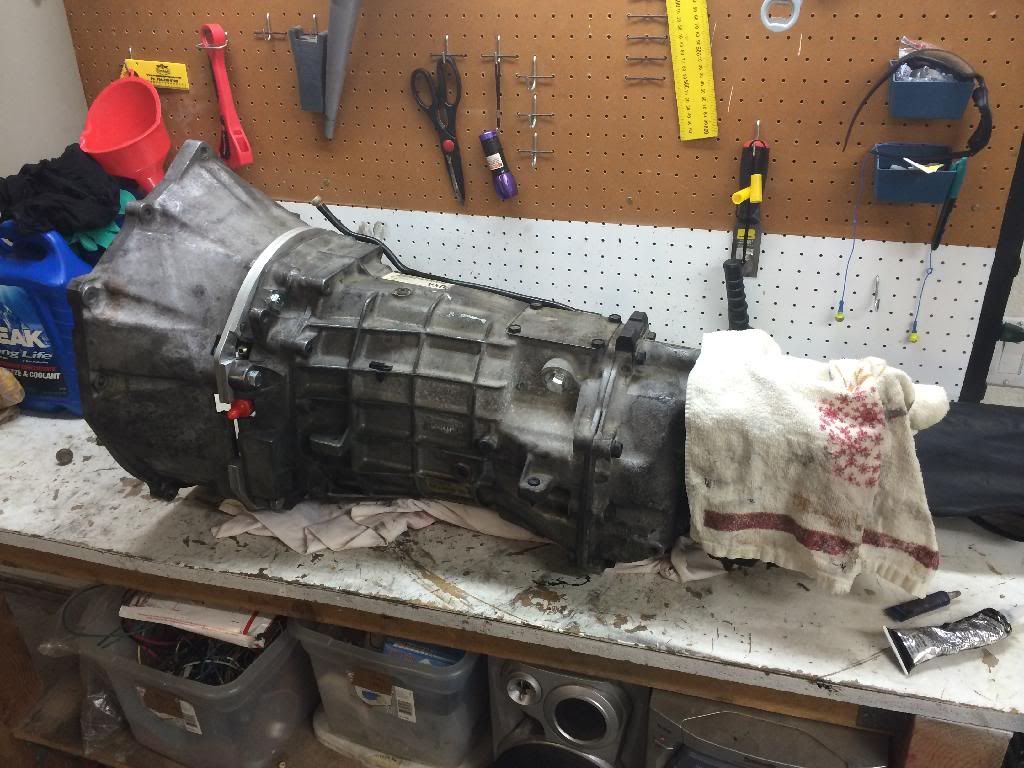
There are a few small things that need to be done to the T56 prior to installation. Here's a good reference for the electrical connections.
1) CAGS (top photo, just forward of the extension housing split line) - I'm deleting this solenoid per this thread and using an M20-1.5 oil drain plug. Dorman PN 090-040 or 65221 work. I found the latter on the shelf at O'Reilly Auto. Note that the gasket that comes with the 65221 is too thick to engage the threads, so I reused the solenoid's o-ring.
2) Reverse lockout - I plan to keep the assembly, but have installed a softer spring similar to this in lieu of hooking up the solenoid. There is always this much cleaner option, too. Pics in post 7.
3) WITH THE EARLY LQ4 ONLY - Install McLeod's .500" spacer (actually 2x .250" spacers) between the bell and trans. These are designed to run a shift fork instead of hydraulic clutch, so some material needs to be removed to clear the throwout bearing hydraulic lines. This also requires (8x) M10-1.5 x 50mm bolts.
Spacer
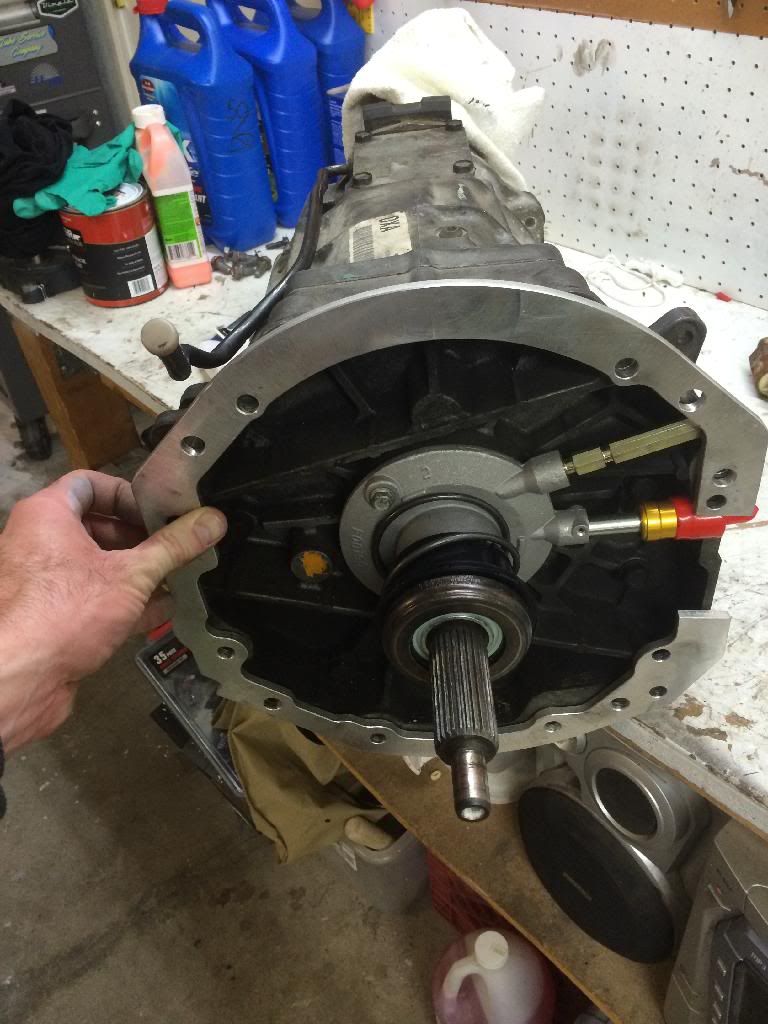
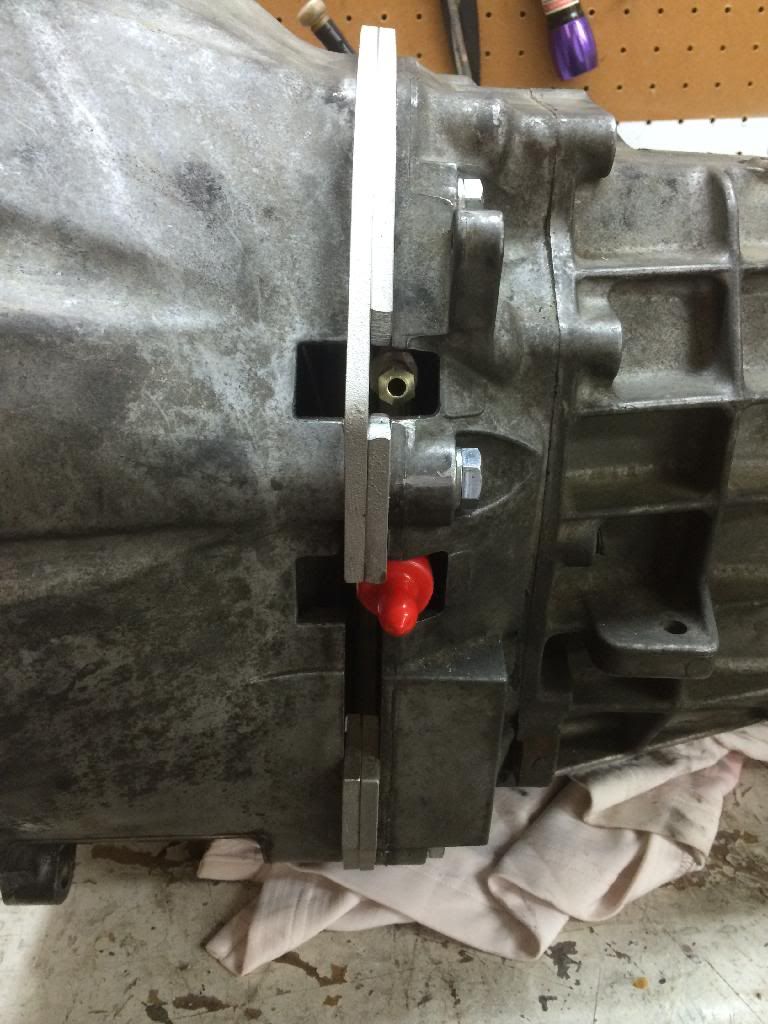
Note the spacer contacting the throw-out bleed line
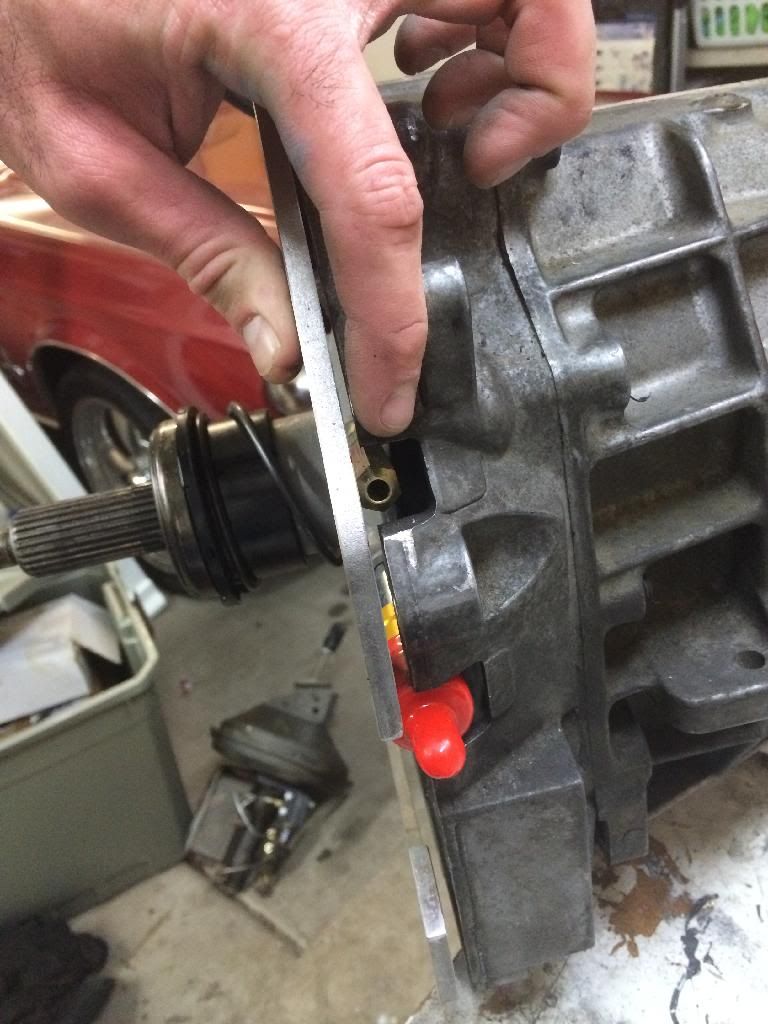
And both spacers sandwiched together. .500" total thickness.
There are a few small things that need to be done to the T56 prior to installation. Here's a good reference for the electrical connections.
1) CAGS (top photo, just forward of the extension housing split line) - I'm deleting this solenoid per this thread and using an M20-1.5 oil drain plug. Dorman PN 090-040 or 65221 work. I found the latter on the shelf at O'Reilly Auto. Note that the gasket that comes with the 65221 is too thick to engage the threads, so I reused the solenoid's o-ring.
2) Reverse lockout - I plan to keep the assembly, but have installed a softer spring similar to this in lieu of hooking up the solenoid. There is always this much cleaner option, too. Pics in post 7.
3) WITH THE EARLY LQ4 ONLY - Install McLeod's .500" spacer (actually 2x .250" spacers) between the bell and trans. These are designed to run a shift fork instead of hydraulic clutch, so some material needs to be removed to clear the throwout bearing hydraulic lines. This also requires (8x) M10-1.5 x 50mm bolts.
Spacer
Note the spacer contacting the throw-out bleed line
And both spacers sandwiched together. .500" total thickness.
Last edited by hookemdevils22; 12-11-2013 at 02:11 PM. Reason: add T56 pics
12-12-2013, 04:14 PM
#386
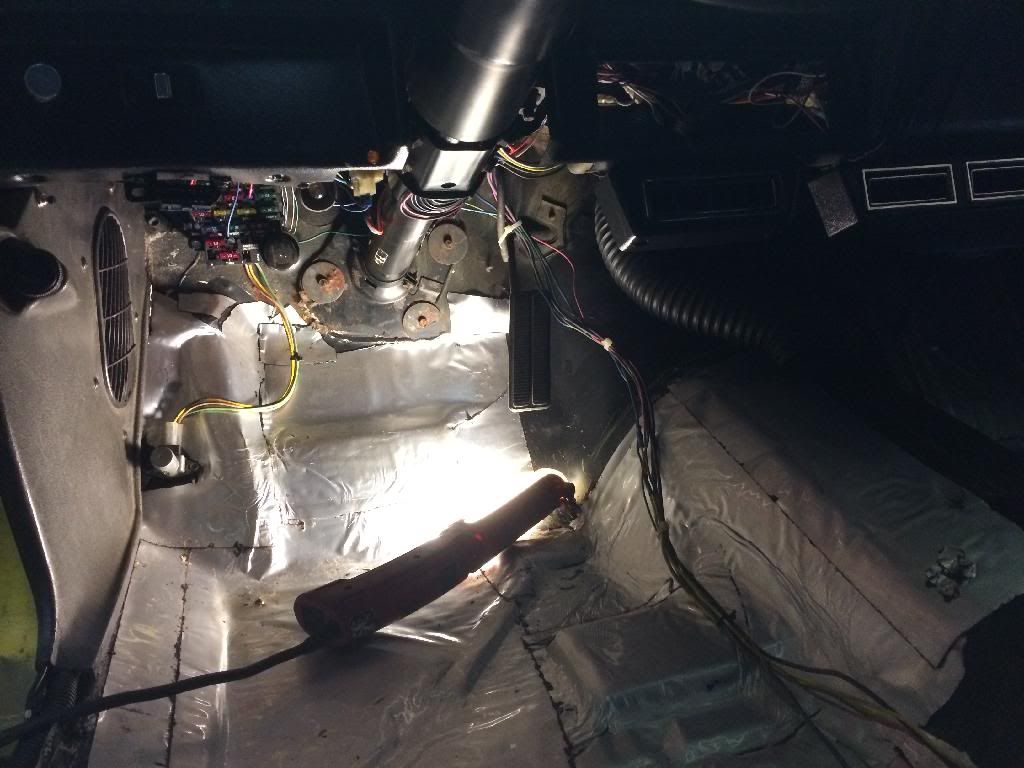
Got the clutch installed, firewall and clutch master bracket prepped for welding, and floor pan hacked up. Like an idiot, I took my angle grinder with wire brush to the firewall and caught some of the engine harness wires. Luckily I only caught the grounds and a white wire (no idea what it does), so I'll solder them back and rewrap everything.
I'm up in the air over whether to keep the 'T' cut or remove the floor pan entirely and fab a new tunnel. Trans is going in this weekend when my dad gets here - I'll likely make a decision then. But any input is greatly appreciated.
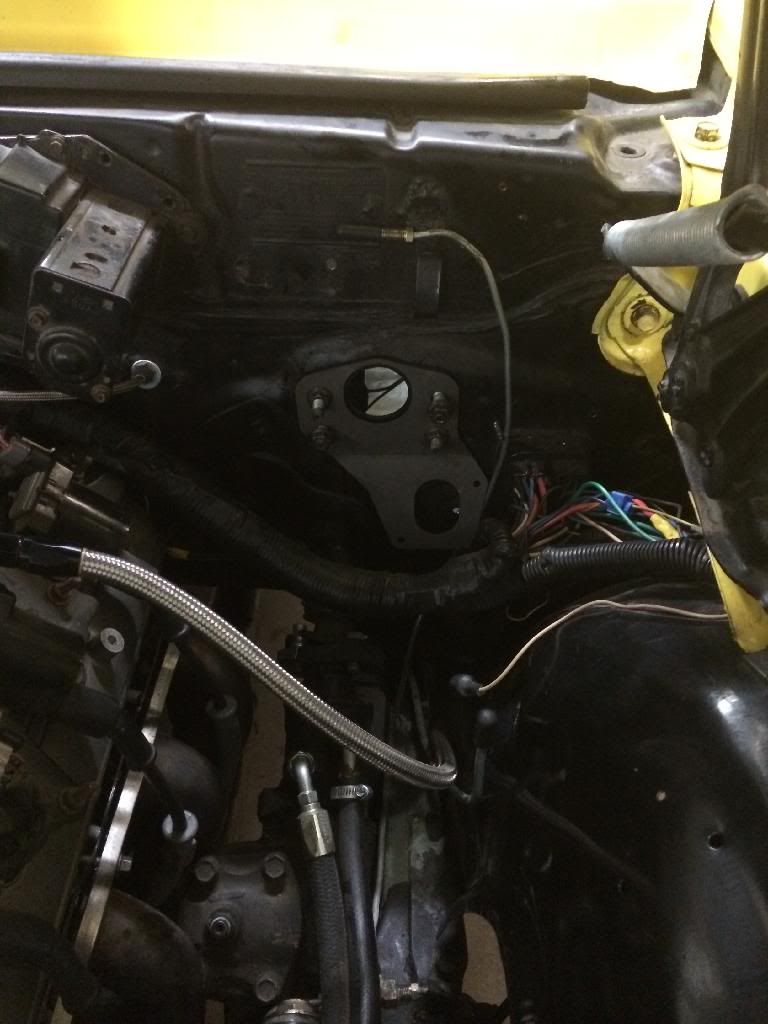
Side note - the Tick (and I'm assuming OE f-body) master features a threaded mount, meaning the bolts must be threaded from the aft of the master cylinder bracket (see photo below). This means that I will need to drill two 3/4" access holes to install the bolts from the inside passenger compartment. I've never seen anyone mention this before, but it's worth noting.
Tick master cylinder. Note the threaded hole in the billet aluminium mount.

Firewall ready for welding. Note how close the bracket will be to the fuse box - I'm contemplating whether to spit the harness at the firewall to fully weld the bracket, or let the driver's side hang free. An ISIS multiplex kit would do wonders to clear up some room...
Floorpan. Thoughts - fully new tunnel or keep the 'T' cut?

I'm up in the air over whether to keep the 'T' cut or remove the floor pan entirely and fab a new tunnel. Trans is going in this weekend when my dad gets here - I'll likely make a decision then. But any input is greatly appreciated.
Side note - the Tick (and I'm assuming OE f-body) master features a threaded mount, meaning the bolts must be threaded from the aft of the master cylinder bracket (see photo below). This means that I will need to drill two 3/4" access holes to install the bolts from the inside passenger compartment. I've never seen anyone mention this before, but it's worth noting.
Tick master cylinder. Note the threaded hole in the billet aluminium mount.
Firewall ready for welding. Note how close the bracket will be to the fuse box - I'm contemplating whether to spit the harness at the firewall to fully weld the bracket, or let the driver's side hang free. An ISIS multiplex kit would do wonders to clear up some room...
Floorpan. Thoughts - fully new tunnel or keep the 'T' cut?
12-12-2013, 04:46 PM
#387
From looking at the 2nd photo and them wires, You may as well do the harness while your at it..!
3/4" holes to just access the bolt to the master ?.. why not just bolt the master to the plate 1st and then slide it on to the Brake Booster studs..?
Or would you have enough room to use a gearwrench to tighten the bolts ?
BC
3/4" holes to just access the bolt to the master ?.. why not just bolt the master to the plate 1st and then slide it on to the Brake Booster studs..?
Or would you have enough room to use a gearwrench to tighten the bolts ?
BC
12-12-2013, 05:17 PM
#388
Bracket is going to be welded to the firewall for rigidity. There would be no way to get to the bolts without the holes. I've heard that it's too flimsy without welding. Actually, now that I think about it, I could bolt just the mount plate to the bracket before welding it on - it's a separate piece from the master itself. That way I could just replace the master as necessary. And I doubt I'd need to replace the plate anytime soon...
Those wires are the result of an overzealous angle grinder wire wheel. It's just the grounds and one non-ground, so I can easily fix it. Now would be a good time to relocate the PCM to the firewall to make things a bit easier... We'll see how far I get this weekend.
Those wires are the result of an overzealous angle grinder wire wheel. It's just the grounds and one non-ground, so I can easily fix it. Now would be a good time to relocate the PCM to the firewall to make things a bit easier... We'll see how far I get this weekend.
12-12-2013, 05:22 PM
#389
Does the bracket really need to be welded to the firewall? I know a lot of people do that, but just attaching the brake booster should be more than adequate to keep it in place, no?
Redoing the tunnel would make it easier to freely adjust the drive train angle before mounting the trans and identify exactly what clearances you need and where. I'm not sure if the t-cut really that much less work, but I've never done this myself so ignore me.
Redoing the tunnel would make it easier to freely adjust the drive train angle before mounting the trans and identify exactly what clearances you need and where. I'm not sure if the t-cut really that much less work, but I've never done this myself so ignore me.
12-12-2013, 06:31 PM
#391
I made my bracket, I welded a extra price to bridge the V and keep it ridgit... Not sure if that will work with the Tick... But I am sure you can figure something out to re-enforce it without welding it to the firewall.
Maybe you can use some socket/hex headed bolts, that way you wouldn,'t have to use such large holes in the firewall..
Just a few thoughts...
BC
Maybe you can use some socket/hex headed bolts, that way you wouldn,'t have to use such large holes in the firewall..
Just a few thoughts...
BC
Last edited by bczee; 01-09-2014 at 10:03 PM.
12-12-2013, 10:33 PM
#392
I was panning to weld the entire circumference of the bracket, including adding pieces perpendicular to the bracket to connect the lower portion to the firewall. This would distribute the force of the clutch pedal to the firewall and bracket, rather than just the 4 mount points. But the more I look at it, the more I don't want to weld it to the firewall. I can bolt it all together and see what happens. I might even add trusses to the concave (fwd) face at the bend for added rigidity, since the force will always try to act to fold, rather than flatten, the bracket.
Edit: basically what it sounds like BC did.
Edit: basically what it sounds like BC did.


 When will we be happy with our cars?
12-13-2013, 02:55 PM
When will we be happy with our cars?
12-13-2013, 02:55 PM
#395
I have my clutch master bracket bolted and have not had any issues. The original brake booster/master cylinder have been used for many years bolted to the firewall without failure so you should be good. The rigidity will only be as good as the thinnest metal it is bolted to. The bracket should be 1/4" thick where as the firewall itself is rather thin.
12-13-2013, 05:20 PM
#397
I ran one like the DSE for about 1-1/2 years until I switched over to the Wilwood. No problems at all. I probably have a weaker mount now since the pedal bracket is no longer an integral part of the mount.
Last edited by tsnow678; 12-13-2013 at 05:28 PM.
12-16-2013, 10:49 AM
#398
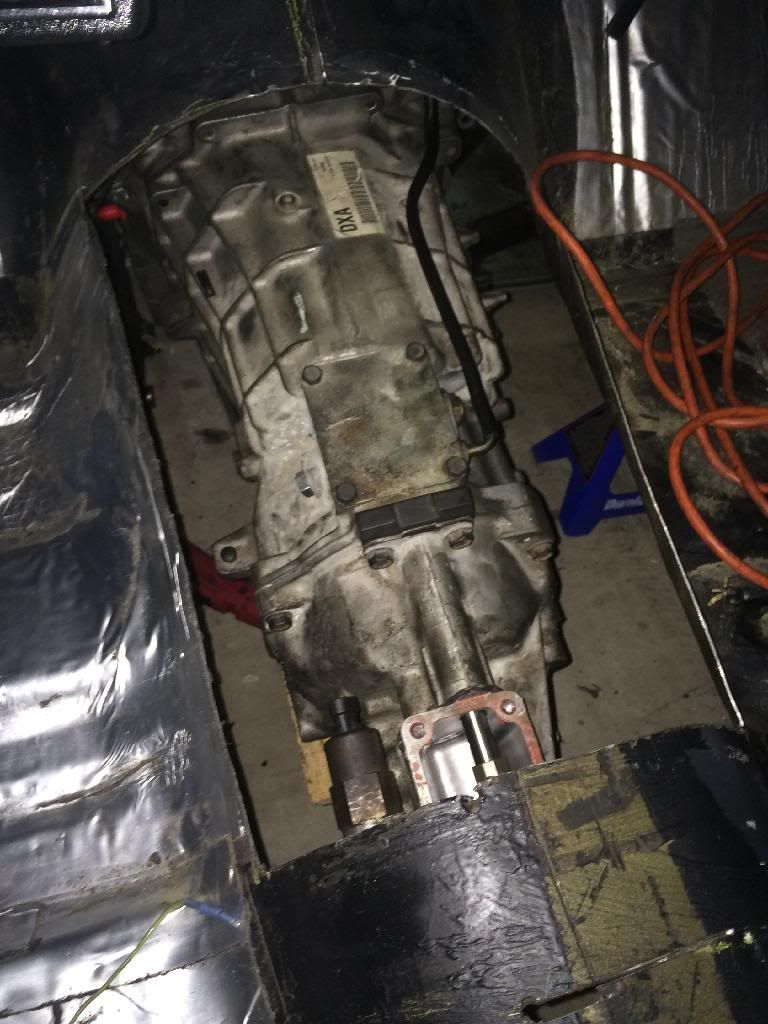
Got the trans installed this weekend. Also cut the rest of the floor pan out.
Ran into a problem installing the trans. The McLeod tech recommended using a 2005+ pilot bearing due to the .500" spacer. According to this LS engine swap guide, GM switched pilots around 2005 due to shortening the trans input shaft at that time. The old pilot is smaller and fits deeper (further forward) into the crank (labeled 1 below), while the newer style has a larger OD and fits further back (2). Long story short, I ended up having to remove the new-style pilot and install an early-style one.
So for anyone planning to mate an early LQ4 to a T56, here's a BOM to use as a guide:
*McLeod flywheel assy (PN 460537)
*McLeod .500" spacer (Call McLeod)
*Qty (8) M10-1.5 x 50mm bolts for the bellhousing
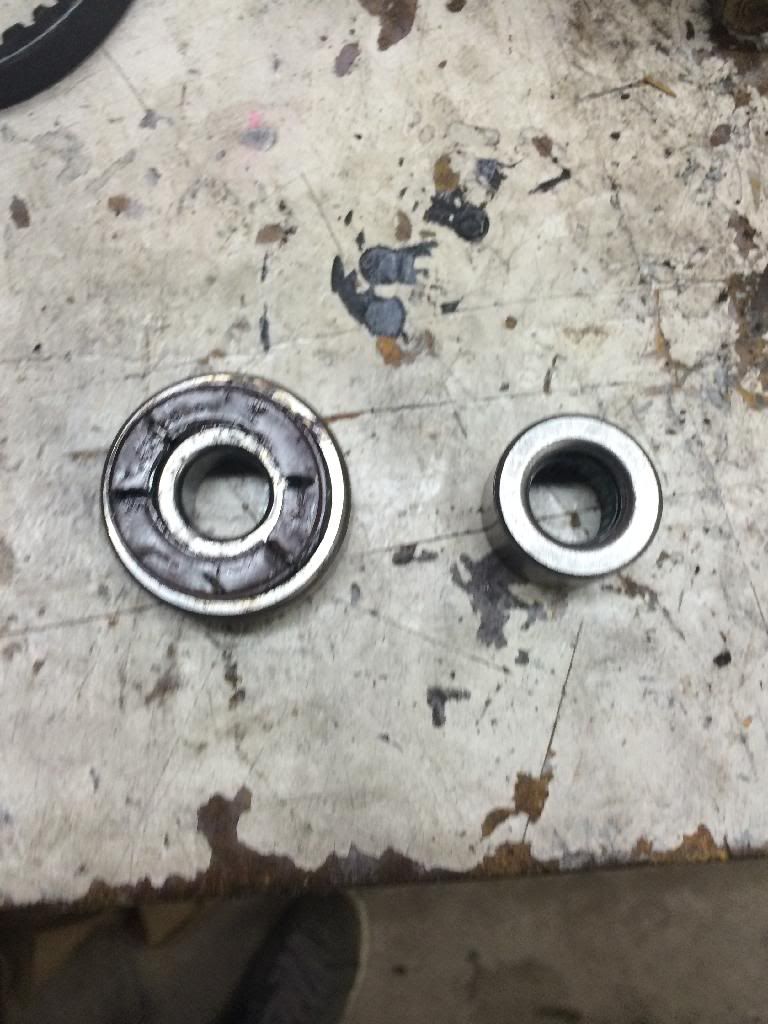
*Pilot bearing according to your transmission (05+ use new, larger OD bearing; pre-05 use small OD pilot).
Difference between pilots. New style on left, old on right.
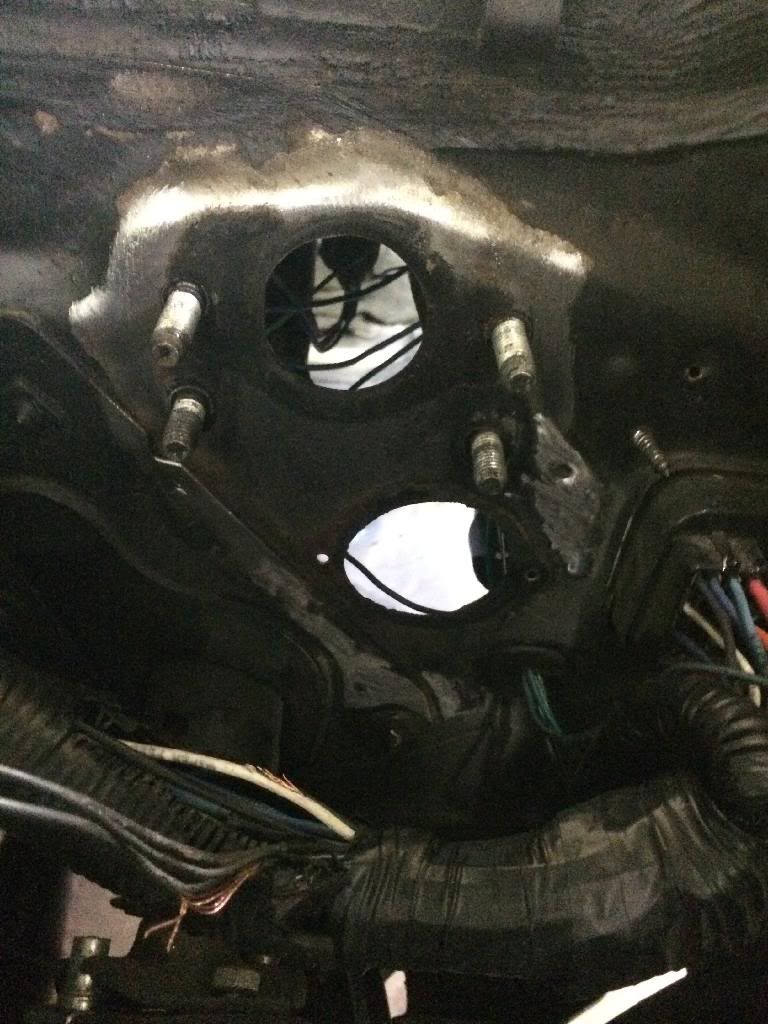
Crank flange. Old style fits into (1), new into (2)

And trans installed! I have to cut and reweld the crossmember to make room for the shifter.
Ran into a problem installing the trans. The McLeod tech recommended using a 2005+ pilot bearing due to the .500" spacer. According to this LS engine swap guide, GM switched pilots around 2005 due to shortening the trans input shaft at that time. The old pilot is smaller and fits deeper (further forward) into the crank (labeled 1 below), while the newer style has a larger OD and fits further back (2). Long story short, I ended up having to remove the new-style pilot and install an early-style one.
So for anyone planning to mate an early LQ4 to a T56, here's a BOM to use as a guide:
*McLeod flywheel assy (PN 460537)
*McLeod .500" spacer (Call McLeod)
*Qty (8) M10-1.5 x 50mm bolts for the bellhousing
*Pilot bearing according to your transmission (05+ use new, larger OD bearing; pre-05 use small OD pilot).
Difference between pilots. New style on left, old on right.
Crank flange. Old style fits into (1), new into (2)
And trans installed! I have to cut and reweld the crossmember to make room for the shifter.
01-09-2014, 04:17 PM
#400
I don't know if I'd say no time...
Sadly, I had a couple issues over the holiday break, and nothing was open until after the new year, so I'm still waiting on parts. I also had to cut the floor pan crossmember to accomodate the shifter. I still need to clean the metal and weld it back up (with reinforcements), put the trans back together, then fab a new tunnel. I sincerely hope I get this thing done before my home sale closes...
Sadly, I had a couple issues over the holiday break, and nothing was open until after the new year, so I'm still waiting on parts. I also had to cut the floor pan crossmember to accomodate the shifter. I still need to clean the metal and weld it back up (with reinforcements), put the trans back together, then fab a new tunnel. I sincerely hope I get this thing done before my home sale closes...