
1969 jetboat build thread. (5.3L)
 01-02-2011, 02:02 PM
#1
On The Tree
Thread Starter

I finally started getting some stuff done on my project.
This weekend I started making front plate mounts
I also cut the pan down but haven't has the time yet to weld it up.
Ill document the build if anyone wants to see
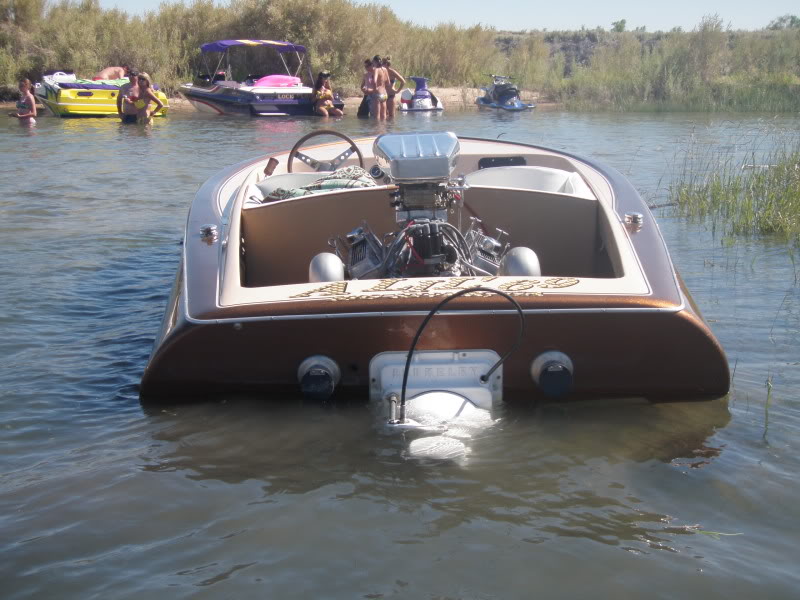
heres the unsuspecting victim, my 1969 16' schiada jetboat. I've completely re-done this entire boat besides the gel coat
dropping the motor in to see how much fitting needs to be done
waaaay to high
thats a lil better.
This weekend I started making front plate mounts
I also cut the pan down but haven't has the time yet to weld it up.
Ill document the build if anyone wants to see
heres the unsuspecting victim, my 1969 16' schiada jetboat. I've completely re-done this entire boat besides the gel coat
dropping the motor in to see how much fitting needs to be done
waaaay to high
thats a lil better.

The following users liked this post:
77challenger-LS3 (01-18-2020)
01-02-2011, 02:54 PM
#2

I believe you would just need CarShop type of 1" setback plates with a oilpan as shallow as the SBC and you are done physically installing it. Then its exhuast, fuel system and done. Pretty easy swap concidering you all ready have the SBC in it.
01-02-2011, 10:29 PM
#4
On The Tree
Thread Starter
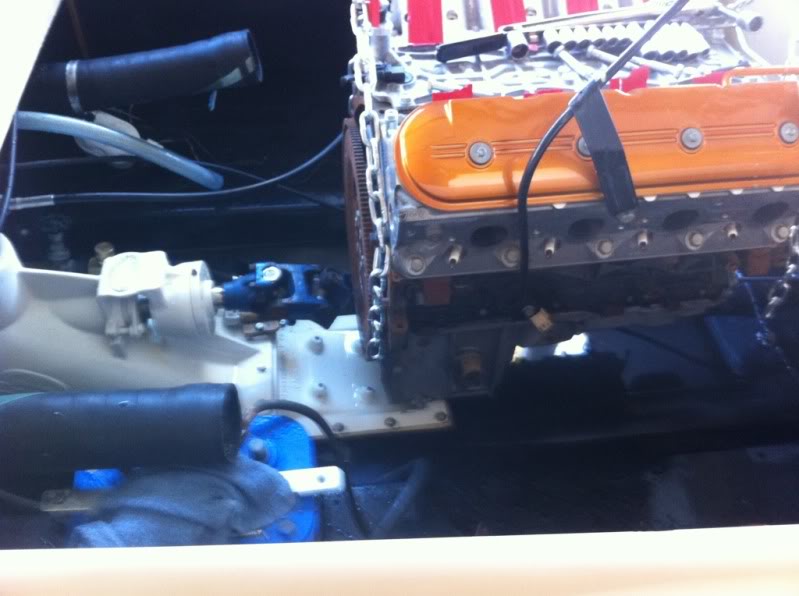
I'm not using the stock mounts, I'm making motor plates out of 3/8" aluminum plate that will mount down to aluminum angle iron that's bolted to the boat, I'll put some pics up soon


Trending Topics
01-04-2011, 08:50 PM
#8
On The Tree
Thread Starter
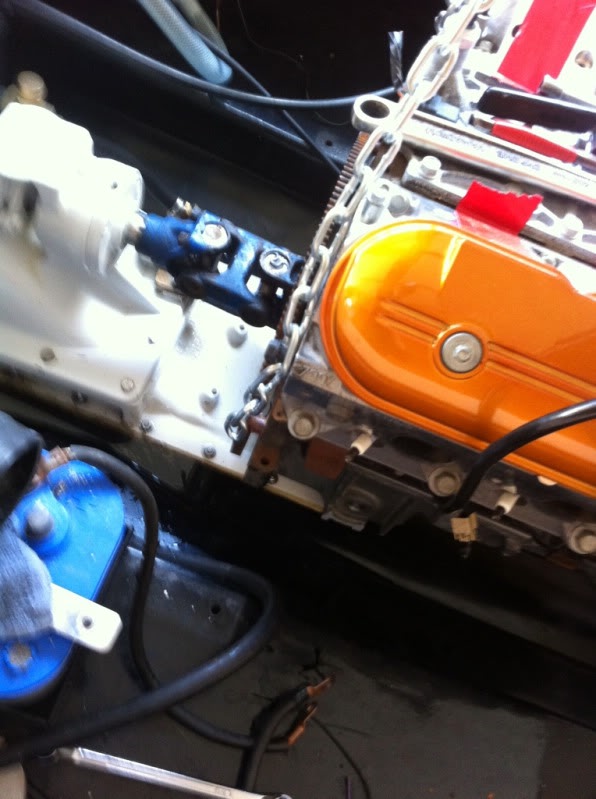
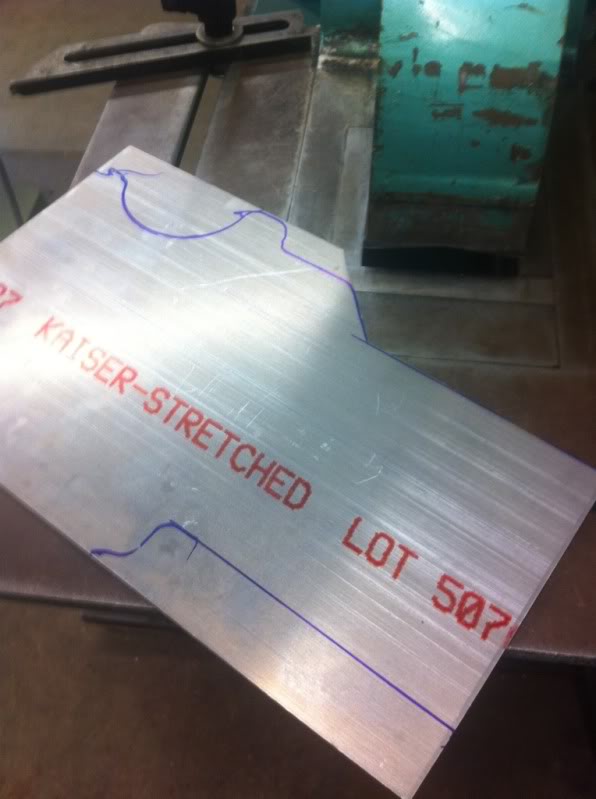
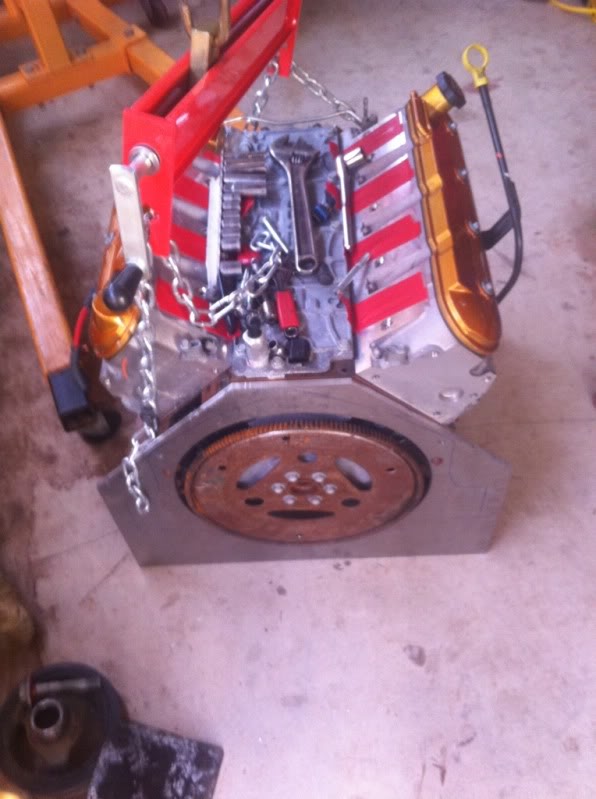
The way I do things, if I can I'll build it or modify it before I shell out my money then I will. I'm chopping my pan because it won't cost me anything but time. Meanwhile I cut out my front motorplates out of 3/8" 6061 aluminum. I pulled the timing cover loose to use it as a template.
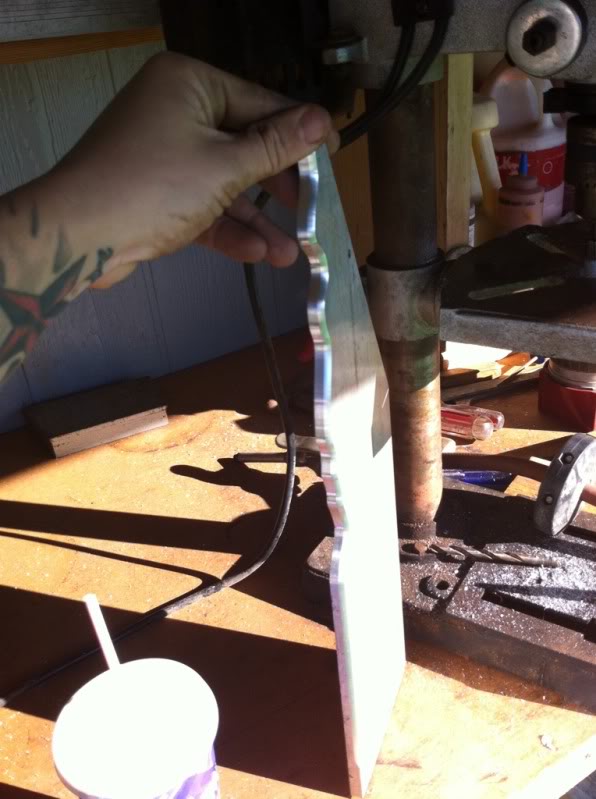
Using a jigsaw, die grinder and router I got them all smoothed out.
I also took a carbide burr and put it in the drill press to square the edges of the cuts. It works awesome. Like having a mill.
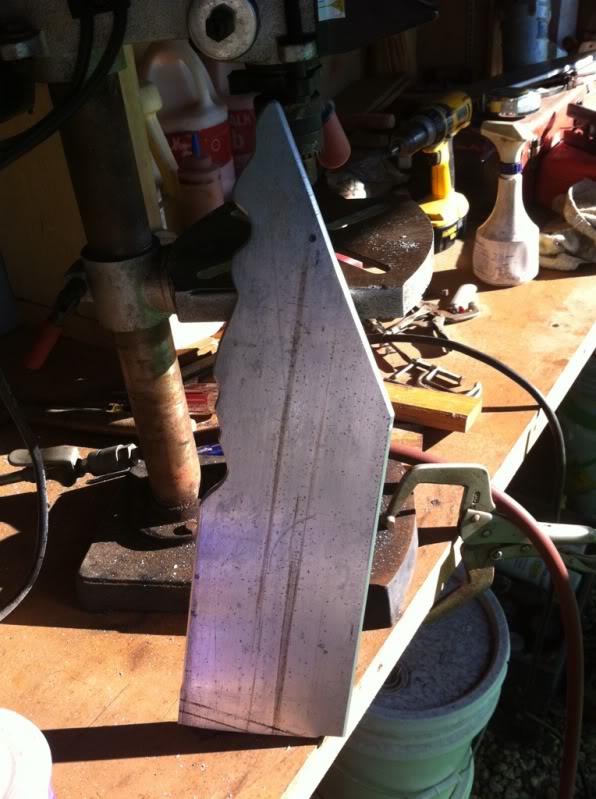

I know on the motor they look like they aren't on the same angle but it's just an optical illusion because the right plate has more of a notch out of it. They are running long right now because I'm waiting on my driveline.
Using a jigsaw, die grinder and router I got them all smoothed out.
I also took a carbide burr and put it in the drill press to square the edges of the cuts. It works awesome. Like having a mill.
I know on the motor they look like they aren't on the same angle but it's just an optical illusion because the right plate has more of a notch out of it. They are running long right now because I'm waiting on my driveline.
Last edited by sandeggo; 01-04-2011 at 08:55 PM.
01-04-2011, 08:58 PM
#9
On The Tree
Thread Starter
 01-07-2011, 08:16 PM
#12
On The Tree
Thread Starter
Well I ordered my PTO adapter, and got the aluminum for the oilpan and the rear motorplate. The pto I ordered from rex marine. They had, by far the cheapest price. Tomorrow I hope to start fitting the motorplates and get the motor and driveline all lined up. I'll update with pic tomorrow.
01-08-2011, 11:55 PM
#13
On The Tree
Thread Starter
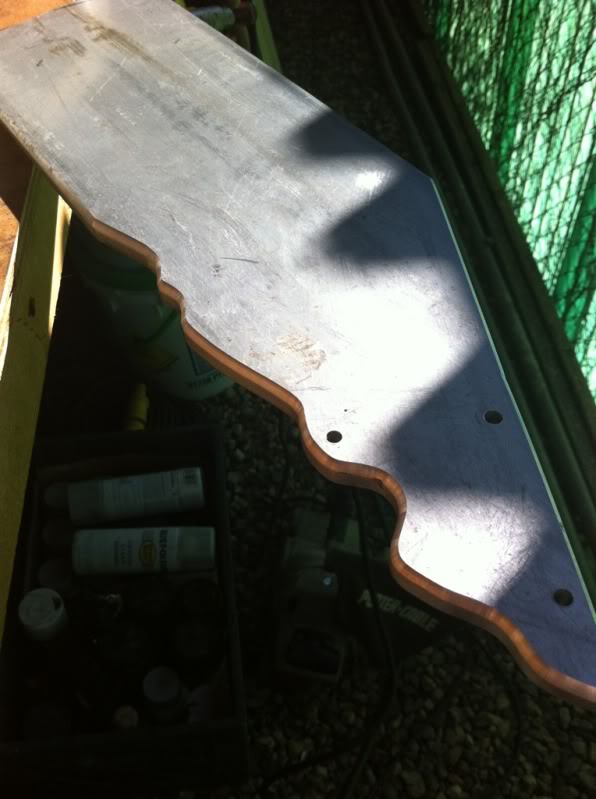
well today I started cutting out the plate I'll be using on the oil pan, then started cutting out the rear motor mount.
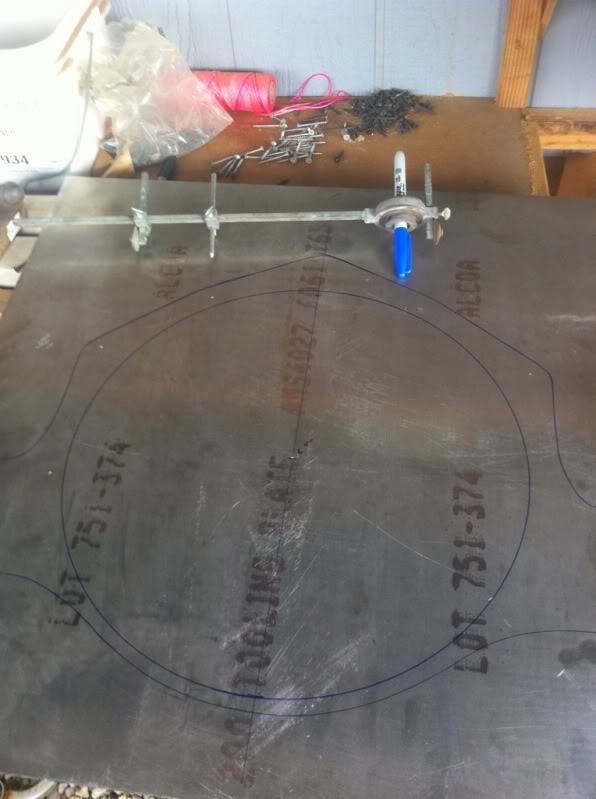
this was seriously the longest jigsaw cut ever. 3/8" 6061 plate
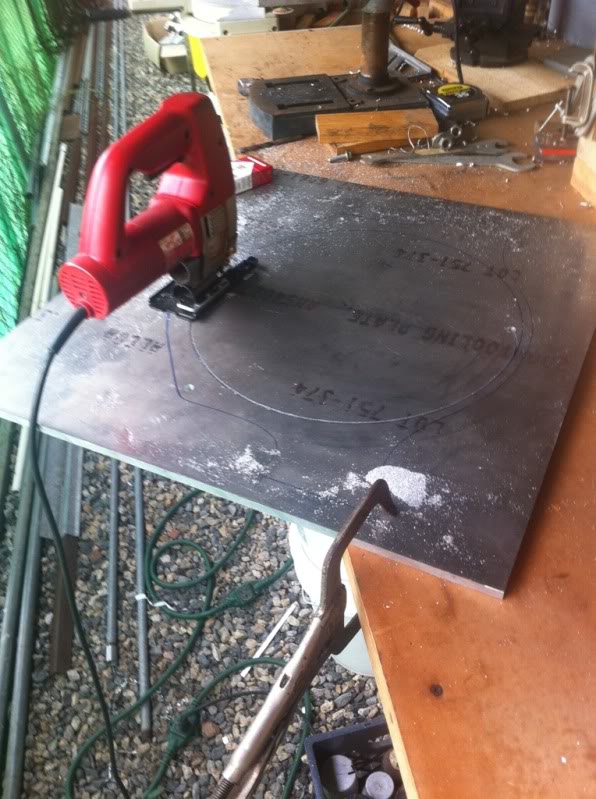
Tomorrow I'm mounting the angle iron into the boat so I can level the motor and start getting the mounts fit in right
this was seriously the longest jigsaw cut ever. 3/8" 6061 plate
Tomorrow I'm mounting the angle iron into the boat so I can level the motor and start getting the mounts fit in right
The following users liked this post:
77challenger-LS3 (01-18-2020)
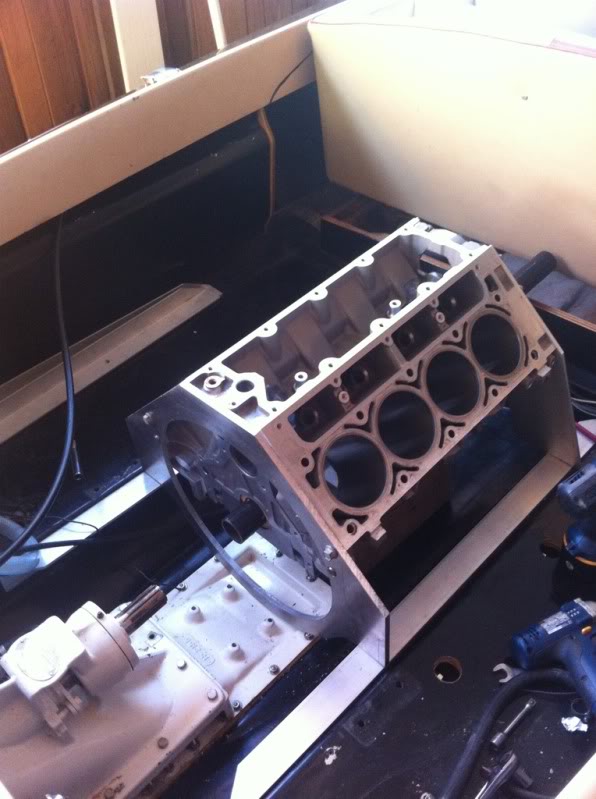
01-12-2011, 07:45 PM
#14
On The Tree
Thread Starter
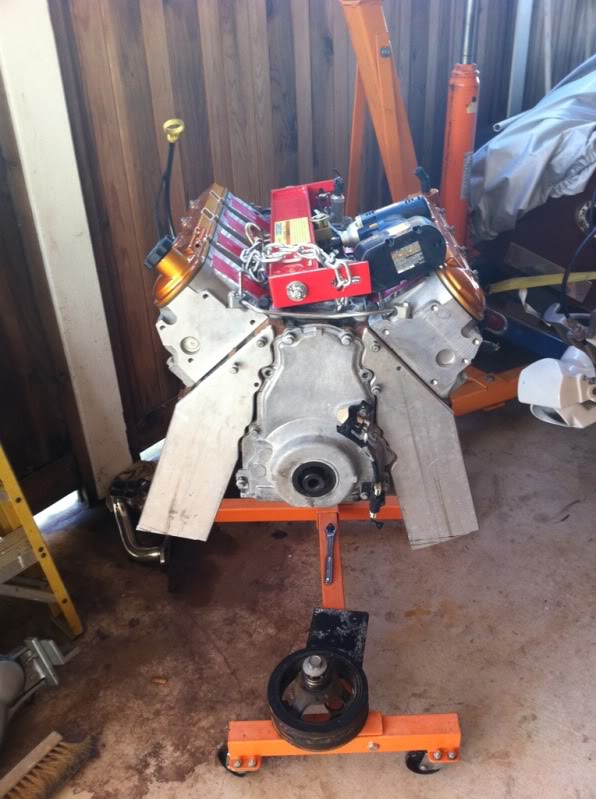
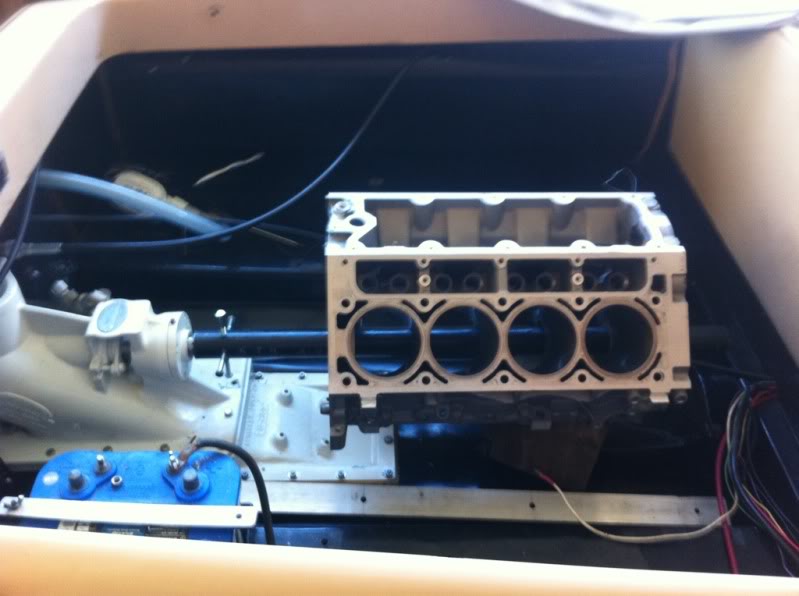
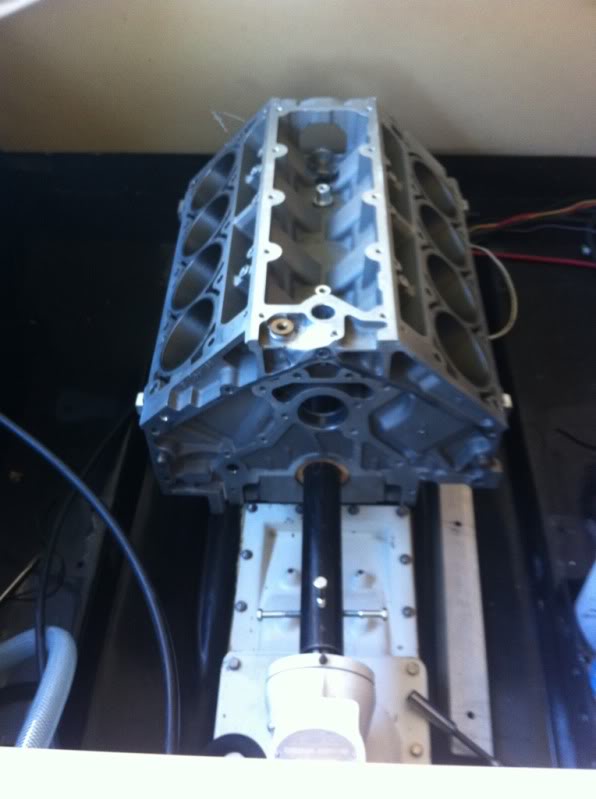
so i got a donor block for free to use as mock up. this aluminum block will make it a lot easier to fit everything. Used a couple holesaws to make some plywood main bearings to help line it up to the drive line. in the pics the motor isn't leveled or centered yet.
The following users liked this post:
77challenger-LS3 (01-18-2020)

 01-13-2011, 10:44 AM
#17
On The Tree
Thread Starter
I'm Going to leave the motor stock for now. I want to get everything purchased to finalize the swap first. If there is funds left over I'll do a cam swap/get rid of the DOD.
01-29-2011, 07:51 PM
#18
On The Tree
Thread Starter
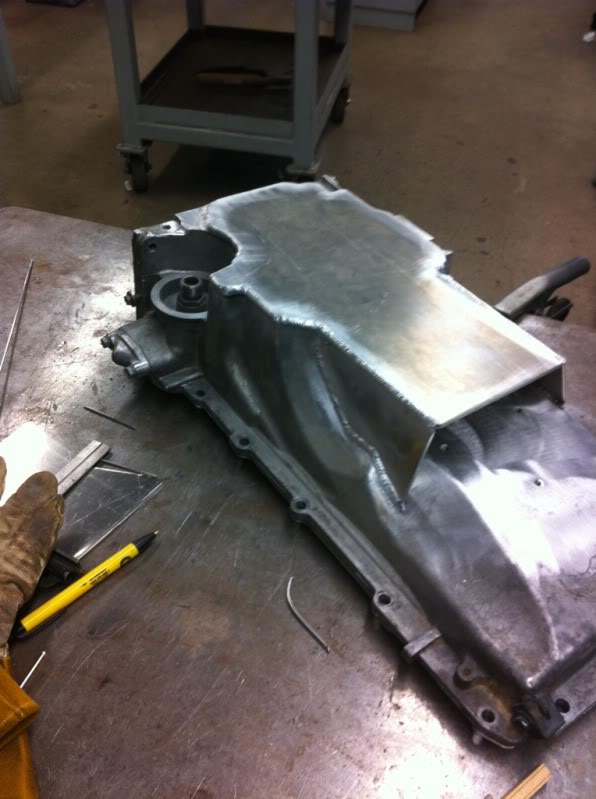
well i finally had time to finish up my oil pan today.
Plate welded on and starting to box it in.
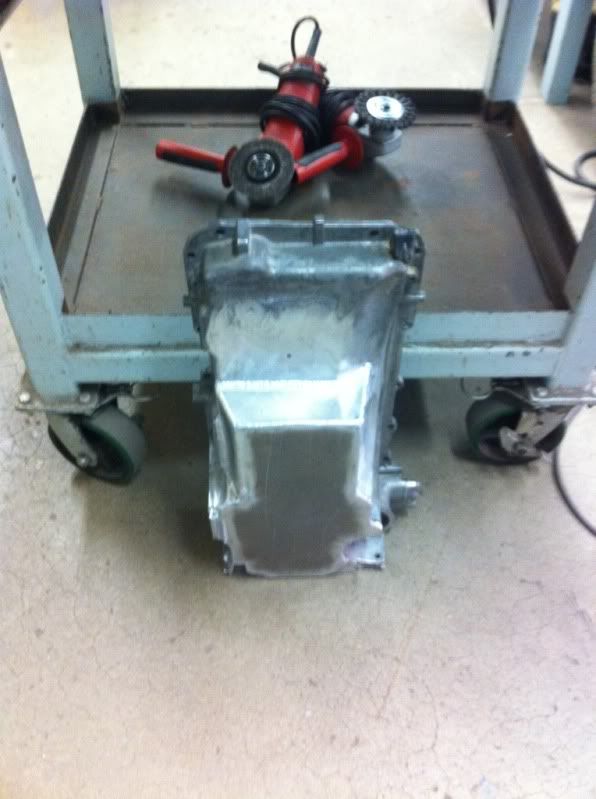
Done
Pick up tube
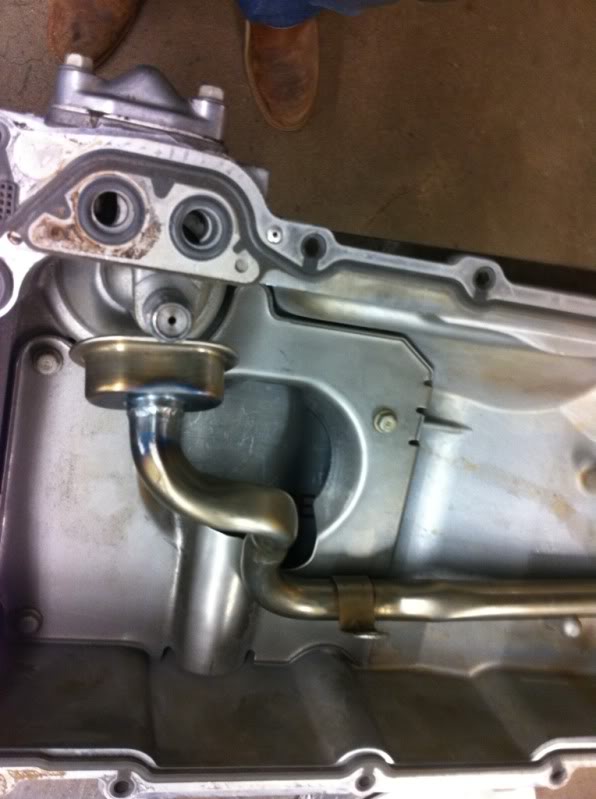
Total height of the pan including the gasket is 5-3/16"
The capacity should be right around stack truck capacity. I cut a slot out so oil will flow into the front where I boxed it in.
Also got the mounts pretty much done for the time being. I need to mount them in and get my headers made.
They got trimmed a little more than this picture shows, I'll get new pics tomorrow.
Plate welded on and starting to box it in.
Done
Pick up tube
Total height of the pan including the gasket is 5-3/16"
The capacity should be right around stack truck capacity. I cut a slot out so oil will flow into the front where I boxed it in.
Also got the mounts pretty much done for the time being. I need to mount them in and get my headers made.
They got trimmed a little more than this picture shows, I'll get new pics tomorrow.
Last edited by sandeggo; 01-29-2011 at 08:29 PM.
The following users liked this post:
77challenger-LS3 (01-18-2020)
01-29-2011, 08:18 PM
#19
TECH Fanatic
iTrader: (14)
Join Date: Mar 2007
Location: Phoenix/Tempe, AZ
Posts: 1,969
Likes: 0
Received 0 Likes
on
0 Posts

is the boxed section for extra capacity then? at first i thought you were just doing it for looks or something ..?
also, you said **** instead of slit.. lol
also, you said **** instead of slit.. lol