
1970 Bug Mid Engine (engine build pg15)
 10-20-2014, 07:32 PM
#221
TECH Addict
iTrader: (5)
Join Date: Oct 2004
Location: NE Texas
Posts: 2,119
Likes: 0
Received 0 Likes
on
0 Posts

Great, now you have me thinking...
That doesn't look too bad at all. Two things I don't like about it though. 1 - No way of locking it. Not worried about people stealing my gas but more of some retard putting something down the filler. 2 - not 100% smooth and flush. I like the look of a normal smooth gas lid (flip open and fill) and the fact that it has to be opened from a pull style latch from inside the car.
Now if I put those two things together, we might have a deal. Normal style gas lid with that filler neck under it!

Look forward to more updates.
 10-21-2014, 01:52 PM
#222

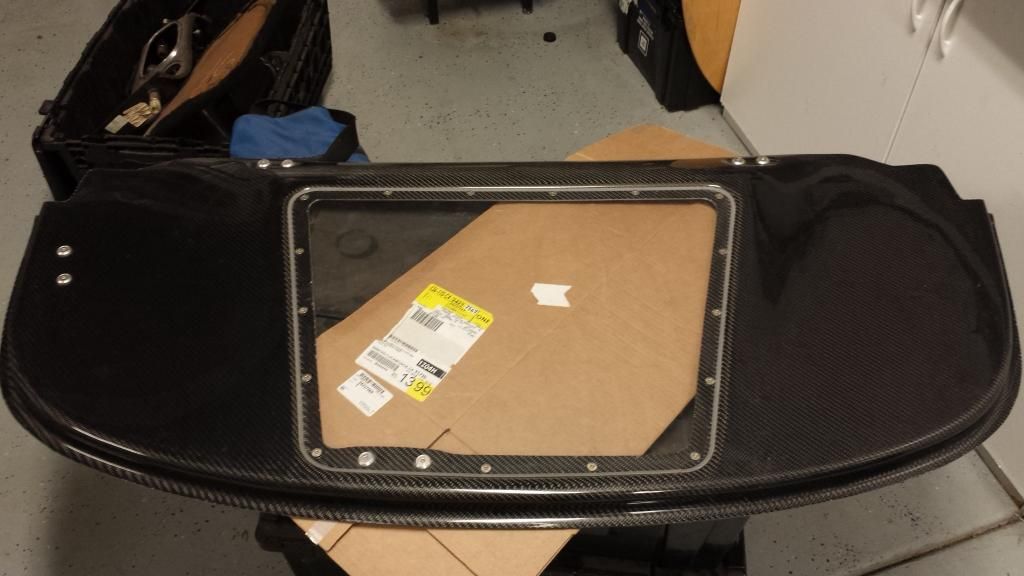
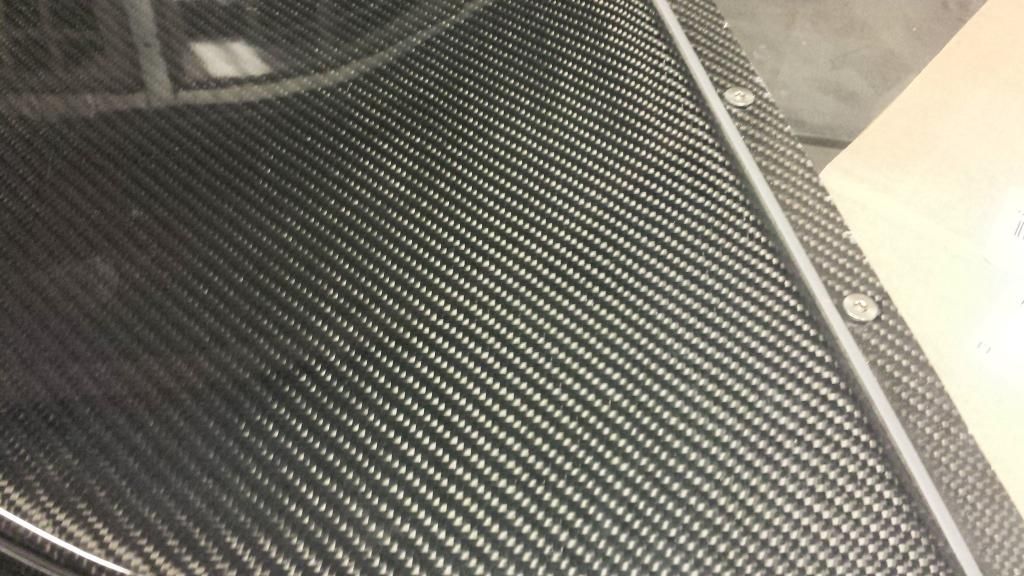
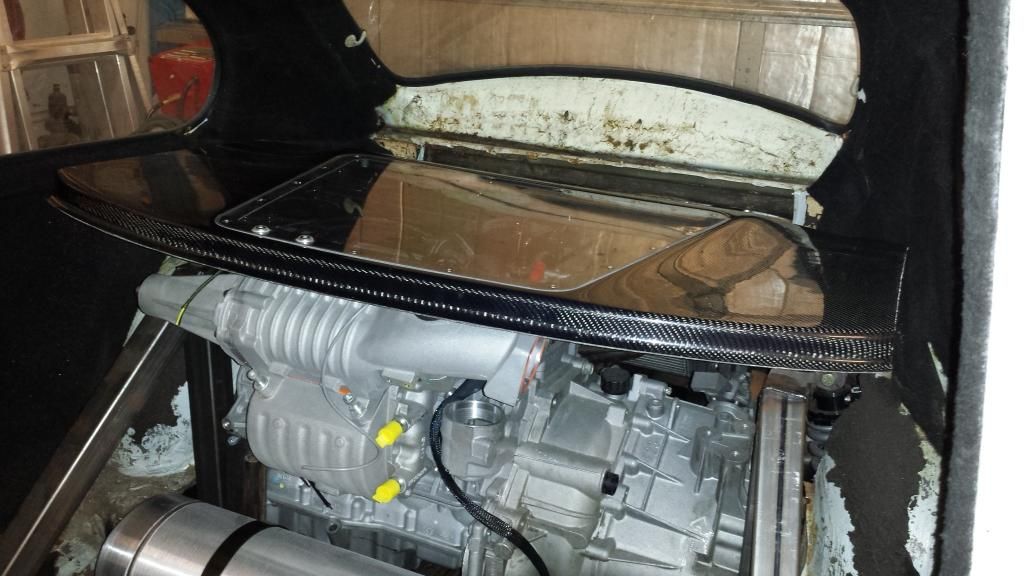
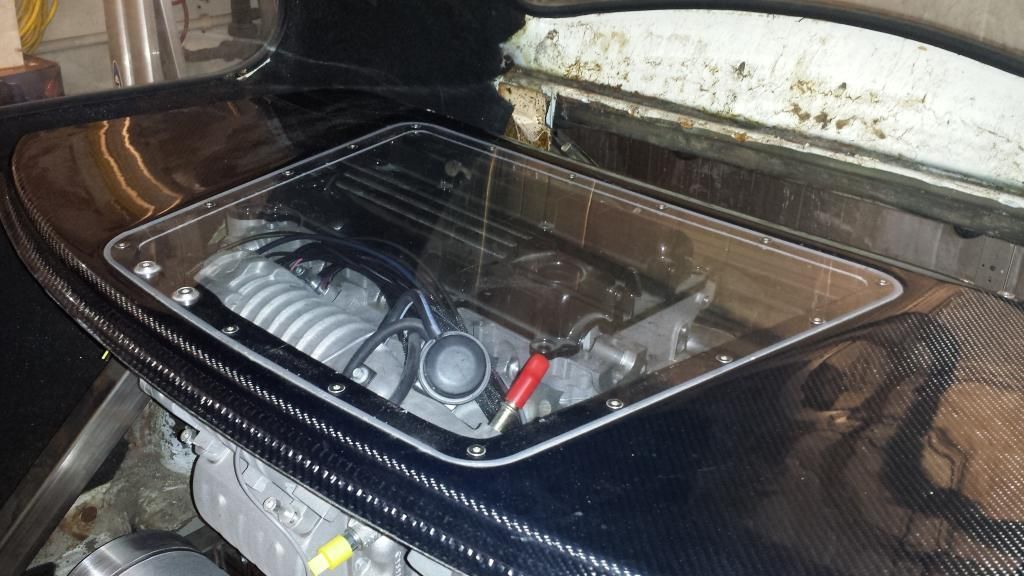
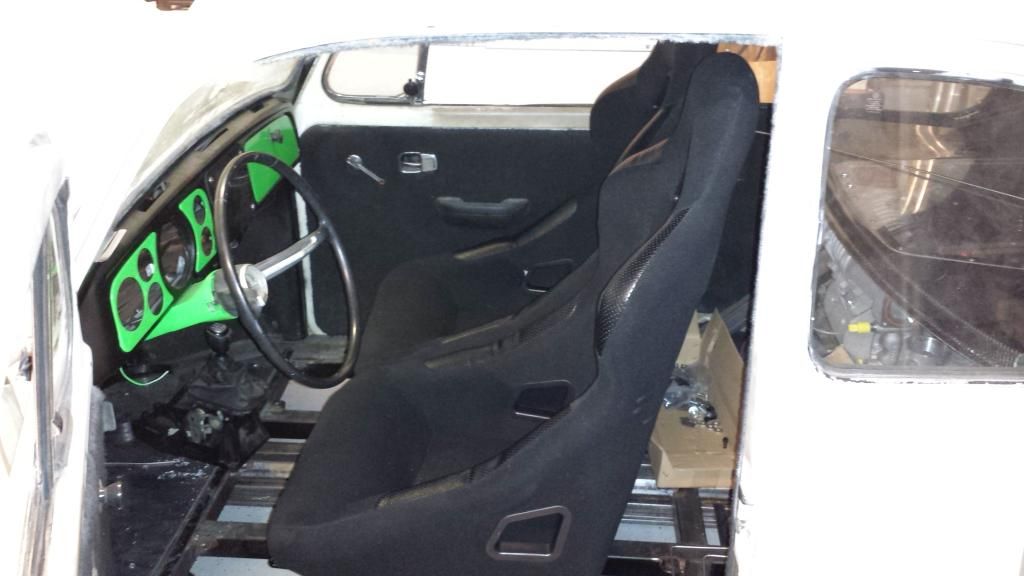
It looks like I left my SD card at home today... I had some pictures to add too! Looks like it will be later tonight. I had this carbon fiber engine cover from a NSX laying around that I modified. Now it is going to be a Bug engine cover! Seats are going to be here today too! I am trying to get this thing done before I find a house and it might actually happen.
 10-22-2014, 03:12 AM
#224

Looking great!!!!!
10-22-2014, 10:02 AM
#225
Teching In
Join Date: Aug 2013
Posts: 36
Likes: 0
Received 0 Likes
on
0 Posts
Wow...this bug is looking better and better each post! That carbon fiber is sic looking!!! Has the hint of the Ferrari look...but instead of looking at a 700hp V-12...we have the kick butt Ecotec, SUPERCHARGED...lol!!!
Hey seriously though, looks great!! Can't wait till you get it on the road...this little bug is going to haul the mail!!
Keep up the great work...thanks for the pictures!
Russel
Hey seriously though, looks great!! Can't wait till you get it on the road...this little bug is going to haul the mail!!
Keep up the great work...thanks for the pictures!
Russel
10-23-2014, 01:44 PM
#226
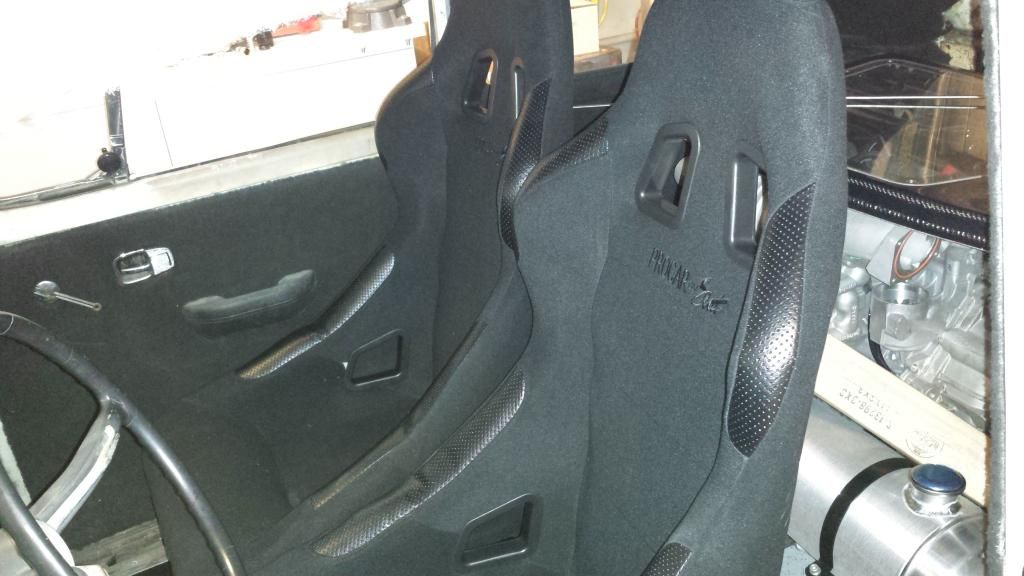
Thanks for the good words guys! It is finally starting to look like a complete car now. The seats really helped make it feel "complete". Now its time to finish boxing off the engine compartment. Not looking forward to doing that... Everything is curved or angled and not going to be easy to make a seamless finish. I see a lot of cardboard cutouts in my future. More pictures will come this weekend when I get to work on it again.
10-23-2014, 05:07 PM
#228
TECH Resident

Can you bend round bar as a skeleton for the complex curves and then fill in the wedges?
I might also buy a flanging tool to make an overlap between adjacent panels and use Dzus fasteners so some of the engine bay is removable.
I'm sure you'll do a great job!
I might also buy a flanging tool to make an overlap between adjacent panels and use Dzus fasteners so some of the engine bay is removable.
I'm sure you'll do a great job!
10-24-2014, 04:20 PM
#229
Fiberglass.....It is a love hate relationship with me. I love the way you can mold it but hate the process of doing it. Although it seems like it might be the way to go. We will see.
Not sure if I want to do the Dzus route. I love the design of them but the sheet metal I would have to use would be super thin and most like going to rattle. As many cars I have been in with those panels, they all rattle. I want this thing to be nice and quiet inside!
Not sure if I want to do the Dzus route. I love the design of them but the sheet metal I would have to use would be super thin and most like going to rattle. As many cars I have been in with those panels, they all rattle. I want this thing to be nice and quiet inside!
10-25-2014, 07:46 PM
#230
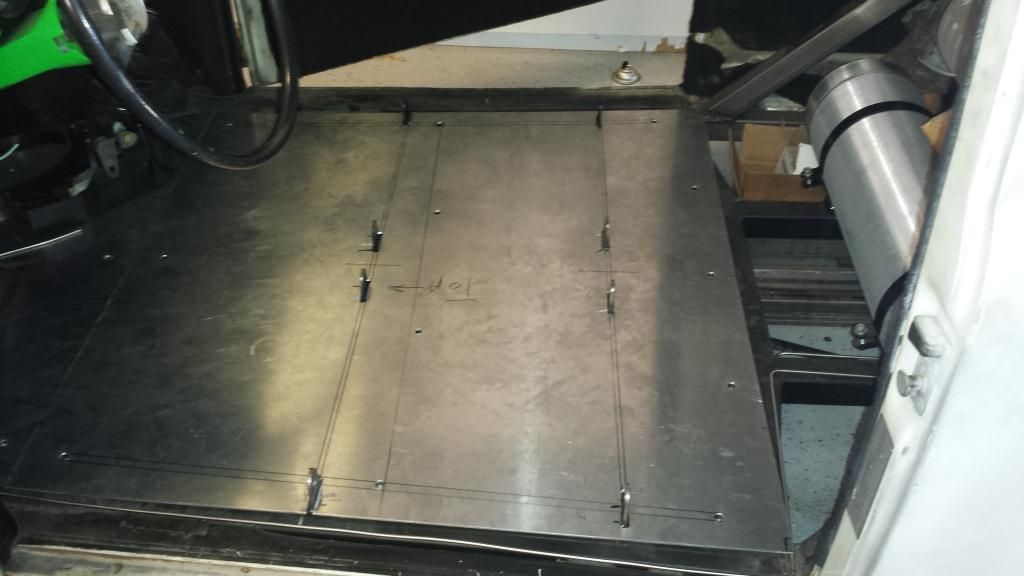
Well the floor board is back in. I had to cut notches for the seat mounts. That was not fun. I swear I had to measure 20 times to make sure the notches were close. I guess it paid off. What you can't see is the hour welding I did under the floor. More bracing and all the mounts are fully welded!
10-26-2014, 04:49 PM
#231
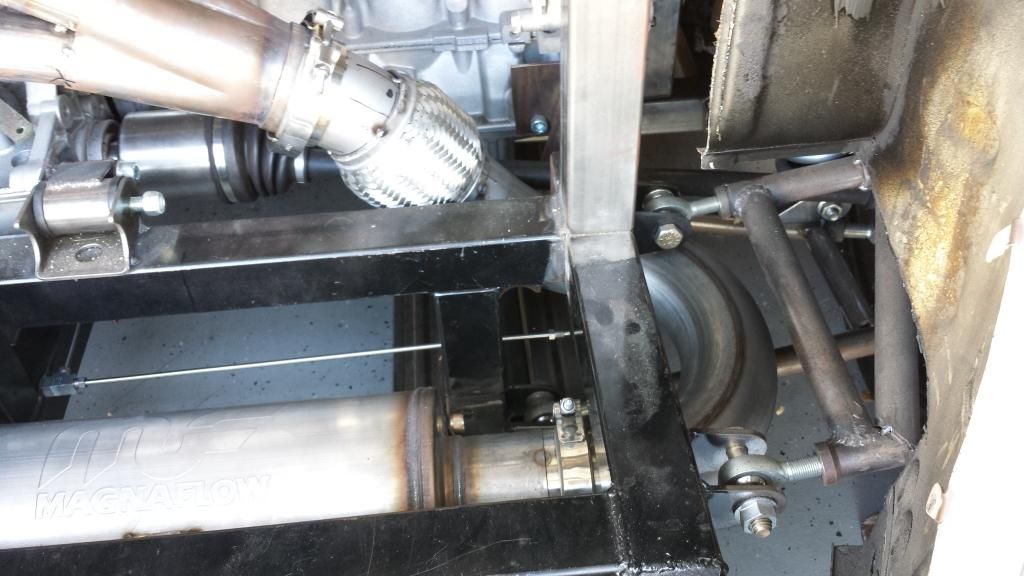
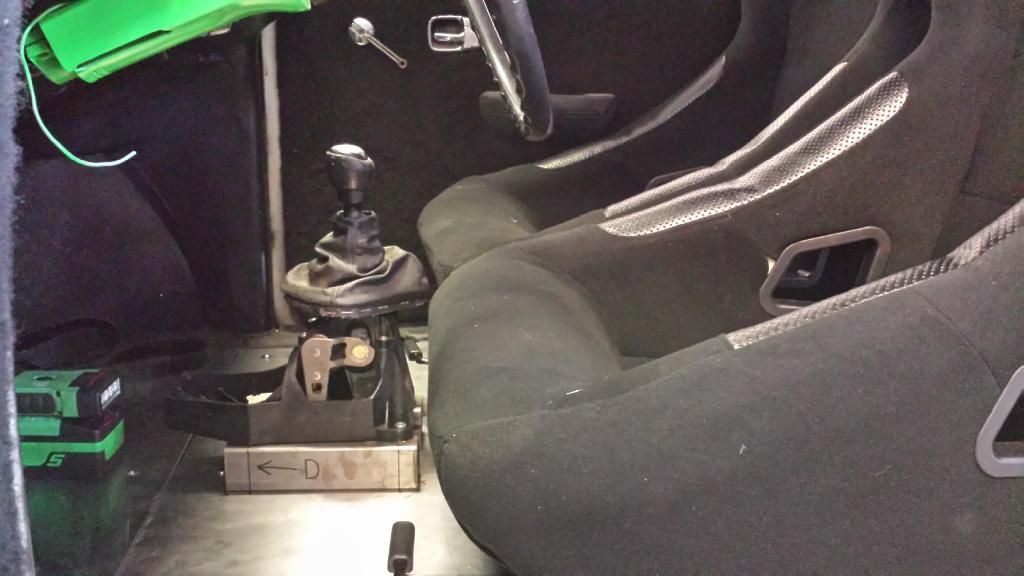
Today I decided to redo this portion of the exhaust. It looked like a hack job before. I also added in a flex coupler which will be well needed. Next is going to be mounting the shifter. I will post pictures later tonight of that mounted in.
 10-28-2014, 11:04 AM
#236
BTW, source your cables from Control Cables Inc. (CableCraft) in Santa Fe Springs. Great outfit to work with, and you can spec what you need by phone and a credit card and you're done.
Andys
10-28-2014, 11:37 AM
#237
Teching In

Join Date: Jul 2014
Posts: 4
Likes: 0
Received 0 Likes
on
0 Posts
The other option is to flip the shifter backwards, and re-learn the pattern.
You may be able to swap the bracketry at the transmission to get a front entry which could end up with things being "normal" even after the backwards shifter base.
That's what I'm probably going to end up doing with my build.
You may be able to swap the bracketry at the transmission to get a front entry which could end up with things being "normal" even after the backwards shifter base.
That's what I'm probably going to end up doing with my build.
10-28-2014, 02:52 PM
#238
Andy1
I was checking some of the cables I have here and even doing a complete circle in a 1ft diameter, they are easy to move. I don't think I should have any problems with that. I am not sure how a different brand shifter will work. As you know, each throw needs to go in a certain direction. I just don't know if a MR2 would be pushing the cables right. I will need to do some research on that. We deal with Control Cables all the time. They are great people.
300D50
I thought about flipping the shifter and mounting the cables backwards. I will have to go home and check again but I think I came to the conclusion of it wont work. I believe my header and exhaust are in the way. If it isn't, I think this is the route to go.
10-28-2014, 03:44 PM
#239
Andy1
I was checking some of the cables I have here and even doing a complete circle in a 1ft diameter, they are easy to move. I don't think I should have any problems with that. I am not sure how a different brand shifter will work. As you know, each throw needs to go in a certain direction. I just don't know if a MR2 would be pushing the cables right. I will need to do some research on that. We deal with Control Cables all the time. They are great people.
.
You're doing a great job. Keep it up!
Andy1
10-28-2014, 07:28 PM
#240
The reason the MR2 shifter would (probably) work is that the gear selector cable attaches above the fulcrum as opposed to below it (as on your Cobalt), thus reversing the throw in the proper direction you'll need. The gate lever on the MR2 is flipped also, and would reverse the throw as well. Google image "MR2 shifter" and you'll seem what I mean. I didn't end up using the MR2 shifter because I have a six speed transaxle in my 914/LS1.
You're doing a great job. Keep it up!
Andy1
You're doing a great job. Keep it up!
Andy1
What trans did you go with on your swap? Was it the Porsche G50? Later on down the road, I wouldn't mind a 6 speed that can handle more power. I would also be able to mount the engine a few inches lower due to the fact that it sits inline, not sideways like mine. I originally designed my chassis for an inline setup anyways. Stupid transaxles are just so expensive...