
1970 Bug Mid Engine (engine build pg15)

 12-12-2014, 02:20 PM
#263

I have not weighed it yet. There is a scale a block away from here that I will use when the car is done. I think the car is sitting at about 1400 LBS right now. I am basing that on my spring rates vs. how far they go down. But that is with no engine internals, no fluids and a few things missing. So I figure it has another 300 or so LBS to go. I am honestly shooting for 1700-1800 LBS done without me in it. We will see!
12-12-2014, 02:28 PM
#264
Lots of insulation! I know the carbon hatch is not going to help keep the heat out but I will deal with it. I do have a nice vent behind the engine to help get all the hot air out and a scoop in front of it to suck in fresh air. At least I shouldn't need to add a heater!
12-18-2014, 01:53 AM
#265
I haven't been working on the Bug that much lately. Christmas has put a hold on my progress. But I have got a small amount done!

My girlfriend has other ideas for me other then working on the Bug...Thank you!
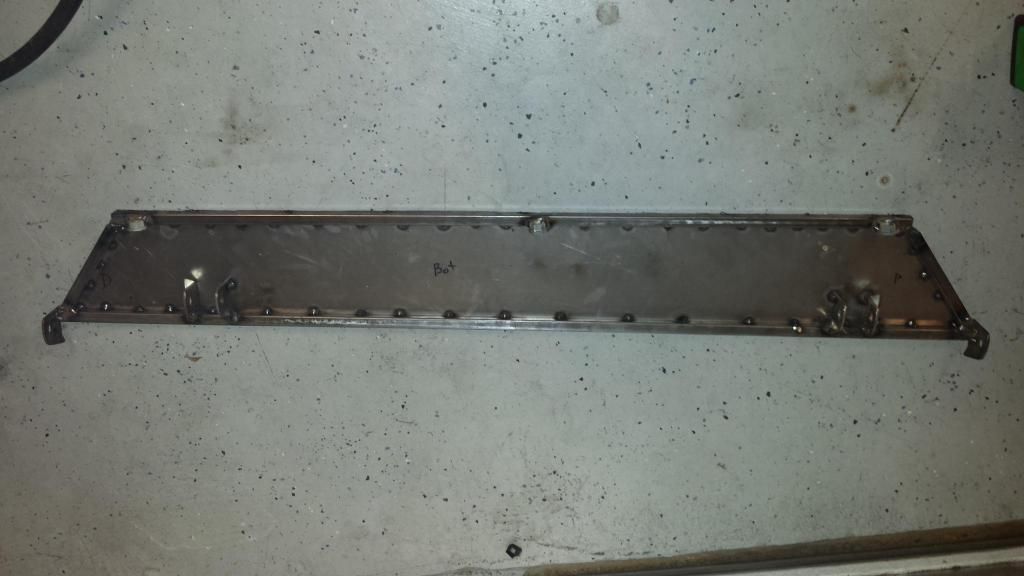
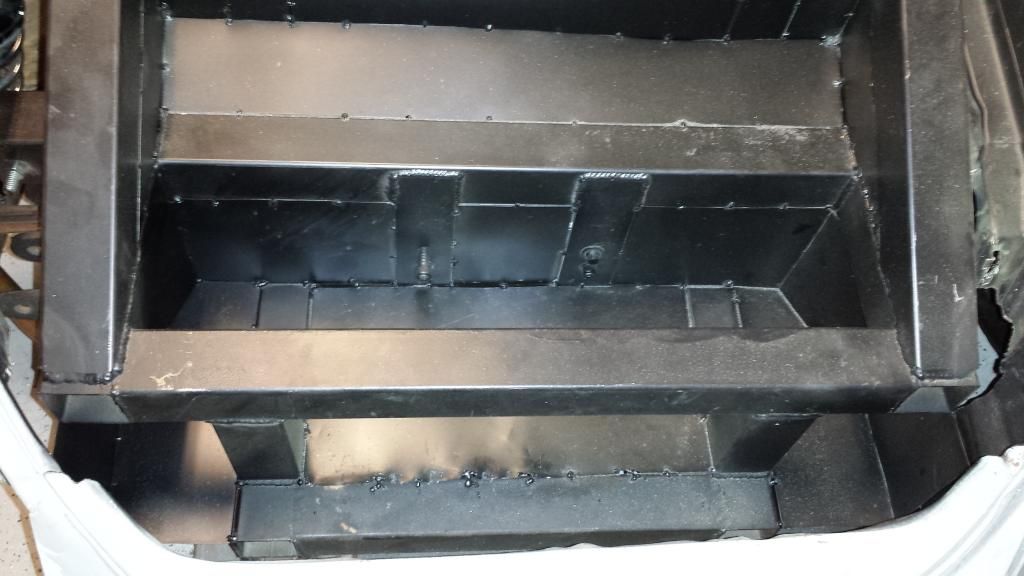
The last removable panel has been made
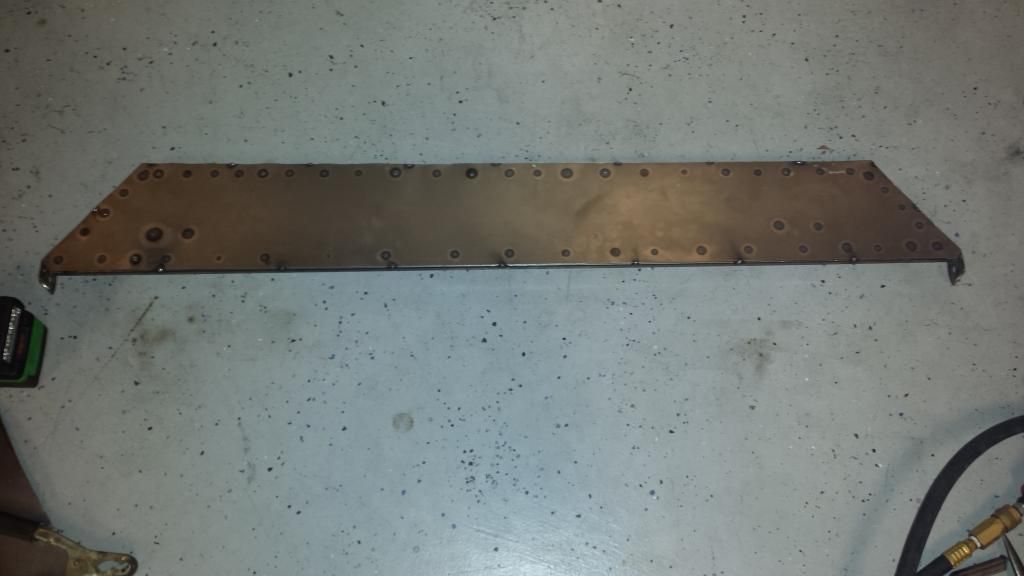
The top side
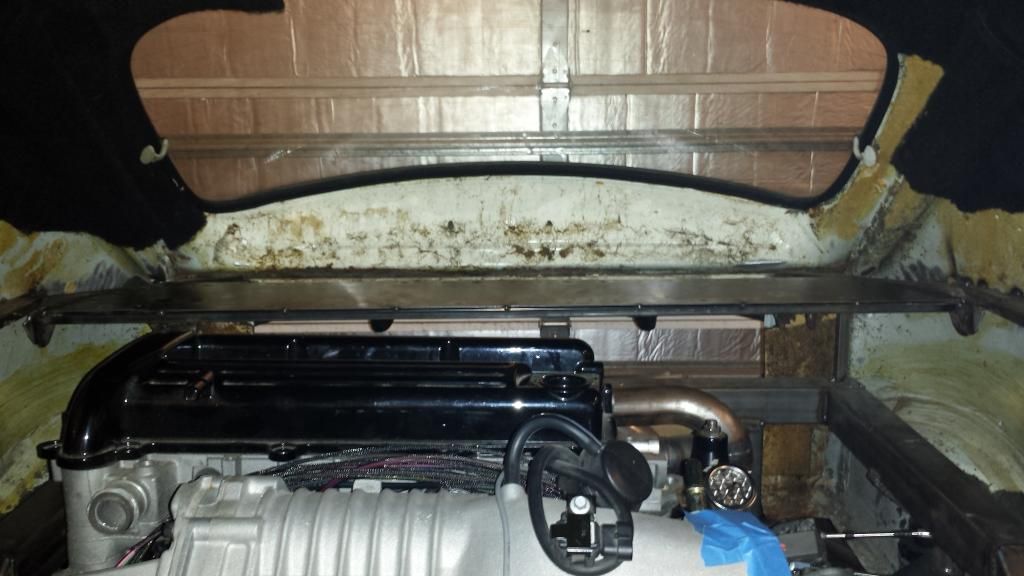
Installed
My girlfriend has other ideas for me other then working on the Bug...Thank you!
The last removable panel has been made
The top side
Installed

 12-23-2014, 07:11 PM
#268
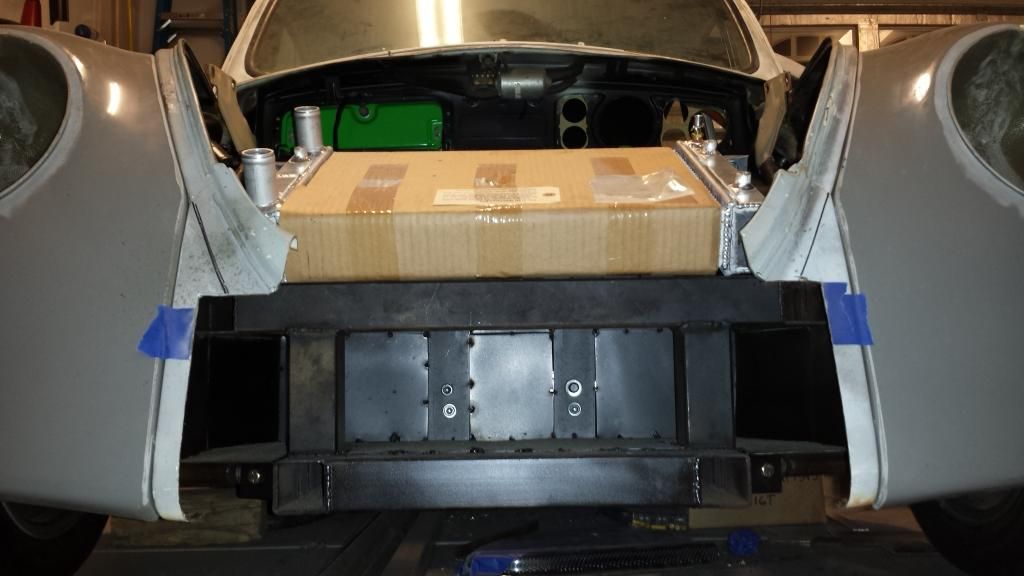
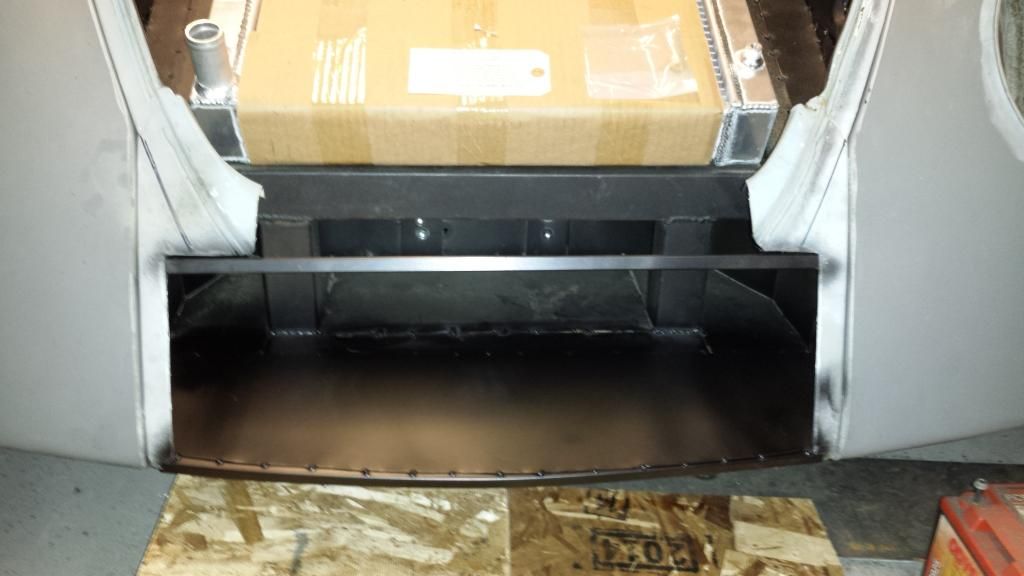
I decided to take a break from working on the inside of the car. I need to start the roll cage before I get any further on the inside. So I moved on to the front of the car.
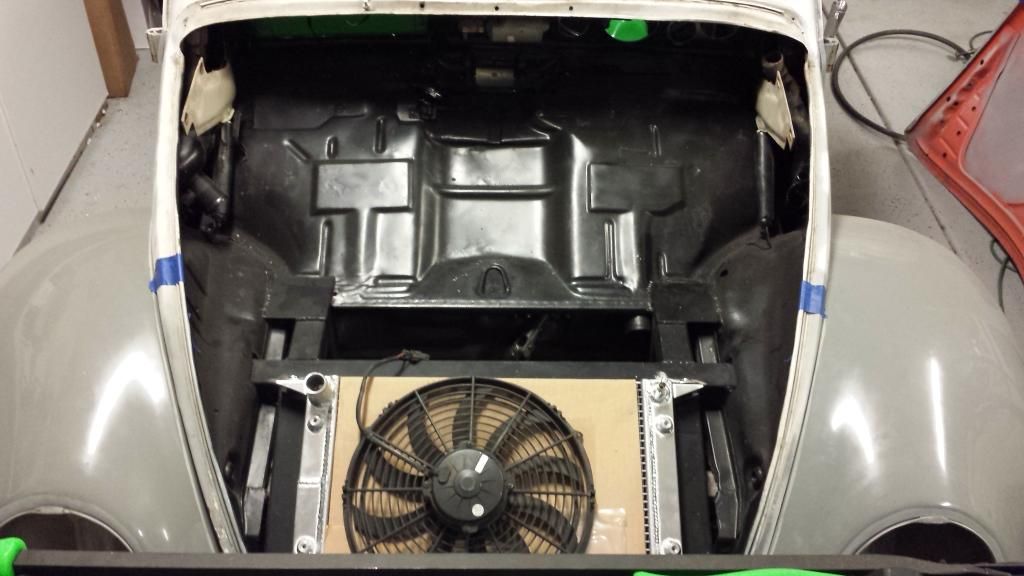
First time the hood has been off since I got the car!
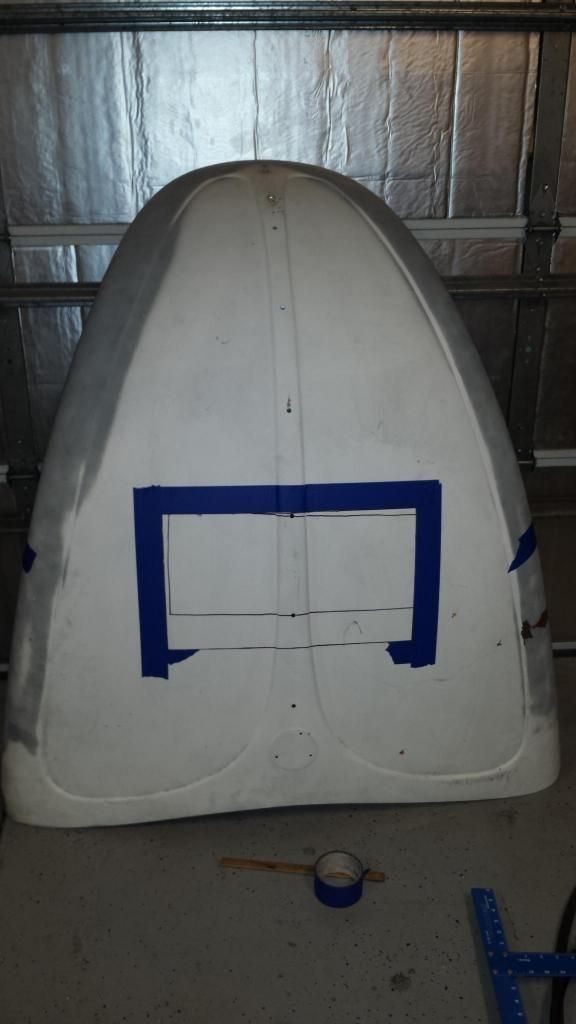
Making sure I get a nice square and centered cut
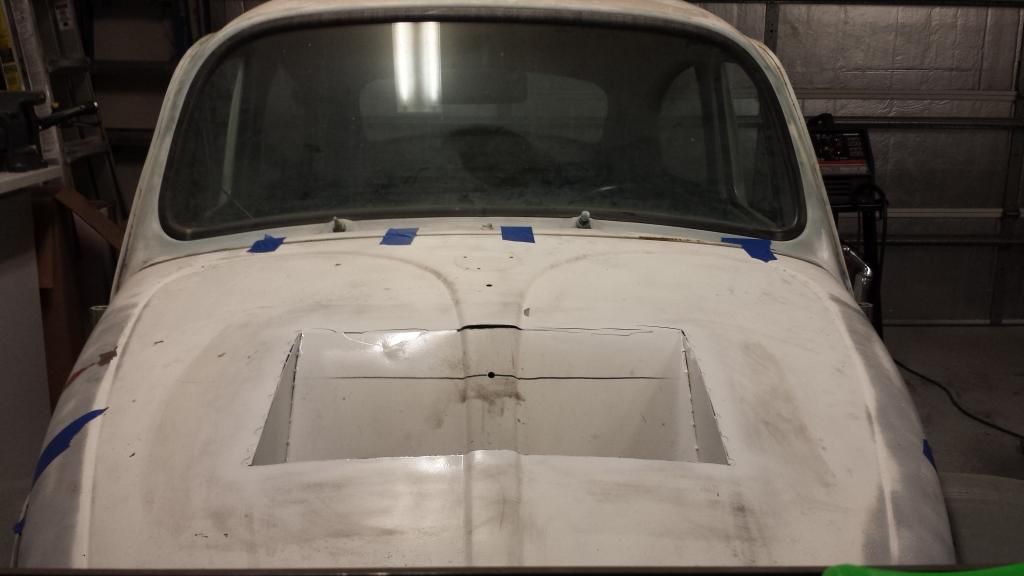
Cut out and back on!
Side view

Should be able to take all the heat away from the radiator. Soon to me a mesh screen going across it.
First time the hood has been off since I got the car!
Making sure I get a nice square and centered cut
Cut out and back on!
Side view
Should be able to take all the heat away from the radiator. Soon to me a mesh screen going across it.
12-24-2014, 09:03 AM
#269

Everyone is doing the"hood" heat vents since Chevy/GM started doing it. Do you have a guesstamate on how long before you get to start it yet?
12-24-2014, 12:03 PM
#270
I am hoping another 2 months or so before I can drive it. I am going to have a lot of time to work on it this week so I should get a lot done (if I don't get lazy).
List of what is left
- Axles
- Plumbing the fuel system (still need a fuel pump)
- Plumbing the cooling system
- Roll cage
- Clutch
- Wiring
- Mount rotors and calipers
- Gauges
- Finish boxing off a few areas
- A lot of welding...
12-29-2014, 03:57 PM
#272
Hope everyone had a good Christmas! I would have posted sooner but my puppy decided to eat my SD card reader. So here it is.
I got a lot boxing stuff in done. Mostly just on the front end.


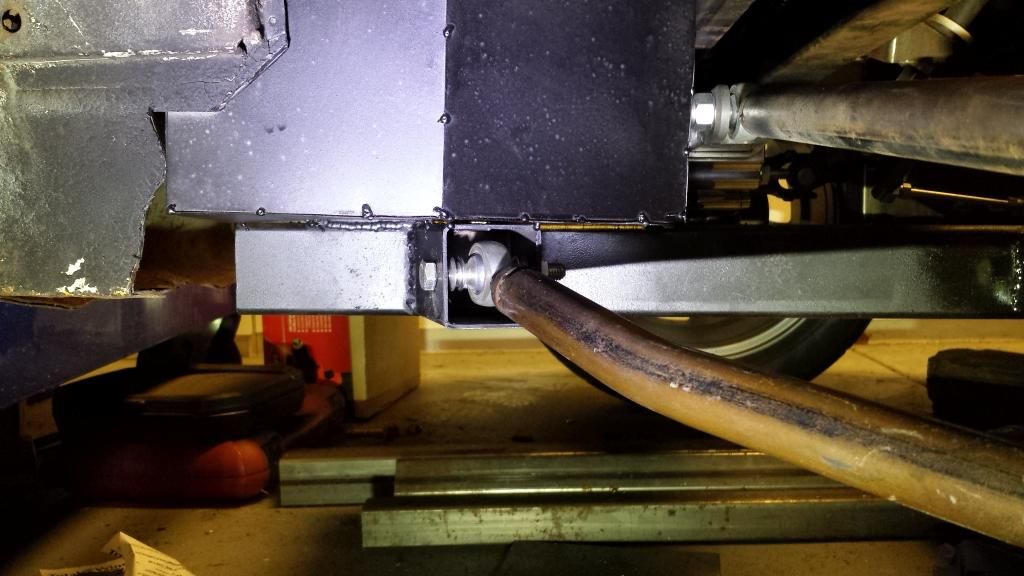
New front bottom arm mount. It is a much needed design change.
I got a lot boxing stuff in done. Mostly just on the front end.
New front bottom arm mount. It is a much needed design change.
01-09-2015, 12:57 PM
#273

WOW. impressive project. I always wanted to stuff a K20 or high revving honda motor into the back of an old 911 but the prices for older 911 rollers have gone insane.
sub'd for results!
sub'd for results!
01-09-2015, 05:16 PM
#274
Due to the holidays and weather, not much has got done. It has finally warmed back up and isn't 40� in the garage. So let the work begin again!
Still working on the front of the car for the mean time....
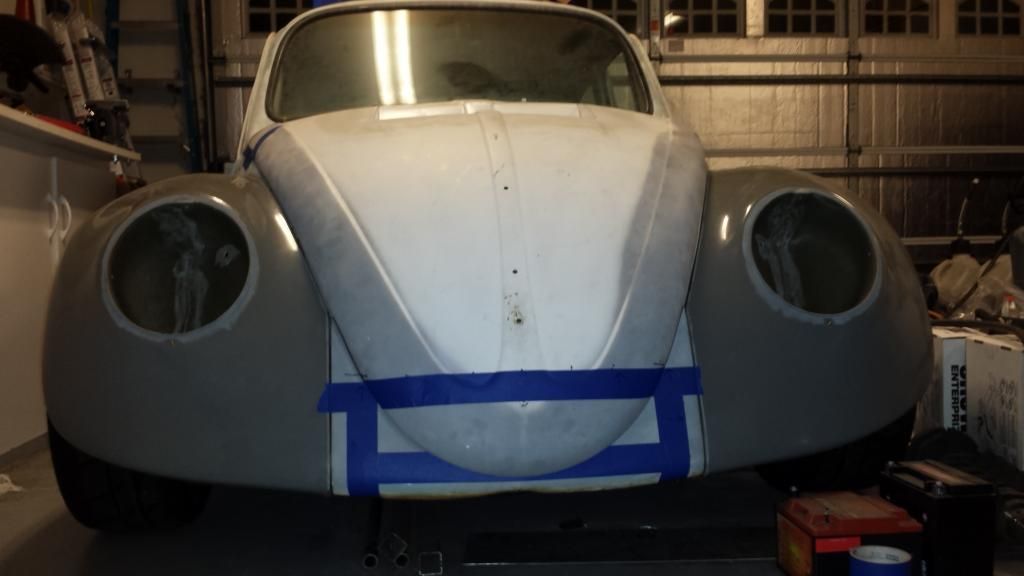
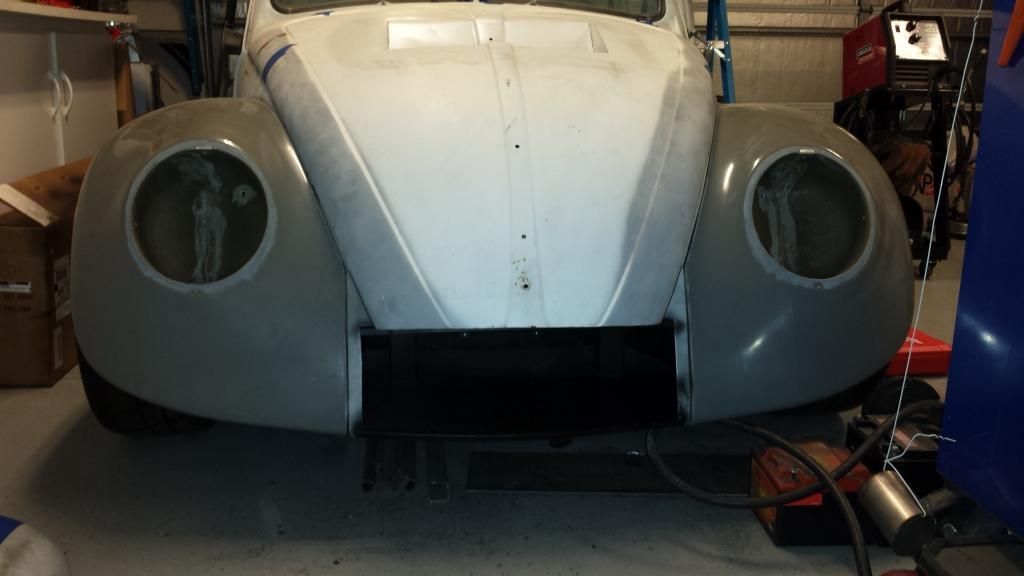
This is the part I did not want to do but since I had no choice to put the radiator up front, let the cutting begin!
Off with the nose!
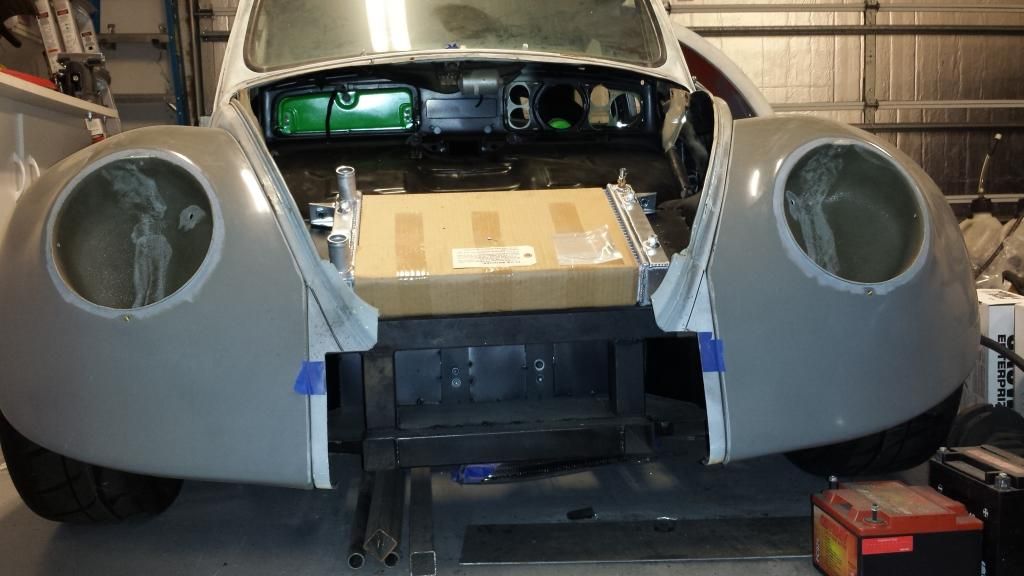
Should be plenty of air getting fed in
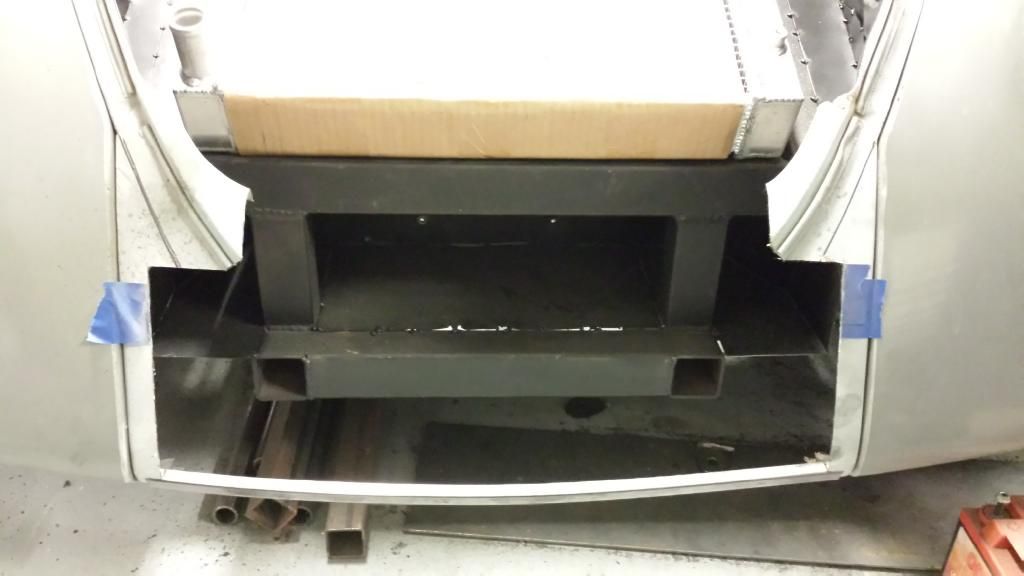
This is about as far as I got. Bent a little tube to match the front body lines and put it in. There is going to be a small cage made to support the front of the body. After that, I will finish boxing in the rest of the front and add a mesh grille.
Still working on the front of the car for the mean time....
This is the part I did not want to do but since I had no choice to put the radiator up front, let the cutting begin!
Off with the nose!
Should be plenty of air getting fed in
This is about as far as I got. Bent a little tube to match the front body lines and put it in. There is going to be a small cage made to support the front of the body. After that, I will finish boxing in the rest of the front and add a mesh grille.

 01-11-2015, 02:42 PM
#276
looking great. Keep it coming !!!
01-14-2015, 01:43 PM
#277
Thanks Jimbo!
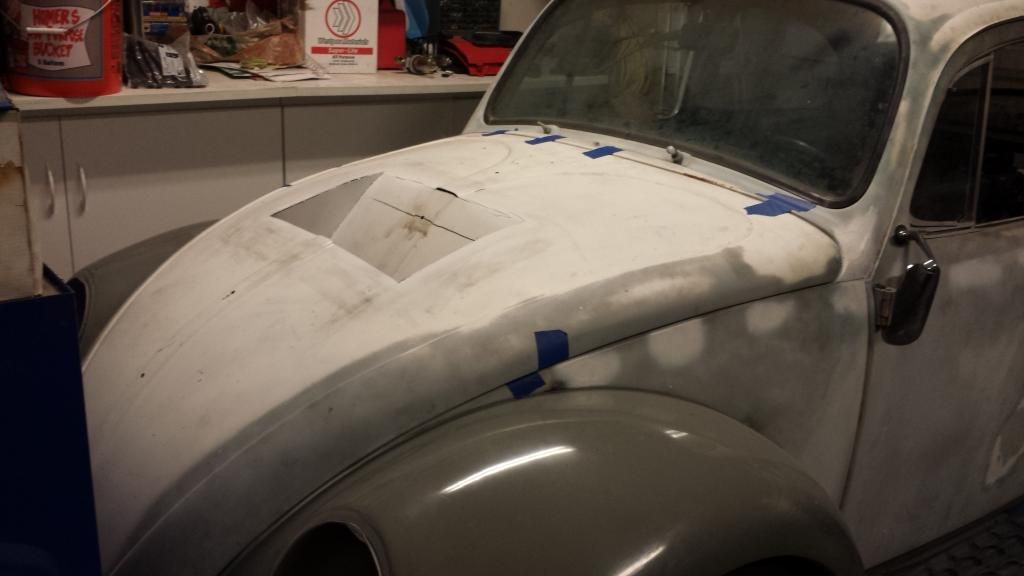
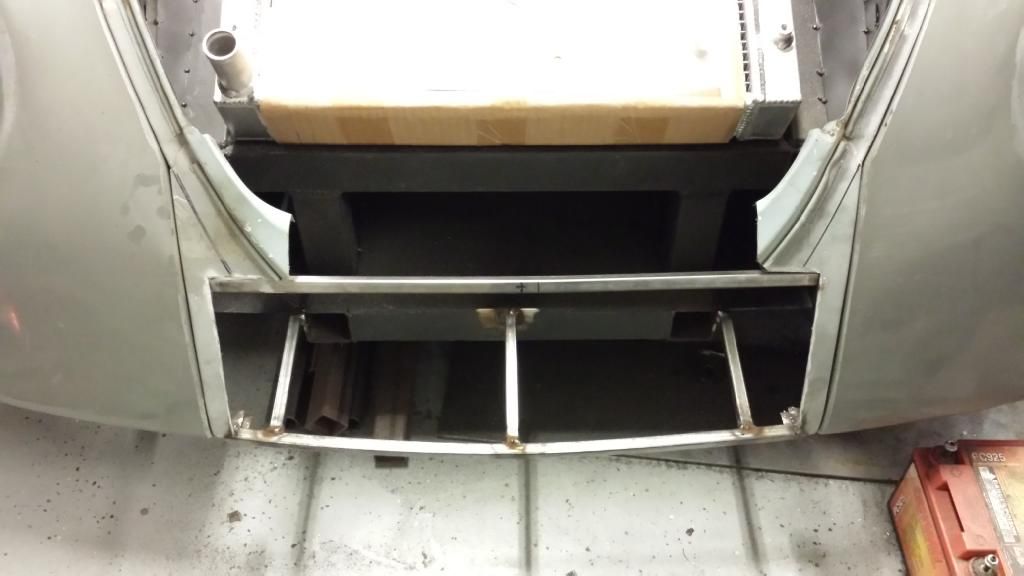
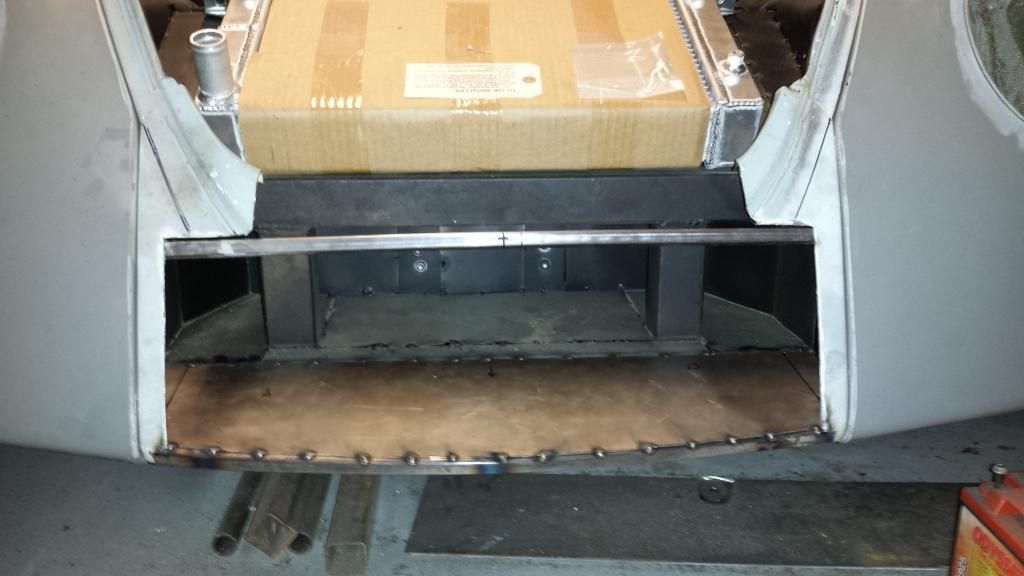
More progress. I cut the hood to match the front opening. I should be getting my grille in today as well. I ran out of sheet metal so I can't finish boxing off the front. I only have one piece left too! I need to get some metal for the cage anyways, so yet another trip to the metal yard... I hate that place.
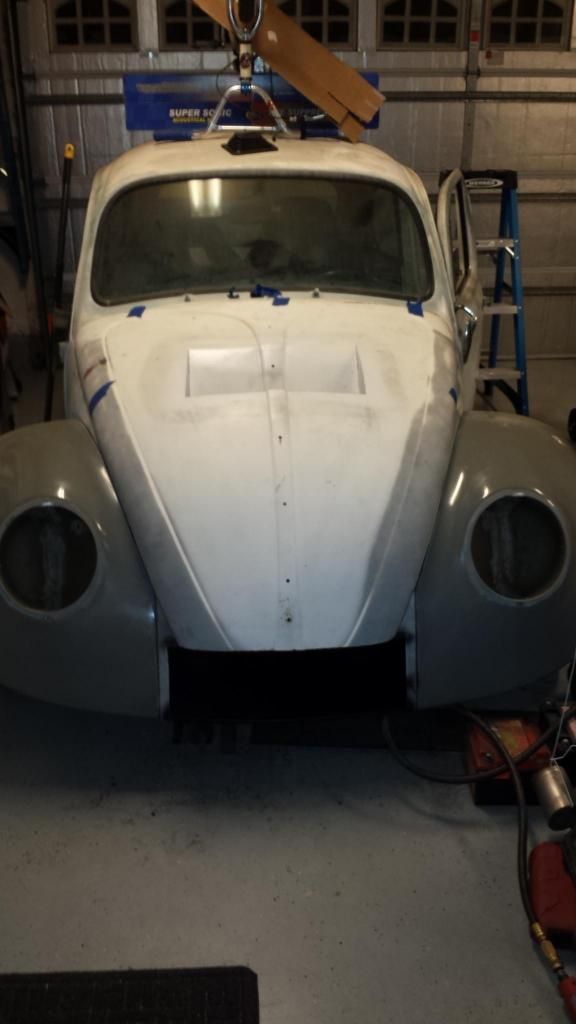
Everything lines up good. I am happy the way it turned out. I think it will look a lot better once the grille is in.
More progress. I cut the hood to match the front opening. I should be getting my grille in today as well. I ran out of sheet metal so I can't finish boxing off the front. I only have one piece left too! I need to get some metal for the cage anyways, so yet another trip to the metal yard... I hate that place.
Everything lines up good. I am happy the way it turned out. I think it will look a lot better once the grille is in.
 01-20-2015, 04:41 PM
#279
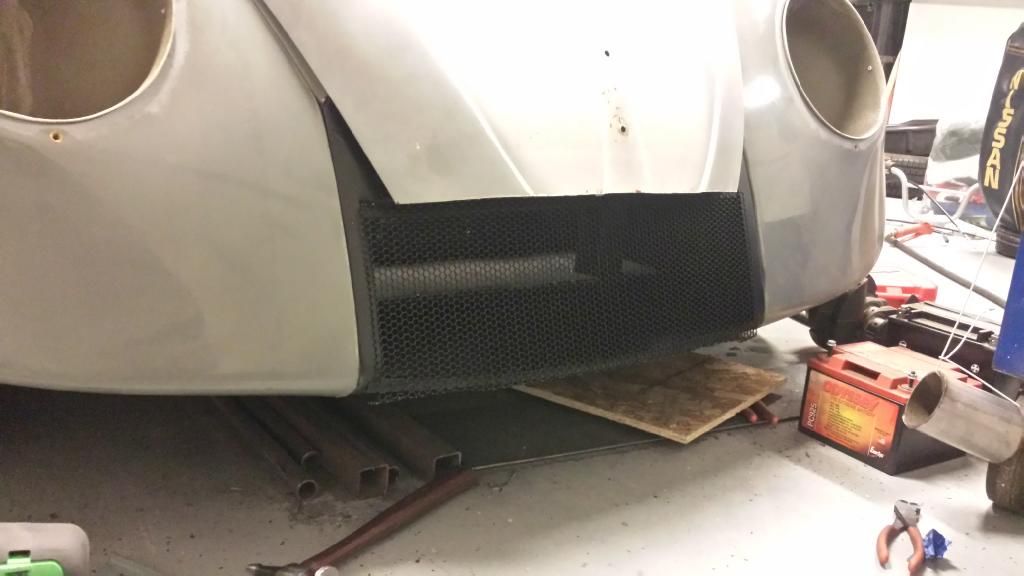
Sill slowly poking along with this thing...
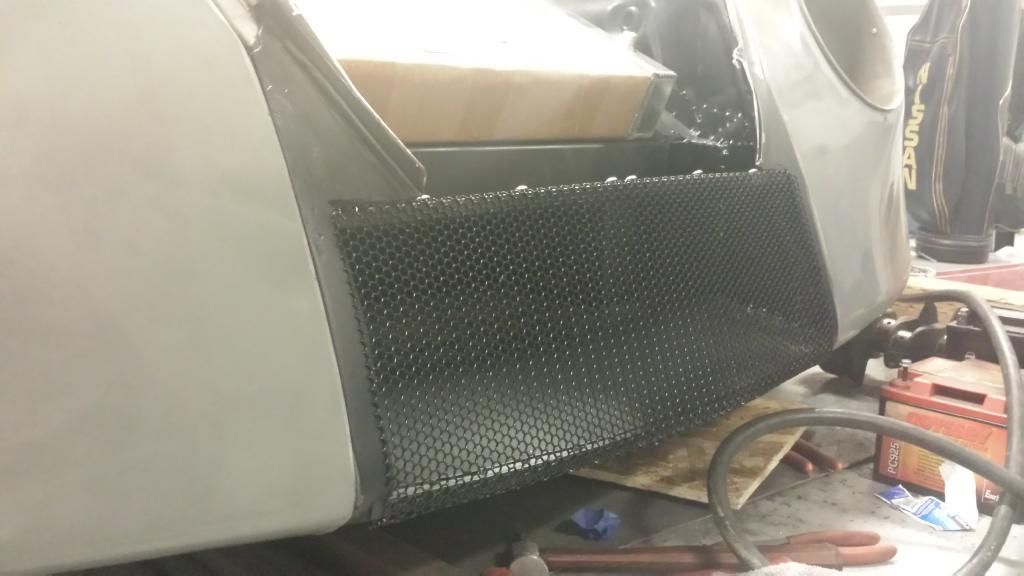
Grille is in and mounted

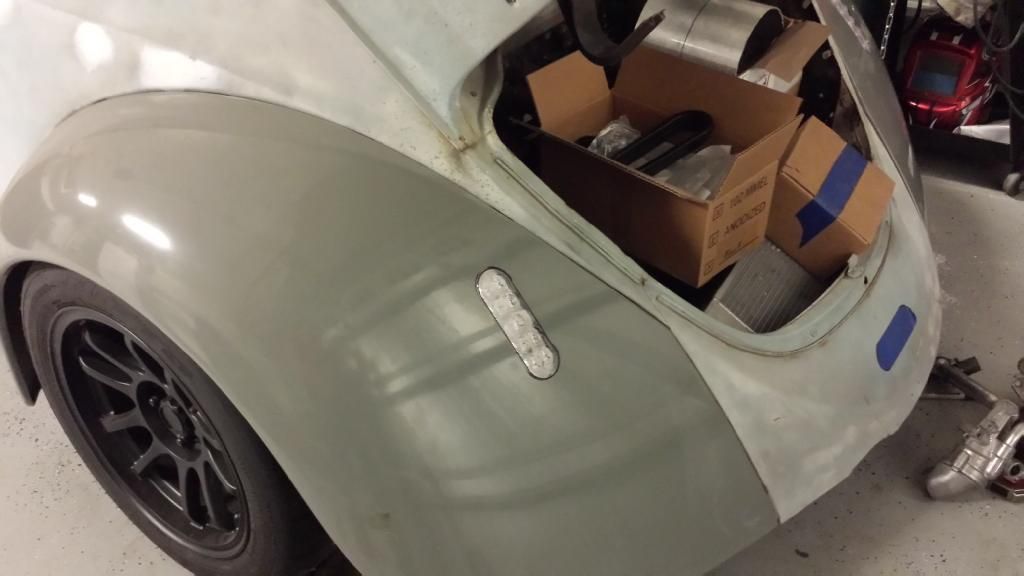
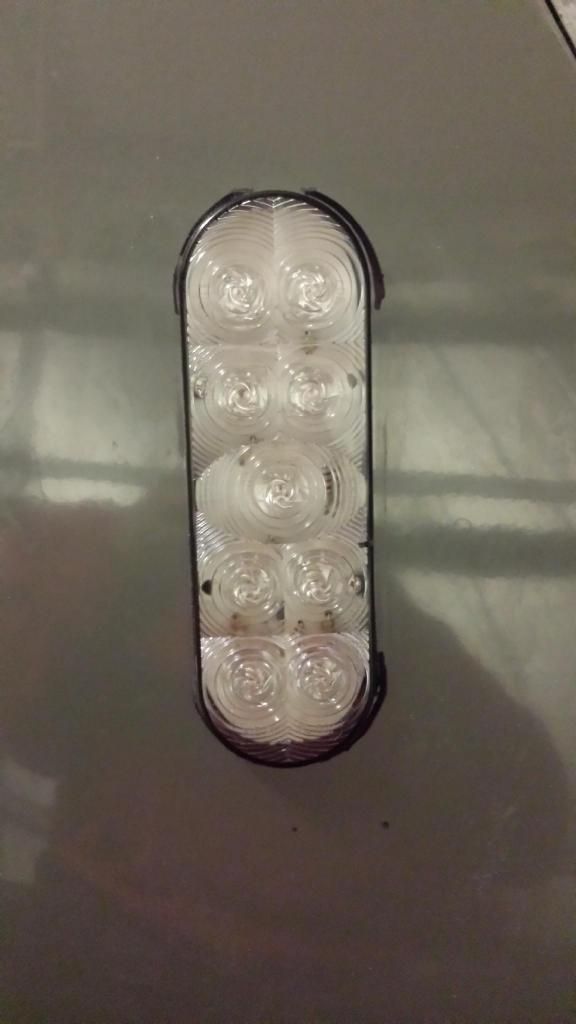
Tail lights are in
This was by far the scariest thing I have done to the car. You only get one shot with fiberglass and it could be an expensive one! Thank you hole saw and cutoff wheel! It could't have turned out any better.
Grille is in and mounted
Tail lights are in
This was by far the scariest thing I have done to the car. You only get one shot with fiberglass and it could be an expensive one! Thank you hole saw and cutoff wheel! It could't have turned out any better.
01-20-2015, 05:43 PM
#280
TECH Resident

I wonder if you could fill in the front trunk lid nose with more of the mesh material, but so as to restore the shape of the lid?
IE build a replacement u-shaped frame and then fill in the lopped off portion with mesh?
Doug
IE build a replacement u-shaped frame and then fill in the lopped off portion with mesh?
Doug