
lq4 accessory's with ls6 intake
 09-08-2014, 06:40 PM
#1
Teching In
Thread Starter
iTrader: (2)

Join Date: Aug 2013
Posts: 37
Likes: 0
Received 0 Likes
on
0 Posts
I'm sure this has been handled before but I can't find a easy and cheap solution . I have a 04 lq4 dbw with truck intake in my 71 nova using dirty dingo's alt only bracket that sticks out in right field. I just purchased a ls6 intake . I read somewhere that there is a truck water pump that you can change to front in order to clear dbw throttle body.
what do you think is the easiest solution and least expensive ?
what do you think is the easiest solution and least expensive ?


 09-11-2014, 11:55 AM
#5
09-11-2014, 05:27 PM
#6

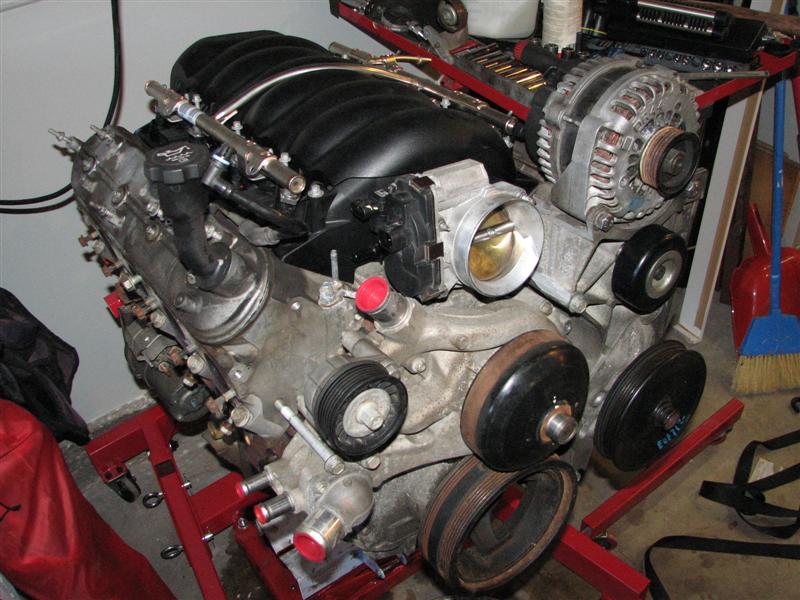
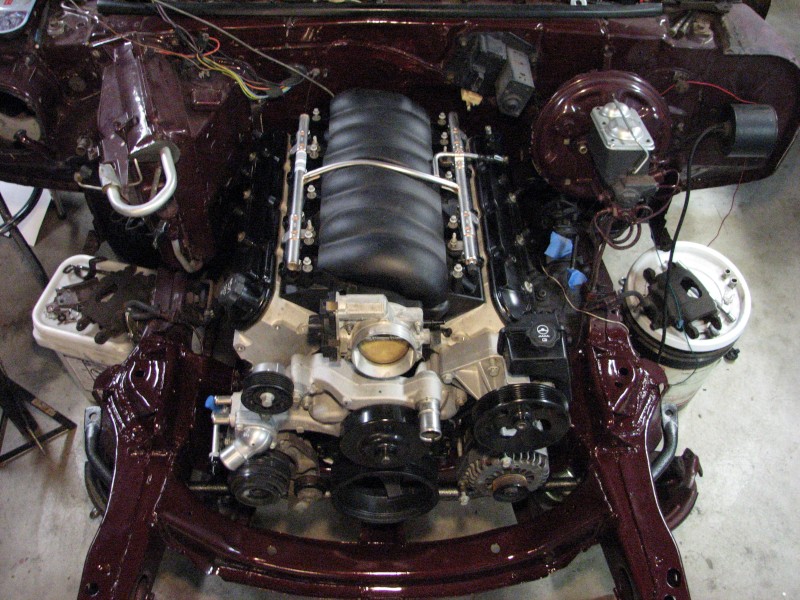
I'm not a big fan of the tall truck intake, so I dug around and found a take-off LS3 intake from a 2010 Camaro for $215 shipped. I started this thread to collect more info on what's involved in swapping from a truck intake to a car intake on this engine.

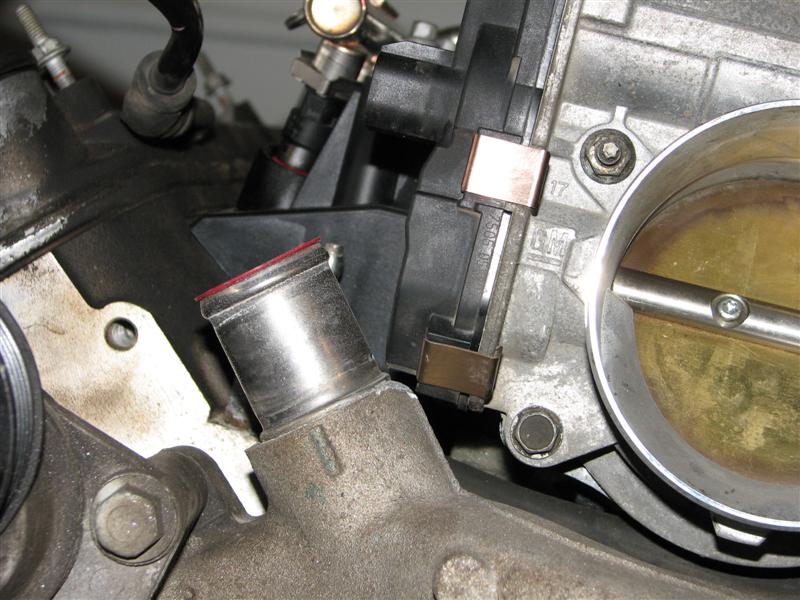
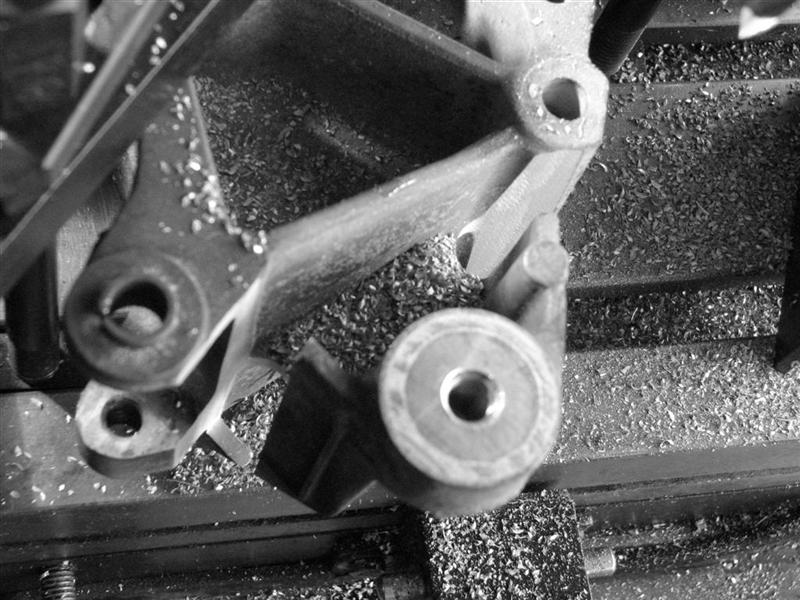
Because the car intake places the throttle body much lower, there are a few places where things interfere with the truck accessories. First is the waterpump outlet, which can interfere with the motor drive assembly on the electric throttle body as shown here. This is before snuggin the intake down.

I used a Dremel and a small cutoff wheel to remove the offending aluminum. I like cutoff wheels for trimming aluminum like this because they don't clog up dangerously the way grinding wheels do. Here it is trimmed:
The next order of business will be relocating the idler pulley which is now in the same area as the throttle body. I started by taking the pulley of it's bolt as shown:


Then I used washers for mockup to temporarily locate the idler on one of the mounting bolts for the accessory bracket. I have a new machined spacer and bolt on order that will permanently attach this for under $8. I will post the part numbers after I verify fitment.

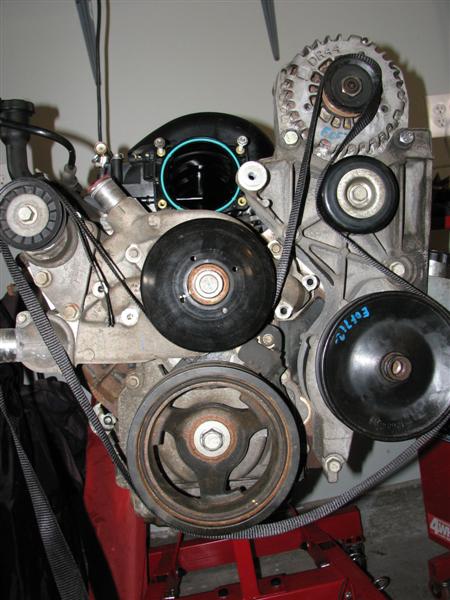
After trimming off the accessory bracket, I think I will have the following two options for belt routing. The second option is my preference since it more closely resembles the original belt routing, it provides more wrap around the pulleys, and the tensioner is acting in the direction of the belt.

Because the car intake places the throttle body much lower, there are a few places where things interfere with the truck accessories. First is the waterpump outlet, which can interfere with the motor drive assembly on the electric throttle body as shown here. This is before snuggin the intake down.
I used a Dremel and a small cutoff wheel to remove the offending aluminum. I like cutoff wheels for trimming aluminum like this because they don't clog up dangerously the way grinding wheels do. Here it is trimmed:
The next order of business will be relocating the idler pulley which is now in the same area as the throttle body. I started by taking the pulley of it's bolt as shown:
Then I used washers for mockup to temporarily locate the idler on one of the mounting bolts for the accessory bracket. I have a new machined spacer and bolt on order that will permanently attach this for under $8. I will post the part numbers after I verify fitment.
After trimming off the accessory bracket, I think I will have the following two options for belt routing. The second option is my preference since it more closely resembles the original belt routing, it provides more wrap around the pulleys, and the tensioner is acting in the direction of the belt.
Here is how I relocated the idler pulley and made the truck accessories work with the LS3 intake for under $10. Granted I do still need to buy a belt, but I'm also thinking about scrapping this altogether and making my own brackets from scratch. I don't like how high the alternator sits with this setup.
First off the parts. From Misumi USA (www.misumiusa.com), the spacer is PN KNCLM10-30-20 and cost $5.70. It is nickel plated steel, 10mm ID, 30MM OD and 20MM length. The bolt is PN CB10-160 and cost $2.40. It is M10x160mm length. Total $8.10.

Here you can see that the spacer is the appropriate height to position the idler in line with where it originally was

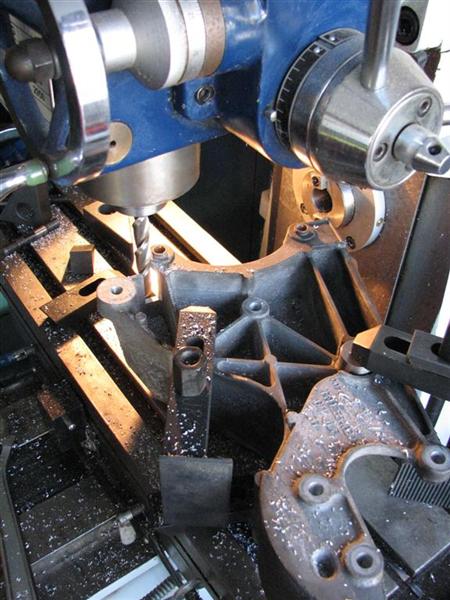
I am spoiled with a mill in my garage, so I used it to cleanly trim down the bracket. You could also do this with a vertical bandsaw or even a hacksaw.

Here is the trimmed bracket around the throttle body

And here you can see a notch I added for the vacuum port on the drivers side of the intake

Here is the ilder pulley mounted with a ratchet strap used as a mockup belt

The Misumi spacer installs here:

And this is what the finished accessory drive looks like using a ratchet strap to mockup the belt path.

Sorry about the black & white pictures. Somehow the setting got changed while I was taking pictures.
I haven't decided yet if I want to keep this setup or scrap it altogether in favor of putting the alternator on the passenger side (lower) and making my own brackets for everything.
That's all for now!
First off the parts. From Misumi USA (www.misumiusa.com), the spacer is PN KNCLM10-30-20 and cost $5.70. It is nickel plated steel, 10mm ID, 30MM OD and 20MM length. The bolt is PN CB10-160 and cost $2.40. It is M10x160mm length. Total $8.10.
Here you can see that the spacer is the appropriate height to position the idler in line with where it originally was
I am spoiled with a mill in my garage, so I used it to cleanly trim down the bracket. You could also do this with a vertical bandsaw or even a hacksaw.
Here is the trimmed bracket around the throttle body
And here you can see a notch I added for the vacuum port on the drivers side of the intake
Here is the ilder pulley mounted with a ratchet strap used as a mockup belt
The Misumi spacer installs here:
And this is what the finished accessory drive looks like using a ratchet strap to mockup the belt path.
Sorry about the black & white pictures. Somehow the setting got changed while I was taking pictures.
I haven't decided yet if I want to keep this setup or scrap it altogether in favor of putting the alternator on the passenger side (lower) and making my own brackets for everything.
That's all for now!


The following users liked this post:
Homer_Simpson (03-17-2024)

Trending Topics
09-12-2014, 07:10 AM
#9

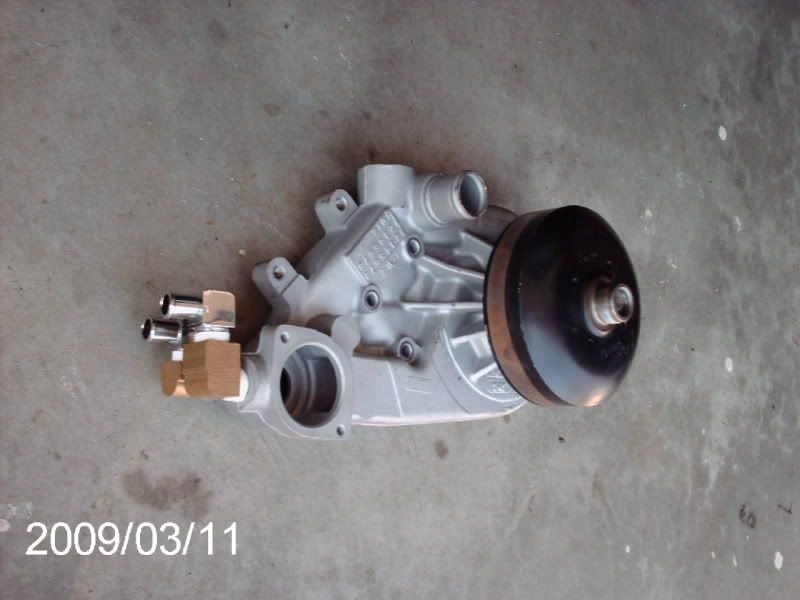
The pre 07 DBW TB will not clear the angled outlet (L92) water pump.
If your Alt accessory bracket bolts to the water pump, like my Kwik AC bracket, the 98-02 f body with spacers wont work. If that's not an issue, that will be your best bet. You'll also need the tensioner for the f body application.
I recall seeing the spacing on the 2010 Camaro pump tensioner mounts would not allow use of the kwik bracket.
I looked at moving the outlet on the truck pump, but an easier solution for me was to swap the truck pulley on to the f body pump. You do need an f body pump with removable back for this.
For parts that eventually need replacing (water pumps), you're always best to use an off the shelf part. Go with the f body/spacers or 2010 Camaro if you can. In my case, I needed the heater hose modification anyway and needed the mechanical fan provision so the pulley swap was the best solution. I did make a spare that's stashed in the garage.
