
Cam only, winter upgrades. Bitch in on a diet
 02-19-2009, 08:00 PM
#1
I started this on a local site, maybe some good info for some. And getting more into it, looking for coments good and bad on what others have done.
Changing a few things on the car, figure id post about it. Some stuff is already done, and older pics. Some still working on, some parts are still on the way. Taking the 6point mild steel wolfe rollbar out, and going with a better 4130 chromoly cage stuff. Also upgrading some suspension parts, brakes, rearend. Removing some stuff I dont use, cleaning up other systems, harness, making the car easier to work on. Making the car lighter too, getting ride of a easy to install steel bolt in rollbar, maybe the dana 60 rearend with a truetrac (truetrac with ring gear weights 56#, rearend minus brakes was just under 200#s 50 more then a 10bolt). Looking at getting a midwest 9, if I can afford it. With selling the s60 setup, and RT TA, BMR reloc trans mount. And maybe a spool. But I drive the car a lot of the street.
Pulling the passanger airbag, the Hvac stuff. But keeping the heater for the fall racing.
getting the car ready for the new stuff
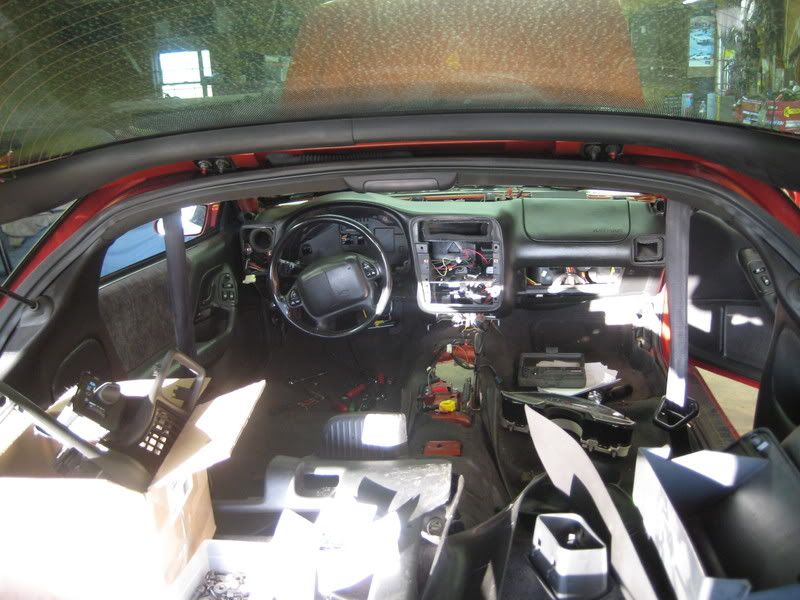
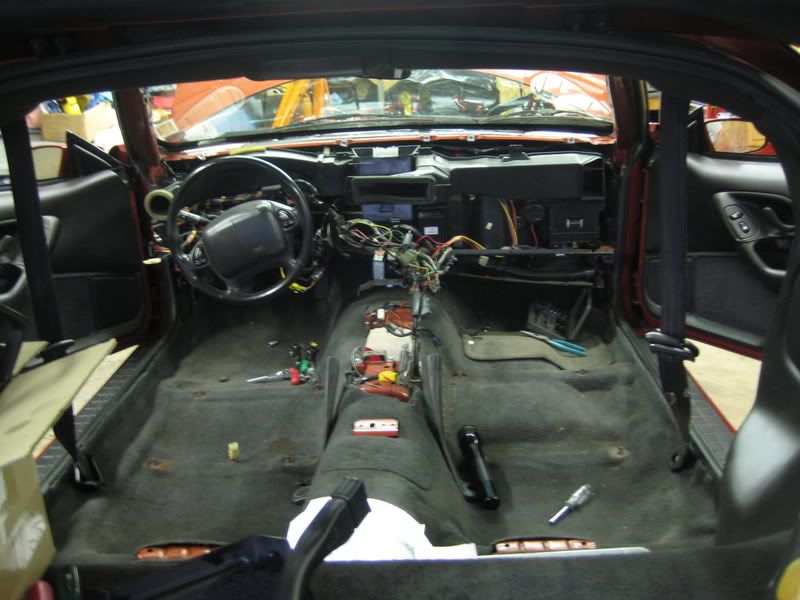
lots of stuff behind the dash
:fry:
WEIGHTS LIST
this is the real weights of parts off my car I weighed with a good scale. 2001 m6 Z28 camaro Ttop car.
VFN Sunoco pin-on hood- 14.802 with side lips, no added holes or faseners.
Panhardrod brace- 4.980 with the 3 bolts, nut and the small heat sheild bracket for a 7mm bolt.
EVAP-4.635 rear over tank crap, purg noild/black lines/choarcoal canister. not any of thereast of the car metal lines and crap.
http://i2.photobucket.com/albums/y11...n/DSC02619.jpg
Evap with metal line. 6.2
https://ls1tech.com/forums/drag-raci...-question.html
SLP 2OTL mufflar 22.70 with both tailpipes/tips, no over axle tube-
2001 Z28 cloth seats nothing changer, removed and weighed
driver /power- 39.15
passanger /manual- 29.85
Kirkey 17" prostreet/drag with cover and racrcraft brakets 17.545 (each) ready to bolt in, unpainted seat
http://i2.photobucket.com/albums/y11...n/DSC02636.jpg
FINAL WEIGHT SAVINGS OVER STOCK
Driver- 21.605
Passanger-12.305
33.91 saving in the seats, And a LOT safer with the rollbar, and harnesses then using them with a stock seat.
Kirkey prostreet Drag 12.13 17inch pn-41700 no cover each
Kirkey seat cover- 2.455 17inch, black cloth/tweed, each
http://i2.photobucket.com/albums/y11...n/DSC02632.jpg
Racecrafter kirkey seat brackets- 6.045 Bolt In style, 1 driver 1 passanger (pair)
http://i2.photobucket.com/albums/y11...n/DSC02630.jpg
RJS 5point harness, camlock 5.805 (each)
http://i2.photobucket.com/albums/y11...n/DSC02633.jpg
front seat belts- 6.696 with the bolts
http://i2.photobucket.com/albums/y11...n/DSC02620.jpg
harnesses are 1.76#'s lighter then that stock belts
speedinc carpet 12.910 out of the box, not cut to fit, with matting.
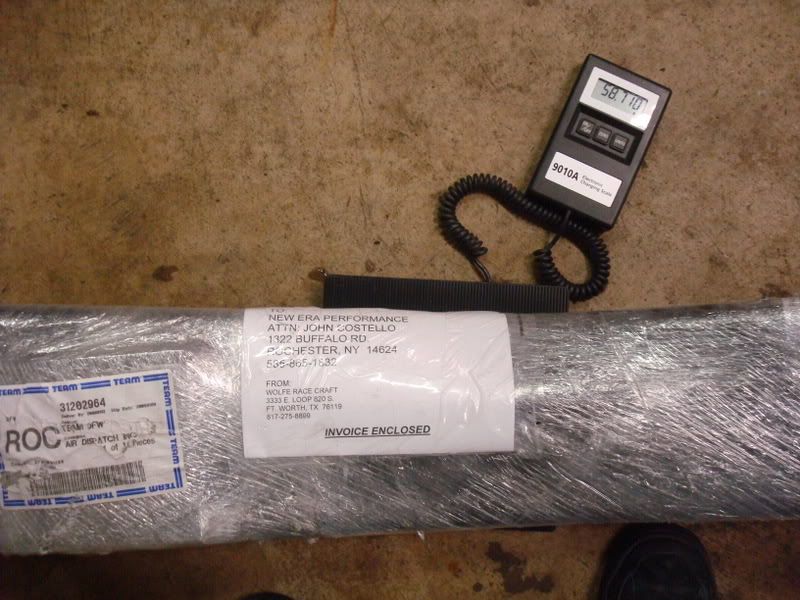
Wolfe 6point 4130 weld in- 58.701 low door bars, rear thu specker bars, wolfe jig notched.
51.98 welded hoop/seat/rear over seat bars, 1 5/8 seat bar, non welded doorbars and plates to floor at that time. legal 1 5/8th seat bar is lighter then the 1 3/4 wolfe ships, And over the seat rear bars are lighter then the longer thu speaker holes style
Stock LS1 Kmember with engine stands 57
BMR Kmember reg style, with LS1 egine stands 25
stock m6 torque arm- 14.6
BMR full lenghts adj. torque arm 21.2
Stock radiator (auto) 99% drained, with no lines 10.8#s
Stock 2001 dual fans in the shroud 11.7-11.8ish
Removing one of the fans blades and motor (4.2 4.1ish) brings them to 7.4
Spal 16' single fan 5.0#s
10bolt- 150 My stock 10bolts 150 right on the money, driand fliud 3;42 gears
S60- 196 Same parts on it as the 10bolt, dry, 3:73 gears, true trac
S60 parts
truetrack- 46
strange "lightweight" pro race spool- 13.2
32.8 saving with a spool over the truretrac
LSX intakes
LS1- 9.8
fast 78- 11.2
bbk 85- 24.8
Quick time LS1 bell housing with SFI window, block plate, and bolts is 29.8 pounds.
Just the bell housing with the window bolted on is 25.4 pounds
Changing a few things on the car, figure id post about it. Some stuff is already done, and older pics. Some still working on, some parts are still on the way. Taking the 6point mild steel wolfe rollbar out, and going with a better 4130 chromoly cage stuff. Also upgrading some suspension parts, brakes, rearend. Removing some stuff I dont use, cleaning up other systems, harness, making the car easier to work on. Making the car lighter too, getting ride of a easy to install steel bolt in rollbar, maybe the dana 60 rearend with a truetrac (truetrac with ring gear weights 56#, rearend minus brakes was just under 200#s 50 more then a 10bolt). Looking at getting a midwest 9, if I can afford it. With selling the s60 setup, and RT TA, BMR reloc trans mount. And maybe a spool. But I drive the car a lot of the street.
Pulling the passanger airbag, the Hvac stuff. But keeping the heater for the fall racing.
getting the car ready for the new stuff
lots of stuff behind the dash
:fry:
WEIGHTS LIST
this is the real weights of parts off my car I weighed with a good scale. 2001 m6 Z28 camaro Ttop car.
VFN Sunoco pin-on hood- 14.802 with side lips, no added holes or faseners.
Panhardrod brace- 4.980 with the 3 bolts, nut and the small heat sheild bracket for a 7mm bolt.
EVAP-4.635 rear over tank crap, purg noild/black lines/choarcoal canister. not any of thereast of the car metal lines and crap.
http://i2.photobucket.com/albums/y11...n/DSC02619.jpg
Evap with metal line. 6.2
https://ls1tech.com/forums/drag-raci...-question.html
SLP 2OTL mufflar 22.70 with both tailpipes/tips, no over axle tube-
2001 Z28 cloth seats nothing changer, removed and weighed
driver /power- 39.15
passanger /manual- 29.85
Kirkey 17" prostreet/drag with cover and racrcraft brakets 17.545 (each) ready to bolt in, unpainted seat
http://i2.photobucket.com/albums/y11...n/DSC02636.jpg
FINAL WEIGHT SAVINGS OVER STOCK
Driver- 21.605
Passanger-12.305
33.91 saving in the seats, And a LOT safer with the rollbar, and harnesses then using them with a stock seat.
Kirkey prostreet Drag 12.13 17inch pn-41700 no cover each
Kirkey seat cover- 2.455 17inch, black cloth/tweed, each
http://i2.photobucket.com/albums/y11...n/DSC02632.jpg
Racecrafter kirkey seat brackets- 6.045 Bolt In style, 1 driver 1 passanger (pair)
http://i2.photobucket.com/albums/y11...n/DSC02630.jpg
RJS 5point harness, camlock 5.805 (each)
http://i2.photobucket.com/albums/y11...n/DSC02633.jpg
front seat belts- 6.696 with the bolts
http://i2.photobucket.com/albums/y11...n/DSC02620.jpg
harnesses are 1.76#'s lighter then that stock belts
speedinc carpet 12.910 out of the box, not cut to fit, with matting.
Wolfe 6point 4130 weld in- 58.701 low door bars, rear thu specker bars, wolfe jig notched.
51.98 welded hoop/seat/rear over seat bars, 1 5/8 seat bar, non welded doorbars and plates to floor at that time. legal 1 5/8th seat bar is lighter then the 1 3/4 wolfe ships, And over the seat rear bars are lighter then the longer thu speaker holes style
Stock LS1 Kmember with engine stands 57
BMR Kmember reg style, with LS1 egine stands 25
stock m6 torque arm- 14.6
BMR full lenghts adj. torque arm 21.2
Stock radiator (auto) 99% drained, with no lines 10.8#s
Stock 2001 dual fans in the shroud 11.7-11.8ish
Removing one of the fans blades and motor (4.2 4.1ish) brings them to 7.4
Spal 16' single fan 5.0#s
10bolt- 150 My stock 10bolts 150 right on the money, driand fliud 3;42 gears
S60- 196 Same parts on it as the 10bolt, dry, 3:73 gears, true trac
S60 parts
truetrack- 46
strange "lightweight" pro race spool- 13.2
32.8 saving with a spool over the truretrac
LSX intakes
LS1- 9.8
fast 78- 11.2
bbk 85- 24.8
Quick time LS1 bell housing with SFI window, block plate, and bolts is 29.8 pounds.
Just the bell housing with the window bolted on is 25.4 pounds
Last edited by studderin; 04-07-2012 at 02:14 PM.

 02-19-2009, 10:40 PM
#5
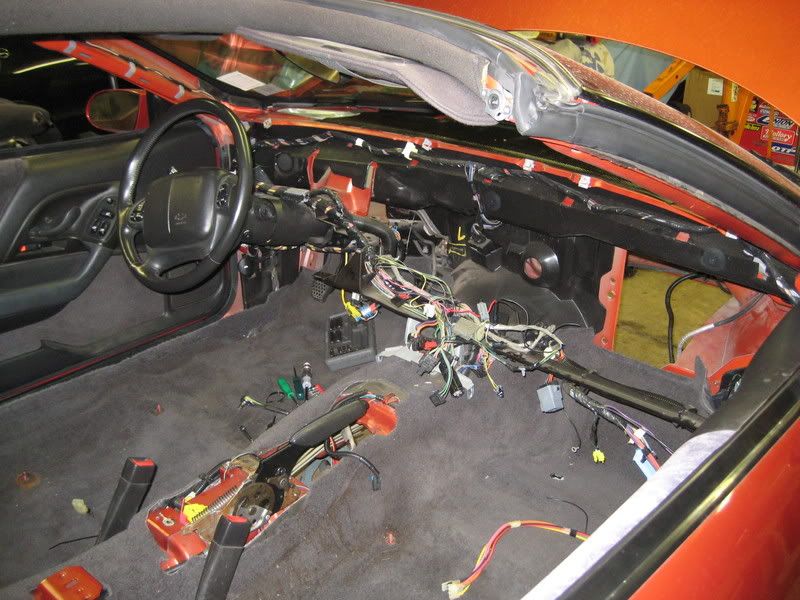
the airbag and braket, I think I read some guys getting our without pulling the dash. Just leaning it forward. But its basicaly out, at that point of the work you'd do I'd say. The 1st time its a pain, But now I know were all the bolts are and what is on what. So maybe I could get the airbag out, with leaving a few things on wothout taking the dash cover out of the car. But it still not somthing I'd do. Just get the dash out ove your way.
02-20-2009, 07:19 AM
#6
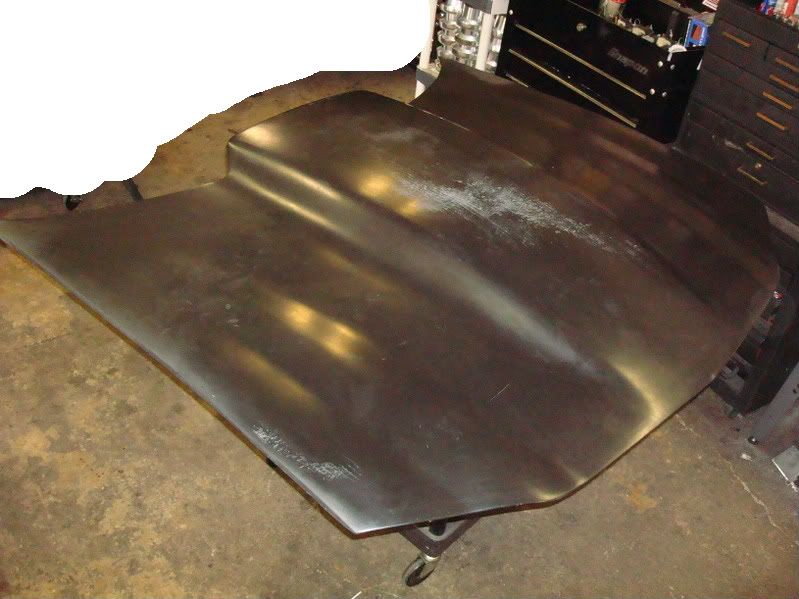
End of last week I bought a not installed new/used pin on sunoco from SouthernTP on here. And recived it yesterday, looks good so far. It weighed less then the box, 
I put the hood on the nitrous scale. 14.802 pounds exact.
A stock Z28 hood is 45-48 I see listed.
And ordered the bad *** rails that come fitted for Dzeus fasteners from racecrafters. You cam also get them from Madman.
http://www.racecraft.com/proddetail.php?prod=704070
http://www.racecraft.com/proddetail.php?prod=704071
The tubing for the 6point rollbar, showed up. Car has to get to new era to get that stuff welding in soon. I never got a weight on the bolt in mild steel one I had. I see people listing that at 75-85#s. I bought this one the last day of the wolfe sale. And made some on selling the steel one. It worked out good. Its a 4130 cromoly 6point, low doorbar, jig notched, this is with the thu rear speaker bars. But later exchanged them with the over the seat ones that I can run to over the frame rails. Thanks for wolfe doing that. The wheel wells didn't look that strong, after I removed the the brakets off them, and if you min tub they are in the way. I liked the thu speaker holes, it gave me more room in the hatch to put the 28 Etdrags, and stuff back there. And the looked a little more hidden form the rear of the car. I'll see how the over seat ones are.
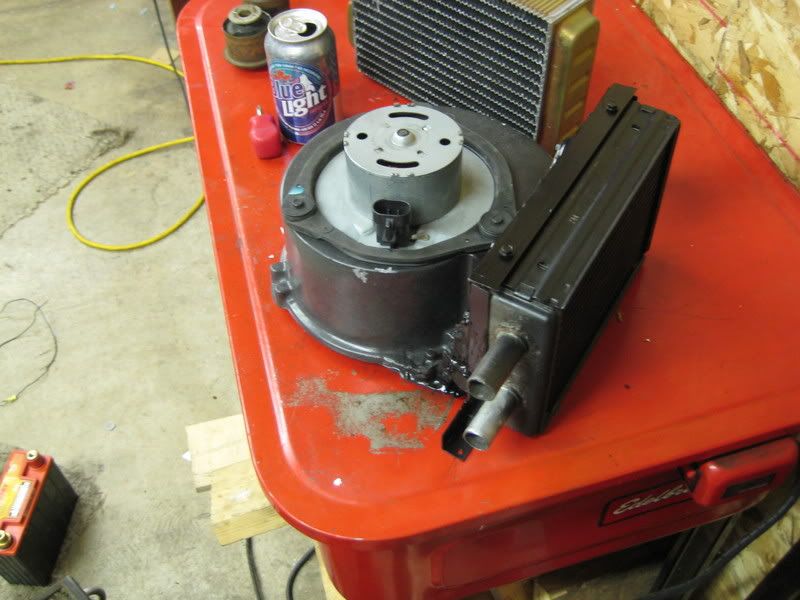
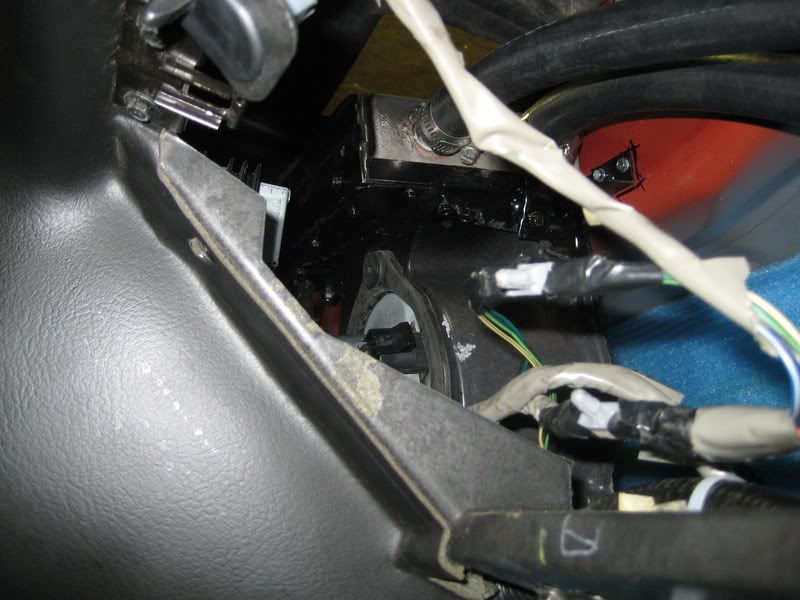
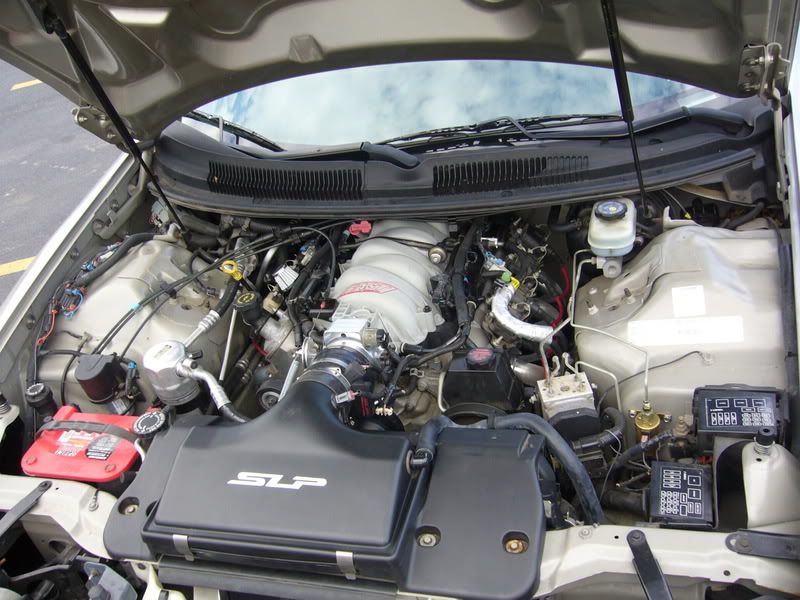
Made a alum HVAC panel, and a lightweight heater. Using a used ford probe heater core I had around. That was in a GTP's w/a intercooler then went pretty fast already. And the stock blower motor, thats nice and quite but moves a ton of air. Still might get a extra harness to cut out some AC, ABS, traction control, airbag wires. There a lot of extras not being used.
repainted were the stock battery had leaked.
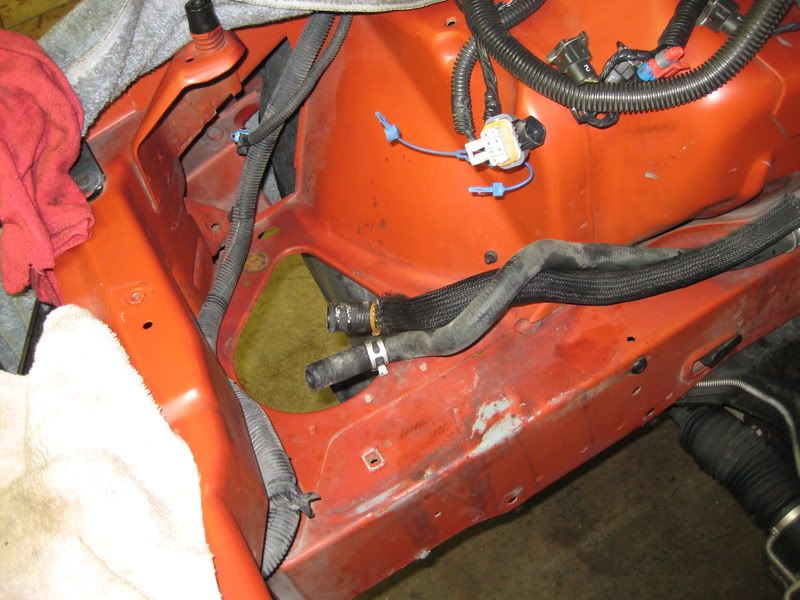
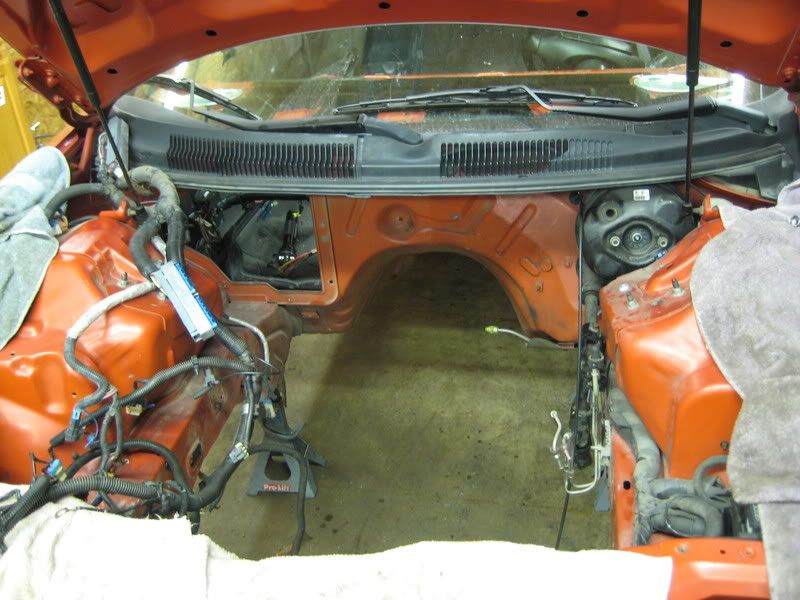
Glued some lightweight foam on the firewall for noise, and some heat shield mat were the passenger header collector is close to the floor. And you can see the top holes for the heater to mount to
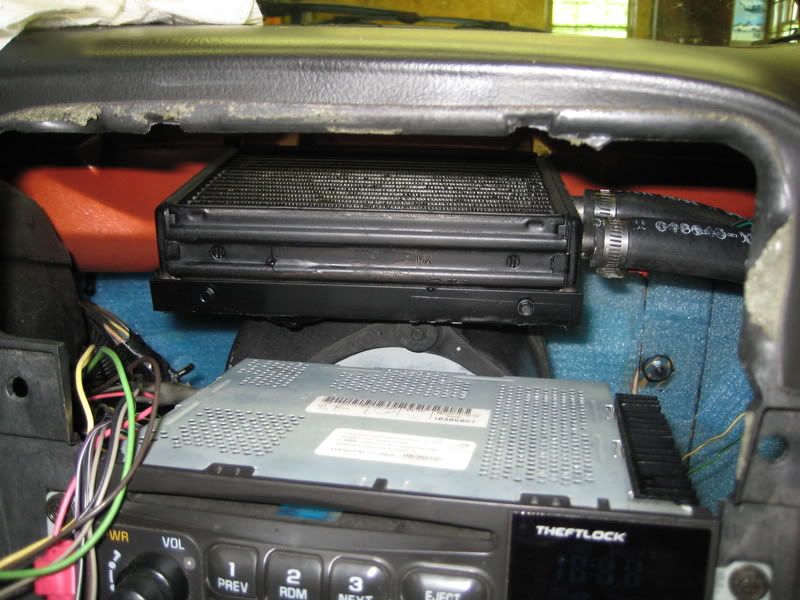
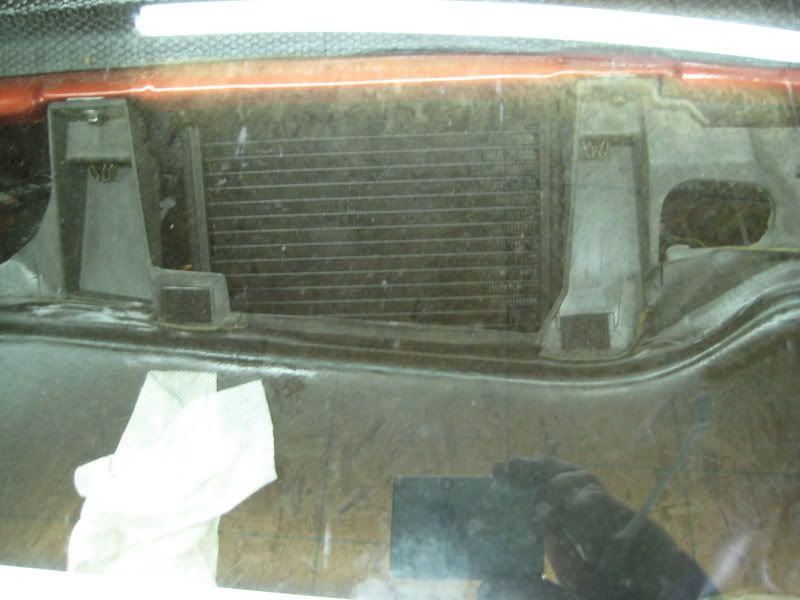
this is how it looks blowing thu the defrost to the windshield. painter it black to hide it under the front dash panel that covers with the stock defrost gill openings.
I hooked it up with part of the stock heat hose lines in the ending bay, bent them to fit under the PCM. Lot of room to work on the car. Or later get a IC pipes to fit:snky:
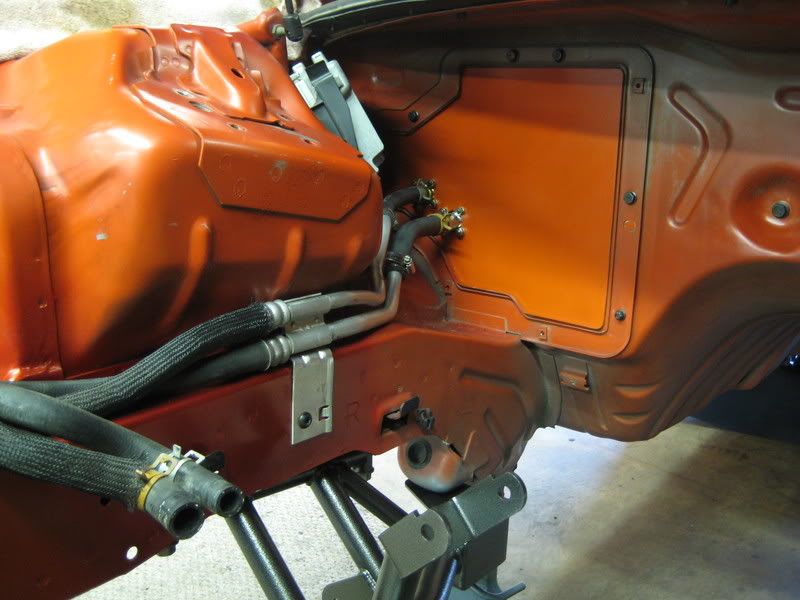
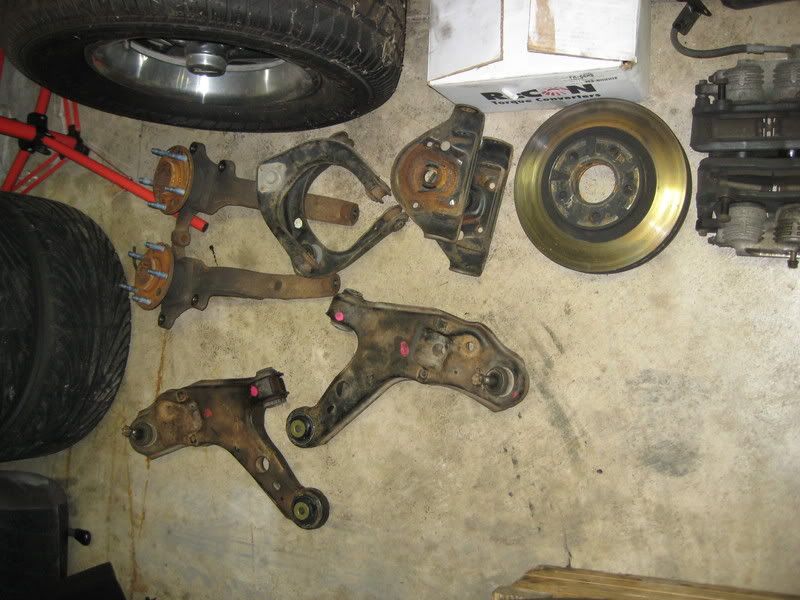
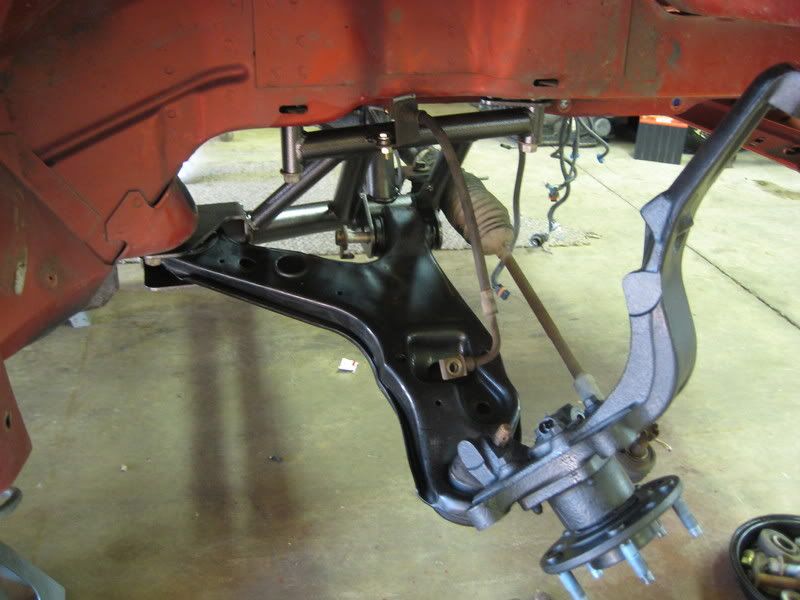
BMR tubular K-member. I got from NewEra $445 in stock. Great price. Stock with the cast iron engine stands was 57#'s The BMR is 25. But the best part is all the room it gives, and alot easier to work on the car.
Repainted all the front suspension parts with POR-15
I'll post some more later of the new brake lines I made. No ABS, SLP linelock.
I bought a streering wheel, form somone on here I fwe weeks ago. http://www.shopatron.com/product/par...58.19258.0.0.0

In a Trans Am
http://i215.photobucket.com/albums/c.../TA/1051_1.jpg
I put the hood on the nitrous scale. 14.802 pounds exact.
A stock Z28 hood is 45-48 I see listed.
And ordered the bad *** rails that come fitted for Dzeus fasteners from racecrafters. You cam also get them from Madman.
http://www.racecraft.com/proddetail.php?prod=704070
http://www.racecraft.com/proddetail.php?prod=704071
The tubing for the 6point rollbar, showed up. Car has to get to new era to get that stuff welding in soon. I never got a weight on the bolt in mild steel one I had. I see people listing that at 75-85#s. I bought this one the last day of the wolfe sale. And made some on selling the steel one. It worked out good. Its a 4130 cromoly 6point, low doorbar, jig notched, this is with the thu rear speaker bars. But later exchanged them with the over the seat ones that I can run to over the frame rails. Thanks for wolfe doing that. The wheel wells didn't look that strong, after I removed the the brakets off them, and if you min tub they are in the way. I liked the thu speaker holes, it gave me more room in the hatch to put the 28 Etdrags, and stuff back there. And the looked a little more hidden form the rear of the car. I'll see how the over seat ones are.
Made a alum HVAC panel, and a lightweight heater. Using a used ford probe heater core I had around. That was in a GTP's w/a intercooler then went pretty fast already. And the stock blower motor, thats nice and quite but moves a ton of air. Still might get a extra harness to cut out some AC, ABS, traction control, airbag wires. There a lot of extras not being used.
repainted were the stock battery had leaked.
Glued some lightweight foam on the firewall for noise, and some heat shield mat were the passenger header collector is close to the floor. And you can see the top holes for the heater to mount to
this is how it looks blowing thu the defrost to the windshield. painter it black to hide it under the front dash panel that covers with the stock defrost gill openings.
I hooked it up with part of the stock heat hose lines in the ending bay, bent them to fit under the PCM. Lot of room to work on the car. Or later get a IC pipes to fit:snky:
BMR tubular K-member. I got from NewEra $445 in stock. Great price. Stock with the cast iron engine stands was 57#'s The BMR is 25. But the best part is all the room it gives, and alot easier to work on the car.
Repainted all the front suspension parts with POR-15
I'll post some more later of the new brake lines I made. No ABS, SLP linelock.
I bought a streering wheel, form somone on here I fwe weeks ago. http://www.shopatron.com/product/par...58.19258.0.0.0
In a Trans Am
http://i215.photobucket.com/albums/c.../TA/1051_1.jpg
02-20-2009, 07:22 AM
#7
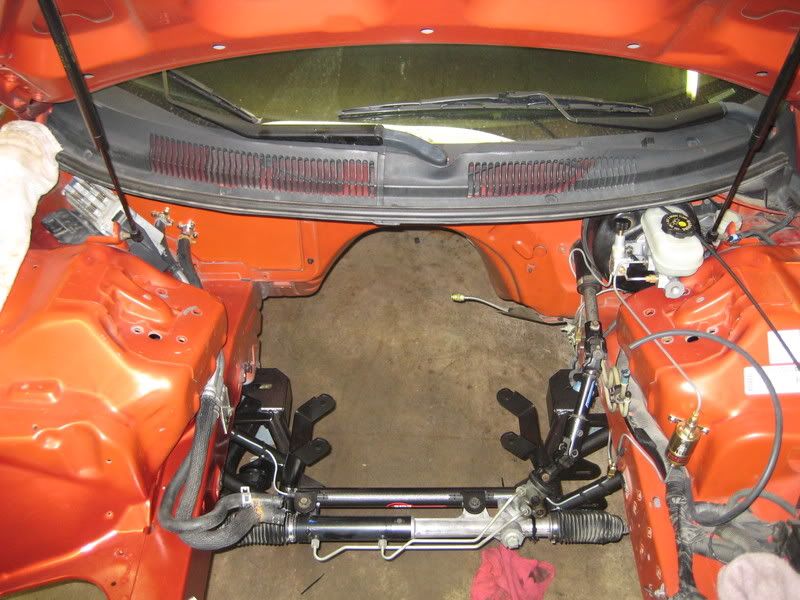
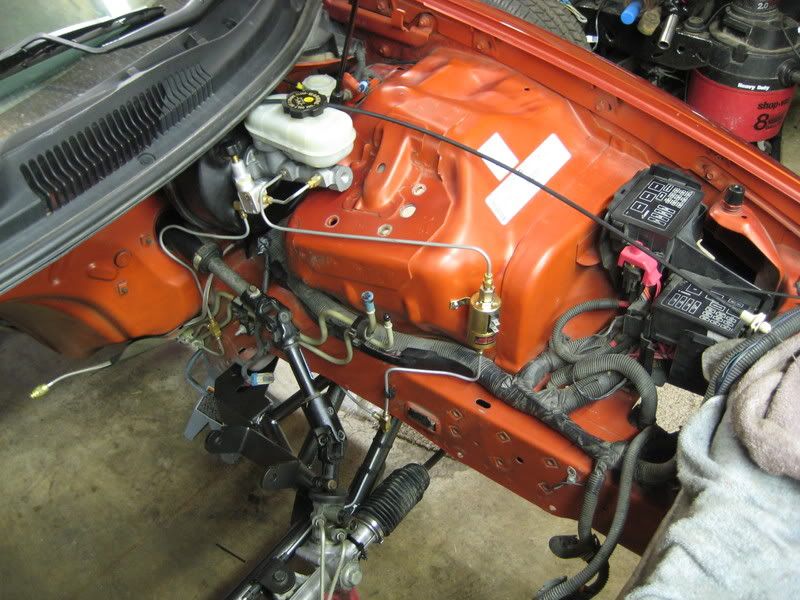
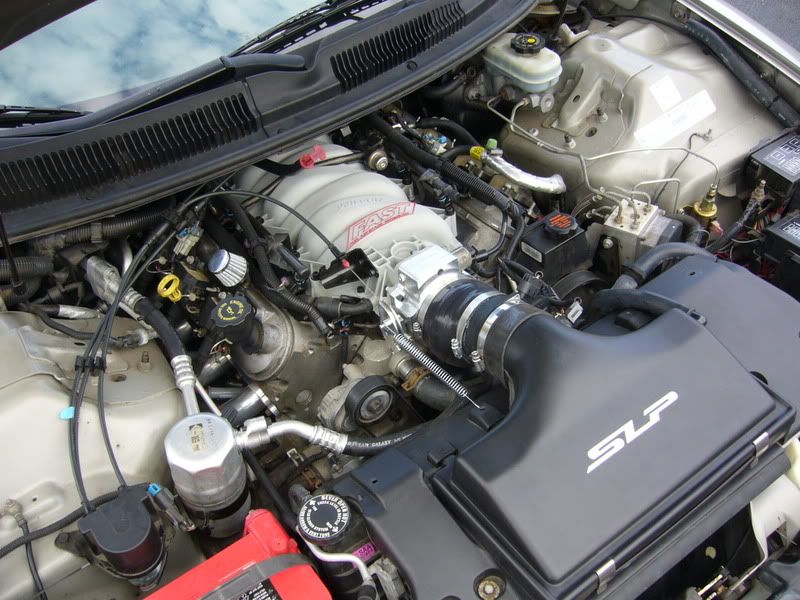
Brake lines came out mint, fit the BMR Kmeber great. I hate the look when people just zip tie the stock front line that fits like ****. Removed the ABS stuff, ran the rear line around the brake booster a little more work the the easy way. But I wasted to leave it all open to get the master cylinder out,that way under behind the the power booster. Its really nice to get to now. Same thing with the line lock solenoid, wanted it out of the way for the headers, header bolts, head bolts. Basically anywere on the side hidden on the wheel well. Or on the firewall, back side of the wheel well, blocking the master.
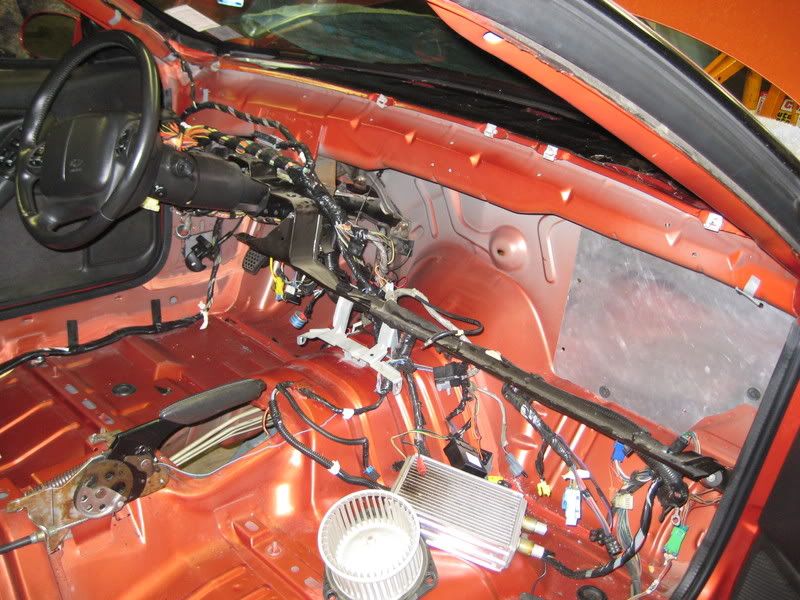
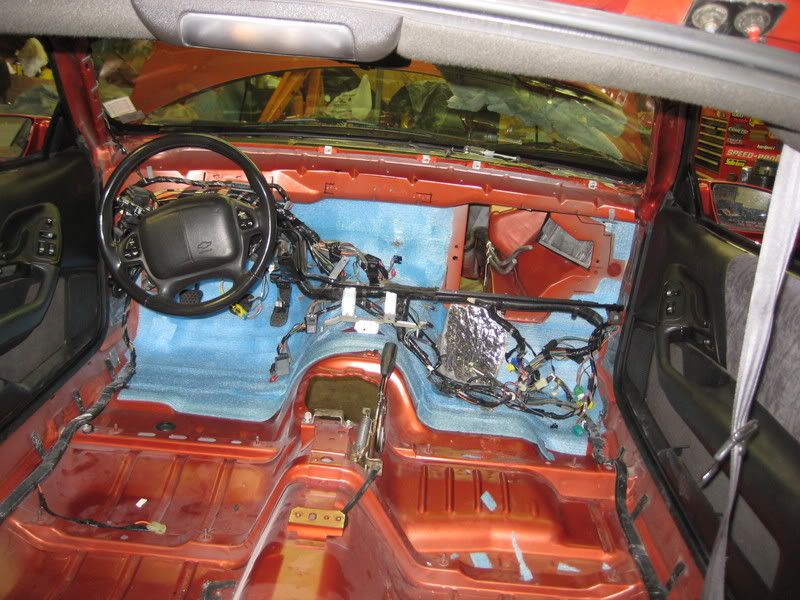
Did the wire tuck of the harness that runs off the passanger side wheel well. The air pump and the air pump tubes, have already been gone. Hood latch cable got tucked, but probably going to a pin on hood. Hid and redid the 5-7 grounds that go to random visable holes in the wheel wells and suck.
So much easier to work on then a stock Fbody, only pics I had for a reminder off all the stuff, the car used to have.
Trending Topics
02-20-2009, 07:48 AM
#8
We have a very strict diet for this car.
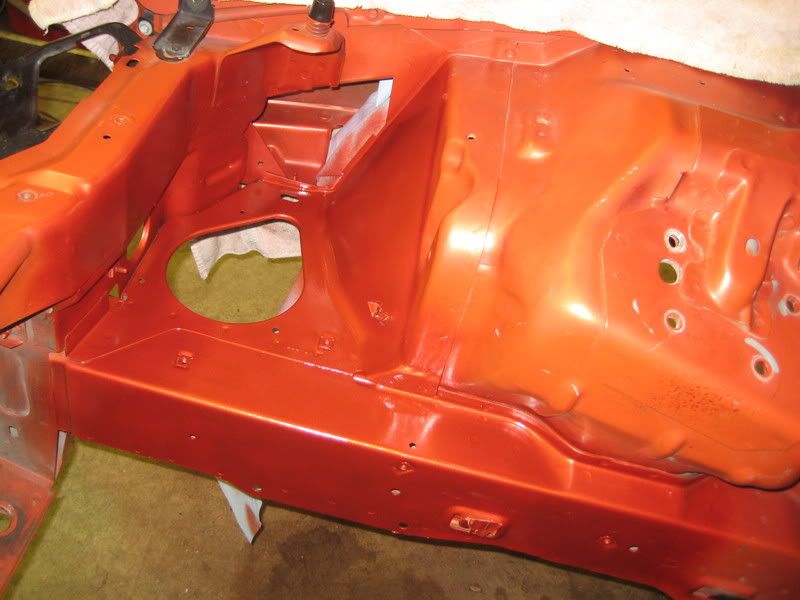
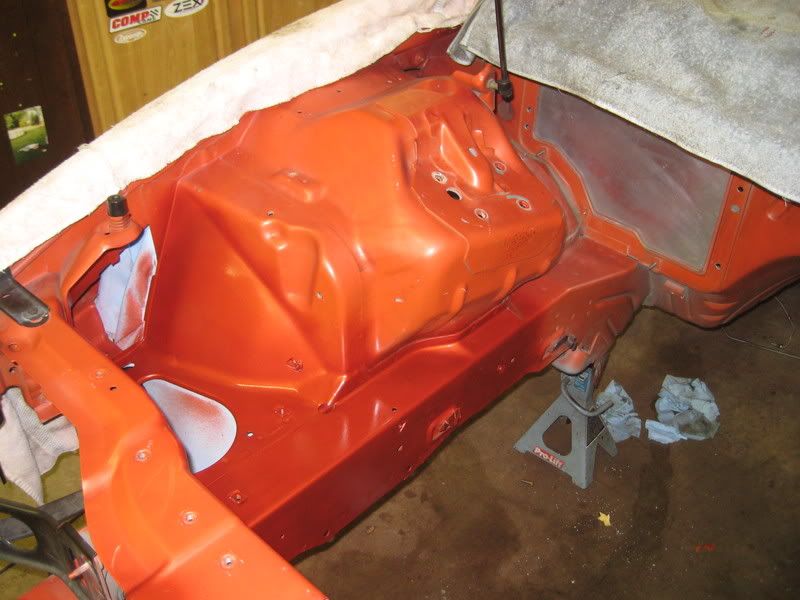
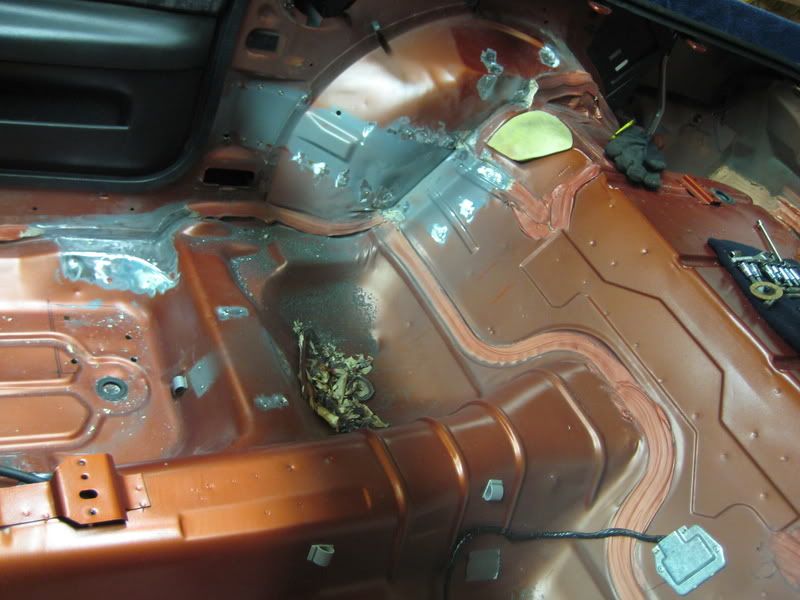
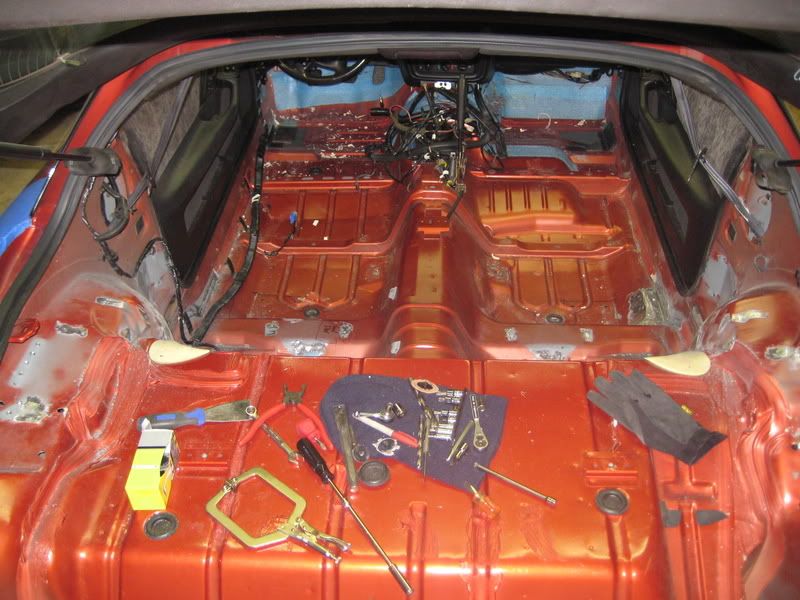
We cut the spare tire well, t-top well, and the driver side well out of the car and replaced them with some sheet metal.
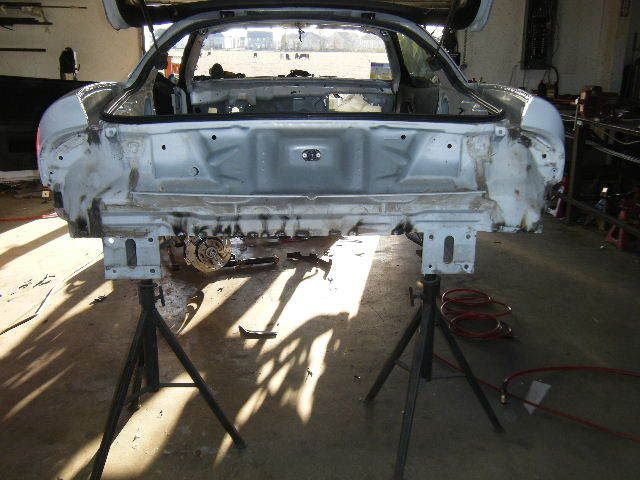
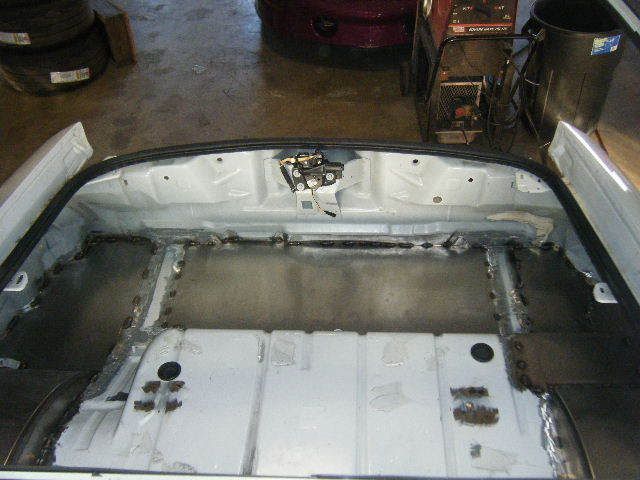
We also cut the seat mounting brackets. (we're going to have a 25.2 cage in this car anyway)
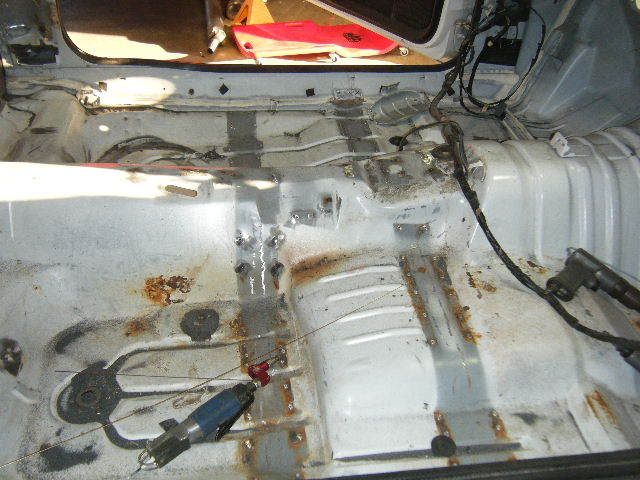
We're also cutting out every bracket that won't be used anymore. Lightening process is coming along nicely.
We cut the spare tire well, t-top well, and the driver side well out of the car and replaced them with some sheet metal.
We also cut the seat mounting brackets. (we're going to have a 25.2 cage in this car anyway)
We're also cutting out every bracket that won't be used anymore. Lightening process is coming along nicely.
02-20-2009, 12:55 PM
#9
TECH Fanatic
iTrader: (9)
Join Date: Apr 2008
Location: Tampa,Florida
Posts: 1,073
Likes: 0
Received 0 Likes
on
0 Posts

Brake lines came out mint, fit the BMR Kmeber great. I hate the look when people just zip tie the stock front line that fits like ****. Removed the ABS stuff, ran the rear line around the brake booster a little more work the the easy way. But I wasted to leave it all open to get the master cylinder out,that way under behind the the power booster. Its really nice to get to now. Same thing with the line lock solenoid, wanted it out of the way for the headers, header bolts, head bolts. Basically anywere on the side hidden on the wheel well. Or on the firewall, back side of the wheel well, blocking the master.
Did the wire tuck of the harness that runs off the passanger side wheel well. The air pump and the air pump tubes, have already been gone. Hood latch cable got tucked, but probably going to a pin on hood. Hid and redid the 5-7 grounds that go to random visable holes in the wheel wells and suck.
So much easier to work on then a stock Fbody, only pics I had for a reminder off all the stuff, the car used to have.
Nice looking build....Glad our parts worked out well for you


 did you buy an ABS delete kit or just a praportioning valve ? that looks sweet!!
02-20-2009, 05:01 PM
did you buy an ABS delete kit or just a praportioning valve ? that looks sweet!!
02-20-2009, 05:01 PM
#13
thanks
Just bought the valve. And got fitting local that convert the metric bubble flairs in the master and have a normal 3/16th double flare female. So you can just make your own lines. Joelester showed me someone with a LT1 that ran the front brake line along the firewall up high in the top out of the way. Then down to the brakets for the rubber lines. That way you cam take the Kmember off and not mess with the brakes at all. That would be a great setup.
Oh the adaptor fitting I forgot the sizes, but ther all diffrent. I htink the 2 ports on the master were M12 and M11 and sence I still have stock brakes had to use one in the stock rubber flex lines to the claipers. Ther both the same m10 I think, and for the rear I cut the line nice on the firewall, de-burr'd it. Its like .200 so sliped a normal 3/16s line nut on. And did a normal double flair in the stock metric line.

The stock lines are thick, so make sure you have a GOOD flair tool. I had a old good one form my dad Ive used for years. Ended up steping and braking the die for 3/16s, so bought a cheap kit and autoretardzone, and its a pile of ****. The one, and only flair I did with it leaked, (left the old kit at my place that night) and it was on the new soft line. The new die worked in the old kit still not a nice, but no way it would do a good job on the stock lines.
Just bought the valve. And got fitting local that convert the metric bubble flairs in the master and have a normal 3/16th double flare female. So you can just make your own lines. Joelester showed me someone with a LT1 that ran the front brake line along the firewall up high in the top out of the way. Then down to the brakets for the rubber lines. That way you cam take the Kmember off and not mess with the brakes at all. That would be a great setup.
Oh the adaptor fitting I forgot the sizes, but ther all diffrent. I htink the 2 ports on the master were M12 and M11 and sence I still have stock brakes had to use one in the stock rubber flex lines to the claipers. Ther both the same m10 I think, and for the rear I cut the line nice on the firewall, de-burr'd it. Its like .200 so sliped a normal 3/16s line nut on. And did a normal double flair in the stock metric line.
The stock lines are thick, so make sure you have a GOOD flair tool. I had a old good one form my dad Ive used for years. Ended up steping and braking the die for 3/16s, so bought a cheap kit and autoretardzone, and its a pile of ****. The one, and only flair I did with it leaked, (left the old kit at my place that night) and it was on the new soft line. The new die worked in the old kit still not a nice, but no way it would do a good job on the stock lines.
 [/img]
  02-22-2009, 02:26 PM
#18
thanks, ya I have a fast 78 I ported to a 85, with a 85mm TB I'm going to run. Was running my stock LS6 and new era ported TB, and still went 123mph once. But I'm also porting a set of 243 heads, that I'll put on the car probaly summer time. And would like to try on of carys singal plans, said them might be ready for cathdral port in march. But probally just going to add the engine mods, 1 at a time over this year.
02-22-2009, 11:37 PM
#20
I havn't drilled any holes in anything so far. I may with a few others pitch in a buy a used GreenLee hydraulic punch kit. Just removed the brakets for the rear set stuff, and the armrest. I stared with a 3/8 bit for a few of the on top brakets, but then found somthing better. I used the $4 harbor feight spotweld cutter, it works very good for being a piece of ****. But it has 2 ends to wear out, and you can exchange it for free.
http://www.harborfreight.com/cpi/cta...emnumber=95343
Just center punch, or drill a little starter 1/8 mark, and start slow till the cutter has a full OD the holesaw is cutting. Its leaves the full numb of the spot weld of the bracket. So you just grind that off later flush. The 1st hole I drilled thu into the wheel well, but its easy to weld it up. I had to do it with the old holes for the wolfe bolt in, anyway.
Last edited by studderin; 02-22-2009 at 11:46 PM.