

Fast intake install
 05-20-2006, 06:54 PM
#1
TECH Enthusiast
Thread Starter
iTrader: (4)

Join Date: Jul 2004
Location: GA
Posts: 720
Likes: 0
Received 0 Likes
on
0 Posts

For anyone that has installed a FAST intake;
1. Can you use the TB gasket (rubber) from the old Z06 intake, or will I need a new one since it is a 90mm? (you would think for the cost that these things would come with one)
2. Are their any obvious things to "port/clean up" on them that will slightly improve their performance without sending it off for a full port job. (There's no way the wife will let me spend $500 more right now!!!)
3. Is there anything else I'm going to need before I do this install. (I am taking a day off from work to install the intake, TB, Dave's N2O plate, and a high flow bridge, and I don't want to get hung up in the middle of it needing to order some fittings etc.)
4. Mike Norris just did a dyno tune on this car after I installed the heads. I have since installed a 3" x-pipe and will add the above items. Will I need to "re-tune"??
Thanks
 05-20-2006, 07:30 PM
#2
TECH Enthusiast
iTrader: (17)

Join Date: Jan 2002
Location: Michigan
Posts: 652
Likes: 0
Received 0 Likes
on
0 Posts

1) The FAST 90mm intake comes with a new gasket. Its in your box, in the baggie with all the other nuts 'n bolts.
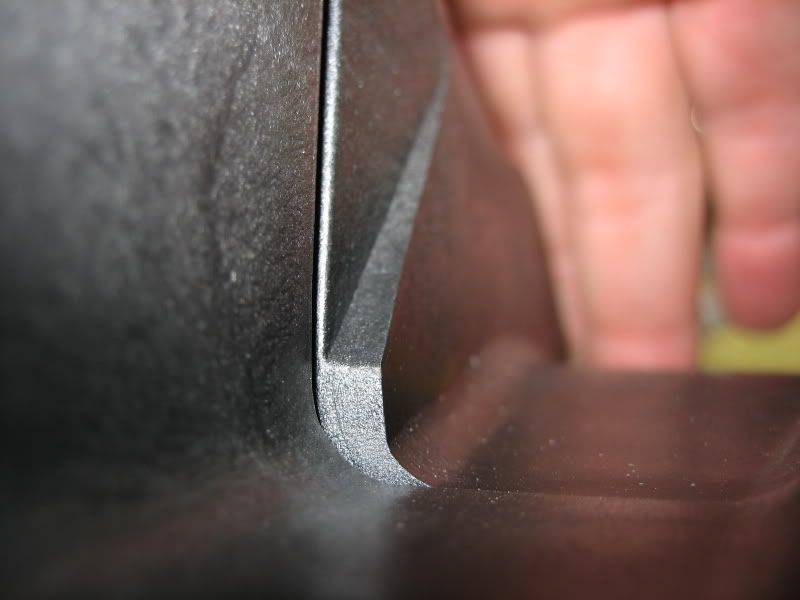
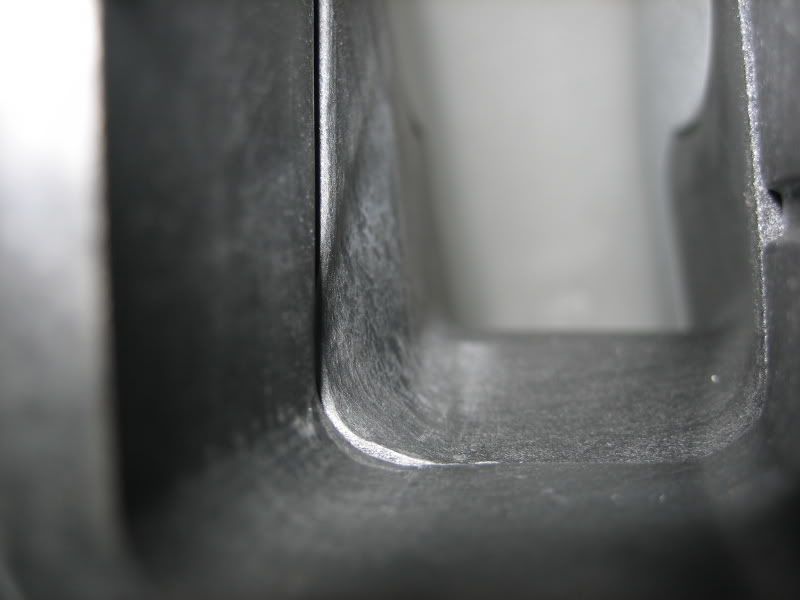
2) Remove the "wedge" in the runners, and clean up any molding-flash on the parting-lines.
3) Runner gaskets, RTV for the MAP sensor (its a loose fit),
4) I would.
2) Remove the "wedge" in the runners, and clean up any molding-flash on the parting-lines.
3) Runner gaskets, RTV for the MAP sensor (its a loose fit),
4) I would.
05-20-2006, 09:28 PM
#3
TECH Enthusiast
Thread Starter
iTrader: (4)
Join Date: Jul 2004
Location: GA
Posts: 720
Likes: 0
Received 0 Likes
on
0 Posts
Thanks RH
Found the TB gasket. I had left it in the large bag with the intake.
I wondered about the "wedge" in the runners. It's so obvious, it seems they would have elimiated it in the casting design. I wondered if it was part of the "design", and had some purpose.
Found the TB gasket. I had left it in the large bag with the intake.
I wondered about the "wedge" in the runners. It's so obvious, it seems they would have elimiated it in the casting design. I wondered if it was part of the "design", and had some purpose.
 05-21-2006, 01:34 AM
#6
Like stated before, it does come with a new O-ring for going between the TB and the manifold, it's folded in half and inside a small ziplock.
You can re-use the port gaskets from the old manifold, but mine have always seemed very flat. I ordered a new set from BYUNSpeed for $32.
I also should note that I had to bend my front coolant pipe down some so the bottom of the manifold (right by the TB) would not hit it. I just placed the wooden end of a hammer on it and tapped it with a rubber mallet.
Here's some pics of what I did to mine.
Trending Topics
05-21-2006, 08:40 PM
#10
TECH Regular

Join Date: Oct 2005
Posts: 430
Likes: 0
Received 0 Likes
on
0 Posts
One advantage of the two piece design is that you can apply a light colored coating to the gasket face then bolt the lower half loosely to the heads, jiggle it around a little for best alignment and use a 'U'-shaped stylus to scribe around the port openings to transfer the port dimensions as a grinding guide.
I found that the ports (GMPP CNC heads) and the FAST runners both slope a little from the vertical, but not at quite the same angle. Made for a bit more work.
I found that the ports (GMPP CNC heads) and the FAST runners both slope a little from the vertical, but not at quite the same angle. Made for a bit more work.
05-22-2006, 11:17 AM
#11
On The Tree
iTrader: (1)

Join Date: Aug 2002
Location: St Louis, MO
Posts: 109
Likes: 0
Received 0 Likes
on
0 Posts
Originally Posted by BOTTLE ROCKET
I wondered about the "wedge" in the runners. It's so obvious, it seems they would have elimiated it in the casting design. I wondered if it was part of the "design", and had some purpose.
05-22-2006, 12:20 PM
#12
TECH Regular
Join Date: Oct 2005
Posts: 430
Likes: 0
Received 0 Likes
on
0 Posts
Well, that makes sense; they look too prominent to be accidental. It would have been smart of FAST to mention it in the instructions though, as even if the buyer didn't go to the trouble of grinding them off, he or she might well feel short-changed.
For the engine I was working on, low speed effects are of no consequence; it is strictly a track car. Power is still slowly rising at our arbitrary 6,800 RPM shift point, and revs will rarely drop below 5,000.
For the engine I was working on, low speed effects are of no consequence; it is strictly a track car. Power is still slowly rising at our arbitrary 6,800 RPM shift point, and revs will rarely drop below 5,000.
05-22-2006, 01:08 PM
#13
TECH Enthusiast
Thread Starter
iTrader: (4)
Join Date: Jul 2004
Location: GA
Posts: 720
Likes: 0
Received 0 Likes
on
0 Posts
Originally Posted by MadBill
Well, that makes sense; they look too prominent to be accidental. It would have been smart of FAST to mention it in the instructions though, as even if the buyer didn't go to the trouble of grinding them off, he or she might well feel short-changed.
.
.
Thanks for checking DIT
