Wsss6 - MPT70 Front Mount Build
 10-23-2009, 01:40 PM
#1
Teching In
Thread Starter
iTrader: (2)
Join Date: Jun 2008
Location: Saint Charles, MO
Posts: 44
Likes: 0
Received 0 Likes
on
0 Posts
So I figure that I leach off of this website enough that I should probably put something back in, here goes:
My plan is pretty straightforward, I want to turbocharge my 1999 TA WS6. I bought the car three years ago and have been planning on turbocharging it for three years, the whole time reading just about every thread in the forced induction page. I have a pretty good idea of what needs to get done but I'm hoping that as I post up my progress some of you guys with experience can chime in and tell me that I'm retarded and did something wrong so I can fix it.
So first things first, my current mods are about nothing. The car just rolled over 102k miles and I have pretty well babied it the whole time I've had it. When I bought her there was a catback exhaust and subframe connectors installed, I kept the sbc's and removed the catback in favor of longtubes and an x-pipe. After a year of that I got tired of not being able to have conversations in the car and hearing a ringing sound every time I shut it off, so I sold the exhaust and put on my factory manifolds and a new stainless catback, big improvement. I also had my factory fuel pressure regulator fail and I replaced it with an adjustable unit I mounted under the car, more on that later.
I started purchasing materials for the build about a month ago and have made a little progress so I'll show off where I'm at so far.
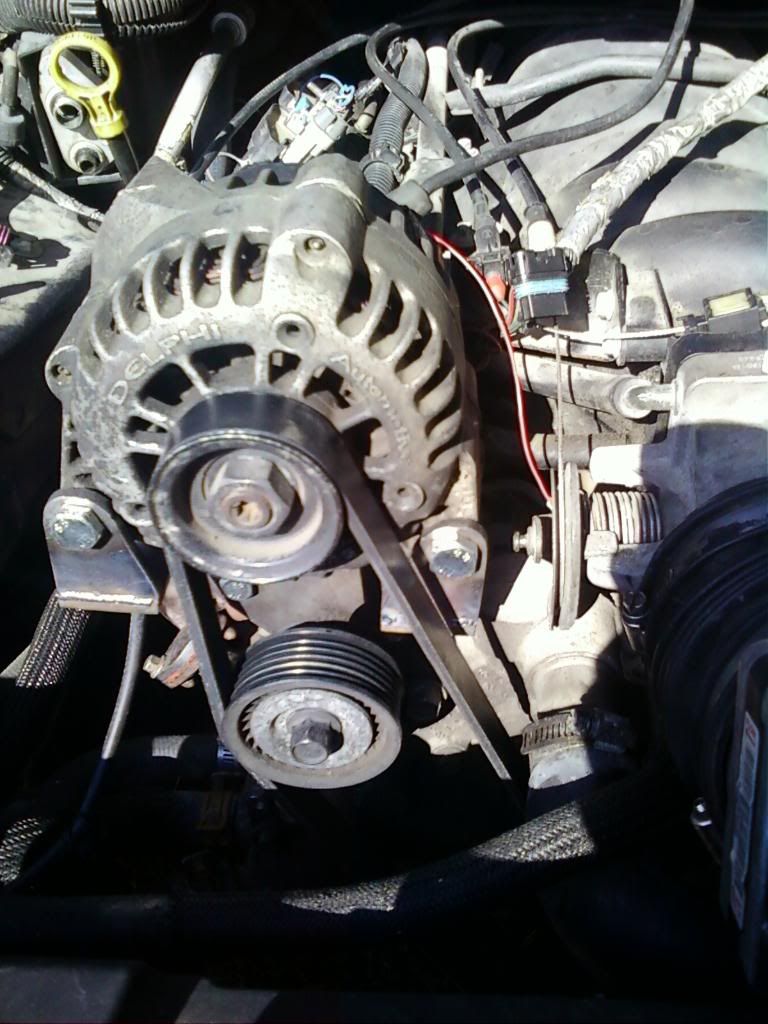
I started by removing the stock fans, air conditioning, EGR, AIR, and alternator. Wow, this cleared up a lot of space. I installed slim puller fans and I'm hoping that I'll be able to fit the MPT70 in there. I went on a little drive to make sure the fans worked and I was really impressed. In half an hour of spirited driving (alt went back on, more in a second) on middle Missouri backroads they never once turned on, but the temp never went over 200. I got home and let it idle for about 15 mins. Temp climbed slightly, maybe 205, and they kicked on and kept it there for another 10 mins before I shut it off. Seems like the stock radiator works a lot better when the ac heat exchanger isn't completely blocking it, go figure.
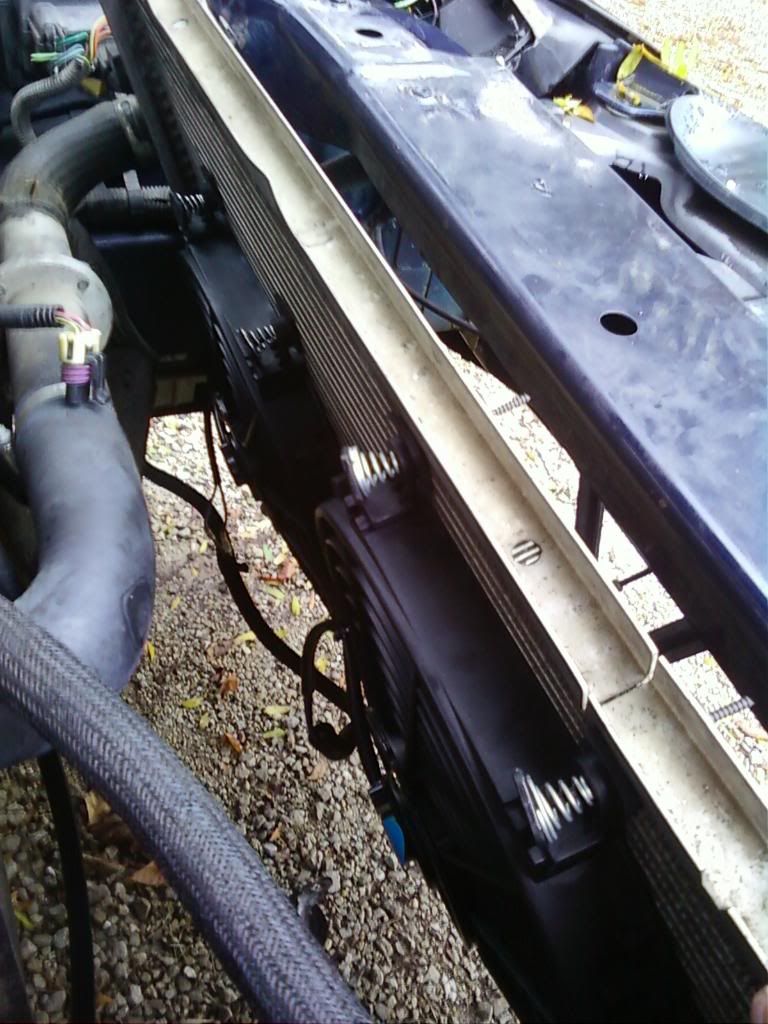
Next task I did was to relocate the stock alternator. I guess this is where I should say more about myself. I just graduated with a BS degree in Aerospace Engineering minoring in Material Science, and am now going for a MS in Mechanical Engineering. Being at school gives me a lot of resources. I have at my disposal CNC and manual mills, lathes, plasma cutters, mig and tig welders, and a lot of software. So I started by measuring the bolt pattern on the passenger head and the offset to the car's belt. This is what I came up with.
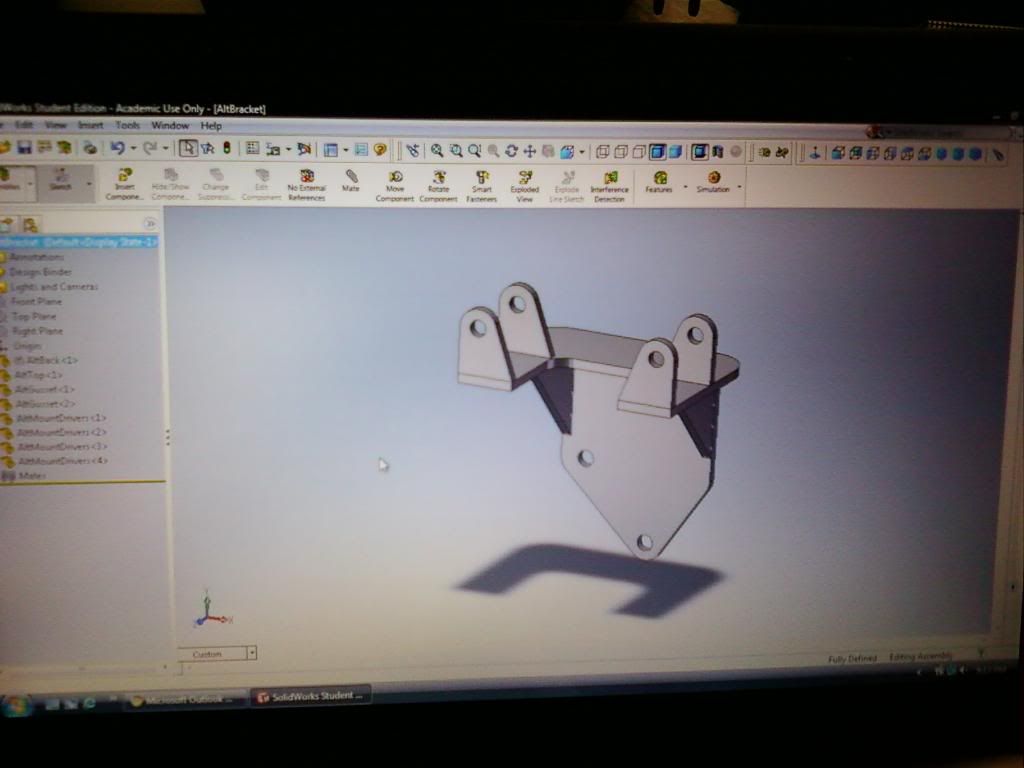
Next was to make it, time for cnc plasma cutter.
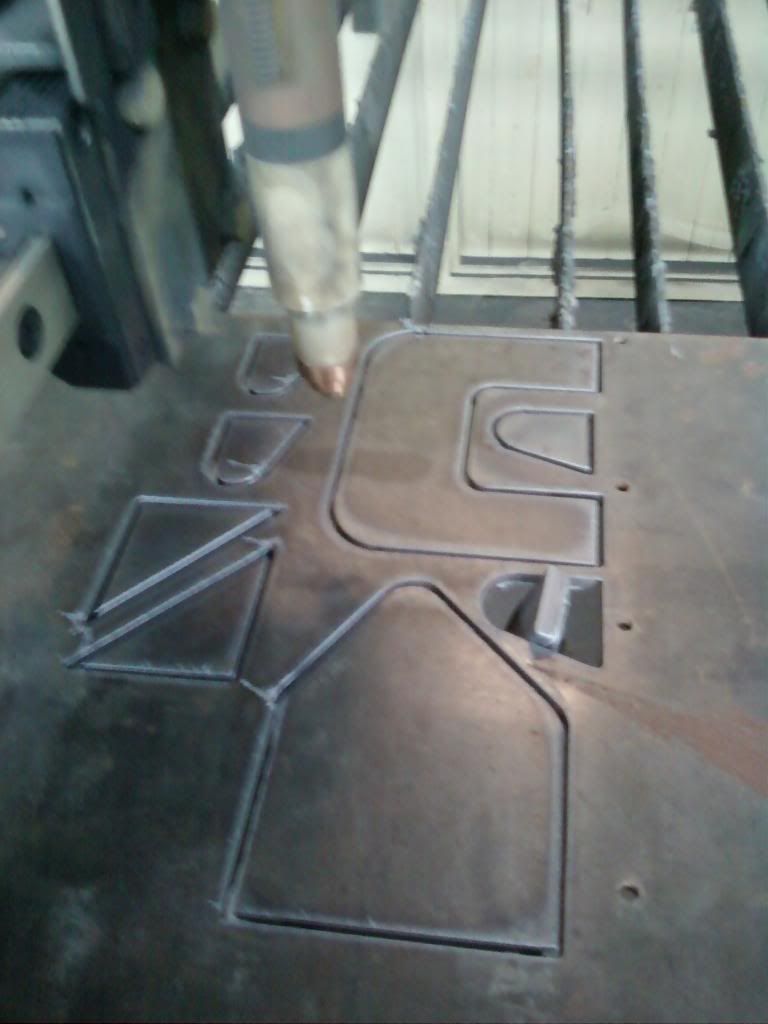
And to build it. Thanks to my housemate Doug for helping me here with some welding. He may be a Toyota guy but in his defense he's a pro at welding and at least his Toyota is putting down a hair over 400 to the wheels. No shame there.
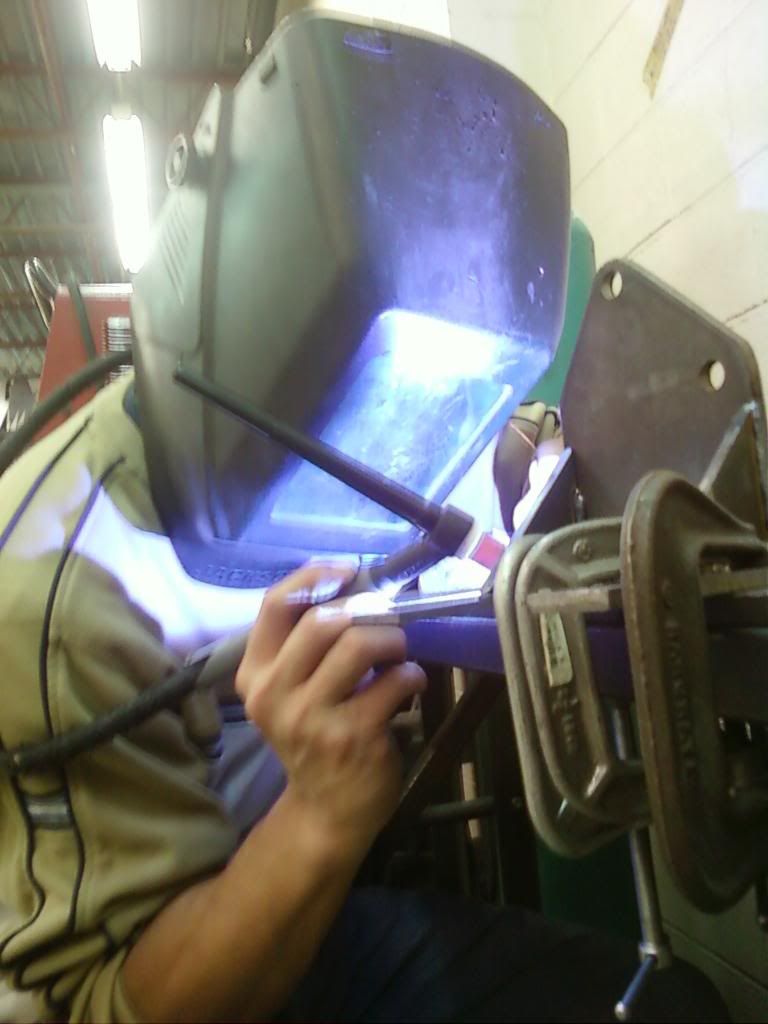
Got it on the car and bought a belt that fit. Turns out it's 5.5 inches shorter than stock (the stock alt bracket and pulley have been removed).
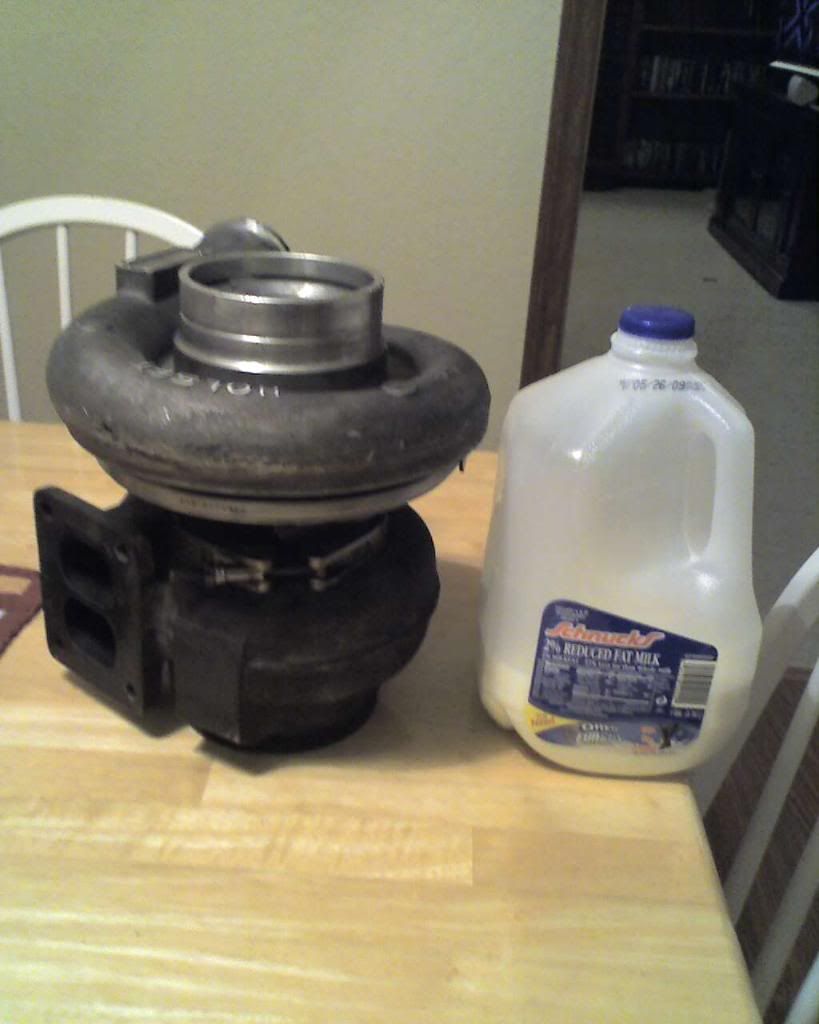
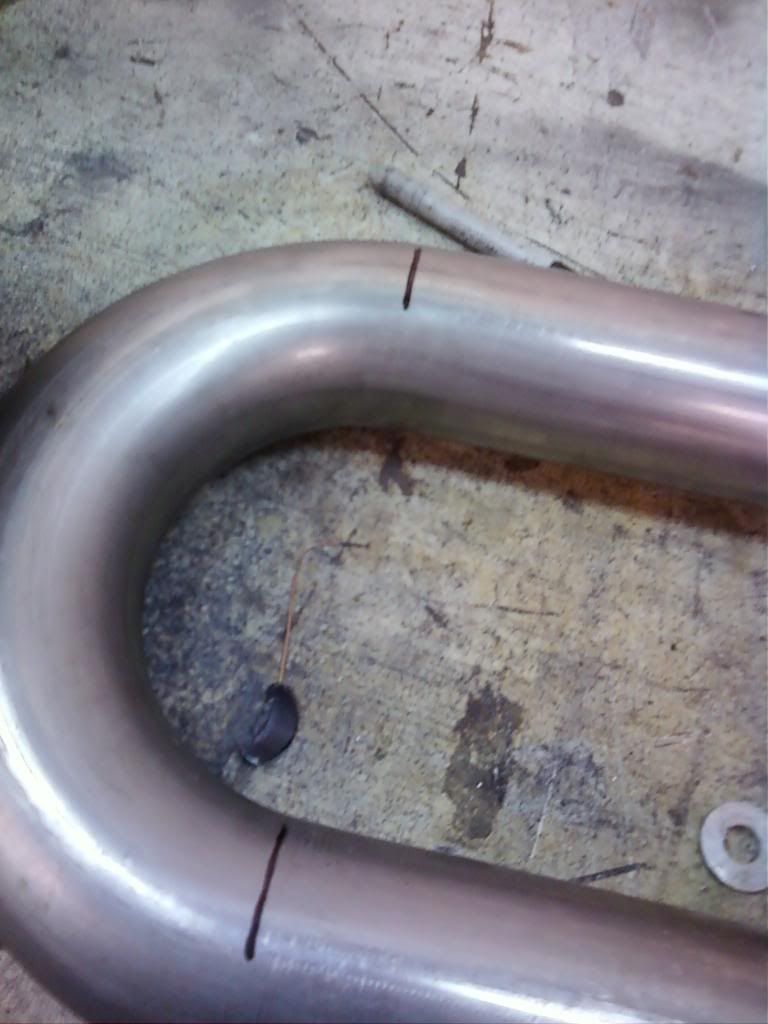
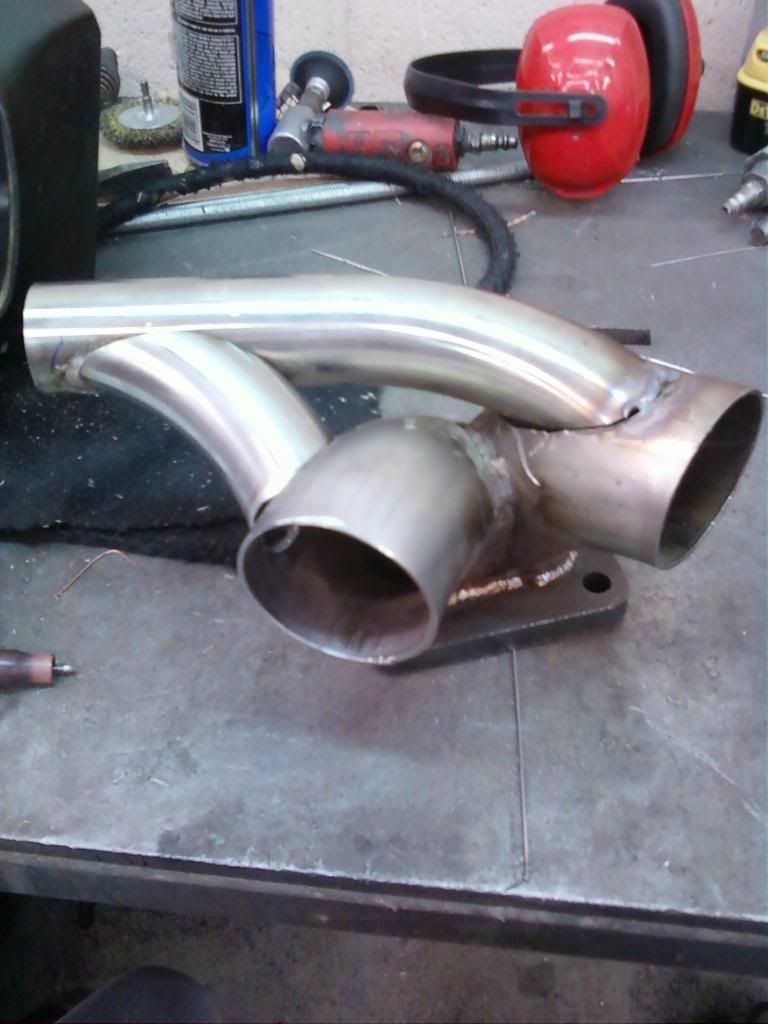
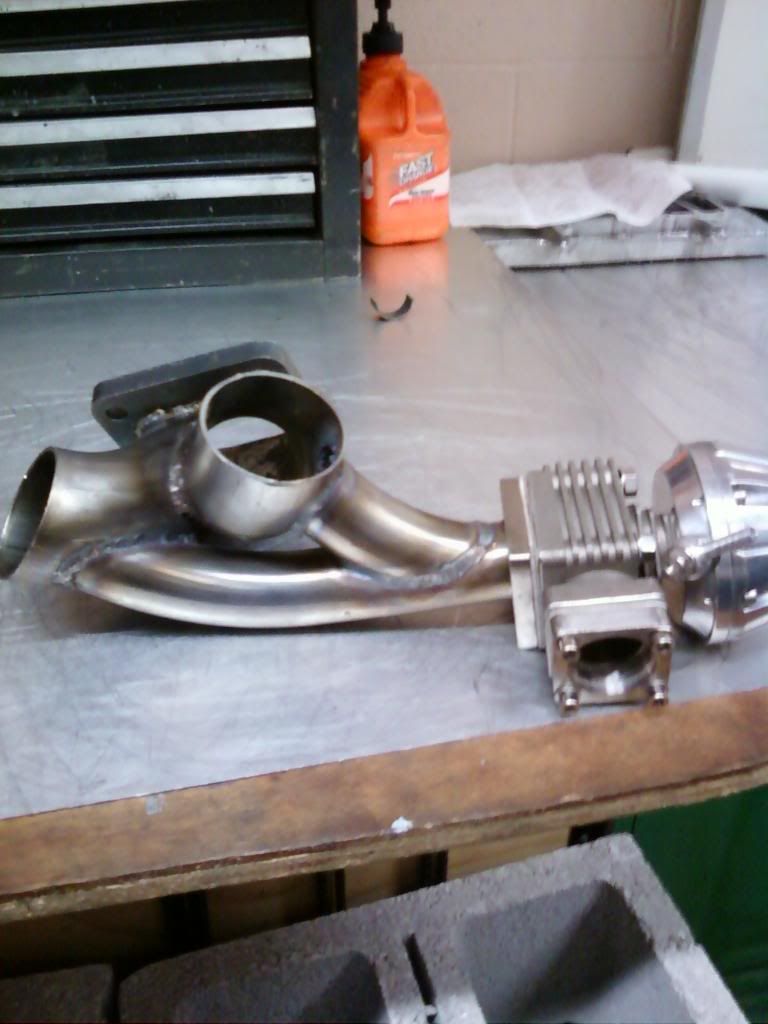
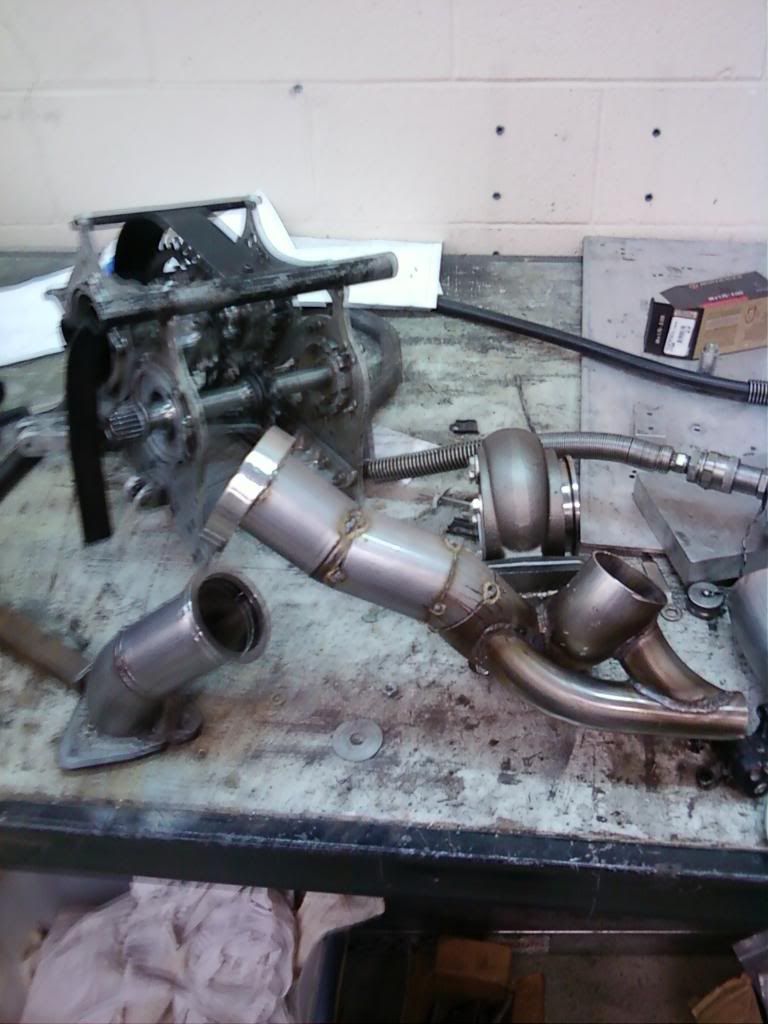
Next hump I tackled was the merge pipe, and this is about as far as I am right now. I had originally bought an HX55 for this build but it was GIGANTIC. Hard to package and very very heavy. Here's a shot of that.
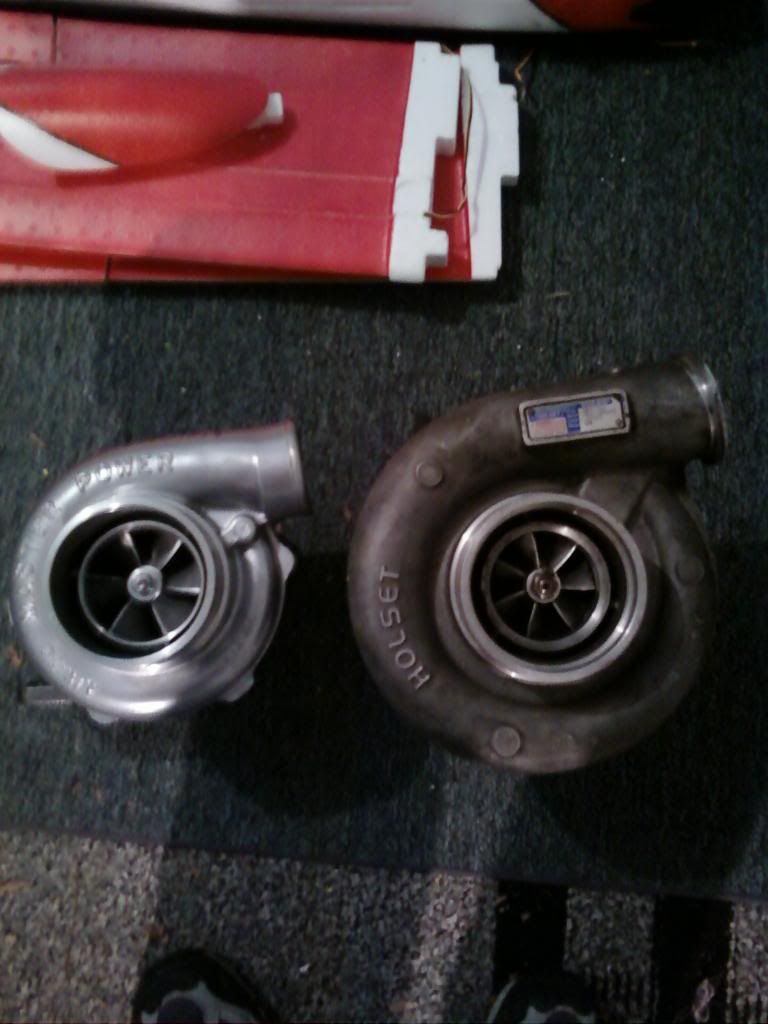
Sold the holset (and made a profit) and bought a MP70. Here's a size comparison.
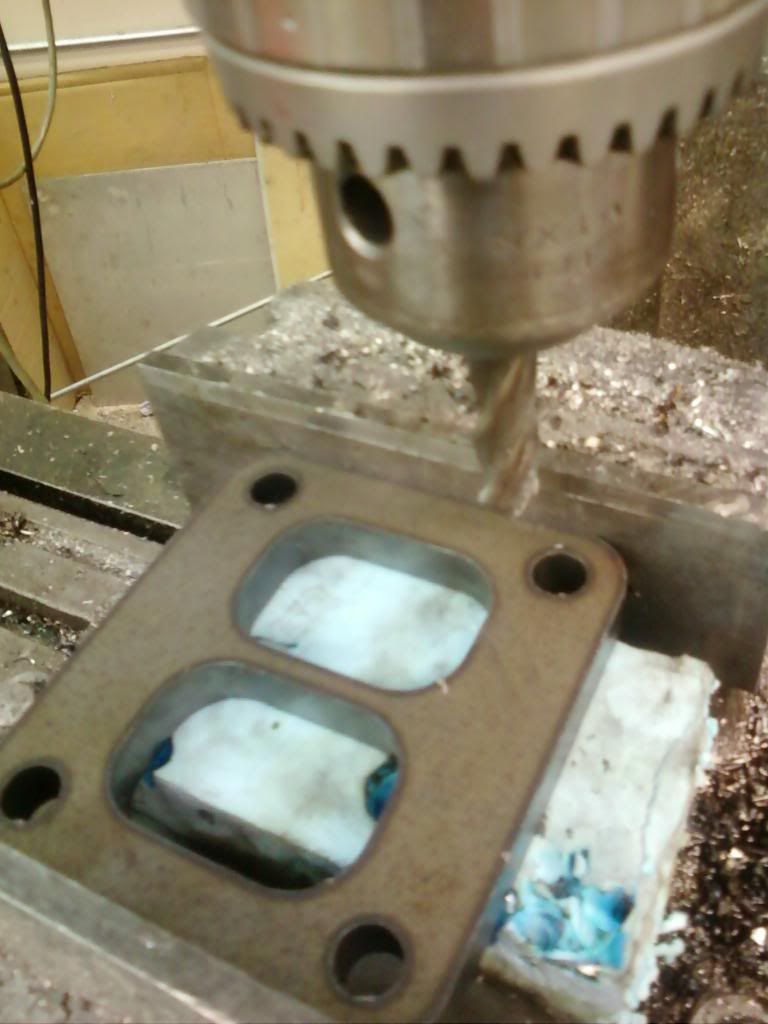
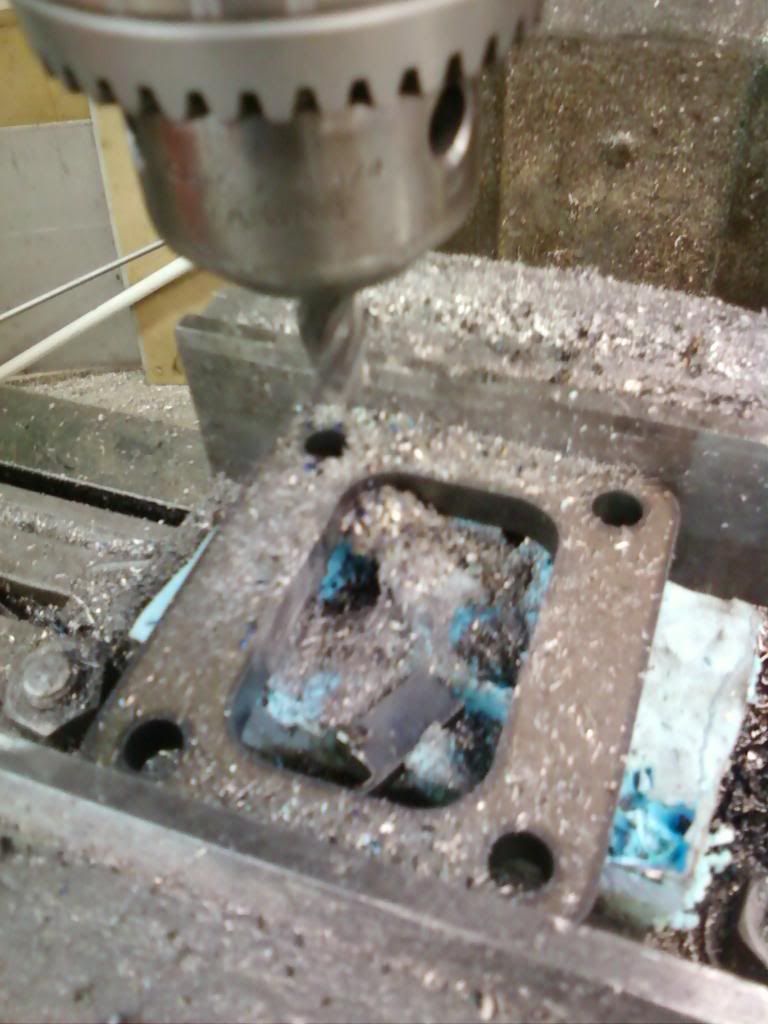
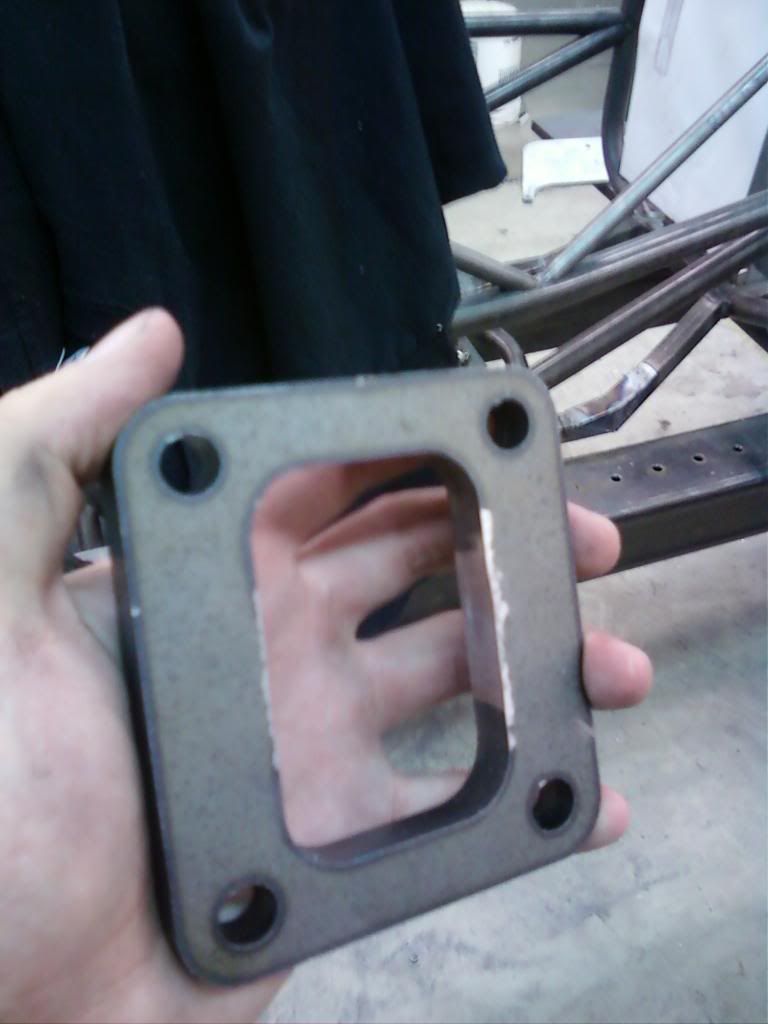
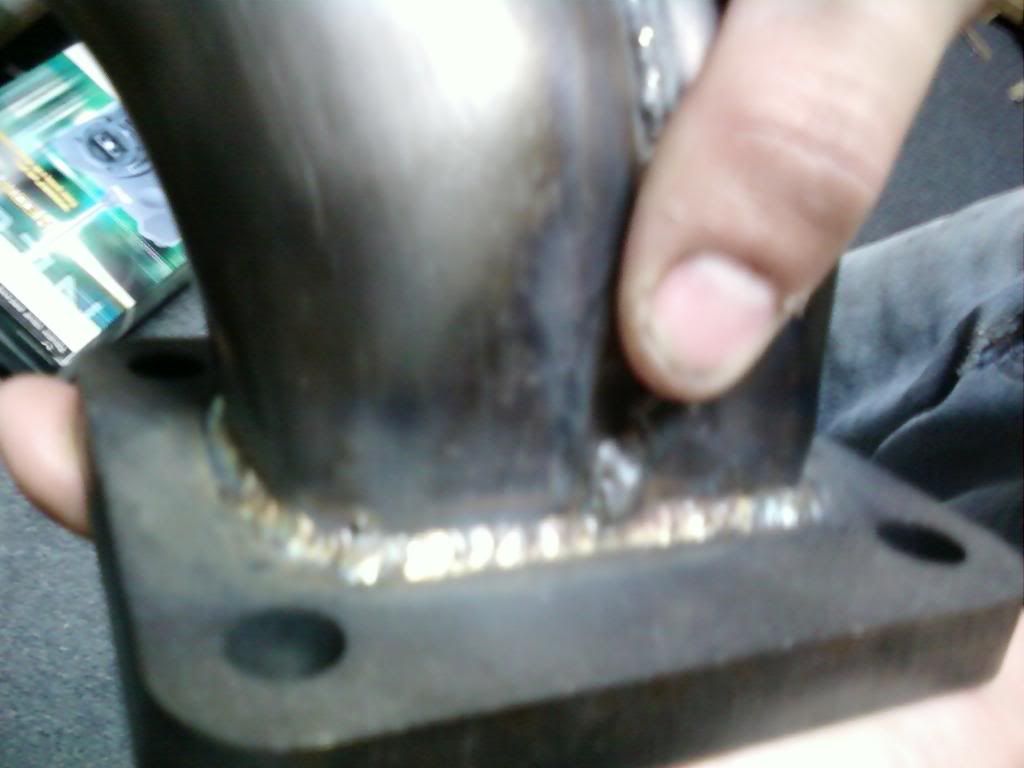
I bought my T4 flange thinking I would use the holset, which is divided. Had to take care of that.
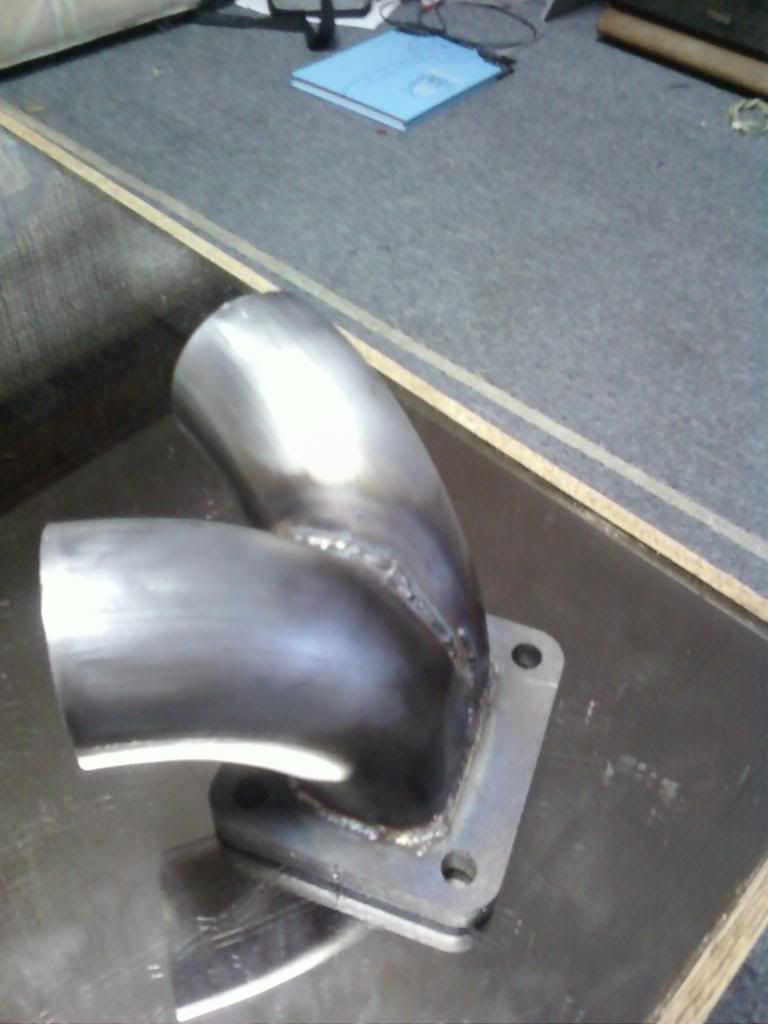
Next up was measuring, cutting, hammering, and welding pipes.
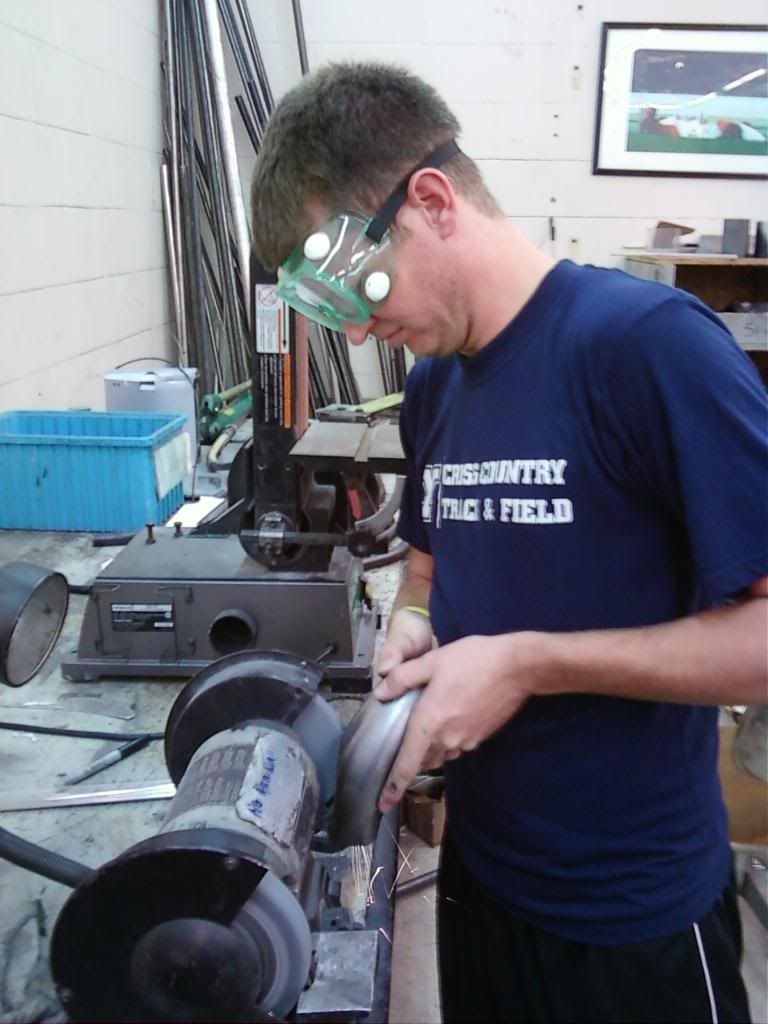
Another buddy helping me with the build, Blaine. He flips cars to make money and is really tech savvy. He goes through cars fast but his baby is a 3800 supercharged fiero; he and Doug are friends but I think the fiero/MR2 rivalry is pretty funny. He thought it would be appropriate to wear chemistry safety glasses in the shop.
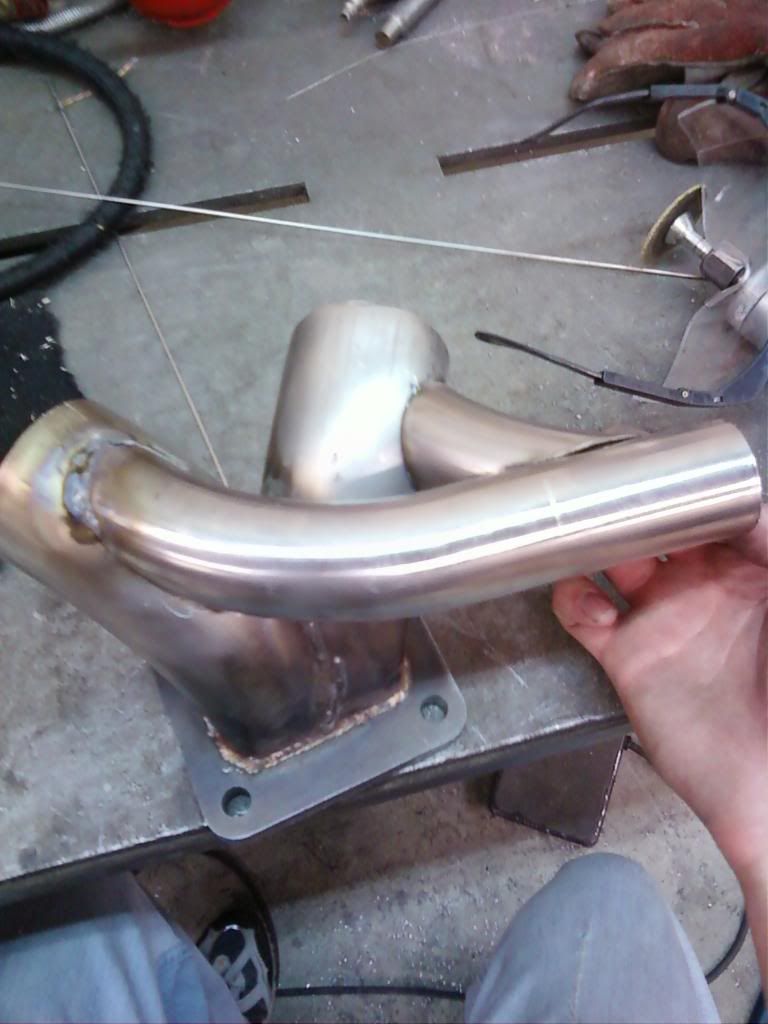
This is about as far as I am right now. I don't forsee any problems making the crossover or downpipe, but I am concerned about how I'm going to get oil to the turbo. Any tricks to drilling and tapping the oil pan that could make this part of the project a little easier?
My plan is pretty straightforward, I want to turbocharge my 1999 TA WS6. I bought the car three years ago and have been planning on turbocharging it for three years, the whole time reading just about every thread in the forced induction page. I have a pretty good idea of what needs to get done but I'm hoping that as I post up my progress some of you guys with experience can chime in and tell me that I'm retarded and did something wrong so I can fix it.
So first things first, my current mods are about nothing. The car just rolled over 102k miles and I have pretty well babied it the whole time I've had it. When I bought her there was a catback exhaust and subframe connectors installed, I kept the sbc's and removed the catback in favor of longtubes and an x-pipe. After a year of that I got tired of not being able to have conversations in the car and hearing a ringing sound every time I shut it off, so I sold the exhaust and put on my factory manifolds and a new stainless catback, big improvement. I also had my factory fuel pressure regulator fail and I replaced it with an adjustable unit I mounted under the car, more on that later.
I started purchasing materials for the build about a month ago and have made a little progress so I'll show off where I'm at so far.
I started by removing the stock fans, air conditioning, EGR, AIR, and alternator. Wow, this cleared up a lot of space. I installed slim puller fans and I'm hoping that I'll be able to fit the MPT70 in there. I went on a little drive to make sure the fans worked and I was really impressed. In half an hour of spirited driving (alt went back on, more in a second) on middle Missouri backroads they never once turned on, but the temp never went over 200. I got home and let it idle for about 15 mins. Temp climbed slightly, maybe 205, and they kicked on and kept it there for another 10 mins before I shut it off. Seems like the stock radiator works a lot better when the ac heat exchanger isn't completely blocking it, go figure.
Next task I did was to relocate the stock alternator. I guess this is where I should say more about myself. I just graduated with a BS degree in Aerospace Engineering minoring in Material Science, and am now going for a MS in Mechanical Engineering. Being at school gives me a lot of resources. I have at my disposal CNC and manual mills, lathes, plasma cutters, mig and tig welders, and a lot of software. So I started by measuring the bolt pattern on the passenger head and the offset to the car's belt. This is what I came up with.
Next was to make it, time for cnc plasma cutter.
And to build it. Thanks to my housemate Doug for helping me here with some welding. He may be a Toyota guy but in his defense he's a pro at welding and at least his Toyota is putting down a hair over 400 to the wheels. No shame there.
Got it on the car and bought a belt that fit. Turns out it's 5.5 inches shorter than stock (the stock alt bracket and pulley have been removed).
Next hump I tackled was the merge pipe, and this is about as far as I am right now. I had originally bought an HX55 for this build but it was GIGANTIC. Hard to package and very very heavy. Here's a shot of that.
Sold the holset (and made a profit) and bought a MP70. Here's a size comparison.
I bought my T4 flange thinking I would use the holset, which is divided. Had to take care of that.
Next up was measuring, cutting, hammering, and welding pipes.
Another buddy helping me with the build, Blaine. He flips cars to make money and is really tech savvy. He goes through cars fast but his baby is a 3800 supercharged fiero; he and Doug are friends but I think the fiero/MR2 rivalry is pretty funny. He thought it would be appropriate to wear chemistry safety glasses in the shop.
This is about as far as I am right now. I don't forsee any problems making the crossover or downpipe, but I am concerned about how I'm going to get oil to the turbo. Any tricks to drilling and tapping the oil pan that could make this part of the project a little easier?
Last edited by smokinHawk; 10-23-2009 at 02:15 PM. Reason: removed nonsponser pimping


 keep up the good work
10-23-2009, 01:59 PM
keep up the good work
10-23-2009, 01:59 PM
#4
TECH Addict
iTrader: (41)
Join Date: Jun 2005
Location: Jefferson City, MO
Posts: 2,329
Likes: 0
Received 0 Likes
on
0 Posts

Looks great man! Looks like you have some great equipment and skills to work with there... Do you have a time slip or power goal in mind?
As far as the oil feed and drain, well you are going to drill and tap the removable flange just above the oil filter. (I used a 1/8npt to AN fitting...and that will supply your oil. As far as the drain, well, there are many schools of thought on that. If you can get your turbo high enough so that you have a decent fall in the drain line, then you will be able to run a gravity drain into the pan or front cover.
My oil feed and drain have actually worked flawlessly for me thus far. If you havent already, take a look at my build thread, and there are some pics there showing the way mine is set up. (Link below in the sig)
Good luck!
Last edited by LS1Silverado05; 10-23-2009 at 02:07 PM.
10-23-2009, 02:14 PM
#5
Teching In
Thread Starter
iTrader: (2)
Join Date: Jun 2008
Location: Saint Charles, MO
Posts: 44
Likes: 0
Received 0 Likes
on
0 Posts
Friends and equipment are a lifesaver, but some things I don't have are a lift, engine hoist, or engine stand.
Thanks for the insight LS1Silverado05, I think I've probably read your build thread about 10 times. I like how you did your oil system, but my main concern was drilling and tapping the return line. Did you do it with the motor still in the car?
Thanks for the insight LS1Silverado05, I think I've probably read your build thread about 10 times. I like how you did your oil system, but my main concern was drilling and tapping the return line. Did you do it with the motor still in the car?
10-23-2009, 02:21 PM
#6
TECH Addict
iTrader: (41)
Join Date: Jun 2005
Location: Jefferson City, MO
Posts: 2,329
Likes: 0
Received 0 Likes
on
0 Posts
Friends and equipment are a lifesaver, but some things I don't have are a lift, engine hoist, or engine stand.
Thanks for the insight LS1Silverado05, I think I've probably read your build thread about 10 times. I like how you did your oil system, but my main concern was drilling and tapping the return line. Did you do it with the motor still in the car?
Thanks for the insight LS1Silverado05, I think I've probably read your build thread about 10 times. I like how you did your oil system, but my main concern was drilling and tapping the return line. Did you do it with the motor still in the car?
10-23-2009, 06:44 PM
#7
Take the pan off, I was surprised at how
any little shavings were left behind. An you don't need a lift or anything like that, it just makes it easier for you to work on the car. I have been building my car with a Jack and jackstands the whole time
any little shavings were left behind. An you don't need a lift or anything like that, it just makes it easier for you to work on the car. I have been building my car with a Jack and jackstands the whole time
Trending Topics
 :Cool:
10-25-2009, 10:08 PM
:Cool:
10-25-2009, 10:08 PM
#9
Teching In
Thread Starter
iTrader: (2)
Join Date: Jun 2008
Location: Saint Charles, MO
Posts: 44
Likes: 0
Received 0 Likes
on
0 Posts
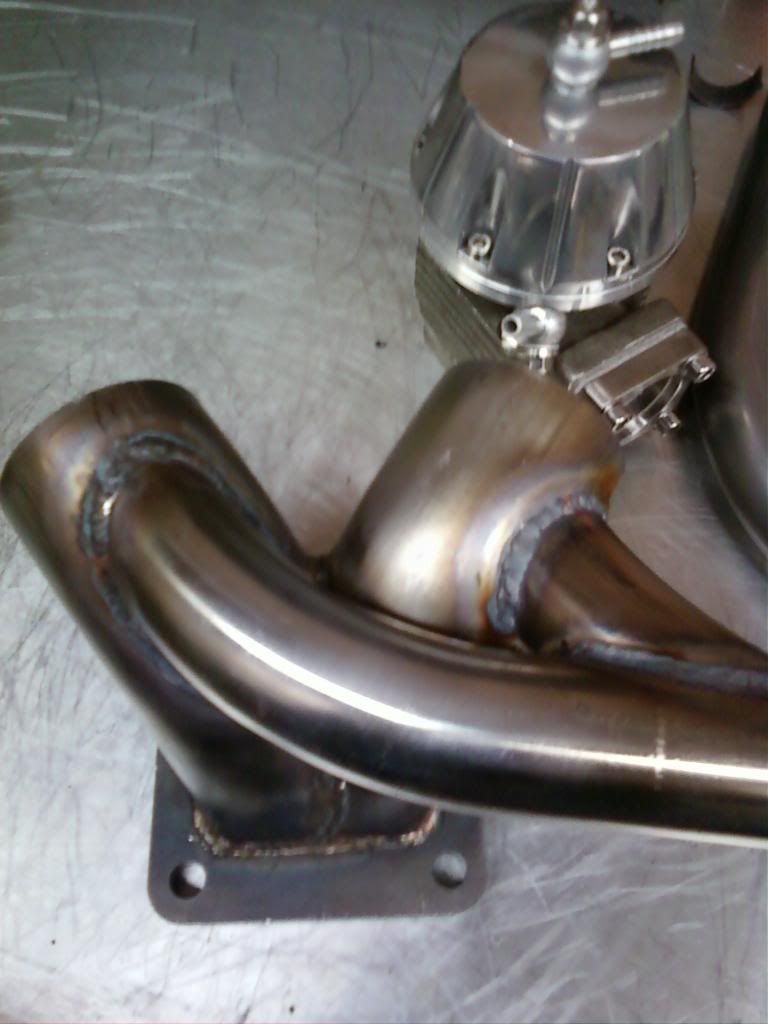
I got a little more work done today, figured out my wastegate route. Doug was working on other things so the pipes are just tacked for now waiting to be welded.
I looked more into how I want to return oil from the turbo and I think I'm gonna try and put a bung on the timing cover, seems like the easiest safe way to do it.
I looked more into how I want to return oil from the turbo and I think I'm gonna try and put a bung on the timing cover, seems like the easiest safe way to do it.


 10-27-2009, 09:05 PM
#13
Teching In
Thread Starter
iTrader: (2)
Join Date: Jun 2008
Location: Saint Charles, MO
Posts: 44
Likes: 0
Received 0 Likes
on
0 Posts
Progress has been slow mainly because I don't have a garage and its been raining for what seems like a year. I've done some inside work though.
Got Doug to weld up my pipes. I have been checking to see that everything fits, so far so good, just can't progress much more until I can get under the car.
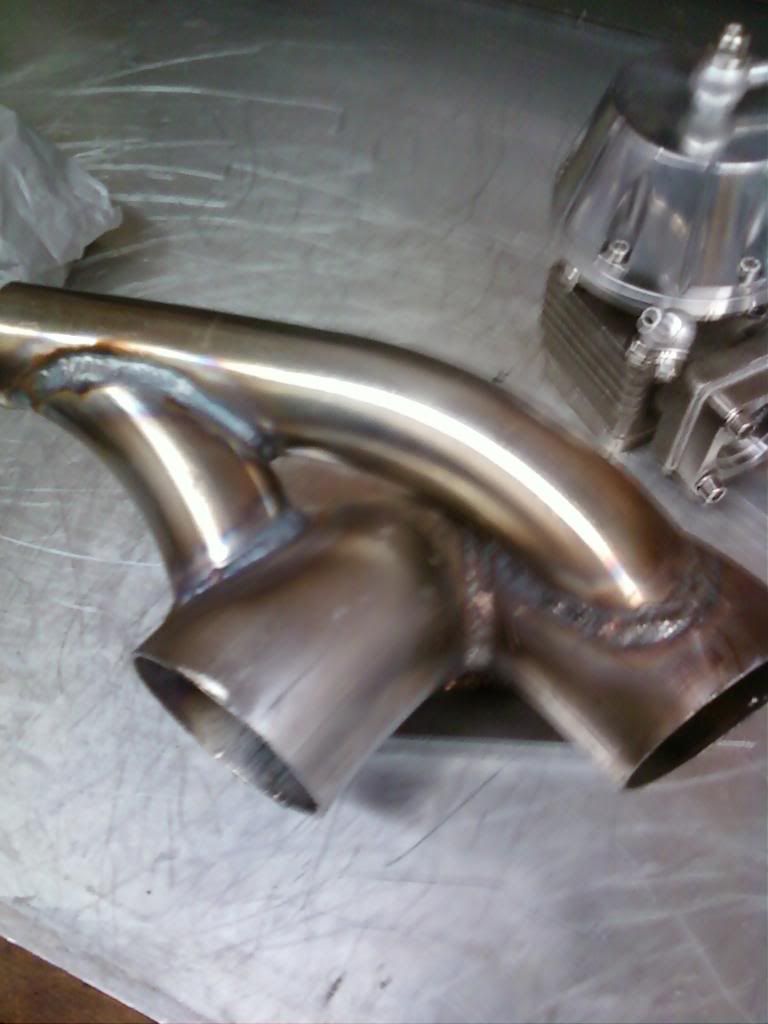
Also been tinkering some more on the cnc plasma cutter. Pretty sure I've cut a few years off the end of my life from that machine. Who wants to be old anyway?

Got Doug to weld up my pipes. I have been checking to see that everything fits, so far so good, just can't progress much more until I can get under the car.
Also been tinkering some more on the cnc plasma cutter. Pretty sure I've cut a few years off the end of my life from that machine. Who wants to be old anyway?
11-03-2009, 07:19 PM
#14
Teching In
Thread Starter
iTrader: (2)
Join Date: Jun 2008
Location: Saint Charles, MO
Posts: 44
Likes: 0
Received 0 Likes
on
0 Posts
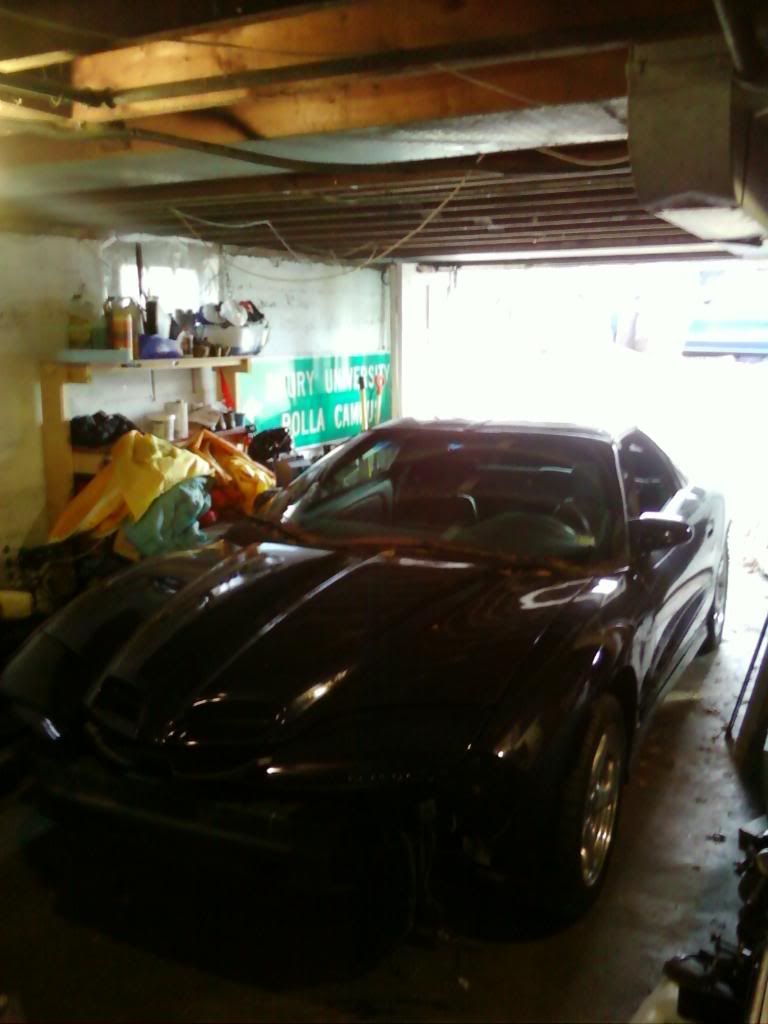
Didn't get much done on the car this weekend, but a few key things did happen: I was able to borrow my dads truck till Christmas, brought back my chop saw and mig, and I figured out how to shoehorn my car into my basement. Since the weekend I have been able to start tearing into my car (without having to worry about my dd being under the knife).
Got the front plastic off
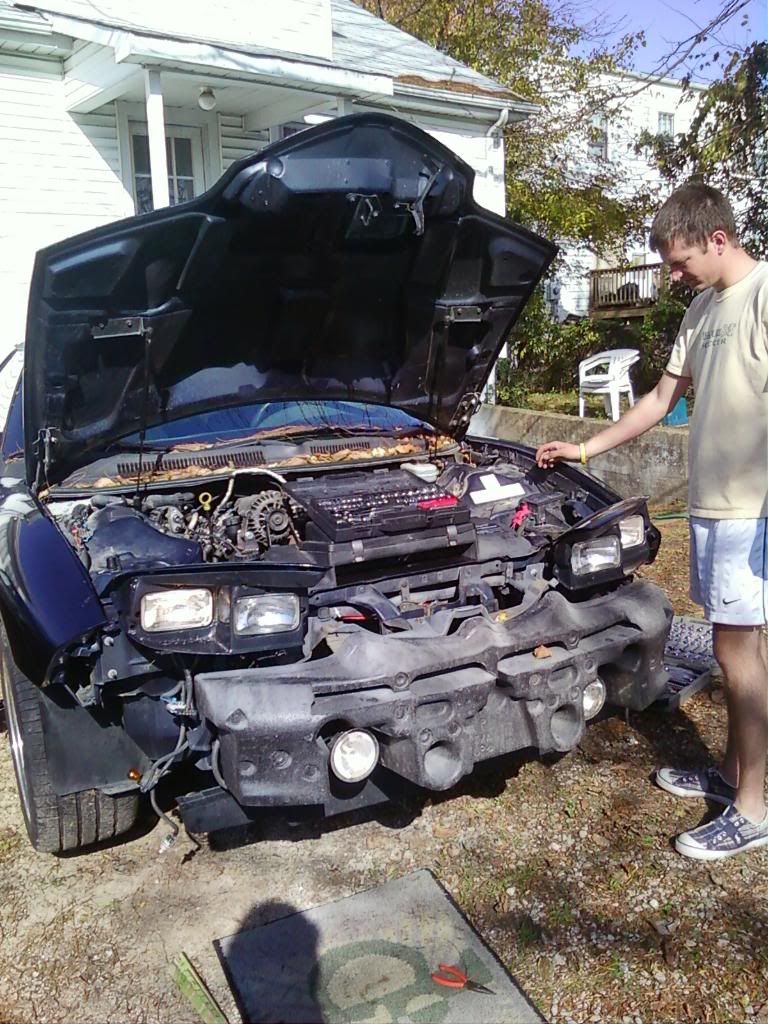
Pulled into my tiny basement
Took out radiator and drained car of oil and coolant
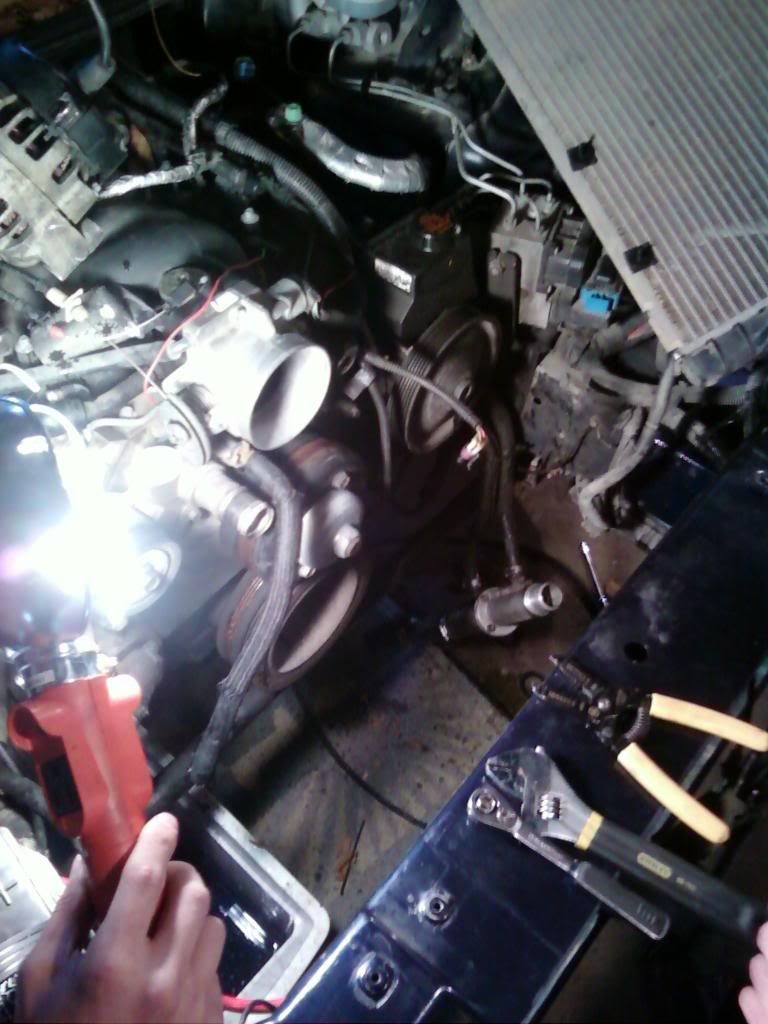
Off with the water pump
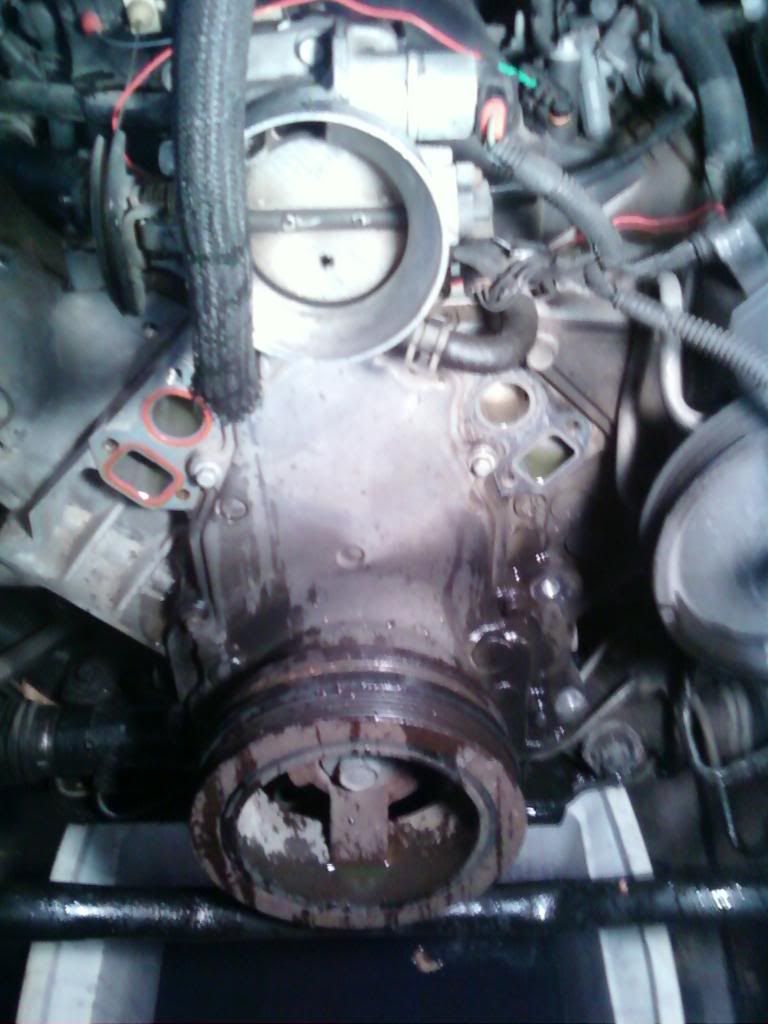
and off with the timing cover
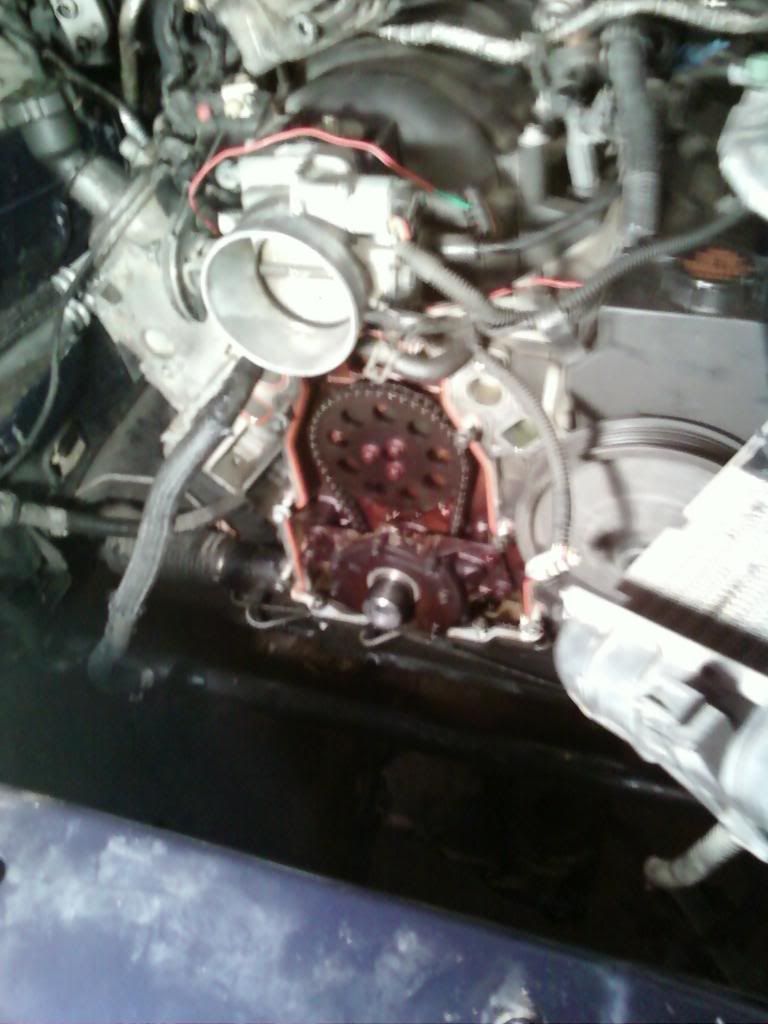
Now the BIG question... I have mostly everything I need to finish my intended build but now both my buddies are really pushing for me to get a different FI friendly cam, and seeing as I'm half way through a cam install already I don't necessarily disagree with them. The part I'm caught up on is shelling out for a cam that I really don't need (one that I just want really bad). So if you're a cheap *** like me I need some input.
Is a new cam really worth it or is the stock one alright?
If it really is, is there one I can swap in that isn't so aggressive that I would have to swap out my timing chain and pushrods?
One of my goals was to finish this project on $xxxx budget, and I'm really close. A cam may bump me over slightly, but I think I could live with myself if it really was that big of a deal.
Got the front plastic off
Pulled into my tiny basement
Took out radiator and drained car of oil and coolant
Off with the water pump
and off with the timing cover
Now the BIG question... I have mostly everything I need to finish my intended build but now both my buddies are really pushing for me to get a different FI friendly cam, and seeing as I'm half way through a cam install already I don't necessarily disagree with them. The part I'm caught up on is shelling out for a cam that I really don't need (one that I just want really bad). So if you're a cheap *** like me I need some input.
Is a new cam really worth it or is the stock one alright?
If it really is, is there one I can swap in that isn't so aggressive that I would have to swap out my timing chain and pushrods?
One of my goals was to finish this project on $xxxx budget, and I'm really close. A cam may bump me over slightly, but I think I could live with myself if it really was that big of a deal.
 11-06-2009, 11:54 AM
#19
Teching In
Thread Starter
iTrader: (2)
Join Date: Jun 2008
Location: Saint Charles, MO
Posts: 44
Likes: 0
Received 0 Likes
on
0 Posts
I've been thinking about the cam a lot and a buddy brought up a good point. I'm probably going to blow the motor a month after I finish the install and have to take it apart again anyway, so the cam is waiting until then.
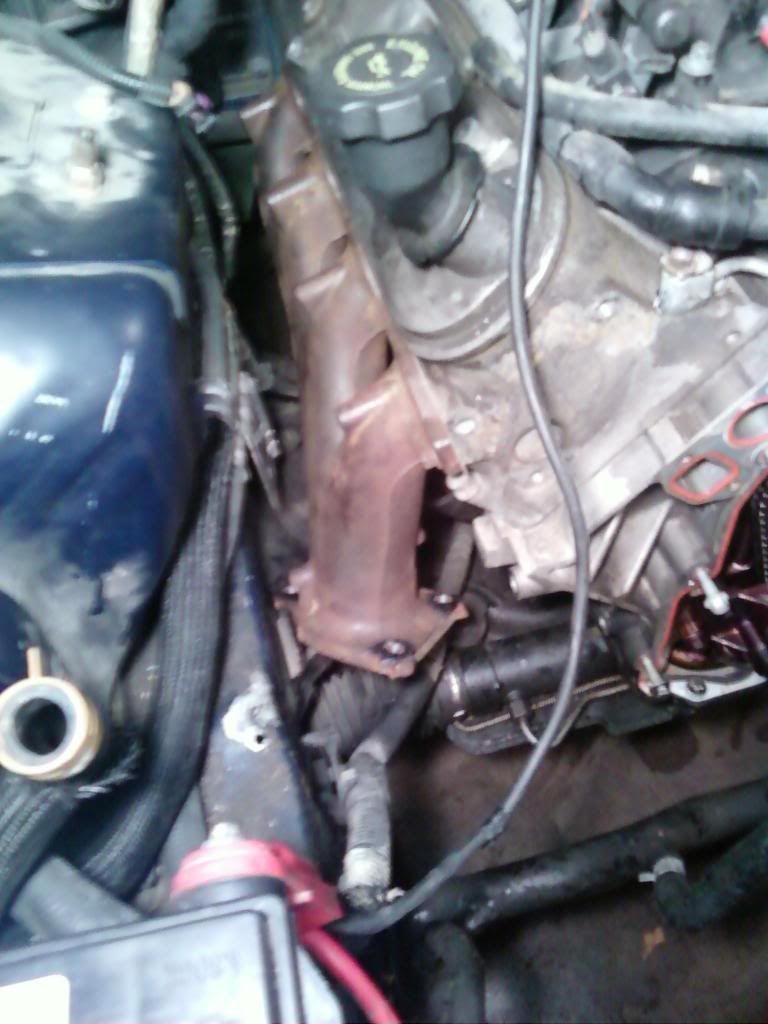
One of the problems I have with truck manifold builds is cutting into the frame of the car, I'm really trying to get around this. I'm hoping to use the stock radiator in a mostly stock position, maybe just rotated forward a little. I'm also trying to get around notching the k member. To accomplish this I pulled the bolts out of the truck manifolds and mounted them to check clearance.
Clearance looked good on both sides. To mount the crossover to these I cut the flanges off my factory exhaust manifolds and modified them slightly.
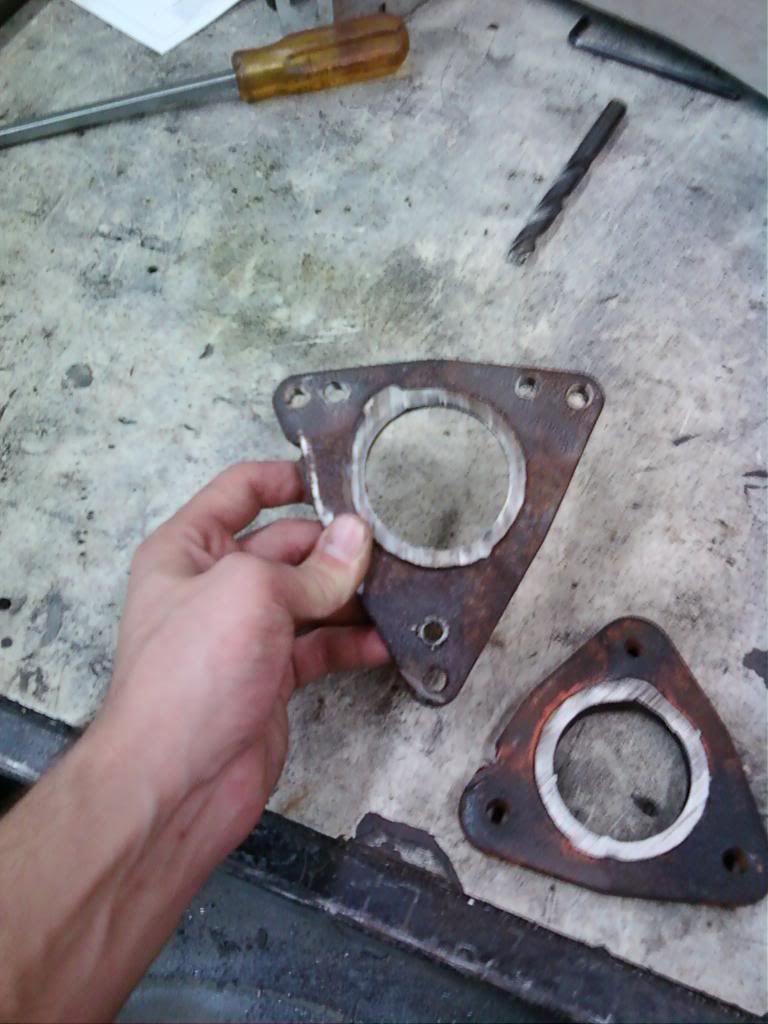
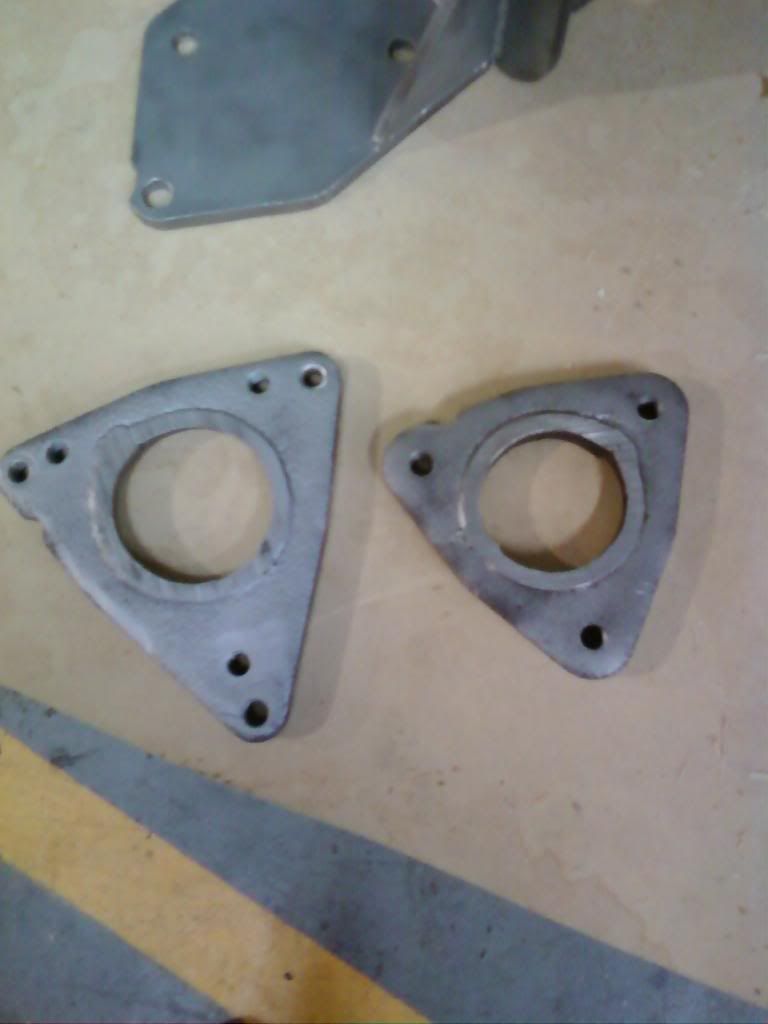
Drilled and tapped them (3/8 - 16) to match up to the truck manifolds. I drilled the threads out of the truck manifolds and plan on putting a bolt through the back of them and tightening the bolts into the steel flanges from the factory exhaust. I test fit them on my car and I think it'll work. I also found out that I have access to a sand blaster so I cleaned them and my alt bracket up a little bit.

Not sure how much I'll be able to work on it this weekend, probably have to wait till next week for time to free up.
One of the problems I have with truck manifold builds is cutting into the frame of the car, I'm really trying to get around this. I'm hoping to use the stock radiator in a mostly stock position, maybe just rotated forward a little. I'm also trying to get around notching the k member. To accomplish this I pulled the bolts out of the truck manifolds and mounted them to check clearance.
Clearance looked good on both sides. To mount the crossover to these I cut the flanges off my factory exhaust manifolds and modified them slightly.
Drilled and tapped them (3/8 - 16) to match up to the truck manifolds. I drilled the threads out of the truck manifolds and plan on putting a bolt through the back of them and tightening the bolts into the steel flanges from the factory exhaust. I test fit them on my car and I think it'll work. I also found out that I have access to a sand blaster so I cleaned them and my alt bracket up a little bit.
Not sure how much I'll be able to work on it this weekend, probably have to wait till next week for time to free up.
11-10-2009, 11:45 PM
#20
Teching In
Thread Starter
iTrader: (2)
Join Date: Jun 2008
Location: Saint Charles, MO
Posts: 44
Likes: 0
Received 0 Likes
on
0 Posts
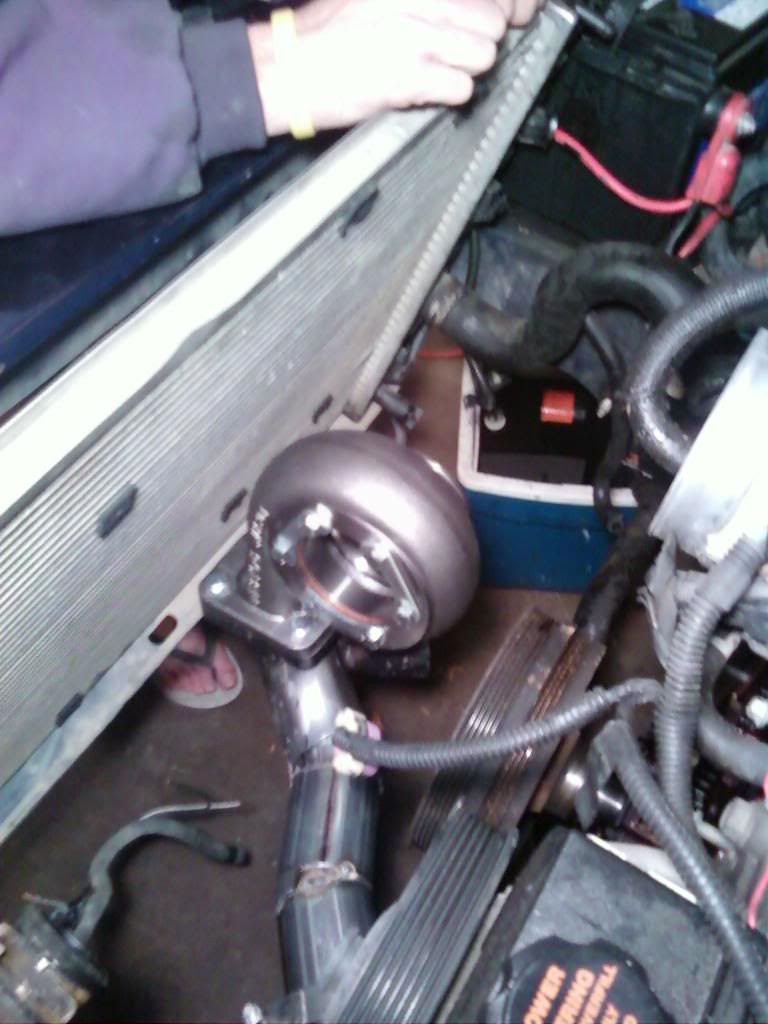
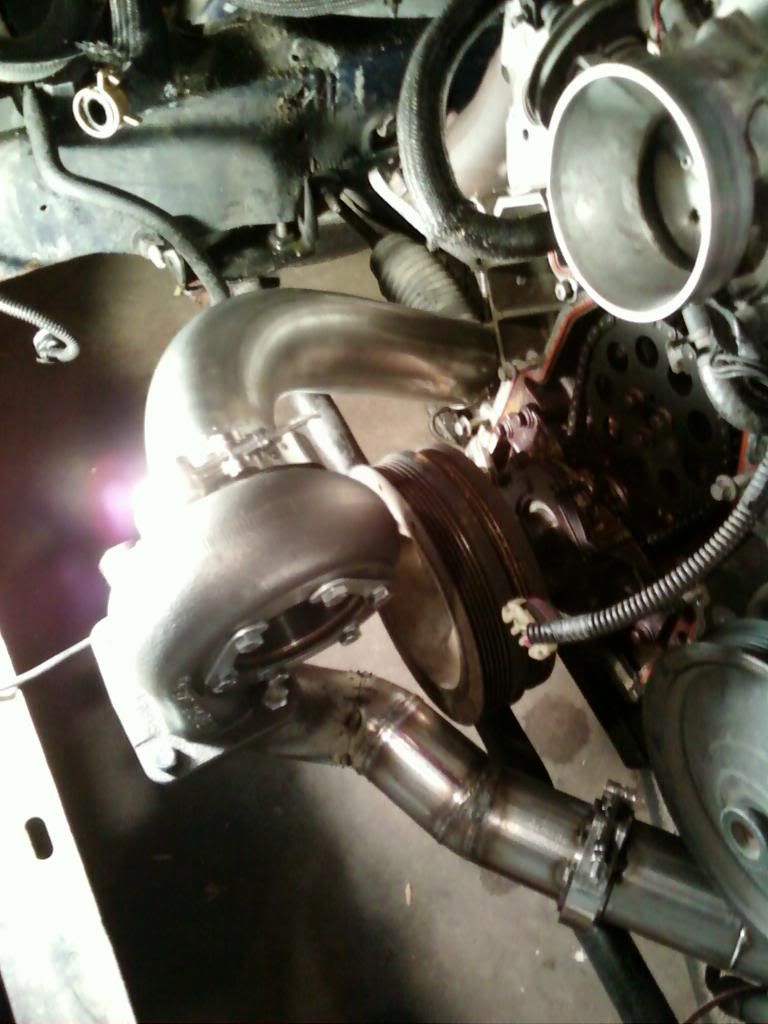
A small update. I've got the majority of the hotside tacked up. Drivers side is complete, downpipe extents through the k member to the starter (still need to turn it down and run it into my catback) and the passengers side is missing an odd shaped piece of straight that I haven't made yet because I ran out of time. I guess I need to weld on o2 bungs still as well... Here's some pictures, I didn't snap one of the passenger side crossover for some reason, I'll get one tomorrow.
Clears radiator in stock location minus fans and has room to spare next to the crank pulley and water pump. Room to grow I guess I should say.

I was thinking about intercooler mounting today and I was wondering what people use to cut the crash bar with? Seems like it would take a long time with a cutoff wheel, and plasma and oxy-acetylene would be messy. Just a thought though, maybe I suck at cutting straight lines with those. Any input?
Clears radiator in stock location minus fans and has room to spare next to the crank pulley and water pump. Room to grow I guess I should say.
I was thinking about intercooler mounting today and I was wondering what people use to cut the crash bar with? Seems like it would take a long time with a cutoff wheel, and plasma and oxy-acetylene would be messy. Just a thought though, maybe I suck at cutting straight lines with those. Any input?